manuals.online logo
Brands
  1. Home
  2. •
  3. Brands
  4. •
  5. Craftsman
  6. •
  7. Nail Gun
  8. •
  9. Craftsman 351.182930 User manual

Craftsman 351.182930 User manual

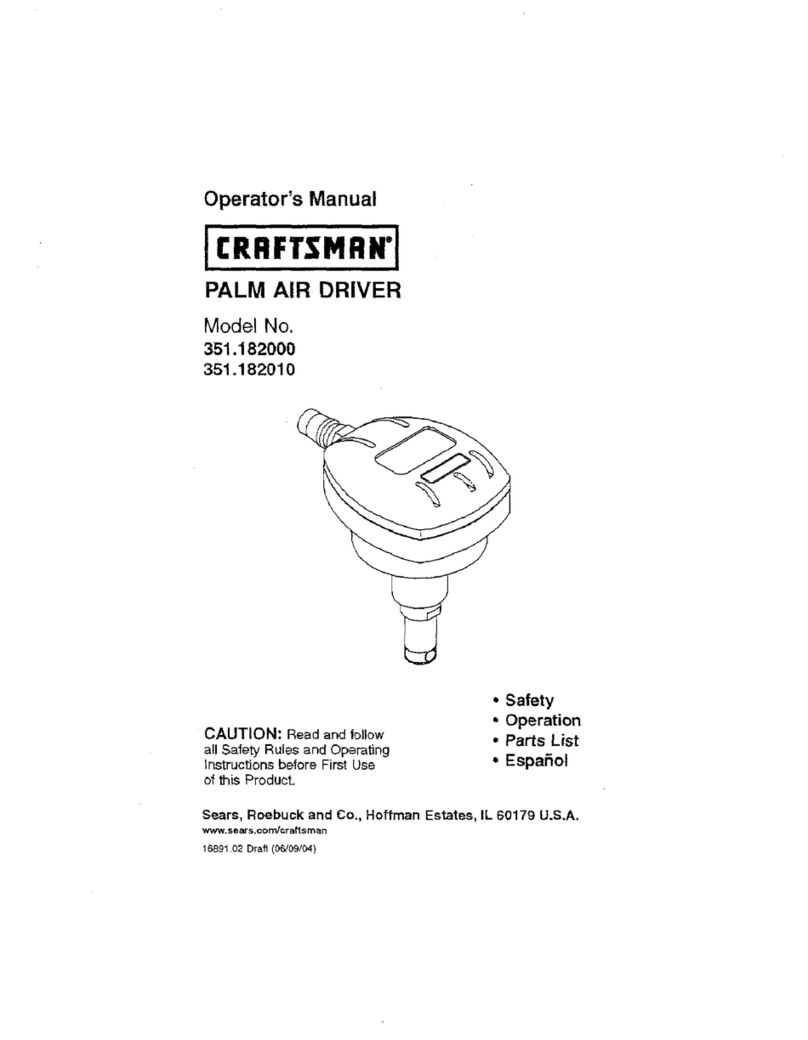
Operator's Manual
ERRFTSHRNo
PALM NAILER
Model No.
351.182930
CAUTION: Read and follow
all Safety Rules and Operating
Instructions before First Use
of this Product.
• Safety
•Operation
•Parts List
Sears, Roebuck and Co., Hoffman Estates, IL 60179 U.S.A.
2698.01 Draft (06/21/00)
Warranty ...................... 2Troubleshooting ................ 5
Safety Rules................... 2 Parts Illustration and List ........ 6-7
Operation ................... 2-3
FULL ONE YEAR WARRANTY ON CRAFTSMAN AIR-DRIVE TOOLS
If this Craftsman air-drive tool fails due to adef_=ctin material or workmanship
withinone full year from the date of purchase, return it to the nearest Sears
Service Center in the United States, and Sears will repair it free of charge.
If this air-drive tool is used for commercial purposes, this warranty applies for
only 90 days from the date of purchase.
This warranty gives you specific legal rights and you may also have other
rights which vary from state to state.
Sears, Roebuck and Co., Dept. 817WA, Hoffman Estates, IL 60179
• Air tool operators and all othersin
work area should always wear safety
gogglescomplyingwith United
States ANSI Z87.1 to preventeye
injuryfromfasteners and flying
debris when loading, operating or
unloadingthis tool,
• Never exceed operating pressure of
100 PSI.
• Always keep hands end body away
from the fastener discharge area
when air supply is connected to tool.
• Always disconnect tool from air sup-
ply when servicing or adjusting tool
and when tool is not in use.
• Never pointtoolat yourselfor others.
•Do net use oxygen,combustiblegas
or high pressure compressed gas as
the air supplyforthe tool.
• Alwaysuse toolat safe distance
fromother people in work area.
Do not attempt to dischargefastener
intohard or brittle materials suchas
concrete, steel or tile.
•Do not connect female quick-discon-
nect coupling to tool side of air line.
• Connect male, frae-fiow nipple to
tool side of air line so that tool is
depressurized when hose is discon-
nected.
Do not usea hose swivelwiththis
tool,
DESCRIPTION
The Craftsman Palm Nailer drives 2-5"
long nails. Lightweight die cast alu-
minum body with handle provides easy
maneuverability in where hammers and
other tools will not work. Nailer has a
magnetic noseto hold nails for accu-
rate, safe placement and includes abelt
hook. Craftsman nailer is ideal for
installation of electrical boxes, rafter
bracing, joint hangers, fencing, decking
and framing.
SPECIFICATIONS
Nail length ........... 2_5" (5d-40d)
Nail head size (dia.)........ V,to ,3/=,,
Nail size (dia.) ............ %, to 3/_,,
Operating pressure ...... 60-100 PSI
Air inlet................. V," N.RT.
Length....................... 8"
Height...................... 51/2,'
Width ...................... 33/,"
Weight.................. 1.50 Ibs.
AIR SUPPLY LINE
Referto Figure 1.
•The air tooloperates on compressed
air at pressures from 60 to 100 PSI.
•Never exceed maximum pressure.
Minimum air requirements for tool:
Averageworking SCFM 2.6 at 90 PSI.
WARNING: Keep handsand body
away from dischargearea oftoolwhen
connectingair supply.Alwaysdiscon-
necttool from air supplywhen servicing
or adjustingtooland whentool is not in
use.
•Airoperatedtools require clean, dry,
compressedairto ensuretopperfor-
mance, lowmaintenance and longlife.
•Dirt and abrasivematerials present
in all air lines will damage tool
O-rings,valves and cylinders.
•Moisture will reduce tool perfor-
mance and lifeif not removed from
compressed air.
•A filter-regulatorsystem is required
and should be located as closeto
tool as possible (see Figure 1). A
distance of lessthan 15 feet is re(:-
ommended.
•Keep air filter clean. A dirty filter will
reduce the air pressureto the tool
causing a reductionin powerand
efficiency.
•The air supplysystem must be able
to provideair pressureof 60 to 100
pounds per square inch at tool.
•All hoses and pipes in the air supply
system must be clean and free of
moistureand foreign particles.
•Do not mountswivel connectorin air
supplyline.
•The air pressura shouldbe properly
regulated.
•Differentworkpieco materials and
fastener lengthswillrequire different
operatingpressure.
•Be sure all connectionsin air supply
systemare sealedto preventairloss.
Never connecta female quick*dis-
connectcouplingto the tool side of
air line connection.A male,free-flow
coupling shouldbe connected tothe
tool side of air lineconnection.
WARNING: The female couplingpro-
vides a seal preventingloss of com-
pressedair from compressortank when
disconnectedfrom male coupling. If
connected to toolside of air supply,the
female couplingcould seal a com-
pressedair charge in the tool which
coulddischarge if the trigger is
actuated.
2Foot HoseWhip
Male Quick-Disconnect
Filter- Regulator
Female Quick-Disconnect
Figure 1 -Air Supply Line
3
NAILING OPERATION
Refer to Figures2 & 3, pages 4 and 6.
WARNING: Do notoperate toolwith-
outfasteners or damage totool may
result.Never pointthe toolat yourself or
others.
• Positionand place the fastener
where it must be applied.
•Slide the nailer on to the fastener so
thatthe magnets in the guide bush-
ing (Key No. 18) contactthe fastener
head.
•Hold bodyfirmly withpalm on the
palm rest and fingers on the finger
rest. If necessary, use other hand on
the handle.
•Gently push nailer against fastener
head to activate.The nailer will auto-
matically stop when the nail is driven
completely.
Palm Rest Finger Rest
OPERATING PRESSURE
• Use only enough air pressure to per-
form the operation.Air pressurein
excess ofthat which isrequired will
make the operation inefficientand
may cause prematurewear or dam-
age to the tool.
•Determine minimumair pressure
required by drivingsome test fasten-
ers intothe workpiece.Set air pres-
sure so that test fasteners are driven
down flush withthe work surface.
Fastenersdriven too deep may dam-
age workpiece.
_uide
Handle lJ
Flgure 2 - Nailing Operation
4
SYMPTOM
3ap leeksair
Fool leaks air
Foolwill not
3perate
Fooloperates
_lowly or loses
:)ower
POSSIBLE CAUSE(S)
1, Cap bolts loose
2, Damaged gasket
1. Damaged O-rings
2. Damaged Bumper
1. Insufficientair supply
2. Damaged or worn
head valve O-rings
3. Head valve binding
1. Damaged or worn
O-rings
2, Cylinder notsealed
on bumper properly
3, Insufficientair supply
CORRECTIVE ACTION
1. Tighten bolts (Fig.3, No. 1)
2. Check and replace damaged
gasket (Fig. 3, Nos. 4 and 5)
1. Check and replece damaged
O-rings (Fig. 3, Nos.6, 11 and 13
2. Check and replace damaged
bumper (Fig. 3, No. 14)
1. Check air supply
2. Replace damaged or worn
O-rings (Fig. 3, No. 6)
3. Clean and lubricate cap and
valve (Fig. 3, Nos. 3 and 8)
1. Check and replace damaged
or worn O-rings
2. Disassemble cylinder and
assemble properly
3. Check air supply
Model351.182930
Figure 3 -Replacement Parts Illustration for Stapler
6
PART NO. DESCRIPTION
1 6045.00 5-0.8 x2Omm Socket Head Bolt
2STD852005 5mm Lock Washer*
3 9810.00 Cap
4 9811.00 Gasket
5 9812.00 Seal
6 9813.00 52.07 x 2.62mm O-Ring
7 9814.00 Ring
8 9815.00 Valve
9 9816.00 Seal
10 9817.00 Cylinder Assembly
11 9818,00 42.20 x 3.5ram O-Ring
12 9819.00 Piston Ram Assembly
13 9820.00 59.50 x 2mm O-Ring
14 9821.00 Bumper
15 9822.00 Bushing
16 9823.00 Body
17 9824.00 Spring
18 9825.00 Guide Bushing with Magnets
19 9827.00 Seal
20 9828.00 Guide Box
21 9959.00 Hanger
22 5331.00 5-0.8 x 12ram Socket Head Bolt
2698.01 Operator's Manual
*Standard hardware item available locally.
ANot Shown
4
5
1
1
1
3
1
1
1
1
2
1
1
1
1
1
1
1
1
1
1
1
1
7
In U.S.A, or Canada
for in-home major brand repair service:
Call 24 hours aday, 7 days a week
1-800-4-MY-HOME _ (1-800-469-4663)
Para pedir servicio de reparaci6n a domicilio - 1-800-676-5811
Au Canada pour tout le service - 1-877-LE-FOYER" (1-877-533-6937)
For the repair or replacement parts you need:
Call 6a.m. - tl p.m. CST, 7 days a week
PartsDirect
1-800-366-PART (1-800-366-7278)
www.sears.com/pa rtsdirect
Para ordenar piezas con entrega a domicnio - 1-800-659-7084
For the location of a Sears Service Center in your area:
Call 24 hours a day, 7 days a week
1-800-488-1222
To purchase or inquire about a Sears Maintenance Agreement:
Call 7 a.m. - 5 p.m. CST, Monday - Saturday
1-800-827-6655

Other Craftsman Nail Gun manuals

Craftsman 351.181730 User manual

Craftsman

Craftsman 351.181730 User manual

Craftsman 351.181790 User manual

Craftsman

Craftsman 351.181790 User manual

Craftsman 351.153000 User manual

Craftsman

Craftsman 351.153000 User manual

Craftsman 315.FS2000 User manual

Craftsman

Craftsman 315.FS2000 User manual

Craftsman CMPPN23 User manual

Craftsman

Craftsman CMPPN23 User manual

Craftsman CMPFN16 User manual

Craftsman

Craftsman CMPFN16 User manual

Craftsman 315.114010 User manual

Craftsman

Craftsman 315.114010 User manual

Craftsman 351.183230 User manual

Craftsman

Craftsman 351.183230 User manual

Craftsman 351.184240 User manual

Craftsman

Craftsman 351.184240 User manual

Craftsman CMCN616 User manual

Craftsman

Craftsman CMCN616 User manual

Craftsman 351.181750 User manual

Craftsman

Craftsman 351.181750 User manual

Craftsman 351.182140 User manual

Craftsman

Craftsman 351.182140 User manual

Craftsman 351.181740 User manual

Craftsman

Craftsman 351.181740 User manual

Craftsman 351.184440 User manual

Craftsman

Craftsman 351.184440 User manual

Craftsman 351.183220 User manual

Craftsman

Craftsman 351.183220 User manual

Craftsman 351.183200 User manual

Craftsman

Craftsman 351.183200 User manual

Craftsman Easy Fire 0993056 User manual

Craftsman

Craftsman Easy Fire 0993056 User manual

Craftsman 351.181770 User manual

Craftsman

Craftsman 351.181770 User manual

Craftsman CMPBN18 User manual

Craftsman

Craftsman CMPBN18 User manual

Craftsman 142.18894 User manual

Craftsman

Craftsman 142.18894 User manual

Craftsman 351.184490 User manual

Craftsman

Craftsman 351.184490 User manual

Craftsman 18180 - to Coil Roofing Nailer User manual

Craftsman

Craftsman 18180 - to Coil Roofing Nailer User manual

Craftsman 351.184300 User manual

Craftsman

Craftsman 351.184300 User manual
Craftsman 2723303 836.27233 User manual

Craftsman

Craftsman 2723303 836.27233 User manual

Popular Nail Gun manuals by other brands

Porter-Cable FC350B-CA instruction manual

Porter-Cable

Porter-Cable FC350B-CA instruction manual

Fromm P356 Operation manual & spare parts list

Fromm

Fromm P356 Operation manual & spare parts list

Ozito SNG-2050U Original instructions

Ozito

Ozito SNG-2050U Original instructions

Freeman PFN1564 manual

Freeman

Freeman PFN1564 manual

Gripe Lite GRTFR83 Operator's manual

Gripe Lite

Gripe Lite GRTFR83 Operator's manual

NN STINGER CS150 owner's manual

NN

NN STINGER CS150 owner's manual

Hamilton HA-1000 Installation and service manual

Hamilton

Hamilton HA-1000 Installation and service manual

ISANTA Senco GT40FS operating instructions

ISANTA

ISANTA Senco GT40FS operating instructions

Metabo HPT NP 18DSALT Instruction and safety manual

Metabo HPT

Metabo HPT NP 18DSALT Instruction and safety manual

Hitachi nr 65ak2 Instruction and safety manual

Hitachi

Hitachi nr 65ak2 Instruction and safety manual

DeWalt DCN690 instruction manual

DeWalt

DeWalt DCN690 instruction manual

Hitachi NT 65MA4 Instruction and safety Instruction and safety manual

Hitachi

Hitachi NT 65MA4 Instruction and safety Instruction and safety manual

BEA 95/16-425S Additional instructions

BEA

BEA 95/16-425S Additional instructions

Milwaukee 7120-21 Service parts list

Milwaukee

Milwaukee 7120-21 Service parts list

Bostitch BTFP1850K Operation and maintenance manual

Bostitch

Bostitch BTFP1850K Operation and maintenance manual

Makita FN001G instruction manual

Makita

Makita FN001G instruction manual

Senco SCN40R operating instructions

Senco

Senco SCN40R operating instructions

Paslode Impulse IM90CI user guide

Paslode

Paslode Impulse IM90CI user guide

manuals.online logo
manuals.online logoBrands
  • About & Mission
  • Contact us
  • Privacy Policy
  • Terms and Conditions

Copyright 2025 Manuals.Online. All Rights Reserved.