Create FRYER AIR PRO LARGE User manual

OIL FREE FRYER 6.2 L FREIDORA SIN ACEITE 6,2 L
USER MANUAL
FRYER AIR
PRO LARGE


4
INDEX
ENGLISH
Safety precautions 6
Additional precautions 8
List of parts 9
Control Panel 9
Before using for the first time 10
Instructions for use 10
Temperature/time control 11
Programs 12
Helpful tips 12
Use tips 13
care and cleaning 13
Storage 13
ESPAÑOL
Precauciones de seguridad 14
Precauciones adicionales 16
Lista de partes 17
Panel de control 17
Antes de usar por primera vez 18
Instrucciones de uso 18
Control de temperatura/tiempo 19
Programas 20
Consejos útiles 20
Consejos de uso 21
Cuidado y limpieza 21
Almacenamiento 21
PORTUGUÊS
Precauções de segurança 22
Precauções adicionais 24
Lista de peças 25
Painel de controle 25
Antes de usar pela primeira vez 26
Instruções de uso 26
Controle de temperatura/tempo 27
Programas 28
Dicas úteis 28
Use dicas 29
Cuidados e limpeza 29
Armazenar 29
FRANÇAIS
Précautions de sécurité 30
Précautions supplémentaires 32
Liste des pièces 33
Panneau de commande 33
Avant d'utiliser pour la première fois 34
Mode d'emploi 34
Contrôle de la température/du temps 35
Programmes 36
Conseils utiles 36
Conseils d'utilisation 37
entretien et nettoyage 37
Stockage 37
FRYER AIR
PRO LARGE

5
ITALIANO
Misure di sicurezza 38
Ulteriori precauzioni 40
Elenco delle parti 41
Pannello di controllo 41
Prima del primo utilizzo 42
Istruzioni per l'uso 42
Controllo temperatura/tempo 43
Programmi 44
Consigli utili 44
Usa suggerimenti 45
cura e pulizia 45
Magazzinaggio 45
DEUTSCH
Sicherheitsvorkehrungen 46
Zusätzliche Vorsichtsmaßnahmen 48
Liste der Teile 49
Schalttafel 49
Vor dem ersten Gebrauch 50
Gebrauchsanweisung 50
Temperatur-/zeitsteuerung 51
Programme 52
Hilfreiche Tipps 52
Tipps nutzen 53
Pflege und Reinigung 53
Lagerung 53
NEDERLANDS
Veiligheidsmaatregelen 54
Aanvullende voorzorgsmaatregelen 56
Lijst met onderdelen 57
Controlepaneel 57
Voor het eerste gebruik 58
Gebruiksaanwijzing 58
Temperatuur/tijd controle 59
Programma's 60
Nuttige tips 60
Gebruik tips 61
verzorging en reiniging 61
Opslag 61
POLSKI
Środki ostrożności 62
Dodatkowe środki ostrożności 64
Lista części 65
Panel sterowania 65
Przed pierwszym użyciem 66
Instrukcja użycia 66
Kontrola temperatury/czasu 67
Programy 68
Pomocne wskazówki 68
Użyj wskazówek 69
pielęgnacja i czyszczenie 69
Magazynowanie 69
INDEX
FRYER AIR
PRO LARGE

6ENGLISH
ENGLISH
Thank you for choosing our air fryer. Before using this appliance and to ensure its best use,
please read the instructions carefully.
The safety precautions listed here reduce the risk of re, electric shock, and injury when
followed correctly. Keep the manual in a safe place for future reference, as well as the war-
ranty, purchase receipt and box. If applicable, give these instructions to the future owner of
the appliance. Always follow basic safety instructions and risk prevention measures when
using an electrical appliance. The manufacturer will not be held responsible for any damage
resulting from the user's failure to follow these instructions.
SAFETY PRECAUTIONS
When using any electrical appliance, basic safety precautions should al-
ways be followed.
• If the appliance is defective, do not try to repair it yourself. Contact a
professional technician to carry out the necessary repairs.
• This appliance can be used by children aged 8 years and above and
persons with reduced physical, sensory or mental capabilities, or lack
of experience or knowledge, provided they are supervised by a person
responsible for their safety or have been trained in its use. the device
safely.
• Children must not play with this appliance. They should also not carry
out cleaning and maintenance tasks on the device unless they are over 8
years of age and supervised.
• Keep the appliance and cord out of the reach of children under 8 years
of age.
• Check that the voltage of the electrical network corresponds to that
shown on the classification label of the electrical appliance before
using it.
• Check that the plug you are going to connect the appliance to has an
earth connection.
• Always install electrical appliances on a stable and level surface from
which they cannot fall.
• Some parts of this electrical appliance may become hot, do not touch
them as you may get burned.
• Make sure your hands are dry before touching an electrical appliance,
cable or plug.
• Electrical appliances can give off some heat to avoid the risk of starting
a re. Make sure that the appliance has enough free space around it and
that it does not come into contact with ammable materials. Electrical
appliances should never be covered.

7
ENGLISH
• Make sure that electrical appliances, cables and plugs do not come into
contact with water.
• Do not immerse electrical appliances, cables or plugs in water or any oth-
er liquid.
• Do not touch electrical appliances if they have fallen into water. Remove
the plug from the outlet immediately. Stop using the appliance.
• Make sure that electrical appliances, cables and plugs do not come into
contact with heat sources such as kitchen counters or burners or any
type of open re.
• Don't let cords hang over the edge of a sink, counter, or table.
• Unplug appliance from outlet when not in use and before cleaning. Let it
cool down before putting on or taking off parts and before cleaning the
appliance.
• Unplug the power cord from the mains by pulling on the plug, not
the cord.
• Regularly check that the cable and the device are not damaged. Do not
use the electrical appliance if the cord shows signs of damage. If the
cord is damaged, it must be replaced by the manufacturer, a service pro-
vider, or an equivalently qualied person in order to avoid a hazard.
• This appliance must not be connected by an external controller or with a
different system with remote control.
• Take care when using the appliance outdoors.
• Never use the appliance in damp or wet places.
• To disconnect, end all function operations on the control panel. Then re-
move plug from wall outlet.
• Unplug the appliance from the wall outlet when not in use and before
cleaning. Let it cool down before putting on or taking off parts and be-
fore cleaning the appliance.
• The use of accessories not recommended by the appliance manufactur-
er may cause injury.
• Do not use the appliance for other than its intended use.
• Make sure the frying basket is properly seated in the front of the drawer.
The tabs on the basket handle must be fully inserted into the grooves in
the top of the basket drawer.
• Always make sure the fry basket drawer is fully closed, with the fry
basket handle securely locked in the drawer, while the air fryer is in
operation.
WARNING: The air fryer will not operate unless the fry basket drawer is
completely closed.

8ENGLISH
This appliance generates heat and exhaust steam during use. Appropriate precautions must
be taken to avoid the risk of burns, re or other injuries.
This appliance is hot during operation and retains heat for some time after it is turned off.
Always use oven mitts when handling hot materials and allow metal parts to cool before
cleaning. Do not place anything on top of the appliance while it is in operation or hot.
CAUTION ON HOT SURFACES
ADDITIONAL PRECAUTIONS
1. Please read the instruction manual carefully before operating or cleaning the appliance.
2. The cord of this appliance must be plugged into a 220-240V AC outlet.
3. If this appliance begins to malfunction during use, immediately unplug the cord. Do not
use or try to repair the damaged device.
4. Do not leave this appliance unattended during use.
5. Do not immerse the power cord in any liquid. If the power cord of this appliance is dam-
aged, it must be replaced by contacting customer service.
6. Keep the cord out of the reach of children and babies to avoid the risk of electric shock
and suffocation.
7. Place the air fryer on a at, heat resistant work area.
8. Do not block the air outlet at the rear and the air inlet at the top of the air fryer with any
object.
9. Keep the device at least 10 centimeters away from walls or other objects during operation.
10. Always use the basket handle to open the fry basket drawer.
11. Do not replace the empty fry basket drawer (without the basket) in the air fryer body.
Check that the frying basket is securely in position.
WARNING:
•
After using the product, be sure to place the frying basket drawer on a at, heat-resistant
surface before pressing the basket release button.
•
Underlling or overlling the frying basket can damage the air fryer.
12. Never move the fryer from hot air or when it contains hot food. Let product cool before
moving.
13. Use the product's power cord to reduce the risk resulting from becoming entangled in or
tripping over a longer cord. Use of an extension cord with this product is not recommend-
ed. Always plug directly into the wall outlet.
CAUTION:
•
To prevent plasticizers from migrating to the surface nish where it is placed, use a
NON-PLASTIC coaster or placemat between the appliance and the countertop or table-
top nish. Failure to do so may cause the nish to darken or cause permanent staining.
14. If the electrical circuit is overloaded with other appliances, your appliance may not work
properly. It must be operated on a separate electrical circuit from other appliances.

9
ENGLISH
CONTROL PANEL
LIST OF PARTS
1. Indicator meat
2. Indicator sh
3. Indicator Fillet
4. Indicator chips
5. Indicator heating.
6. Indicator pie
7. Indicator nuts
8. Indicator chicken wings
1. Frying basket
2. Basket release button
3. Grab handle
9. Indicator chicken
10. Button On/Off
11. Button temperature / time
12. Indicator Fan
13. Buttons temperature and time regulators
14. Button program choice
15. Button play/pause
1
10 1412
42 73 86 95
13 1511
5
6
1
3
4
2
4. Fryer drawer
5. Control Panel
6. Air vent

10 ENGLISH
INSTRUCTIONS FOR USE
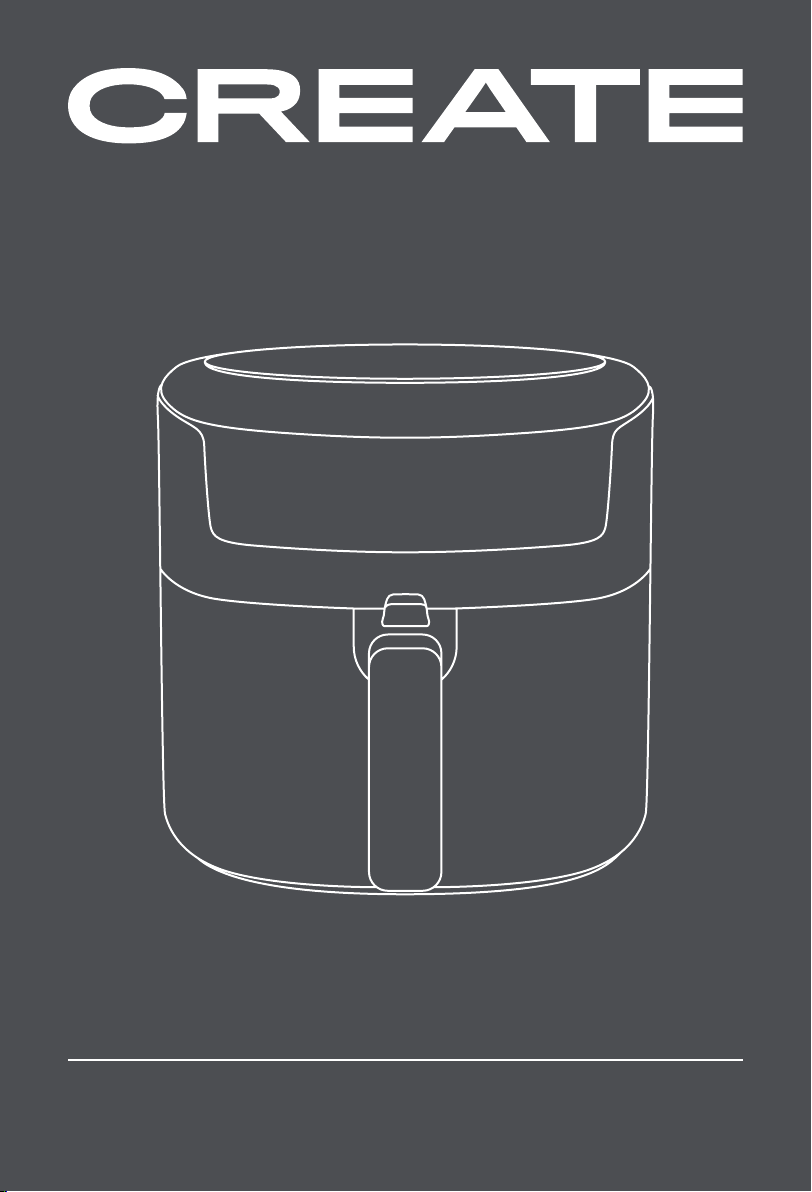
1. If your fryer is found with the fry basket locked in the drawer inside the fryer body. Firmly
grasp the basket handle to open the basket drawer, then remove the product drawer and
place it on a clean, at work surface.
2. Remove all packing material and labels from the inside and outside of the fryer. Check
that there is no packaging under and around the frying basket and drawer.
3. Wash the frying basket and drawer in hot, soapy water.
4. Do not immerse the fryer body in water. Wipe the body of the air fryer clean with a damp
cloth, then dry all parts thoroughly.
5. Lock the frying basket once clean in the drawer.
BEFORE USING FOR THE FIRST TIME
CAVEAT!
• This product should not be used to boil water.
• Great care must be taken when handling the basket and drawer when hot. Prevent steam
from escaping from the frying basket and food.
• The air fryer will not heat and the control panel will remain off until the fry basket drawer
is fully closed.
NOTE: During the rst use, the air fryer may emit a slight odor. This is normal.
1. Place the air fryer on a at, heat-resistant work area near the power outlet.
2. Firmly grasp the frying basket handle to open the fryer drawer, then remove the drawer
from the machine and place it on a clean, at surface.
3. Place the food in the frying basket. Do not overll the basket with food. To ensure proper
cooking and air circulation, NEVER ll the frying basket more than half full.
4. Place the frying basket in the fryer drawer. Make sure it is in place and locked. Then push
into the fryer and make sure the basket drawer is completely closed.
5. Plug the power cord into the wall outlet.
Note: The adjustable temperature range is 40-200ºC.
6. If the fryer is cold, set the time to 3-5 minutes to preheat the machine. The electric heating
indicator shows that the air fryer is starting to heat up.
Important:
• If the start button is not pressed, the fryer will not heat.
• Unless the fryer drawer is completely closed, the fryer will not heat and the display will
be off.
7. When the set temperature is reached, the electric heating indicator does not show the
ashing message on the screen.
Note: During operation, the heating indicator light turns on and off to maintain the selected
temperature NTC control.
8. To ensure even cooking, open the fryer drawer halfway through the cooking time and
check the food inside. Turn or shake the food in the inner container. When nished, push
the fryer drawer completely into the body of the machine. Adjust the temperature again
if necessary.
9. When the drawer is opened, the entire machine shuts down, the fryer fan stops working,
and the display turns off. After putting the drawer back in place, the appliance will con-
tinue to heat.

11
ENGLISH
TEMPERATURE/TIME CONTROL
1. Touch the power button and a beep will sound. All the lights on the screen will turn
on and the default temperature of 220ºC will appear. The default value of the time is 0:15
seconds.
2. Touch temperature/time key to select the temperature or time you want, and the num-
bers on the screen will be converted accordingly.
3. After choosing the time mode, touch the +/-buttons to set the cooking time. You can in-
crease or decrease the time in one minute intervals.
If you hold the bracelet +/-button, you can quickly set the time. The time setting range is
0:01-0:60 (Except roasted nuts).
4. To set the cooking temperature press the +/- buttons. You can increase or decrease the
time in steps of 5ºC.
If you hold the bracelet +/-button, you can set the time quickly. The temperature setting
range is 40-200ºC.
5. Press the start/pause button , the machine will start to work.
6. When the time reaches "000" a beep will sound 5 times and the fryer will stop heating and
remain in ventilation mode. The fryer will then turn off completely.
7. Once turned off, disconnect the plug from the outlet.
NOTE: To ensure even doneness/browning, open the frying basket drawer halfway through
the cooking time. Check, rotate or vigorously shake the food in the fryer basket.
IMPORTANT: When the drawer is pulled out of the fryer body, the machine stops working.
The fryer starts working again when the basket is put back in place.
Note: Be careful when turning the food inside the basket. To avoid personal injury or property
damage, do not turn food over by shaking the entire machine.
Warning: Be very careful when removing and inserting the fryer drawer to avoid burns from
hot steam.
Note: Hot oil can collect in the bottom of the fryer drawer. To avoid personal injury or food
contamination, be sure to remove the shelf from the drawer before cleaning, and then wipe
any residual oil from the bottom of the fryer.
Warning: After cooking, please do not put the rack and inner pot directly on the plastic table
to avoid burning the plastic table.
Do not overturn drawers with shelves.
Note: Please turn off the power switch in time to turn off the fryer.
10. When the set working time is reached, the appliance will beep continuously. The air fryer
will automatically turn off. The display screen will turn off and only the power switch will
be displayed.
11. Turn over to check the color and degree of doneness of the food. If you need to continue
cooking, adjust the temperature and time until the food is fully cooked.
12. After the work is nished, pull out the drawer from the machine body and place it on a
at, heat-resistant surface.
13. Place cooked food in a suitable container. Continue cooking if necessary.
Note: When preparing for the next cook, the fryer's heating system will heat up faster than
the rst time.
14. After frying all the food, press the pause button and the electric heating tube indicator
will turn off.
15. Remember to unplug the appliance when not in use.

12 ENGLISH
To use the preset programs press the button .
press the key again as many times as you like until you select the program you want to
use. The light of the selected program will ash.
Once the program has been chosen, press the button. for the fryer to begin heating.
At any time you can modify the set temperature or time by pressing the button. and
selecting with +/-depending on whether you want to add or decrease temperature or time.
PROGRAMS
ICON PROGRAM TEMPERATURE WEATHER ACTION
Meat 200ºC 15 minutes
Chips 200ºC 20 minutes Remove
Pie 160ºC 30 minutes
Chicken 200ºC 20 minutes
Fish 170ºC 20 minutes
Fillet 180ºC 10 minutes
Nuts 40-80ºC 4 hours
Chicken wings 200ºC 13 minutes
* This chart lists the total average cooking time, the time that action is required, and what
action should be taken for best results.
For best results Add 5 minutes to the fryer to allow it to preheat.
HELPFUL TIPS
• Use olive oil spray or vegetable oil for air frying.
• Use your air fryer to cook prepackaged foods with a fraction of the oil, in a fraction of the
time. As a general rule, lower the cooking temperature of the recipe by 10ºC and reduce the
cooking time by 30% to 50% depending on the food and the quantity.
• Do not overll the basket to fry food. Never ll the basket more than half full.
• For best results, some foods need to be vigorously shaken or turned over during the cook-
ing time.
• To avoid excessive smoking, when cooking foods naturally high in fat, such as chicken wings or
sausages, it may be necessary to drain the fat from the fry basket drawer during use.
• Always pat food dry before cooking to encourage browning and prevent excessive smoking.
• To fry small batches of freshly breaded food, press the breading onto the food to help it
adhere. Place in frying basket so that food is not touching to allow airow to all surfaces.
• The air fryer can be used to reheat food at a temperature of 220ºC for 15-20 minutes.

13
ENGLISH
USE TIPS
CAVEAT! Always use a meat thermometer to make sure meat, poultry, and sh are thorough-
ly cooked before eating.
1. To ensure even doneness/browning, open the frying basket drawer halfway through the
cooking time. Check, turn, or vigorously shake the food in the basket.
2. Remember, frying smaller amounts of food in shorter cooking times will achieve better
cooking results. Adjust temperatures and air fry times as needed to suit your taste.
IMPORTANT: Unless foods are pre-greased, for crisp, browned results, all foods should be
lightly oiled before air frying.
• You can spray or brush oil on food.
• Spray oils work well as the oil is evenly distributed and smaller amounts of oil are needed.
• To ensure crispy results, make sure food is dry before adding oil.
• Cut smaller pieces to create more surface area for crispier results.
• It is advisable to preheat the fryer for 3-5 minutes to improve the cooking of the food.
STORAGE
1. Make sure the air fryer is unplugged and all parts are clean and dry before storing.
2. Never store the air fryer while it is hot or wet.
3. Store the air fryer in its box or in a clean, dry place.
CARE AND CLEANING
CAVEAT! Let the air fryer cool completely before cleaning.
1. Unplug the fryer. Remove fry basket from drawer. Make sure the frying drawer and basket
have cooled completely before cleaning.
2. Wash the frying drawer and basket with hot, soapy water. Do not use metal cookware or
abrasive cleansers or cleaners as this may damage the nonstick coating.
3. The fry basket and basket drawer are dishwasher safe. For best cleaning results, place in
the top rack of your dishwasher.
4. Clean the fryer body with a soft, non-abrasive damp cloth.
In compliance with Directives: 2012/19/EU and 2015/863/EU on the restriction of the use of dangerous
substances in electric and electronic equipment as well as their waste disposal. The symbol with the
crossed dustbin shown on the package indicates that the product at the end of its service life shall be
collected as separate waste. Therefore, any products that have reached the end of their useful life must
be given to waste disposal centres specialising in separate collection of waste electrical and electronic
equipment, or given back to the retailer at the time of purchasing new similar equipment, on a one for one
basis. The adequate separate collection for the subsequent start-up of the equipment sent to be recycled,
treated and disposed of in an environmentally compatible way contributes to preventing possible nega-
tive effects on the environment and health and optimises the recycling and reuse of components making
up the apparatus. Abusive disposal of the product by the user involves application of the administrative
sanctions according to the laws.

14 ESPAÑOL
ESPAÑOL
Gracias por elegir nuestra freidora de aire. Antes de utilizar este electrodoméstico y para
asegurar su mejor uso, por favor, lea detenidamente las instrucciones.
Las medidas de seguridad aquí indicadas reducen el riesgo de incendio, descarga eléctrica y
lesiones cuando se siguen correctamente. Guarde el manual en un lugar seguro para futuras
referencias, así como la garantía, el recibo de compra y la caja. Si procede, entregue estas
instrucciones al futuro propietario del electrodoméstico. Siempre siga las instrucciones bá-
sicas de seguridad y las medidas de prevención de riesgos cuando utilice un electrodomésti-
co eléctrico. El fabricante no se responsabilizará de ningún daño derivado del incumplimien-
to de estas instrucciones por parte del usuario.
PRECAUCIONES DE SEGURIDAD
Al usar cualquier aparato eléctrico, siempre se deben observar precaucio-
nes básicas de seguridad.
• Si el aparato tiene algún defecto, no intente repararlo usted mismo. Pón-
gase en contacto con algún técnico profesional para que realice las repa-
raciones pertinentes.
• Este electrodoméstico puede ser utilizado por niños de 8 años en adelan-
te y personas con capacidades físicas, sensoriales o mentales reducidas,
o con falta de experiencia o conocimientos limitados, siempre que estén
supervisados por una persona responsable de su seguridad o que haya
sido formada para usar el aparato de forma segura.
• Los niños no deben jugar con este aparato. Tampoco deben realizar ta-
reas de limpieza y mantenimiento del aparato a menos que sean mayores
de 8 años y estén supervisados.
• Mantenga el electrodoméstico y el cable fuera del alcance de los niños
menores de 8 años.
• Compruebe que la tensión de la red eléctrica se corresponde con la que
se muestra en la etiqueta de clasicación del aparato eléctrico antes de
usarlo.
• Compruebe que el enchufe en el que vaya a conectar el electrodoméstico
tiene toma de tierra.
• Instale siempre los aparatos eléctricos sobre una supercie estable y ni-
velada de la que no se pueda caer.
• Algunas partes de este aparato eléctrico pueden calentarse, no las toque
ya que se podría quemar.
• Asegúrese de que tiene las manos secas antes de tocar un aparato eléc-
trico, un cable o un enchufe.
• Los aparatos eléctricos pueden expulsar algo de calor para evitar el ries-
go de iniciar un incendio. Asegúrese de que el aparato dispone de su-
ciente espacio libre a su alrededor y que no entra en contacto con mate-
riales inamables. No deben cubrirse nunca los aparatos eléctricos.

15
ESPAÑOL
• Asegúrese de que los aparatos eléctricos, los cables y los enchufes no
entran en contacto con el agua.
• No sumerja los aparatos eléctricos, los cables ni los enchufes ni en agua
ni en ningún otro líquido.
• No toque los aparatos eléctricos si se han caído al agua. Retire el enchufe
de la toma de corriente inmediatamente. Deje de utilizar el aparato.
• Asegúrese de que los aparatos eléctricos, cables y enchufes no entran
en contacto con fuentes de calor como encimeras o quemadores de la
cocina o algún tipo de fuego encendido.
• No deje que los cables cuelguen desde el borde del fregadero, la encime-
ra o una mesa.
• Desenchufe el electrodoméstico de la toma de corriente cuando no esté
en uso y antes de limpiarlo. Deje que se enfríe antes de poner o quitar
piezas y antes de limpiar el aparato.
• Desenchufe el cable de alimentación de la red eléctrica tirando del en-
chufe, no del cable.
• Compruebe regularmente que el cable y el aparato no están dañados. No
utilice el aparato eléctrico si el cable muestra señales de daño. Si el cable
está dañado, debe ser reemplazado por el fabricante, un proveedor de
servicios técnicos o alguna persona con cualicación equivalente, para
evitar peligros.
• Este electrodoméstico no debe conectarse mediante un controlador ex-
terno o con un sistema diferente con mando a distancia.
• Tenga cuidado cuando vaya a utilizar el aparato en el exterior.
• No utilice nunca el aparato en lugares húmedos o mojados.
• Para desconectar, nalice todas las operaciones de funciones en el panel
de control. Luego elimina enchufe de la toma de corriente de la pared.
• Desenchufe el aparato de la toma de corriente cuando no esté en uso
y antes de limpiarlo. Deje que se enfríe antes de poner o quitar piezas y
antes de limpiar el aparato.
• El uso de accesorios no recomendados por el fabricante del aparato pue-
de causar lesiones.
• No utilice el aparato para otro uso que no sea el previsto.
• Asegúrese de que la cesta para freír esté bien colocada en el frente del
cajón. Las lengüetas del asa de la canasta deben estar completamente
insertadas en las zanjas de la parte superior del cajón de la cesta.
• Asegúrese siempre de que el cajón de la cesta para freír esté comple-
tamente cerrado, con el asa de la cesta para freír bloqueada de forma
segura en el cajón, mientras la freidora de aire está en funcionamiento.
ADVERTENCIA: La freidora de aire no funcionará a menos que el cajón de
la canasta para freír esté completamente cerrado.

16 ESPAÑOL
Este aparato genera calor y vapor de escape durante su uso. Se deben tomar las precaucio-
nes adecuadas para evitar el riesgo de quemaduras, incendios u otras lesiones.
Este aparato está caliente durante el funcionamiento y retiene el calor durante algún tiem-
po después de apagarlo. Utilice siempre guantes para horno cuando manipule materiales
calientes y deje que las piezas metálicas se enfríen antes de limpiarlas. No coloque nada
encima del aparato mientras esté en funcionamiento o caliente.
PRECAUCIÓN EN SUPERFICIES CALIENTES
PRECAUCIONES ADICIONALES
1. Lea detenidamente el manual de instrucciones antes de operar o limpiar el aparato.
2. El cable de este aparato debe enchufarse en un 220-240V con toma de corriente de CA.
3. Si este aparato comienza a funcionar mal durante el uso, desconecte inmediatamente el
cable. No utilice ni intente reparar el aparato averiado.
4. No deje este aparato desatendido durante su uso.
5. No sumerja el cable de alimentación en ningún líquido. Si el cable de alimentación de
este electrodoméstico está dañado, debe reemplazarse comunicándose con el servicio
de atención al cliente.
6. Mantenga el cable fuera del alcance de los niños y los bebés para evitar el riesgo de des-
carga eléctrica y asxia.
7. Coloque la freidora de aire en un área de trabajo plana y resistente al calor.
8. No obstaculice la salida de aire de la parte posterior y la entrada de aire en la parte supe-
rior de la freidora de aire con cualquier objeto.
9. Mantenga el aparato a una distancia mínima de 10 centímetros de las paredes u otros ob-
jetos durante el funcionamiento.
10. Utilice siempre el asa de la cesta para abrir el cajón de la cesta para freír.
11. No vuelva a colocar el cajón vacío de la cesta de freír (sin la cesta) en el cuerpo de la frei-
dora de aire. Verique que la canasta para freír esté bien colocada en su posición.
ADVERTENCIA:
•
Después de usar el producto, asegúrese de colocar el cajón de la cesta para freír so-
bre una superficie plana y resistente al calor antes de presionar el botón de liberación
de la cesta.
•
Llenar la canasta para freír de manera insuficiente o excesiva puede dañar la freidora
de aire.
12. Nunca mueva la freidora de aire caliente o cuando contenga alimentos calientes. Deje
enfriar el producto antes de mover.
13. Use el cable de alimentación del producto para reducir el riesgo de enredarse o trope-
zarse con un cable más largo. No se recomienda el uso de un cable de extensión con este
producto. Enchufe siempre directamente a la toma de corriente de la pared.
PRECAUCIÓN:
•
Para evitar que los plasticantes migren al acabado de la supercie donde esté colocada,
utilice un posa vasos o salva mantel NO PLÁSTICOS entre el electrodoméstico y el aca-
bado de la encimera o la mesa. De lo contrario, el acabado puede oscurecerse o producir
manchas permanentes.
14. Si el circuito eléctrico está sobrecargado con otros aparatos, es posible que su apara-
to no funcione correctamente. Debe operarse en un circuito eléctrico separado de otros
aparatos.

17
ESPAÑOL
PANEL DE CONTROL
LISTA DE PARTES
1. Indicador carne
2. Indicador pescado
3. Indicador Filete
4. Indicador patatas fritas
5. Indicador calentamiento.
6. Indicador pastel
7. Indicador frutos secos
8. Indicador alitas de pollo
1. Canasta para freír
2. Botón liberador de la cesta
3. Asa de agarre
9. Indicador pollo
10. Botón On/Off
11. Botón temperatura / tiempo
12. Indicador Ventilador
13. Botones reguladores de
temperatura y tiempo
14. Botón de elección de programa
15. Botón de play/pause
5
6
1
3
4
2
4. Cajón de la freidora
5. Panel de control
6. Salida de aire
1
10 1412
42 73 86 95
13 1511

18 ESPAÑOL
INSTRUCCIONES DE USO
1. Si su freidora se encuentra con la cesta para freír bloqueada en el cajón, dentro del cuerpo
de la freidora. Sujete rmemente el asa de la cesta para abrir el cajón de la cesta, luego
retire el cajón del producto y colóquelo en una supercie de trabajo plana y limpia.
2. Retire todo el material de embalaje y las etiquetas del interior y el exterior de la freidora. Com-
pruebe que no quede ningún embalaje debajo y alrededor de la cesta y el cajón para freír.
3. Lave la canasta para freír y el cajón con agua caliente y jabón.
4. No sumerja el cuerpo de la freidora en agua. Limpie el cuerpo de la freidora de aire con un
paño húmedo, después, seque bien todas las piezas.
5. Bloquee la cesta para freír una vez limpia en el cajón.
ANTES DE USAR POR PRIMERA VEZ
¡ADVERTENCIA!
• Este producto no debe usarse para hervir agua.
• Se debe tener mucho cuidado al manipular la cesta y el cajón cuando esté caliente. Evite
que escape vapor de la cesta de freír y de los alimentos.
• La freidora de aire no calentará y el panel de control permanecerá apagado hasta que el
cajón de la canasta para freír esté completamente cerrado.
NOTA: Durante el primer uso, la freidora de aire puede emitir un ligero olor. Esto es normal.
1. Coloque la freidora de aire en un área de trabajo plana y resistente al calor, cerca de la
toma de corriente.
2. Sujete rmemente el asa de la cesta para freír para abrir el cajón de la freidora, luego
retire el cajón de la máquina y colóquelo sobre una supercie plana y limpia.
3. Coloque los alimentos en la canasta para freír. No llene en exceso la cesta con alimentos.
Para garantizar una cocción adecuada y la circulación del aire, NUNCA llene la canasta
para freír más de la mitad.
4. Coloque la cesta para freír en el cajón de la freidora. Asegúrese de que esté en su lugar y
bloqueado. Después empuje dentro de la freidora y asegúrese de que el cajón de la cesta
esté completamente cerrado.
5. Enchufe el cable de alimentación en la toma de corriente de pared.
Nota: El rango de temperatura ajustable es de 40-200ºC.
6. Si la freidora está fría, ajuste el tiempo a 3-5 minutos para precalentar la máquina. El in-
dicador de calentamiento eléctrico muestra que la freidora de aire comienza a calentarse.
Importante:
• Si no se presiona el botón de inicio, la freidora no calentará.
• A menos que el cajón de la freidora esté completamente cerrado, la freidora no se calen-
tará y la pantalla estará apagada.
7. Cuando se alcanza la temperatura establecida, el indicador de calefacción eléctrica no
muestra el mensaje parpadeante en la pantalla.
Nota: Durante el funcionamiento, la luz indicadora de calentamiento se enciende y se apaga
para mantener el control NTC de temperatura seleccionada.
8. Para asegurar una cocción uniforme, abra el cajón de la freidora a la mitad del tiempo de
cocción y verique la comida del interior. Gire o agite la comida en el recipiente interior.
Cuando termine, empuje el cajón de la freidora completamente dentro del cuerpo de la
máquina. Ajuste la temperatura nuevamente si es necesario.
9. Cuando se abre el cajón, toda la máquina se apaga, el ventilador de la freidora deja de fun-
cionar y la pantalla se apaga. Después de volver a colocar el cajón en su lugar, el aparato
seguirá calentando.

19
ESPAÑOL
CONTROL DE TEMPERATURA/TIEMPO
1. Toque el botón de encendido y sonará un pitido. Todas las luces de la pantalla se en-
cenderán y la temperatura predeterminada de 220ºC aparecerá. El valor por defecto del
tiempo es de 0:15 segundos.
2. Toque la tecla de temperatura/tiempo para seleccionar la temperatura o el tiempo que
desee, y los números en la pantalla se convertirán en consecuencia.
3. Un vez elejido el modo de tiempo, toque los botones +/- para congurar el tiempo de coc-
ción. Pdrá aumentar o disminuir el tiempo en intervalos de un minuto.
Si mantiene pulsera el botón +/- podrá congurar la hora rápidamente. El rango de con-
guración de la hora es 0:01-0:60 (Excepto frutos secos tostados).
4. Para establecer la temperatura de cocción presione los botones +/-. Podrá aumentar o
disminuir el tiempo en intervalos de 5ºC.
Si mantiene pulsera el botón +/- podrá congurar el tiempo rápidamente. El rango de con-
guración de temperatura es 40-200ºC.
5. Presione el botón de inicio/pausa , la máquina comenzará a funcionar.
6. Cuando el tiempo llegue a “000” sonará un pitido 5 veces y la freidora dejará de calentar
quedando en modo ventilación. Posteriormente la freidora se apagará por completo.
7. Una vez apagada desconecte el enchufe de la toma de corriente.
NOTA: Para asegurar una cocción/dorado, abra el cajón de la canasta para freír a la mitad
del tiempo de cocción. Revise, gire o agite enérgicamente los alimentos en la canasta de la
freidora.
IMPORTANTE: Cuando se saca el cajón del cuerpo de la freidora, la máquina deja de funcio-
nar. La freidora vuelve a funcionar cuando se vuelve a colocar la cesta en su lugar.
Nota: Tenga cuidado al dar la vuelta a la comida en el interior de la cesta. Para evitar lesio-
nes personales o daños a la propiedad, no dé la vuelta a los alimentos sacudiendo toda la
máquina.
Advertencia: Tenga mucho cuidado al sacar y colocar el cajón de la freidora para evitar que-
maduras con el vapor caliente.
Nota: el aceite caliente puede acumularse en el fondo del cajón de la freidora. Para evitar le-
siones personales o contaminación de los alimentos, asegúrese de quitar el estante del cajón
antes de limpiarlo y luego limpie el aceite residual en el fondo de la freidora.
Advertencia: después de cocinar, no coloque el estante y la olla interior directamente sobre
la mesa de plástico para evitar quemar la mesa de plástico.
No voltee los cajones con estantes.
Nota: apague el interruptor de encendido a tiempo para apagar la freidora.
10. Cuando se alcanza el tiempo de trabajo establecido, el aparato emitirá un pitido de forma
continua. La freidora de aire se apagará automáticamente. La pantalla de visualización se
apagará y solo se mostrará el interruptor de encendido.
11. De la vuelta para comprobar el color y el grado de cocción de los alimentos. Si necesita
continuar cocinando, ajuste la temperatura y el tiempo hasta que la comida esté comple-
tamente cocida.
12. Una vez nalizado el trabajo, extraiga el cajón del cuerpo de la máquina y colóquelo sobre
una supercie plana y resistente al calor.
13. Coloque los alimentos cocidos en un recipiente adecuado. Continúe cocinando si es
necesario.
Nota: Cuando se prepare para la próxima cocción, el sistema de calentamiento de la freidora
se calentará más rápido que la primera vez.
14. Después de freír toda la comida, presione el botón de pausa y el indicador del tubo de
calentamiento eléctrico se apagará.
15. Recuerde desenchufar el aparato cuando no esté en uso.

20 ESPAÑOL
Para utilizar los programas preestablecidos pulse el botón .
Vuelva a presionar la telca tantas veces desee hasta seleccionar el programa que quiera
utilizar. La luz del porgrama seleccionado parpadeará.
Una vez elegido el programa pulse el botón para que la freidora comience a calentar.
En cualquier momento podrá modicar la temperatura o tiempo peestablecido presionando
el botón y seleccionando con +/-según quiera añadir o disminuir temperatura o tiempo.
PROGRAMAS
ICONO PROGRAMA TEMPERATURA TIEMPO ACCIÓN
Carne 200 ºC 15 min.
Patatas fritas 200 ºC 20 min. Remover
Pastel 160 ºC 30 min.
Pollo 200 ºC 20 min.
Pescado 170 ºC 20 min.
Filete 180 ºC 10 min.
Frutos secos 40-80 ºC 4 horas
Alitas de pollo 200 ºC 13 min.
* Este cuadro enumera el tiempo promedio total de la cocción, el tiempo en el que se requiere
alguna acción y qué acción se debe tomar para obtener los mejores resultados.
Para unos mejores resultados Agregue 5 minutos a la freidora para permitir se precaliente.
CONSEJOS ÚTILES
• Utilice aceite de oliva en aerosol o aceite vegetal para freír al aire.
• Use su freidora para cocinar alimentos preenvasados con una fracción de aceite, en una
fracción del tiempo. Como regla general, baje la temperatura de cocción de la receta en 10
ºC y reduzca el tiempo de cocción entre un 30% y un 50% según el alimento y la cantidad.
• No llene en exceso la cesta para freír los alimentos. Nunca llene la cesta más de la mitad
de su capacidad.
• Para obtener los mejores resultados, es necesario agitar enérgicamente algunos alimentos
o darles la vuelta durante el tiempo de cocción.
• Para evitar el exceso de humo, cuando cocine alimentos naturalmente ricos en grasas,
como alitas de pollo o salchichas, puede ser necesario vaciar la grasa del cajón de la cesta
de freír durante su utilización.
• Siempre seque los alimentos antes de cocinarlos para estimular el dorado y evitar el exce-
so de humo.
• Para freír pequeños lotes de alimentos recién empanados presione el empanado sobre la
comida para ayudar a que se adhiera. Colóquelo en la canasta para freír de modo que los
alimentos no se toquen para permitir el ujo de aire en todas las supercies.
• La freidora de aire se puede utilizar para recalentar alimentos a una temperatura de 220ºC
durante 15-20 minutos.
Table of contents
Languages:
Other Create Fryer manuals