AUTOMATIC
1. Check that the operating mechanism is intact.
2. There are two coloured indicators on the operating mechanism, the indicator adjacent to the gas cylinder
indicates the status of the gas cylinder.
a. If the indicator displays green, this signifies that the gas cylinder is intact (full) and correctly fastened to
the operating mechanism.
b. If the indicator displays red, this signifies that there is a problem with the gas cylinder. This can be for a
number of reasons:
i. Firstly the gas cylinder may have been activated and needs to be replaced. A replacement cylinder
can be purchased from your Crewsaver stockist.
ii. The gas cylinder is not attached or the cylinder is not firmly fastened into the operating mechanism
iii. The gas cylinder is defective. A replacement cylinder can be purchased from your Crewsaver stockist.
3. The coloured indicator adjacent to the automatic cartridge indicates the status of the automatic cartridge.
a. If the indicator displays green, this signifies that the automatic cartridge has not been activated, is fully
intact and is correctly fastened to the operating mechanism.
b. If the indicator displays red, this signifies that there is a problem with the automatic cartridge. This can
be for a number of reasons.
i. Firstly the automatic cartridge may have been activated and needs to be replaced. A replacement
automatic cartridge can be purchased from your Crewsaver stockist.
ii. The automatic cartridge is not attached or the automatic cartridge is not correctly fastened to the
operating mechanism.
iii. The automatic cartridge is defective or the cartridge’s water activated element has dissolved due to
over exposure to moisture. A replacement automatic cartridge can be purchased from your
Crewsaver stockist.
4. IMPORTANT: Remove the automatic cartridge first from the operating mechanism by unscrewing in an
anti-clockwise direction.
5. Detach the gas cylinder from the operating mechanism by unscrewing in an anti-clockwise direction.
6. Once both the automatic cartridge and the gas cylinder have been detached from the operating mechanism,
pull the manual inflation chord.
7. Check that the firing arm is moving freely
8. Check that the firing pin is free from any damage or corrosion
9. Replace the firing arm back into the main body of the operating mechanism. It will click into the operating
mechanism to signify it is correctly in place.
10. Screw the automatic cartridge into the operating mechanism in a clockwise direction until hand tight. If the
automatic cartridge is intact and correctly fastened to the operating mechanism, the colour indicator adja-
cent to the cartridge will turn green. If the indicator remains red, this signifies that the cartridge has either
been used or is faulty and MUST be replaced immediately. You can purchase this from your Crewsaver
stockist.
11. Check that the cylinder seal inside the operating mechanism has been fitted and is intact. Screw in the
undamaged or new 23g cylinder in a clockwise direction into the operating mechanism until hand tight. If
the cylinder is intact and correctly fastened to the operating mechanism, the coloured indicator adjacent to
the gas cylinder will turn green. If the indicator remains red, this signifies that the gas cylinder is either used
or faulty and MUST be replaced immediately. You can purchase this from your Crewsaver stockist.
12. If both indicators are green, your automatic operating mechanism is now rearmed.
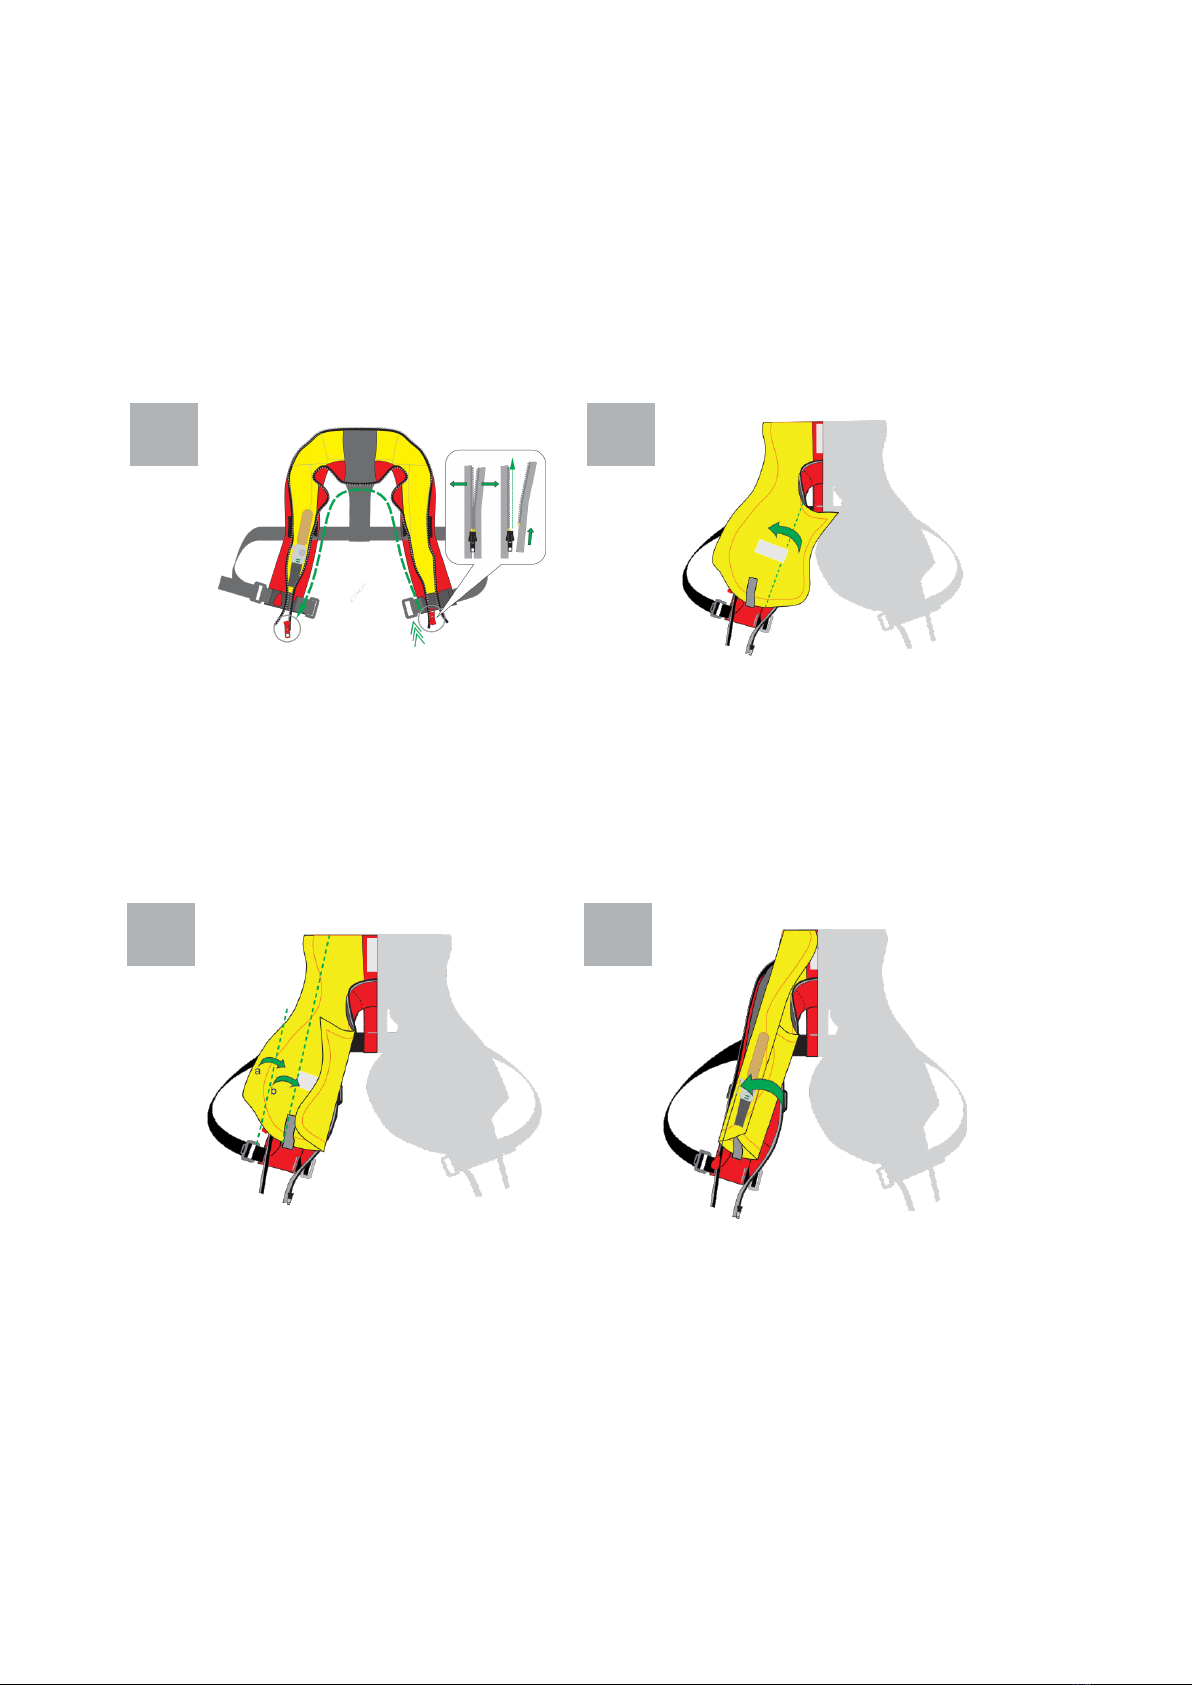
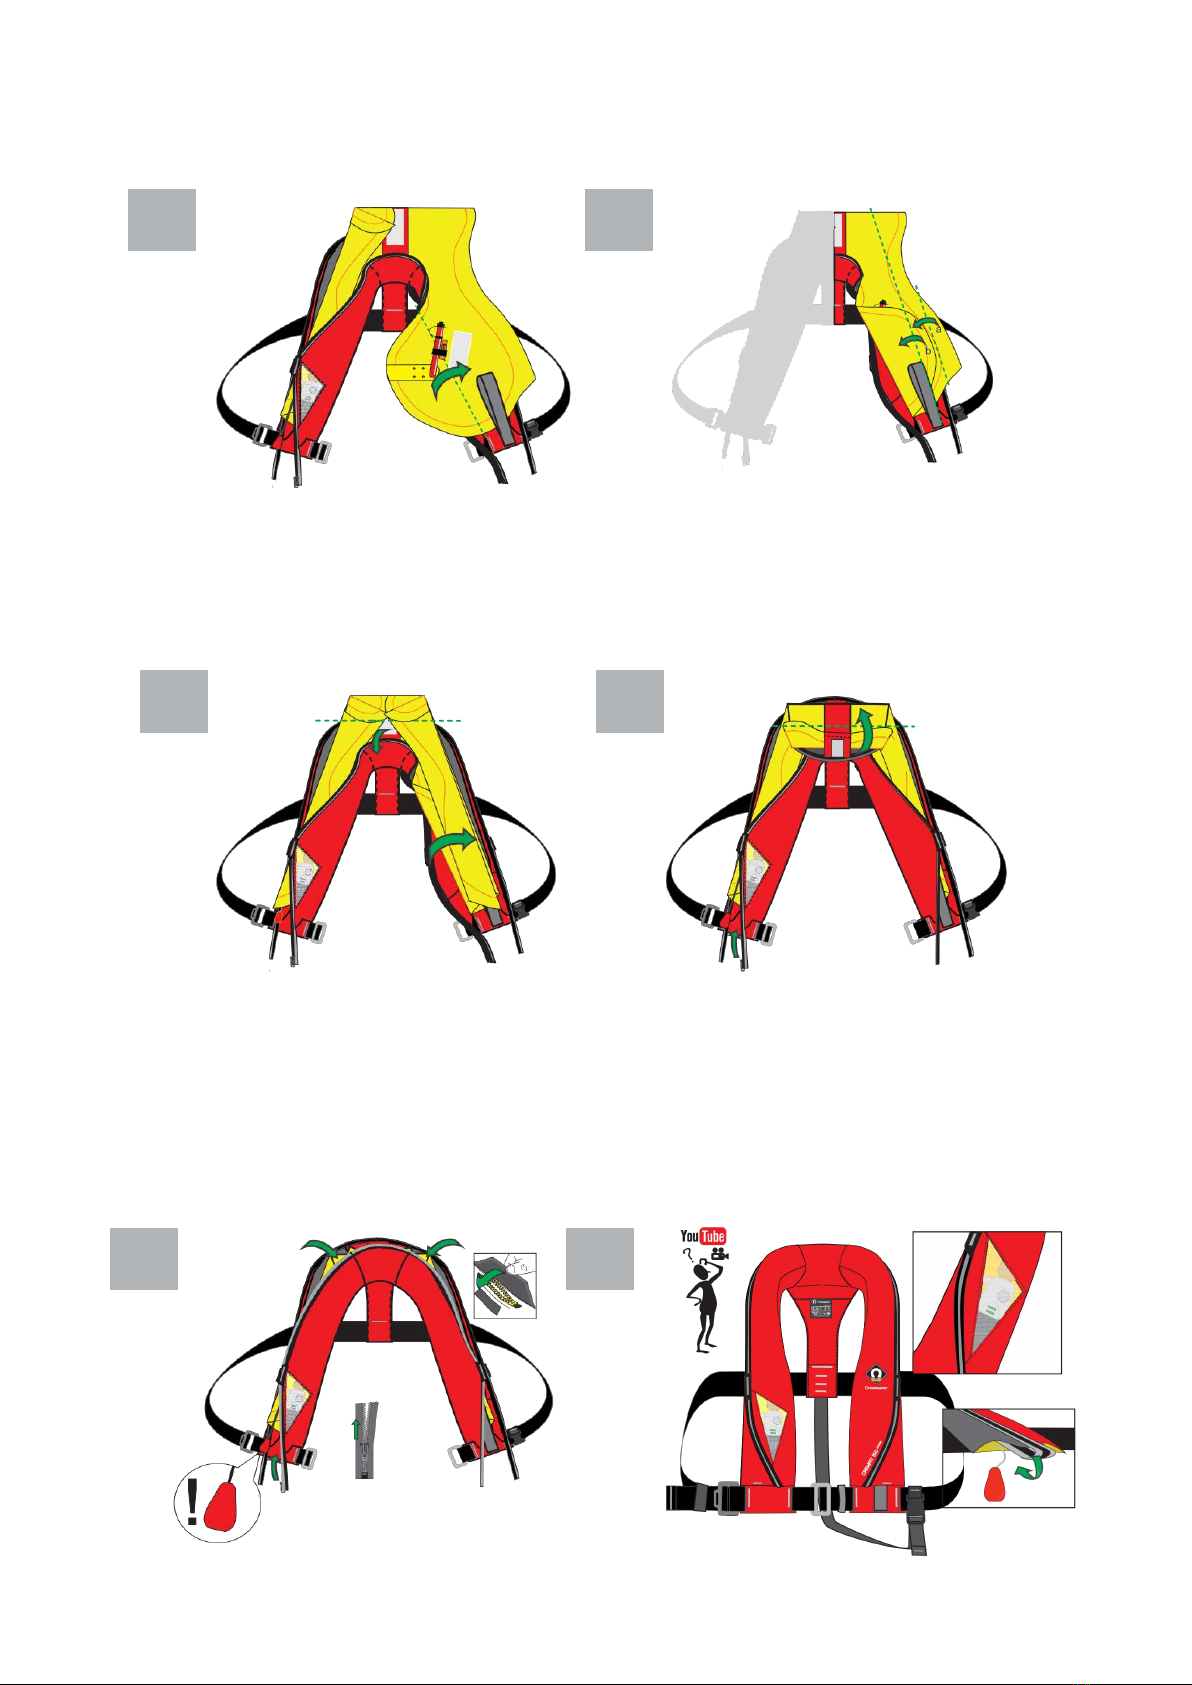
INSPECTION - STEP 7
Checking the operating mechanism
5.
a. b. c.
d.
e.
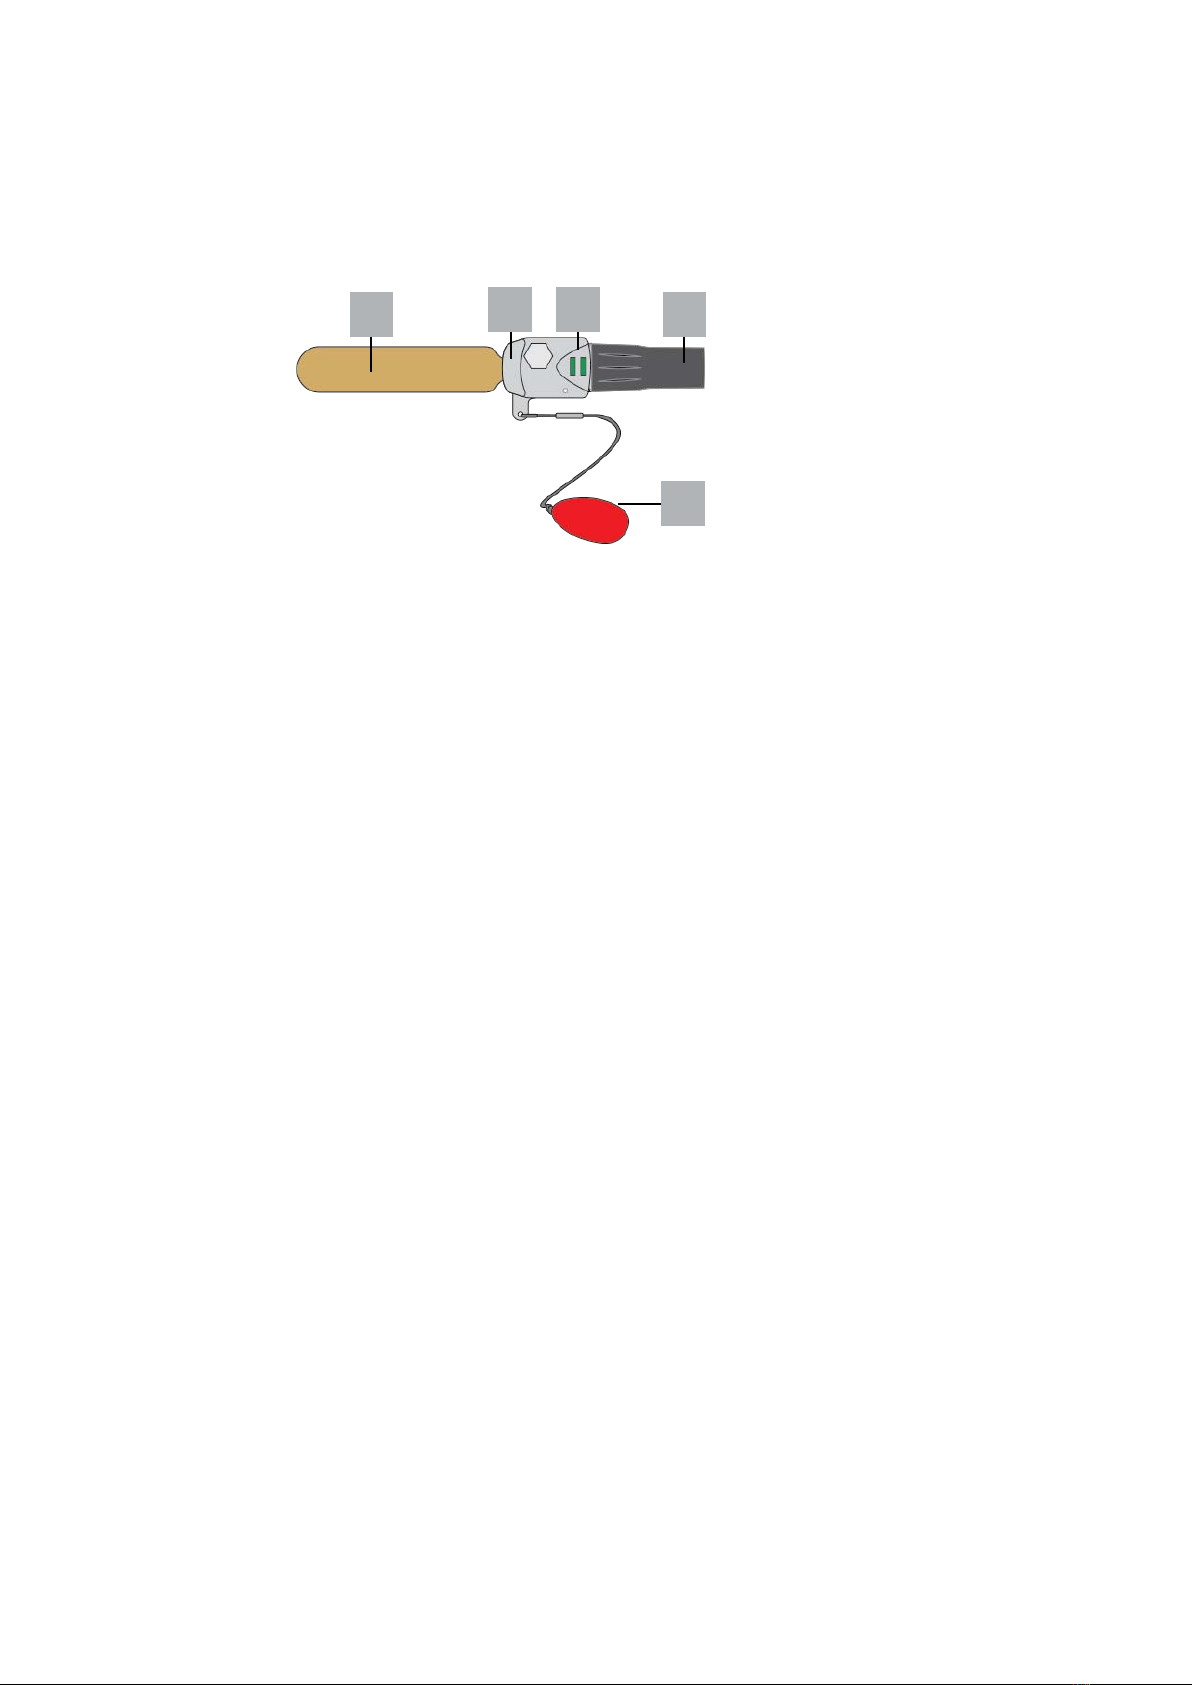
A: Gas Cylinder
B: Operating Mechanism
C: Automatic Cartridge
D: Indicators
E: Manual firing chord