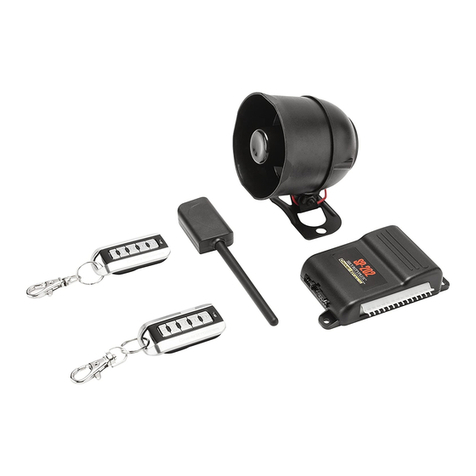
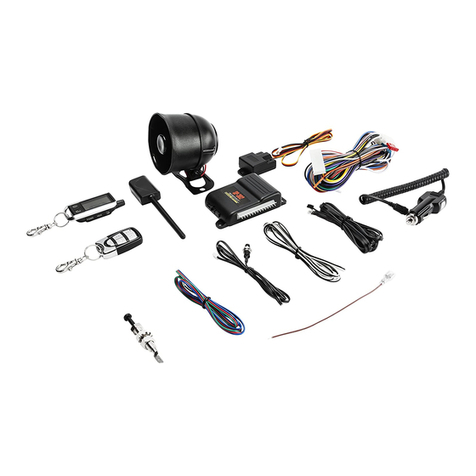
CrimeStopper SP-102 User manual

CONGRATULATIONS on your choice of a CrimeStopper Remote Security System. This booklet contains all the
necessary information for using, and maintaining your security system. If any questions should arise, contact
your installation facility or check out the Knowledge Base at www.crimestopper.com.
ONE-WAY
DELUXE
SECURITY
SYSTEM
OWNER’S MANUAL1230-60033-01-A

2
INTRODUCTION
FCC Compliant
This device complies with Part 15 of the FCC Rules. Operation is subject to the following two conditions: (1) This device may not cause
harmful interference, and (2) this device must accept any interference received, including interference that may cause undesired
operation.
CAUTION: Changes or modications not expressly approved by TESSONICS Inc. Could void the user’s authority to operate this device.
NOTE: This equipment has been tested and found to comply with the limits for a Class A digital device, pursuant to Part 15 of the FCC
Rules. These limits are designed to provide reasonable protection against harmful interference when the equipment is operated in a
commercial environment. This equipment generates, uses, and can radiate radio frequency energy and, if not installed and used in
accordance with the instruction manual, may cause harmful interference to radio communications. Operation of this equipment in a
residential area is likely to cause harmful interference in which case the user will be required to correct the interference at his own
expense.
TABLE OF CONTENTS
Introduction 2
Remote Pairing and Battery Replacement 3
System Command and Valet Mode 4-5
Carjack Modes 6
Alarm Triggers and Shock Sensor 7
French 9-13
Spanish 14-18
Warranty 20

3
REMOTE PAIRING/ BATTERY REPLACEMENT
Pairing a Remote to the System
NOTE: Once you enter programming mode it will erase all of the other remotes paired to the
system, therefore we recommend having all remotes for the system ready to pair prior to
entering pairing mode. The SP-102 can pair up to 4 remotes. The Override/Programming button
can usually be found at the bottom of the dash near the OBD II port or near the driver’s side fuse
panel. If you need help locating this button please contact the installation facility that installed
your security system.
1. Turn the ignition to the ON position
2. Press the Override/Program button 4 times. You will know you are in pairing mode once
the system “chirps” the siren and ashes the parking lights 4 times.
3. Once in pairing mode, press Button #1 or the LOCK/ARM button of the rst remote you
want to learn. You will know that the remote has paired when the parking lights ash twice
indicating that the system is ready for the next remote. Now press Button #1 or LOCK/
ARM button of the next remote. The parking lights will ash 3 times indicating the system
is ready for the next remote. Continue this until you have added all of the remotes you wish
to add to control the system or up to 4 remotes.
4. After you have programmed all of your remotes, exit programming by turning the ignition
to OFF position.
Replacing the Battery
To replace the battery in the remotes you will need to remove the 4 screws on the back of the remote. Once all of the screws are
removed you can separate the remote. Now slide out the (3) CR-2016 batteries from the back of the circuit board. Stack the new
batteries on top of each other with the plus sign facing up and slide them into the holder on the circuit board. Place the remote pieces
back together and reinsert the screws holding the case together. Be careful to not over tighten the screws as it could strip out and not
hold the case together.
SP-102 4 BUTTON REMOTE
LOCK
UNLOCK
SILENT
TRUNK
RELEASE

4
SYSTEM COMMANDS
LOCK/ARM (Active Arming) - To arm the security system and lock the doors, press Button #1 (LOCK) on the remote. You will hear
a single chirp from the system and the parking lights will ash once. The system will arm, the doors will lock and the starter will be
disabled if these optional features have been installed. After the short 5-30 second delay to allow the vehicle and electronics to settle,
the system will be completely armed. The alarm status LED in the vehicle will begin ashing.
UNLOCK/DISARM (Active Disarm) - To disarm the security system and unlock the doors, press button 2 (UNLOCK) on the remote. You
will hear 2 chirps from the system and the parking lights will ash twice. The LED will stop ashing. The doors will unlock if the vehicle’s
power locks are connected to the system.
Silent Arming - To silently arm the alarm, press Button #3 (SILENT) on the remote, the parking lights will ash one time and the system
will arm.
Silent Disarm - With the system already armed using SILENT ARM, press Button #3 (SILENT) and the system will disarm and ash the
parking lights twice.
Passive Arming - If programmed, Passive (automatic) Arming will occur 40 seconds after the ignition is turned OFF and the last door
has been closed. The LED will begin to ash rapidly while counting down. If a door, trunk, hood is reopened, the system will wait for the
door, trunk, and hood to close before arming. The unit will ash the parking lights once.
Active Re-Arming - The active re-arming feature allows the system to re-arm itself 40 seconds after being disarmed with the remote if
a door has not yet been opened. This is handy if the vehicle is accidentally disarmed (via the remote in your pocket) without you knowing
it. This feature can be turned ON or OFF in the programming.
Emergency Disarm/System Override - If you have lost the remote or it has stopped working for any reason and the vehicle is armed,
you will need to perform an Emergency Override to disarm the alarm. To do this, you will need to unlock the vehicle with the key in the
door. This will activate the alarm, the siren will sound and the parking lights will ash. Insert the key into the ignition and turn it to the
ON position. After the ignition is ON, press and hold the Override/Programming button for 4-5 seconds or until the alarm stops. This
will disarm the alarm.

5
SYSTEM COMMANDS
Ignition Controlled Door Locks - If this feature is enabled in the programming, the doors will automatically lock when the ignition is
turned ON and will unlock when the ignition is turned OFF. This feature can be turned ON or OFF in the programming.
Trunk Release - To release the trunk (if this options is applicable and installed), press Button #4 (TRUNK) on the remote for at least
4 seconds. If “disarm with trunk release” has been disabled, the trunk WILL open without activating the alarm when using the remote
only, but the system will remain armed.
Alarm Triggering - If there is an intrusion into the vehicle or a hard impact to the body, the alarm will sound and ash the parking
lights for 45 seconds. After 45 seconds the siren and the ashing parking lights will stop; the alarm will remain armed and continue to
monitor the vehicle. If an intruder left the door open, the unit will cycle a second time of 45 seconds and then continue to monitor the
remaining un-tampered zones of the vehicle.
Panic/Vehicle Finder - To sound the alarm with the remote, press and hold Button #1 (LOCK) for at least 3 seconds or until the siren
sounds. To shut off the remote panic, press Button #1 (LOCK) and the alarm will reset.
Valet Operation – This will disable the alarm system while still allowing the keyless entry portion to still work (if applicable).
Entering Valet Mode – Turn the ignition to the ON position. Press and hold the Override/Program button for 4-5 seconds until the alarm
LED turns ON solid and the system chirps the siren once.
Exiting Valet Mode – Turn the ignition to the ON position. Press and hold the Override/Program button for 4-5 seconds until the alarm
LED turns OFF and the system chirps the siren twice.
VALET MODE

6
CARJACK MODES
NOTE: This feature will need to be enabled through the programming of the system. Consult the installation manual or installation facility
that installed your system.
Active Carjack - This feature provides Active Carjack protection and MUST be enabled before use through the alarm programming. To
activate, with the ignition ON, press Button #2 (UNLOCK). The parking lights will ash twice to conrm Carjack countdown has begun.
After 90 seconds the unit will begin the Carjack cycle consisting of pre-warning chirps for 20 seconds then turning into a full system
alarm activation with the siren and parking lights ashing for 5 minutes. To reset the Active Carjack, turn the ignition to the ON position
and press Button #2 (UNLOCK) again.
Passive Carjack - This feature provides Passive Carjack protection and MUST be enabled before use through the alarm programming.
To activate, the ignition has to be ON and a door must be opened. The parking lights will ash twice to conrm Carjack countdown has
begun. After 90 seconds the unit will begin the Carjack cycle consisting of pre-warning chirps for 20 seconds then turning into a full
system alarm activation with the siren and parking lights ashing for 5 minutes. To reset the Passive Carjack protection, turn the
ignition ON with the doors CLOSED, then press the Override/Program button 3 times.
Full-time Carjack - Full-time Carjack mode should only be used in extreme conditions. This feature provides Full-time Carjack protection
and MUST be enabled before use through the alarm programming. Every time the ignition is turned ON or a door is opened, the Carjack
countdown will be initiated. The parking lights will ash twice to conrm the Carjack countdown has begun. After 90 seconds, the unit
will begin the Carjack cycle consisting of pre-warning chirps for 20 seconds and then turning into a full system alarm activation with the
siren and parking lights ashing for 5 minutes. You MUST reset the unit every time the ignition is turned ON or a door is opened. To reset
the Full-time Carjack feature, the ignition must be ON and the doors must be closed, then press the Override/Program button 3 times.
NOTE: Before you are able to enter Valet mode, program any option or remotes, you MUST reset the unit every time the ignition is turned
ON or a door is opened when full-time Carjack mode is active. It is always active each time the ignition is turned ON and/or a door is
opened with the ignition ON.

7
ALARM TRIGGERS
Alarm Trigger Diagnostics (This feature is only available w/Active Rearm Enabled)
If the system was triggered when you were away from your vehicle, the system will give 4 chirps and ashes from the parking lights
when you disarm the system. After you Disarm the system the LED will ash a sequence giving you which trigger was activated. The
graph below will show what the different ashes represent.
• 1 Flash – Ignition was turned ON
• 3 Flashes – Door, Hood or Trunk trigger
• 4 Flashes – Shock Sensor
Alarm Trigger Reset - After the alarm has been triggered, you will need to reset the system by turning the ignition to the ON position
then turning the ignition to the OFF position. Once you rearm the vehicle all of the triggers will be reset.
SHOCK SENSOR
Shock Sensor - This system does come with a dual stage shock sensor. What this means is that it will offer both a warn away as well
as full alarm with different impact sensitivity.
Warn Away - This is for light impacts such as someone kicking a tire. Once a warn away impact is registered, the system will chirp the
siren 5 times and ash the parking lights once to alert anyone in the area.
Full Alarm - This is for heavy impacts such as door window being broken. Once a full alarm impact has been registered, the system will
trigger the full siren and multiple parking light ashes.

8
INTRODUCTION
FÉLICITATIONS sur votre choix d’un Système de sécurité à télécommande CrimeStopper. Cette brochure contient toutes les
informations nécessaires pour utiliser et maintenir votre système de sécurité. En cas de question, contactez votre facilité
d’installation et consultez la base de connaissances à www.crimestopper.com.
Conformité FCC
Ce périphérique est conforme à la Partie 15 des Règlements de la FCC. Son fonctionnement est sous réserve des deux conditions suivantes : (1)
ce dispositif ne peut provoquer de brouillage nuisible et (2) ce dispositif doit accepter tout brouillage reçu, y compris brouillage risquant de
provoquer un fonctionnement non souhaité.
ATTENTION : Des changements ou modications non expressément approuvés par TESSONICS Inc. pourraient annuler l'autorisation de
l'utilisation à utiliser cet équipement.
NOTE : Ce matériel a été testé et jugé conforme aux limites d’un dispositif numérique de Classe A, conformément à la Partie 15 des Règlements
de la FCC. Ces limites sont destinées à assurer une protection raisonnable contre les interférences nuisibles quand l'appareil est utilisé dans
une installation commerciale. Ce matériel produit, utilise et peut rayonner une énergie des fréquences radio, et risque, s’il n’est pas installé et
utilisé conformément à ce mode d’emploi, de provoquer un brouillage nuisible aux communications radio. L'utilisation de cet appareil dans une
installation résidentielle peut entraîner des interférences nuisibles, lesquelles devront être corrigées aux frais de l'utilisateur.

9
LIAISON DE TÉLÉCOMMANDE / REMPLACEMENT DES PILES
Liaison d'une télécommande au système
NOTE: Une fois que vous entrez en mode de programmation, cela effacera toutes les autres
télécommandes liées au système, par conséquent, nous recommandons que toutes les télécommandes
pour le système soient prêtes à être liées avant d'entrer en mode de liaison. Le SP-102 peut être lié à
4 télécommandes maximum. Le bouton de neutralisation/programmation se trouve généralement au
bas du tableau de bord près du port OBD II ou près du panneau de fusibles latéral du conducteur. Si
vous avez besoin d'aide pour localiser ce bouton, veuillez contacter la facilité d'installation qui a installé
votre système de sécurité.
1. Mettez le contact en position ON (marche).
2. Appuyez sur le bouton de neutralisation/programmation à 4 reprises. Vous saurez que vous
êtes en mode de liaison une fois que le système fait « retentir » la sirène et fait clignoter les
feux de stationnement à 4 reprises.
3. Une fois en mode de liaison, appuyez sur le bouton n° 1 ou le bouton VERROUILLER/ARMER de la
première télécommande que vous souhaitez former. Vous saurez que la télécommande est liée
lorsque les feux de stationnement clignotent à deux reprises pour indiquer que le système est
prêt pour la télécommande suivante. Maintenant, appuyez sur le Bouton n° 1 ou sur le bouton VERROUILLER/ARMER de la télécommande
suivante. Les feux de stationnement clignoteront à 3 reprises pour indiquer que le système est prêt pour la télécommande suivante.
Continuez jusqu'à ce que vous ayez ajouté toutes les télécommandes que vous souhaitez ajouter pour contrôler le système ou un
maximum de 4 télécommandes.
4. Après avoir programmé toutes vos télécommandes, quittez le mode Programmation en mettant le contact en position OFF (arrêt).
Remplacement des piles
Pour remplacer la pile dans les télécommandes, il vous faudra retirer les 4 vis sur le dos de la télécommande. Une fois toutes les vis retirées,
vous pouvez séparer la télécommande. Maintenant, faites glisser les (3) piles CR-2016 du dos du circuit imprimé. Empilez les piles neuves les
unes sur les autres avec le signe plus faisant face vers le haut et faites-les glisser dans le support sur le circuit imprimé. Remettez les parties
de la télécommande ensemble et réinsérez les vis en maintenant le boîtier ensemble. Faites attention de ne pas trop serrer les vis car elles
pourraient se fausser et ne pas maintenir les parties du boîtier ensemble.
SP-102 4 BUTTON REMOTE
LOCK
UNLOCK
SILENT
TRUNK
RELEASE

10
COMMANDES SYSTÈME
VERROUILLAGE/ARMEMENT (Armement actif) - Pour armer le système de sécurité et verrouiller les portes, appuyez sur le Bouton n° 1
(VERROUILLAGE) sur la télécommande. Vous entendrez un seul bip du système et les feux de stationnement clignoteront une fois. Le système
s'armera, les portes se verrouilleront et le démarreur sera désactivé si ces fonctionnalités optionnelles ont été installées. Après le court délai
de 5-30 secondes pour permettre au véhicule et aux composants électroniques de se régulariser, le système sera complètement armé. La DEL
d'état d'alarme dans le véhicule commencera à clignoter.
DÉVERROUILLAGE/DÉSARMEMENT (Désarmement actif) - Pour désarmer le système de sécurité et déverrouiller les portes, appuyez sur le
Bouton n° 2 (DÉVERROUILLAGE) sur la télécommande. Vous entendrez deux bips du système et les feux de stationnement clignoteront deux fois.
La DEL s'arrêtera de clignoter. Les portes se déverrouilleront si le verrouillage électrique du véhicule est connecté au système.
Armement silencieux - Pour armer silencieusement l'alarme, appuyez sur le Bouton n° 3 (SILENCIEUX) sur la télécommande, les feux de
stationnement clignoteront une fois et le système sera armé.
Désarmement silencieux - Avec le système déjà armé à l'aide de l'ARMEMENT SILENCIEUX, appuyez sur le Bouton n° 3 (SILENCIEUX) et le
système sera désarmé, et les feux de stationnement clignoteront deux fois.
Armement passif - Si programmé, l'armement passif (automatique) se produira 40 secondes après que le contact soit éteint et que la dernière
porte ait été fermée. La DEL commencera à clignoter rapidement pendant le compte à rebours. Si une porte, un coffre ou un capot sont rouverts,
le système attendra que la porte, le coffre et le capot se referment avant l'armement. L'unité fera clignoter les feux de stationnement une fois.
Réarmement actif - La fonctionnalité de réarmement actif permet au système de réarmer 40 secondes après avoir été désarmé avec la
télécommande si une porte n'a pas encore été ouverte. Ce qui est pratique si le véhicule est accidentellement désarmé (via la télécommande
dans votre poche) sans que vous le sachiez. Cette fonction peut être activée ou désactivée dans la programmation.
Désarmement d'urgence/Neutralisation du système - En cas de perte de la télécommande ou si celle-ci s'arrête de fonctionner pour
une raison quelconque et que le véhicule est armé, il vous faudra effectuer une neutralisation d'urgence pour désarmer l'alarme. Pour ce
faire, il vous faudra déverrouiller le véhicule avec la clé dans la porte. Ceci activera l'alarme, la sirène retentira et les feux de stationnement
clignoteront. Introduisez votre clé dans le contact et mettez-la en position ON. Une fois le contact allumé, appuyez sur le bouton neutralisation/
programmation et maintenez-le enfoncé pendant 4-5 secondes ou jusqu'à ce que l'alarme s'arrête. Ceci désarmera l'alarme.

11
COMMANDES SYSTÈME
Serrures de porte commandées par l'allumage - Si cette fonction est activée dans la programmation, les portes se verrouilleront
automatiquement lorsque le contact est allumé et se déverrouilleront lorsque le contact est éteint. Cette fonction peut être activée ou
désactivée dans la programmation.
Télé-ouverture du coffre - Pour ouvrir le coffre (si cette option est applicable et installée), appuyez sur le Bouton n° 4 (COFFRE) sur la
télécommande pendant au moins 4 secondes. Si la fonction « désarmer avec ouverture du coffre » a été désactivée, le coffre S'OUVRIRA sans
activer l'alarme lors de l'utilisation de la télécommande uniquement mais le système restera armé.
Déclenchement d'alarme - En cas d'intrusion dans le véhicule ou d'un impact dur sur la carrosserie, l'alarme retentira et les feux de
stationnement clignoteront pendant 45 secondes. Au bout de 45 secondes, la sirène et les feux de stationnement clignotants s'arrêteront ;
l'alarme restera armée et continuera de surveiller le véhicule. Si un intrus a laissé la porte ouverte, l'unité effectuera un cycle de 45 secondes
une deuxième fois et continuera ensuite à surveiller les zones non altérées restantes du véhicule.
Panique/Recherche de véhicule - Pour faire retentir l'alarme avec la télécommande, appuyez sur le Bouton n° 1 (VERROUILLAGE) et maintenez-
le enfoncé pendant au moins 3 secondes ou jusqu'à ce que la sirène retentisse. Pour arrêter la fonction panique de télécommande, appuyez sur
le Bouton n° 1 (VERROUILLAGE) et l'alarme se réinitialisera.
Fonctionnement voiturier – Ceci désactivera le système d'alarme tout en permettant à la portion d'entrée sans clé de toujours fonctionner
(s'il y a lieu).
Entrée en mode Voiturier - Mettez le contact en position ON (marche). Appuyez sur le bouton neutralisation/programmation et maintenez-le
enfoncé pendant 4-5 secondes jusqu'à ce que la DEL d'alarme s'allume en continu et que le système fait retentir la sirène une fois.
Quitter le mode Voiturier – Mettez le contact en position ON. Appuyez sur le bouton neutralisation/programmation et maintenez-le enfoncé
pendant 4-5 secondes jusqu'à ce que la DEL d'alarme s'éteigne et que le système fasse retentir la sirène deux fois.
MODE VOITURIER

12
MODES ANTI-CARJACKING
NOTE : Cette fonction devra être activée par le biais de la programmation du système. Consultez le manuel d'installation ou la facilité d'installation
qui a installé le système.
Anti-carjacking actif - Cette fonction offre une protection anti-carjacking active et DOIT être activée avant utilisation via la programmation
d'alarme. Pour activer, avec le contact allumé, appuyez sur le Bouton n° 2 (DÉVERROUILLER). Les feux de stationnement clignoteront à deux
reprises pour conrmer que le compte à rebours d'anti-carjacking a commencé. Au bout de 90 secondes, l'unité commencera le cycle d'anti-
carjacking consistant de bips pré-avertissement pendant 20 secondes se transformant ensuite en une activation d'alarme de système complète
avec la sirène et les feux de stationnement clignotant pendant 5 minutes. Pour réinitialiser l'anti-carjacking actif, mettez le contact en position
ON et appuyez sur le Bouton n° 2 (DÉVERROUILLER) à nouveau.
Anti-carjacking passif - Cette fonction offre une protection anti-carjacking passive et DOIT être activée avant utilisation via la programmation
d'alarme. Pour activer, le contact doit être en position ON et une porte doit être ouverte. Les feux de stationnement clignoteront à deux reprises
pour conrmer que le compte à rebours d'anti-carjacking a commencé. Au bout de 90 secondes, l'unité commencera le cycle d'anti-carjacking
consistant de bips pré-avertissement pendant 20 secondes se transformant ensuite en une activation d'alarme de système complète avec la
sirène et les feux de stationnement clignotant pendant 5 minutes. Pour réinitialiser la protection anti-carjacking passive, mettez le contact en
position ON avec les portes FERMÉES, puis appuyez sur le bouton neutralisation/programmation à 3 reprises.
Anti-carjacking plein temps - Le mode anti-carjacking plein temps ne doit être utilisé dans des conditions extrêmes. Cette fonction offre une
protection anti-carjacking plein temps et DOIT être activée avant utilisation via la programmation d'alarme. À chaque fois que le contact est
allumé ou qu'une porte est ouverte, le compte à rebours d'anti-carjacking sera initié. Les feux de stationnement clignoteront à deux reprises
pour conrmer que le compte à rebours d'anti-carjacking a commencé. Au bout de 90 secondes, l'unité commencera le cycle d'anti-carjacking
consistant de bips pré-avertissement pendant 20 secondes se transformant ensuite en une activation d'alarme de système complète avec la
sirène et les feux de stationnement clignotant pendant 5 minutes. Vous DEVEZ réinitialiser l'unité à chaque fois que le contact est allumé ou
qu'une porte est ouverte. Pour réinitialiser la protection anti-carjacking plein temps, le contact doit être allumé et les portes fermées, puis
appuyez sur le bouton neutralisation/programmation à 3 reprises.
NOTE : Avant de pouvoir entrer en mode Voiturier, de programmer toute option ou télécommande, vous DEVEZ réinitialiser l'unité à chaque fois
que le contact est allumé ou qu'une porte est ouverte lorsque le mode anti-carjacking est actif. Il est toujours actif à chaque fois que le contact
est allumé et/ou qu'une porte est ouverte avec le contact allumé.


14
INTRODUCCIÓN
FELICITACIONES por escoger un sistema remoto de seguridad CrimeStopper. El folleto contiene toda la información necesaria para
usar y dar mantenimiento a su sistema de seguridad. Si surge una pregunta, comuníquese con su centro de instalación o compruebe
la base de conocimientos en www.crimestopper.com.
Cumple con las normas de la FCC
Este dispositivo cumple con las normas de la Parte 15 de la FCC. La operación está sujeta a las dos condiciones siguientes: (1) Este dispositivo no
puede causar interferencia nociva y (2) este dispositivo tiene que aceptar cualquier interferencia recibida, incluida la interferencia que puede
causar el funcionamiento no deseado.
PRECAUCIÓN: Los cambios y las modicaciones que no hayan sido expresamente aprobados por TESSONICS Inc. podrían anular la autoridad
del usuario a usar este dispositivo.
NOTA: Se ha probado este equipo y se determinó que cumple con los límites de un dispositivo digital clase A, de acuerdo a la parte 15 de las
reglas de la FCC. Estos límites están diseñados para proporcionar protección razonable contra la interferencia dañina cuando se opera el
equipo en un ambiente comercial. Este equipo genera, usa y puede irradiar energía de radiofrecuencia y, si no se instala y usa correctamente de
acuerdo al manual de instrucciones, puede causar interferencia nociva a las comunicaciones radiales. Es probable que la operación del equipo
en áreas residenciales cause interferencias nocivas en cuyo caso se requiere que el usuario corrija la interferencia por cuenta del mismo.

15
ACOPLAMIENTO DEL CONTROL REMOTO/CAMBIO DE LA BATERÍA
Acoplamiento de un control remoto con el sistema
NOTA: Una vez que ingrese en el modo de programación borrará todos los otros controles remotos
acoplados al sistema, por lo tanto recomendamos tener todos los controles remotos para el sistema
listos para acoplar antes de entrar en el modo de acoplamiento El sistema SP-102 puede acoplar hasta
4 unidades de control remoto. Normalmente se puede encontrar el botón Anular/Programar en la parte
inferior del tablero de instrumentos, cerca del puerto OBD II o cerca del panel de fusibles del lado del
conductor. Si necesita ayuda para encontrar este botón, comuníquese con tel centro de instalación que
instaló su sistema de seguridad.
1. Coloque el encendido en la posición de activado "ON”.
2. Presione 4 veces el botón Anular/Programar. Usted sabrá que se encuentra en el modo de
acoplamiento una vez que el sistema emita sonidos de la sirena y destellen 4 veces las luces
de estacionamiento.
3. Una vez que esté en el modo de acoplamiento, presione el botón no. 1 o el botón BLOQUEAR/
ARMAR en el primer control remoto que quiera aprender. Usted sabrá que el control remoto se
ha acoplado cuando destellen dos veces las luces de estacionamiento indicando que el sistema
está listo para el próximo control remoto. Presione ahora el botón no. 1 o el botón BLOQUEAR/ARMAR del control remoto siguiente. Las
luces de estacionamiento destellarán 3 veces indicando que el sistema está listo para el control remoto siguiente. Siga con esto hasta
que haya agregado todos los controles remotos que quiera agregar para controlar el sistema o hasta 4 controles remotos.
4. Después que haya programado todos sus controles remotos salga de la programación colocando el encendido en la posición de apagado
(OFF).
Cambio de la batería
Para cambiar la batería en los controles remotos deberá extraer los 4 tornillos en el reverso del control remoto. Una vez que se hayan quitado
todos los tronillos tiene que separar las dos partes del control remoto. Deslice ahora hacia afuera las (3) baterías CR-2016 de la parte posterior
del circuito impreso. Apile las baterías una arriba de otra con el símbolo positivo enfrentado hacia arriba y deslícelas en el soporte del circuito
impreso. Coloque las piezas del control remoto juntas nuevamente y reinserte los tornillos sosteniendo unida la caja. Tenga cuidado de no
apretar demasiado los tornillos pues podría desgarrarlos y no sostendrían unida la caja.
SP-102 4 BUTTON REMOTE
LOCK
UNLOCK
SILENT
TRUNK
RELEASE

16
COMANDOS DEL SISTEMA
BLOQUEO/ARMADO (Armado activo) - Para armar el sistema de seguridad y bloquear las puertas, presione el botón no. 1 (BLOQUEAR) en el
control remoto. Escuchará un solo sonido del sistema y las luces de estacionamiento destellarán una vez. Se armará el sistema, se bloquearán
las puertas y se desactivará el arrancador si se han instalado estas características opcionales. Después de una breve demora de 5 a 30
segundos para permitir que se estabilice el vehículo y sus componentes electrónicos, el sistema estará completamente armado. El LED de estado
del vehículo comenzará a destellar.
DESBLOQUEAR/DESARMAR (Desarmado Activo) - Para desarmar el sistema de seguridad y desbloquear las puertas, presione el botón 2
(DESBLOQUEAR) en el control remoto. Escuchará dos sonidos del sistema y las luces de estacionamiento destellarán dos veces. El LED dejará de
destellar. Se desbloquearán las puertas si las cerraduras eléctricas están conectadas al sistema.
Armado silencioso - Para armar silenciosamente la alarma, presione el botón no. 3 (SILENT) en el control remoto, las luces de estacionamiento
destellarán una vez y se armará el sistema.
Desarmado silencioso - Con el sistema ya armado usando SILENT ARM, presione el botón 3 (SILENT) y se desarmará el sistema y destellará
dos veces las luces de estacionamiento.
Armado pasivo - Si está programado, el armado pasivo (automático) ocurrirá 40 segundos después que se haya apagado (OFF) el encendido y
que se haya cerrado la última puerta. El LED comenzará a destellar rápidamente mientras hace una cuenta regresiva. Si se vuelve a abrir una
puerta, cajuela, capó, el sistema esperará a que la puerta, cajuela, y capó se cierren antes de armarse. La unidad destellará una vez las luces
de estacionamiento.
Rearmado activo - La característica de rearmado activo permite que el sistema se rearme a sí mismo 40 segundos después de haberse
desarmado con el control remoto si todavía no se ha abierto una puerta. Esto es muy útil si se desarma accidentalmente el vehículo (vía control
remoto en su bolsillo) sin que usted lo sepa. Se puede encender y apagar esta característica (ON y OFF) durante la programación.
Desarmado de emergencia/Anulación del sistema - Si ha perdido el control remoto o si dejó de funcionar por cualquier motivo y el vehículo
está armado tendrá que efectuar una anulación de emergencia para desarmar la alarma. Para hacer esto tendrá que desbloquear el vehículo
usando la llave en la puerta. Esto activará la alarma, sonará la sirena y destellarán las luces de estacionamiento. Inserte la llave en el encendido
y gire a la posición de encendido (ON). Después que el encendido esté activado (ON), presione y mantenga presionado el botón Anular/Programar
durante 4 a 5 segundos o hasta que se detenga la alarma. Esto desarmará la alarma.

17
COMANDOS DEL SISTEMA
Cerraduras de las puertas controladas por el encendido - Si se habilita esta característica durante la programación, se bloqueará
automáticamente las puertas cuando se active (ON) el encendido y se desbloqueará cuando se apague (OFF) el encendido. Se puede encender y
apagar esta característica (ON y OFF) durante la programación.
Apertura de la cajuela - Para abrir la cajuela (si estas opciones son aplicables y están instaladas), presione el botón 4 (CAJUELA) en el control
remoto durante por lo menos 4 segundos. Si se ha desactivado “desarmar con la liberación de la cajuela”, se ABRIRÁ la cajuela sin activar la
alarma al usar solamente el control remoto, pero el sistema permanecerá armado.
Dispro de la alarma - Si hay una intrusión en el vehículo o un impacto fuerte sobre la carrocería, sonará la alarma y destellarán las luces de
estacionamiento durante 45 segundos. Después de 45 segundos se apagarán la sirena y las luces de estacionamiento destellantes; la alarma
permanecerá armada y seguirá monitoreando el vehículo. Si un intruso dejó la puerta abierta, la unidad ejecutará un ciclo de 45 segundos por
segunda vez y luego seguirá monitoreando las zonas no alteradas del vehículo.
Pánico/Buscador del vehículo - Para hacer sonar la alarma con el control remoto, presione y mantenga presionado el botón no. 1 (BLOQUEAR)
durante por lo menos 3 segundos o hasta que suene la sirena. Para apagar el pánico remoto, presione el botón 1 (BLOQUEAR) y se repondrá la alarma.
Operación de Valet – Esto desactivará el sistema de alarma mientras que sigue permitiendo que funcione la parte de ingreso sin llave
(si corresponde).
Ingreso en el modo Valet – Coloque el encendido en la posición de activado "ON”. Presione y mantenga presionado el botón Anular/Programar
durante 4 a 5 segundos hasta que se encienda (ON) el LED de alarma sin parpadear y el sistema haga sonar brevemente la sirena una vez.
Salida del modo Valet – Coloque el encendido en la posición de activado "ON”. Presione y mantenga presionado el botón Anular/Programar
durante 4 a 5 segundos hasta que se apague (OFF) el LED de alarma y el sistema haga sonar brevemente la sirena dos veces.
MODO VALET

18
MODOS CARJACK
NOTA: Se deberá habilitar esta característica mediante la programación del sistema. Consulte el manual de instalación o con el centro de
instalación que instaló su sistema.
Carjack activo - Esta característica le proporciona protección activa de Carjack y se la DEBE habilitar antes de usar mediante la programación
de la alarma. Para activar, con el encendido activado (ON), presione el botón no. 2 (DESBLOQUEAR). Las luces de estacionamiento destellarán
dos veces para conrmar que comenzó la cuenta regresiva de Carjack. Después de 90 segundos la unidad comenzará el ciclo Carjack que
consiste en sonidos de pre-advertencia durante 20 segundos y luego cambia a una activación completa del sistema con la sirena y las luces de
estacionamiento destellando durante 5 minutos. Para reponer el Carjack activo, coloque el encendido en la posición de activado "ON” y presione
nuevamente el botón 2 (DESBLOQUEAR).
Carjack pasivo - Esta característica proporciona protección de Carjack pasivo y DEBE estar habilitada antes de usar mediante la programación
de la alarma. Para activar, el encendido debe estar en ON (activado) y debe haber una puerta abierta. Las luces de estacionamiento destellarán
dos veces para conrmar que comenzó la cuenta regresiva de Carjack. Después de 90 segundos la unidad comenzará el ciclo de Carjack que
consiste en sonidos de pre-advertencia durante 20 segundos y luego cambia a una activación completa del sistema con la sirena y las luces de
estacionamiento destellando durante 5 minutos. Para reponer la protección de Carjack pasivo, coloque el encendido en la posición de encendido
(ON) con las puertas CERRADAS, luego presione 3 veces el botón Anular/Programar.
Carjack a tiempo completo - Solamente se debe usar el modo Carjack a tiempo completo en condiciones extremas. Esta característica
proporciona protección Carjack a tiempo completo y DEBE estar habilitada antes de usar mediante la programación de la alarma. Cada vez que
se activa (ON) el encendido o se abre una puerta, se iniciará la cuenta regresiva de Carjack. Las luces de estacionamiento destellarán dos veces
para conrmar que comenzó la cuenta regresiva de Carjack. Después de 90 segundos la unidad comenzará el ciclo Carjack que consiste en
sonidos de pre-advertencia durante 20 segundos y luego cambia a una activación completa de la alarma del sistema con la sirena y las luces de
estacionamiento destellando durante 5 minutos. Usted TIENE que reponer la unidad cada vez que se activa el encendido (ON) o que se abre una
puerta. Para reponer la característica Carjack a tiempo completo, el encendido debe estar activado (ON) y las puertas deben estar cerradas,
luego presione 3 veces el botón Anular/Programar.
NOTA: Antes de que pueda entrar en el modo Valet, programar alguna opción o controles remotos, usted DEBE reponer la unidad cada vez que
se activa (ON) el encendido o se abre una puerta cuando el modo Carjack a tiempo completo está activo. Siempre está activo cada vez que se
activa (ON) el encendido y/o se abre una puerta con el encendido activado (ON).


20
LIMITED WARRANTY
Rockford Corporation offers a limited warranty on all CrimeStopper products as detailed below and on the following terms:
ALL SAFETY PRODUCTS
Length Of Warranty - 1 Year
SECURITY and REMOTE START PRODUCTS
Length Of Warranty
Limited Lifetime, CrimeStopper will repair or replace defective modules with a comparable new or refurbished module during reasonable usage and the lifetime of the vehicle
in which it is originally installed provided that the module is returned to Rockford, shipping pre-paid and accompanied by a legible copy of the original sales receipt from the
authorized dealer containing; the consumer’s name, authorized dealer’s name, date of purchase, item or sku number, product description, and the year make and model of the
vehicle in which it is installed. The additional componentry of the system, including but not limited to remotes, antennas and harnesses, are covered by a one year warranty from
the date of original purchase. Products received for repair or replacement without proof of purchase from an authorized dealer will be denied.
What Is Covered
This warranty applies only to CrimeStopper products sold to consumers by authorized CrimeStopper dealers in the United States of America Products purchased by consumers
from an Authorized CrimeStopper Dealer in any other country are covered only by that country’s Distributor and not by Rockford Corporation.
Who Is Covered
This warranty covers only the original purchaser of CrimeStopper product purchased from an authorized CrimeStopper dealer. In order to receive service, the purchaser must
provide Rockford Corporation with a copy of the original sales receipt stating the customer name, dealer name, product purchased and date of purchase. Products found to be
defective during the warranty period will be repaired or replaced with a product deemed to be equivalent at Rockford’s sole discretion.
What Is NOT Covered
- Damage caused by accident, abuse, improper installation, operations, water, and theft
- Any cost or expense related to the removal or reinstallation of product
- Any product which has had the serial number defaced, altered, or removed
- Subsequent damage to other components
- Any product not purchased from an authorized CrimeStopper dealer
Limit On Implied Warranties
Any implied warranties including warranties of tness for use and merchantability are limited in duration to the period of the express warranty set forth above. Some states
do not allow limitations on the length of an implied warranty, so this limitation may not apply. No person is authorized to assume for Rockford Corporation any other liability in
connection with the sale of the product.
How To Obtain Service
Please call 1-800-998-6880 for Rockford Customer Service. You must obtain an RA# (Return Authorization number) to return any product to Rockford Corporation. You are
Printed in China
Other manuals for SP-102
1
Table of contents
Languages:
Other CrimeStopper Security System manuals

CrimeStopper
CrimeStopper CS-872 User manual

CrimeStopper
CrimeStopper CS-2000DPII SERIES IV Manual

CrimeStopper
CrimeStopper Cp-4900 User manual

CrimeStopper
CrimeStopper CS-2004DC II User manual

CrimeStopper
CrimeStopper SP-302 User manual

CrimeStopper
CrimeStopper CS-9705 Owner's manual

CrimeStopper
CrimeStopper SP-101 Manual

CrimeStopper
CrimeStopper RS901 RS900ER User manual

CrimeStopper
CrimeStopper CS-2002DC.IV Manual

CrimeStopper
CrimeStopper SP-102 User manual