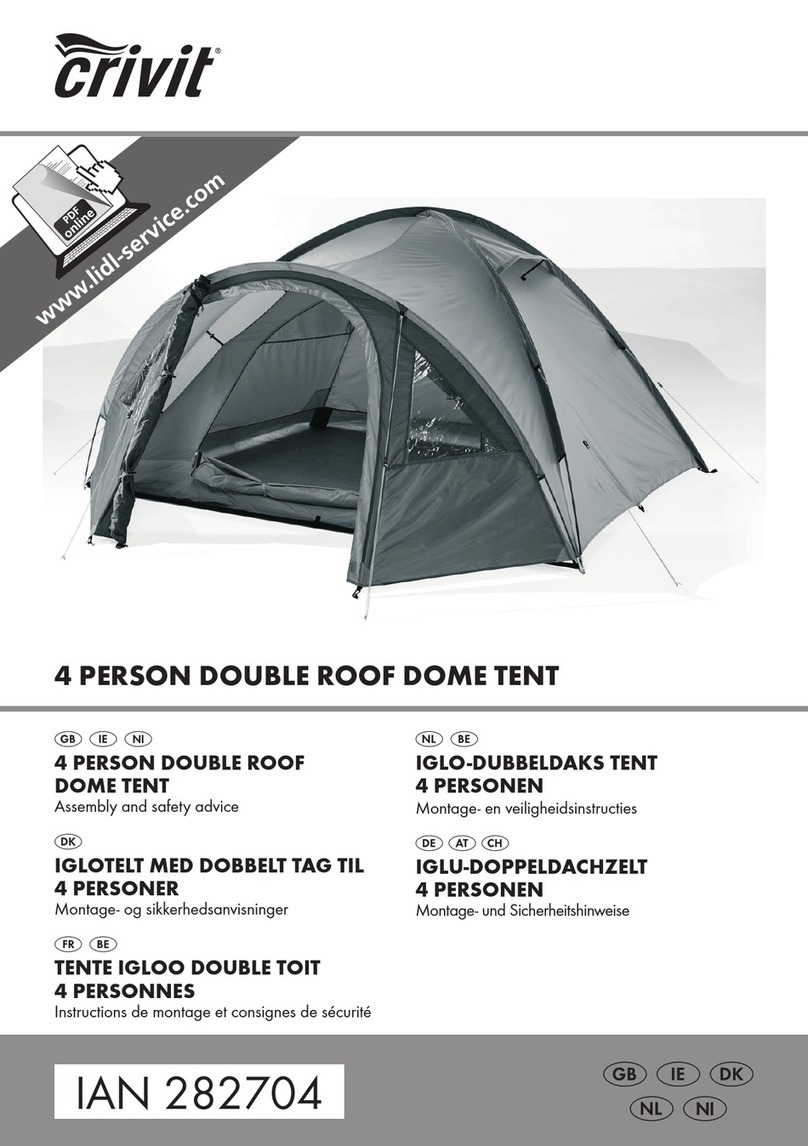
Crivit 313762 User manual

TIENDA DE CAMPAÑA DE TREKKING PARA 2
PERSONAS/TENDA DA TREKKING PER 2 PERSONE
TENDA DA TREKKING PER 2 PERSONE
Indicazioni per l’uso e per la sicurezza
TIENDA DE CAMPAÑA DE
TREKKING PARA 2 PERSONAS
Instrucciones de utilización y de seguridad
2-PERSONEN-TREKKINGZELT
Bedienungs- und Sicherheitshinweise
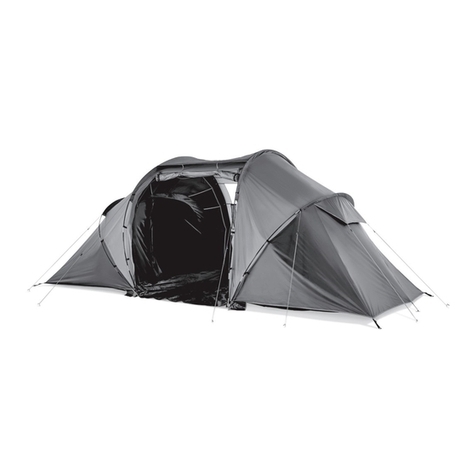
2-PERSON HIKING TENT
Operation and safety notes
IAN 313762

ES Instrucciones de utilización y de seguridad Página 5
IT/MT Indicazioni per l’uso e per la sicurezza Pagina 9
GB/MT Operation and safety notes Page 13
DE/AT / CH Bedienungs- und Sicherheitshinweise Seite 17

A
B
1
1 x 3
2 x
6
4 x
1
1 x
3
3
3
2 x
2
1 x
4
1 x
7
4 x
5
12 x

D
C
E
4
4
1 x
5
2
1 x

5ES
Leyenda de los pictogramas utilizados
¡Leer las instrucciones! ¡Peligro de muerte y de accidentes
para bebés y niños!
¡Tenga en cuenta las advertencias
e indicaciones de seguridad!
Tienda de campaña de trekking
para 2 personas
Introducción
Enhorabuena por la adquisición de su
nuevo producto. Ha elegido un producto
de alta calidad. Familiarícese con el pro-
ducto antes de la primera puesta en funcionamiento.
Lea detenidamente el siguiente manual de instruc-
ciones y las indicaciones de seguridad. Utilice el
producto únicamente como se describe a continua-
ción y para las aplicaciones indicadas. Guarde estas
instrucciones en un lugar seguro. En caso de trans-
ferir el producto a terceros, entregue también todos
los documentos correspondientes.
Especificaciones de uso
El producto no ha sido diseñado para un uso comer-
cial. Este producto es una tienda de campaña con
doble techo concebida como alojamiento para via-
jes y para acampadas. Puede utilizarse incluso en
condiciones meteorológicas desfavorables, por ej. en
c
aso de humedad o viento, aunque no debe utiliza
rse
en caso de situaciones climáticas extremas ni en la
montaña. Utilice la tienda interior únicamente junto
con el doble techo o con otra protección adecuada.
Descripción de los componentes
1Doble techo
2Tienda interior
3Varilla larga
4Varilla corta
5Piqueta
6Viento
7Viento corto
Características técnicas
Medidas:
Doble techo: aprox. 240 x 223 x 117cm
(L x An x Al)
Tienda interior: aprox. 210 x 120 x 108cm
(L x An x Al)
Columna de agua: 3000mm
La tela del doble techo tiene un factor de protección
UV de 30; impide el paso del 96,6% de las dañin
as
radiaciones UV.
Advertencias de seguridad
GUARDE ESTAS INSTRUCCIONES EN UN LUG
AR
SEGURO. ADJUNTE ESTAS INSTRUCCIONES EN
CASO DE ENTREGAR EL PRODUCTO A TERCEROS.
¡PELIGRO
MORTAL Y RIESGO DE ACCI-
DENTES PARA BEBÉS Y NIÑOS!
Nunca deje a los niños sin vigilancia cuando
estén con el material de embalaje o con el pro-
ducto. Existe peligro de asfixia. Mantenga el
producto fuera del alcance de los niños.
Este producto no es un juguete y debe utilizarse
con la supervisión de un adulto.

6 ES
El producto no es un juguete ni sirve como
barras de trepado.
Asegúrese de que nadie, especialmente los
niños, se suba al producto ni se ponga de pie
sobre este. El producto podría volcarse.
¡CUIDADO! ¡PELIGRO DE LESIONES!
Asegúrese de que todas las piezas estén mon-
tadas correctamente y de la forma debida. Si el
montaje no se realiza tal y como se indica en
las instrucciones, podrían producirse lesiones.
Las piezas dañadas pueden mermar la seguri-
dad y el funcionamiento.
Elija, en la medida de lo posible, una base firme
y llana para montarlo.
C
ompruebe regularmente el estado de todos lo
s
puntos de unión y vientos, así como la tirantez
y el firme asiento de las piquetas.
No utilice aerosoles insecticidas dentro ni
encima de la tienda.
Las fugas de pequeño tamaño se pueden sellar
con un aerosol para costuras. Para la superficie
de la tienda se puede emplear un aerosol im-
pregnador.
¡CUIDADO! ¡PELIGRO DE INTOXICACIÓN
Y DE DAÑOS MATERIALES! No encienda
ningún fuego dentro del producto y manténgalo
alejado de cualquier fuente de calor.
Familiarícese con la normativa local contra
incendios (por ej. del camping o zona de
acampada).
¡ADVERTENCIA! ¡PELIGRO DE ASFIXIA!
Si el interior de la tienda de campaña no disp
one
de la ventilación adecuada, en determinadas
circunstancias puede existir riesgo de asfixia.
Asegúrese de que las zonas de ventilación de
los laterales de la tienda en ningún momento
quedan cubiertas.
Nunca deje a los niños sin vigilancia dentro
de la tienda de campaña.
Medidas de seguridad
relacionadas frente al fuego
Para garantizar la seguridad durante la
acampada deberá seguir estas reglas de
sentido común:
No coloque aparatos calientes cerca de las
paredes, del techo o de las cortinas.
Tenga siempre en cuenta las indicaciones de
seguridad de estos aparatos.
No permita a los niños jugar cerca de aparatos
calientes.
Deje los pasillos libres. No obstaculice las
salidas con objetos.
Asegúrese de conocer los dispositivos y las me-
didas de protección contra incendios de la zona.
Montar la tienda
En el interior de la bolsa de transporte hay una
etiqueta con un código QR impreso. Al escan
ear
el código QR obtendrá los detalles del montaje
de la tienda.
Tenga en cuenta que el producto solo debe ser
montado por personal capacitado.
Nota: El tejido de poliéster del doble techo
es hidrófugo.
Es posible que durante el primer uso con lluvia
la tienda de campaña no sea completamente
impermeable. No obstante, la humedad de la
lluvia contrae las fibras de la tienda, que en
poco tiempo se vuelve impermeable.
Doble techo y tienda interior
Nota:
La tela del doble techo tiene un factor de protección
UV de 30. La tienda interior y la malla no disponen
de factor de protección UV. La radiación UV puede
penetrar a través de la entrada del doble techo
cuando esté abierta. Protéjase la piel.
Figura A:
1. Coloque el doble techo 1extendido sobre
el suelo. Los canales de las varillas largas 3
deben quedar hacia arriba.

7ES
2. Introduzca las dos varillas largas 3una tras
otra con los extremos de plástico por delante a
través de los dos canales del doble techo 1;
empuje las varillas 4hasta el final.
Figura B:
3. Pase las varillas largas 3del toldo por el canal
de este, de manera que sobresalgan de ambos
lados del canal.
4. Monte el doble techo 1y fije las varillas lar-
gas 3a las tapas de plástico de los soportes
para el suelo del doble techo.
Figura C:
5. Introduzca la varilla corta 4con el extremo
metálico por delante a través de los canales de
tela del doble techo 1y fije la varilla corta 4
a ambos lados del techo de la tienda con las
tapas de plástico.
Figura D:
6. Fije un lado de la tienda de campaña con las
piquetas 5al suelo. Sujete el otro extremo
de la tienda de campaña y estire hasta que la
tienda quede tensa.
Figura E:
7. Una todos los ganchos de fijación de la tienda
interior 2con los anillos de plástico del doble
techo 1e introduzca los dos conectores en la
hebilla de la parte inferior del doble techo 1.
Nota: Si únicamente va a utilizar el doble techo
como protector, ignore el paso 7.
8. Abra los orificios de ventilación y fíjelos con
los separadores.
9.
Asegure el doble techo
1
tensando los soport
es
para el suelo con las piquetas 5.
10. A continuación asegure el doble techo 1con
los vientos 6, 7y las piquetas 5.
Figura F:
11. Abra la entrada, enrolle la tela de la entrada
y asegúrela con los dos soportes.
12. Tense la tienda y ajuste todas las esquinas y los
vientos 6. No tense los vientos 6en exceso.
Al aumentar el viento, pueden desgarrarse tanto
el punto de fijación como las costuras de la tienda.
Tienda interior (sin doble techo):
Advertencia: La tienda interior y la malla no dis-
ponen de factor de protección UV. Protéjase la piel.
Si utiliza la tienda interior sin el doble techo, el agua
de la lluvia accedería al interior a través de la ven-
tana. Utilice la tienda interior sin doble techo única-
mente en un lugar cálido, seco y protegido y siempre
que el clima sea favorable.
Figura G:
1. Coloque la tienda interior 2extendida sobre
el suelo. Los canales de las varillas largas 3
deben quedar hacia arriba.
2. Introduzca las dos varillas largas 3una tras
otra con los extremos metálicos por delante a
través de los canales hasta llegar al final.
Figura H:
3. Pase las varillas largas 3del toldo por el canal
de este, de manera que sobresalgan por igual
a ambos lados del canal.
4. Monte la tienda interior 2y fije las varillas lar-
gas 3a las tapas de plástico de los soportes
para el suelo.
Figura I:
5. Introduzca las varillas cortas 4por los canales
y fíjelas a las tapas de plástico de la zona supe-
rior de la tienda interior 2.
6. A continuación ate las varillas 3, 4al techo
de la tienda interior
2
con las cintas de fijaci
ón.
Figura J:
7. Fije un lado de la tienda interior 2con las
piquetas 5al suelo. Sujete el otro extremo
de la tienda interior 2y estire hasta que la
tienda quede tensa.
8. Asegure la tienda interior 2tensando los
soportes para el suelo con las piquetas 5.
Desmontar la tienda
Limpie el interior y el exterior de la tienda de
campaña antes de desmontarla. Para desmontar
la tienda siga las indicaciones de montaje en
orden inverso.

8 ES
Guardar la tienda
¡CUIDADO! Asegúrese de que la tienda de
campaña esté completamente seca antes de
guardarla. De lo contrario, podrían aparecer
manchas en el tejido.
¡CUIDADO! Asegúrese de guardar las pique-
tas 5por separado en la bolsa dispuesta para
ello. De lo contrario, las piquetas 5podrían
dañar la tienda de campaña. Guarde también
el resto de componentes en la bolsa dispuesta
para ello.
Pliegue siempre la tienda de tal forma que el
suelo de la misma quede mirando hacia fuera.
Reúna todas las piezas con cuidado antes de
guardarlas. Cuéntelas para asegurarse de que
ninguna pieza queda extraviada o sin guardar.
A continuación guarde con cuidado la tienda
enrollada en su bolsa de transporte.
Limpieza y cuidados
¡CUIDADO! Nunca lave la tienda en la lava-
dora. De lo contrario podría mermar la imper-
meabilidad de la misma.
¡CUIDADO! Nunca utilice bencina, disolventes
u otros productos de limpieza. En caso contrario,
el producto podría dañarse.
En todas las tiendas sintéticas pueden acumularse
condensados, por lo que se recomienda ventilarlas
para mitigar el efecto.
Limpie la suciedad de la tienda con una esponja
suave y agua limpia.
Deje secar todas las piezas completamente
antes de guardar la tienda. Esto previene el
moho, el mal olor y las coloraciones.
Aplique un aerosol de silicona en las cremalleras
si se atascan al abrirse o cerrarse.
El uso frecuente puede afectar negativamente
a la impermeabilidad del producto. Por tanto,
se recomienda aplicar a la tienda un aerosol
impregnador regularmente (disponible en tien-
das de bricolaje y tiendas especializadas).
Almacene el producto en un lugar seco y fresco.
Eliminación
El embalaje está compuesto por materiales no con-
taminantes que pueden ser desechados en el centro
de reciclaje local.
Para obtener información sobre las posibilidades de
desecho del producto al final de su vida útil, acuda
a la administración de su comunidad o ciudad.
Garantía
El producto ha sido fabricado cuidadosamente sigu-
iendo exigentes normas de calidad y ha sido pro-
bado antes de su entrega. En caso de defecto del
producto, usted tiene derechos legales frente al ven-
dedor del mismo. Nuestra garantía (abajo indicada)
n
o supone una restricción de dichos derechos lega
les.
Este producto dispone de una garantía de 3 años
desde la fecha de compra. El plazo de garantía
comienza a partir de la fecha de compra. Por favor,
conserve adecuadamente el justificante de compra
original. Este documento se requerirá como prueba
de que se realizó la compra.
Si en el plazo de 3 años a partir de la fecha de
compra se produce un fallo de material o fabrica-
ción en este producto, repararemos el producto o lo
sustituiremos gratuitamente por un producto nuevo
(según nuestra elección). La garantía quedará anu-
lada si el producto resulta dañado o es utilizado o
mantenido de forma inadecuada.
La garantía cubre defectos de materiales o de fabri-
cación. Esta garantía no cubre aquellos componen-
tes del producto sometidos a un desgaste normal y
que, por ello, puedan considerarse piezas de des-
gaste (por ej. las pilas). Tampoco cubre daños de
componentes frágiles como, por ejemplo, los inter-
ruptores, baterías y piezas de cristal.

9IT/MT
Legenda dei pittogrammi utilizzati
Leggere le istruzioni! Pericolo di morte e incidente per
neonati e bambini!
Rispettare le avvertenze e le indicazioni
per la sicurezza!
Tenda da trekking per 2 persone
Introduzione
Congratulazioni per l‘acquisto del vostro
nuovo prodotto. Con esso avete optato
per un prodotto di qualità. Familiarizzare
con il prodotto prima di metterlo in funzione per la
prima volta. A tale scopo, leggere attentamente le
seguenti istruzioni d‘uso e le avvertenze di sicurezza.
Utilizzare il prodotto solo come descritto e per i ca
mpi
di applicazione indicati. Conservare queste istruzioni
in un luogo sicuro. Consegnare tutta la documenta-
zione in caso di cessione del prodotto a terzi.
Utilizzo conforme alla
destinazione d’uso
Il prodotto non è destinato a un uso commerciale.
Questo prodotto è una tenda con tenda esterna che
serve come luogo di riparo in viaggio o in campeg-
gio. Può essere utilizzato anche in condizioni atmo-
sferiche sfavorevoli, ad es. quando c‘è umidità o ve
nto,
tuttavia non può essere utilizzato in caso di condi-
zioni atmosferiche gravose o in montagna. Utilizzare
la tenda interna soltanto insieme alla tenda esterna
oppure con un‘altra protezione idonea.
Descrizione dei componenti
1Tenda esterna
2Tenda interna
3Asta lunga
4Asta corta
5Picchetto
6Tirante
7Tirante corto
Specifiche tecniche
Dimensioni:
Tenda esterna: ca. 240 x 223 x 117cm (L x L x A)
Tenda interna: ca. 210 x 120 x 108 cm (L x L x A)
Colonna d'acqua: 3000mm
Il materiale della tenda esterna ha un fattore di
protezione anti-UV di 30, scherma il 96,6% delle
irradiazioni UV nocive.
Avvertenze per la sicurezza
CONSERVARE QUESTE ISTRUZIONI IN UN
LUOGO SICURO. IN CASO DI CESSIONE DEL
PRODOTTO A TERZI CONSEGNARE ANCHE
QUESTE ISTRUZIONI D’USO.
PERICOLO
DI MORTE E INCIDENTE PER
NEONATI E BAMBINI! Non la-
sciare mai i bambini incustoditi con il materiale
di imballaggio e il prodotto. Pericolo di soffoca-
mento. Tenere il prodotto lontano dalla portata
dei bambini.
Questo prodotto non è un giocattolo e deve
essere utilizzato esclusivamente sotto la super-
visione di un adulto.
Il prodotto non è una struttura per arrampicarsi
né un giocattolo.
Assicurarsi che nessuno, in particolare i bambini,
si appoggi al prodotto o si metta in piedi su di
esso. Il prodotto potrebbe ribaltarsi.

10 IT/MT
ATTENZIONE! PERICOLO DI LESIONI!
Assicurarsi che tutti i componenti siano integri
e montati correttamente. Un montaggio errato
provoca il rischio di lesioni. Eventuali compo-
nenti danneggiati possono compromettere la
sicurezza e la funzionalità.
Scegliere come punto di montaggio un fondo
possibilmente compatto e piano.
Controllare regolarmente l‘integrità di tutti i punti
di raccordo e dei tiranti e l‘ancoraggio e la stabi-
lità dei picchetti.
Non utilizzare nessun spray anti-insetti nella
tenda o su di essa.
Piccoli punti non ermetici delle cuciture possono
essere eliminati con uno spray apposito. Per la
tenda è possibile utilizzare uno spray imperme-
abilizzante.
ATTENZIONE! PERICOLO DI AVVELENA-
MENTO E PERICOLO DI DANNI MATERI
ALI!
Non accendere nessun fuoco all’interno del
prodotto e tenerlo lontano da fonti di calore.
Inoltre, informarsi sulle disposizioni antincendio
in vigore nel luogo di montaggio (ad es. aree
attrezzate per il camping, campeggi).
ATTENZIONE! PERICOLO DI SOFFOCA-
MENTO! Se l‘interno della tenda non è adegua-
tamente aerato, sussiste il pericolo di soffocamento.
Assicurarsi che le uscite di aerazione sui lati
della tenda interna siano sempre aperte.
Non lasciare mai i bambini incustoditi nella tend
a.
Precauzioni in caso di incendio
P
er praticare un campeggio sicuro, attene
rsi
alle seguenti regole di comune buonsenso:
Non collocare oggetti surriscaldati nelle vicin
anze
delle pareti, del tetto o delle tendine.
Rispettare sempre le avvertenza di sicurezza
di questi oggetti.
Non lasciare giocare i bambini nelle vicinanze
di oggetti surriscaldati.
Lasciare liberi i passaggi. Non bloccare i pas-
saggi con nessun oggetto.
Informarsi sulle avvertenze e le misure precau-
zionali locali contro gli incendi.
Montaggio della tenda
All‘interno della custodia si trova un‘etichetta
con un codice QR. Facendo la scansione del
codice QR è possibile visualizzare i dettagli
relativi al montaggio del prodotto.
Assicurarsi che il prodotto venga montato
soltanto da persone esperte.
Nota: il materiale poliestere della tenda esterna
è idrorepellente.
Durante il primo utilizzo della tenda con la piog-
gia, la totale impermeabilità di questa non è
garantita. Tuttavia, l‘acqua contrae le cuciture
della tenda, che diventa in poco tempo imper-
meabile.
Tenda interna ed esterna
Nota:
il materiale della tenda esterna ha un fattore di pro-
tezione anti-UV di 30. La tenda interna e il tessuto
non hanno nessun fattore di protezione anti-UV. I
raggi UV possono penetrare attraverso l‘ingresso
aperto della tenda esterna. Proteggere la pelle.
Figura A:
1. Distendere la tenda esterna 1sul terreno.
I canali per le aste lunghe 3devono essere
rivolti verso l‘alto.
2. Spingere le due aste lunghe 3con le estremità
di plastica in avanti in entrambi i canali della
tenda esterna 1; spingere le aste 4fino in
fondo.
Figura B:
3. Spingere le aste lunghe 3del tetto nel canale
del tetto in modo che risultino visibili su entrambi
i lati del canale.
4. Montare la tenda esterna 1e fissare le aste
lunghe 3ai tappi in plastica degli ancoraggi
della tenda esterna.
Figura C:
5. Spingere l‘asta corta 4con l‘estremità metal-
lica in avanti in entrambi i canali di stoffa della
tenda esterna 1e fissare l‘asta corta 4, su
entrambi i lati del tetto, ai tappi in plastica.
11IT/MT
Figura D:
6. Fissare un lato della tenda con i picchetti 5al
terreno. Afferrare poi l‘altro lato della tenda e
tirarlo in modo da tendere la tenda.
Figura E:
7. Agganciare i ganci di fissaggio della tenda
interna 2agli anelli di plastica della tenda
esterna 1e inserire i due spilli nella fibbia sul
lato inferiore della tenda esterna 1.
Nota: se si utilizza soltanto la tenda esterna
come riparo, saltare la fase 7.
8. Aprire i fori di aerazione e fissarli con gli elementi
di fermo.
9. Fissare la tenda esterna 1tendendo gli anco-
raggi con i picchetti 5.
10. Fissare poi la tenda esterna 1con i tiranti 6,
7e i picchetti 5.
Figura E:
11. Aprire l‘ingresso arrotolando il relativo tessuto
e fissarlo con entrambi i ganci.
12. Tendere la tenda e fissare tutti gli angoli e i ti-
ranti 6. Non tendere troppo i tiranti 6. Se il
vento diventa più forte il punto di fissaggio e la
cucitura della tenda possono strapparsi.
Tenda interna (senza tenda esterna):
Attenzione: la tenda interna e il tessuto non hanno
nessun fattore di protezione anti-UV. Proteggere la
pelle. Se si utilizza la tenda interna senza quella
esterna la pioggia può penetrare all‘interno attra-
verso la finestra di stoffa. Utilizzare la tenda interna
senza la tenda esterna esclusivamente in luoghi caldi,
asciutti e protetti e solo quando il tempo è bello.
Figura G:
1. Distendere la tenda interna 2sul terreno.
I canali per le aste lunghe 3devono essere
rivolti verso l‘alto.
2. Spingere le aste lunghe 3del tetto nel canale
del tetto in modo che risultino visibili nello stesso
modo su entrambi i lati del canale.
Figura H:
3. Spingere le aste lunghe 3del tetto nel canale
del tetto in modo che risultino visibili nello stesso
modo su entrambi i lati del canale.
4. Montare la tenda interna 2e fissare le aste
lunghe 3ai tappi in plastica degli ancoraggi.
Figura I:
5. Spingere le aste corte 4nei canali e fissarle
ai tappi in plastica nell‘area superiore della
tenda interna 2.
6. Fissare le aste 3, 4al tetto della tenda
interna 2con le fascette di fissaggio.
Figura J:
7. Fissare un lato della tenda interna 2al terreno
con i picchetti 5. Afferrare poi l‘altro lato della
tenda interna 2e tirarlo in modo da tendere
la tenda.
8. Fissare la tenda interna 2tendendo gli anco-
raggi con i picchetti 5.
Smontaggio della tenda
Pulire la tenda dall‘interno verso l‘esterno prima
di smontarla. Lo smontaggio della tenda deve
avvenire in ordine inverso a quello di montaggio.
Ripiegare la tenda
ATTENZIONE! Prima di ripiegare la tenda
accertarsi che sia completamente asciutta. In
caso contrario potrebbero verificarsi danni del
tessuto e macchie.
ATTENZIONE! I picchetti 5devono essere
riposti separatamente nella apposite custodie.
Altrimenti i picchetti 5potrebbero danneggiare
la tenda. Anche gli altri componenti devono es-
sere riposti separatamente nella apposite custo
die.
Ripiegare la tenda sempre in modo che il fondo
della tenda risulti rivolto verso l‘esterno.
Prima di ripiegare la tenda raccogliere con cura
tutti i componenti. Contarli per assicurarsi che
non si perda o manchi nessun componente.
Riporre quindi la tenda arrotolata nell‘apposita
custodia.

12 IT/MT
Pulizia e cura
ATTENZIONE! Non lavare mai la tenda in
lavatrice. In caso contrario l‘impermeabilità
della tenda potrebbe diminuire.
ATTENZIONE! Non utilizzare mai benzina,
solventi o altri detergenti. In caso contrario, il
prodotto potrebbe danneggiarsi.
In tutti i prodotti sintetici può crearsi dell‘acqua di
condensa, quindi ventilare il più spesso possibile
per ridurre l‘effetto.
R
imuovere lo sporco dalla tenda con una spugn
a
morbida e acqua corrente.
Lasciare asciugare completamente tutti i compo-
nenti prima di ripiegare la tenda. Questo prev
iene
la formazione di muffa, di odori molesti e lo
scolorimento.
Spruzzare lo spray al silicone sulle cerniere
quando queste si bloccano durante l‘apertura
o la chiusura.
In caso di utilizzo eccessivo l‘impermeabilità
della tenda potrebbe diminuire. Per evitare ciò
spruzzare regolarmente lo spray impermeabi-
lizzante (disponibile nei negozi di edilizia e nei
negozi specializzati) sulla tenda.
Conservare il prodotto in un luogo fresco e
asciutto.
Smaltimento
L’imballaggio è composto da materiali ecologici
che possono essere smaltiti presso i siti di raccolta
locali per il riciclo.
E’ possibile informarsi circa le possibilità di smalti-
mento del prodotto usato presso l’amministrazione
comunale o cittadina.
Garanzia
Il prodotto è stato prodotto secondo severe direttive
di qualità e controllato con premura prima della con-
segna. In caso di difetti del prodotto, l‘acquirente
può far valere i propri diritti legali nei confronti del
venditore. Questi diritti legali non vengono limitati
in alcun modo dalla garanzia di seguito riportata.
Questo prodotto è garantito per 3 anni a partire
dalla data di acquisto. Il termine di garanzia ha ini-
zio a partire dalla data di acquisto. Conservare lo
scontrino di acquisto originale in buone condizioni.
Questo documento servirà a documentare l‘avvenuto
acquisto.
Il prodotto da Lei acquistato dà diritto ad una garan-
zia di 3 anni a partire dalla data di acquisto. La
presente garanzia decade nel caso di danneggia-
mento del prodotto, di utilizzo o di manutenzione
inadeguati.
La prestazione di garanzia vale sia per difetti di ma-
teriale che per difetti di fabbricazione. La presente
garanzia non si estende a parti del prodotto soggette
a normale usura e che possono essere identificate,
pertanto, come parti soggette a usura (p. es., le bat-
terie), né a danni su parti staccabili, come interruttore,
batterie o simili, realizzate in vetro.

13GB/MT
List of pictograms used
Please read the instructions! Danger to life and risk of accident
for infants and children!
Observe warnings and safety notices!
2-Person hiking tent
Introduction
We congratulate you on the purchase
of your new product. You have chosen a
high quality product. Familiarise yourself
with the product before using it for the first time. In
addition, please carefully refer to the operating
instructions and the safety advice below. Only use
the product as instructed and only for the indicated
field of application. Keep these instructions in a safe
place. If you pass the product on to anyone else,
please ensure that you also pass on all the docu-
mentation with it.
Proper use
The product is not intended for commercial use. This
product with outer tent is suitable for use as accom-
modation when travelling and camping. Suitable for
use in unfavorable, e.g. wet and windy weather con-
ditions, but not designed for extreme or mountain con-
ditions. Use the inner tent only under by a shelter
covered.
Description of parts
1Outer tent
2Inner tent
3Long pole
4Short pole
5Peg
6Guy rope
7Short guy rope
Technical data
Dimensions:
Outer tent dimension: approx. 240 x 223 x
117cm (L x W x H)
Inner tent dimension: approx. 210 x 120 x
108cm (L x W x H)
Water column:
3000mm
The outer tent fabric has an UPF 30, it blocks
96.6% of harmful UV radiation.
Safety notice
KEEP THIS INSTRUCTION IN A SAFE PLACE!
WHEN PASSING THIS PRODUCT ON TO OTHERS;
PLEASE INCLUDE ALL THE DOCUMENTS.
DANGER TO
LIFE AND RISK OF ACCIDENTS
FOR INFANTS AND CHILDREN!
Never leave children unsupervised with the
packaging materials. The packaging material
poses a suffocation hazard.
This product is not a toy and should only use
under adult supervision.
This product is not a climbing frame or a toy.
Please ensure that person, especially children,
do not stand on the article or pull themselves
up on it. The product could fall over.
CAUTION! RISK OF INJURY! Ensure that
all parts are undamaged and have been as-
sembled appropriately. Risk of injury exists if

14 GB/MT
assembled incorrectly. Damaged parts can
effect safety and function.
Select a piece of land that is as flat and firm as
possible to assemble your tent.
The intactness of all connection points and the
guy ropes should be checked regularly, as should
the firmness of the tent pegs in the ground.
Do not use any insect spray in or on the tent.
Small leaks on the seams can be repaired with
a seam spray and impregnation spray can be
used for the tent skin.
CAUTION! DANGER OF POISONING
AND DAMAGE TO PROPERTY! Do not light
any fires within the product and keep it away
from sources of heat.
You should also familiarize yourself with the
local fire protection regulations (e.g. camping
site, tent pitch).
WARNING! DANGER OF SUFFOCATION!
If the inside of the tent is not adequately venti-
lated, there is a risk of suffocation.
Make sure that the vents on the side of the inner
tent are not covered at any time.
Do not leave children unattended in the tent.
Fire precautions
Camp safely. Follow these commonsense
rules:
Do not place hot appliances near the walls, roof
or curtains.
Always observe the safety instructions for these
appliances.
Never allow children to play near hot a
ppliances.
K
eep exits clear. Do not block the exit with ob
jects.
Make sure you know the fire precaution arrange-
ments on the site.
Tent assembly
Inside the carrying bag there is a label with
a QR-code. If the QR code is scanned you will
receive details about how to pitch the product.
Please ensure that the product is only assembled
by people with the appropriate skills.
Note: The polyester material of the outer tent
consists of water-repellent material.
It is possible that during the first rainfall the outer
tent will not be completely watertight. However,
the threads of the tent will contract when exposed
to water so that after a short time the outer tent
will become watertight.
Outer tent + Inner tent
Note: The outer tent fabric has an UPF rating of 30.
The inner tent and the mesh do not show a UV pro-
tection. UV radiation can pass through the open door
of outer tent. Protect your skin.
Illustration A:
1. Place the outer tent 1flat on the ground. The
tunnels for the poles
3
must be facing upwards.
2. Run the two poles
3with into the two tunnel
guides on the outer tent 1one after another
and slide them through to the end.
Illustration B:
3. Push the pole
3
of the awning through the
tunnel guide on the awning so that it extends
evenly on both sides of the tunnel guide.
4. Set the outer tent
1up and fix the poles 3
to the plastic cap of the floor fastenings of the
outer tent.
Illustration C:
5. Run the pole
4with the metal end forward
into the fabric hook guides on the outer
tent
1
top to the end and fix the
pole
4
to the plastic
cap of the roof on both side
Illustration D:
6. Fix one side of the tent in the ground with the
tent pegs
5. Then take hold of the other end
of the tent and pull it apart in such a way that
the tent is taut.
Illustration E:
7. Attach all the fastening hooks of inner tent
2to
the plastic loops in outer tent
1and plug the
two plastic buckle on the bottom of the outer
tent
1.
Note: If using the outer tent as a shelter without
the inner tent, skip this step 7.

15GB/MT
8. Open the ventilating windows
and secure them
with the spacers.
9. Secure the outer tent
1by tensioning the floor
fastenings with the tent pegs
5.
10. Now secure the outer tent
1with the guy rope
(pre-assembled)
6
,
7and the tent pegs
5.
Illustration F:
11. Open the entrance, unroll it and attach it with
the one fasteners.
12. Stretch the tent until taut and pull all of the
corners and guy ropes 6
until they are tight.
Do not over-tighten the guy ropes 6. If the
strength of the wind increases the attachment
point and seam of the tent might tear.
Inner tent (without using the outer tent):
Warning: The inner tent and the mesh do not show
a UV protection. Protect your skin. While using the
inner test alone without the outer tent, rains may get
in the inner tent through the mesh windows. Use the
inner tent only under by a shelter covered in warm,
dry conditions with fair weather.
Illustration G:
1. Place the inner tent 2flat on the ground. The
hooks for the poles 3must be facing upwards.
2. Run the two poles 3with the metal end forward
into the hole of the hook on the inner tent one
after another and slide them through to the end.
Illustration H:
3.
Push the pole
3
of the awning through the hook
s
on the awning so that it extends evenly on both
sides of the hooks.
4. Set the tent 2up and fix the poles to the plastic
cup of the floor fastenings.
Illustration I:
5. Run the fiberglass poles 4through the hooks
and fix into the plastic cap on the both end of
the top of inner tent 2.
6. And then tie up the poles 3, 4tightly with the
strings at the top of the inner tent 2.
Illustration J:
7. Fix one side of the inner tent 2in the ground
with the tent pegs 5. Then take hold of the
other end of the inner tent 2and pull it apart
in such a way that the tent is taut.
8. Secure the inner tent 2by tensioning all the
floor fastenings with the tent pegs 5.
Taking down the tent
Clean the tent both inside and outside before you
take the tent down. The tent must be dismantled
in the reverse order to the manner in which it has
been erected.
Packing the tent together
CAUTION! Please ensure that the tent is com-
pletely dry before you pack it together. Other-
wise this may result in stains and damage to the
fabric.
CAUTION! The tent pegs 5and other indi-
vidual parts must be packed separately in the
bags provided. Otherwise the tent pegs 5
might damage the tent.
Always fold the tent together in such a way
that the floor of the tent is facing outwards.
Collect all of the parts together carefully before
you pack the tent. You should count the parts
in order to ensure that none of them have been
mislaid or lost.
After the tent has been rolled up, pack it care-
fully into the carrying bag.
Cleaning and care
CAUTION! Never wash the tent in a washing
machine. Otherwise the product may lose some
of its ability to keep out water.
CAUTION! Never use petrol, solvent or other
cleaning agents. Otherwise there is a danger
of damage to the product.

16 GB/MT
Condensation can form in all synthetic tents, you
should therefore air the tent as frequently as possible
in order to counteract this.
Remove any dirt from the tent with a soft sponge
and clean water.
Please allow all parts to dry thoroughly before
you repack the tent. This will prevent the formation
of mould, bad odours and discolouration.
If the zipper sticks when being opened or closed,
spray it with silicone spray.
The product may lose some of its ability to keep
out water with frequent use. Therefore you should
spray the tent regularly with a waterproofing a
gent
(available in DIY shops, camping shops etc.).
Store the product in a cool dry area.
Disposal
The packaging is made entirely of recyclable mate-
rials, which you may dispose of at local recycling
facilities.
Contact your local refuse disposal authority for more
details of how to dispose of your worn-out product.
Warranty
The product has been manufactured to strict quality
guidelines and meticulously examined before deliv-
ery. In the event of product defects you have legal
rights against the retailer of this product. Your legal
rights are not limited in any way by our warranty
detailed below.
The warranty for this product is 3 years from the d
ate
of purchase. Should this product show any fault in
materials or manufacture within 3 years from the
date of purchase, we will repair or replace it – at
our choice – free of charge to you.
The warranty period begins on the date of purchase.
Please keep the original sales receipt in a safe lo-
cation. This document is required as your proof of
purchase. This warranty becomes void if the product
has been damaged, or used or maintained imprope
rly.
The warranty applies to defects in material or manu-
facture. This warranty does not cover product parts
subject to normal wear, thus possibly considered
consumables (e.g. batteries) or for damage to frag-
ile parts, e.g. switches, rechargeable batteries or
glass parts.

17DE/AT/CH
Legende der verwendeten Piktogramme
Anweisungen lesen! Lebens- und Unfallgefahr für
Kleinkinder und Kinder!
Warn- und Sicherheitshinweise
beachten!
2-Personen-Trekkingzelt
Einleitung
Wir beglückwünschen Sie zum Kauf Ihres
neuen Produkts. Sie haben sich damit für
ein hochwertiges Produkt entschieden.
Machen Sie sich vor der ersten Inbetriebnahme mit
dem Produkt vertraut. Lesen Sie hierzu aufmerksam
die nachfolgende Bedienungsanleitung und die
Sicherheitshinweise. Benutzen Sie das Produkt nur
wie
beschrieben und für die angegebenen Einsatz-
bereiche.
Bewahren Sie diese Anleitung an einem
sicheren Ort auf. Händigen Sie alle Unterlagen bei
Weitergabe des Produktes an Dritte mit aus.
Bestimmungsgemäße
Verwendung
Das Produkt ist nicht für den kommerziellen Gebrauch
vorgesehen. Bei diesem Produkt handelt es sich um
ein Zelt mit Außenzelt, welches als Unterkunft auf
Reisen und beim Camping konzipiert wurde. Es kann
auch bei schlechtem Wetter, z. B. feuchten und win-
digen Wetterbedingungen, verwendet werden, ist
jedoch nicht für den Gebrauch bei extremen Wetter-
bedingungen oder in den Bergen geeignet. Verwen-
den Sie das Innenzelt nur in Verbindung mit dem
Außenzelt oder unter einem anderen, geeigneten
Schutz.
Teilebeschreibung
1Außenzelt
2Innenzelt
3lange Stange
4kurze Stange
5Hering
6Abspannleine
7kurze Abspannleine
Technische Daten
Maße:
Außenzelt: ca. 240 x 223 x 117cm (L x B x H)
Innenzelt: ca. 210 x 120 x 108cm (L x B x H)
Wassersäule: 3000mm
Der Stoff des Außenzelts hat einen UV-Schutzfaktor
von 30; er hält 96,6% der schädlichen UV-Strahlung ab.
Sicherheitshinweise
BEWAHREN SIE DIESE ANLEITUNGEN AN EINEM
SICHEREN AUF. BITTE GEBEN SIE DIE ANLEI
TUNG
BEI WEITERGABE DES PRODUKTS MIT.
LEBENS- UND
UNFALLGEFAHR FÜR KLEIN-
KINDER UND KINDER! Lassen
Sie Kinder niemals unbeaufsichtigt mit dem Ver-
packungsmaterial und dem Produkt. Es besteht
Erstickungsgefahr. Halten Sie Kinder vom Pro-
dukt fern.
Dieses Produkt ist kein Spielzeug und sollte unter
Aufsicht von Erwachsenen verwendet werden.
Das Produkt ist kein Klettergerüst oder Spielzeug.

18 DE/AT/CH
Achten Sie darauf, dass keine Personen, insbe-
sondere Kinder, sich an dem Produkt hochziehen
oder darauf stellen. Das Produkt könnte umkipp
en.
VORSICHT! VERLETZUNGSGEFAHR!
Stellen Sie sicher, dass alle Teile unbeschädigt
und sachgerecht montiert sind. Bei unsachge-
mäßer Montage besteht Verletzungsgefahr.
Beschädigte Teile können die Sicherheit und
Funktion beeinflussen.
Wählen Sie einen möglichst festen, ebenerdigen
Untergrund als Standplatz.
Kontrollieren Sie regelmäßig die Unversehrtheit
aller Verbindungsstellen und Abspannleinen und
überprüfen Sie Abspannungen und den festen
Sitz der Heringe.
Verwenden Sie kein Insekten-Spray in oder auf
dem Zelt.
Kleine undichte Stellen an den Nähten können
mit einem Nahtspray behoben werden. Für die
Zelthaut kann ein Imprägnierspray verwendet
werden.
VORSICHT! VERGIFTUNGSGEFAHR UND
GEFAHR DER SACHBESCHÄDIGUNG!
Entzünden Sie kein Feuer innerhalb des Produkts
und halten Sie es von Wärmequellen fern.
Machen Sie sich zudem mit den Brandschutz-
bestimmungen vor Ort (z. B. Campingplatz,
Zeltplatz) vertraut.
WARNUNG! ERSTICKUNGSGEFAHR! Falls
der Innenraum
des Zeltes nicht adäquat belüftet
w
ird, besteht unter Umständen Erstickungsgefa
hr.
Stellen Sie sicher, dass die Lüftungsöffnungen an
den Seiten des Innenzelts zu keiner Zeit verdeckt
werden.
Lassen Sie Kinder niemals unbeaufsichtigt im Zelt.
Vorsichtsmaßnahmen
gegen Feuer
Zum sicheren Campen sind folgende Regeln
des gesunden Menschenverstandes zu
befolgen:
Keine heißen Geräte in der Nähe der Wände,
des Daches oder der Vorhänge aufstellen.
Immer die Sicherheitsinstruktionen für diese
Geräte beachten.
Niemals Kindern erlauben, in der Nähe von
heißen Geräten zu spielen.
Lassen Sie die Durchgänge frei. Stellen Sie die
Ausgänge nicht mit Gegenständen zu.
Erkundigen Sie sich nach den Einrichtungen und
Vorkehrungen gegen Feuer auf dem Gelände.
Zelt aufbauen
Im Inneren der Tragetasche befindet sich ein
Label, auf den ein QR-Code gedruckt ist. Beim
Scannen des QR-Codes werden Ihnen Details
zum Aufbau des Produkts angezeigt.
Achten Sie darauf, dass das Produkt nur von
fachkundigen Personen montiert wird.
Hinweis: Das Polyestermaterial des Außenzel-
tes besteht aus wasserabweisendem Material.
Während der ersten Verwendung bei Regen ist
es möglich, dass das Zelt nicht vollständig was-
serdicht ist. Durch die Nässe ziehen sich aber
die Fäden des Zeltes zusammen und so wird
das Zelt nach einer kurzen Zeit wasserdicht.
Außen- und Innenzelt
Hinweis:
Der Stoff des Außenzelts hat einen UV-Schutzfaktor
von 30. Das Innenzelt und das Gewebe haben kei-
nen UV-Schutzfaktor. UV-Strahlung kann durch den
geöffneten Zelteingang des Außenzelts einstrahlen.
Schützen Sie Ihre Haut.
Abbildung A:
1. Legen Sie das Außenzelt 1flach auf den
Boden. Die Kanäle für die langen Stangen 3
müssen nach oben zeigen.
2. Führen Sie nacheinander die zwei langen
Stangen
3
mit den Kunststoffenden voran durch
die beiden Kanäle am Außenzelt 1; schieben
Sie die Stangen 4bis zum Ende hindurch.
Abbildung B:
3. Schieben Sie die langen Stangen 3des Vor-
daches durch den Kanal am Vordach, sodass
diese auf beiden Seiten des Kanals heraus
schauen.

19DE/AT/CH
4. Bauen Sie das Außenzelt 1auf und fixieren
Sie die langen Stangen 3an den Kunststoff-
kappen der Bodenhalterungen des Außenzelts.
Abbildung C:
5. Führen Sie die kurze Stange 4mit dem Metall-
ende voran durch die beiden Stoffkanäle am
Außenzelt 1und fixieren Sie die kurze Stange
4an beiden Seiten des Zeltdaches in den
Kunststoffkappen.
Abbildung D:
6. Fixieren Sie eine Seite des Zeltes mit den
Heringen 5am Boden. Greifen Sie dann das
andere Ende des Zeltes und ziehen Sie es so
auseinander, dass das Zelt gespannt wird.
Abbildung E:
7. Verbinden Sie alle Befestigungshaken des Innen-
zelts 2mit den Kunststoffringen des Außenzelts
1und stecken Sie die zwei Steckverbinder in
die Schnalle auf der Unterseite des Außenzelts
1
.
Hinweis: Wenn Sie lediglich das Außenzelt
als Unterstand verwenden, überspringen Sie
Schritt 7.
8. Öffnen Sie die Lüftungsöffnungen und sichern
Sie diese mit den Abstandshaltern.
9.
Sichern Sie das Außenzelt
1
, indem Sie mit den
Heringen 5die Bodenhalterungen spannen.
10. Sichern Sie nun das Außenzelt 1mit den Ab-
spannleinen 6, 7und den Heringen 5.
Abbildung F:
11. Öffnen Sie den Eingang, rollen Sie den Zeltstoff
des Eingangsbereichs auf und befestigen Sie
ihn mit den beiden Halterungen.
12. Spannen Sie das Zelt und ziehen Sie alle Ecken
und Abspannleinen 6fest. Spannen Sie die
Abspannleinen 6nicht zu stark. Bei zuneh-
mendem Wind können Befestigungspunkt und
Zeltnaht einreißen.
Innenzelt (ohne Außenzelt):
Warnung: Das Innenzelt und das Gewebe haben
k
einen UV-Schutzfaktor. Schütze Sie Ihre Haut. W
enn
Sie das Innenzelt ohne das Außenzelt verwenden,
kann Regenwasser durch die Stofffenster ins Innere
eintreten. Verwenden Sie das Innenzelt ohne das
Außenzelt ausschließlich an einem warmen, trockne
nen
und geschützten Ort und nur bei gutem Wetter.
Abbildung G:
1. L
egen Sie das Innenzelt
2
flach auf den Bod
en.
Die Kanäle für die langen Stangen 3müssen
nach oben zeigen.
2. Führen Sie die zwei langen Stangen 3mit
den Metallenden voran nacheinander in die
Öffnun
gen der Kanäle ein und schieben Sie sie
komplett
hindurch.
Abbildung H:
3. Schieben Sie die langen Stangen 3des Vor-
daches durch den Kanal am Vordach, sodass
diese zu gleichen Teilen auf beiden Seiten des
Kanals herausschauen.
4. Bauen Sie das Innenzelt 2auf und fixieren
Sie die langen Stangen 3an den Kunststoff-
kappen der Bodenhalterung.
Abbildung I:
5. Führen Sie die kurzen Stangen 4durch die
Kanäle und fixieren Sie diese an den Kunststoff-
kappen im oberen Bereich des Innenzeltes 2.
6. Binden Sie nun die Stangen 3, 4mit den
Befestigungsbändern am Dach des Innenzelts
2fest.
Abbildung J:
7. Fixieren Sie eine Seite des Innenzeltes 2mit
d
en Heringen 5am Boden. Greifen Sie dann
d
as andere Ende des Innenzeltes
2
und zieh
en
Sie es so auseinander, dass das Zelt gespannt
wird.
8. Sichern Sie das Innenzelt 2, indem Sie mit den
Heringen 5die Bodenhalterungen spannen.
Zelt abbauen
Reinigen Sie das Zelt von innen und außen,
bevor Sie das Zelt abbauen. Der Abbau des
Zeltes muss in umgekehrter Reihenfolge zum
Aufbau erfolgen.

20 DE/AT/CH
Zelt zusammenpacken
VORSICHT! Stellen Sie sicher, dass das Zelt
komplett trocken ist, bevor Sie es zusammen-
packen. Andernfalls können Flecken und Ge-
webeschäden die Folge sein.
VORSICHT! Achten Sie darauf, dass Sie die
Heringe 5separat in die dafür vorgesehenen
Taschen packen. Ansonsten können die Heringe
5das Zelt beschädigen. Packen Sie die übrigen
Einzelteile ebenfalls in die dafür vorgesehenen
Taschen.
Falten Sie das Zelt immer so zusammen, dass
der Zeltboden nach außen zeigt.
Sammeln Sie alle Teile vor dem Verpacken sorg-
fältig zusammen. Zählen Sie diese durch um
sicherzustellen, dass keine Teile verlegt oder
verloren gegangen sind.
Verstauen Sie anschließend das zusammenge-
rollte Zelt sorgfältig in der Tragetasche.
Reinigung und Pflege
VORSICHT! Waschen Sie das Zelt niemals in
einer Waschmaschine. Andernfalls kann die
Wasserdichtigkeit negativ beeinflusst werden.
VORSICHT! Benutzen Sie niemals Benzin,
Lösungsmittel oder andere Reinigungsmittel.
An-
dernfalls drohen Beschädigungen des Prod
ukts.
In allen synthetischen Zelten kann es zu Kondensbil-
dung kommen; lüften Sie also so häufig wie möglich,
um den Effekt abzuschwächen.
Entfernen Sie Schmutz vom Zelt mit einem
weichen Schwamm und klarem Wasser.
Lassen Sie alle Teile gründlich trocknen, bevor
Sie das Zelt wieder verpacken. Dies beugt
Schimmel, Geruch und Verfärbungen vor.
Sprühen Sie die Reißverschlüsse mit Silikonspray
ein, wenn diese beim Öffnen oder Schließen
haken.
Bei häufiger Verwendung kann die Wasserdich-
tigkeit des Produkts negativ beeinflusst werden.
Sprühen Sie das Zelt daher regelmäßig mit einem
Imprägnierspray (im Baumarkt, Fachhandel
erhältlich) ein.
Lagern Sie das Produkt an einem kühlen,
trockenen Ort.
Entsorgung
Die Verpackung besteht aus umweltfreundlichen
Materialien, die Sie über die örtlichen Recycling-
stellen entsorgen können.
Möglichkeiten zur Entsorgung des ausgedienten
Produkts erfahren Sie bei Ihrer Gemeinde- oder
Stadtverwaltung.
Garantie
Das Produkt wurde nach strengen Qualitätsrichtlinien
sorgfältig produziert und vor Anlieferung gewissen-
haft geprüft. Im Falle von Mängeln dieses Produkts
stehen Ihnen gegen den Verkäufer des Produkts
gesetzliche Rechte zu. Diese gesetzlichen Rechte
werden durch unsere im Folgenden dargestellte
Garantie nicht eingeschränkt.
Sie erhalten auf dieses Produkt 3 Jahre Garantie
ab Kaufdatum. Die Garantiefrist beginnt mit dem
Kaufdatum. Bitte bewahren Sie den Original-Kassen-
bon gut auf. Diese Unterlage wird als Nachweis
für den Kauf benötigt.
Tritt innerhalb von 3 Jahren ab dem Kaufdatum die-
ses Produkts ein Material- oder Fabrikationsfehler
auf, wird das Produkt von uns – nach unserer Wahl
– für Sie kostenlos repariert oder ersetzt. Diese
Garantie verfällt, wenn das Produkt beschädigt,
nicht sachgemäß benutzt oder gewartet wurde.
Die Garantieleistung gilt für Material- oder Fabrika-
tionsfehler. Diese Garantie erstreckt sich nicht auf
Produktteile, die normaler Abnutzung ausgesetzt
sind (z. B. Batterien) und daher als Verschleißteile
angesehen werden können oder Beschädigungen
an zerbrechlichen Teilen, z. B. Schalter, Akkus oder
die aus Glas gefertigt sind.
Table of contents
Languages:
Other Crivit Tent manuals

Crivit
Crivit Z30696 Installation and operating instructions

Crivit
Crivit Z30696 Installation and operating instructions

Crivit
Crivit 292637 Installation and operating instructions

Crivit
Crivit 282704 Installation and operating instructions

Crivit
Crivit Z30696 Installation and operating instructions

Crivit
Crivit 273711 User manual

Crivit
Crivit 292637 Installation and operating instructions

Crivit
Crivit 282737 User manual

Crivit
Crivit 290255 User manual

Crivit
Crivit 104999 User manual