Crivit 1-LD5029 Parts list manual

IAN
309652
HEART RATE MONITOR WATCH
·
10/2018
· Art.
-
Nr.:
1
-
LD5029
IHEART RATE MONITOR
WATCH
Us ge nd s fety instructions
SZÍVFREKVENCIA-MÉRŐ ÓRA
OPTIKAI ÉRZÉKELŐVEL
H sznál ti és biztonsági t nácsok
URA ZA MERJENJE SRČN
E
FREKVENCE Z OPTIČNIM
SENZORJEM
N vodilo z upor bo in v rnostno
n vodilo
MĚŘIČ TEPOVÉ FREKVENCE
S OPTICKÝM SENZOREM
Pokyny k obsluze bezpečnostní pokyny
HODINK NA MERANIE
FREKVENCIE SRDCA S
OPTICKÝM SENZOROM
Návod n použitie bezpečnostné
pokyny
IHERZFREQUENZ-
MESSUHR MIT OPTISCHEM SENSOR
Bedienungs- und Sicherheitshinweise
All manuals and user guides at all-guides.com
all-guides.com

Us ge nd s fety instructions .................................................................. - 1 -
H sznál ti és biztonsági t nácsok ....................................................... - 28 -
N vodilo z upor bo in v rnostno n vodilo ..................................... - 58 -
Pokyny k obsluze bezpečnostní pokyny .......................................... - 85 -
Návod n použitie bezpečnostné pokyny ......................................... - 112 -
Bedienungs- und Sicherheitshinweise ......................... - 140 -
All manuals and user guides at all-guides.com

-
1
-
Usage and safety instructions
Table of contents
T ble of contents ........................................................................................................... - 1 -
Introduction .................................................................................................................... - 3 -
Intended use .................................................................................................................. - 3 -
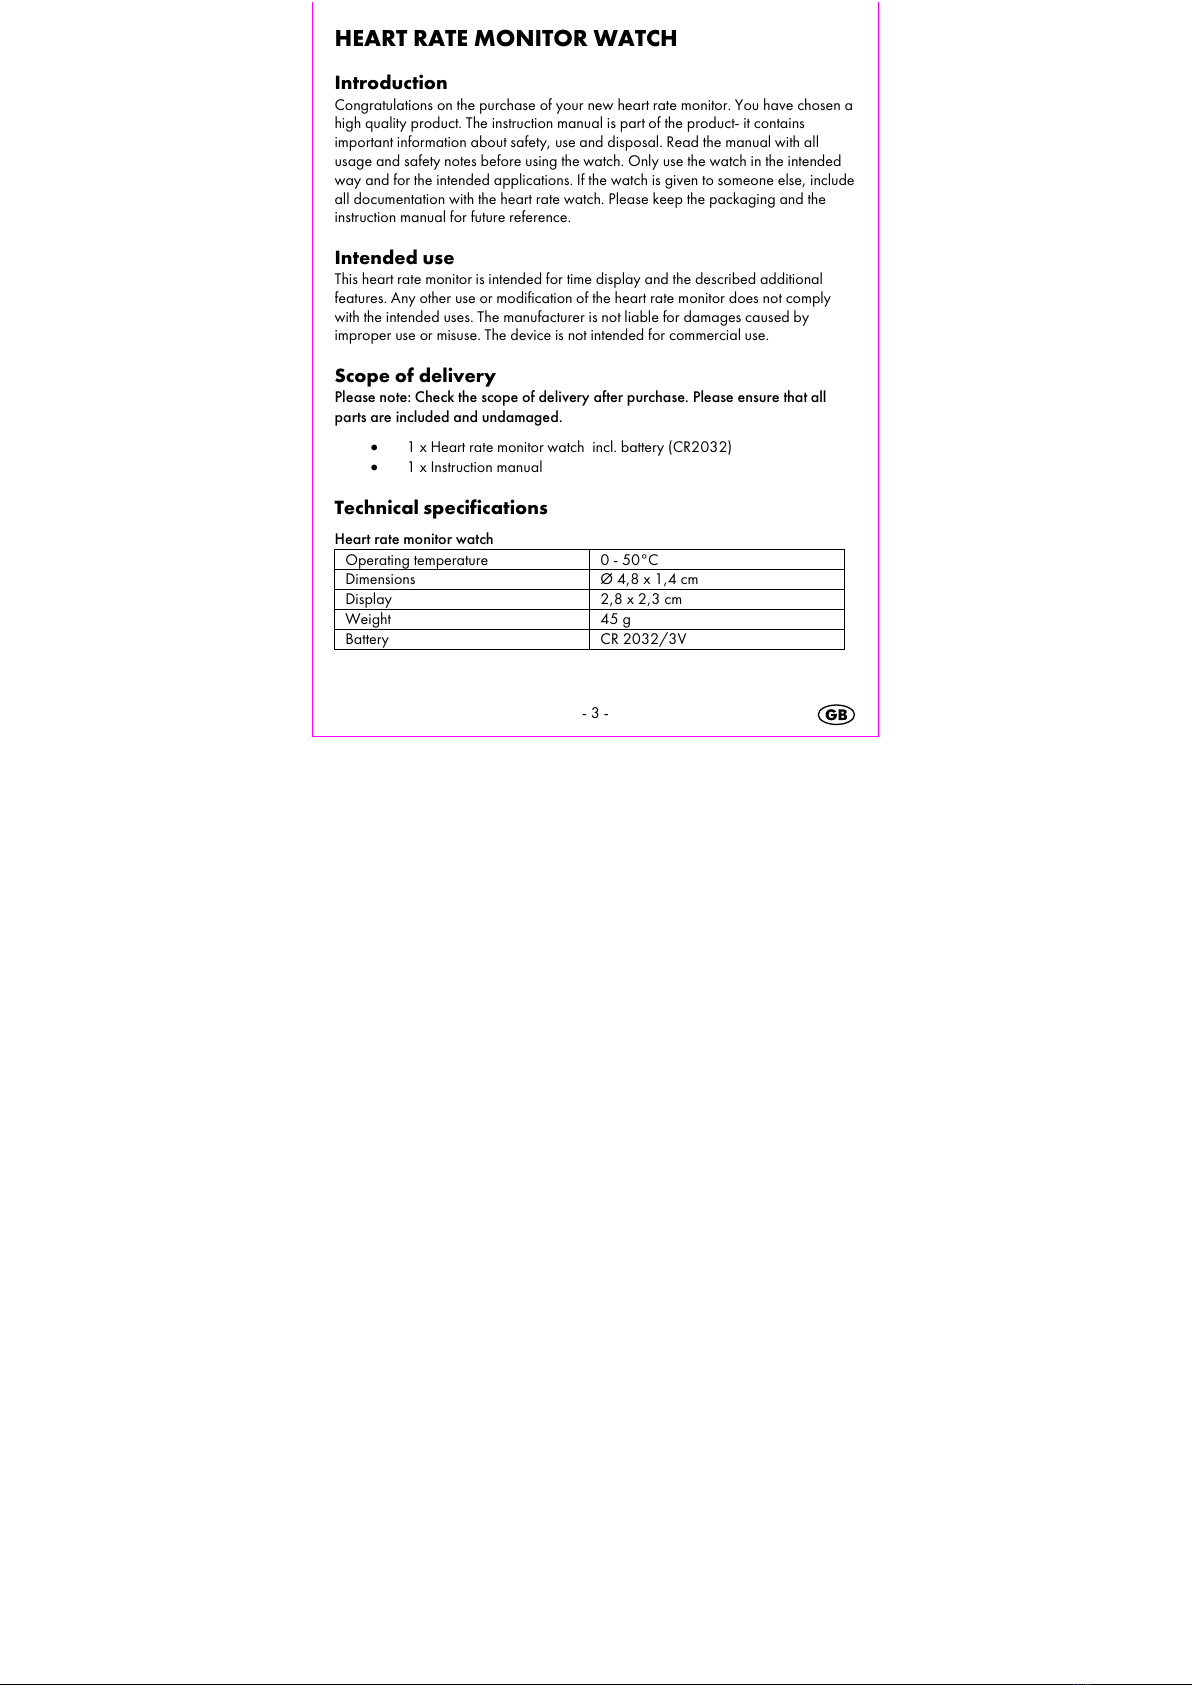
Scope of delivery .......................................................................................................... - 3 -
Technic l specific tions ................................................................................................ - 3 -
Import nt s fety inform tion
Import nt s fety inform tionImport nt s fety inform tion
Import nt s fety inform tion ..................................................................................... - 4 -
Import nt s fety inform tion for the b tteries............................................................. - 4 -
Import nt s fety inform tion for users ......................................................................... - 4 -
Optic l he rt r te me suring ....................................................................................... - 5 -
Correct positioning of the he rt r te monitor w tch .................................................. - 6 -
Import nt he rt r te monitor w tch us ge inform tion ............................................. - 7 -
Speed setting .......................................................................................................... - 7 -
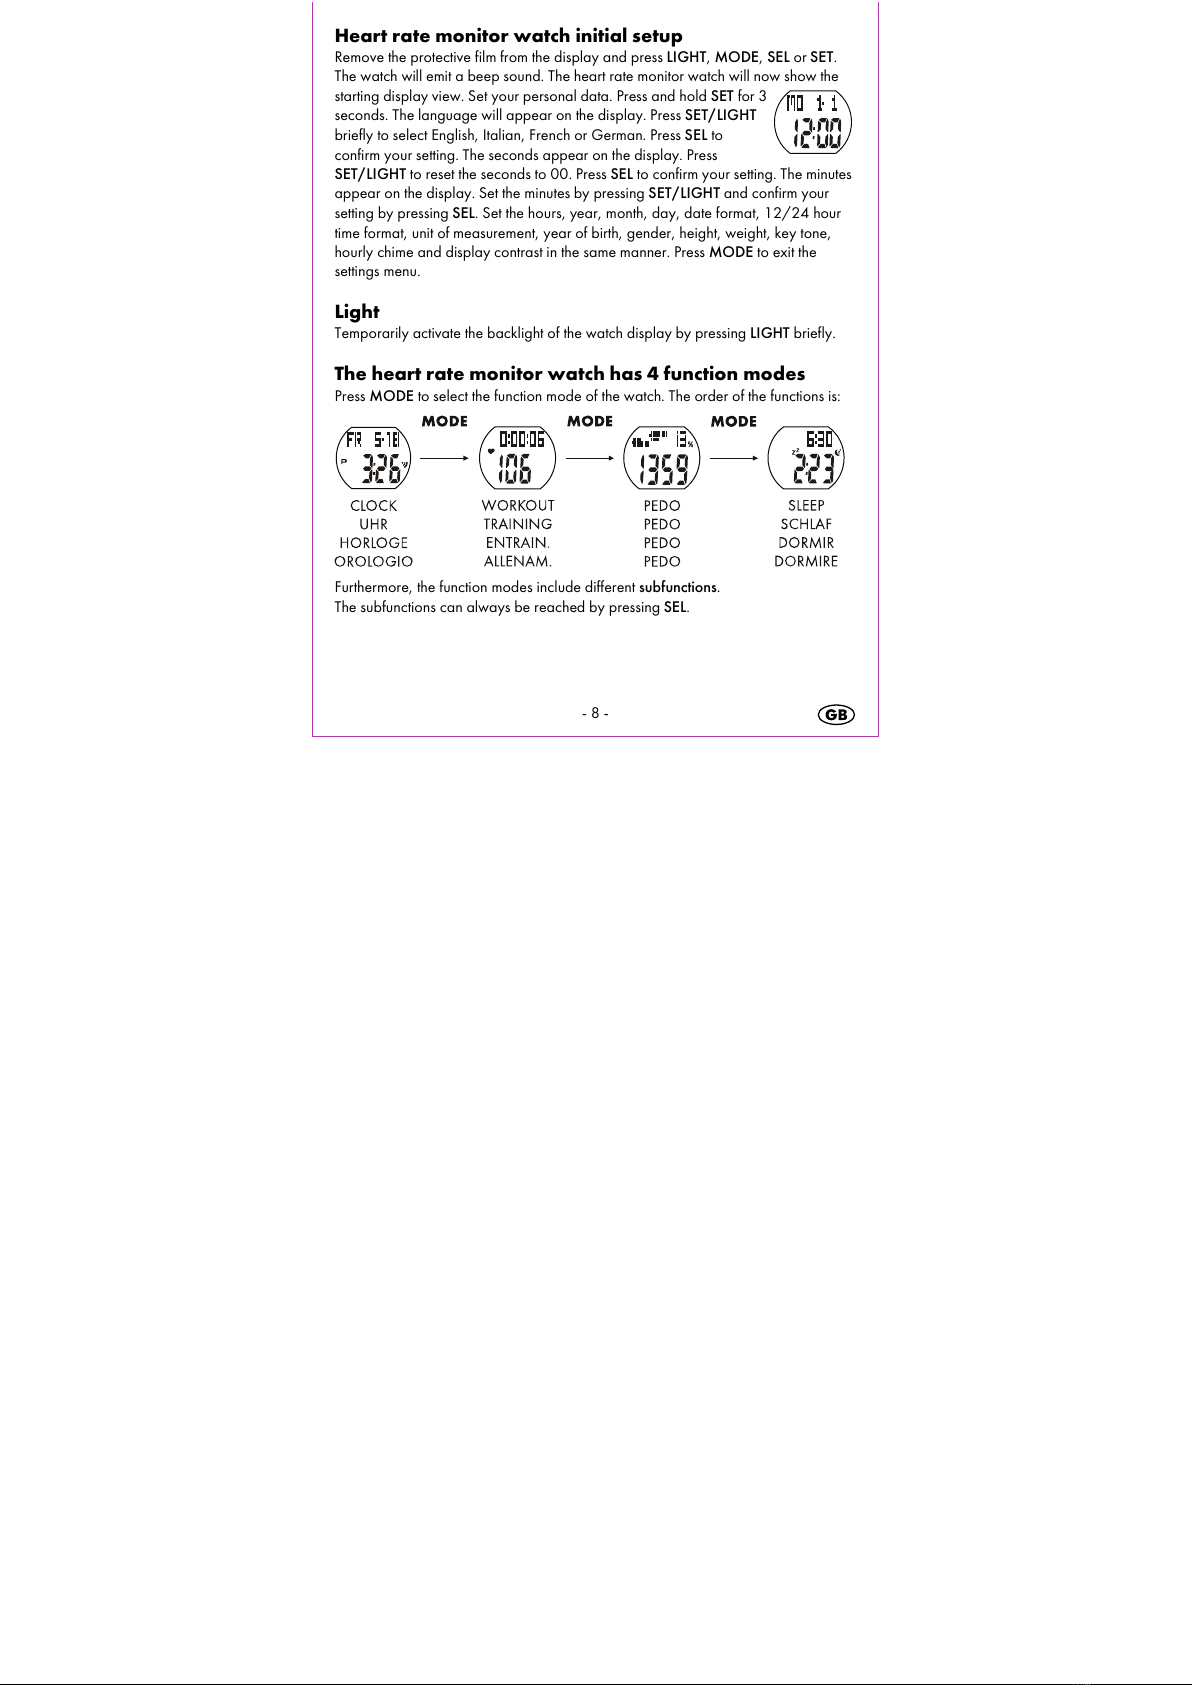
He rt r te monitor w tch initi l setup ......................................................................... - 8 -
Light ................................................................................................................................ - 8 -
The he rt r te monitor w tch h s 4 function modes ................................................. - 8 -
CLOCK (CLOCK / UHR / HORLOGE / OROLOGIO) .......................................... - 9 -
1. Clock ................................................................................................................... - 9 -
2. Al rm ................................................................................................................... - 9 -
3. TIMER (countdown) m x. 23:59:59 ............................................................. - 10 -
Workout mode (WORKOUT / TRAINING / ENTRAIN. /ALLENAM.) .............. - 11 -
1. Workout timer .................................................................................................. - 12 -
2. Current/ ver ge p ce time/km .................................................................... - 13 -
3. Current/ ver ge speed km/h ....................................................................... - 14 -
4. Dist nce ............................................................................................................ - 14 -
5. He rt r te (workout mode) ............................................................................. - 14 -
6. C lories burned / f t burned / BMI ............................................................. - 17 -
Pedometer mode ......................................................................................................... - 18 -
Sleep function mode (SLEEP / SCHLAF / DORMIR / DORMIRE) ....................... - 19 -
1. St rting m nu l sleep mode ........................................................................... - 19 -
All manuals and user guides at all-guides.com

-
2
-
2. Stopping m nu l sleep mode ........................................................................ - 20 -
3. Setting the utom tic sleep mode .................................................................. - 20 -
Troubleshooting ........................................................................................................... - 21 -
Reset ............................................................................................................................. - 22 -
Low b ttery w rning indic tor ................................................................................... - 23 -
Repl cing the b ttery .................................................................................................. - 23 -
W ter resist nce ......................................................................................................... - 23 -
Cle ning instructions ................................................................................................... - 24 -
Dispos l of the electronic ppli nce ......................................................................... - 24 -
Dispos l of the b tteries ............................................................................................. - 24 -
Recycling ...................................................................................................................... - 24 -
Corrug ted c rdbo rd............................................................................................... - 24 -
W ste dispos l ............................................................................................................ - 24 -
digi-tech gmbh w rr nty ............................................................................................ - 24 -
W rr nty conditions ................................................................................................... - 25 -
W rr nty period nd defects li bility ....................................................................... - 25 -
Scope of the w rr nty ................................................................................................ - 25 -
W rr nty cl im procedure ........................................................................................ - 25 -
Service.......................................................................................................................... - 27 -
Supplier ........................................................................................................................ - 27 -
All manuals and user guides at all-guides.com

-
3
-
HEART RATE MONITOR WATCH
Introduction
Congr tul tions on the purch se of your new he rt r te monitor. You h ve chosen
high qu lity product. The instruction m nu l is p rt of the product- it cont ins
import nt inform tion bout s fety, use nd dispos l. Re d the m nu l with ll
us ge nd s fety notes before using the w tch. Only use the w tch in the intended
w y nd for the intended pplic tions. If the w tch is given to someone else, include
ll document tion with the he rt r te w tch. Ple se keep the p ck ging nd the
instruction m nu l for future reference.
Intended use
This he rt r te monitor is intended for time displ y nd the described ddition l
fe tures. Any other use or modific tion of the he rt r te monitor does not comply
with the intended uses. The m nuf cturer is not li ble for d m ges c used by
improper use or misuse. The device is not intended for commerci l use.
Scope of delivery
Please note: Check the scope of delivery after purchase. Please ensure that all
parts are included and undamaged.
1 x He rt r te monitor w tch incl. b ttery (CR2032)
1 x Instruction m nu l
Technical specifications
Heart rate monitor watch
Oper ting temper ture
0
-
50°C
Dimensions
Ø 4,8 x 1,4 cm
Displ y
2,8 x 2,3 cm
Weight
45 g
B ttery
CR 2032/3V
All manuals and user guides at all-guides.com

-
4
-
Important safety information
Important safety information for the batteries
WARNING! HEALTH HAZARD!
RISK OF EXPLOSION!
Keep b tteries out of re ch of sm ll children. If b ttery is sw llowed, you must
seek medic l ttention immedi tely. B tteries/rech rge ble b tteries must lw ys
be inserted in the correct pol rity. If necess ry, cle n the b ttery nd device
cont cts. Never ttempt to rech rge non-rech rge ble b tteries. Never short-circuit
or ttempt to open b tteries. Never throw b tteries into fire s they m y explode. If
the device will not be used for n extended time period, remove the b ttery nd
store the device in dry nd dust-free re . Improper use of the b ttery c n le d to
explosion or le k ge. If the b ttery le ks, void cont ct with skin, eyes nd mucous
membr nes. Use gloves. If you re exposed to b ttery cid, rinse the ffected re s
with plenty of cle n w ter nd immedi tely seek medic l ttention. Remove
disch rged b tteries from the device s they present n incre sed risk of le k ge.
Important safety information for users
ATTENTION:
Consult your doctor before you begin any
training program. Your doctor can help you choose the
proper training intensity and heart rate guidelines for your
exercises.
This Heart rate monitor watch is not a medical device and
should only be used as a guide for your training.
WARNING! RISK OF INJUR !
This device m y be used by persons (including children over 8 ye rs of ge) with
reduced physic l, sensory or ment l bilities or l ck of experience nd knowledge,
All manuals and user guides at all-guides.com
all-guides.com

-
5
-
if they re supervised or instructed reg rding the s fe use of the device nd
underst nd the d ngers th t m y rise. Children m y not pl y with the device.
Cle ning nd user m inten nce of the device m y not be performed by children
without supervision. Keep p ck ging films out of the h nds of children. There is
d nger of suffoc tion.
Optical heart rate measuring
Your he rt r te monitor w tch me sures your he rt r te t your wrist using n
optic l sensor. A chest belt is not required when using this method.
lood circulation
Blood circul tion v ries from person to person nd m y differ intr -individu lly (for
ex mple, between the left nd right rms). In some c ses, n tur l blood flow m y
not be optim l for he rt r te me surement with n optic l sensor in cert in
individu ls.
Environmental factors
If the mbient temper ture is too low, blood flow to the fore rms c n be reduced
nd this m y reduce me surement ccur cy.
Skin Colour
Skin reflectivity is influenced by the colour of the skin surf ce. In principle, the less
light is bsorbed through the skin surf ce, the better the he rt r te me surement.
Strong pigment tion of the skin, sc rring nd t ttooing c n therefore dversely
ffect the me surement ccur cy.
Keep skin dry and clean
It is import nt to keep your w tch nd skin cle n nd dry. Dry will m ximize comfort
nd prevent d m ge to the w tch. This is especi lly import nt during workouts or
exposure to liquids. Liquids such s swe t, so p, sunscreen, nd lotions c n reduce
me surement ccur cy.
Posture
Improper posture (such s sh rply bent wrists) will ffect the circul tion of the
fore rms nd reduce he rt r te me surement ccur cy.
All manuals and user guides at all-guides.com

-
6
-
Correct positioning of the heart rate monitor watch
Pl ce the he rt r te monitor w tch on your wrist. The correct positioning is import nt
for precise me surements.
To me sure the he rt r te, the he rt r te monitor w tch must be snugly fitted round
your wrist. The displ y must f ce upw rd nd must be positioned one finger-width
behind the wrist bones. The sensor must be touching the skin. The he rt r te monitor
w tch must not be worn so tightly th t blood circul tion is reduced. While you re
not working out, the w tch should be worn more loosely round your wrist- in the
style of norm l w tch. We r the w tch slightly more tightly round your wrist while
working out to m ximise the precision of the he rt r te me surement.
M ny exercises such s cycling or weightlifting require you to ngle your wrists. This
m y interfere with the he rt r te me surement if the he rt r te monitor w tch is worn
too low on the wrist. For the best results, we r your he rt r te monitor w tch for
few minutes before you begin your workout.
If your h nds or skin feels cool quickly, w rm up your skin below the sensor. Do
some w rm up exercises before you begin your workout.
Ensure th t the he rt r te monitor w tch h s skin cont ct.
Do not we r the he rt r te monitor w tch too tightly round your wrist s this
m y interfere with blood circul tion nd reduce me surement precision.
All manuals and user guides at all-guides.com

-
7
-
The he rt r te monitor w tch should be worn slightly more tightly round your
wrist when working out.
During very intense workouts or other ctivities, which c use forceful or
rrhythmic movements of your wrist, the sensor m y not be ble to me sure
your he rt r te correctly.
If your he rt r te monitor w tch does not displ y your he rt r te, rel x your
wrist nd rem in motionless for short while ( pproxim tely 10 seconds). Your
he rt r te should now ppe r.
Important heart rate monitor watch usage information
Press MODE to ch nge the fe ture mode of the w tch or exit settings menus
Press SET to set your person l d t by decre sing v lues
Press LIGHT to set your person l d t by incre sing v lues
Press SEL to confirm your setting nd dv nce one step in submenu
Speed setting
Press nd hold SET or LIGHT while setting numeric l v lues to use the speed-setting
fe ture.
All manuals and user guides at all-guides.com

-
8
-
Heart rate monitor watch initial setup
Remove the protective film from the displ y nd press LIGHT, MODE, SEL or SET.
The w tch will emit beep sound. The he rt r te monitor w tch will now show the
st rting displ y view. Set your person l d t . Press nd hold SET for 3
seconds. The l ngu ge will ppe r on the displ y. Press SET/LIGHT
briefly to select English, It li n, French or Germ n. Press SEL to
confirm your setting. The seconds ppe r on the displ y. Press
SET/LIGHT to reset the seconds to 00. Press SEL to confirm your setting. The minutes
ppe r on the displ y. Set the minutes by pressing SET/LIGHT nd confirm your
setting by pressing SEL. Set the hours, ye r, month, d y, d te form t, 12/24 hour
time form t, unit of me surement, ye r of birth, gender, height, weight, key tone,
hourly chime nd displ y contr st in the s me m nner. Press MODE to exit the
settings menu.
Light
Tempor rily ctiv te the b cklight of the w tch displ y by pressing LIGHT briefly.
The heart rate monitor watch has 4 function modes
Press MODE to select the function mode of the w tch. The order of the functions is:
Furthermore, the function modes include different subfunctions.
The subfunctions c n lw ys be re ched by pressing SEL.
All manuals and user guides at all-guides.com

-
9
-
CLOCK (CLOCK / UHR / HORLOGE / OROLOGIO)
Press MODE repe tedly to select the function CLOCK / UHR / HORLOGE /
OROLOGIO.
Press SEL to select the subfunctions of the clock mode.
1. CLOCK
2. ALARM
3. TIMER
1. 2. 3.
1. Clock
The d y of the week nd the d te re shown in the upper p rt of the displ y. The
time is shown in the lower p rt of the displ y. Set the time s described under “he rt
r te monitor w tch initi l setup”.
2. Alarm
Press SET in l rm mode to ctiv te or de ctiv te the l rm.
Press nd hold SET for 3 seconds to set the l rm time. The minutes will blink on the
displ y. Press SET/LIGHT to set the minutes nd confirm your setting by pressing
SEL. The hours will blink on the displ y. Set the hours in the s me m nner. Confirm
by pressing MODE.
D y of the week
D te
Time
All manuals and user guides at all-guides.com
all-guides.com

-
10
-
Activating/deactivating the alarm and the snooze feature
Press ny button when the l rm sounds to turn off the l rm. If the l rm is not
turned off within 30 seconds, the snooze fe ture will ctiv te. The -symbol will
blink on the displ y nd the l rm will sound g in fter 5 minutes. This will be
repe ted 3 times. After 24 hours the l rm will sound g in.
3. TIMER (countdown) max. 23:59:59
The preset time of 1:00 hour will ppe r on the displ y.
Press SET while in TIMER mode to st rt or stop the timer.
Press nd hold SET for 3 seconds to reset the TIMER.
Press nd hold SET again for 3 seconds to set custom time for the TIMER. The
hours will blink. Press SET/LIGHT to set the hours nd confirm your setting by
pressing SEL. The minutes will blink on the displ y. Set the minutes nd seconds in
the s me m nner. Confirm by pressing MODE.
hours
seconds
minutes
All manuals and user guides at all-guides.com

-
11
-
Stop the TIMER l rm by pressing ny button. If no button is pressed, the l rm will
utom tic lly stop fter 30 seconds.
Workout mode (WORKOUT / TRAINING /
ENTRAIN. /ALLENAM.)
Press MODE repe tedly to select the function WORKOUT / TRAINING / ENTRAIN
/ ALLENAM.
Press SEL to select the subfunctions of the workout mode.
1. WORKOUT TIMER
2. CURRENT/AVERAGE PACE
3. CURRENT/AVERAGE SPEED
4. DISTANCE
5. HEART RATE
6. CALORIES BURNED/FAT BURNED/BMI
All manuals and user guides at all-guides.com

-
12
-
1. Workout timer
Press SET while in workout mode to begin the he rt r te me surement. The he rt
symbol will blink on the displ y.
ATTENTION: All described subfunctions will only function if the workout timer is
running.
Press SET while in workout mode to stop the he rt r te me surement. The he rt
symbol will rem in on without blinking.
NOTE: If the workout timer is stopped, the he rt r te monitor w tch will revert to the
norm l time displ y fter pproxim tely 5 minutes.
Press nd hold SET for 3 seconds to reset the workout timer time.
NOTE: Resetting the workout timer time will lso reset ll d t of the subfunctions.
Heart rate target zone
Within t rget zone
Above t rget zone
Below t rget zone
Automatic deactivation of the workout time (in workout mode)
After dur tion of 2.5 hours the displ y will show:
All manuals and user guides at all-guides.com

-
13
-
Press SET/LIGHT to select YES/JA/OUI/SI or NO/NEIN/NON/NO nd press
SEL to confirm.
Setting YES/JA/OUI/SI will stop the he rt r te me surement.
Setting NO/NEIN/NON/NO will c use the he rt r te me surement to continue.
If no button is pressed during the next 30 minutes ( fter 3 hours tot l workout time)
the me surement will stop utom tic lly.
ATTENTION: After 5.5 hours, the message will reappear.
Automatic deactivation of the workout time (in another mode)
If different function mode is selected fter st rting the workout timer, fter 4
minutes the displ y will show:
Press SET/LIGHT to select YES/JA/OUI/SI or NO/NEIN/NON/NO nd press
SEL to confirm.
Setting YES/JA/OUI/SI will stop the he rt r te me surement.
Setting NO/NEIN/NON/NO will c use the he rt r te me surement to continue.
If no button is pressed during the next minute, the me surement will stop
utom tic lly.
2. Current/average pace time/km
Press SEL to show the p ce in the upper p rt of the displ y. The lower p rt of the
displ y will show the he rt r te. Press SET to show the current or ver ge p ce.
All manuals and user guides at all-guides.com

-
14
-
3. Current/average speed km/h
Press SEL to show the current/ ver ge speed in the upper p rt of the displ y. The
lower p rt will show the current he rt r te. Press SET to show the current or ver ge
speed.
4. Distance
Press SEL to show the dist nce in the upper p rt of the displ y. The lower p rt will
show the current he rt r te.
5. Heart rate (workout mode)
Press SEL to show the ver ge he rt r te. Press SET to select the subfunctions.
A. AVERAGE HEART RATE
B. MAXIMUM HEART RATE
C. MINIMUM HEART RATE
D. MHR %*
E. TARGET HEART RATE ZONE
All manuals and user guides at all-guides.com
all-guides.com

-
15
-
*MHR – Maximum heart rate
(100 % of the maximum heart rate = 220 – your age in years)
Workout target heart rate zone settings
ATTENTION: Consult your physician to find out which
target heart rate zone is suitable for you. The pre-set
values are only approximate and are not suitable for
everyone.
To set the workout t rget he rt r te zone, the l rms nd the stride length, press SET
for 3 seconds while in ver ge he rt r te displ y mode.
Press SET/LIGHT to select one of the pre-set workout t rget he rt r te zones 1 – 3
or select MYZONE to set custom workout t rget he rt r te zone. The following
t ble shows n overview of zones 1-3.
All manuals and user guides at all-guides.com

-
16
-
Age in ye rs
20
25
30
35
40
45
50
55
60
65
Zone 1
100
97
95
92
90
87
85
82
80
77
Recre tion
-
-
-
-
-
-
-
-
-
-
50
-
65 % MHR*
130
126
123
120
117
113
110
107
104
100
Zone 2
130
126
123
120
117
113
110
107
104
100
Fitness
-
-
-
-
-
-
-
-
-
-
65
-
80 % MHR*
160
156
152
148
144
140
136
132
128
124
Zone 3
160
156
152
148
144
140
136
132
128
124
Sports
-
-
-
-
-
-
-
-
-
-
80
-
95 % MHR*
190
185
180
175
171
166
161
156
152
147
While MYZONE is shown on the displ y, press SEL to enter setting mode for the
custom workout t rget he rt r te zone. The lower limit of the zone will blink on the
displ y. Press SET/LIGHT to set the lower limit nd confirm your setting by pressing
SEL. Set the upper limit in the s me m nner.
Alarm for workout target heart rate zone
Press SET/LIGHT to ctiv te (ON) or de ctiv te (OFF) the l rm for the selected
limit. Confirm your settings by pressing SEL.
lower limit upper limit m ximum he rt r te
Alarm for heart rate exceeding maximum heart rate
If your he rt r te re ches 99% of the m ximum he rt r te or exceeds the m ximum
he rt r te, ste dy l rm tone will sound. The l rm tone will stop when your he rt
r te drops to below 99% of the m ximum he rt r te.
All manuals and user guides at all-guides.com

-
17
-
Stride length setting
The stride length displ y ppe rs. Enter your stride length for w lking nd running
by pressing SET/LIGHT. Press SEL to confirm e ch setting. S ve by pressing MODE.
To determine your stride length, me sure dist nce of (for ex mple) 100m. W lk
or run (depending on the v lue you wish to set) the dist nce with uniform strides nd
count your steps. Divide the dist nce by the number of strides nd convert the metres
to centimetres.
NOTE: Ple se set the v lues for w lking nd running even if you intend to use the
w tch solely for w lking. In this c se, set the v lue for running s “f st w lking”. A
me ningful result c n only be chieved only if both v lues re entered. If the v lues
re not entered, the w tch will use def ult v lues, which m y not m tch your
person l movement profile.
NOTE: If the displ yed v lues for dist nce strongly devi te from the ctu l dist nce
tr velled, the stride length setting must be repe ted. Your g it, your shoes nd the
properties of the ground you re tr velling on will lw ys h ve n imp ct on the
me sured v lues.
6. Calories burned / fat burned / BMI
Press SEL to show the c lories burned. Press SET to enter the subfunctions.
A. CALORIES BURNED
B. FAT BURNED
C. BMI
E ch v lue is shown in the upper p rt of the displ y. The he rt r te is shown in the
lower p rt of the displ y.
All manuals and user guides at all-guides.com

-
18
-
NOTE: To incre se the precision of the c lories burned nd f t burned v lues, the
correct v lues for your ge nd weight must be set.
NOTE: The counter for f t burned only ctiv tes when the me sured he rt r te is
bove 120 be ts per minute.
MI ( ody Mass Index)
The BMI is st tistic l me surement th t c n be used to judge person’s weight.
For dults, v lue between 18.5 nd 25 is considered norm l. V lues below 18.5
re considered "underweight". V lues bove 25 re considered "overweight".
V lues bove 30 re considered "obese". The BMI is only co rse guideline
bec use it does not t ke persons body type nd body composition (f t/muscle
tissue) into consider tion.
The w tch utom tic lly c lcul tes your BMI from the v lues entered during setup.
Age
BMI norm l (kg/m²)
19
-
24
19
-
24
25
-
34
20
-
25
35
-
44
21
-
26
45
–
54
22
-
27
55
–
64
23
-
28
> 64
24
-
29
Pedometer mode
Press MODE repe tedly to select the pedometer function mode PEDO.
Press nd hold SET for 3 seconds to reset the d ily step go l.
NOTE: The counted steps nd the percent ge of your step go l re reset
utom tic lly every night.
-
Percent ge of step
go l
- Step counter
All manuals and user guides at all-guides.com
Other manuals for 1-LD5029
2
This manual suits for next models
1
Table of contents
Languages:
Other Crivit Watch manuals

Crivit
Crivit 317347_1904 User manual

Crivit
Crivit 110778 User manual

Crivit
Crivit 275275 User manual

Crivit
Crivit Z31222 User manual

Crivit
Crivit Z31222 User manual

Crivit
Crivit 89432 User manual

Crivit
Crivit 1-LD5029 Parts list manual

Crivit
Crivit 285498 Parts list manual

Crivit
Crivit Deluxe Keyless Entry & Remote Start User manual

Crivit
Crivit 1-LD4657 Parts list manual