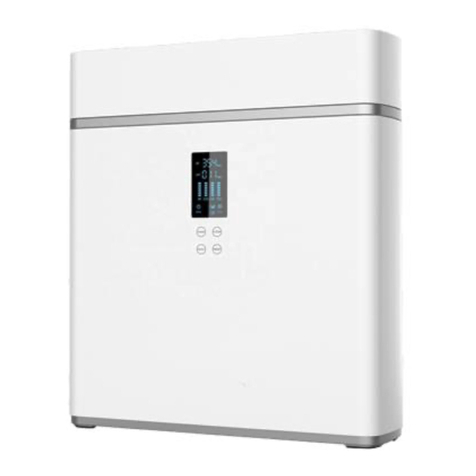
Crystal Water CW-A2010 SU108 User manual

CRYSTAL WATER
Installation Guide
CW-A2010 SU108 Filtration System

Features
•Easily Installed with the use of an Arco Conekta Mini Stop Water Diverter
•Can be easily connected to an existing Flick Mixer Tap (other fittings may be
required) or the Standard Tap provided.
•Filters Standard Municipal Water Supplies
•Automatically Shuts off Water when a Leak is Detected
•Runs on a 9V Alkaline Battery (same battery that is in smoke detectors)
•Automatically Shuts off when The Battery Power is Low

Specifications
Everclear SU108 Filter System
•Capacity: 3,785 Litres
•Filter Life Span: 12 Months
•Cartridge Length: 14.5”
•Flow Rate: 0.5 Gallons per minute
•Certifications: NSF 42, NSF 53, SGS, WQA Gold Seal
Water Filter Monitor & Leak Detector
•Operating Voltage: 9VDC
•Supply Current: Typical 1mA, Maximum 15mA
•Cable Length: 1.5m for Solenoid Valve
•Connection: ½” BSP Male & Female Thread
•Water Leak Detection Method: Control Unit with Metal Detecting Plates to be
put on the floor near the water filter
•Environment Temperature: -20 ~ 90°C
•Maximum Pressure: 6000 kpa

Basic Installation Instructions
Tools Needed for Installation:
•Phillips Screwdriver
•12mm Drill Bit and Drill
•Wrench
•Utility Knife
•Measuring Tape
•Pencil
1. OPEN CARTON & Inspect Parts
Installation Parts
Mounting Hardware not included
Key
Description
Part No.
1
QL1 Filter Head
101
2
Filter Cartridge
(Varies)
3
Water Diverter
1120105
4
Tubing ¼” LLDPE
CW-P1000-01
5
½” Thread to ¼”
Fitting
CW-P91009-02
6
7/16” Thread to ¼”
Fitting
CW-A1009-05
7
PLV Check Valve
CW-P1830-C
8
Leak Detector &
Filter Monitor
CW-B9041-BR
9
Faucet
CW-A8001
2. Verify Undersink Mounting Location
Measure 20” (500mm) from the base of the cabinet and mark the mounting location for the
top of the filter head. Make sure the chosen location offers easy access for future cartridge
changes.
3. Mount Filter Head Under Sink
Mount Filter Head on the Cabinet using appropriate screws and washers. DO NOT TIGHTEN
Until the Installation is complete.
4. Attach Inlet Water Supply
a. Locate and Close the Cold-Water Angle Stop Valve Under your kitchen sink. Open
the Cold-Water line one your existing Tap to release the water pressure.
b. Unscrew and disconnect the braided tubing on the threaded end of the Angle
Stop Valve.

c. Attach the Solenoid Valve to the Arco Mini Stop Valve. Attach the ½” Push-fit
Fitting to the End of the Solenoid Valve.
d. Attach the Arco Conekta Mini Stop Valve to the existing Cold-Water Angle Stop
Valve.
e. Attach the Braided tubing to the top of the Arco Conekta Mini Stop Valve.
f. Close the Side Valve on the Arco Conekta Mini Stop Valve and open the Cold-
Water Angle Stop Valve to return water service to the Kitchen Sink. Check for
Leaks.
g. Measure length of tubing needed to connect the Diverted water to the Inlet of the
Filter head. Allow adequate tubing to avoid sharp turns.
h. Cut at a 90-Degree angle using a sharp knife.
i. Attach one end of the tubing to the Water Diverter Fitting.
j. Measure approximately 30-50mm away from the Water Diverter Fitting along the
tubing.
k. Cut at a 90-Degree angle using a sharp knife.
l. Attach the Water Diverter Tube to the Bottom of the PLV Check Valve and the
Remaining Tube to bother the outlet of the PLV Check Valve and the Inlet of the
Filter Head.
5. Install Supplied Tap
a. Place Chrome Cover Plate on top of the counter for the placement of the Tap.
b. Mark on the counter for drilling the hole for the tap. Ensure the is adequate room
both on top and underneath the counter/sink top for the locking nut, round plate
and push fit fitting installation.
c. Drill hole into the counter/sink top for the shaft of the Tap to go through. Clean
any potential burrs or knicks around the hole.
d. Place the small rubber Washer, Chrome Cover plate and large Rubber Washer (in
that order) on the shaft of the faucet. Insert shaft into the hole on the
counter/sink top.
e. Place Round Plastic Plate and Locking Washer on under the counter/sink side of
the faucet shaft. Tighten with the Locking Nut supplied on the shaft and ensure
the tap handle is pointing in the desired direction.
f. Attach the remaining Push-fit fitting onto the bottom of the shaft of the tap.
Tighten to ensure the internal seal is on the base of the tap.
6. Attach Filtered Water to Sink Tap
Measure length of tubing needed to connect the Outlet of the Filter Head to the Tap
connector fitting. Cut and insert each end of the tubing into the fittings.
7. Water Diverter Battery Installation
a. Slide off the Battery Cover on the right side of the Control Box. Install the 9V
Alkaline Battery into the Control Box connecting it to the Supplied Cables.
PLEASE NOTE: The System should only be powered by a 9V ALKALINE
BATTERY. Other Batteries may not activate the functionality of the Solenoid
Valve.

b. After the Battery is installed, the Control Box will generate a long “BEEP” sound
and all the light turns on for 3 Seconds. The Filter Light will Blink Several Times to
Indicate the Elapsed Time. The Filter Monitor is now in Operation Mode.
c. The Table below is a reference for the number of Light Blinks and remaining days
until the Filters need to be replaced:
1 Time
90 Days
2 Times
180 Days
3 Times
270 Days
4 Times
360 Days
d. Final Check
Check over all fittings and connections to ensure a tight and sealed fitment. Tighten the
Mounting Screws on the filter head. Install the filter into the filter head. The filter is a ¼ turn.
Once Complete, Open the Tap, then SLOWLY open the Water Diverter Valve and Run the
water for approximately 30 –45 seconds. Check for Leaks.

Filter Monitor & Leak Detector Instructions
1. Checking Filter Life
Pressing the Button on the Control Box will illuminate the Filter Life Indicator. The Light will
turn on for 3 seconds to indicate the Filter Life Status:
Colour
Remaining Days
■
> 14 Days
■
1 –14 Days
■
=< 0 Days
2. Near End-of Life Filter Alert
The Control Box will generate 5 “BEEP-BEEP’ sounds and blink orange every 15 Minutes to
notify users when the filter life is less than 14 days.
Pressing the Check/Reset Button will terminate the “BEEP-BEEP” sound alert for 2 days.
The Control Box will resume the alert after 2 days.
3. End-of Life Filter Alert
The Control Box will generate 5 “BEEP-BEEP-BEEP’ sounds and blink red every 15 Minutes to
notify users when the filter life is less than 0 days.
Pressing the Check/Reset Button will terminate the “BEEP-BEEP” sound alert for 2 days.
The Control Box will resume the alert after 2 days.
4. Resetting the Filter Monitor
Please Call Crystal Water on +61 8 6244 1300 to arrange a Filter Service and to reset the Filter
Monitor and Leak Detector (The Red light will blink and the unit will generate the alarm every
15 minutes).
5. Water Leak Detection Alert
The Control Box shuts the active Solenoid Valve to shut off the inlet of the Water Filtration
System to stop Water Flow and generates an acoustic signal, “BEEP-BEEP,” and blinks the
blue light continuously to notify users a Water Leask has been detected.
6. Reset Water Leak Alert
Press the Check/Reset Button on the Control Box to terminate the acoustic signal. Please Call
Crystal Water on +61 8 6244 1300 to arrange a callout for the Leak inspection and to reset the
Filter Monitor and Leak.
7. Low Power Alert
When the battery power is low, the Control Box shut the active Solenoid Valve, blinks a Yellow
Light and generates a “BEEP,” sound every 2 seconds to notify the user of a low battery.
Replacing with a new 9V ALKALINE Battery will release the alert and turn on the Solenoid
Valve.

Commissioning Checklist
Water Diverter Installed onto Cold Line Water Supply.
Solenoid Valve is installed on Water Diverter.
½” Thread to ¼” Tube Fitting Installed onto Solenoid Valve.
In-line PLV Check Valve Installed before Filtration System.
Control Box is on the floor near the Water Filtration System
Battery if fitted to Control Box
Inlet and outlet connections are properly fitted and well secured (if
applicable)
Tap Fitting Installed onto Threading
Water has been run for at least 20 seconds before use.
If any difficulties arise contact Crystal Water: Phone +61 8 6244 1300.
For information on our Filtration and Service Contracts please contact Crystal Water
Customer Service on +61 8 6244 1300 or service@crystalwaterperth.com.au.

Warnings
For continued safety of this appliance it must be installed, operated and maintained in accordance with the
manufacturer’s instructions. For correct operation of this appliance, it is essential to observe the instructions
as outlined in this booklet.
—Your unit should be installed by a suitably qualified tradesperson.
—For correct operation of this unit it is essential to observe the instructions as outlined in this booklet.
—Do not use this unit with water that is microbiologically unsafe or with water of unknown quality without
adequate disinfection before or after the system. Systems certified for cyst reduction may be used on disinfected
water that may contain filterable cysts.
—Use this unit only as directed in these instructions and relevant Crystal Water User Guides and only for its
designed purpose.
—Do not install unit if power cord is damaged.
—This unit is not intended for use by persons (including children) with reduced physical, sensory or mental
capabilities, or lack of experience and knowledge, unless they have been given supervision or instruction
concerning use of the appliance by a person responsible for their safety. Children should be supervised to ensure
that they do not play with the unit.
—This unit is designed for indoor installation only and must not be exposed to direct sunlight, rain and excessive
heat, cold, damp or dust.
—Do not store solvents or corrosive chemicals or other flammable items on or around this Unit.
—Any service or unit repairs must be performed by a trained and suitably qualified Technician.
—If the supply cord is damaged, it must be replaced by the manufacturer, its service agent or similarly qualified
persons in order to avoid a hazard.
—Packaging material including plastic bags must be kept out of reach of children and disposed of according to
local regulations.

Crystal Water
236 Fletcher Road, Karnup
Western Australia 6176, Australia
Telephone: +61 8 6244 1300
Email: service@crystalwaterperth.com.au
Crystalwaterperth.com.au
As Crystal Water has a policy of
continual improvement, all details are
subject to change without notice. All
goods are sold subject to out
published terms and conditions.
Table of contents
Other Crystal Water Water Filtration System manuals
Popular Water Filtration System manuals by other brands
BRÖTJE
BRÖTJE NEOP 70 installation instructions
US Water Systems
US Water Systems Flexx Oxi-Gen FX-150 owner's manual

Shop fox
Shop fox W1690 owner's manual
EHEIM
EHEIM Professionel-3 2080 operating instructions

Franklin Water Treatment
Franklin Water Treatment POZ1-10 Installation instructions and owner's manual

Jet
Jet AFS-1000B Operating instructions and parts manual
