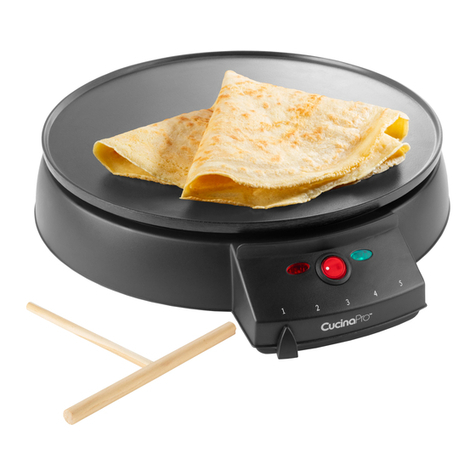
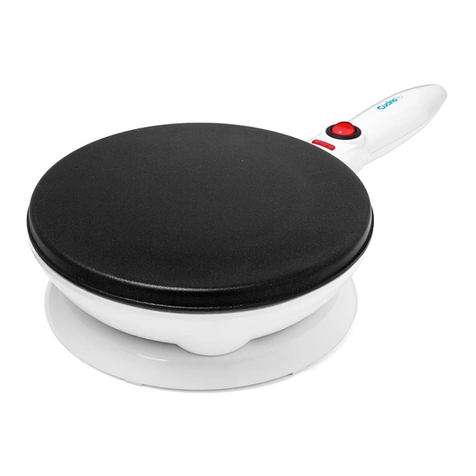
CucinaPro 1448 User manual

GRIDDLE & CREPE MAKER
#1448
IMPORTANT SAFEGUARDS
When using electrical appliances, basic safety precautions should always be
followed, including:
1. Read all instructions.
2. Do not touch hot surfaces, instead use the handles.
3. To protect against electrical shock, do not immerse power cord, plug
or appliance in water or any other liquid.
4. If the power cord is damaged, the manufacturer (or a similarly
qualified person) must replace it in order to avoid a hazard.
5. Do not use outdoors
6. Close supervision is necessary when any appliance is being used by
or near children.
7. Avoid contact with moving parts
8. The use of attachments not recommended or sold by the
manufacturer may cause fire, electric shock or injury.
9. Unplug from outlet when not in use and before cleaning. Allow
appliance to cool completely before putting on or taking off parts.
10. Do not operate any appliance with a damaged power cord or plug or
after the appliance malfunctions or is dropped or damaged in any

manner. Return appliance to manufacturer of its service agent for
examination, repair or electrical or mechanical adjustment.
11. Do not let the power cord hang over the edge of a table or counter or
touch any hot surface.
12. Do not use the appliance for other than intended use.
13. Do not place on or near a hot gas or electric burner, or in a heated
oven.
14. To disconnect, remove the plug from the wall outlet.
15. Do not clean the appliance with metal scouring pads. Pieces can
break off from the pad and touch electrical parts, creating a risk of
electrical shock.
POLARIZED PLUG
This appliance has a polarized plug (one blade is wider than the other). To
reduce the risk of electric shock, this plug will fit in a polarized outlet only one
way. If the plug does not fit fully in the outlet, reverse the plug. If it still does not
fit, contact a qualified electrician. Do not modify the plug in any way.
SAVE THESE INSTRUCTIONS - HOUSEHOLD USE ONLY
Longer extension cords may be used if care is exercised in their use. If an
extension cord is used, the marked electrical rating should be at least as great as
the electrical rating of the appliance. Arrange the longer cord so that it will not
drape over the counter top or tabletop where it can be pulled on by children
HOW TO USE YOUR ELECTRICAL CREPE MAKER
Place the unit on a level surface, never against a wall or in a corner or against
curtains. It should be free-standing and kept away from any flammable material.
The cooking surface can become extremely hot while the appliance is in use.
Make sure that no one touches the hot parts of the unit during use and the
cooling down period. Allow the unit to cool down before cleaning, transporting or
storing.
Never cut the crepes on the baking plate! Use only heatproof plastic or wooden
utensils so as not to scratch the non-stick coating on the baking plate.
FIRST USE
Remove the unit from box and properly dispose of packing materials.
Wipe the unit with a damp cloth and let dry well.

Insert the plug into a wall outlet. Move the temperature selection switch fully to
the right to level 5 and switch the crepe maker on using the On/Off switch. The
red light lights us and the unit starts to heat.
Pre-heat the unit for 4 minutes (until the green indicator light comes on) at the
highest temperature (5) and then turn it off and let it cool.
The first time the unit is used, a slight odor may develop. This is entirely
harmless. Please make sure that there is adequate
ventilation.
COOKING
Set up the crepe maker as above and once it reaches cooking temperature
(green light comes on) pour some crepe batter onto the baking plate, spreading it
with a circular movement using the batter spreader. Moisten the batter spreader
before use. This prevents the batter from sticking to it.
When you pour the batter onto the hot baking plate, you might hear some slight
crackling noises caused by differences in temperature and voltage. This does not
damage the appliance.
The green light will go on and off repeatedly during use. This indicates when the
unit is heating up in order to maintain the required temperature.

Allow the crepe to cook until the surface is no longer liquid and the crepe can be
moved slightly.
Insert a spatula under a third of the crepe, lift the crepe and turn it over.
Leave the crepe to cook briefly until done. Lift it slightly with the spatula to
check. The crepe should be visibly cooked through but not yet brown. Cooked
this way, it can be easily folded or rolled.
Remove the crepe from baking plate.
If you wish to cook another crepe and the last crepe was too dark, move the
temperature selection switch down slightly.
When finished, remove the plug from the wall outlet and let the appliance cool.
Spread or fill the crepe according to taste and fold it or roll it.
CLEANING
Remove the plug from the wall socket and allow the crepe baker to cool. Take a
damp cloth and clean the surface, and edges.
The batter spreader can be washed, but do not allow it to soak in water.
Once dry, store in a safe place.

RECIPES
BASIC CREPE BATTER
Yields about 22 six inch crepes
4 Large eggs
1 ½ Cups milk; more as needed
1 ½ Cups all-purpose flour
1/4th Teaspoon salt
2-3 Tablespoons butter, for basting the crepe maker cooking surface
Combine the eggs and milk in a bowl, add the flour and salt and whisk until
smooth.
Separately, combine the flour and salt in a large bowl. Push the flour aside to
make a well in the center. Break the eggs into the center and pour in ¾ Cup of
the milk mixture. Whisking constantly, gradually draw the flour until you have a
thick mixture. Add another ¾ Cup of the milk mixture. Whisk until the mixture
forms a smooth batter.
Strain the batter, to remove any lumps, into a quart size measuring cup with a
spout and let the batter rest at room temperature for 30 minutes.
Melt the butter and use a pastry brush to put a coating to the cooking plate
before pouring and cooking. Transfer the crepe to a cooling rack. Proceed with
the remaining batter. Once cool, stack the crepes between sheets of waxed
paper.
KEEPING CREPES WARM
If you want to serve crepes, warm without baking, broiling or frying them, cover
the stack of crepes as they are made using a cover made of foil.
FREEZE OR REFERIGERATE YOUR CREPES
Crepes will keep up to a month in the freezer, a week in the refrigerator. Stack a
batch on a sheet or foil or waxed paper, then insert into a large plastic food
storage bag and twist and fasten opening, pressing out as much air as possible.
To use the crepes, allow the crepes to warm up to room temperature. They will
peel apart with a gentle pull. If you are in a hurry, the stack can be warmed by
covering them with foil in a flat pan in a low oven.
FRESH MUSHROOM CREPES
1 Batch crepes (about 16)
1 Pound fresh mushrooms

¼ Cup butter
½ Teaspoon salt
¼ Teaspoon pepper
½ Teaspoon seasoned salt
2 Cubes beef bouillon
4 Tablespoons dry white wine
1 Cup sour cream
2 Tablespoons minced chives
Slice mushrooms and sauté in melted butter in a skillet for about 4 minutes. Add
salt, pepper, seasoned salt, bouillon and wine. Cook over medium heat several
minutes. Stir in sour cream and chives. Heat, but do not boil. Spoon about 4
tablespoons mushrooms and sauce onto center of crepes, browned side out and
fold over.
BLUEBERRY BLINTZES
1 Batch crepes (about 10)
1 ½ Cups Ricotta cheese
4 Ounces cream cheese
3 Tablespoons confectioners’ sugar
1 Lemon, zested or finely grated
1 Egg
Combine ricotta, cream cheese, confectioners’ sugar, lemon zest and egg.
Blend until smooth then chill filling to firm it up so that it doesn’t squirt out of the
crepes.
Spoon about ¼ cup of the cheese filling along the lower third of the crepe. Fold
the bottom edge away from you to just cover the filling, then fold the 2 sides in
towards the center. Roll the crepe away from you a couple of times finishing with
the seam side down. Put on a plate seam side down until all your blintzes are
done. Then in a skillet over medium heat, brush with melted butter and pan-fry
the blintzes a few at a time until they brown and crisp quickly. Drain on paper
towel and serve hot.
BLUEBERRY SAUCE
2 Tablespoons butter
2 Pints blueberries, cleaned
¾ Cups sugar
1 Teaspoon sugar
1 Teaspoon cornstarch
Juice of 1 lemon

Combine the butter, blueberries, sugar, cornstarch and lemon juice in a small pot
over medium-high heat. Bring up to a low boil and stir gently until the berries
break down and release their juice. The consistency should remain a bit chunky.
As it cools down slightly, it will thicken up a bit.
STRAWBERRY SAUCE
3 Cups fresh strawberries
½ Cup sugar
¼ Cup water
1 Tablespoon cornstarch
Dash salt
1 Teaspoon butter
Wash and hull strawberries; crush 1 cup. Slice remainder and set aside.
Combine crushed berries, sugar, water, cornstarch and salt. Cook over medium
heat, stirring constantly, until mixture thickens and boils. Boil and stir 1 minute.
Add butter and fold in sliced berries.
I would also consider spreading on fruit jams and marmalades such as Apricot,
Blackberry or Raspberry.
CREPE SERVING HINTS
Starting with a pile of flat crepes, you can use them in a number of ways,
depending on whether you want a simple crepe or a fancy filled crepe. They can
be served cold, warm or hot, baked, broiled or crisp-fried in oil.
Here are some ideas on handling crepes:
FOLD IN QUARTERS: When served plain (or spread with a thin
filling) and served in sauce, or used hot off the pan for dipping in an appetizer
dip.
ROLLED: When filled with a few spoonfuls of an entrée or dessert
mixture and quickly baked or broiled, or filled with cold mousse, ice cream or
whipped cream.
STACKED: To make a cake (gateau) or in a casserole dish, with
appropriate fillings and toppings, served hot or cold.
CREATE YOUR OWN FILLINGS
Crepes welcome many kinds of fillings. Try them hot off the griddle brushed with
unsalted butter and jam, make up your own filling or try some of these
suggestions.

Fill with hunks of cooked crabmeat and ripe avocado.
Line with a shaved piece of ham and sprinkle with grated cheese. Fold in half
and heat until the cheese melts.
Spread with cream cheese mixed with dill & chives. Layer some thinly sliced
smoked salmon. Roll and cut into slices.
CucinaPro
This product is warranted against defect in materials and
manufacturing for one (1) year from the date of original purchase. If
the product proves to be defective during this period, it will be
repaired or replaced free of charge.
This warranty does not apply to damage resulting from misuse,
accidents or alterations to the product or to damage incurred in
transit.
CucinaPro, Inc
4785 State Rd
Cleveland, OH 44109
P 216-351-3002 - F 216-351-3010
www.cucinapro.com
Table of contents
Other CucinaPro Kitchen Appliance manuals
CucinaPro
CucinaPro 340 User manual

CucinaPro
CucinaPro 1453 User manual

CucinaPro
CucinaPro 1447 User manual

CucinaPro
CucinaPro 760 User manual

CucinaPro
CucinaPro 1447 User manual

CucinaPro
CucinaPro 1448 User manual

CucinaPro
CucinaPro 220-05NS User manual

CucinaPro
CucinaPro 530 User manual

CucinaPro
CucinaPro 1550 Quick guide

CucinaPro
CucinaPro 220-05NS User manual

CucinaPro
CucinaPro 1447 User manual

CucinaPro
CucinaPro 1445 User manual

CucinaPro
CucinaPro 1551 User manual

CucinaPro
CucinaPro 220-06 User manual

CucinaPro
CucinaPro 1550 User manual

CucinaPro
CucinaPro 1552 User manual

CucinaPro
CucinaPro 220-05P User manual

CucinaPro
CucinaPro 300 User manual
CucinaPro
CucinaPro 447 User manual