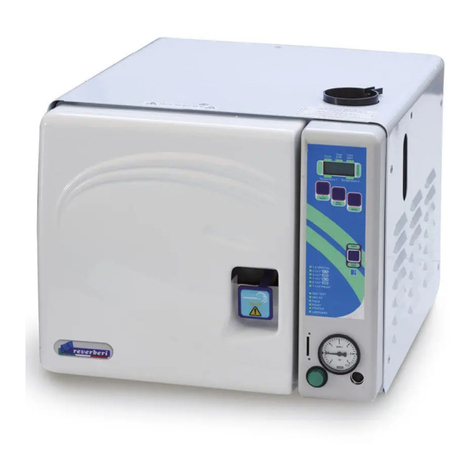
Cuisinart baby CS-6C SERIES User manual

For your safety and continued enjoyment of this product, always read the instruction book carefully before using.
Electric Steam Sterilizer
CS-6C SERIES
INSTRUCTION BOOKLET
TM

23
IMPORTANT SAFEGUARDS
When using an electrical appliance, basic safety precautions should
always be adhered to, including the following:
1. READ ALL INSTRUCTIONS.
2. Always unplug unit from outlet when not in use, before
putting on or taking off parts, and before cleaning. To
unplug, grasp plug and pull from electrical outlet. Never pull
cord. Allow to cool before handling.
3. To protect against risk of electric shock, do not put cord, plug or
unit base in water or other liquids.
4. Close supervision is necessary when any appliance is used by or
near children.
5. Do not operate any appliance with a damaged cord or plug,
or after the appliance malfunctions, or if appliance has been
dropped or damaged in any manner. Return the appliance to
the nearest authorized Cuisinart Service Facility for examination,
repair, and electrical or mechanical adjustment.
6. The use of attachments not recommended or sold by Cuisinart
may cause fire, electric shock or injury.
7. Do not let cord hang over edge of table or counter, or touch hot
surfaces.
8. Don’t attempt to handle the electrical cord to plug or unplug the
unit when your hands are wet.
9. Do not use outdoors.
10. Do not touch hot surfaces. Use handles or knobs.
11. Extreme caution must be used when moving an appliance
containing hot oil or other hot liquids.
12. When in use, the sterilizer contains hot water. Be careful to avoid
spilling any water on yourself when removing items from the
sterilizer.
13. Do not operate your appliance in an appliance garage or under
a wall cabinet. When storing in an appliance garage, always
unplug the unit from the electrical outlet. Not doing so could
risk a fire, especially if the appliance touches the walls of the
garage or the door touches the unit as it closes.
14. Do not use the appliance for other than intended use.
15. Where applicable, always attach plug to appliance and check
that the control is OFF before plugging cord into wall outlet. To
disconnect, turn the control to OFF, then remove plug from wall
outlet.
16. Do not place on or near a hot gas or electric burner, or in a
heated oven.
17. WHEN IN USE THE STERILIZER CONTAINS BOILING WATER
AND STEAM ESCAPES FROM THE VENT IN THE LID.
18. Not for space heating purposes.
SAVE THESE INSTRUCTIONS
FOR HOUSEHOLD USE ONLY
SPECIAL CORD SET INSTRUCTIONS
A short power supply cord is provided to reduce the risks of
becoming entangled in or tripping over a longer cord. Extention cord
are available and maybe used if care is excercised in their use. If an
extension cord (or a long detachable power-supply cord) is used:
1. The marked electrical rating of the detachable power-supply cord
or extension cord should be at least as great as the electrical
rating of the appliance.
2. If the appliance is of the grounded type, the extension cord
should be a grounding type 3-wire cord.
3. The longer cord should be arranged so that it will not drape over
the countertop or tabletop where it can be tripped over, snagged
or pulled on unintentionally (especially by children).
FEATURES AND BENEFITS
1. Lid - helps to accommodate different sized bottles and parts and
contains steam for quick sterilization.
2. Removable Lower Tray - holds 6 glass or plastic bottles of all
brands, shapes and sizes.
3. Removable Upper Tray - can be used to sterilize nipples, paciers,
teethers and other small items.
4. Stem - keeps the trays securely in place.
5. Measuring Cup - stores conveniently inside the unit lid.
6. Sterilizing Chamber - wipes clean with a damp cloth.
7. Simple Dial Control - easy ON/OFF operation.
8. Cord Wrap (not shown)
9. BPA Free (not shown) - all materials that come in contact with
food are BPA free.
NOTICE
This appliance has a polarized plug (one prong is wider than the
other). As a safety feature, this plug will t into a polarized outlet only
one way. If the plug does not t fully in the outlet, reverse the plug. If
it still does not t, contact a qualied electrician. Do not attempt to
defeat this safety feature.
CONTENTS
Important Safeguards..........................................................................2
Features and Benefits .........................................................................3
Before First Use .................................................................................4
Operation........................................................................................ 4-5
Tips and Hints .....................................................................................6
Troubleshooting...................................................................................6
Cleaning and Maintenance .................................................................6
Warranty ..............................................................................................7
3
1
5
4
6
7
2

45
BEFORE THE FIRST USE
Carefully unpack the unit and remove any packag-
ing and promotional labels in or on the sterilizer.
Rinse all accessories thoroughly with warm soapy
water.
OPERATION
Before you begin sterilizing, thoroughly wash all
bottles and feeding accessories in warm soapy
water or in the dishwasher.
1. Remove the measuring cup from the
sterilizer lid by popping it up from the
bottom edge.
2. Lift off the sterilizer lid and set it aside.
3. Fill the measuring cup with water to the
ll line on the side of the measuring cup
(100mL), then pour it into the sterilizing
chamber.
NOTE: DO NOT EXCEED the
recommended amount of water.
4. Slide the stem through the lower tray to
assemble, then place them in the sterilizing
chamber.
5. Place the bottles neck downward into the
designated areas on the lower tray. Note:
The tray hold up to 6 of the largest bottles
available.
6. Lift the upper tray by the center post in the
middle of the tray and slide it over the stem
attached to the lower tray in the steaming
chamber.
7. Loosely scatter the unassembled
components on the upper tray.
(It is important that all bottle parts are
disassembled before adding them to the
upper tray for proper sterilization).
8. Replace the measuring cup in the sterilizer
lid and then place the lid on top of the
sterilizing chamber.
9. Turn the dial to ON and the LED light will
illuminate to indicate the sterilizing has
begun. The unit and the LED light will shut
off automatically once sterilizing is complete.
Turn the dial to the OFF position.
Caution: Hot surface. Avoid contact. During
use, never touch the base, the lid or the lid
handles.
10. Allow the sterilizer to cool for 10 minutes
before opening, and wash your hands
thoroughly before handling the sterilized
items.
11. Carefully remove the sterile contents by
lifting up from the stem sticking through the
upper tray. Use caution when removing, as
the items will be hot.
NOTE: The contents will remain sterile for up
to 24 hours if the sterilizer is unopened.
12. To help prevent a buildup of calcium in the
unit, drain and rinse the unit after each use.
To empty the unit of excess water, wait until
the unit has cooled, then tip the unit onto its
side over the sink and any extra water will
come out.
7. 9.
11.
10. 12.
8.
1. 3.
5. 6.4.
2.

67
WARRANTY
Limited 3 Years Warranty
We warrant that this Cuisinart product will be free of defects in materials or
workmanship under normal home use for 3 years from the date of original
purchase. This warranty covers manufacturer’s defects including
mechanical and electrical defects. It does not cover damage from consumer
abuse, unauthorized repairs or modifications, theft, misuse, or damage due
to transportation or environmental conditions. Products with removed or
altered identification numbers will not be covered.
This warranty is not available to retailers or other commercial purchasers or
owners. If your Cuisinart product should prove to be defective within the
warranty period, we will repair it or replace it if necessary. For warranty
purposes, please register your product online at www.cuisinart.ca to
facilitate verification of the date of original purchase and keep your original
receipt for the duration of the limited warranty. This warranty excludes
damage caused by accident, misuse or abuse, including damage caused
by overheating, and it does not apply to scratches, stains, discolouration or
other damage to external or internal surfaces that does not impair the
functional utility of the product. This warranty also expressly excludes all
incidental or consequential damages.
Your Cuisinart product has been manufactured to the strictest specifications
and has been designed for use only in 120 volt outlets and only with
authorized accessories and replacement parts. This warranty expressly
excludes any defects or damages caused by attempted use of this unit with
a converter, as well as use with accessories, replacement parts or repair
service other than those authorized by Cuisinart.
If the appliance should become defective within the warranty period, do
not return the appliance to the store. Please contact our Customer Service
Centre:
Toll-free phone number:
1-800-472-7606
Address:
Cuisinart Canada
100 Conair Parkway
Woodbridge, Ont. L4H 0L2
Email:
Model:
CS-6C
To facilitate the speed and accuracy of your return, please enclose:
•$10.00forshippingandhandlingoftheproduct(chequeormoneyorder)
•Returnaddressandphonenumber
•Descriptionoftheproductdefect
•Productdatecode*/copyoforiginalproofofpurchase
•Anyotherinformationpertinenttotheproduct’sreturn
* Productdatecodecanbefoundontheundersideofthebaseofthe
product. The product date code is a 4 or 5 digit number. Example, 90630
would designate year, month & day (2009, June 30th).
Note: We recommend you use a traceable, insured delivery service for
added protection. Cuisinart will not be held responsible for in-transit damage
or for packages that are not delivered to us.
To order replacement parts or accessories, call our Customer Service Centre
at 1-800-472-7606. For more information, please visit our website at
www.cuisinart.ca.
TIPS AND HINTS
For best results, use puried water to
minimize a buildup of calcium in the sterilizing
chamber.
TROUBLESHOOTING
Q: Why won’t sterilizing start when I turn
the unit on?
A: Check that the plug is securely inserted
into the outlet.
A: The sterilizing chamber may be empty.
Add water to the sterilizing chamber.
Q: How do I empty the unit of excess
water?
A: To empty the unit of excess water, tilt the
unit onto its side over the sink and any
extra water will come out.
Q: Why is there a white residue in the ster-
ilizing chamber?
A: Mineral-rich water causes calcium depos-
its to build up in the sterilizing chamber.
The unit should be cleaned out once a
month to avoid this buildup. Refer to the
Decalcication section in Cleaning and
Maintenance, following. To help prevent/
minimize this buildup, fresh or puried
water can be used.
Q: Why are the bottles coming out with
marks on them?
A: This can happen when the sterilizer has a
buildup of calcium deposits. Refer to the
Decalcication section in Cleaning and
Maintenance, following.
Q: Why is the sterilizing cycle taking so long?
A:
Too much water has been added to the
sterilizing chamber. Exactly 100mL of water
should be used each time to sterilize.
CLEANING AND
MAINTENANCE
Cleaning accessories and base
Clean all accessories in warm soapy water or
on the top rack of the dishwasher.
Wipe the base clean with a damp sponge or
cloth. Dry it immediately. Never submerge the
base or the plug in water or other liquids.
Decalcification
Sometimes mineral deposits form inside the
steam chamber that can cause damage to the
machine. To avoid buildup of these minerals,
the unit should be de-scaled once a month.
To descale, pour 1 cup (250ml) of white
(distilled) vinegar into the sterilizing cham-
ber. Let it stand for at least 2 hours and then
empty. Rinse the unit with water after you
empty the unit of the vinegar to ensure it is
properly rinsed out. Repeat if necessary.
Storage
The Cuisinart BabyTM Electric Steam Sterilizer
stores neatly on the countertop in a minimum
of space. When it is not in use, make sure to
empty any leftover water from the unit and
leave it unplugged. The hidden cord storage
underneath the base will help keep excess
cord off the countertop.
The Cuisinart BabyTM Electric Steam Steril-
izer is intended for HOUSEHOLD USE ONLY.
Any service other than cleaning and normal
user maintenance should be performed by an
authorized Cuisinart Service Representative.

Juicers Blenders
TM
IB-11645-CAN
Cuisinart offers an extensive assortment of top quality products to make life
in the kitchen easier than ever. Try some of our other countertop appliances,
cookware, tools and gadgets.
www.cuisinartbaby.ca
www.cuisinart.ca
Baby Food Maker
& Bottle Warmer
Sterilizer Tools and
Gadgets
Any trademark or service mark of third parties used herein is the trademark or service mark of its respective owners.
©2012 Cu s nart Canada
100 Cona r Parkway,
Woodbr dge, Ontar o L4H 0L2
Pr nted n Ch na
12CC136497
Table of contents
Popular Steriliser manuals by other brands

Viqua
Viqua Sterilight Platinum P410-HO owner's manual

Market Forge Industries
Market Forge Industries Sterilmatic Installation & operation manual

Lena Lighting
Lena Lighting UV-C STERILION 36W Installation instruction

Lisa
Lisa 500 Series user manual

Buffalo
Buffalo CJ306 instruction manual

Munchkin
Munchkin 59S owner's guide