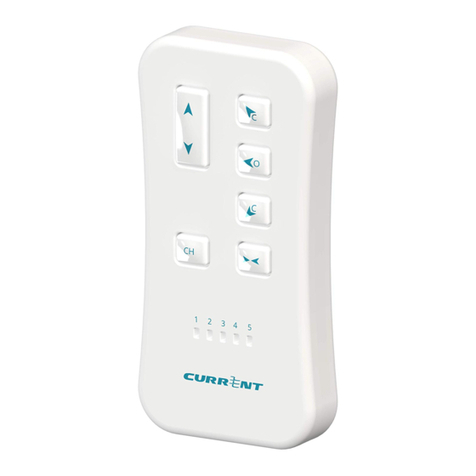
Current E-WAND User manual

1
CPC Bridge setup
guide
TABLE OF CONTENTS
A. Set up the Current Products Corp. Bridge
with the MyCurtains app...............................................
B. Set Up the Current Products Corp. Bridge
wihout the MyCurtains app...........................................
C. Set Up with Google Home.........................................
D. Set Up with Amazon Echo (without using
built-in Zigbee hub)..........................................................
Statements............................................................................
2-4
5-6
7-9
10-12
13-15

2A. Set up the Current
Products Corp. bridge with
the MyCurtains App
1. Download the App
Download the Current Products Corp. app
(MyCurtains) from the Google Play Store or the
Apple App Store. Follow the prompts to set up your
account.
2. Power the Bridge
Find an outlet in a location central to the devices you are
installing in the home. Insert the micro-usb end of the
included power cable into the power port on the bridge.
Plug the other end of the cable into an outlet [Fig. A1].
Place the bridge at least 2ft off the ground.
Figure A1; Plug in the bridge
The LEDs on the bottom of the bridge [Fig. A2] will be
solid red and solid green during start up. The LEDs will
then turn solid red.
Figure A2; LED indicators
If you would like to set up the E-Wand onto a mesh
network WITHOUT WiFi, please proceed to the
next section.
If you have not yet installed your E-Wands, please
do so now.

3
Figure A5; Press and release the recessed button
3b. Connect Bridge to Account
During the set up process, the app will ask you to scan
the QR code located on the bottom of the bridge [Fig.
A4]. Scan the code when prompted. The LED will turn
to your account.
Your bridge is now connected to your account.
Figure A6; Scan the QR Code on the bottom of the bridge
If you had previously set up your account and are adding
top of the Dashboard. [Fig.A5]. On the next page hit the
plus (+) icon at the top right.
3a. (optional) Add a New Hub to an Existing
Account
Beach House
Figure A3; Hit the Bridge Icon
Beach House
Figure A4; Hit the Plus (+) Icon
After setting up your account on the app (or performing
step 3a), follow the steps in the app. After inputting
bridge information, it will prompt you to enable the
Bluetooth on the bridge. The app will ask you to press
and release the recessed button on the bottom of the
bridge [Fig. A3]. The LED lights will turn solid blue and
solid red.

4
You will see the device pop up in the menu on your Smart
Phone screen. Select the appropriate device, using the
name the device.
If you would like to add any additional devices, repeat
step 4.
E-Wand
Figure A9; Device will show up, hit
Register
Once your devices have been added, use the app to set up
groups, scenes, and schedules as desired.
On any E-Wand you wish to pair to the bridge (you can
add more than one device at a time), press and release
the programming button 3 times (without hearing a
it is searching for a network.
when it has discovered the network or a failure beep
4. Pair and Add Devices
In the app under devices, hit the + sign [Fig. A5].
Figure A7; Hit the + to add a device
Figure A8; Press and release the
programming button quickly three times

5
In some rare instances you may want to establish a mesh
network without using the app or WiFi.
1. Power the Bridge
Figure B1; Plug in the bridge.
turn solid red [Fig. B2].
Figure B2; LEDs will ash red and
green, then turn solid red.
Push a tack or paperclip into the hole in the back of the
bridge and press and hold the button for 5 seconds or
[Fig. B3].
2. Put Bridge in Pairing Mode
Figure B3 - Press and release the
recessed button on the bottom of the
bridge
the LEDs will stay red [Fig. B4].
Figure B4; LEDs will ash blue, then turn
solid red.
b. Set up the Current
Products Corp. bridge
without the mycurtains app
Find an outlet in a location central to the drapery that
you are installing in the home. Insert the micro-usb end
of the included power cable into the power port on the
bridge. Plug the other end of the cable into an outlet [Fig.
B1]. Place the bridge at least 2ft off the ground.

6
3. Pair E-Wand
successfully or a failure beep (Beethoven’s 5th) if it
If you have additional devices you would like to add,
repeat Steps 2 & 3.
putting the unit into pairing mode again. You have 5
minutes until the bridge times out of pairing mode.
If the pairing is not successful again, try a Master Reset
on the E-Wand (instructions on pg. 39 of E-Wand
Installation Manual and User Guide).
Figure B5; Press and release
programming button three times.
Figure B6; Green LED will ash to indicate
successful pairing.
On any unit that you would like to pair to the bridge, press
and release the programming button three times without
hearing a beep [Fig. B5]. The E-Wand should start beeping
to indicate it is in Zigbee Pairing mode.

7
Once the Current Products Corp. Bridge has been setup with the
MyCurtains app and all devices have been added, you can connect
the system to Google Home for voice control.
1. Set up Google Home and CPC Bridge
If your Google Home device is not yet set up, do so now
by following the instructions that came with your Google
Home.
Also be sure the bridge and app have been setup. For
instructions on how to set up your bridge and MyCurtains
app, see the Bridge Set Up Guide on page 2.
Figure C1; Open App and hit Add Figure C2; “Set Up Device”
Figure C3; “Works with Google” Figure C4; Find and Select Service
Home
C. Set up with google home
2. Set up Device
Open the Google Home app on your smart device and
multiple homes connected to one account).

8
Figure C5; Sign In Figure C6; Select Devices
3. Sign in and Customize
set up your bridge and MyCurtains app to log into the
Current Products Drapery service.

9
Figure C7;Select Rooms Figure C8; Review and Conrm
You can say open or close, and use percentages to get
living loom
kitchen
Google Home will know the names of the devices and
groups based on what they are named in the app. You can
control devices, groups, or trigger scenes through Google,
and create custom names for each in the MyCurtains app.
4. Using Google Home

10
1. Set up your Echo and CPC Bridge
If your Amazon Echo device is not yet set up, do so
now by following the instructions that came with your
Amazon Echo.
Also be sure the bridge and MyCurtains app have been
setup. For instructions on how to set up your bridge and
app, see the Bridge Set Up Guide on page 2.
2. Download the Skill
you are on that page, hit the spyglass icon at the top right
hand corner.
like to use [Fig D1-D2]. If you want to be able to trigger
Alexa using both phrases, be sure to download both
skills.
D. Set up with Amazon Echo
(Alexa)
(without using Alexa plus built
in hub)
Once the Current Products Corp. Bridge has been setup
with the MyCurtains app and all devices have been added,
you can connect the system to Amazon Alexa.
Be aware that certain Alexa devices have a built-in Zigbee
hub (Echo Plus). If you would like to use the built-in hub
instead of the CPC hub, proceed to the instructions in
E-Wand(s).
You do not have to use the Alexa-integrated hub on Echo
Plus devices unless you wish to do so.

11
Figure D1; Download the Alexa Skill Figure D2; Download the Alexa Skill
3. Sign In
up your bridge and MyCurtains app. You are now able
to control your devices via Amazon Alexa [Fig. D3-D4].
Figure D3; Hit “Enable” Figure D4; Sign In using credentials
established when setting up your
MyCurtains account.

12
4. Using Alexa
Trigger Alexa using the trigger word selected when you
installed the skill.
living loom
kitchen
You can control devices, groups, or trigger scenes
through Alexa, and create custom names for each in the
MyCurtains app.

13
FCC STATEMENT
Contains:
FCC ID: A3LSIP005AFS30
(1) This device may not cause harmful interference, and
(2) This device must accept any interference received, including interference that may cause undesirable operation.
This equipment has been tested and found to comply with the limits for a Class B digital device, pursuant to part 15 of the FCC Rules. These limits are
designed to provide reasonable protection against harmful interference in a residential installation. This equipment generates, uses and can radiate radio
frequency energy and, if not installed and used in accordance with the instructions, may cause harmful interference to radio communications. However,
there is no guarantee that interference will not occur in a particular installation. If this equipment does cause harmful interference to radio or television
reception, which can be determined by turning the equipment off and on, the user is encouraged to try to correct the interference by one or more of the
following measures:
• Reorient or relocate the receiving antenna.
• Increase the separation between the equipment and receiver.
• Connect the equipment into an outlet on a circuit different from that to which the receiver is connected.
• Consult the dealer or an experienced radio/ TV technician for help.
This equipment complies with FCC radiation exposure limits set forth for an uncontrolled environment. This equipment should be installed and operated
with a minimum distance of 20cm between the transmitter’s radiating structure(s) and the body of the user or nearby persons.

14 IC STATEMENT
cause harmful interference, and (2) this device must accept any interference received, including interference that may cause undesired operation.
Cet appareil est conforme avec Industrie Canada exempts de licence standard RSS (s). L’opération est soumise aux deux conditions suivantes:(1) cet appareil
ne peut causer d’interférences, et (2) cet appareil doit accepter toute interférence, y compris les interférences qui peuvent causer un mauvais fonctionnement
de l’appareil.
Industry Canada Radiation Exposure Statement and Limitations on Use
This equipment complies with IC RSS-102 radiation exposure limits set forth for an uncontrolled environment. This equipment should be installed and
operated with minimum distance 20 cm between the radiator and your body. This equipment should be installed and must not be co-located or operating in
Canada, only Channel 1~11 can be operated and these channel assignments deal only with the 2.4 GHz range.

15
EU Disclosures
Hereby, Samsung declares that this IoT Module is in compliance with the essential requirements and other relevant provisions of Article 3 of the Radio

16
Current Products Corp.
1995 Hollywood Ave.
Pensacola, FL 32505
www.currentproductscorp.com
844-307-7435
www.myewand.com
Other manuals for E-WAND
4
Other Current Network Hardware manuals
