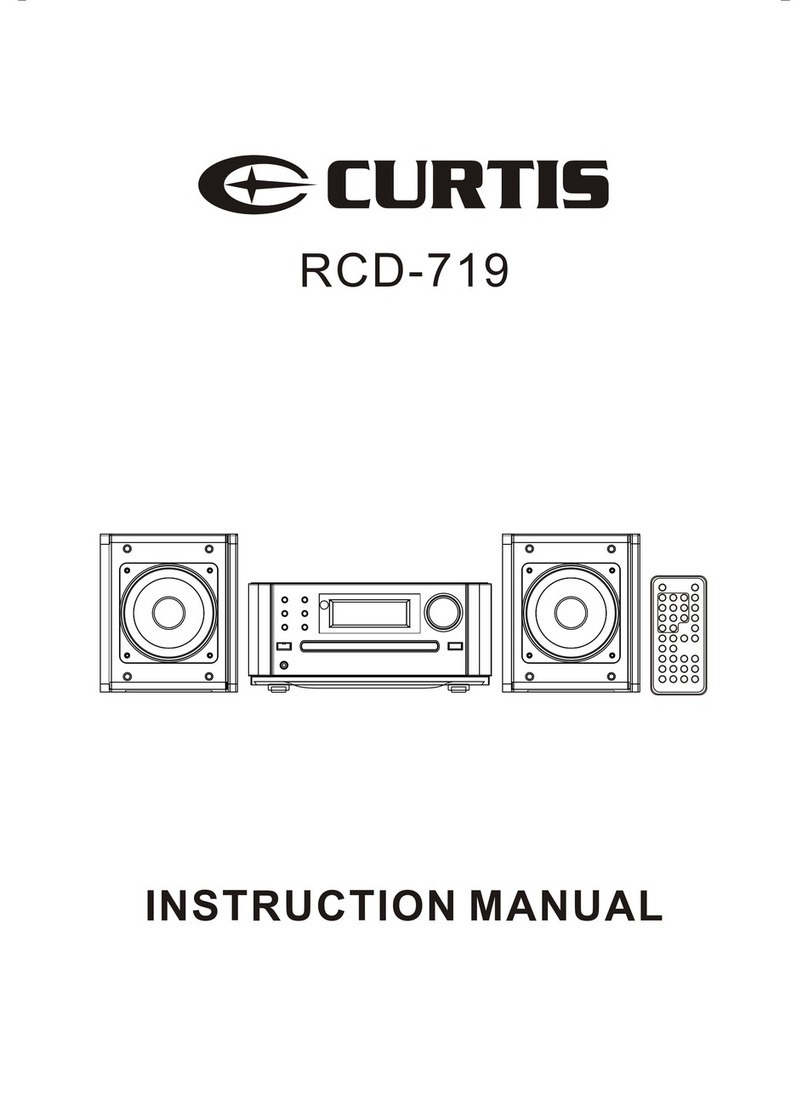
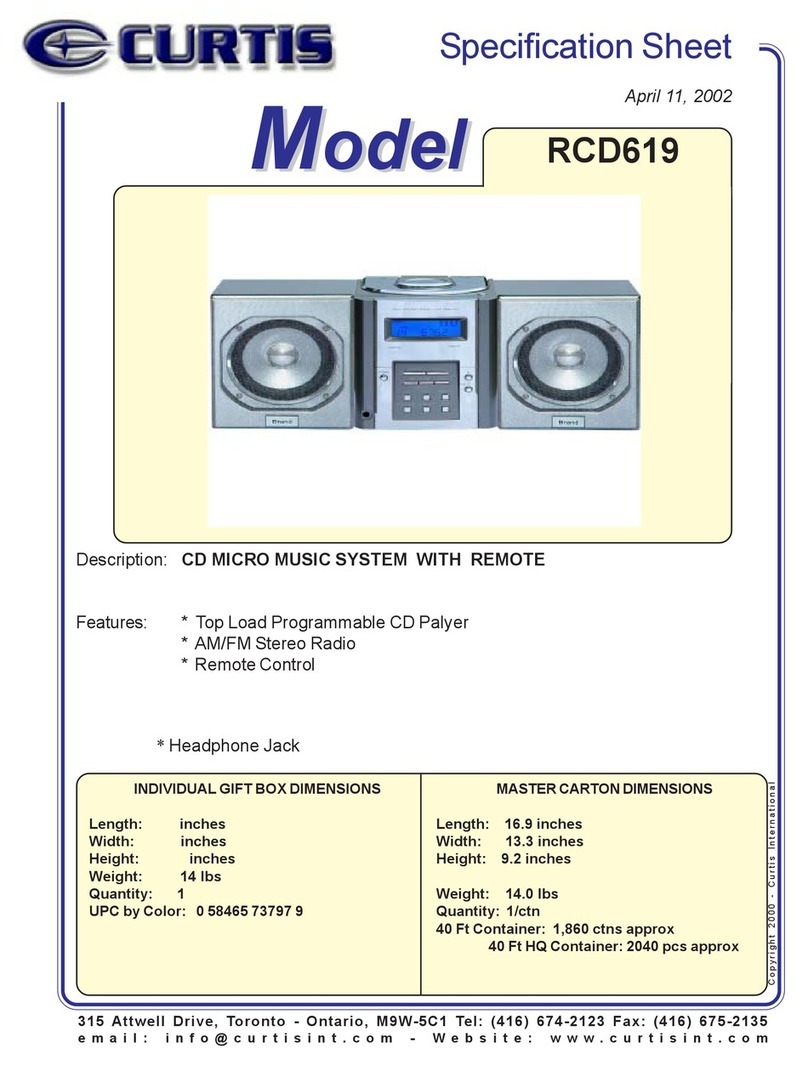
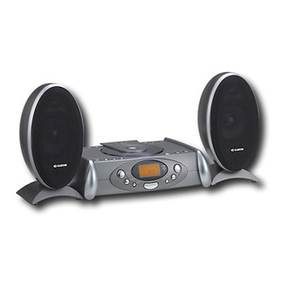
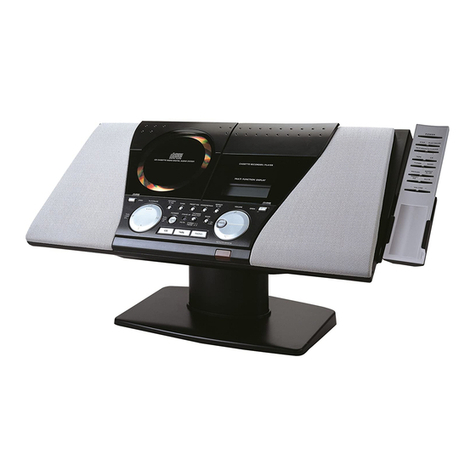
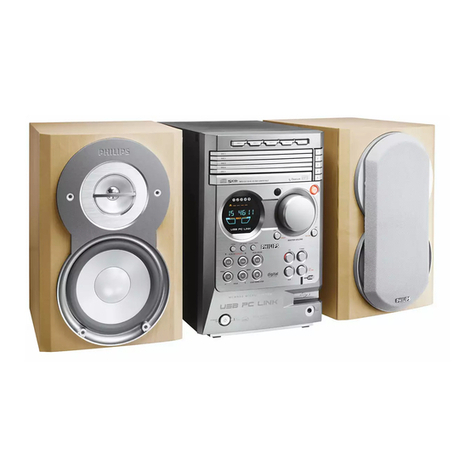
Curtis RCD739UK User manual

RCD739UK (Eng.)(A5)17-8-2007/L
TocleantheCDplayer:
Dustonthepickuplenscanleadtoerraticoperationandinterruptionofthesoundduringplay.
NOTE:Donottouchthesurfaceofthepickuplens.Donotallowanyliquidsontheinsideoftheproduct.
------Tocleanthepickuplens,opentheCDDoorandblowthedustoffofthepickuplensusingacamera
lensblower(availableatmostcamerastores)
-----TocleantheCDplayercabinet,useasoft,dampclothtowipeofftheexteriorsurface.
-----Neverusebenzeneorotherstrongchemicalcleaners,asthesecoulddamagetheproduct'sfinish.
RCD739 (Eng.)(A5)
- 1 -
RCD739 (Eng.)(A5)
- 2 -
Digital CD/Radio Stereo System with Remote
MODEL: RCD739UK
INSTRUCTION MANUAL
Operating Instructions
BEFORE OPERATING THIS PRODUCT, READ, UNDERSTAND,
AND FOLLOW THESE INSTRUCTIONS.
Be sure to save this booklet for future reference.
ENGLISH SAFETY INSTRUCTIONS
CAUTION : TO PREVENT ELECTRIC SHOCK, MATCH WIDE BLADE OF PLUG TO WIDE SLOT,
FULLY INSERT.
WARNING : TO REDUCE THE RISK OF FIRE OR ELECTRIC SHOCK, DO NOT EXPOSE THE
APPLIANCE TO RAIN OR MOISTURE.
1. Read instructions-All the safety and operating instructions should be read before the appliance is
operated.
2. Retain instructions-The safety and operating instructions should be retained for future reference.
3. Head Warnings-All warnings and cautions on the appliance and in the operating instructions should
be adhered to.
4. Follow instructions-All operating and use instructions should be followed.
5. Water and Moisture-The appliance should not be used near water, e.g. near a bathtub, washbowl,
kitchen sink, laundry tub, in a wet basement, or near a swimming pool or the like.
6. Wall or Ceiling Mounting-The appliance should not be mounted to a wall or ceiling.
7. Ventilation-The appliance should be situated so that its location or position does not interfere with its
proper ventilation. For example, the appliance should not be situated on a bed, sofa, rug or similar
surface that may block the ventilation openings, or placed in a built-in installation, such as a bookcase
or cabinet, that may impede the flow of air through the ventilation openings.
8. heat-The appliance should be situated away from neat sources such as radiators, heat registers, stoves,
or other appliances (including amplifiers) that produce heat..
9. Power Sources-The product should be operated only with the type of power supply indicated on the
marking label. If you are not sure of the type of power supply to your home, consult your product
dealer or local power company. For products intended to operate from battery power, or other sources,
refer to the operation instructions.
10.Grounding Polarization-This product may be equipped with a polarized alternating current line plug
(a plug having one blade wider than the other). This plug will fit into the power outlet only one way
this is a safety feature. If you are unable to insert the plug fully into the outlet, try reversing the plug.
If the plug should still fail to fit, contact your electrician to replace your obsolete outlet. Do not defeat
the safety purpose of the polarized plug.
11.Power-Cord Protection-Power supply cords should be routed so that they are not likely to be walked
on or pinched by items placed upon or against them, paying particular attention to cords at plugs,
convenience receptacles, and the point where they exit from the appliance.
12. Cleaning-The appliance should be cleaned only as recommended by the manufacturer.
13. Nonuse periods-The power cord of the appliance should be unplugged from the outlet when left
when left unused for a long period of time.
14. Object and Liquid Entry-Care should be taken so that objects do not fall and liquids are not spilled
into the product case through product openings.
15. Damage Requiring Service-Unplug this product from the wall outlet and take it to qualified service
personnel under the following conditions.
a) When the power-supply cord or plug is damaged.
b) If liquid has been spilled into, or objects have fallen into the product.
c) If the product has been exposed to rain or water.
d) If the product does not operate when used according to the operating instructions.
Adjust only those controls that are covered by the operating instructions as an improper
adjustment of other controls may interfere with the product's normal operation.
e) If the product has been dropped or damaged in any way.
f) When the product exhibits a distinct change in performance-this indicates a need for service.
16. Servicing-The user should not attempt to service the product beyond that described in the operating
instruction. All servicing should be referred to qualified service personnel.
17. Power Lines-An outside antenna system should not be located in the vicinity of overhead power
lines, or other electric light or power circuits, or where it can fall into such power lines or circuits.
When installing an outside antenna system, extreme care should be taken to keep from touching
power lines or circuits as contact with them might be fatal.
18. If an outside antenna is connected to the receiver, be sure the antenna system is grounded so as to
provide some protection against voltage surges and built up static. Section 810 of the National
Electrical Code ANSI/NEFA 70 provides information with respect to proper grounding of the mast
and supporting structure, grounding conductress, location of antenna-discharge unit, size of
grounding electrodes, and requirements for the grounding electrode (see figure).
19. Cleaning-Unplug this product from the wall outlet before cleaning. Do not use liquid cleaners or
aerosol cleaners. Use a damp cloth for cleaning.
20. Lightning-For added protection for this product during a lightning storm, or when it is left
unattended and unused for long periods of time, unplug it from the wall outlet and disconnect the
antenna or cable system. This will prevent damage to the product due to lightning and power-line
surges.
21. Safety Check-Upon completion of any service or repairs to this product, ask the service technician
to perform safety checks to determine that the product is in proper operation condition.
22. Overloading-Do not overload wall outlets, extension cords, or integral convenience receptacles as
this can result in a risk of fir or electric shock.
NEC NATIONAL ELECTRICAL CODE
Do not apply oil or petroleum products to this product.
CAUTION
Invisible laser radiation will be emitted when the product is open and interlocks are defeated.
Do not defeat the safety interlocks.
GRAPHIC SYMBOLS WITH SUPPLEMENTARY MARKINGS ARE LOCATED ON THE
BOTTOM OF THE UNIT.
USE OF CONTROLS, ADJUSTMENTS, OR PERFORMANCE PROCED URE HEREIN MAY
RESULT IN HAZARDOUS RADIATION EXPOSURE.
RCD739 (Eng.)(A5)
-3-
RCD739(Eng.)(A5)
-4-
MOUNTING LOCATION
RCD739(Eng.)(A5)
-5-
RCD739(Eng.)(A5)
-6-
LOCATIONOFCONTROLS
1.CDDoor
2.CDDoorOpenButton
3.Speaker
4.RepeatButton
5.VolumeControlKnob
6.ProgramButton
7.RandomButton
8.SKIP(FAST-FORWARD)button
9.FunctionSwitch(CD,AM,FM)
10.AlarmON/OFFButton
11.MinuteSetButton
12.LCDDisplay(CD,ClockandFrequency)
13.StereoLEDIndicator
14.HourSetButton
15.AlarmSetButton
16.SelectorSwitch(ON/OFF/AUTO)
17.TimeSetButton
18.SKIP(REWIND)button
19.TuningControlKnob
20.CDPlay/PauseButton
21.CDStopButton
22.RemoteSensor
23.HeadphoneJack
24.DCInputJack
REMOTECONTROL
1.PLAYButton
2.SKIP(FAST-FORWARD)button
3.ProgramButton
4.RepeatButton
5.RandomButton
6.STOPButton
7.SKIP(REWIND)button
ACOPERATION
Tooperatetheunitusing ACpower,connecta9VACadaptor(included)toanACoutlet
having120VAC.
CAUTION:
Whennotusing ACpower,disconnecttheACadapterfromthewalloutletbypullingthe
plug(notthecord).Donottouchthe ACadapterwithwethandsandplugfullyinsertedwithout
exposinganypartoftheblade.
HEADPHONEJACK
ThisunitwillacceptstereoheadphoneswithaØ3.5mmplug.Beforeconnectingtheheadphonessetthe
volumetominimumlevelasnottodamageyourearsortheheadphones.Connecttheheadphonestothe
headphonesjack.Thespeakerswillbeautomaticallydisconnected.
Warning:Prolongedexposuretohighsoundlevelsmaypermanentlydamageyourhearing. Youmaynot
hearsomewarningsoundwhilewearingtheseheadphones.
VOLUMECONTROL
AdjusttheVOLUMEcontroltothedesiredlevel.
RADIOSECTION
LISTENINGTOTHERADIO
1.SlideSELECTORSwitchto"ON"position.
2.SlideFUNCTIONSwitchtoselectAMorFMposition
3.RotatetheTuningControlKnobtoyourdesiredRadiostation.
4.ToturnoffRadio,SlideSELECTORswitchto"OFF"positiontoturnofftheunit.
Forbetterreception,
Thisunithasabuilt-inantennafor AM/FM,Locatetheunitwhereyoucanobtainthebestreception.
CLOCKSECTION
CLOCKSETTING
PressandholdTime./SETbuttontosettheclock
PressHourorMinbuttonrespectively
Note:Inradiomode,thefrequencywillappearatthe locationwheretimeappears.Pressandholdthe
Time/Setbuttontodisplaythecurrenttime;Pressandholdthe AL./Setbuttontodisplaythecurrent
alarmtime.
RCD739(Eng.)(A5)
-7-
ALARMTIMESETTING
1.SlideSELECTORswitcht o"OFF"or"AUTO"position.
2.PressandholdAl.SETbuttontosettheAlarmtime
3.PressHourorMinbuttonrespectively.
4.TurnonthealarmfunctionbypressingAL.ON/OFFbuttontillthealarmIconappears
Note.Whilealarmtimeison,itwillalarmfor3minutes.Toturnoffthealarm,presstheAL.ON/OFF
buttononce.
WakeupbyBuzzer
1.Aftersetthedesiredalarmtime.AndpresstheAL.ON/OFFbuttontillthealarmiconappears
2.SlidetheSELECTORswitchto"OFF"position.
WakeupbyCDorRadio
1.SlideSELECTORswitcht o"AUTO"position.
2.Setyourdesiredalarmtime.
3.TurnonthealarmfunctionbypressingAL.ON/OFFbuttontillthealarmIconappears
4.SlidetheSELECTORswitchto"AUTO"position.
5.SlidetheFunctionSwitchtoCD,AMorFMposition.
Whenthealarmtimeison,CD&RADIO(AM/FM)willbeautomaticallyplayed.
CDSECTION
PLAYINGACD
1.PresstheOpenbuttonofCDDoorwhereremarked"Open"toopentheCDDoor.
2.InsertaCDwiththelabelfacingupward.
3.ClosetheCDcompartmentbypressingtheuppercornerofCDDoor.
4.SlidetheFUNCTIONswit chtoCDposition
5.SlidetheSELECTORswitchto"ON"positiontoturnontheunit.
TheCDwillrotateforawhileandthenstop.
6.PressPLAY/PAUSEbutton tostartCDplaybackfromthefirsttrack.
7.PressoncemorePLAY/PAUSEbuttontomomentarilypause,Icon""willflash.Pressagain
PLAY/PAUSEbuttontoresumetoplayback
8.Tostoptheplayback,PressSTOPbutton.
TRACKSEARCH
PresstheSKIP/SEARCHbuttonduringplaytoskiptothedesiredtrack.
Pressthe"F.FWD"buttontoskiptothenexttrackonthedisc.
Pressthe"REW"buttontoskiptothebeginningofthecurrenttrack
Pressthe"REW"buttontwiceormoretoskiptoprevioustrack.
FORWARD/REVESESEARCH
PressandholdtheForwardorBackwardSKIP/SEARCHbuttonduringplaytoscanthediscathighspeed.
Whenthedesiredsectionofthedisciffound,releasetheButtonandnormalplaywill resume.
"F.FWD"-------------------Forward
"RE W"---------------- ---Backward
Pressandholdthe"F.FWD"buttonwhileplayingtoscanthecurrenttrackforwardathighspeed.
Pressandholdthe"REW"buttonwhileplayingtoscanthecurrenttrackbackwardathighspeed.
PROGRAMMEDPLAYBACK
Upto20trackscanbeprogrammedintoplayinanydesiredsequence.
1.PresstheOpenbuttonofCDDoorwhereremarked"Open"toopentheCDDoor.
2.InsertaCDwiththelabe lsidefacingupward.
3.ClosetheCDcompartmentbypressingtheuppercornerofCDDoor.
4.SlidetheFUNCTIONSwitchtoCDposition
5.SlidetheSELECTORSwitchtoONpositiontoturnontheunit.
TheCDwillrot ateforawhileandthenstop.
6.PressPROGbuttonuntil"PROG01"flashesindisplay.
7.PressSKIPForwardorSKIPBackwardbuttontoselectadesiredtracktobememorized.
8.PressPROGbuttontoprogramthetrack.
9.Repeatsteps7and8toprogramtracks.
10.PressPLAY/PAUSEbuttontostartplaying.
Tocancelprogramplay,PressSTOPbuttontwotimes.
REPEATPLAY
ToRepeatSingle Track
PressREPEATbuttonontheremotecontrolwhilethetrackyou wanttorepeatisplaying.The"REPEAT"
flashingwillappearindisplay.
------PressREPEATtwotimesontheremotecontrol.
------PressREPEATbuttonontheremotecontroltwiceduringplay.
------Torepeatanothertrack,PressREWorFWDSKIPbutton.
------Tocancelrepeatplay,PressREPEATbuttontwotimes.
ToRepeatallthetracks
PressREPEATbuttontwiceduringplay.The"REPEAT"indicatorwillappearindisplay.
------Alltrackswillbeplayedthroughinsequenceandthenthesequencewillberepeatedcontinuously.
------Tocancelrepeatplay,pressREPEATbuttononetime.
Randomplay
Pressstopbutton toenterintostopmode,pressRandombuttononcethenpressplay/pausebuttonto
carryoutrandomplay,"RANDOM"willappearindisplay.
Alltracksonthediscwillbeplayedinrandomorder,thenwillstop.
Duringrandomp laying,Tocancelrandomplay,pressstopbuttontwice.
HANDLINGDISCS
ThisproductisdesignedtoplayCDsbearing theDISCIdentificationlogo.
CDnotcarryingthislogomaynotconformt otheCDstandardandmaynotplayproperly.
Dirty,scratched,orwarpeddiscsmaycauseskippingornoise.
------HandletheCDonlybytheedges.
------TokeeptheCDclean,donottouchthesurfaceofthedisc.
------ReturnCDs totheiroriginalcasesafterusetoavoidseriousscratchesthatcouldcausethelaser
pickuptoskip.
------DonotexposeCDstodirectsunlight,highhumidityorhightemperaturesforextendedperiodsof
time,asprolongedexposuretohightemperaturescanwarpCDs
------DonotapplypaperorwriteanythingoneithersideofaCD.Sharpwritinginstrumentsorthe
inksinsomefelt-tippens,maydamagethesurfaceofaCD
TOCleanCDs:
------FingerprintsshouldbewipedfromthesurfaceoftheCDwithasoftcloth.Unlikeconven tional
records,CDshavenogroovestocollectdustandmicroscopicdebris,sogentlywipingtheCDs
withaclothremovesmostoftheparticles.
------Wipeinastraightmotionfromtheinsid etotheoutsideoftheCD.
------Neverusechemicals(i.e.recordcleaningsprays, anti-stati csprays,benzeneorthinner)toclean
CDs,asdamagetotheplasticoftheCDmayresult.
RC D739(Eng.)(A5)
-8-
TROUBLESHOOTINGGUIDE
Youexperienceaproblemwiththisunitcheckthechartbelowbeforecallingofservice.
CAREANDMAINTENANCE
CARINGF ORCOMPACTDISCS
---TokeeptheCDclean,handleitbyitsedge.Donottouchthesurface.
---DonotstickpaperortapeontotheCD
---DonotexposetheC Dtodirectsunlightorheatsourcessuchasholtairducts.
DonotleavetheCDinacarparkedunderdirectsunlight.
CleaningtheUnit
---Topreventfireorshockhazard,disconnectyourunitfromtheACpowersourcewhencleaning.
---Thefinishonyourunitmaybecleanedwithadustclothandcaredforasotherfurnit ure.
Usecaution whencleaningandwipingtheplasticparts.
---Mildsoapandadampclothmaybeusedonthefrontpanel.
IMPORTANCE
Tokeepupthe clock'soperating,RemembertoturnofftheunitbyslidingtheSELECTORswitchAto
AL.OFFpositionastheclockmemorywillbelostifyoudisconnectyourunitfromtheACpowersource.

RCD739 (Eng.)( A5) 17-8- 2005 / L
To clean the CD player:
Dust on the pickup lens can lead to erratic operation and interruption of the sound during play.
NOTE: Do not touch the surface of the pickup lens. Do not allow any liquids on the inside of the product.
------To clean the pickup lens, open the CD Door and blow the dust off of the pickup lens using a camera
lens blower(available at most camera stores)
-----To clean the CD player cabinet , use a soft , damp cloth to wipe off the exterior surface.
-----Never use benzene or other strong chemical cleaners ,as these could damage the product's finish.
RCD739 (Eng.)(A5)
- 1 -
RCD739 (Eng.)(A5)
- 2 -
Digital CD/Radio Stereo System w ith Remot e
MODEL : RCD739
INSTRUCTION MANUAL
Operating Instructions
SAFETY INSTRUCTIONS
The exclamation point within
an equilateral tr iangle i s
intended to alert the user of the
presence of important operating
and maintenance (servicing)
instructions in the literature
accompanying the appliance.
The Lightning fla sh with
arrowhead symbol, with an
equilateral triangle is intended
to alert the user of the presence
of uninsula ted da ng ero us
voltage within the product's
enc losure that may be of
s uf fi c i en t m a g ni t u de to
constitute a risk of electric
shock to persons.
CAUTION: TO REDUCE THE RISK
OF ELECTRIC SHOCK, DO NOT
REMOVE COVER (OR BACK). NO
U S ER S E RV I C EA B L E PA RT S
INSIDE. REFER SERVICING TO
QUALIFIED SERVICE PERSONNEL.
CAUTION
RISK OF ELECTRIC SHOCK
DO NOT OPEN
CAUTION : TO PREVENT ELECTRIC SHOCK, MATCH WIDE BLADE OF PLUG TO WIDE SLOT,
FULLY INSERT.
WARNING : TO REDUCE THE RISK OF FIRE OR ELECTRIC SHOCK, DO NOT EXPOSE THE
APPLIANCE TO RAIN OR MOISTURE.
1. Read instructions-All the safety and operating instructions should be read before the appliance is
operated.
2. Retain instructions-The safety and operating instructions should be retained for future reference.
3. Head Warnings-All warnings and cautions on the appliance and in the operating instructions should
be adhered to.
4. Follow instructions-All operating and use instructions should be followed.
5. Water and Moisture-The appliance should not be used near water, e.g. near a bathtub, washbowl,
kitchen sink, laundry tub, in a wet basement, or near a swimming pool or the like.
6. Wall or Ceiling Mounting-The appliance should not be mounted to a wall or ceiling.
7. Ventilation-The appliance should be situated so that its location or position does not interfere with its
proper ventilation. For example, the appliance should not be situated on a bed, sofa, rug or similar
surface that may block the ventilation openings, or placed in a built-in installation, such as a bookcase
or cabinet, that may impede the flow of air through the ventilation openings.
8. heat-The appliance should be situated away from neat sources such as radiators, heat registers, stoves,
or other appliances (including amplifiers) that produce heat..
9. Power Sources-The product should be operated only with the type of power supply indicated on the
marking label. If you are not sure of the type of power supply to your home, consult your product
dealer or local power company. For products intended to operate from battery power, or other sources,
refer to the operation instructions.
10.Grounding Polarization-This product may be equipped with a polarized alternating current line plug
(a plug having one blade wider than the other). This plug will fit into the power outlet only one way
this is a safety feature. If you are unable to insert the plug fully into the outlet, try reversing the plug.
If the plug should still fail to fit, contact your electrician to replace your obsolete outlet. Do not defeat
the safety purpose of the polarized plug.
11.Power-Cord Protection-Power supply cords should be routed so that they are not likely to be walked
on or pinched by items placed upon or against them, paying particular attention to cords at plugs,
convenience receptacles, and the point where they exit from the appliance.
12. Cleaning-The appliance should be cleaned only as recommended by the manufacturer.
13. Nonuse periods-The power cord of the appliance should be unplugged from the outlet when left
when left unused for a long period of time.
14. Object and Liquid Entry-Care should be taken so that objects do not fall and liquids are not spilled
into the product case through product openings.
15. Damage Requiring Service-Unplug this product from the wall outlet and take it to qualified service
personnel under the following conditions.
a) When the power-supply cord or plug is damaged.
b) If liquid has been spilled into, or objects have fallen into the product.
c) If the product has been exposed to rain or water.
d) If the product does not operate when used according to the operating instructions.
Adjust only those controls that are covered by the operating instructions as an improper
adjustment of other controls may interfere with the product's normal operation.
e) If the product has been dropped or damaged in any way.
f) When the product exhibits a distinct change in performance-this indicates a need for service.
16. Servicing-The user should not attempt to service the product beyond that described in the operating
instruction. All servicing should be referred to qualified service personnel.
17. Power Lines-An outside antenna system should not be located in the vicinity of overhead power
lines, or other electric light or power circuits, or where it can fall into such power lines or circuits.
When installing an outside antenna system, extreme care should be taken to keep from touching
power lines or circuits as contact with them might be fatal.
18. If an outside antenna is connected to the receiver, be sure the antenna system is grounded so as to
provide some protection against voltage surges and built up static. Section 810 of the National
Electrical Code ANSI/NEFA 70 provides information with respect to proper grounding of the mast
and supporting structure, grounding conductress, location of antenna-discharge unit, size of
grounding electrodes, and requirements for the grounding electrode (see figure).
19. Cleaning-Unplug this product from the wall outlet before cleaning. Do not use liquid cleaners or
aerosol cleaners. Use a damp cloth for cleaning.
20. Lightning-For added protection for this product during a lightning storm, or when it is left
unattended and unused for long periods of time, unplug it from the wall outlet and disconnect the
antenna or cable system. This will prevent damage to the product due to lightning and power-line
surges.
21. Safety Check-Upon completion of any service or repairs to this product, ask the service technician
to perform safety checks to determine that the product is in proper operation condition.
22. Overloading-Do not overload wall outlets, extension cords, or integral convenience receptacles as
this can result in a risk of fir or electric shock.
NEC NATIONAL ELECTRICAL CODE
Do not apply oil or petroleum products to this product.
CAUTION
Invisible laser radiation will be emitted when the product is open and interlocks are defeated.
Do not defeat the safety interlocks.
GRAPHIC SYMBOLS WITH SUPPLEMENTARY MARKINGS ARE LOCATED ON THE
BOTTOM OF THE UNIT.
USE OF CONTROLS, ADJUSTMENTS, OR PERFORMANCE PROCED URE HEREIN MAY
RESULT IN HAZARDOUS RADIATION EXPOSURE.
RCD739 (Eng.)(A5)
- 3 -
RCD739 (Eng.)(A5)
- 4 -
MOUNTING LOCATION
RCD739 (Eng.)(A5)
- 5 -
RCD739 (Eng.)(A5)
- 6 -
LOCATION OF CONTROLS
1. CD Door
2. CD Door Open Button
3. Speaker
4. Repeat Button
5. Volume Control Knob
6. Program Button
7. Random Button
8. SKIP (FAST-FORWARD) button
9. Function Switch (CD, AM, FM )
10. Alarm ON/OFF Button
11. Minute Set Button
12. LCD Display (CD, Clock and Frequency)
13. Stereo LED Indicator
14. Hour Set Button
15. Alarm Set Button
16. Selector Switch (ON/OFF/AUTO)
17. Time Set Button
18. SKIP (REWIND) button
19. Tuning Control Knob
20. CD Play/Pause Button
21. CD Stop Button
22. Remote Sensor
23. Headphone Jack
24. DC Input Jack
REMOTE CONTROL
1. PLAY Button
2. SKIP (FAST-FORWARD) button
3. Program Button
4. Repeat Button
5. Random Button
6. STOP Button
7. SKIP (REWIND) button
AC OPERATION
To operate the unit using AC power , connect a 9V AC adaptor (included) to an AC outlet
having 120V AC.
CAUTION: When not using AC power, disconnect the AC adapter from the wall outlet by pulling the
plug (not the cord). Do not touch the AC adapter with wet hands and plug fully inserted without
exposing any part of the blade.
HEADPHONE JACK
This unit will accept stereo headphones with a Ø 3.5mm plug. Before connecting the headphones set the
volume to minimum level as not to damage your ears or the headphones. Connect the headphones to the
headphones jack. The speakers will be automatically disconnected.
Warning: Prolonged exposure to high sound levels may permanently damage your hearing. You may not
hear some warning sound while wearing these headphones.
VOLUME CONTROL
Adjust the VOLUME control to the desired level.
RADIO SECTION
LISTENING TO THE RADIO
1. Slide SELECTOR Switch to "ON" position.
2. Slide FUNCTION Switch to select AM or FM position
3. Rotate the Tuning Control Knob to your desired Radio station.
4. To turn off Radio, Slide SELECTOR switch to "OFF" position to turn off the unit.
For better reception,
This unit has a built-in antenna for AM/FM, Locate the unit where you can obtain the best reception.
CLOCK SECTION
CLOCK SETTING
Press and hold Time./SET button to set the clock
Press Hour or Min button respectively
Note: In radio mode, the frequency will appear at the location where time appears. Press and hold the
Time/Set button to display the current time; Press and hold the AL./Set button to display the current
alarm time.
RCD739 (Eng.)(A5)
- 7 -
ALARM TIME SETTING
1. Slide SELECTOR switch to "OFF" or "AUTO" position.
2. Press and hold Al. SET button to set the Alarm time
3. Press Hour or Min button respectively.
4. Turn on the alarm function by pressing AL.ON/OFF button till the alarm Icon appears
Note. While alarm time is on, it will alarm for 3 minutes. To turn off the alarm, press the AL.ON/OFF
button once.
Wake up by Buzzer
1. After set the desired alarm time. And press the AL.ON /OFF button till the alarm icon appears
2. Slide the SELECTOR switch to "OFF" position.
Wake up by CD or Radio
1. Slide SELECTOR switch to "AUTO" position.
2. Set your desired alarm time.
3. Turn on the alarm function by pressing AL.ON/OFF button till the alarm Icon appears
4. Slide the SELECTOR switch to "AUTO" position.
5. Slide the Function Switch to CD, AM or FM position.
When the alarm time is on, CD & RADIO(AM/FM) will be automatically played.
CD SECTION
PLAYING A CD
1. Press the Open button of CD Door where remarked "Open" to open the CD Door.
2. Insert a CD with the label facing upward.
3. Close the CD compartment by pressing the upper corner of CD Door.
4. Slide the FUNCTION switch to CD position
5. Slide the SELECTOR switch to "ON" position to turn on the unit.
The CD will rotate for a while and then stop.
6. Press PLAY/PAUSE button to start CD playback from the first track.
7. Press once more PLAY/PAUSE button to momentarily pause, Icon " " will flash. Press again
PLAY/PAUSE button to resume to playback
8. To stop the playback, Press STOP button.
TRACK SEARCH
Press the SKIP/SEARCH button during play to skip to the desired track.
Press the "F.FWD" button to skip to the next track on the disc.
Press the "REW" button to skip to the beginning of the current track
Press the "REW" button twice or more to skip to previous track.
FORWARD/REVESE SEARCH
Press and hold the Forward or Backward SKIP/SEARCH button during play to scan the disc at high speed.
When the desired section of the disc if found, release the Button and normal play will resume.
"F.FWD" -------------------Forward
"REW" -------------------Backward
Press and hold the "F.FWD" button while playing to scan the current track forward at high speed.
Press and hold the "REW" button while playing to scan the current track backward at high speed.
PROGRAMMED PLAYBACK
Up to 20 tracks can be programmed in to play in any desired sequence.
1. Press the Open button of CD Door where remarked "Open" to open the CD Door.
2. Insert a CD with the label side facing upward.
3. Close the CD compartment by pressing the upper corner of CD Door.
4. Slide the FUNCTION Switch to CD position
5. Slide the SELECTOR Switch to ON position to turn on the unit.
The CD will rotate for a while and then stop.
6. Press PROG button until "PROG 01" flashes in display.
7. Press SKIP Forward or SKIP Backward button to select a desired track to be memorized.
8. Press PROG button to program the track.
9. Repeat steps 7 and 8 to program tracks.
10. Press PLAY/PAUSE button to start playing.
To cancel program play, Press STOP button two times.
REPEAT PLAY
To Repeat Single Track
Press REPEAT button on the remote control while the track you want to repeat is playing. The "REPEAT"
flashing will appear in display.
------Press REPEAT two times on the remote control.
------Press REPEAT button on the remote control twice during play.
------To repeat another track, Press REW or FWD SKIP button.
------To cancel repeat play, Press REPEAT button two times.
To Repeat all the tracks
Press REPEAT button twice during play. The "REPEAT" indicator will appear in display.
------All tracks will be played through in sequence and then the sequence will be repeated continuously.
------To cancel repeat play, press REPEAT button one time.
Random play
Press stop button to enter into stop mode, press Random button once then press play/pause button to
carry out random play, "RANDOM" will appear in display.
All tracks on the disc will be played in random order, then will stop.
During random playing, To cancel random play, press stop button twice.
HANDLING DISCS
This product is designed to play CDs bearing the DISC Identification logo.
CD not carrying this logo may not conform to the CD standard and may not play properly.
Dirty, scratched, or warped discs may cause skipping or noise.
------Handle the CD only by the edges.
------To keep the CD clean , do not touch the surface of the disc.
------Return CDs to their original cases after use to avoid serious scratches that could cause the laser
pickup to skip.
------Do not expose CDs to direct sunlight, high humidity or high temperatures for extended periods of
time, as prolonged exposure to high temperatures can warp CDs
------Do not apply paper or write anything on either side of a CD. Sharp writing instruments or the
inks in some felt-tip pens, may damage the surface of a CD
TO Clean CDs:
------Fingerprints should be wiped from the surface of the CD with a soft cloth. Unlike conventional
records, CDs have no grooves to collect dust and microscopic debris, so gently wiping the CDs
with a cloth removes most of the particles.
------Wipe in a straight motion from the inside to the outside of the CD.
------Never use chemicals (i.e. record cleaning sprays, anti-static sprays, benzene or thinner) to clean
CDs, as damage to the plastic of the CD may result.
RCD739 (Eng.)(A5)
- 8 -
TROUBLESHOOTING GUIDE
You experience a problem with this unit check the chart below before calling of service.
CARE AND MAINTENANCE
CARING FOR COMPACT DISCS
--- To keep the CD clean, handle it by its edge. Do not touch the surface.
--- Do not stick paper or tape onto the CD
--- Do not expose the CD to direct sunlight or heat sources such as holt air ducts.
Do not leave the CD in a car parked under direct sunlight.
Cleaning the Unit
--- To prevent fire or shock hazard , disconnect your unit from the AC power source when cleaning.
--- The finish on your unit may be cleaned with a dust cloth and cared for as other furniture.
Use caution when cleaning and wiping the plastic parts.
---Mild soap and a damp cloth may be used on the front panel.
IMPORTANCE
To keep up the clock's operating, Remember to turn off the unit by sliding the SELECTOR switch A to
AL.OFF position as the clock memory will be lost if you disconnect your unit from the AC power source.
SAFETY INSTRUCTIONS
THESE IMPORTANT SAFETY INSTRUCTIONS ARE INCLUDED,
AS APPLICABLE TO THE APPLIANCE, CONVEYING TO THE
USER THE INFORMATION ITEMIZED BELOW
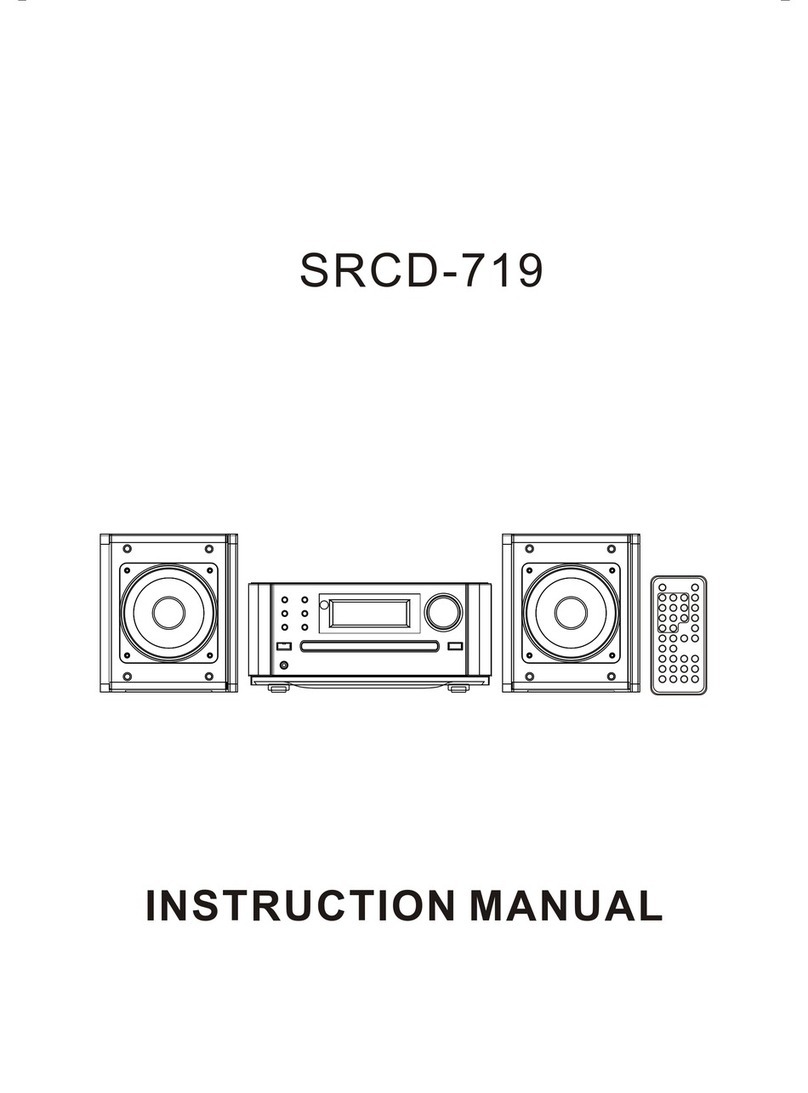
RCD739 (Eng.)( A5) 17-8- 2005 / L
TocleantheCDplayer:
Dustonthepickuplenscanleadtoerraticoperationandinterruptionofthesoundduringplay.
NOTE:Donottouchthesurfaceofthepickuplens.Donotallowanyliquidsontheins ideofthe product.
------Toc leanthepickuplens,opentheCDDoorandblowthedustoffofthepickuplensusingacamera
lensblower(availableatmostcamerastores)
-----TocleantheCDplayercabinet,useasoft,dampclothtowipeofftheexteriorsurface.
-----Never usebenzeneorotherstrongchemicalcleaners,asthesecoulddamagetheproduct'sfinish.
RCD739 (Eng.)(A5)
- 1 -
RCD739 (Eng.)(A5)
- 2 -
Digital CD/Radio Stereo System w ith Remot e
MODEL : RCD739
INSTRUCTION MANUAL
Operating Instructions
SAFETY INSTRUCTIONS
CAUTION : TO PREVENT ELE CTRIC S HOCK, MATCH WIDE BLA DE OF PLUG TO WIDE S LOT,
FULLY INSERT.
WARNING : TO REDUCE THE RI SK OF FIRE OR ELECTRIC S HOCK, DO NOT EXPOSE THE
APPLIANCE TO RA IN OR M OISTURE.
1. Read instructions-All th e safety and operating instructions should be read before the appliance is
operated.
2. Retain instructions-The safety and operating instructions should be retain ed fo r future reference.
3. Head Warnings-All warnings and cautions on the appliance and in the operating instructions should
be adhered to.
4. Follow instructions-All o perating and use instructions should be followed.
5. Water a nd Moisture-The appliance should not be used near water, e.g. near a bathtub, washbowl,
kitchen sink, laundry tub, in a we t basement, or near a swimming pool or the like.
6. Wall or Ceilin g Mounting-The appliance should not be mounted to a wall or ceiling.
7. Ventila tion-The applian ce sh ould be situated so that its lo cation or p osition does not in terfere with its
proper ventilation. For example, the appliance should not be situated on a bed, sofa, rug or similar
surface tha t may block the ventila tion openings, or placed in a built-in installatio n, such as a bookcase
or cabinet, that may impede the flow of air th rough the ventila tion openings.
8. heat-The appliance should be situ ated away from neat sources such as radiators, heat registers, stoves,
or other appliances (including amplifiers) that produce heat..
9. Power Sources-The product should be operated only with the type of power supply indicated on the
marking label. If you are not sure of the type of power supply to your home, consult y our product
dealer or local p ower company. For products intended to o perate from battery power, or other sources,
refer to the operation instructions.
10.Grounding Polarization-This product may be equipped with a polarized alternating current line plug
(a plug having one blade wider than the other). This plug will fit in to the power outlet only one way
this is a sa fety feature. If yo u are unable to insert the plug fu lly into the outlet, try reversing the plug.
If the plug should still fail to f it, contact your electrician to replace your obsolete outlet. Do not defeat
the safety purpose of the polarized plug.
11.Power-Cord Protection-Power supply cords should be routed so that they are not li kely to be walked
on or pinched by items placed upon or against the m, paying particular attention to cords at p lugs,
convenience receptacles, and the point w here they exit fro m the appliance.
12. Cleaning-The appliance should be cleaned only as recommended by the manufacturer.
13. Nonuse periods-The power cord of the appliance should be unplugged from the outlet when left
when left unused for a long period of time.
14. Object and Liquid Entry-Care should be taken so that objects do not fall and liquids are not spilled
into the product case through product openings.
15. Damage Requiring Service-Unplug this product from the wall outlet and take it to qualified service
personnel under the following conditions.
a) When the power-supply cord or plug is damaged.
b) If liquid has been spilled into, or objects have fallen into the product.
c) If the product has been exposed to rain or water.
d) If the product does not operate when used according to the operating instructions.
Adjust only those controls that are covered by the operating instructions as an improper
adjustment of other controls may interfere with the product's normal operation.
e) If the product has been dropped or damaged in any way.
f) When the product exhibits a distinct change in performance-this indicates a need for service.
16. Servicing-The user should not attempt to service the product beyond that described in the operating
instruction. All servicing should be referred to qualified service personnel.
17. Power Lines-An outside antenna system should not be located in the vicinity of overhead power
lines, or other electric light or power circuits, or where it can fall into such power lines or circuits.
When installing an outside antenna system, extreme care should be taken to keep from touching
power lines or circuits as contact with them might be fatal.
18. If an outside antenna is connected to the receiver, be sure the antenna system is grounded so as to
providesomeprotectionagainst voltage surgesand builtup static.
19. Cleaning-Unplug this product from the wall outlet before cleaning. Do not use liquid cleaners or
aerosol cleaners. Use a damp cloth for cleaning.
20. Lightning-For added protection for this product during a lightning storm, or when it is left
unattended and unused for long periods of time, unplug it from the wall outlet and disconnect the
antenna or cable system. This will prevent damage to the product due to lightning and power-line
surges.
21. Safety Check-Upon completion of any service or repairs to this product, ask the service technician
to perform safety checks to determine that the product is in proper operation condition.
22. Overloading-Do not overload wall outlets, extension cords, or integral convenience receptacles as
this can result in a risk of fir or electric shock.
CAUTION
Invisiblelaserradiationwillbeemittedwhen theproduct isopenand interlocks are defeated.
Do not defeat the safety interlocks.
GRAPHIC SYMBOLS WITH SUPPLEMENTARY MARKINGS ARE LOCATED ON THE
BOTTOM OF THE UNIT.
USE OF CONTROLS, ADJUSTMENTS, OR PERFORMANCE PROCED URE HEREIN MAY
RESULT IN HAZARDOUS RADIATION EXPOSURE.
RCD739 (Eng.)(A5)
- 3 -
RCD739 (Eng.)(A5)
- 4 -
MOUNTING LOCATION
RCD739 (Eng.)(A5)
-5-
RCD739(Eng.)(A5)
-6-
LOCATION OF CONTROLS
1. CD Door
2. CD Door Open Button
3. Speaker
4. Repeat Button
5. Volume Control Knob
6. Program Button
7. Random Button
8. SKIP (FAST-FORWARD) button
9. Function Switch (CD, AM, FM )
10. Alarm ON/OFF Button
11. Minute Set Button
12. LCD Display (CD, Clock and Frequency)
13. Stereo LED Indicator
14. Hour Set Button
15. Alarm Set Button
16. Selector Switch (ON/OFF/AUTO)
17. Time Set Button
18. SKIP (REWIND) button
19. Tuning Control Knob
20. CD Play/Pause Button
21. CD Stop Button
22. Remote Sensor
23. Headphone Jack
24. DC Input Jack
REMOTE CONTROL
1.PLAYButton
2.SKIP(FAST-FORWARD)button
3.ProgramButton
4.RepeatButton
5.RandomButton
6.STOPButton
7.SKIP(REWIND)button
ACOPERATION
Tooperatetheunitusing ACpower,connecta9VACadaptor(included)toanACoutlet
having120VAC.
CAUTION:
Whennotusing ACpower,disconnecttheACadapter fromthewalloutl etbypullingthe
plug(notthecord).Donottouchthe ACadapterwithwethandsandplugfullyinsertedwithout
exposinganypartoftheblade.
HEADPHONEJACK
ThisunitwillacceptstereoheadphoneswithaØ3.5mmplug.Beforeconnectingtheheadphonessetthe
volumetominimumlevelasnottodamageyourearsortheheadphones.Connecttheheadphonestothe
headphonesjack.Thespeakerswillbeautomaticallydisconnected.
Warning:Prolongedexposuretohighsoundlevelsmaypermanentlydamageyourhearing.Youmaynot
hearsomewarningsoundwhilewearingtheseheadphones.
VOLUMECONTROL
AdjusttheVOLUMEcontroltothedesiredlevel.
RADIO SECTION
LISTENINGTOTHERADIO
1.SlideSELECTORSwitchto"ON"position.
2.SlideFUNCTIONSwitchtoselectAMorFMposition
3.RotatetheTuningControlKnobtoyourdesiredRadiostation.
4.ToturnoffRadio,SlideSELECTORswitchto"OFF"positiontoturnofftheunit.
Forbetterreception,
Thisunithasabuilt-inantennafor AM/FM,Locatetheunitwhereyoucanobt ainthebes treception.
CLOCK SECTION
CLOCKSETTING
PressandholdTime./SETbuttontosettheclock
PressHourorMinbuttonrespectively
Note:Inradiomode,thefrequencywillappearatthelocationwheretimeappears.Pressandholdthe
Time/Setbuttontodisplaythecurrentti me;Press andholdthe AL./Setbutton todisplaythecurrent
alarmtime.
RCD739(Eng.)(A5)
-7-
ALARMTIMESETTING
1.SlideSELECTORswitchto"OFF"or"AUTO"position.
2.PressandholdAl.SETbuttontosettheAlarmtime
3.PressHourorMinbuttonrespectively.
4.TurnonthealarmfunctionbypressingAL.ON/OFFbuttontillthealarmIconappears
Note.Whilealarmtimeison,itwillalarmfor3minutes.Toturnoffthealarm,presstheAL.ON/OFF
buttononce.
WakeupbyBuzzer
1.Aftersetthedesiredalarmtime.AndpresstheAL.ON/OFFbuttontillthealarmiconappears
2.SlidetheSELECTORswitchto"OFF"position.
WakeupbyCDorRadio
1.SlideSELECTORswitchto"AUTO"position.
2.Setyourdesiredalarmtime.
3.TurnonthealarmfunctionbypressingAL.ON/OFFbuttontillthealarmIconappears
4.SlidetheSELECTORswitchto"AUTO"position.
5.SlidetheFunctionSwitchtoCD,AMorFMposition.
Whenthealarmtimeison,CD&RADIO(AM/FM)willbeautomaticallyplayed.
CDSECTION
PLAYINGACD
1.PresstheOpenbuttonofCDDoorwhereremarked"Open"toopentheCDDoor.
2.InsertaCDwiththelabelfacingupward.
3.ClosetheCDcompartmentbypressingtheuppercornerofCDDoor.
4.SlidetheFUNCTIONswitchtoCDposition
5.SlidetheSELECTORswitchto"ON"positiontoturnontheunit.
TheCDwillrotateforawhileandthenstop.
6.PressPLAY/PAUSEbuttontostartCDplaybackfromthefirsttrack.
7.PressoncemorePLAY/PAUSEbuttontomomentarilypause,Icon""willflash.Pressagain
PLAY/PAUSEbuttontoresumetoplayback
8.Tostoptheplayback,PressSTOPbutton.
TRACKSEARCH
PresstheSKIP/SEARCHbuttonduringplayt oskiptothedesiredtrack.
Pressthe"F.FWD"buttontoskiptothenextt rackonthedisc.
Pressthe"REW"buttontoskiptothebeginningofthecurrenttk
Pressthe"REW"buttontwiceormoretoskiptoprevioustrack.
FORWARD/REVESESEARCH
PressandholdtheForwardorBackwardSKIP/SEARCHbuttonduringplaytoscan thediscathighspeed.
Whenthedesiredsectionofthedisciffound,releasethe Buttonandnormalplaywillresume.
"F.FWD"-------------------Forward
"REW"-------------------Backward
Pressandholdthe"F.FWD"buttonwhileplayingtoscanthecurrenttrackforwardathighspeed.
Pressandholdthe"REW"buttonwhileplayingtoscanthecurrenttrackbackwardathighspeed.
PROGRAMMEDPLAYBACK
Upto20trackscanbeprogrammedintoplayinanydesiredsequence.
1.PresstheOpenbuttonofCDDoorwhereremarked"Open"toopentheCDDoor.
2.InsertaCDwiththelabelsidefacingupwar d.
3.ClosetheCDcompartmentbypressing theuppercornerofCDDoor.
4.SlidetheFUNCTIONSwitchtoCDposition
5.SlidetheSELECTORSwitchtoONpositiontoturnontheunit.
TheCDwillrotateforawhileandthenstop.
6.PressPROGbuttonuntil"PROG01"flashesindisplay.
7.PressSKIPForwardorSKIPBackwardbuttontoselectadesiredtracktobememorized.
8.PressPROGbuttontoprogramthetrack.
9.Repeatsteps7and8toprogramtracks.
10.PressPLAY/PAUSEbuttontostartplaying.
Tocancelprogramplay,PressSTOPbuttontwotimes.
REPEATPLAY
ToRepeatSingle Track
PressREPEATbuttonontheremotecontrolwhilethetrackyouwanttorepeatisplaying.The"REPEAT"
flashingwillappearindisplay.
------PressREPEATtwotimesontheremotecontrol.
------PressREPEATbuttonontheremotecontroltwiceduringplay.
------Torepeatanothertrack,PressREWorFWDSKIPbutton.
------Tocancelrepeatplay,PressREPEATbuttontwotimes.
ToRepeatallthetracks
PressREPEATbuttontwiceduringplay.The"REPEAT"indicatorwillappearindisplay.
------Alltrackswillbeplayedthroughinsequenceandthenthesequencewillberepeated continuously.
------Tocancelrepeatplay,pressREPEATbuttononetime.
Randomplay
Pressstopbuttontoenterintostopmode,pressRandombuttononcethenpressplay/pausebuttonto
carryoutrandomplay,"RANDOM"willappearindisplay.
Alltracksonthediscwillbeplayedinrandomorder,thenwillstop.
Duringrandomplaying,Tocancelrandomplay,pressstopbuttontwice.
HANDLINGDISCS
ThisproductisdesignedtoplayCDsbearingtheDISCIdentificationlogo.
CDnotcarryingthislogomaynotconformtotheCDstandardandmaynotplayproperly.
Dirty,scratched,orwarpeddiscsmaycauseskippingornoise.
------HandletheCDonlybytheedges.
------TokeeptheCDclean,donottouchthesurfaceofthedisc.
------ReturnCDstotheiroriginalcasesaft erusetoavoidseriousscratchesthatcouldcausethelaser
pickuptoskip.
------DonotexposeCDstodirectsunlight,highhumidityorhightemperaturesforextendedperiodsof
time,asprolongedexposuretohightemperaturescanwarpCDs
------DonotapplypaperorwriteanythingoneithersideofaCD.Sharpwritinginstrumentsorthe
inksinsomefelt-tippens,maydamagethesurfaceofaCD
TOCleanCDs:
------FingerprintsshouldbewipedfromthesurfaceoftheCDwithasoftcloth.Unlikecon ventional
records,CDshavenogroovestocollec tdustandmicroscopicdebris,sogentlywipingtheCDs
withaclothremovesmostoftheparticles.
------WipeinastraightmotionfromtheinsidetotheoutsideoftheCD.
------Neverusechemicals(i.e.recordcleaningsprays,anti-staticsprays,benzeneorthinner)toclean
CDs,asdamagetotheplasticoftheCDmayresult.
RCD739(Eng.)(A5)
-8-
TROUBLESHOOTINGGUIDE
Youexper ienceaproblemwiththisunitcheckthechartbelowbeforecallingofservice.
CAREANDMAINTENANCE
CARINGFORCOMPACTDISCS
---TokeeptheCDclean,handleitbyitsedge.Donottouchthesurface.
---DonotstickpaperortapeontotheCD
---DonotexposetheCDtodirectsunlightorheatsourcessuchasholtairducts.
DonotleavetheCDinacarparkedunderdirectsunlight.
CleaningtheUnit
---Topreventfireorshockhaz ard,disconnectyourunitfromtheACpowersourcewhencleaning.
---Thefinishonyourunitmaybecleanedwithadustclothandcaredforasotherfurniture.
Usecautionwhencleaningandwipingtheplasticparts.
---Mildsoapandadampclothmaybeusedonthefrontpanel.
IMPORTANCE
Tokeepuptheclock'soperating,RemembertoturnofftheunitbyslidingtheSELECTORswitchAto
AL.OFFpositionastheclockmemorywillbelostifyoudisconnectyourunitfromtheACpowersource.

RCD739 (Eng.)( A5) 17-8- 2005 / L
To clean the CD player:
Dust on the pickup lens can lead to erratic operation and interruption of the sound during play.
NOTE: Do not touch the surface of the pickup lens. Do not allow any liquids on the inside of the product.
------To clean the pickup lens, open the CD Door and blow the dust off of the pickup lens using a camera
lens blower(available at most camera stores)
-----To clean the CD player cabinet , use a soft , damp cloth to wipe off the exterior surface.
-----Never use benzene or other strong chemical cleaners ,as these could damage the product's finish.
RCD739 (Eng.)(A5)
- 1 -
RCD739 (Eng.)(A5)
- 2 -
Digital CD/Radio Stereo System w ith Remot e
MODEL : RCD739
INSTRUCTION MANUAL
Operating Instructions
SAFETY INSTRUCTIONS
CAUTION : TO PREVENT ELE CTRIC S HOCK, MATCH WIDE BLA DE OF PLUG TO WIDE S LOT,
FULLY INSERT.
WARNING : TO REDUCE THE RI SK OF FIRE OR ELECTRIC S HOCK, DO NOT EXPOSE THE
APPLIANCE TO RA IN OR M OISTURE.
1. Read instructions-All th e safety and operating instructions should be read before the appliance is
operated.
2. Retain instructions-The safety and operating instructions should be retained for future reference.
3. Head Warnings-All warnings and cautions on the appliance and in the operating instructions should
be adhered to.
4. Follow instructions-All o perating and use instructions should be followed.
5. Water a nd Moisture-The appliance should not be used near water, e.g. near a bathtub, washbowl,
kitchen sink, laundry tub, in a we t basement, or near a swimming pool or the like.
6. Wall or Ceilin g Mounting-The appliance should not be mounted to a wall or ceiling.
7. Ventila tion-The applian ce sh ould be situated so that its lo cation or p osition does not in terfere with its
proper ventilation. For example, the appliance should not be situated on a bed, sofa, rug or similar
surface tha t may block the ventila tion openings, or placed in a built-in installatio n, such as a bookcase
or cabinet, that may impede the flow of air th rough the ventila tion openings.
8. heat-The appliance should be situ ated away from neat sources such as radiators, heat registers, stoves,
or other appliances (including amplifiers) that produce heat..
9. Power Sources-The product should be operated only with the type of power supply indicated on the
marking label. If you are not sure of the type of power supply to your home, consult y our product
dealer or local power company. For products intended to operate from battery power, or other sources,
refer to the operation instructions.
10.Grounding Polarization-This product may be equipped with a polarized alternating current line plug
(a plug having one blade wider than the other). This plug will fit in to the power outlet only one way
this is a sa fety feature. If yo u are unable to insert the plug fu lly into the outlet, try reversing the plug.
If the plug should still fail to f it, contact your electrician to replace your obsolete outlet. Do not defeat
the safety purpose of the polarized plug.
11.Power-Cord Protection-Power supply cords should be routed so that they are not li kely to be walked
on or pinched by items placed upon or against the m, paying particular attention to cords at p lugs,
convenience receptacles, and the point w here they exit fro m the appliance.
12. Cleaning-The appliance should be cleaned only as recommended by the manufacturer.
13. Nonuse periods-The power cord of the appliance should be unplugged from the outlet when left
when left unused for a long period of tim e.
14. Object and Liquid Entry-Care should be taken so that objects d o not fall and liquids are not spilled
into the product case through product openings.
15. Damage Requiring Service-Unplug this product from the wall ou tlet and take it to q ualified service
personnel under the following conditio ns.
a) When the power-supply cord o r plug is damaged.
b) If liquid has been spilled into, or o bjects have fallen into th e product.
c) If the product has been exposed to rain or water.
d) If the product does n ot operate when used according to the operating instructions.
Adjust only those controls that are covered by the operatin g instructions as an improper
adjustment of other controls may interfere wit h the product's normal operation.
e) If the product has been dropped or damaged in any way.
f) When the product exhibits a distin ct change in performance-this indicates a need for service.
16. Servicing-The user should not attempt to service the product be yond tha t described in the operating
instru ction . All servicing should b e referred to qualified service personnel.
17. Power Lines-An outside antenna system should not be located in th e vicinity of overhead power
lines, or other electric li ght or power circuits, or w here it ca n fall into such power lines or circ uits.
When installing an outside antenna system, extreme care should be taken to keep from touching
power lines or circ uits a s contact wit h th em might be fatal.
18. If an outside antenna is connected to th e receiver, be sure the antenna system is grounded so as t o
provide some protection against voltage surges and built up static. Section 810 of the National
Electrical Cod e ANSI/NEFA 70 provides information with respect to p roper grounding of the mast
and supporting stru cture, grounding conductress, location of antenna-discharge unit, siz e of
grounding electrodes, and requirements fo r the grounding electrode (see figure).
19. Cleaning-Unplug this product fr om the wall ou tlet before cleaning. Do not use liq uid cleaners or
aerosol cleaners. Use a damp cloth for cleaning.
20. Lightning-For added protection for this product during a lightning storm, or when it is le ft
unattended and unused for long periods of time, unplug it from the wall outlet and disconnect th e
antenna or cable system. This will prevent damage to th e product due to lightning and power-line
surges.
21. Safety Check-Upon completion of any service or repairs to this product, ask the service technician
to perform safety checks to determine that th e product is in proper operation condition.
22. Overloading-Do not overload wall ou tlets, extension cords, or integral convenience receptacles as
this can result in a ris k of fir or electric shock.
NEC NATIONAL ELECTRICAL CO DE
Do not apply oil o r petroleum products to this product.
CAUTION
Invisib le laser radiation will be emitted when the product is o pen and interlocks are defeated.
Do not defeat the safety interlocks.
GRAPHIC SYMBOLS WITH SUPPLEMENTARY MARKINGS ARE LOCATED O N THE
BOTTOM OF THE UNIT.
USE OF CONT ROLS, ADJUS TMENTS, O R PERFO RMANC E PROCED URE HEREI N MAY
RESULT IN HAZA RDOUS RADI ATION EXPO SURE.
RCD739 (Eng.)(A5)
- 3 -
RCD739 (Eng.)(A5)
- 4 -
MOUNTING LOCATION
RCD739 (Eng.)(A5)
- 5 -
RCD739 (Eng.)(A5)
- 6 -
LOCATION OF CONTROLS
1. CD Door
2. CD Door Open Button
3. Speaker
4. Repeat Button
5. Volume Control Knob
6. Program Button
7. Random Button
8. SKIP (FAST-FORWARD) button
9. Function Switch (CD, AM, FM )
10. Alarm ON/OFF Button
11. Minute Set Button
12. LCD Display (CD, Clock and Frequency)
13. Stereo LED Indicator
14. Hour Set Button
15. Alarm Set Button
16. Selector Switch (ON/OFF/AUTO)
17. Time Set Button
18. SKIP (REWIND) button
19. Tuning Control Knob
20. CD Play/Pause Button
21. CD Stop Button
22. Remote Sensor
23. Headphone Jack
24. DC Input Jack
REMOTE CONTROL
1. PLAY Button
2. SKIP (FAST-FORWARD) button
3. Program Button
4. Repeat Button
5. Random Button
6. STOP Button
7. SKIP (REWIND) button
AC OPERATION
To operate the unit using AC power , connect a 9V AC adaptor (included) to an AC outlet
having 120V AC.
CAUTION: When not using AC power, disconnect the AC adapter from the wall outlet by pulling the
plug (not the cord). Do not touch the AC adapter with wet hands and plug fully inserted without
exposing any part of the blade.
HEADPHONE JACK
This unit will accept stereo headphones with a Ø 3.5mm plug. Before connecting the headphones set the
volume to minimum level as not to damage your ears or the headphones. Connect the headphones to the
headphones jack. The speakers will be automatically disconnected.
Warning: Prolonged exposure to high sound levels may permanently damage your hearing. You may not
hear some warning sound while wearing these headphones.
VOLUME CONTROL
Adjust the VOLUME control to the desired level.
RADIO SECTION
LISTENING TO THE RADIO
1. Slide SELECTOR Switch to "ON" position.
2. Slide FUNCTION Switch to select AM or FM position
3. Rotate the Tuning Control Knob to your desired Radio station.
4. To turn off Radio, Slide SELECTOR switch to "OFF" position to turn off the unit.
For better reception,
This unit has a built-in antenna for AM/FM, Locate the unit where you can obtain the best reception.
CLOCK SECTION
CLOCK SETTING
Press and hold Time./SET button to set the clock
Press Hour or Min button respectively
Note: In radio mode, the frequency will appear at the location where time appears. Press and hold the
Time/Set button to display the current time; Press and hold the AL./Set button to display the current
alarm time.
RCD739 (Eng.)(A5)
- 7 -
ALARM TIME SETTING
1. Slide SELECTOR switch to "OFF" or "AUTO" position.
2. Press and hold Al. SET button to set the Alarm time
3. Press Hour or Min button respectively.
4. Turn on the alarm function by pressing AL.ON/OFF button till the alarm Icon appears
Note. While alarm time is on, it will alarm for 3 minutes. To turn off the alarm, press the AL.ON/OFF
button once.
Wake up by Buzzer
1. After set the desired alarm time. And press the AL.ON /OFF button till the alarm icon appears
2. Slide the SELECTOR switch to "OFF" position.
Wake up by CD or Radio
1. Slide SELECTOR switch to "AUTO" position.
2. Set your desired alarm time.
3. Turn on the alarm function by pressing AL.ON/OFF button till the alarm Icon appears
4. Slide the SELECTOR switch to "AUTO" position.
5. Slide the Function Switch to CD, AM or FM position.
When the alarm time is on, CD & RADIO(AM/FM) will be automatically played.
CD SECTION
PLAYING A CD
1. Press the Open button of CD Door where remarked "Open" to open the CD Door.
2. Insert a CD with the label facing upward.
3. Close the CD compartment by pressing the upper corner of CD Door.
4. Slide the FUNCTION switch to CD position
5. Slide the SELECTOR switch to "ON" position to turn on the unit.
The CD will rotate for a while and then stop.
6. Press PLAY/PAUSE button to start CD playback from the first track.
7. Press once more PLAY/PAUSE button to momentarily pause, Icon " " will flash. Press again
PLAY/PAUSE button to resume to playback
8. To stop the playback, Press STOP button.
TRACK SEARCH
Press the SKIP/SEARCH button during play to skip to the desired track.
Press the "F.FWD" button to skip to the next track on the disc.
Press the "REW" button to skip to the beginning of the current track
Press the "REW" button twice or more to skip to previous track.
FORWARD/REVESE SEARCH
Press and hold the Forward or Backward SKIP/SEARCH button during play to scan the disc at high speed.
When the desired section of the disc if found, release the Button and normal play will resume.
"F.FWD" -------------------Forward
"REW" -------------------Backward
Press and hold the "F.FWD" button while playing to scan the current track forward at high speed.
Press and hold the "REW" button while playing to scan the current track backward at high speed.
PROGRAMMED PLAYBACK
Up to 20 tracks can be programmed in to play in any desired sequence.
1. Press the Open button of CD Door where remarked "Open" to open the CD Door.
2. Insert a CD with the label side facing upward.
3. Close the CD compartment by pressing the upper corner of CD Door.
4. Slide the FUNCTION Switch to CD position
5. Slide the SELECTOR Switch to ON position to turn on the unit.
The CD will rotate for a while and then stop.
6. Press PROG button until "PROG 01" flashes in display.
7. Press SKIP Forward or SKIP Backward button to select a desired track to be memorized.
8. Press PROG button to program the track.
9. Repeat steps 7 and 8 to program tracks.
10. Press PLAY/PAUSE button to start playing.
To cancel program play, Press STOP button two times.
REPEAT PLAY
To Repeat Single Track
Press REPEAT button on the remote control while the track you want to repeat is playing. The "REPEAT"
flashing will appear in display.
------Press REPEAT two times on the remote control.
------Press REPEAT button on the remote control twice during play.
------To repeat another track, Press REW or FWD SKIP button.
------To cancel repeat play, Press REPEAT button two times.
To Repeat all the tracks
Press REPEAT button twice during play. The "REPEAT" indicator will appear in display.
------All tracks will be played through in sequence and then the sequence will be repeated continuously.
------To cancel repeat play, press REPEAT button one time.
Random play
Press stop button to enter into stop mode, press Random button once then press play/pause button to
carry out random play, "RANDOM" will appear in display.
All tracks on the disc will be played in random order, then will stop.
During random playing, To cancel random play, press stop button twice.
HANDLING DISCS
This product is designed to play CDs bearing the DISC Identification logo.
CD not carrying this logo may not conform to the CD standard and may not play properly.
Dirty, scratched, or warped discs may cause skipping or noise.
------Handle the CD only by the edges.
------To keep the CD clean , do not touch the surface of the disc.
------Return CDs to their original cases after use to avoid serious scratches that could cause the laser
pickup to skip.
------Do not expose CDs to direct sunlight, high humidity or high temperatures for extended periods of
time, as prolonged exposure to high temperatures can warp CDs
------Do not apply paper or write anything on either side of a CD. Sharp writing instruments or the
inks in some felt-tip pens, may damage the surface of a CD
TO Clean CDs:
------Fingerprints should be wiped from the surface of the CD with a soft cloth. Unlike conventional
records, CDs have no grooves to collect dust and microscopic debris, so gently wiping the CDs
with a cloth removes most of the particles.
------Wipe in a straight motion from the inside to the outside of the CD.
------Never use chemicals (i.e. record cleaning sprays, anti-static sprays, benzene or thinner) to clean
CDs, as damage to the plastic of the CD may result.
RCD739 (Eng.)(A5)
- 8 -
TROUBLESHOOTING GUIDE
You experience a problem with this unit check the chart below before calling of service.
CARE AND MAINTENANCE
CARING FOR COMPACT DISCS
--- To keep the CD clean, handle it by its edge. Do not touch the surface.
--- Do not stick paper or tape onto the CD
--- Do not expose the CD to direct sunlight or heat sources such as holt air ducts.
Do not leave the CD in a car parked under direct sunlight.
Cleaning the Unit
--- To prevent fire or shock hazard , disconnect your unit from the AC power source when cleaning.
--- The finish on your unit may be cleaned with a dust cloth and cared for as other furniture.
Use caution when cleaning and wiping the plastic parts.
---Mild soap and a damp cloth may be used on the front panel.
IMPORTANCE
To keep up the clock's operating, Remember to turn off the unit by sliding the SELECTOR switch A to
AL.OFF position as the clock memory will be lost if you disconnect your unit from the AC power source.
1
3
5
1
3
2
4
6
2
4

RCD739 (Eng.)( A5) 17-8- 2005 / L
To clean the CD player:
Dust on the pickup lens can lead to erratic operation and interruption of the sound during play.
NOTE: Do not touch the surface of the pickup lens. Do not allow any liquids on the inside of the product.
------To clean the pickup lens, open the CD Door and blow the dust off of the pickup lens using a camera
lens blower(available at most camera stores)
-----To clean the CD player cabinet , use a soft , damp cloth to wipe off the exterior surface.
-----Never use benzene or other strong chemical cleaners ,as these could damage the product's finish.
RCD739 (Eng.)(A5)
- 1 -
RCD739 (Eng.)(A5)
- 2 -
Digital CD/Radio Stereo System w ith Remot e
MODEL : RCD739
INSTRUCTION MANUAL
Operating Instructions
SAFETY INSTRUCTIONS
CAUTION : TO PREVENT ELE CTRIC S HOCK, MATCH WIDE BLA DE OF PLUG TO WIDE S LOT,
FULLY INSERT.
WARNING : TO REDUCE THE RI SK OF FIRE OR ELECTRIC S HOCK, DO NOT EXPOSE THE
APPLIANCE TO RA IN OR M OISTURE.
1. Read instructions-All th e safety and operating instructions should be read before the appliance is
operated.
2. Retain instructions-The safety and operating instructions should be retained for future reference.
3. Head Warnings-All warnings and cautions on the appliance and in the operating instructions should
be adhered to.
4. Follow instructions-All o perating and use instructions should be followed.
5. Water a nd Moisture-The appliance should not be used near water, e.g. near a bathtub, washbowl,
kitchen sink, laundry tub, in a we t basement, or near a swimming pool or the like.
6. Wall or Ceilin g Mounting-The appliance should not be mounted to a wall or ceiling.
7. Ventila tion-The applian ce sh ould be situated so that its lo cation or p osition does not in terfere with its
proper ventilation. For example, the appliance should not be situated on a bed, sofa, rug or similar
surface tha t may block the ventila tion openings, or placed in a built-in installatio n, such as a bookcase
or cabinet, that may impede the flow of air th rough the ventila tion openings.
8. heat-The appliance should be situ ated away from neat sources such as radiators, heat registers, stoves,
or other appliances (including amplifiers) that produce heat..
9. Power Sources-The product should be operated only with the type of power supply indicated on the
marking label. If you are not sure of the type of power supply to your home, consult y our product
dealer or local power company. For products intended to operate from battery power, or other sources,
refer to the operation instructions.
10.Grounding Polarization-This product may be equipped with a polarized alternating current line plug
(a plug having one blade wider than the other). This plug will fit in to the power outlet only one way
this is a sa fety feature. If yo u are unable to insert the plug fu lly into the outlet, try reversing the plug.
If the plug should still fail to f it, contact your electrician to replace your obsolete outlet. Do not defeat
the safety purpose of the polarized plug.
11.Power-Cord Protection-Power supply cords should be routed so that they are not li kely to be walked
on or pinched by items placed upon or against the m, paying particular attention to cords at p lugs,
convenience receptacles, and the point w here they exit fro m the appliance.
12. Cleaning-The appliance should be cleaned only as recommended by the manufacturer.
13. Nonuse periods-The power cord of the appliance should be unplugged from the outlet when left
when left unused for a long period of tim e.
14. Object and Liquid Entry-Care should be taken so that objects d o not fall and liquids are not spilled
into the product case through product openings.
15. Damage Requiring Service-Unplug this product from the wall ou tlet and take it to q ualified service
personnel under the following conditio ns.
a) When the power-supply cord o r plug is damaged.
b) If liquid has been spilled into, or o bjects have fallen into th e product.
c) If the product has been exposed to rain or water.
d) If the product does n ot operate when used according to the operating instructions.
Adjust only those controls that are covered by the operatin g instructions as an improper
adjustment of other controls may interfere wit h the product's normal operation.
e) If the product has been dropped or damaged in any way.
f) When the product exhibits a distin ct change in performance-this indicates a need for service.
16. Servicing-The user should not attempt to service the product be yond tha t described in the operating
instru ction . All servicing should b e referred to qualified service personnel.
17. Power Lines-An outside antenna system should not be located in th e vicinity of overhead power
lines, or other electric li ght or power circuits, or w here it ca n fall into such power lines or circ uits.
When installing an outside antenna system, extreme care should be taken to keep from touching
power lines or circ uits a s contact wit h th em might be fatal.
18. If an outside antenna is connected to th e receiver, be sure the antenna system is grounded so as t o
provide some protection against voltage surges and built up static. Section 810 of the National
Electrical Cod e ANSI/NEFA 70 provides information with respect to p roper grounding of the mast
and supporting stru cture, grounding conductress, location of antenna-discharge unit, siz e of
grounding electrodes, and requirements fo r the grounding electrode (see figure).
19. Cleaning-Unplug this product fr om the wall ou tlet before cleaning. Do not use liq uid cleaners or
aerosol cleaners. Use a damp cloth for cleaning.
20. Lightning-For added protection for this product during a lightning storm, or when it is le ft
unattended and unused for long periods of time, unplug it from the wall outlet and disconnect th e
antenna or cable system. This will prevent damage to th e product due to lightning and power-line
surges.
21. Safety Check-Upon completion of any service or repairs to this product, ask the service technician
to perform safety checks to determine that th e product is in proper operation condition.
22. Overloading-Do not overload wall ou tlets, extension cords, or integral convenience receptacles as
this can result in a ris k of fir or electric shock.
NEC NATIONAL ELECTRICAL CO DE
Do not apply oil o r petroleum products to this product.
CAUTION
Invisib le laser radiation will be emitted when the product is o pen and interlocks are defeated.
Do not defeat the safety interlocks.
GRAPHIC SYMBOLS WITH SUPPLEMENTARY MARKINGS ARE LOCATED O N THE
BOTTOM OF THE UNIT.
USE OF CONT ROLS, ADJUS TMENTS, O R PERFO RMANC E PROCED URE HEREI N MAY
RESULT IN HAZA RDOUS RADI ATION EXPO SURE.
RCD739 (Eng.)(A5)
- 3 -
RCD739 (Eng.)(A5)
- 4 -
MOUNTING LOCA TION
RCD739 (Eng.)(A5)
- 5 -
RCD739 (Eng.)(A5)
- 6 -
LOCATION OF CONTROLS
23 24
1. CD Door
2. CD Door Open Button
3. Speaker
4. Repeat Button
5. Volume Control Knob
6. Program Button
7. Random Button
8. SKIP (FAST-FORWARD) button
9. Function Switch (CD, AM, FM )
10. Alarm ON/OFF Button
11. Minute Set Button
12. LCD Display (CD, Clock and Frequency)
13. Stereo LED Indicator
14. Hour Set Button
15. Alarm Set Button
16. Selector Switch (ON/OFF/AUTO)
17. Time Set Button
18. SKIP (REWIND) button
19. Tuning Control Knob
20. CD Play/Pause Button
21. CD Stop Button
22. Remote Sensor
23. Headphone Jack
24. DC Input Jack
REMOTE CONTROL
1. PLAY Button
2. SKIP (FAST-FORWARD) button
3. Program Button
4. Repeat Button
5. Random Button
6. STOP Button
7. SKIP (REWIND) button
AC OPERATION
To operate the unit using AC power , connect a 9V AC adaptor (included) to an AC outlet
having 120V AC.
CAUTION: When not using AC power, disconnect the AC adapter from the wall outlet by pulling the
plug (not the cord). Do not touch the AC adapter with wet hands and plug fully inserted without
exposing any part of the blade.
HEADPHONE JACK
This unit will accept stereo headphones with a Ø 3.5mm plug. Before connecting the headphones set the
volume to minimum level as not to damage your ears or the headphones. Connect the headphones to the
headphones jack. The speakers will be automatically disconnected.
Warning: Prolonged exposure to high sound levels may permanently damage your hearing. You may not
hear some warning sound while wearing these headphones.
VOLUME CONTROL
Adjust the VOLUME control to the desired level.
RADIO SECTION
LISTENING TO THE RADIO
1. Slide SELECTOR Switch to "ON" position.
2. Slide FUNCTION Switch to select AM or FM position
3. Rotate the Tuning Control Knob to your desired Radio station.
4. To turn off Radio, Slide SELECTOR switch to "OFF" position to turn off the unit.
For better reception,
This unit has a built-in antenna for AM/FM, Locate the unit where you can obtain the best reception.
CLOCK SECTION
CLOCK SETTING
Press and hold Time./SET button to set the clock
Press Hour or Min button respectively
Note: In radio mode, the frequency will appear at the location where time appears. Press and hold the
Time/Set button to display the current time; Press and hold the AL./Set button to display the current
alarm time.
RCD739 (Eng.)(A5)
- 7 -
ALARM TIME SETTING
1. Slide SELECTOR switch to "OFF" or "AUTO" position.
2. Press and hold Al. SET button to set the Alarm time
3. Press Hour or Min button respectively.
4. Turn on the alarm function by pressing AL.ON/OFF button till the alarm Icon appears
Note. While alarm time is on, it will alarm for 3 minutes. To turn off the alarm, press the AL.ON/OFF
button once.
Wake up by Buzzer
1. After set the desired alarm time. And press the AL.ON /OFF button till the alarm icon appears
2. Slide the SELECTOR switch to "OFF" position.
Wake up by CD or Radio
1. Slide SELECTOR switch to "AUTO" position.
2. Set your desired alarm time.
3. Turn on the alarm function by pressing AL.ON/OFF button till the alarm Icon appears
4. Slide the SELECTOR switch to "AUTO" position.
5. Slide the Function Switch to CD, AM or FM position.
When the alarm time is on, CD & RADIO(AM/FM) will be automatically played.
CD SECTION
PLAYING A CD
1. Press the Open button of CD Door where remarked "Open" to open the CD Door.
2. Insert a CD with the label facing upward.
3. Close the CD compartment by pressing the upper corner of CD Door.
4. Slide the FUNCTION switch to CD position
5. Slide the SELECTOR switch to "ON" position to turn on the unit.
The CD will rotate for a while and then stop.
6. Press PLAY/PAUSE button to start CD playback from the first track.
7. Press once more PLAY/PAUSE button to momentarily pause, Icon " " will flash. Press again
PLAY/PAUSE button to resume to playback
8. To stop the playback, Press STOP button.
TRACK SEARCH
Press the SKIP/SEARCH button during play to skip to the desired track.
Press the "F.FWD" button to skip to the next track on the disc.
Press the "REW" button to skip to the beginning of the current track
Press the "REW" button twice or more to skip to previous track.
FORWARD/REVESE SEARCH
Press and hold the Forward or Backward SKIP/SEARCH button during play to scan the disc at high speed.
When the desired section of the disc if found, release the Button and normal play will resume.
"F.FWD" -------------------Forward
"REW" -------------------Backward
Press and hold the "F.FWD" button while playing to scan the current track forward at high speed.
Press and hold the "REW" button while playing to scan the current track backward at high speed.
PROGRAMMED PLAYBACK
Up to 20 tracks can be programmed in to play in any desired sequence.
1. Press the Open button of CD Door where remarked "Open" to open the CD Door.
2. Insert a CD with the label side facing upward.
3. Close the CD compartment by pressing the upper corner of CD Door.
4. Slide the FUNCTION Switch to CD position
5. Slide the SELECTOR Switch to ON position to turn on the unit.
The CD will rotate for a while and then stop.
6. Press PROG button until "PROG 01" flashes in display.
7. Press SKIP Forward or SKIP Backward button to select a desired track to be memorized.
8. Press PROG button to program the track.
9. Repeat steps 7 and 8 to program tracks.
10. Press PLAY/PAUSE button to start playing.
To cancel program play, Press STOP button two times.
REPEAT PLAY
To Repeat Single Track
Press REPEAT button on the remote control while the track you want to repeat is playing. The "REPEAT"
flashing will appear in display.
------Press REPEAT two times on the remote control.
------Press REPEAT button on the remote control twice during play.
------To repeat another track, Press REW or FWD SKIP button.
------To cancel repeat play, Press REPEAT button two times.
To Repeat all the tracks
Press REPEAT button twice during play. The "REPEAT" indicator will appear in display.
------All tracks will be played through in sequence and then the sequence will be repeated continuously.
------To cancel repeat play, press REPEAT button one time.
Random play
Press stop button to enter into stop mode, press Random button once then press play/pause button to
carry out random play, "RANDOM" will appear in display.
All tracks on the disc will be played in random order, then will stop.
During random playing, To cancel random play, press stop button twice.
HANDLING DISCS
This product is designed to play CDs bearing the DISC Identification logo.
CD not carrying this logo may not conform to the CD standard and may not play properly.
Dirty, scratched, or warped discs may cause skipping or noise.
------Handle the CD only by the edges.
------To keep the CD clean , do not touch the surface of the disc.
------Return CDs to their original cases after use to avoid serious scratches that could cause the laser
pickup to skip.
------Do not expose CDs to direct sunlight, high humidity or high temperatures for extended periods of
time, as prolonged exposure to high temperatures can warp CDs
------Do not apply paper or write anything on either side of a CD. Sharp writing instruments or the
inks in some felt-tip pens, may damage the surface of a CD
TO Clean CDs:
------Fingerprints should be wiped from the surface of the CD with a soft cloth. Unlike conventional
records, CDs have no grooves to collect dust and microscopic debris, so gently wiping the CDs
with a cloth removes most of the particles.
------Wipe in a straight motion from the inside to the outside of the CD.
------Never use chemicals (i.e. record cleaning sprays, anti-static sprays, benzene or thinner) to clean
CDs, as damage to the plastic of the CD may result.
RCD739 (Eng.)(A5)
- 8 -
TROUBLESHOOTING GUIDE
You experience a problem with this unit check the chart below before calling of service.
CARE AND MAINTENANCE
CARING FOR COMPACT DISCS
--- To keep the CD clean, handle it by its edge. Do not touch the surface.
--- Do not stick paper or tape onto the CD
--- Do not expose the CD to direct sunlight or heat sources such as holt air ducts.
Do not leave the CD in a car parked under direct sunlight.
Cleaning the Unit
--- To prevent fire or shock hazard , disconnect your unit from the AC power source when cleaning.
--- The finish on your unit may be cleaned with a dust cloth and cared for as other furniture.
Use caution when cleaning and wiping the plastic parts.
---Mild soap and a damp cloth may be used on the front panel.
IMPORTANCE
To keep up the clock's operating, Remember to turn off the unit by sliding the SELECTOR switch A to
AL.OFF position as the clock memory will be lost if you disconnect your unit from the AC power source.
19
1
3
2
4
5
6
7
8
9
10
11
12
13
14
15
16
17
18
20
21
22

RCD739(Eng.)(A5)17-8-2005 /L
TocleantheCDplayer:
Dustonthepickuplenscanleadtoerraticoperationandinterruptionofthesoundduringplay.
NOTE:Donottouchthesurfaceofthepickuplens.Donotallowanyliquidsontheinsideoftheproduct.
------Tocleanthepickuplens,opentheCDDoorandblowthedustoffofthepickuplensusingacamera
lensblower(availableatmostcamerastores)
-----TocleantheCDplayercabinet,useasoft,dampclothtowipeofftheexteriorsurface.
-----Neverusebenzeneorotherstrongchemicalcleaners,asthesecoulddamagetheproduct'sfinish.
RCD739(Eng.)(A5)
-1-
RCD739 (Eng.)(A5)
- 2 -
Digital CD/Radio Stereo System w ith Remot e
MODEL :RCD739
INSTRUCTION MANUAL
Operating Instructions
SAFETY INSTRUCTIONS
CAUTION :TO PREVENT ELECTRIC SHOCK, MATCHWIDE BLADE OFPLUGTOWIDE SLOT,
FULLY INSERT.
WARNING:TO REDUCETHE RISKOFFIRE OR ELECTRIC SHOCK, DONOT EXPOSETHE
APPLIANCETO RAIN OR MOISTURE.
1.Readinstructions-All the safetyand operatinginstructions shouldbe read before the applianceis
operated.
2.Retaininstructions-Thesafety andoperating instructionsshouldberetained for futurereference.
3.HeadWarnings-All warnings andcautionsonthe applianceand inthe operatinginstructions should
be adheredto.
4.Follow instructions-All operating and useinstructions should befollowed.
5.Water and Moisture-Theappliance should not beusednear water, e.g. near abathtub, washbowl,
kitchen sink, laundry tub, ina wet basement, orneara swimmingpool or the like.
6.Wall orCeilingMounting-The applianceshouldnot be mountedtoa wall orceiling.
7.Ventilation-Theappliance should be situated so that its locationor positiondoes not interfere with its
proper ventilation. For example, the appliance shouldnot be situatedon abed, sofa, rugor similar
surfacethat mayblockthe ventilation openings, orplacedin abuilt-ininstallation, suchasa bookcase
or cabinet, that mayimpedethe flow of air throughtheventilation openings.
8.heat-The applianceshouldbesituatedaway fromneatsources suchas radiators, heat registers, stoves,
or other appliances(includingamplifiers) that prod uceheat..
9.Power Sources-The product shouldbeoperatedonlywiththe type of power supplyindicatedon the
marking label. Ifyouarenot sure of the type of power supplytoyour home, consult yourproduct
dealeror local power company. For produ ctsintendedto operatefrom batterypower, or other sources,
refer totheoperationinstructions.
10.GroundingPolarization-Thisproduct maybe equippedwitha polarizedalternating current lineplug
(aplughavingoneblade wider thanthe other).This plugwill fit intothepower outlet only one way
this isa safetyfeature. If youare unable toinsert the plug fu llyinto theoutlet, tryreversingtheplug.
If theplugshouldstillfail to fit, contact your electrician toreplace your obsoleteoutlet. Donot defeat
the safetypurpose of thepolarizedplug.
11.Power-CordProtection-Power supplycordsshouldberoutedsothat theyarenot likely tobe walked
on or pinchedby itemsplacedupon or against them, payingparticular attentionto cordsat plugs,
conveniencereceptacles, andthe point wheretheyexit from theappliance.
12. Cleaning-The appliance should be cleaned only as recommended by the manufacturer.
13. Nonuse periods-The power cord of the appliance should be unplugged from the outlet when left
when left unused for a long period of tim e.
14. Object and Liquid Entry-Care should be taken so that objects d o not fall and liquids are not spilled
into the product case through product openings.
15. Damage Requiring Service-Unplug this product from the wall ou tlet and take it to q ualified service
personnel under the following conditio ns.
a) When the power-supply cord o r plug is damaged.
b) If liquid has been spilled into, or o bjects have fallen into th e product.
c) If the product has been exposed to rain or water.
d) If the product does n ot operate when used according to the operating instructions.
Adjust only those controls that are covered by the operatin g instructions as an improper
adjustment of other controls may interfere wit h the product's normal operation.
e) If the product has been dropped or damaged in any way.
f) When the product exhibits a distin ct change in performance-this indicates a need for service.
16. Servicing-The user should not attempt to service the product beyond tha t described in the operating
instru ction . All servicing should b e referred to qualified service personnel.
17. Power Lines-An outside antenna system should not be located in th e vicinity of overhead power
lines, or other electric li ght or power circuits, or w here it ca n fall into such power lines or circ uits.
When installing an outside antenna system, extreme care should be taken to keep from touching
power lines or circ uits a s contact wit h th em might be fatal.
18. If an outside antenna is connected to th e receiver, be sure the antenna system is grounded so as t o
provide some protection against voltage surges and built up static. Section 810 of the National
Electrical Cod e ANSI/NEFA 70 provides information with respect to p roper grounding of the mast
and supporting stru cture, grounding conductress, location of antenna-discharge unit, siz e of
grounding electrodes, and requirements fo r the grounding electrode (see figure).
19. Cleaning-Unplug this product fr om the wall ou tlet before cleaning. Do not use liq uid c leaners or
aerosol cleaners. Use a damp cloth for cleaning.
20. Lightning-For added protection for this product during a lightning storm, or when it is le ft
unattended and unused for long periods of time, unplug it from the wall outlet and disconnect th e
antenna or cable system. This will prevent damage to th e product due to lightning and power-line
surges.
21. Safety Check-Upon completion of any service or repairs to this product, ask the service technician
to perform safety checks to determine that th e product is in proper operation condition.
22. Overloading-Do not overload wall ou tlets, extension cords, or integral convenience receptacles as
this can result in a ris k of fir or electric shock.
NEC NATIONAL ELECTRICAL CO DE
Do not apply oil o r petroleum products to this product.
CAUTION
Invisib le laser radiation will be emitted when the product is o pen and interlocks are defeated.
Do not defeat the safety interlocks.
GRAPHIC SYMBOLS WITH SUPPLEMENTARY MARKINGS ARE LOCATED O N THE
BOTTOM OF THE UNIT.
USE OF CONT ROLS, ADJUS TMENTS, O R PERFO RMANC E PROCED URE HEREI N MAY
RESULT IN HAZA RDOUS RADIATION EXPO SURE.
RCD739 (Eng.)(A5)
- 3 -
RCD739 (Eng.)(A5)
- 4 -
MOUNTING LOCA TION
6
7
1
2
3
4
5
RCD739 (Eng.)(A5)
- 5 -
RCD739 (Eng.)(A5)
- 6 -
LOCATION OF CONTROLS
1. CD Door
2. CD Door Open Button
3. Speaker
4. Repeat Button
5. Volume Control Knob
6. Program Butto n
7. Random Button
8. SKIP (FAST-FORWARD) button
9. Function Switch (CD, AM, FM )
10. Alarm ON/OF F Button
11. Minute Set Button
12. LCD Display (CD, Cloc k and Frequency)
13. Stereo LED In dicator
14. Hour Set Bu tton
15. Alarm Set Button
16. Selector S witch (ON/OFF/AUTO)
17. Time Set Button
18. SKIP (REWIN D) b utton
19. Tuning Control Knob
20. CD Play/Pause Button
21. CD S top Butto n
22. Remote S ensor
23. Headphone Jack
24. DC Input Jack
REMOTE CONTROL
1. PLAY Button
2. SKIP (FAST-FORWARD) button
3. Program Button
4. Repeat Button
5. Random Button
6. STOP Button
7. SKIP (REWIND) button
AC OPERATION
To operate the unit using AC power , connect a 9V AC adaptor (included) to an AC outlet
having 230V AC.
CAUTION:Whennot using ACpower,disconnect the ACadapterfromthe walloutlet bypullingthe
plug (not the cord). Do not touch the AC adapter with wet hands and plug fully inserted without
exposing any part of the blade.
HEADPHONE JACK
This unit will accept stereo headphones with a Ø 3.5mm plug. Before connecting the headphones set the
volume to minimum level as not to damage your ears or the headphones. Connect the headphones to the
headphones jack. The speakers will be automatically disconnected.
Warning: Prolonged exposure to high sound levels may permanently damage your hearing. You may not
hear some warning sound while wearing these headphones.
VOLUME CONTROL
Adjust the VOLUME control to the desired level.
RADIO SECTION
LISTENING TO THE RADIO
1. Slide SELECTOR Switch to "ON" position.
2. Slide FUNCTION Switch to select AM or FM position
3. Rotate the Tuning Control Knob to your desired Radio station.
4. To turn off Radio, Slide SELECTOR switch to "OFF" position to turn off the unit.
For better reception,
This unit has a built-in antenna for AM/FM, Locate the unit where you can obtain the best reception.
CLOCK SECTION
CLOCK SETTING
Press and hold Time./SET button to set the clock
Press Hour or Min button respectively
Note: In radio mode, the frequency will appear at the location where time appears. Press and hold the
Time/Set button to display the current time; Press and hold the AL./Set button to display the current
alarm time.
RCD739 (Eng.)(A5)
- 7 -
ALARM TIME SETTING
1. Slide SELECTOR switch to "OFF" or "AUTO" position.
2. Press and hold Al. SET button to set the Alarm time
3. Press Hour or Min button respectively.
4. Turn on the alarm function by pressing AL.ON/OFF button till the alarm Icon appears
Note. While alarm time is on, it will alarm for 3 minutes. To turn off the alarm, press the AL.ON/OFF
button once.
Wake up by Buzzer
1. After set the desired alarm time. And press the AL.ON /OFF button till the alarm icon appears
2. Slide the SELECTOR switch to "OFF" position.
Wake up by CD or Radio
1. Slide SELECTOR switch to "AUTO" position.
2. Set your desired alarm time.
3. Turn on the alarm function by pressing AL.ON/OFF button till the alarm Icon appears
4. Slide the SELECTOR switch to "AUTO" position.
5. Slide the Function Switch to CD, AM or FM position.
When the alarm time is on, CD & RADIO(AM/FM) will be automatically played.
CD SECTION
PLAYING A CD
1. Press the Open button of CD Door where remarked "Open" to open the CD Door.
2. Insert a CD with the label facing upward.
3. Close the CD compartment by pressing the upper corner of CD Door.
4. Slide the FUNCTION switch to CD position
5. Slide the SELECTOR switch to "ON" position to turn on the unit.
The CD will rotate for a while and then stop.
6. Press PLAY/PAUSE button to start CD playback from the first track.
7. Press once more PLAY/PAUSE button to momentarily pause, Icon " " will flash. Press again
PLAY/PAUSE button to resume to playback
8. To stop the playback, Press STOP button.
TRACK SEARCH
Press the SKIP/SEARCH button during play to skip to the desired track.
Press the "F.FWD" button to skip to the next track on the disc.
Press the "REW" button to skip to the beginning of the current track
Press the "REW" button twice or more to skip to previous track.
FORWARD/REVESE SEARCH
Press and hold the Forward or Backward SKIP/SEARCH button during play to scan the disc at high speed.
When the desired section of the disc if found, release the Button and normal play will resume.
"F.FWD" -------------------Forward
"REW" -------------------Backward
Press and hold the "F.FWD" button while playing to scan the current track forward at high speed.
Press and hold the "REW" button while playing to scan the current track backward at high speed.
PROGRAMMED PLAYBACK
Up to 20 tracks can be programmed in to play in any desired sequence.
1. Press the Open button of CD Door where remarked "Open" to open the CD Door.
2. Insert a CD with the label side facing upward.
3. Close the CD compartment by pressing the upper corner of CD Door.
4. Slide the FUNCTION Switch to CD position
5. Slide the SELECTOR Switch to ON position to turn on the unit.
The CD will rotate for a while and then stop.
6. Press PROG button until "PROG 01" flashes in display.
7. Press SKIP Forward or SKIP Backward button to select a desired track to be memorized.
8. Press PROG button to program the track.
9. Repeat steps 7 and 8 to program tracks.
10. Press PLAY/PAUSE button to start playing.
To cancel program play, Press STOP button two times.
REPEAT PLAY
To Repeat Single Track
Press REPEAT button on the remote control while the track you want to repeat is playing. The "REPEAT"
flashing will appear in display.
------Press REPEAT two times on the remote control.
------Press REPEAT button on the remote control twice during play.
------To repeat another track, Press REW or FWD SKIP button.
------To cancel repeat play, Press REPEAT button two times.
To Repeat all the tracks
Press REPEAT button twice during play. The "REPEAT" indicator will appear in display.
------All tracks will be played through in sequence and then the sequence will be repeated continuously.
------To cancel repeat play, press REPEAT button one time.
Random play
Press stop button to enter into stop mode, press Random button once then press play/pause button to
carry out random play, "RANDOM" will appear in display.
All tracks on the disc will be played in random order, then will stop.
During random playing, To cancel random play, press stop button twice.
HANDLING DISCS
This product is designed to play CDs bearing the DISC Identification logo.
CD not carrying this logo may not conform to the CD standard and may not play properly.
Dirty, scratched, or warped discs may cause skipping or noise.
------Handle the CD only by the edges.
------To keep the CD clean , do not touch the surface of the disc.
------Return CDs to their original cases after use to avoid serious scratches that could cause the laser
pickup to skip.
------Do not expose CDs to direct sunlight, high humidity or high temperatures for extended periods of
time, as prolonged exposure to high temperatures can warp CDs
------Do not apply paper or write anything on either side of a CD. Sharp writing instruments or the
inks in some felt-tip pens, may damage the surface of a CD
TO Clean CDs:
------Fingerprints should be wiped from the surface of the CD with a soft cloth. Unlike conventional
records, CDs have no grooves to collect dust and microscopic debris, so gently wiping the CDs
with a cloth removes most of the particles.
------Wipe in a straight motion from the inside to the outside of the CD.
------Never use chemicals (i.e. record cleaning sprays, anti-static sprays, benzene or thinner) to clean
CDs, as damage to the plastic of the CD may result.
RCD739 (Eng.)(A5)
-8-
TROUBLESHOOTINGGUIDE
Youexperienceaproblemwiththisunit checkthechartbelowbeforecallingofservice.
CAREANDMAINTENANCE
CARINGFORCOMPACTDISCS
---TokeeptheCDclean,handleitbyitsedge.Donottouchthesurface.
---DonotstickpaperortapeontotheCD
---DonotexposetheCDtodirectsunlightorheatsourcessuchasholtairducts.
DonotleavetheCDinacarparkedunderdire ctsunlight.
CleaningtheUnit
---Topreventfireorshockhazard,disconnectyour unitfromtheACpowersourcewhencleaning.
---Thefinishonyourunitmaybecleanedwithadustclothandcare dforasotherfurniture.
Usecautionwhencleaningandwiping theplasticparts.
---Mildsoapandadampclothmaybeusedonthefrontpanel.
IMPORTANCE
Tokeepuptheclock'soperating,RemembertoturnofftheunitbyslidingtheSELECTORswitchAto
AL.OFFpositionastheclockmemorywillbelost ifyoudisconnectyourunitfromtheACpowersource.

RCD739 (Eng.)( A5) 17-8- 2005 / L
To clean the CD player:
Dust on the pickup lens can lead to erratic operation and interruption of the sound during play.
NOTE: Do not touch the surface of the pickup lens. Do not allow any liquids on the inside of the product.
------To clean the pickup lens, open the CD Door and blow the dust off of the pickup lens using a camera
lens blower(available at most camera stores)
-----To clean the CD player cabinet , use a soft , damp cloth to wipe off the exterior surface.
-----Never use benzene or other strong chemical cleaners ,as these could damage the product's finish.
RCD739 (Eng.)(A5)
- 1 -
RCD739 (Eng.)(A5)
- 2 -
Digital CD/Radio Stereo System w ith Remot e
MODEL : RCD739
INSTRUCTION MANUAL
Operating Instructions
SAFETY INSTRUCTIONS
CAUTION : TO PREVENT ELE CTRIC S HOCK, MATCH WIDE BLA DE OF PLUG TO WIDE S LOT,
FULLY INSERT.
WARNING : TO REDUCE THE RI SK OF FIRE OR ELECTRIC S HOCK, DO NOT EXPOSE THE
APPLIANCE TO RA IN OR M OISTURE.
1. Read instructions-All th e safety and operating instructions should be read before the appliance is
operated.
2. Retain instructions-The safety and operating instructions should be retained for future reference.
3. Head Warnings-All warnings and cautions on the appliance and in the operating instructions should
be adhered to.
4. Follow instructions-All o perating and use instructions should be followed.
5. Water a nd Moisture-The appliance should not be used near water, e.g. near a bathtub, washbowl,
kitchen sink, laundry tub, in a we t basement, or near a swimming pool or the like.
6. Wall or Ceilin g Mounting-The appliance should not be mounted to a wall or ceiling.
7. Ventila tion-The applian ce sh ould be situated so that its lo cation or p osition does not in terfere with its
proper ventilation. For example, the appliance should not be situated on a bed, sofa, rug or similar
surface tha t may block the ventila tion openings, or placed in a built-in installatio n, such as a bookcase
or cabinet, that may impede the flow of air th rough the ventila tion openings.
8. heat-The appliance should be situ ated away from neat sources such as radiators, heat registers, stoves,
or other appliances (including amplifiers) that produce heat..
9. Power Sources-The product should be operated only with the type of power supply indicated on the
marking label. If you are not sure of the type of power supply to your home, consult y our product
dealer or local power company. For products intended to operate from battery power, or other sources,
refer to the operation instructions.
10.Grounding Polarization-This product may be equipped with a polarized alternating current line plug
(a plug having one blade wider than the other). This plug will fit in to the power outlet only one way
this is a sa fety feature. If yo u are unable to insert the plug fu lly into the outlet, try reversing the plug.
If the plug should still fail to f it, contact your electrician to replace your obsolete outlet. Do not defeat
the safety purpose of the polarized plug.
11.Power-Cord Protection-Power supply cords should be routed so that they are not li kely to be walked
on or pinched by items placed upon or against the m, paying particular attention to cords at p lugs,
convenience receptacles, and the point w here they exit fro m the appliance.
12. Cleaning-The appliance should be cleaned only as recommended by the manufacturer.
13. Nonuse periods-The power cord of the appliance should be unplugged from the outlet when left
when left unused for a long period of tim e.
14. Object and Liquid Entry-Care should be taken so that objects d o not fall and liquids are not spilled
into the product case through product openings.
15. Damage Requiring Service-Unplug this product from the wall ou tlet and take it to q ualified service
personnel under the following conditio ns.
a) When the power-supply cord o r plug is damaged.
b) If liquid has been spilled into, or o bjects have fallen into th e product.
c) If the product has been exposed to rain or water.
d) If the product does n ot operate when used according to the operating instructions.
Adjust only those controls that are covered by the operatin g instructions as an improper
adjustment of other controls may interfere wit h the product's normal operation.
e) If the product has been dropped or damaged in any way.
f) When the product exhibits a distin ct change in performance-this indicates a need for service.
16. Servicing-The user should not attempt to service the product be yond tha t described in the operating
instru ction . All servicing should b e referred to qualified service personnel.
17. Power Lines-An outside antenna system should not be located in th e vicinity of overhead power
lines, or other electric li ght or power circuits, or w here it ca n fall into such power lines or circ uits.
When installing an outside antenna system, extreme care should be taken to keep from touching
power lines or circ uits a s contact wit h th em might be fatal.
18. If an outside antenna is connected to th e receiver, be sure the antenna system is grounded so as t o
provide some protection against voltage surges and built up static. Section 810 of the National
Electrical Cod e ANSI/NEFA 70 provides information with respect to p roper grounding of the mast
and supporting stru cture, grounding conductress, location of antenna-discharge unit, siz e of
grounding electrodes, and requirements fo r the grounding electrode (see figure).
19. Cleaning-Unplug this product fr om the wall ou tlet before cleaning. Do not use liq uid cleaners or
aerosol cleaners. Use a damp cloth for cleaning.
20. Lightning-For added protection for this product during a lightning storm, or when it is le ft
unattended and unused for long periods of time, unplug it from the wall outlet and disconnect th e
antenna or cable system. This will prevent damage to th e product due to lightning and power-line
surges.
21. Safety Check-Upon completion of any service or repairs to this product, ask the service technician
to perform safety checks to determine that th e product is in proper operation condition.
22. Overloading-Do not overload wall ou tlets, extension cords, or integral convenience receptacles as
this can result in a ris k of fir or electric shock.
NEC NATIONAL ELECTRICAL CO DE
Do not apply oil o r petroleum products to this product.
CAUTION
Invisib le laser radiation will be emitted when the product is o pen and interlocks are defeated.
Do not defeat the safety interlocks.
GRAPHIC SYMBOLS WITH SUPPLEMENTARY MARKINGS ARE LOCATED O N THE
BOTTOM OF THE UNIT.
USE OF CONT ROLS, ADJUS TMENTS, O R PERFO RMANC E PROCED URE HEREI N MAY
RESULT IN HAZA RDOUS RADI ATION EXPO SURE.
RCD739 (Eng.)(A5)
- 3 -
RCD739 (Eng.)(A5)
- 4 -
MOUNTING LOCA TION
RCD739 (Eng.)(A5)
- 5 -
RCD739 (Eng.)(A5)
- 6 -
LOCATION OF CONTROLS
1. CD Door
2. CD Door Open Button
3. Speaker
4. Repeat Button
5. Volume Control Knob
6. Program Butto n
7. Random Button
8. SKIP (FAST-FORWARD) button
9. Function Switch (CD, AM, FM )
10. Alarm ON/OF F Button
11. Minute Set Button
12. LCD Display (CD, Cloc k and Frequency)
13. Stereo LED In dicator
14. Hour Set Bu tton
15. Alarm Set Button
16. Selector S witch (ON/OFF/AUTO)
17. Time Set Button
18. SKIP (REWIN D) b utton
19. Tuning Control Knob
20. CD Play/Pause Button
21. CD Stop Butto n
22. Remote Sensor
23. Headphone Jack
24. DC Input Jack
REMOTE CONTROL
1. PLAY Button
2. SKIP (FAST-FORWARD) button
3. Program Butto n
4. Repeat Button
5. Random Button
6. STOP Button
7. SKIP (REWIN D) button
AC OPERATION
To operate the unit u sing AC power , c onnect a 9V AC adaptor (included) to an AC outlet
having 120V AC.
CAUTION: When not using AC power, disconnect the AC adapter from the wall outlet by pulling the
plug (not the cord). Do not touch the AC adapter w ith w et hands and plug fully inserted without
exposing any part of the blade.
HEADPHO NE JACK
This unit will a ccept stereo headphones with a Ø 3.5mm plug. Before connecting the headphones set the
volume to minimum level as not to damage your ears or the headphones. Connect th e headphones to the
headphones jack. The speakers wil l be automatically disconnected.
Warning: Prolonged exposure to high sound levels may permanently damage your hearing. You may not
hear some warning sound while wearing these headphones.
VOLUME CON TROL
Adjust th e VOLUME control to the desired level.
RADIO SECT ION
LISTENING TO THE RADI O
1. Slide SELECTOR S witch to "ON" positio n.
2. Slide FUNCTION S witch to s elect AM or FM positio n
3. Rotate the Tuning Control Knob to your desired Radio station.
4. To turn off Radio, Slide SELECTOR switch to "OFF" positio n to tu rn off the unit.
For better reception,
This unit has a built-in antenna for AM/FM, Locate the unit where you can obtain the best reception.
CLOCK SECT ION
CLOCK SETTING
Press and hold Time./SET button to set the clock
Press Hour or Min button respectively
Note: In radio mode, th e frequency will a ppear at the location where time appears. P ress and hold the
Time/Set button to display the current time; Press and hold the AL./Set button to display the current
alarm time.
RCD739 (Eng.)(A5)
- 7 -
ALARM TIME SETTING
1. Slide SELECTOR switch to "OFF" or "AUTO" position.
2. Press and hold Al. SET button to set the Alarm time
3. Press Hour or Min button respectively.
4. Turn on the alarm function by pressing AL.ON/OFF button till the alarm Icon appears
Note. While alarm time is on, it will alarm for 3 minutes. To turn off the alarm, press the AL.ON/OFF
button once.
Wake up by Buzzer
1. After set the desired alarm time. And press the AL.ON /OFF button till the alarm icon appears
2. Slide the SELECTOR switch to "OFF" position.
Wake up by CD or Radio
1. Slide SELECTOR switch to "AUTO" position.
2. Set your desired alarm time.
3. Turn on the alarm function by pressing AL.ON/OFF button till the alarm Icon appears
4. Slide the SELECTOR switch to "AUTO" position.
5. Slide the Function Switch to CD, AM or FM position.
When the alarm time is on, CD & RADIO(AM/FM) will be automatically played.
CD SECTION
PLAYING A CD
1. Press the Open button of CD Door where remarked "Open" to open the CD Door.
2. Insert a CD with the label facing upward.
3. Close the CD compartment by pressing the upper corner of CD Door.
4. Slide the FUNCTION switch to CD position
5. Slide the SELECTOR switch to "ON" position to turn on the unit.
The CD will rotate for a while and then stop.
6. Press PLAY/PAUSE button to start CD playback from the first track.
7. Press once more PLAY/PAUSE button to momentarily pause, Icon " " will flash. Press again
PLAY/PAUSE button to resume to playback
8. To stop the playback, Press STOP button.
TRACK SEARCH
Press the SKIP/SEARCH button during play to skip to the desired track.
Press the "F.FWD" button to skip to the next track on the disc.
Press the "REW" button to skip to the beginning of the current track
Press the "REW" button twice or more to skip to previous track.
FORWARD/REVESE SEARCH
Press and hold the Forward or Backward SKIP/SEARCH button during play to scan the disc at high speed.
When the desired section of the disc if found, release the Button and normal play will resume.
"F.FWD" -------------------Forward
"REW" -------------------Backward
Press and hold the "F.FWD" button while playing to scan the current track forward at high speed.
Press and hold the "REW" button while playing to scan the current track backward at high speed.
PROGRAMMED PLAYBACK
Up to 20 tracks can be programmed in to play in any desired sequence.
1. Press the Open button of CD Door where remarked "Open" to open the CD Door.
2. Insert a CD with the label side facing upward.
3. Close the CD compartment by pressing the upper corner of CD Door.
4. Slide the FUNCTION Switch to CD position
5. Slide the SELECTOR Switch to ON position to turn on the unit.
The CD will rotate for a while and then stop.
6. Press PROG button until "PROG 01" flashes in display.
7. Press SKIP Forward or SKIP Backward button to select a desired track to be memorized.
8. Press PROG button to program the track.
9. Repeat steps 7 and 8 to program tracks.
10. Press PLAY/PAUSE button to start playing.
To cancel program play, Press STOP button two times.
REPEAT PLAY
To Repeat Single Track
Press REPEAT button on the remote control while the track you want to repeat is playing. The "REPEAT"
flashing will appear in display.
------Press REPEAT two times on the remote control.
------Press REPEAT button on the remote control twice during play.
------To repeat another track, Press REW or FWD SKIP button.
------To cancel repeat play, Press REPEAT button two times.
To Repeat all the tracks
Press REPEAT button twice during play. The "REPEAT" indicator will appear in display.
------All tracks will be played through in sequence and then the sequence will be repeated continuously.
------To cancel repeat play, press REPEAT button one time.
Random play
Press stop button to enter into stop mode, press Random button once then press play/pause button to
carry out random play, "RANDOM" will appear in display.
All tracks on the disc will be played in random order, then will stop.
During random playing, To cancel random play, press stop button twice.
HANDLING DISCS
This product is designed to play CDs bearing the DISC Identification logo.
CD not carrying this logo may not conform to the CD standard and may not play properly.
Dirty, scratched, or warped discs may cause skipping or noise.
------Handle the CD only by the edges.
------To keep the CD clean , do not touch the surface of the disc.
------Return CDs to their original cases after use to avoid serious scratches that could cause the laser
pickup to skip.
------Do not expose CDs to direct sunlight, high humidity or high temperatures for extended periods of
time, as prolonged exposure to high temperatures can warp CDs
------Do not apply paper or write anything on either side of a CD. Sharp writing instruments or the
inks in some felt-tip pens, may damage the surface of a CD
TO Clean CDs:
------Fingerprints should be wiped from the surface of the CD with a soft cloth. Unlike conventional
records, CDs have no grooves to collect dust and microscopic debris, so gently wiping the CDs
with a cloth removes most of the particles.
------Wipe in a straight motion from the inside to the outside of the CD.
------Never use chemicals (i.e. record cleaning sprays, anti-static sprays, benzene or thinner) to clean
CDs, as damage to the plastic of the CD may result.
RCD739 (Eng.)(A5)
- 8 -
TROUBLESHOOTING GUIDE
You experience a problem with this unit check the chart below before calling of service.
CARE AND MAINTENANCE
CARING FOR COMPACT DISCS
--- To keep the CD clean, handle it by its edge. Do not touch the surface.
--- Do not stick paper or tape onto the CD
--- Do not expose the CD to direct sunlight or heat sources such as holt air ducts.
Do not leave the CD in a car parked under direct sunlight.
Cleaning the Unit
--- To prevent fire or shock hazard , disconnect your unit from the AC power source when cleaning.
--- The finish on your unit may be cleaned with a dust cloth and cared for as other furniture.
Use caution when cleaning and wiping the plastic parts.
---Mild soap and a damp cloth may be used on the front panel.
IMPORTANCE
To keep up the clock's operating, Remember to turn off the unit by sliding the SELECTOR switch A to
AL.OFF position as the clock memory will be lost if you disconnect your unit from the AC power source.

RCD739 (Eng.)( A5) 17-8- 2005 / L
To clean the CD player:
Dust on the pickup lens can lead to erratic operation and interruption of the sound during play.
NOTE: Do not touch the surface of the pickup lens. Do not allow any liquids on the inside of the product.
------To clean the pickup lens, open the CD Door and blow the dust off of the pickup lens using a camera
lens blower(available at most camera stores)
-----To clean the CD player cabinet , use a soft , damp cloth to wipe off the exterior surface.
-----Never use benzene or other strong chemical cleaners ,as these could damage the product's finish.
RCD739 (Eng.)(A5)
- 1 -
RCD739 (Eng.)(A5)
- 2 -
Digital CD/Radio Stereo System w ith Remot e
MODEL : RCD739
INSTRUCTION MANUAL
Operating Instructions
SAFETY INSTRUCTIONS
CAUTION : TO PREVENT ELE CTRIC S HOCK, MATCH WIDE BLA DE OF PLUG TO WIDE S LOT,
FULLY INSERT.
WARNING : TO REDUCE THE RI SK OF FIRE OR ELECTRIC S HOCK, DO NOT EXPOSE THE
APPLIANCE TO RA IN OR M OISTURE.
1. Read instructions-All th e safety and operating instructions should be read before the appliance is
operated.
2. Retain instructions-The safety and operating instructions should be retained for future reference.
3. Head Warnings-All warnings and cautions on the appliance and in the operating instructions should
be adhered to.
4. Follow instructions-All o perating and use instructions should be followed.
5. Water a nd Moisture-The appliance should not be used near water, e.g. near a bathtub, washbowl,
kitchen sink, laundry tub, in a we t basement, or near a swimming pool or the like.
6. Wall or Ceilin g Mounting-The appliance should not be mounted to a wall or ceiling.
7. Ventila tion-The applian ce sh ould be situated so that its lo cation or p osition does not in terfere with its
proper ventilation. For example, the appliance should not be situated on a bed, sofa, rug or similar
surface tha t may block the ventila tion openings, or placed in a built-in installatio n, such as a bookcase
or cabinet, that may impede the flow of air th rough the ventila tion openings.
8. heat-The appliance should be situ ated away from neat sources such as radiators, heat registers, stoves,
or other appliances (including amplifiers) that produce heat..
9. Power Sources-The product should be operated only with the type of power supply indicated on the
marking label. If you are not sure of the type of power supply to your home, consult y our product
dealer or local power company. For products intended to operate from battery power, or other sources,
refer to the operation instructions.
10.Grounding Polarization-This product may be equipped with a polarized alternating current line plug
(a plug having one blade wider than the other). This plug will fit in to the power outlet only one way
this is a sa fety feature. If yo u are unable to insert the plug fu lly into the outlet, try reversing the plug.
If the plug should still fail to f it, contact your electrician to replace your obsolete outlet. Do not defeat
the safety purpose of the polarized plug.
11.Power-Cord Protection-Power supply cords should be routed so that they are not li kely to be walked
on or pinched by items placed upon or against the m, paying particular attention to cords at p lugs,
convenience receptacles, and the point w here they exit fro m the appliance.
12. Cleaning-The appliance should be cleaned only as recommended by the manufacturer.
13. Nonuse periods-The power cord of the appliance should be unplugged from the outlet when left
when left unused for a long period of tim e.
14. Object and Liquid Entry-Care should be taken so that objects d o not fall and liquids are not spilled
into the product case through product openings.
15. Damage Requiring Service-Unplug this product from the wall ou tlet and take it to q ualified service
personnel under the following conditio ns.
a) When the power-supply cord o r plug is damaged.
b) If liquid has been spilled into, or o bjects have fallen into th e product.
c) If the product has been exposed to rain or water.
d) If the product does n ot operate when used according to the operating instructions.
Adjust only those controls that are covered by the operatin g instructions as an improper
adjustment of other controls may interfere wit h the product's normal operation.
e) If the product has been dropped or damaged in any way.
f) When the product exhibits a distin ct change in performance-this indicates a need for service.
16. Servicing-The user should not attempt to service the product be yond tha t described in the operating
instru ction . All servicing should b e referred to qualified service personnel.
17. Power Lines-An outside antenna system should not be located in th e vicinity of overhead power
lines, or other electric li ght or power circuits, or w here it ca n fall into such power lines or circ uits.
When installing an outside antenna system, extreme care should be taken to keep from touching
power lines or circ uits a s contact wit h th em might be fatal.
18. If an outside antenna is connected to th e receiver, be sure the antenna system is grounded so as t o
provide some protection against voltage surges and built up static. Section 810 of the National
Electrical Cod e ANSI/NEFA 70 provides information with respect to p roper grounding of the mast
and supporting stru cture, grounding conductress, location of antenna-discharge unit, siz e of
grounding electrodes, and requirements fo r the grounding electrode (see figure).
19. Cleaning-Unplug this product fr om the wall ou tlet before cleaning. Do not use liq uid cleaners or
aerosol cleaners. Use a damp cloth for cleaning.
20. Lightning-For added protection for this product during a lightning storm, or when it is le ft
unattended and unused for long periods of time, unplug it from the wall outlet and disconnect th e
antenna or cable system. This will prevent damage to th e product due to lightning and power-line
surges.
21. Safety Check-Upon completion of any service or repairs to this product, ask the service technician
to perform safety checks to determine that th e product is in proper operation condition.
22. Overloading-Do not overload wall ou tlets, extension cords, or integral convenience receptacles as
this can result in a ris k of fir or electric shock.
NEC NATIONAL ELECTRICAL CO DE
Do not apply oil o r petroleum products to this product.
CAUTION
Invisib le laser radiation will be emitted when the product is o pen and interlocks are defeated.
Do not defeat the safety interlocks.
GRAPHIC SYMBOLS WITH SUPPLEMENTARY MARKINGS ARE LOCATED O N THE
BOTTOM OF THE UNIT.
USE OF CONT ROLS, ADJUS TMENTS, O R PERFO RMANC E PROCED URE HEREI N MAY
RESULT IN HAZA RDOUS RADI ATION EXPO SURE.
RCD739 (Eng.)(A5)
- 3 -
RCD739 (Eng.)(A5)
- 4 -
MOUNTING LOCA TION
RCD739 (Eng.)(A5)
- 5 -
RCD739 (Eng.)(A5)
- 6 -
LOCATION OF CONTROLS
1. CD Door
2. CD Door Open Button
3. Speaker
4. Repeat Button
5. Volume Control Knob
6. Program Butto n
7. Random Button
8. SKIP (FAST-FORWARD) button
9. Function Switch (CD, AM, FM )
10. Alarm ON/OF F Button
11. Minute Set Button
12. LCD Display (CD, Cloc k and Frequency)
13. Stereo LED In dicator
14. Hour Set Bu tton
15. Alarm Set Button
16. Selector S witch (ON/OFF/AUTO)
17. Time Set Button
18. SKIP (REWIN D) b utton
19. Tuning Control Knob
20. CD Play/Pause Button
21. CD Stop Butto n
22. Remote Sensor
23. Headphone Jack
24. DC Input Jack
REMOTE CONTROL
1. PLAY Button
2. SKIP (FAST-FORWARD) button
3. Program Butto n
4. Repeat Button
5. Random Button
6. STOP Button
7. SKIP (REWIN D) button
AC OPERATION
To operate the unit u sing AC power , c onnect a 9V AC adaptor (included) to an AC outlet
having 120V AC.
CAUTION: When not using AC power, disconnect the AC adapter from the wall outlet by pulling the
plug (not the cord). Do not touch the AC adapter w ith w et hands and plug fully inserted without
exposing any part of the blade.
HEADPHO NE JACK
This unit will a ccept stereo headphones with a Ø 3.5mm plug. Before connecting the headphones set the
volume to minimum level as not to damage your ears or the headphones. Connect th e headphones to the
headphones jack. The speakers wil l be automatically disconnected.
Warning: Prolonged exposure to high sound levels may permanently damage your hearing. You may not
hear some warning sound while wearing these headphones.
VOLUME CON TROL
Adjust th e VOLUME control to the desired level.
RADIO SECT ION
LISTENING TO THE RADI O
1. Slide SELECTOR S witch to "ON" positio n.
2. Slide FUNCTION S witch to s elect AM or FM positio n
3. Rotate the Tuning Control Knob to your desired Radio station.
4. To turn off Radio, Slide SELECTOR switch to "OFF" positio n to tu rn off the unit.
For better reception,
This unit has a built-in antenna for AM/FM, Locate the unit where you can obtain the best reception.
CLOCK SECT ION
CLOCK SETTING
Press and hold Time./SET button to set the clock
Press Hour or Min button respectively
Note: In radio mode, th e frequency will a ppear at the location where time appears. P ress and hold the
Time/Set button to display the current time; Press and hold the AL./Set button to display the current
alarm time.
RCD739 (Eng.)(A5)
- 7 -
ALARM TIME S ETTING
1. Slide SELECTOR s witch to "OFF" or "AUTO" position.
2. Press and hold Al. S ET button to set the Alarm time
3. Press Hour or Min button respectively.
4. Turn on the alarm fu nction by pressing AL.ON/OFF button till th e alarm Icon appears
Note. While alarm time is on, it will a larm fo r 3 minutes. To turn off the alarm, p ress the AL.ON/OFF
button once.
Wake up by Buzzer
1. After set th e desired alarm time. And press the AL.ON /OFF button till th e alarm icon appears
2. Slide the SELECTOR switch to "OFF" positio n.
Wake up by CD o r Radio
1. Slide SELECTOR s witch to "AUTO" position.
2. Set your desired alarm time.
3. Turn on the alarm fu nction by pressing AL.ON/OFF button till th e alarm Icon appears
4. Slide the SELECTOR switch to "AUTO" position.
5. Slide the Function Switch to CD, AM or FM positio n.
When the alarm time is o n, CD & RA DIO(AM/FM) will be automatically played.
CD SECT ION
PLAYING A CD
1. Press the Open button of CD D oor where remarked "Open" to open the CD Door.
2. Insert a CD with the label facing upward.
3. Close the CD compartment by pressing the upper corner of CD Do or.
4. Slide the FUNCTION switc h to CD positio n
5. Slide the SELECTOR switch to "ON" position to turn on the unit.
The CD will ro tate fo r a while and then stop.
6. Press PLAY/PAUSE button to start CD playback from the first track.
7. Press once more PLAY/PAUSE button to momentarily pause, Icon " " will fla sh. Press again
PLAY/PAUSE button to resume to p layback
8. To stop the playback, Press STOP button.
TRACK SEARCH
Press the SKIP/SEARCH b utton during play to skip to th e desired trac k.
Press the "F.FWD" button to skip to th e next track on the disc.
Press the "REW" button to skip to th e beginning of the current trac k
Press the "REW" button twice or more to skip to previous track.
FORWARD/REVE SE S EARCH
Press and hold the Forward or Backward S KIP/SEARCH b utton during play to scan the disc at high speed.
When the desired section of the disc if fo und, release the Button and normal play will re sume.
" F.FWD" -------------------Forward
" REW" - --------- ---------Backward
Press and hold the "F.FWD" button while playing to scan the current track forward a t high speed.
Press and hold the "REW" button while playing to scan the current track backward at high speed.
PROGRAMMED PLAYBACK
Up to 20 tracks can be programmed in to play in any desired sequence.
1. Press the Open button of CD D oor where remarked "Open" to open the CD Door.
2. Insert a CD with the label side facing upward.
3. Close the CD compartment by pressing the upper corner of CD Do or.
4. Slide the FUNCTION Switch to CD position
5. Slide the SELECTOR S witch to ON position to turn on the unit.
The CD will ro tate fo r a while and then stop.
6. Press PROG button until "P ROG 01" flashes in display.
7. Press SKIP Forward or SKIP Backward button to select a desired track to b e memorized.
8. Press PROG button to program the trac k.
9. Repeat steps 7 and 8 to program tracks.
10. Press PLAY/PAUSE button to start playing.
To cancel pro gram play, Press STOP button two times.
REPEAT PLAY
To Repeat Single Track
Press REP EAT button on the remote control while the track you want to repeat is playing. The "REPEAT"
flashing will ap pear in display.
------Press REPEAT two time s on the remote control.
------Press REPEAT button on the remote control twice during play.
------To repeat another track, Press REW o r FWD SKIP button.
------To cancel repeat play, Press REP EAT button two time s.
To Repeat all the tracks
Press REP EAT button twice during play. The "REPEAT" ind icator will ap pear in display.
------All tra cks will be played through in s equence and then the sequence will be repeated continuously.
------To cancel repeat play, press REP EAT button one time.
Random play
Press stop button to enter into stop mode, press Random button once then press play/pause button to
carry out random play, "RANDOM" will ap pear in display.
All tracks on the disc will be played in random order, then will s top.
During random playing, To cancel ran dom play, press stop button twice.
HANDLING DISCS
This product is designed to play CDs bearing the DISC Identification logo.
CD not carrying this logo may not conform to the CD standard and may not play properly.
Dirty, scratched, or warped discs may cause skipping or noise.
------Handle th e CD only by the edges.
------To keep the CD clean , do not touch the surface of the disc.
------Return CDs to their original cases after use to avoid serious scratches that could cause the laser
pickup to skip.
------Do not expose CDs to d irect sunlight, hig h humidity or high temperatures for extended periods of
time, as prolonged exposure to high temperatures c an warp CDs
------Do not apply paper or write anything on either side of a CD. Sharp writin g instruments or the
inks in some felt-tip p ens, may damage the surface of a CD
TO Clean CDs:
------Fingerprints should be wiped from the surface of the CD wit h a soft cloth . Unlike conventional
records, CDs have no grooves to collect dust an d microscopic debris, so gently wiping the CDs
with a cloth removes most of the particles.
------Wipe in a stra ight motion from the inside to the outside of the CD.
------Never use chemicals (i.e . record cleaning sprays, anti-static sprays, benzene or th inner) to c lean
CDs, as damage to the plastic of the CD may result.
RCD739 (Eng.)(A5)
- 8 -
TROUBLESHOOTING GUIDE
You experience a problem with this unit check the chart below before calling of service.
CARE AND MAINTENANCE
CARING FOR COMPACT DISCS
--- To keep the CD clean, handle it by its edge. Do not touch the surface.
--- Do not stick paper or tape onto the CD
--- Do not expose the CD to direct sunlight or heat sources such as holt air ducts.
Do not leave the CD in a car parked under direct sunlight.
Cleaning the Unit
--- To prevent fire or shock hazard , disconnect your unit from the AC power source when cleaning.
--- The finish on your unit may be cleaned with a dust cloth and cared for as other furniture.
Use caution when cleaning and wiping the plastic parts.
---Mild soap and a damp cloth may be used on the front panel.
IMPORTANCE
To keep up the clock's operating, Remember to turn off the unit by sliding the SELECTOR switch A to
AL.OFF position as the clock memory will be lost if you disconnect your unit from the AC power source.
• Reinsert headphone cord into
headphone jack
• Increase the volume
• Try another compact disc
• press FUNCTION SELECTOR
switch to the desired function
SOLUTION
CD Player will
Not turn on
• Wrong adapter being used
• AC adapter not connected
properly
Disc will notPlay
• Disc inserted incorrectly
• Defective compact disc
• CD compartment not closed
• Moisture condensationon disc
• Reinsert disc with label side
facing up
• Try another compact disc
• Close CD compartment
• Wipe disc with soft cloth
Erratic CDplayback
No sound
Noise or Sound
distorted on radio
• Dirty or defective disc • Clean or replace disc
• Headphone plug not inserted
property
• Volume control set to minimum
• Defective compact disc
• FUNCTION is not set to the
• desired position
• Station not tuned properly for FM • Retune FM broadcast station
SYMPTOM CAUSE
Table of contents
Other Curtis Stereo System manuals

Curtis
Curtis RCD621 User manual

Curtis
Curtis RCD881 User manual

Curtis
Curtis RCD-718 User manual

Curtis
Curtis RCD847 User manual

Curtis
Curtis RCD926 User manual

Curtis
Curtis RCD745MP3 User manual

Curtis
Curtis iP1490 User manual

Curtis
Curtis RCD725 User manual

Curtis
Curtis iP1490 User manual

Curtis
Curtis RCD635UK User manual

Curtis
Curtis RCD856 User manual

Curtis
Curtis RCD869 User manual

Curtis
Curtis iMode IP1502 User manual

Curtis
Curtis RCD631 User manual

Curtis
Curtis RCD836 User manual

Curtis
Curtis RCD882 User manual

Curtis
Curtis RCD855 User manual

Curtis
Curtis RCD641 User manual

Curtis
Curtis RCD794R User manual

Curtis
Curtis RCD629 User manual