manuals.online logo
Brands
  1. Home
  2. •
  3. Brands
  4. •
  5. CYBEX
  6. •
  7. Car Seat
  8. •
  9. CYBEX PALLAS-fix User manual

CYBEX PALLAS-fix User manual

Other manuals for PALLAS-fix

4

This manual suits for next models

1

Other CYBEX Car Seat manuals

CYBEX Solution M User manual

CYBEX

CYBEX Solution M User manual

CYBEX Sirona T i-SIZE User manual

CYBEX

CYBEX Sirona T i-SIZE User manual

CYBEX JUNO 2-FIX User manual

CYBEX

CYBEX JUNO 2-FIX User manual

CYBEX FREE-FIX How to use

CYBEX

CYBEX FREE-FIX How to use

CYBEX ATON 3S User manual

CYBEX

CYBEX ATON 3S User manual

CYBEX JUNO 2-FIX User manual

CYBEX

CYBEX JUNO 2-FIX User manual

CYBEX SOLUTION X User manual

CYBEX

CYBEX SOLUTION X User manual

CYBEX ATON BASE-FIX User manual

CYBEX

CYBEX ATON BASE-FIX User manual

CYBEX SOLUTION X-FIX User manual

CYBEX

CYBEX SOLUTION X-FIX User manual

CYBEX ATON User manual

CYBEX

CYBEX ATON User manual

CYBEX BASE M User manual

CYBEX

CYBEX BASE M User manual

CYBEX ATON 2 User manual

CYBEX

CYBEX ATON 2 User manual

CYBEX SIRONA M i-SIZE User manual

CYBEX

CYBEX SIRONA M i-SIZE User manual

CYBEX CBX FREE-FIX User manual

CYBEX

CYBEX CBX FREE-FIX User manual

CYBEX ATON M User manual

CYBEX

CYBEX ATON M User manual

CYBEX SOLUTION X2 User manual

CYBEX

CYBEX SOLUTION X2 User manual

CYBEX ATON User manual

CYBEX

CYBEX ATON User manual

CYBEX Cloud Q User manual

CYBEX

CYBEX Cloud Q User manual

CYBEX SIRONA Z i-SIZE User manual

CYBEX

CYBEX SIRONA Z i-SIZE User manual

CYBEX ATON 4 User manual

CYBEX

CYBEX ATON 4 User manual

CYBEX SIRONA G i-Size User manual

CYBEX

CYBEX SIRONA G i-Size User manual

CYBEX ATON BASE 2 User manual

CYBEX

CYBEX ATON BASE 2 User manual

CYBEX CBX SHIMA User manual

CYBEX

CYBEX CBX SHIMA User manual

CYBEX ATON Q i-SIZE User manual

CYBEX

CYBEX ATON Q i-SIZE User manual

Popular Car Seat manuals by other brands

doona ISOFIX Base user guide

doona

doona ISOFIX Base user guide

Britax Safe-n-Sound JS8A/2010 Instructions for use

Britax

Britax Safe-n-Sound JS8A/2010 Instructions for use

RECARO Monza Reha Instructions for assembly and use

RECARO

RECARO Monza Reha Instructions for assembly and use

Britax SAFEFIX PLUS TT User instructions

Britax

Britax SAFEFIX PLUS TT User instructions

Britax PARKWAY SGL user guide

Britax

Britax PARKWAY SGL user guide

Digicom Tippy Pad Instructions for use

Digicom

Digicom Tippy Pad Instructions for use

Combi Zeus Turn 8815 Series instruction manual

Combi

Combi Zeus Turn 8815 Series instruction manual

Graco Car Booster Seat owner's manual

Graco

Graco Car Booster Seat owner's manual

Little Tikes Highway Assembly instructions

Little Tikes

Little Tikes Highway Assembly instructions

Coccolle Atira manual

Coccolle

Coccolle Atira manual

hifold HF01-GL instruction manual

hifold

hifold HF01-GL instruction manual

Combi Navette 22 instruction manual

Combi

Combi Navette 22 instruction manual

kiwy SLF 123 instruction manual

kiwy

kiwy SLF 123 instruction manual

Safety 1st Summit ISO 30 manual

Safety 1st

Safety 1st Summit ISO 30 manual

Safety 1st Grand 2-IN-1 manual

Safety 1st

Safety 1st Grand 2-IN-1 manual

Graco NAUTILUS owner's manual

Graco

Graco NAUTILUS owner's manual

Britax Multi-Tech BB0-702-00 user guide

Britax

Britax Multi-Tech BB0-702-00 user guide

Grammer MSG45/421 Repair manual

Grammer

Grammer MSG45/421 Repair manual

manuals.online logo
manuals.online logoBrands
  • About & Mission
  • Contact us
  • Privacy Policy
  • Terms and Conditions

Copyright 2025 Manuals.Online. All Rights Reserved.

CYBEX SOLUTION X-fix | ECE R44/04, Gr II/III – ca. 3–12Y (15-36kg/33–79lbs) |
CYBEX PALLAS-fix | ECE R44/04, Gr I – ca. 9M–4Y (9-18kg/20-40lbs) |
CYBEX Industrial Ltd.
1/F. |Sunning Plaza |10 Hysan Avenue |Causeway Bay | Hong Kong
[email protected] /www.cybex-online.com
DE / EN / FR / SL / HU / IT / ES / PT
CYBEX PALLAS-FIX
USER GUIDE
C223_661-1_01B
DE – Kurzanleitung / EN – Short manual / FR – Instructions sommaires / SL – Kratka navodila
HU – rövid ismertetés / IT – Sommario / ES – Instrucciones abreviadas / PT – instruções abreviadas
DE – Kurzanleitung / EN – Short manual / FR – Instructions sommaires / SL – Kratka navodila
HU – rövid ismertetés / IT – Sommario / ES – Instrucciones abreviadas / PT – instruções abreviadas
DE – Gruppe I (9-18 kg) / EN – Group I (9-18 kg) / FR – Groupe I (9 à 18 kg) / SL – skupina I (9 do 18 kg)
HU – I. korcsoport (9-18 kg) / IT – Gruppo I (9-18 kg) / ES – Grupo I (9-18 Kg.) / PT – Grupo I (9-18 Kg.)
Warnung! Diese Kurzanleitung dient nur der Übersicht. Für maximalen Schutz und Komfort Ihres Kindes ist es unbedingt notwendig, die
gesamte Gebrauchsanleitung aufmerksam zu lesen.
DE
Warning! This short manual serves as an overview only. For maximum protection and best comfort for your child, it is essential to read and
follow the entire instruction manual carefully.
EN
Attention! Ces instructions sommaires sont une synthèse. Afin que votre enfant bénéficie d’un maximum de protection et de confort, il est
essentiel de lire attentivement l’intégralité du manuel d’utilisation.
FR
Opozorilo! Ta kratka navodila služijo le za hiter pregled. Za maksimalno varnost in večje udobje vašega malčka pa je izjemno pomembno,
da skrbno preberete celotna navodila.
SL
Attenzione! Queste istruzioni sono solo un sommario. Per garantire la massima sicurezza e comfort al Vostro bambino è molto importante
leggere attentamente ed interamente il manuale d’istruzioni e seguirne scrupolosamente le indicazioni.
IT
Figyelem! Ez a rövid használati utasítás mindösszesen egy áttekintés. Gyermeke maximális biztonsága és kényelme érdekében fontos,
hogy a teljes használati utasítást figyelmesen elolvassa.
HU
¡Advertencia! Estas instrucciones sólo son un resumen. Para garantizar la máxima seguridad y confort para su hijo, es muy importante leer
de un modo completo y atentamente el manual de instrucciones.
ES
Atenção: Estas instruções são um resumo abreviado. Para garantir segurança e um conforto máximos para sua criança, é muito
importante ler cuidadosamente todo o manual de instruções.
PT
12
1
6
2
7
54
10
3
8 9
6 7 8 9 10
1 2 543
DE – Gruppe II / III (15-36 kg) / EN – Group II / III (15-36 kg) / FR – Groupe II /III (15 à 36 kg / SL – skupina II/III (15 do 36 kg)
HU – II / III. korcsoport (15-36 kg) / I T – Gruppo II/III (15-36 kg) / ES – Grupo II/III (15-36 Kg.)/ PT – Grupo II/III (15-36 Kg.)
34
Sehr geehrte Kundin, sehr geehrter Kunde!
VIELEN DANK, DASS SIE SICH BEI DER WAHL EINES KINDERSITZES FÜR DEN CYBEX PALLAS-FIX ENTSCHIEDEN HABEN.
BEI DER ENTWICKLUNG DES CYBEX PALLAS-FIX KINDERSITZES HABEN SICHERHEIT, KOMFORT UND BEDIENFREUNDLICHKEIT
IM VORDERGRUND GESTANDEN.
Dear Customer!
THANK YOU FOR PURCHASING THE CYBEX PALLAS-FIX.
WE ASSURE YOU THAT IN THE PROCESS OF DEVELOPING THE CYBEX PALLAS-FIX WE FOCUSED ON SAFETY, COMFORT
AND USER FRIENDLINESS. THE PRODUCT IS MANUFACTURED UNDER SPECIAL QUALITY SURVEILLANCE AND COMPLIES
WITH THE STRICTEST SAFETY REQUIREMENTS.
Cher Client
NOUS VOUS REMERCIONS D’AVOIR CHOISI LE SIÈGE PALLAS-FIX DE CYBEX.
LORS DU PROCESSUS DE DÉVELOPPEMENT DU PALLAS-FIX, NOS EFFORTS SE SONT CONCENTRÉS SUR LA SÉCURITÉ, LE
CONFORT, ET LA FACILITÉ D’UTILISATION. LA FABRICATION DE CE PRODUIT EST RÉALISÉE SOUS UN CONTRÔLE QUALITÉ
RIGOUREUX, ET RÉPOND AUX NORMES DE SÉCURITÉ LES PLUS STRICTES.
Hinweis! Bewahren Sie die Anleitung immer griffbereit auf (z. B. unter dem elastischen
Bezug an der Rückseite der Rückenlehne).
Note! Please keep the user guide close by for further references (e.g. under
the elastic cover on the rear side of the backrest).
Warnung! Um den optimalen Schutz für Ihr Kind zu gewährleisten, muss der CYBEX
PALLAS-fix Kindersitz unbedingt so verwendet werden, wie es in der Anleitung be-
schrieben ist.
Warning! For your child’s maximum protection it is essential to use and install the
CYBEX PALLAS-fix according to the instructions in this user guide.
07/2010
KURZANLEITUNG ALTERSGRUPPE I ....................................................................................1
KURZANLEITUNG ALTERSGRUPPE II/III ............................................................................... 2
ZULASSUNG ........................................................................................................................5
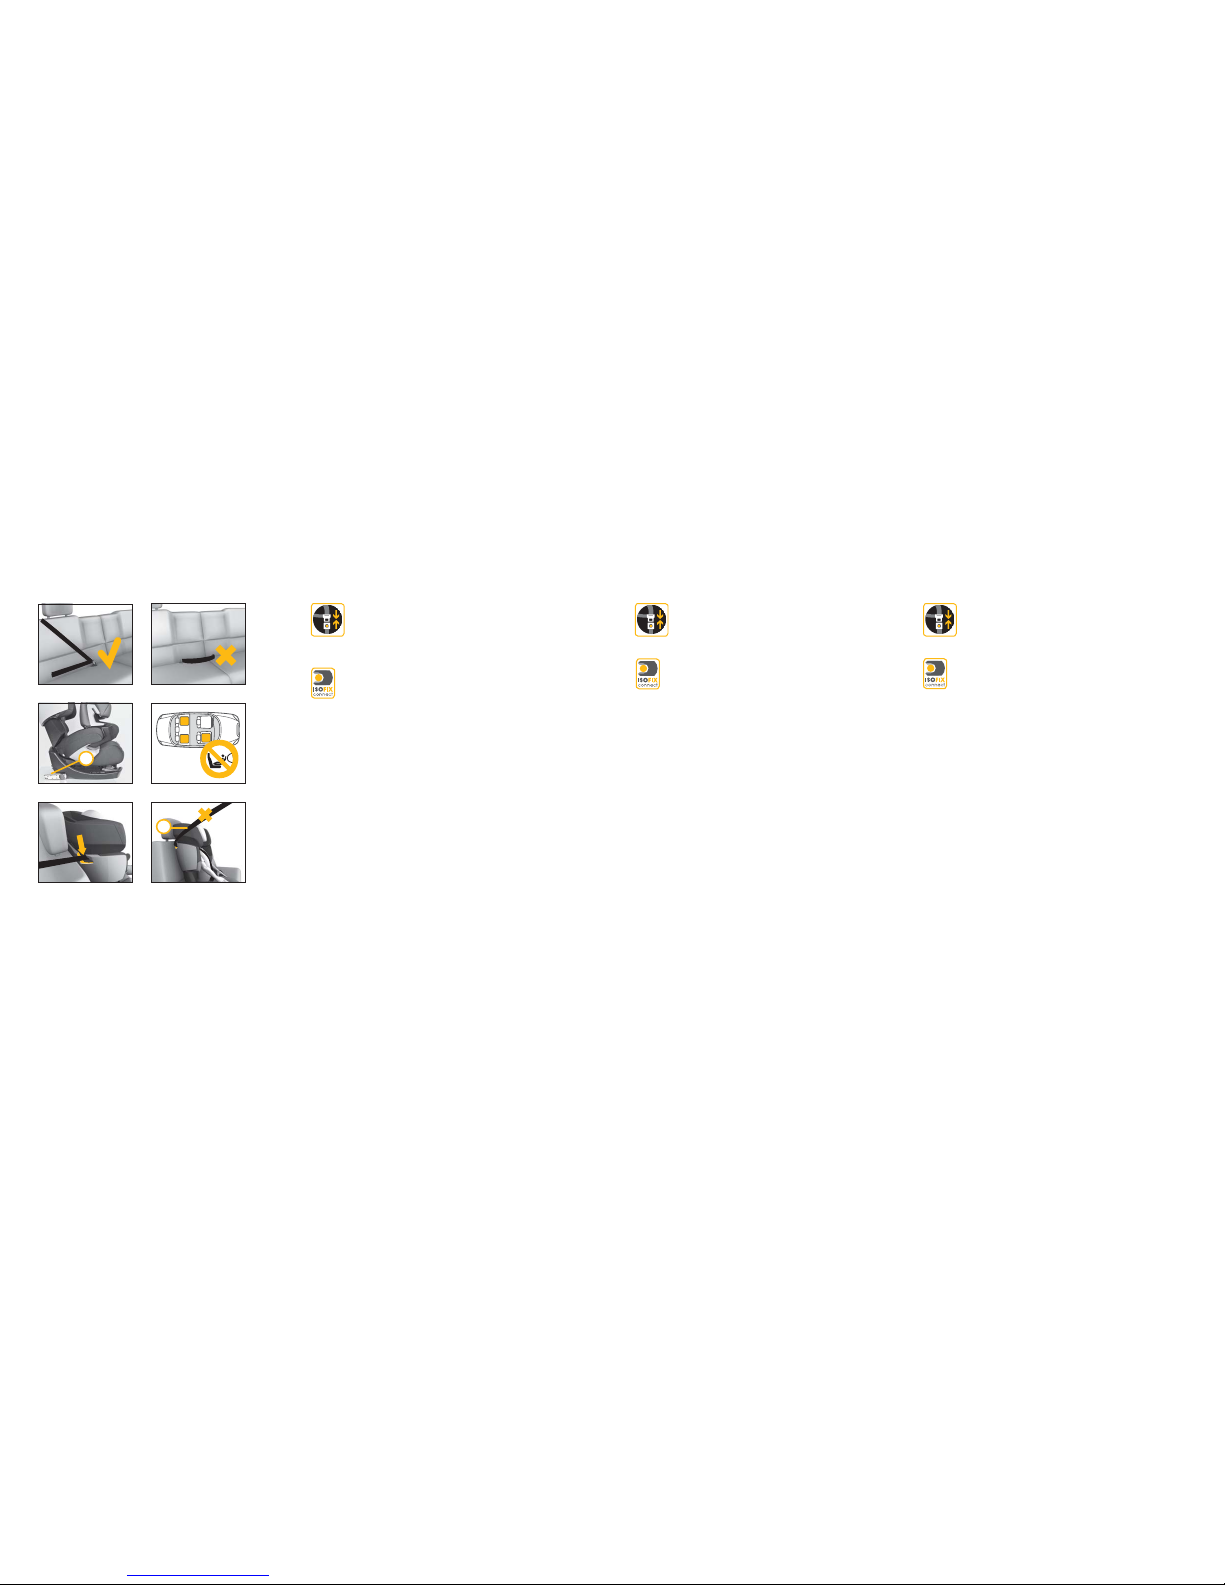
DER RICHTIGE PLATZ IM FAHRZEUG ..................................................................................7
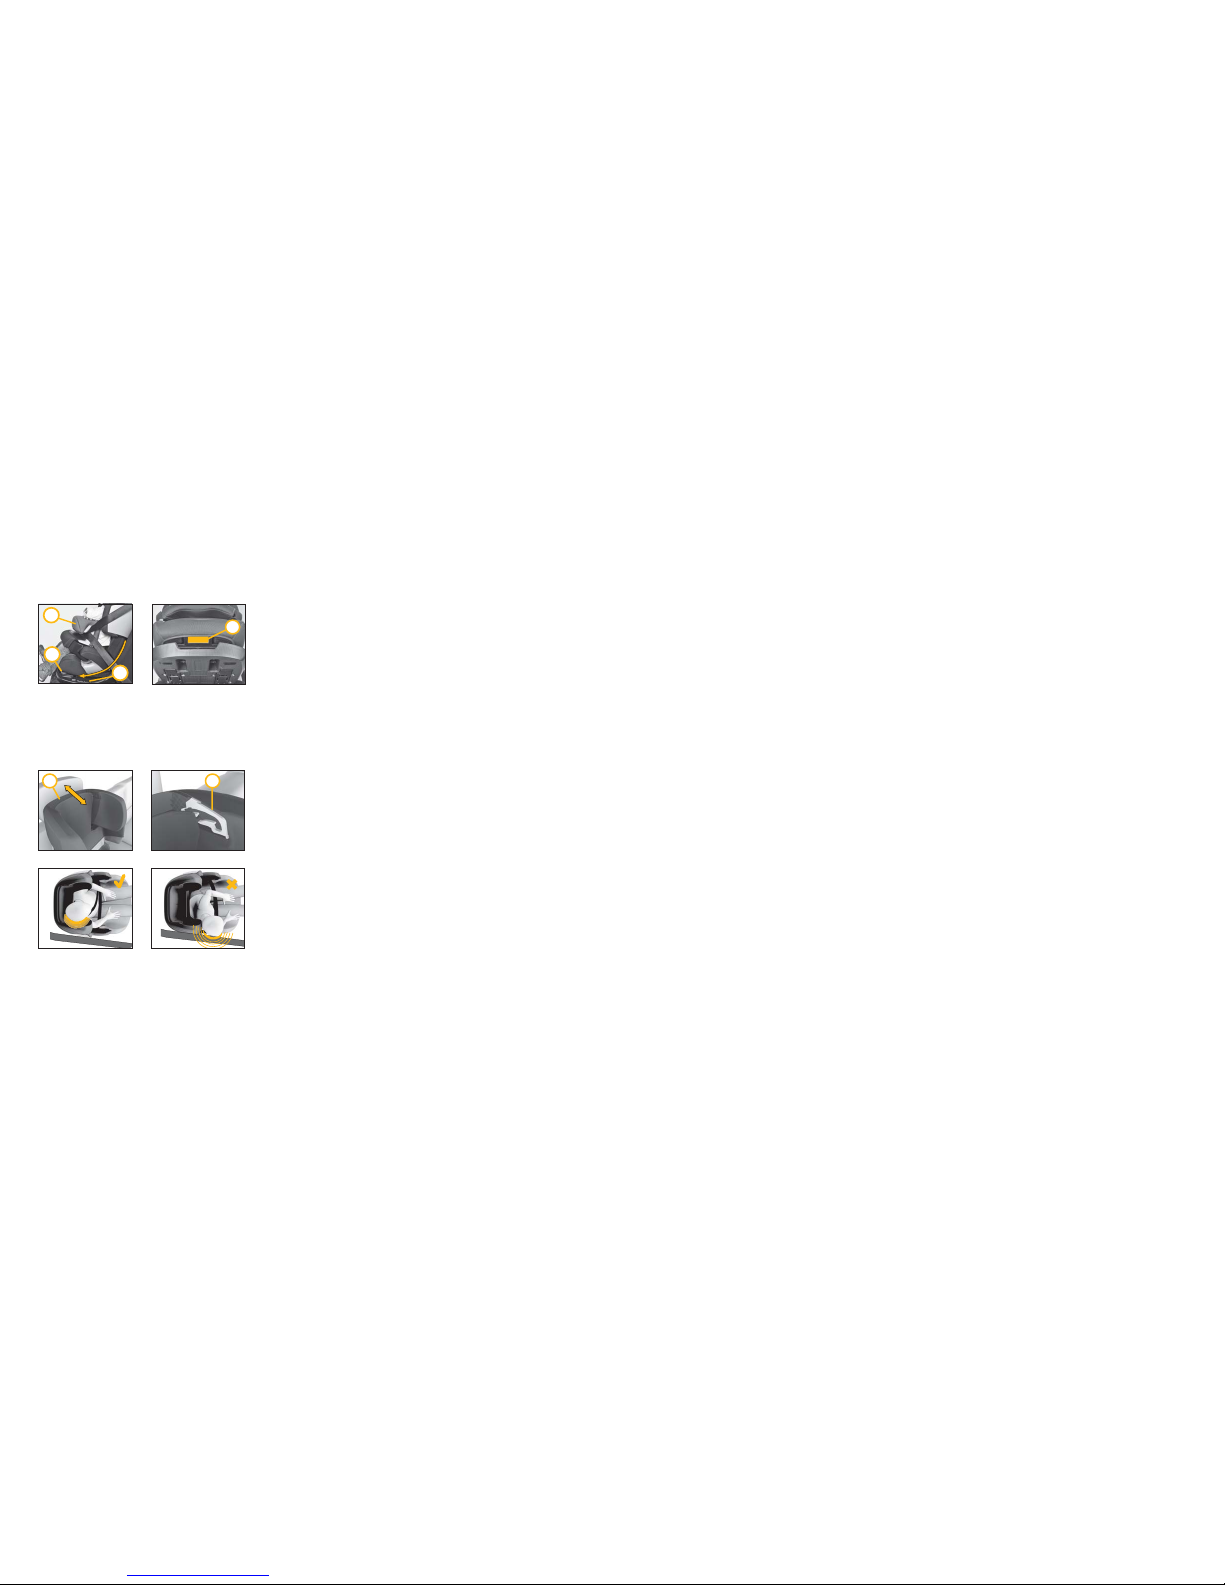
BEFESTIGEN DES KINDERSITZES MITTELS ISOFIX-CONNECT SYSTEM ................................. 9
AUSBAU DES CYBEX PALLAS-FIX .....................................................................................11
DEN SITZ INS FAHRZEUG STELLEN .....................................................................................11
ANPASSEN AN DIE KÖRPERGRÖSSE ...............................................................................13
ENTNEHMEN DES SITZERHÖHERS ....................................................................................13
EINSTELLEN DES FANGKÖRPERS – ECE GRUPPE I (9-18 KG) ..........................................13
SITZ- UND LIEGEPOSITION – ECE GRUPPE I (9-18 KG) ....................................................15
NEIGUNGSVERSTELLBARE KOPFSTÜTZE ..........................................................................15
ANSCHNALLEN MITTELS FANGKÖRPER – ECE GRUPPE I (9-18 KG) ...............................17
WECHSEL VON GRUPPE I (9-18 KG) AUF GRUPPE II/III (15-36 KG) ................................17
ISOFIX-CONNECT UMBAU ...............................................................................................19
ANSCHNALLEN OHNE FANGKÖRPER – ECE GRUPPE II/III (15-36 KG) ..........................21
IST IHR KIND RICHTIG GESICHERT? ..................................................................................21
PFLEGE............................................................................................................................. 23
ENTFERNEN DES BEZUGES ............................................................................................... 23
ENTFERNEN DES BEZUGES VON DER SITZLEHNE .............................................................23
REINIGUNG ......................................................................................................................23
VERHALTEN NACH EINEM UNFALL .................................................................................. 25
PRODUKTLEBENSDAUER ..................................................................................................25
ENTSORGUNG .................................................................................................................25
GARANTIEBEDINGUNGEN...............................................................................................27
SHORT MANUAL GROUP I .................................................................................................1
SHORT MANUAL GROUP II/III.............................................................................................2
HOMOLOGATION ..............................................................................................................5
THE BEST POSITION IN THE CAR..........................................................................................8
INSTALLING OF THE CHILD SEAT WITH THE ISOFIX-CONNECT SYSTEM ........................... 10
REMOVING THE CYBEX PALLAS-FIX ................................................................................12
SECURING THE CHILD ......................................................................................................12
ADJUSTMENT TO THE BODY SIZE ......................................................................................14
REMOVING THE BOOSTER INLAY .....................................................................................14
SAFETY CUSHION ADJUSTMENT – ECE GROUP I (9-18 KG) ............................................14
SITTING AND RECLINING POSITION – ECE GROUP I (9-18 KG) ......................................16
RECLINING HEADREST......................................................................................................16
SECURING WITH SAFETY CUSHION – ECE GROUP 1 (9-18 KG) ......................................18
SWITCHING FROM GROUP I (9-18kg) TO GROUP II/III (15-36kg) ..................................18
ISOFIX-CONNECT MODIFICATION .................................................................................20
SECURING WITHOUT SAFETY CUSHION – ECE GROUP II/III (15-36 KG) .........................22
IS YOUR CHILD PROPERLY SECURED? ............................................................................22
PRODUCT CARE ............................................................................................................. 24
REMOVING THE COVER ..................................................................................................24
REMOVING THE SEAT COVER FROM THE BACKREST ......................................................24
CLEANING........................................................................................................................24
WHAT TO DO AFTER AN ACCIDENT ................................................................................26
DURABILITY OF THE PRODUCT ........................................................................................26
DISPOSAL..........................................................................................................................26
WARRANTY .......................................................................................................................28
56
INHALT CONTENTS
CYBEX PALLAS-fix KINDERAUTOSITZ -
Sitzerhöher mit Rückenlehne und Kopfstütze auf einem
verstellbaren Grundrahmen mit tiefenverstellbarem
Fangkörper.
Empfohlen für:
Alter: Ca. 9 Monate bis 4 Jahre
Gewicht: 9-18 kg
Für Fahrzeugsitze mit Dreipunkt Automatik Gurt
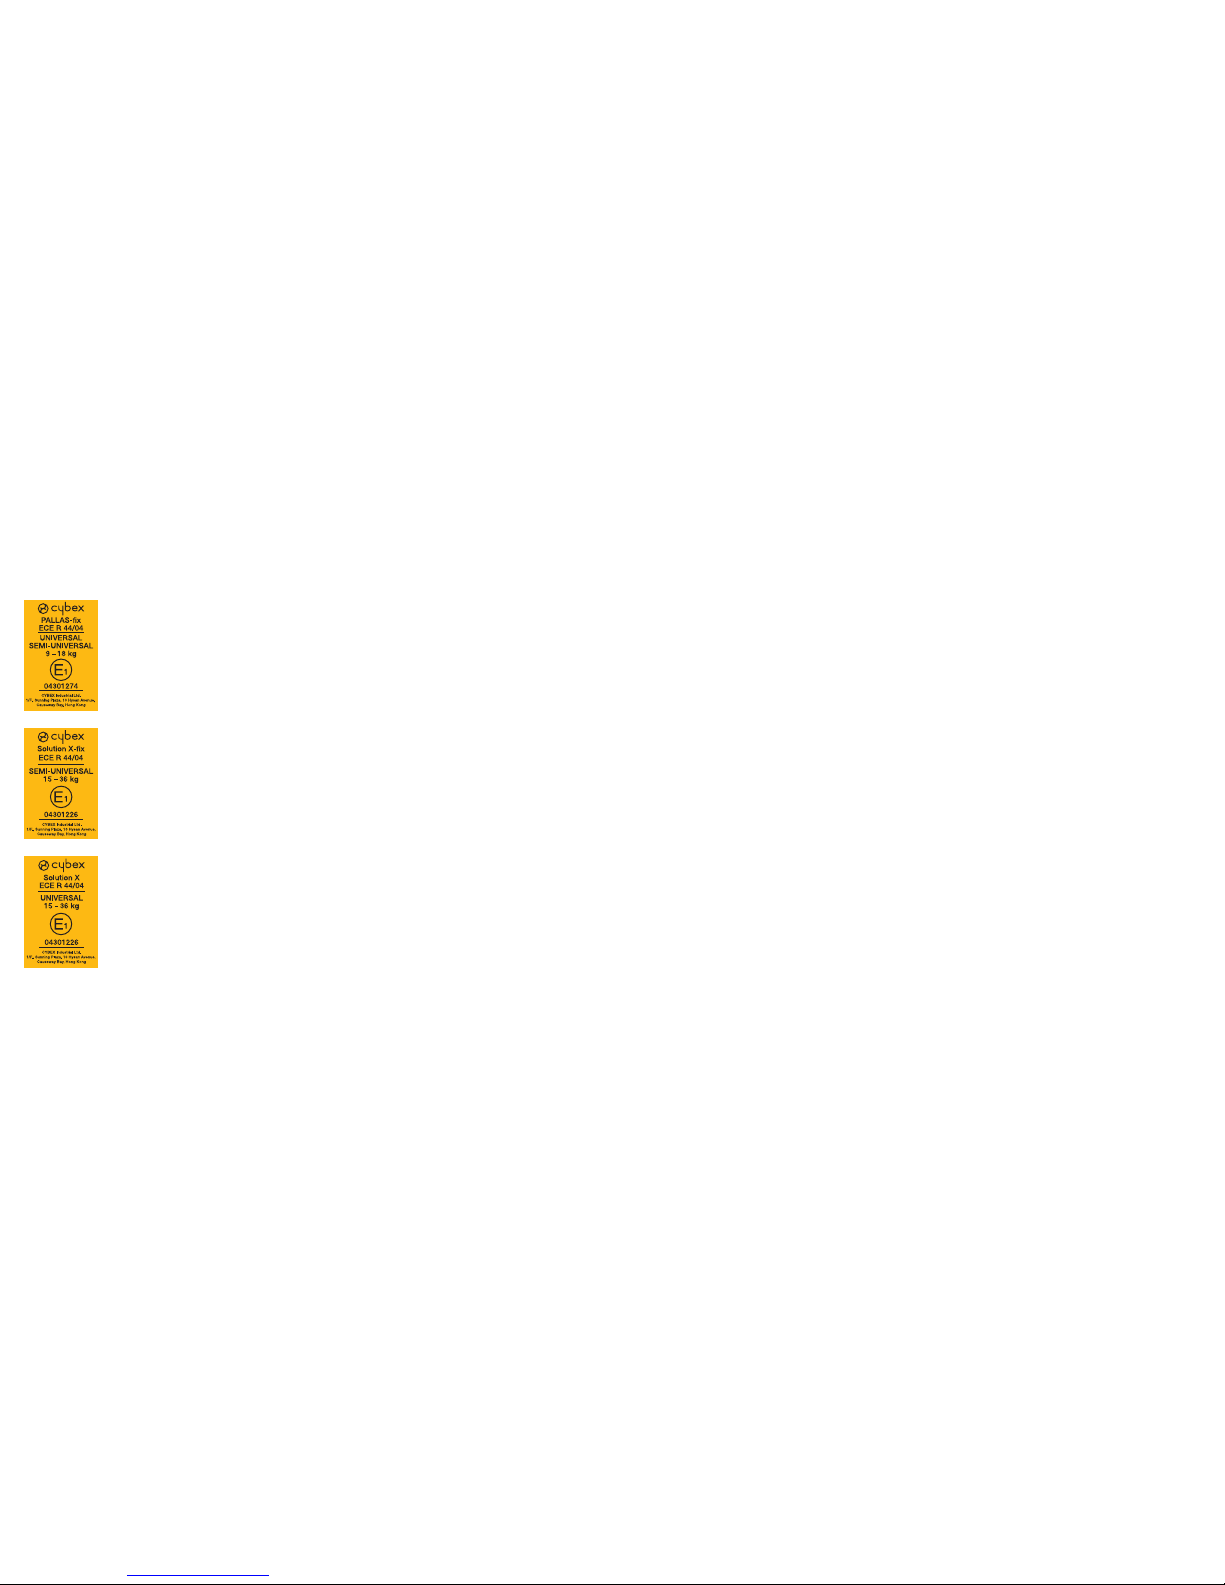
Zulassung:
ECE R-44/04,
CYBEX PALLAS-fix - Gruppe I, 9 bis 18 kg
CYBEX SOLUTION X-fix - Gruppe II/III, 15 bis 36 kg
CYBEX PALLAS-fix CHILD RESTRAINT SYSTEM –
Seat Cushion with backrest and headrest on adjustable
main frame with an adjustable crash pillow.
Recommended for:
Age: Approximately 9 months to 4 years
Weight: 9 to 18 kg
For vehicle seats with three-point automatic retractor belt
Homologation:
ECE R-44/04,
CYBEX PALLAS-fix - Group I, 9 to 18 kg
CYBEX SOLUTION X-fix - Group II/III, 15 to 36 kg
DE EN FR
CYBEX PALLAS–FIX SYSTÈME DE RETENUE POUR ENFANT
Siège-auto avec dossier et appuie-tête sur base
réglable et bouclier de protection ajustable.
Recommandé pour:
Âge: d‘environ 9 mois à 4 ans
Poids : de 9 à 18 kg
Pour sièges de voiture équipés d’une ceinture de
sécurité 3-points à enrouleur.
Conformité:
ECE R-44/04
CYBEX PALLAS-fix - Groupe I (9 à 18kg) CYBEX
Solution X-Fix - Groupe II/III (15 à 36 kg)
Note! Merci de toujours conserver le manuel d‘instructions sous la housse elastique
a l‘arriere du dossier du siege, de facon a ce qu‘elle soit toujours a portee de main.
Attention ! Pour une protection optimale de votre enfant, il est essentiel d’installer et
d’utiliser le CYBEX PALLAS-fix conformément aux instructions de ce manuel.
SOMMAIRE
INSTRUCTIONS SOMMAIRES GROUPE I............................................................................1
INSTRUCTIONS SOMMAIRES GROUPE II/III ........................................................................2
CONFORMITÉ .....................................................................................................................5
POSITION CORRECTE DANS LA VOITURE..........................................................................8
INSTALLATION DU SIÈGE AVEC LE SYSTÈME ISOFIX-CONNECT ......................................10
RETIRER LE CYBEX PALLAS-FIX ..........................................................................................12
ATTACHER CORRECTEMENT L’ENFANT............................................................................12
RÉGLAGE SELON LA TAILLE DE L’ENFANT ........................................................................14
RETIRER LE RÉDUCTEUR ....................................................................................................14
RÉGLAGE DU BOUCLIER DE PROTECTION – ECE GROUPE I (9 À 18 KG) ......................14
POSITION ASSISE ET POSITION INCLINÉE (9 À 18 KG)...................................................... 16
INCLINAISON DE L‘APPUIE-TETE .......................................................................................16
SÉCURISER AVEC LE BOUCLIER DE PROTECTION ECE GROUPE I (9 À 18 KG)...............18
CONVERSION DU GROUPE I (9-18KG) AU GROUP II/III (15-36KG)................................18
MODIFICATION DU SYSTÈME ISOFIX-CONNECT .............................................................20
SÉCURISER SANS LE BOUCLIER DE PROTECTION - ECE GROUPE II/III (15-36 KG)..........22
VOTRE ENFANT EST-IL CORRECTEMENT ATTACHÉ? ........................................................22
ENTRETIEN .........................................................................................................................24
RETIRER LA HOUSSE .........................................................................................................24
RETIRER LA HOUSSE DU DOSSIER ..................................................................................... 24
NETTOYAGE ......................................................................................................................24
CONDUITE À TENIR APRÈS UN ACCIDENT.......................................................................26
DURÉE DE VIE DU PRODUIT ..............................................................................................26
RECYCLAGE .....................................................................................................................26
GARANTIE.........................................................................................................................28
DER RICHTIGE PLATZ IM FAHRZEUG THE BEST POSITION IN THE CAR
DER CYBEX PALLAS-fix ist, ohne ISOFIX-CONNECT-System, auf allen Plätzen
mit Dreipunkt-Automatikgurt verwendbar, die für die Beförderung von er-
wachsenen Personen zugelassen sind.
The CYBEX PALLAS-fix can be used without ISOFIX-CONNECT on all vehicle
seats with a three-point automatic retractor belt, assuming the seat is
approved for adults.
Für die Befestigung mit den ISOFIX-CONNECT Rastarmen (o) besteht eine
„semi-universale“ Genehmigung. Aus diesem Grund kann ISOFIX-CONNECT
nur in bestimmten Fahrzeugen eingesetzt werden. Die zugelassenen Fahr-
zeuge entnehmen Sie bitte der beigelegten Fahrzeugtypenliste. Die aktu-
elle Version erhalten Sie auf www.cybex-online.com.
In Ausnahmefällen kann der Kindersitz auch vorne am Beifahrersitz verwendet wer-
den. Beachten Sie dabei die folgenden Punkte:
When installing the CYBEX PALLAS-fix with ISOFIX-CONNECT system (o), the
child seat falls into the “semi-universal” admission category, i.e. it may only
be used in certain types of vehicles. Please refer to the list of approved cars
to check your vehicle’s compatibility. The list is updated regularly and the
latest version can be accessed online at www.cybexonline. com.
Please note the following exceptions, when the child seat may be used on the
passenger seat:
Gepäckstücke oder andere Gegenstände im Fahrzeug, welche bei einem Unfall
Verletzungen verursachen können, müssen immer gut befestigt werden. Sie können
zu tödlichen Geschossen im Fahrzeug werden.
Luggage or other objects in the vehicle which may cause injuries in an accident must
always be secured properly. Loose parts may turn into deadly projectiles during an
impact.
Hinweis! Bitte lassen Sie Ihr Kind nie unbeaufsichtigt im Fahrzeug zurück.
Note! Please never leave your child unattended in the car.
– Bei Fahrzeugen mit Airbag sollten Sie den Beifahrersitz so weit wie möglich nach
hinten schieben. Beachten Sie jedoch, dass der obere Anlenkpunkt des Fahrzeug-
gurtes hinter der Gurtführung des Kindersitzes bleibt.
– Die Empfehlungen des Fahrzeugherstellers sind unbedingt zu befolgen.
– In cars equipped with an airbag please push the passenger seat as far back
as possible. Please make sure that the upper point of the vehicle seat belt stays
behind the belt guide of the child seat.
– Strictly follow the recommendations of the vehicle manufacturer.
Warnung! Der Sitz ist nicht für die Verwendung mit einem 2-Punkt- oder Beckengurt
geeignet. Wird der Sitz mit einem 2-Punkt-Gurt gesichert, kann es bei einem Unfall zu
schweren oder gar tödlichen Verletzungen des Kindes kommen.
Warning! Do not use the child seat with a two-point belt or a lap belt. When securing
your child with a two-point belt, the child may sustain lethal injuries in an accident.
Warnung! Der Diagonalgurt (f) muss schräg nach hinten verlaufen und darf nie nach
vorn zum oberen Gurtpunkt in Ihrem Fahrzeug führen. Sollte dies nicht einzustellen
sein z.B. durch Vorschieben des Autositzes oder Verwendung auf einem anderen Sitz-
platz, so ist der Kindersitz für dieses Fahrzeug nicht geeignet.
Warning! The seat belt (f) must run diagonally from the back und must never lead
to the front upper belt point of the seat in your vehicle. Should you be unable to
adjust this, for example by pushing the seat to the front or by using the child seat on a
different seat in the car, then the child seat is not suitable for this vehicle.
Warnung! Auf Fahrzeugplätzen, die quer zur Fahrtrichtung angeordnet sind, ist die
Verwendung des Sitzes nicht zulässig. Auf rückwärtsgerichteten Fahrzeugsitzen, wie
z.B. in einem Van oder Minibus, ist die Verwendung zulässig, sofern der Fahrzeugsitz
für die Beförderung eines Erwachsenen zugelassen ist. Zu Beachten ist, dass die Kopf-
stütze bei rückwärtsgerichtetem Einbau nicht entfernt werden darf! Der Kindersitz
muss auch dann, wenn er nicht benutzt wird, immer mit dem Fahrzeuggurt befestigt
sein. Bereits bei einer Notbremsung oder einem geringen Aufprall kann ein unbefe-
stigter Sitz andere Mitfahrer und Sie selbst verletzen.
Warning! For vehicles with seats that are positioned sideways, the use of this child seat
is not permitted. For seats that are positioned backwards, e.g. in a van or minibus, the
use of the child seat is permitted, assuming the seat is approved for adults. Please
ensure that the headrest is not taken off when installing the child seat on a rearward
facing seat! The child seat must have the seat belt fastened even when not in use.
This is necessary to avoid the driver or passenger getting injured by a loose child seat
when making an emergency stop or in case of a crash.
f
78
o
POSITION CORRECTE DANS LA VOITURE
Le CYBEX PALLAS-fix peut être utilisé sur tous les sièges de voiture disposant
d’une ceinture de sécurité 3-points à enrouleur.
Avant d‘installer le CYBEX PALLAS-fix avec le système ISOFIX-CONNECT: le
siège appartient à la catégorie „semi-universel“, c.a.d qu‘il ne peut être
utilisé que dans certains types de véhicules. Veuillez vous référer à la liste
des véhicules approuvés pour vérifier la compatbilité du vôtre. La liste est
mise à jour régulièrement et peut être consultée en ligne sur www.cybex-online.com.
Dans certains cas exceptionnels, le siège-auto peut être placé sur le siège passager.
Dans de tels cas, veuillez noter les directives suivantes
Attention ! Vous ne pouvez pas utiliser le siège auto avec une ceinture
2-points ou avec une ceinture ventrale. Une ceinture 2-points risque de causer à
votre enfant de sérieuses blessures en cas d’accident.
Les bagages ou autres objets présents dans l’habitacle peuvent causer des blessures
en cas d’accident, et doivent donc être attachés correctement.
Note importante : Ne laissez jamais votre enfant sans surveillance dans la voiture.
– Pour les véhicules équipés d’un airbag passager, désactivez l’airbag et reculez le
siège passager au maximum. Vérifiez que la partie supérieure de la ceinture de
sécurité du véhicule soit bien derrière le guide-ceinture du siège enfant.
– Suivez toujours les recommandations du constructeur du véhicule.
Attention ! La ceinture de sécurité (f) doit être transversale, et son point le plus
haut (dérouleur) doit toujours être situé derrière le siège. Si, en reculant le siège
au maximum, l’enrouleur de la ceinture ne se trouve pas derrière le siège-auto, il
convient de ne pas utiliser le PALLAS-fix sur ce siège.
Avertissement! L‘usage de ce siège enfant est interdit sur les sièges de véhicules
qui sont positionnés de côté par rapport au sens de la marche. Lorsque le siège est
positionné dos à la route, par exemple dans un monospace ou minibus, l‘usage de
ce produit est autorisé à condition que ledit siège soit approuvé pour le transport
d‘un adulte. Vérifiez que l‘appuie-tête n‘est pas retiré quand le siège enfant est
installé sur un siège dos à la route. Le siège enfant doit être attaché avec la ceinture
de sécurité du véhicule même vide, afin qu‘il ne se transforme pas en projectile en
cas d‘accident.
BEFESTIGEN DES KINDERSITZES MITTELS ISOFIX-CONNECT SYSTEM INSTALLING OF THE CHILD SEAT WITH THE ISOFIX-CONNECT SYSTEM
Mit den ISOFIX-CONNECT System können Sie den CYBEX PALLAS-fix mit dem
Fahrzeug verbinden und so die Sicherheit Ihres Kindes erhöhen. Ihr Kind wird
weiterhin mit dem 3-Punkt-Gurt Ihres Fahrzeuges angeschnallt.
The safety of your child will be increased using the ISOFIX-CONNECT system
linking the CYBEX PALLAS-fix tightly with the vehicle. Your child will still be
buckled up using the car’s three-point belt.
Hinweis! Die ISOFIX-Befestigungspunkte (j) sind zwei Metalllaschen pro Sitzplatz und
befinden sich zwischen Rückenlehne und Sitzfläche des Fahrzeugsitzes. Im Zweifels-
fall nehmen Sie die Bedienungsanleitung Ihres Fahrzeuges zu Hilfe.
Note! The car’s ISOFIX anchorage points (j) are two metal rings per seat, located
between the backrest and the seat cushion of your vehicle seat. If in doubt please
refer to your vehicle owner’s manual.
Hinweis! Achten Sie darauf, dass die beiden grünen Sicherheitsknöpfe (b) an den
Rastarmen (o) nicht herausragen. Entriegeln Sie gegebenenfalls die ISOFIX-
CONNECT Rastarme (o) indem Sie den grünen Sicherheitsknopf (b) drücken und die
rote Entriegelungstaste (y) zurückziehen. Wiederholen Sie den Vorgang gegebenen-
falls auch beim zweiten Rastarm.
Note! Make sure that the two green security buttons (b) of the connectors (o) are not
sticking out. If necessary, release them by pushing and pulling back the red release
button (y). Repeat this procedure with the other connector.
Hinweis! Beachten Sie dazu den Abschnitt „ DEN SITZ INS FAHRZEUG STELLEN“.
Note! For additional information please refer to the section “SECURING THE CHILD”.
– Schieben Sie die beiden Rastarme (o) in die Einführhilfen (u) bis diese mit einem
hörbaren „KLICK“ an den ISOFIX-Befestigungspunkten (j) einrasten.
– Vergewissern Sie sich, dass der Sitz gut hält, indem Sie versuchen ihn aus den Ein-
führhilfen (u) herauszuziehen.
– Die grünen Sicherheitsknöpfe (b) müssen auf beiden Seiten gut sichtbar aus der
roten Entriegelungstaste (y) herausragen.
– Mit dem Verstellgriff (c) am Rahmen (w) des CYBEX PALLAS-fix Kindersitzes können
Sie nun die Position des Sitzes einstellen.
– Push both of the connectors (o) into the ISOFIX-CONNECT guides (u) until you hear
them clicking into the ISOFIX anchorage points (j).
– Make sure that the CYBEX PALLAS-fix is connected properly by trying to pull the
child seat out.
– The green security buttons (b) have to be clearly visible on both sides and must
stick out of the red release buttons (y).
– With the adjusting handle (c), located on the main frame (w) of the CYBEX PALLAS-
fix, you can now adjust the position of the child seat.
– Sie können jetzt Ihr Kind anschnallen; siehe Abschnitt „ANSCHNALLEN MITTELS
FANGKÖRPER“.
– You can now buckle up the child. Please refer to section “SECURING WITH SAFETY
CUSHION”.
– Hängen Sie die mitgelieferten Einführhilfen (u) mit der längeren Lasche nach oben
in den beiden ISOFIX-Befestigungspunkten (j) ein. In manchen Fahrzeugen eignet
sich eine entgegengesetzte Einbaurichtung der Einführhilfen (u) besser.
– Connect the two enclosed ISOFIX-CONNECT guides (u) (longer parts pointing
upward) with the ISOFIX anchorage points (j). An opposite installation (longer parts
pointing downward) is also possible.
– Betätigen Sie den Verstellgriff (c) unter dem Sitzkissen (d), am Rahmen (w) des
CYBEX PALLAS-fix Kindersitzes.
– Ziehen Sie die beiden ISOFIX-CONNECT Rastarme (o) bis zum Endanschlag.
– Drehen Sie nun die ISOFIX-CONNECT Rastarme (o) um 180°, damit diese in Rich-
tung der Einführhilfen (u) zeigen.
– Pull the adjusting handle (c), located under the seat cushion (d) on main frame
(w) of the CYBEX PALLAS-fix.
– Pull the connectors (o) as far out as they will go.
– Rotate the connectors (o) by 180° until they point into the direction of the ISOFIX-
CONNECT guides (u).
910
wj
d
c
o
y
b
c
u
INSTALLATION DU SIEGE ENFAN T AVEC LE SYSTEME ISOFIX-CONNECT
La sécurité de votre enfant sera augmentée en utilisant le système ISOFIX-
CONNECT qui solidarise fortement le siège avec le véhicule. Votre enfant
restera attaché utilisant la ceinture trois-points du véhicule.
Note! Les points d‘ancrage ISOFIX du véhicule (j) sont deux anneaux métalliques par
siège, situés entre le dossier et l‘assise du siège du véhicule. En cas de doute, référez-
vous au manuel de votre véhicule.
Attention! Vérifiez que les deux boutons de sécurité verts (b) sur les connecteurs
(o) sont enfoncés. Si nécessaire, réamorcez en poussant et tirant le bouton de
déverrouillage rouge (y). Répétez la procédure avec l‘autre connecteur.
Note! Pour plus d‘information, veuillez vous référer à la section „ATTACHER L‘ENFANT“.
– Poussez les deux connecteurs (o) dans les guides ISOFIX-CONNECT (u) jusqu‘à ce
qu‘ils s‘enclenchent dans les points d‘ancrage ISOFIX (j).
– Assurez vous que le CYBEX PALLAS-fix est bien connecté en tirant dessus.
– Les boutons de sécurité verts ((b) doivent être clairement visibles sur les deux côtés
et doivent ressortir des boutons rouges de déverrouillage (y).
– Avec la poignée d‘ajustement (c), située sur l‘armature (w) du CYBEX PALLAS-fix ,
vous pouvez maintenant ajuster la position du siège enfant.
– Vous pouvez maintenant attacher l‘enfant. Veuillez vous référer à la section
„SECURISER AVEC LE BOUCLIER DE PROTECTION“.
– Connectez les deux guides ISOFIX-CONNECT (u) (parties plus longues vers le haut)
avec les points d‘ancrage ISOFIX (j). Une installation opposée (parties plus longues
vers le bas) est aussi possible.
– Tirez la poignée d‘ajustement (c) située sous l‘assise (d) sur l‘armature (w) du
CYBEX PALLAS-fix. -Tirez les connecteurs (o) aussi loin que possible.
– Tournez les connecteurs (o) de 180° jusqu‘à ce qu‘ils pointent ves les guides ISOFIX-
CONNECT (u)
AUSBAU DES CYBEX PALLAS-FIX REMOVING THE CYBEX PALLAS-FIX
Führen Sie die Einbauschritte in umgekehrter Reihenfolge durch. Perform all installation steps in reverse order.
Hinweis! Durch das Einklappen der Rastarme (o) schonen Sie nicht nur den Fahrzeug-
sitz, sondern schützen auch die Rastarme des ISOFIX-CONNECT Systems vor Verunrei-
nigung und Beschädigung.
Note! By following these steps the vehicle’s seat pad will be protected and the ISOFIX
connectors will be prevented from being stained or damaged. Damages and stains
could obstruct a smooth operation.
– Entriegeln Sie die Rastarme (o) des ISOFIX-CONNECT Systems, indem Sie
die grünen Sicherheitsknöpfe (b) drücken und gleichzeitig die rote Entrie-
gelungstaste (y) zurückziehen.
– Ziehen Sie den Sitz aus den Einführhilfen (u).
– Drehen Sie die Rastarme (o) um 180°.
– Betätigen Sie den Verstellgriff (c) am Rahmen (w) des CYBEX PALLAS-fix Kindersitzes
und schieben Sie die Rastarme (o) bis zum Anschlag hinein.
– Release the connectors (o) by pushing the green security buttons (b) and
pulling back the red release buttons (y).
– Pull the child seat out of the ISOFIX-CONNECT guides (u).
– Rotate the connectors (o) by 180°.
– Pull the adjusting handle (c) located on the main frame (w) of the CYBEX PALLAS-fix
and push the connectors (o) into the child seat until they are completely hidden.
11 12
DEN SITZ INS FAHRZEUG STELLEN SECURING THE CHILD
Hinweis! An einigen Autositzbezügen aus empfindlichem Material (z.B. Velours, Leder,
etc.) können durch die Benutzung von Kindersitzen Gebrauchspuren auftreten. Um
das zu vermeiden, können Sie z.B. eine Decke oder ein Handtuch unterlegen.
Note! On some car seat covers made of sensitive material (e.g. velour’s, leather etc.)
the use of child seats may lead to traces of wear and tear. To avoid this, put a blanket
or a towel underneath the child seat.
Stellen Sie den Kindersitz auf den entsprechenden Fahrzeugsitz im Auto.
Place the CYBEX PALLAS-fix on the respective seat in the car.
– Achten Sie unbedingt darauf, dass die Rückenlehne (a) des CYBEX PALLAS-fix flä-
chig an der Rückenlehne des Fahrzeugsitzes anliegt, sodass sich der Kindersitz auf
keinen Fall in einer Liegeposition befinden kann.
– Achten Sie bei Benutzung der ISOFIX Befestigungspunkte (j) im Fahrzeug
darauf, dass die Rückenlehne (a) des CYBEX PALLAS-fix vollflächig an der
Rückenlehne des Fahrzeugsitzes aufliegt. Sie können den Abstand mit
dem Verstellgriff (c) am Rahmen (w) des CYBEX PALLAS-fix Kindersitzes
einstellen.
– Sollte die Kopfstütze des Fahrzeuges störend sein, ziehen Sie diese ganz heraus,
drehen Sie sie um oder nehmen Sie diese ganz ab (Ausnahme siehe Abschnitt
„DER RICHTIGE PLATZ IM FAHRZEUG“). Die Rückenlehne (a) passt sich optimal stu-
fenlos nahezu jeder Neigung des Fahrzeugsitzes an.
– Please make sure that the backrest (a) of the CYBEX PALLAS-fix rests flat against
the backrest of the car seat so that the child seat is under no circumstance in a
sleeping position.
– When using the ISOFIX anchorage points (j) in the car, make sure that
the backrest (a) of the CYBEX PALLAS-fix is perfectly aligned and in full
contact with the upright part backrest of the car seat. The position can
be adjusted with the adjusting handle (c) located under the seat cushion
(d) on the main frame (w) of the child seat.
– Should the headrest of the vehicle seat interfere, please pull it out completely, turn
it around or take it off entirely (exceptional case, refer to the section “THE BEST
POSITION IN THE CAR”). The backrest (a) optimally adjusts to almost any inclination
of the vehicle seat.
Warnung! Die Rückenlehne des CYBEX Kindersitzes muss an der Lehne des Fahr-
zeuges flächig aufliegen. Um den größtmöglichen Schutz für das Kind zu gewährlei-
sten, muss sich der Sitz in einer normalen aufrechten Position befinden!
Warning! The backrest of the CYBEX PALLAS-fix should rest flat against backrest of the
car seat. Pushing the booster rearwards the seat should be tightly pressed against
the seat. For the best possible protection of your child, the seat must be in a normal
upright position!
POUR RETIRER LE CYBEX PALLAS-FIX
Procédez à toutes les étapes dans l‘ordre inverse.
Note! En suivant ces étapes, l‘assise du véhicule sera protégée et les connecteurs
ISOFIX ne pourront pas être endommagés, ce qui pourrait empêcher une utilisation
facile.
– Détachez les connecteurs (o) en poussant les boutons de sécurité verts
(b) et en tirant les boutons rouges de déverrouillage (y).
– Tirez le siège enfant hors des guides ISOFIX-CONNECT (u)
– Tournez les connecteurs de 180°.
– Tirez la poignée d‘ajustement (c) située sur l‘armature (w) du CYBEX PALLAS-fix
et repoussez les connecteurs (o) à l‘intérieur du siège enfant jusqu‘à ce qu‘ils
disparaissent complètement.
ATTACHER CORRECTEMENT L’ENFANT
Note! Sur certain siège de voiture en velours, cuirs, alcantara, etc. le siège auto peut
parfois laisser des traces. Pour éviter cela, mettez une serviette ou une couverture
sous le siège enfant.
Placer le CYBEX PALLAS-fix sur le siège choisi.
– Assurez-vous que le dossier (a) du CYBEX PALLAS-fix soit bien adossé contre le
dossier du siège du véhicule, de façon à ce que le siège enfant n‘est pas dans
une position sommeil.
– Quand vous utilisez les points d‘ancrage ISOFIX (j) du véhicule, assurez
vous que le dossier (a) du CYBEX PALLAS-fix est bien aligné et en contact
complet avec le dossier vertical du siège du véhicule. La position peut
être ajustée avec la poignée d‘ajustement (c) située sous l‘assise (d) sur
le chassis (w) du siège enfant.
– Si l‘appui-tête du siège du véhicule gêne, veuillez le tirer en position haute
maximale, le retourner, ou le retirer complètement (cas exceptionnel, veuillez
vous référer à la section „LA MEILLEURE POSITION DANS LE VEHICULE“). Le dossier
(a) s‘ajuste parfaitement à presque toutes les inclinaisons de dossier du siège
véhicule.
Avertissement! Le dossier du CYBEX PALLAS-fix doit être en contact complet avec
le dossier du siège véhicule. Pousser l‘assise du siège vers l‘arrière sur le fauteuil
du véhicule pour que le siège soit fermement pressé contre le fauteuil. Pour une
protection optimale de votre enfant, le siège doit être en position assise droite.
Um den CYBEX PALLAS-fix optimal an die Körpergröße anzupassen ist werkseitig ein
Sitzerhöher (i) mitgeliefert und bereits unter dem Bezug eingelegt.
For a proper height adjustment of the CYBEX PALLAS-fix a booster inlay (i) is included
and already inserted under the seat cover when purchased.
Hinweis! Nur eine in optimaler Höhe eingestellte Schulter- und Kopfstütze (e) bietet
den größtmöglichen Schutz und Komfort für Ihr Kind und gewährleistet außerdem
den optimalen Verlauf des Diagonalgurtes (f). Die Höhenverstellung kann beim
CYBEX PALLAS-fix in 11 Positionen erfolgen. Die Schulterstütze ist mit der Kopfstütze
fest verbunden und muss nicht separat eingestellt werden.
Note! Shoulder and headrest (e) need to be perfectly adjusted in height to provide
the best protection and comfort for your child and to also guarantee the optimal
position of the diagonal belt (f). The height of the shoulder and headrest can be
adjusted in 11 positions. The shoulder part is attached to the headrest and does not
have to be adjusted separately.
ANPASSEN AN DIE KÖRPERGRÖSSE ADJUSTMENT TO THE BODY SIZE
ENTNEHMEN DES SITZERHÖHERS REMOVING THE BOOSTER INLAY
– Wir empfehlen diesen Sitzerhöher (i) für Kinder vom 9. bis zum 18. Lebensmonat zu
verwenden.
– Ab dem 19. Lebensmonat ist kein Sitzerhöher (i) mehr notwendig.
– Danach ist die Größenanpassung ausschließlich über die verstellbare Kopfstütze
(e) vorzunehmen. Ziehen Sie dazu den Verstellgriff (h) nach oben, um die Schulter-
und Kopfstütze (e) zu entriegeln.
– Die Anpassung hat so zu erfolgen, dass zwischen der unteren Kante der Kopfstütze
(e) und der Schulter des Kindes noch 2 fingerbreit Platz ist.
– It is recommended to use this height adjustment inlay (i) between the age of 9 and
18 months.
– For children over 19 months the height adjustment inlay (i) may be removed.
– Afterwards the height adjustment should be regulated by moving the headrest
(e) into the correct position. Pull the adjustment handle (h) in order to release the
headrest.
– The seat is correctly adjusted if you can fit 2 fingers between the bottom edge of
the headrest (e) and the shoulder of the child. Pull the adjustment handle (h) in
order to unlock the shoulder and headrest.
1. Lösen Sie die vorderen Druckknöpfe des Sitzbezuges vom Sitzkissen (d).
2. Ziehen Sie den Stoffbezug vorne hoch, bis Sie den Sitzerhöher (i) herausziehen kön-
nen.
3. Die Entnahme des Sitzerhöhers (i) hat entsprechend der obigen Altersangabe zu
erfolgen.
4. Bringen Sie den Sitzbezug wieder in den ursprünglichen Zustand und befestigen Sie
diesen anschließend wieder.
1. Open the press buttons at the front of the booster cover.
2. Lift the booster cover until the height adjusting inlay (i) can be easily removed from
the front.
3. Remove the height adjustment inlay (i) according to the above age
recommendation.
4. Put the seat cover back in its original position and fasten the press buttons.
i
h
e
13 14
Durch das gleichzeitige Betätigen der beiden Verstelltasten (z) gleitet der Fangkör-
per (p) automatisch in seine vorderste Position. Durch loslassen der Verstelltasten (z)
wird der Fangkörper (p) in seiner Position fixiert.
Die Seitenteile des Fangkörpers (p) mit den beiden Verstelltasten (z) passen exakt
in die Armlehnen des Sitzkissens (d) und dienen zur Abstützung des Fangkörpers (p)
am Sitz.
Stellen Sie den Fangkörper (p) so ein, dass dieser am Kind anliegt, jedoch ohne dass
der Fangkörper (p) auf den Körper des Kindes drückt.
Warnung! Der Fangkörper (p) darf nur in Verbindung mit dem Rahmen (w) und bis
maximal 18kg verwendet werden.
EINSTELLEN DES FANGKÖRPERS – ECE GRUPPE I (9 - 18 KG) By pushing the two buttons (z) the safety cushion (p) will slide into the widest position.
By releasing the buttons (z) the safety cushion (p) will be locked in position.
The side parts of the safety cushion (p) fit exactly into the armrest of the booster
cushion. They connect the safety cushion (p) and the booster (d).
The safety cushion (p) should be well adjusted to touch the child’s chest without
exerting any pressure on the child’s body.
Warning! Safety cushion (p) may only be used in conjunction with the main frame (w)
and only up to a maximum weight of 18 kg!
SAFETY CUSHION ADJUSTMENT – ECE GROUP I (9-18 KG)
z
d
p
Pour un réglage correct du CYBEX PALLAS-fix, un réducteur (i) est inclus, et déjà
installé sous le tissu de l‘assise lors de l’achat.
Note! Seul un ajustement optimal de l’appuie-tête (e) et des protections latérales
apportera à votre enfant la meilleure protection et le plus grand confort. Il garantit
également une position optimale de la ceinture diagonale (f). Il existe 11 positions de
réglages possibles en hauteur. La protection latérale est solidaire de l’appuie-tête et
n’a pas besoin d’être ajustée séparément.
RÉGLAGE SELON LA TAILLE DE L’ENFANT
RETIRER LE RÉDUCTEUR
– Il est recommandé d‘utiliser ce réducteur (i) pour les enfants âgés de 9 à 18 mois.
– Le réducteur (i) peut être retiré dès que l‘enfant atteint l‘âge de 19 mois
– Par la suite, le réglage de la taille pourra se faire en ajustant la position de l’appuie-
tête (e). Tirez la réglette (h) pour relâcher l‘appuie-tête.
– L’ajustement doit se faire de façon à vous permettre de placer deux doigts entre le
bas de l’appuie-tête et l’épaule de votre enfant. Saisir la poignée de règlage en
hauteur (h) pour dévérouiller les protèges épaules et repose tête.
1. Détachez les boutons-pressions situés sur la housse de l’assise.
2. Soulevez la housse de l’assise jusqu’à ce que le réducteur (i) puisse être retiré par
l’avant.
3. Retirezleréducteurdusiègeselonl’âgedel’enfantensuivantlesrecommandations
ci-dessus.
4. Replacez la housse du siège en position initiale, et refermez les boutons.
En appuyant sur les deux boutons (z), le bouclier de protection (p) coulisse vers
l’avant. Relâchez les boutons (z) pour verrouiller la position du bouclier de protection.
Les parties latérales du bouclier de protection (p) s’adaptent exactement aux
accoudoirs de l’assise. Elles relient le bouclier de protection (p) à l’assise (d).
Le bouclier de protection doit être réglé de façon à toucher la poitrine de l’enfant
sans exercer de pression.
Attention : le bouclier de protection (p) et la base (w) ne peuvent être utilisés
qu’ensemble et uniquement pour les enfants de moins de 18kg.
RÉGLAGE DU BOUCLIER DE PROTECTION – ECE GROUPE I (9 À 18 KG)
Um den CYBEX PALLAS-fix in die Liegeposition zu bringen, muss das fahrzeugeigene
Gurtsystem nicht geöffnet werden.
It is not necessary to open the seat belt, to move the CYBEX PALLAS-fix into a reclining
position.
Der CYBEX PALLAS-fix hat eine neigungsverstellbare Kopfstütze (r), die hilft, dass der
Kopf Ihres Kindes beim Einschlafen nicht so leicht nach vorne fällt. Außerdem trägt
diese verstellbare Kopfstütze zum Komfort ihres Kindes während der Autofahrt bei.
The CYBEX PALLAS-fix has a reclining headrest (r) preventing your child’s head from
falling forward when asleep. Furthermore, this adjustable headrest contributes to the
comfort of your child during the car ride.
Durch leichtes Anheben der Kopfstütze (r) kann deren Neigungswinkel in drei Positi-
onen eingestellt werden.
By slightly lifting the headrest, the inclination of the headrest (r) can be adjusted in
three different positions.
Hinweis! Achten Sie bitte darauf, dass der Kopf des Kindes immer in Kontakt mit der
neigungsverstellbaren Kopfstütze (r) bleibt, da die Kopfstütze nur so ihre optimierte
Seitenaufprall-Schutzfunktion erfüllen kann.
Note! Please ensure that the child’s head always remains in contact with the reclining
headrest since otherwise the headrest cannot fulfill its optimal side-crash protection
function.
Hinweis! Achten Sie darauf, dass der Beckengurt (n) und der Diagonalgurt (f) immer
gut gespannt sind.
Hinweis! Eine Einstellung der Liegeposition ist während der Fahrt durch den Fahrzeug-
lenker zu unterlassen!
Note! Make sure that both lap belt (n) and diagonal belt (f) are always tightly
fastened.
Note! As long the car is in motion, the driver is not allowed to adjust the reclining
position.
Warnung! Achten Sie immer darauf, dass die Verstelltaste (v) in Liege- sowie in Sitz-
position hörbar einrastet. Die Liegeposition steht nur mit dem Fangkörper (p) und
dem Grundrahmen (w) für die ECE Gruppe I (9-18 kg) zur Verfügung.
Warning! Make sure that the handle (v) of the reclining mechanism is always
audibly locked. The reclining position is only approved for ECE Group I (9-18 kg), in
conjunction with the main frame (w) and the safety cushion (p).
Warnung! Auf keinen Fall darf die Einrastvorrichtung (t) mit Gegenständen blockiert
werden! Im Falle eines Unfalls muss die Leichtgängigkeit der Neigungsverstellung
gewährleistet sein, da es sonst eventuell zu Verletzungen Ihres Kindes kommen kann.
Warning! The locking device (t) must never be blocked by any objects! In case of an
accident, the free movement of the reclining mechanism must be guaranteed since
otherwise your child may suffer injuries.
SITZ- UND LIEGEPOSITION (9-18 KG) SITTING AND RECLINING POSITION – ECE GROUP I (9-18 KG)
NEIGUNGSVERSTELLBARE KOPFSTÜTZE
RECLINING HEADREST
– Wenn ihr Kind während der Fahrt einschläft, betätigen Sie die Einstelltaste (v) an
der Unterseite des Sitzkissens (d) und der CYBEX PALLAS-fix gleitet automatisch, mit
Hilfe des Körpergewichtes des Kindes, nach unten.
– Um nach dem Aussteigen des Kindes den Sitz von der Liege- in die aufrechte
Sitzposition zurückzubringen, betätigen Sie erneut die Einstelltaste (v) und führen
Sie den Kindersitz mit einem leichten Druck gegen das Sitzkissen (d) wieder nach
oben.
– When the child is about to fall asleep, pull the handle (v) and the CYBEX PALLAS-fix
slides down automatically.
– When the child is no longer in the seat you can move the seat into an upright
position by pulling the handle (v) again and slightly pressing against the booster
(d).
p
w
v
tr
15 16
vIl n’est pas nécessaire d’ouvrir le système de ceinture de sécurité pour mettre le
PALLAS-fix en position inclinée.
Note importante: assurez-vous que la ceinture passant à la taille (n) et à l’épaule (f)
soit toujours correctement positionnée et attachée.
Le CYBEX PALLAS-fix est équipé d’un appuie-tête inclinable (r) afin d’éviter que la
tête de l’enfant endormi ne bascule vers l’avant. De plus, cet appuie-tête inclinable
contribue au confort de votre enfant lors des trajets.
APPUIE-TÊTE INCLINABLE
– Une fois l’enfant sorti du véhicule, vous pouvez remettre le siège en position
verticale en actionnant à nouveau la poignée (v) tout en appuyant légèrement
sur l’avant de la base (d).
Note! Si le véhicule est en mouvement, il est interdit au conducteur d‘ajuster
l‘inclinaison du véhicule tout en conduisant.
Note importante ! Assurez-vous que la tête de votre enfant reste toujours en contact
avec l’appuie-tête inclinable, de façon à garantir une sécurité optimale en cas
d’accident.
POSITION ASSISE ET INCLINÉE - ECE GROUP I (9 À 18 KG)
Attention ! Assurez-vous que la poignée (v) du mécanisme d’inclinaison se verrouille
en émettant un « clic » audible quelle que soit sa position. La position inclinée n’est
homologuée que pour les ECE groupe I (9 à 18 kg), avec la base réglable (w) et le
bouclier de protection (p).
– Quand l’enfant s’endort, actionnez la poignée (v). Le siège s’incline
automatiquement.
En soulevant légèrement l’appuie-tête, vous pouvez régler son inclinaison dans 3
positions.
Attention ! Le verrou (t) ne doit jamais être bloqué par un quelconque objet. En cas
d’accident, la liberté de mouvement de l’inclinaison doit être assurée. Dans le cas
contraire, votre enfant risquerait d’être blessé.
ANSCHNALLEN MITTELS FANGKÖRPER – ECE GRUPPE I (9-18 KG) SECURING WITH SAFETY CUSHION – ECE GROUP 1 (9-18 KG)
WECHSEL VON GRUPPE I (9-18 KG) AUF GRUPPE II/III (15-36 KG)
SWITCHING FROM GROUP I (9-18KG) TO GROUP II/III (15- 36KG)
1. Setzen Sie ihr Kind in den CYBEX PALLAS-fix Kindersitz.
2. Legen Sie nun den bereits eingestellten Fangkörper (p) ein. (siehe Abschnitt „EIN-
STELLEN DES FANGKÖRPERS“)
3. Ziehen Sie die gesamte Gurtlänge des Fahrzeug-Dreipunktgurtes heraus. Nehmen
Sie den Beckengurt (n) und legen Sie diesen in die dafür vorgesehene Gurtführung
(x) des Fangkörpers (p) ein.
4. Stecken Sie die Gurtzunge (m) in das Gurtschloss (l). Dieses muss mit einem hör-
baren „KLICK“ einrasten.
5. Spannen Sie den Beckengurt (n) vor, indem Sie am Diagonalgurt (f) ziehen.
6. Führen Sie nun den Diagonalgurt (f) parallel zum Beckengurt (n) in der Gurtführung
(x) zurück.
7. Ziehen Sie den Diagonalgurt (f) straff und achten Sie dabei darauf, dass beide
Gurtteile, über die gesamte Breite des Fangkörpers (p), innerhalb der Gurtführung
(x) verlaufen.
Warnung: Den Gurt auf keinen Fall verdrehen!
1. Place the child in the CYBEX PALLAS-fix child seat.
2. Attach the previously adjusted safety cushion (p) to the child seat. (See chapter
“SAFETY CUSHION ADJUSTMENT”)
3. Pull out the complete vehicle belt length. Take the lap belt (n) and slide it into the
dedicated belt routings (x) (marked red) of the safety cushion (p).
4. Insert the belt tongue (m) into the belt buckle (l). Listen for an audible “CLICK”.
5. Now take the shoulder belt (f) and pull it to tighten lap belt (n).
6. Lead back the shoulder belt (f) parallel to the lap belt (n) into the same belt routing
(x) channel.
7. Pull the belt tight and make sure that the diagonal belt (f) and the lap belt (n) are
running completely inside (over the whole width) of the belt routing (x).
1. Entfernen Sie den Fangkörper (p).
2. Drücken Sie die beiden Entriegelungstasten (q) an der Unterseite des Sitzkissens (d)
und ziehen Sie dieses bis zum ersten Widerstand vom Rahmen (w) weg.
3. Betätigen Sie nun die Einstelltaste (v), die zentral unter dem Sitzkissen (d) liegt, und
ziehen Sie den Sitz komplett vom Rahmen (w) ab.
4. Zum Entfernen der Abstandhalter (s) ziehen Sie den Bezug an der Rückenlehne (a)
hoch, um die Fingeröffnung an der Rückseite der Rückenlehne freizulegen.
5. Betätigen Sie den Entriegelungshaken im Inneren der Rückenlehne (a) und lösen
Sie nun den Abstandhalter (s) von unten ab.
6. Wiederholen Sie den Vorgang ebenfalls auf der gegenüberliegenden Seite.
1. Remove the safety cushion (p).
2. Press the two release buttons (q) on the bottom side of the seat cushion (d) and
simultaneously pull it away from the main frame (w) until you feel a resistance.
3. Now pull the reclining handle (v), situated centrally on the bottom of the seat
cushion (d), and pull off the child seat from the main frame (w).
4. To remove the spacers (s), pull up the backrest cover to reveal the finger hole on
the backside of the backrest (a).
5. Push the release hook inside the finger hole and pull the spacers (s) out of the
backrest (a).
6. Repeat this procedure on the other side of the backrest.
Warning! Never twist the belt!
n
x
f
f
l
f
x
nl
m
x
q
v
d
w
a
17 18
p
s
4. Insérez l’attache de la ceinture de sécurité (m) dans la boucle (l).Vous devez
distinctement entendre un « clic ».
5. Prenez ensuite la partie haute de la ceinture (f) et tirez-la pour la resserrer au
niveau du bassin (n).
6. Glisser les parties supérieure (f) et inférieure de la ceinture dans le guide du
bouclier de protection (x).
7. Resserrezetassurez-vousque les ceintures(f)et (m) soiententièrementpositionnées
dans le guide du bouclier de protection (x) et ce, sur toute leur largeur (x).
ATTACHER L’ENFANT AVEC LE BOUCLIER DE PROTECTION - ECE GROUP I (9 À 18 KG)
Attention ! La ceinture ne doit jamais être vrillée !
1. Placez l’enfant dans le siège CYBEX PALLAS-fix.
2. Fixez au siège le bouclier de protection préalablement ajusté (voir le chapitre «
réglage du bouclier de protection »)
3. Faites passer la partie ventrale (n) de la ceinture dans les guides rouges (x) prévues
à cet effet sur le bouclier de protection.
PASSER DU ECE GROUPE I (9 À 18 KG) AU GROUPE II/III (15 À 36 KG)
1. Retirez le bouclier de protection (p).
2. Appuyez sur les boutons (q) situés sous l’assise de chaque côté, puis dissociez-la
de la base (d) en tirant jusqu’à ce que vous sentiez un blocage.
3. Actionnez ensuite la poignée d’inclinaison (v) située au milieu, sous l’assise, et
détachez complètement l’assise de la base (w).
4. Pour retirer les espaceurs (s) il est recommandé de mettre le siège en position
inclinée.
5. Tirez la housse (a) vers le haut pour faire apparaître un orifice derrière le dossier.
6. Appuyez sur le bouton situé dans l’orifice, et faites sortir les espaceurs (s) du dossier.
7. Répétez l’opération de l’autre côté du dossier.