manuals.online logo
Brands
  1. Home
  2. •
  3. Brands
  4. •
  5. Cygolite
  6. •
  7. Bicycle Accessories
  8. •
  9. Cygolite MITYCROSS 800 User manual

Cygolite MITYCROSS 800 User manual

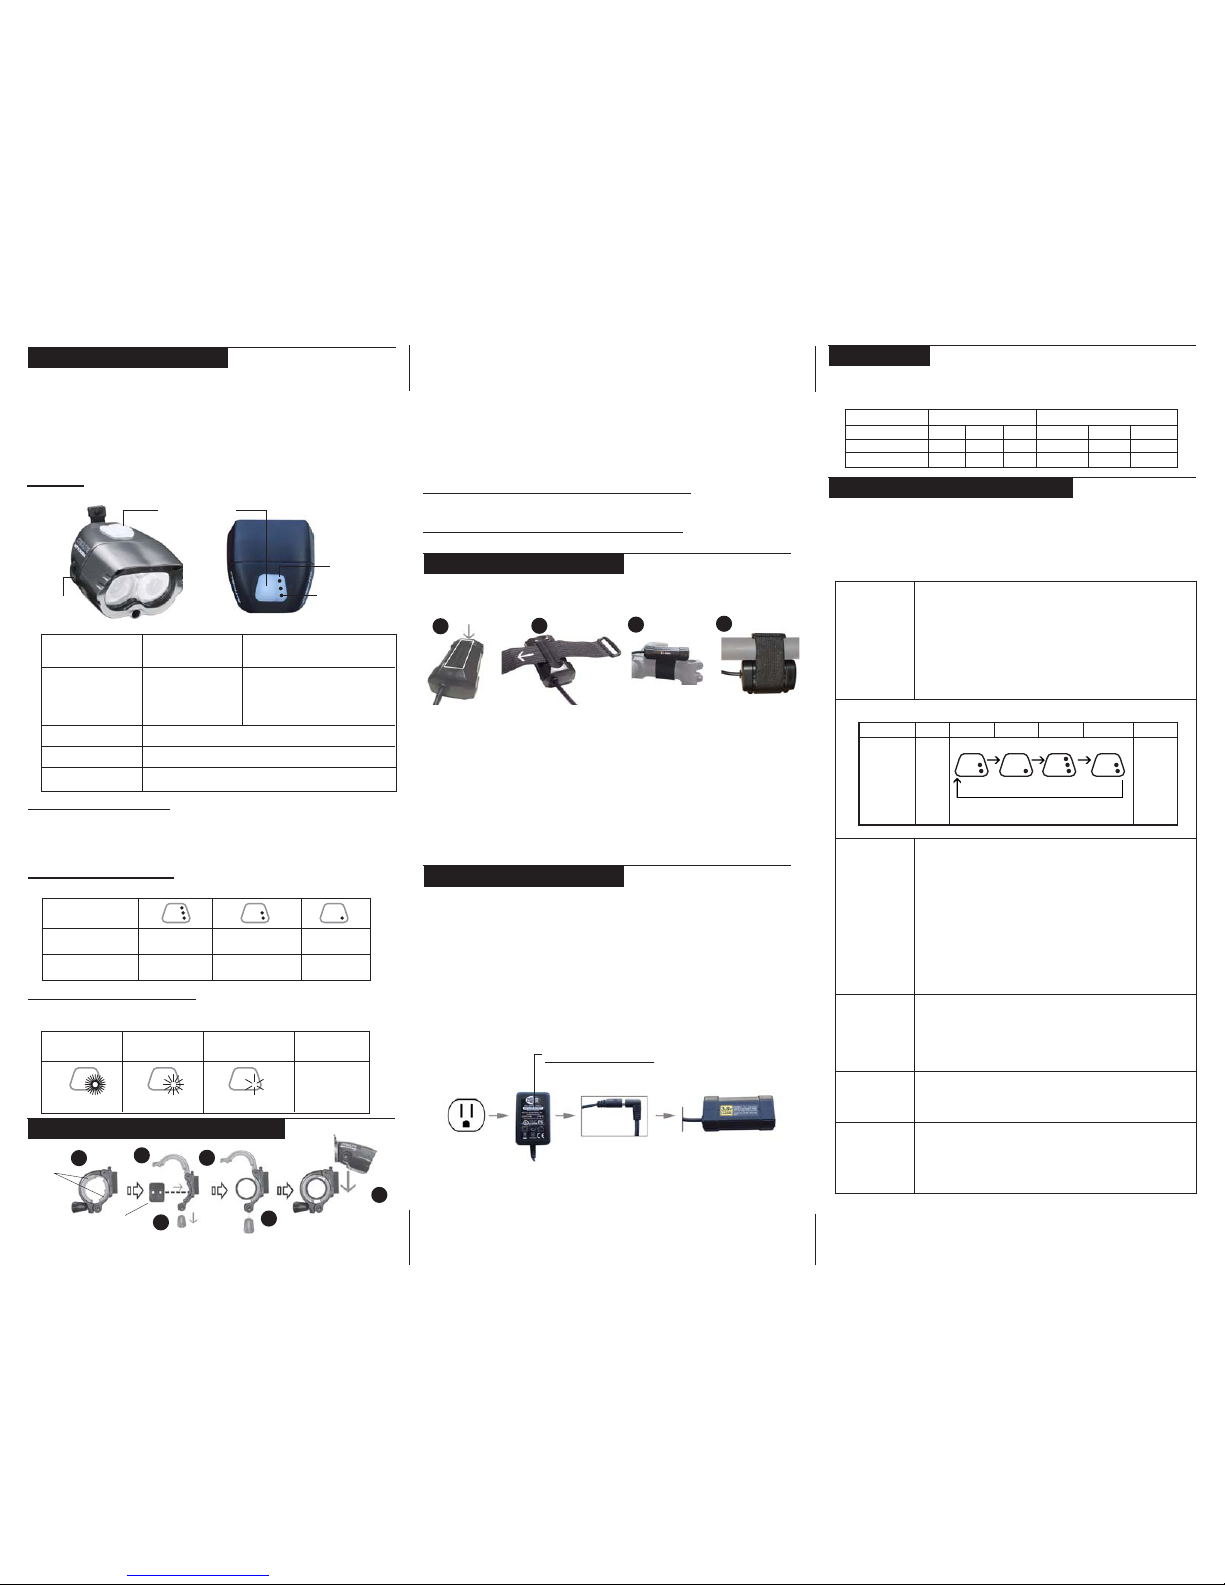
•800 lumen LED light output
•2 High-brightness Cree X-lamp LEDs
•6 versatile lighting settings
High>Med>Low>DaylightFlash>2-in-1SteadyPulse>Walking)
•OSP (On-Site Programmable) Technology
•Compact Rechargeable Li-Ion battery
•Light setting and battery level indicator
•Smart Rapid Charger
•Locktite tool-free handlebar mount
•Helmet mount kit (Xtra model only)
OPERATION MANUALOPERATION MANUAL
OPERATION MANUAL
Congratulations on your purchase of the MityCross 800 high-brightness
LED headlight system. Please refer to this guide to operate your
MityCross 800 safely and properly.
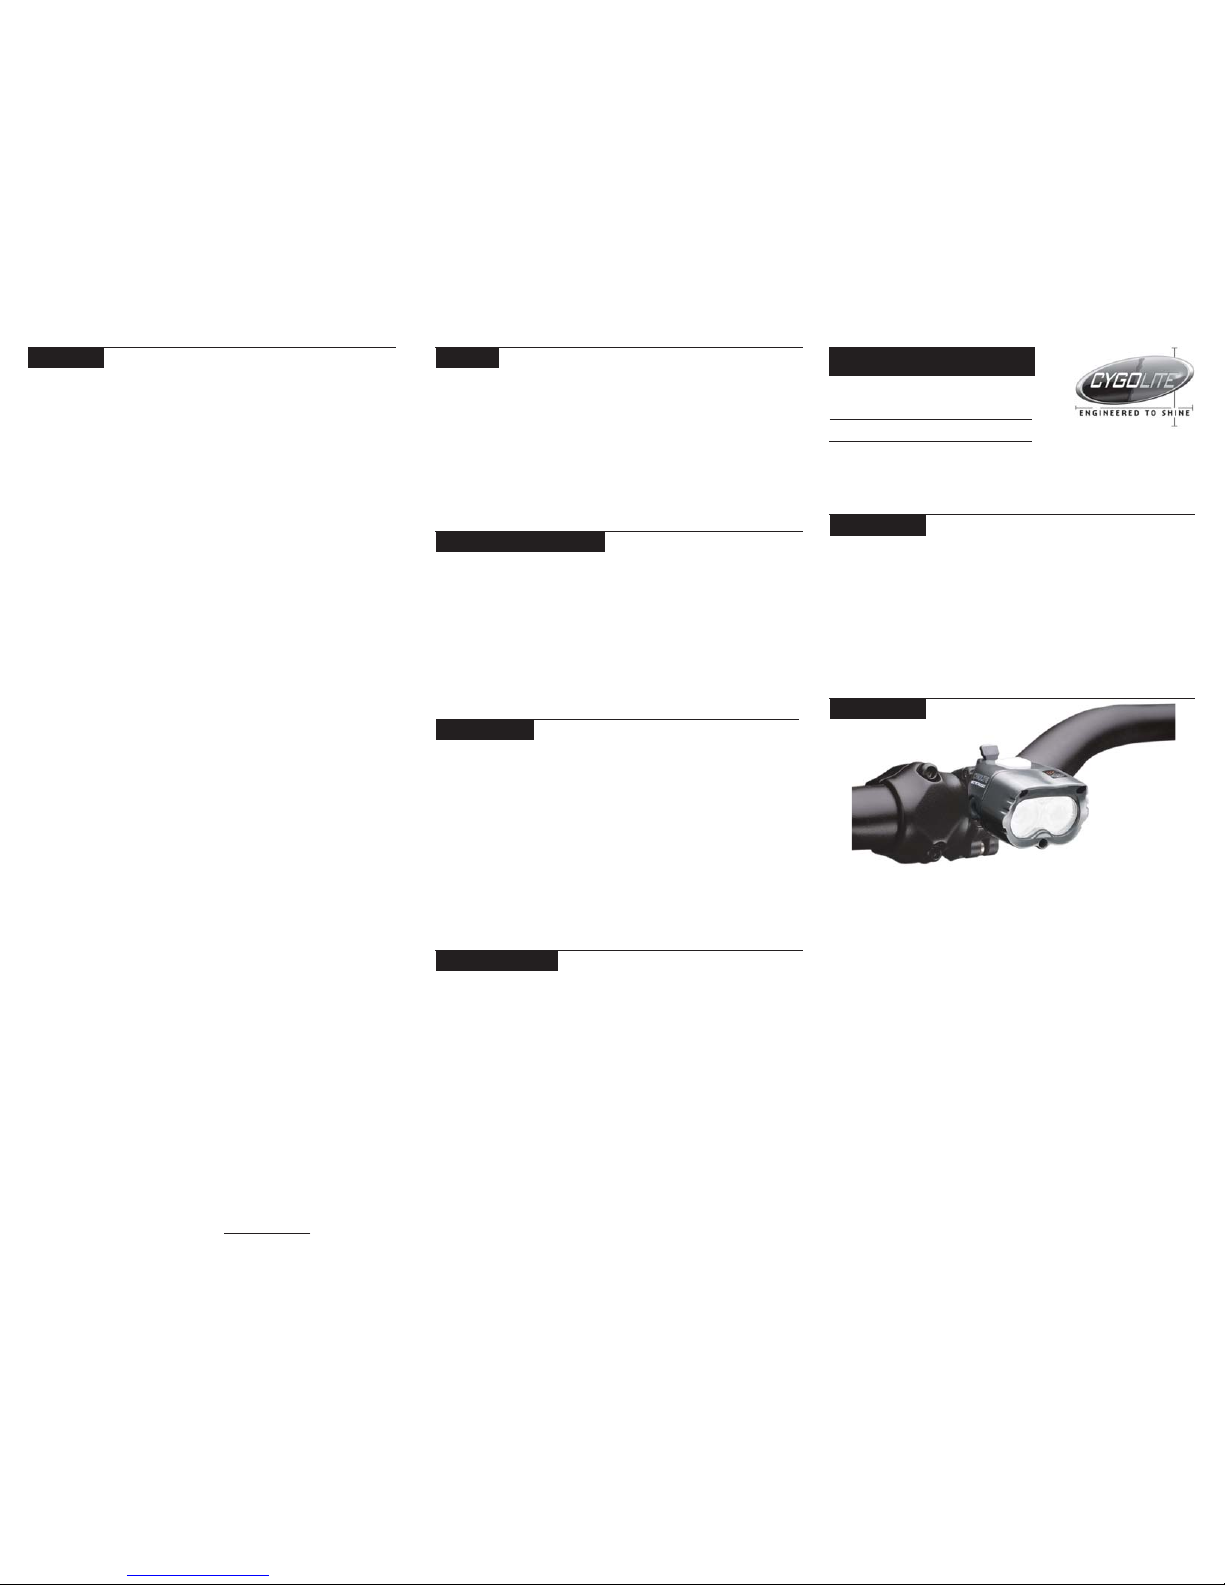
Ultra Compact Rechargeable Smart Bicycle Light
If you have more questions that are not listed here,
visit the support page at: www.cygolite.com
CAUTION:
· Headlightmaygethotduringuse.Usecautionwhenhandling.
· Unplugtheheadlightfromchargerwhennotinuse.
· Unplugconnectorsbytheplug,neverbythecable.
· Donotmodifyorsubstituteanypartswithnon-Cygoliteparts.
· Donotopenheadlightcase.
· Provideadequateairflowtotheheadlighttocoolduringuse.
· Ifthelightis on&stationarylongerthan10minutes,turnitoff.
· Donotlook directlyatlight.
· Donotoperateorsubmergeunderwater.
· Donotoperatethelightunattended.
· Keepheadlightawayfromcombustiblematerials.
· Donotpackageheadunitwhenhotorimmediatelyafteruse.
· Carryingaflashlightisrecommended.
· This light is for bicycle useonly.
· Statelawsregardingflashingbicyclelightsmayvaryamongstates.Usetheflashing modes
in accordancetoyourlocalstatelawsaswellas federal law.
MITYCROSS 800
FEATURESFEATURES
FEATURESFEATURES
FEATURES
CONTENTSCONTENTS
CONTENTSCONTENTS
CONTENTS
F.A.Q.sF.A.Q.s
F.A.Q.sF.A.Q.s
F.A.Q.s
The MityCross 800 is designed to be used on bikes in some of the most
extreme outdoor conditions. Over time, dust and dirt may hinder the
connections on your battery and headlight. To prevent this from happening,
ensure that both the battery and headlight are clean after every ride.
Wipe the headlight and battery down with a damp cloth. Do not submerge
the battery or headlight in water. The DC jack grommet on the headlight
occasionally needs lubrication. We recommend using a bit of vaseline to
ensure easier connection between the plug and headlight. Remove all dirt
around or on the plugs or jacks on both the battery and headlight.
The High-Brightness LEDs have extensive life so bulb replacement is not
required.
CARECARE
CARECARE
CARE
The headlight will not turn on.
•Make sure the power button was firmly pressed.
•Make sure the battery cable is properly connected.
•Make sure the battery is fully charged.
The headlight turns off over rough terrain.
•Make sure battery cable is securely plugged into the headlight.
•Make sure battery cable is fastened to the handlebar to
minimize cable vibration.
TROUBLESHOOTINGTROUBLESHOOTING
TROUBLESHOOTING
In the USA, the MityCross 800 comes with a lifetime limited warranty on
the light housing and one year warranty on electrical parts, against any
defective part or craftsmanship. The battery is warranted up to 6 months
after the original date of purchase. If the unit is under warranty, Cygolite
will repair or replace defective components at no charge provided the
product has not been subject to misuse, abuse, or non-Cygolite authorized
alteration, modification or repair. Warranted products requiring service
must receive a Return Merchandise Authorization number (RMA#) from
customer service. The original receipt (INCLUDING DATE) is required on
all warranty repairs. Shipping costs inccurred from shipping warranty or
repair items from the customer to Cygolite are covered by the customer.
For warranty issues outside the USA, contact the retailer where the
purchase was made.
WARRANTYWARRANTY
WARRANTYWARRANTY
WARRANTY
CYGOLITE
1307-AEASTSAINTGERTRUDEPL.,SANTAANA,CA92705 USA
PHONE:(714)437-7752 FAX:(714)437-7962
www.cygolite.com
All Cygolite products are backed by Cygolite’s warranty, providing
quality, craftsmanship, and the assistance of our knowledgeable staff.
If any support is needed, we will assist with 48 hour turnarounds on parts
and service. For questions, problems, and/or authorized Cygolite parts
contact us.
COMMITMENTCOMMITMENT
COMMITMENT
CONTENTS
• High-brightness LED headlight
• Rechargeable Li-Ion battery
• Smart Rapid charger
• Locktite Handlebar Bracket
• Helmet mount kit (Xtra model only)
• Operation Manual
Q:When shouldIchargemybattery?
·Thebatterycanbe chargedanytime, butwerecommend fullychargingthe battery
everytimeyou chargeit.
Q:Can Ileavemybatteryonthechargerfor extendedperiodsoftime?
·The SmartRapidcharger preventsdamagefromoverchargingbut,likeall electrical
appliances,werecommendunpluggingthebatteryandcharger oncethebattery is
fullycharged.
Q:HowdoIknowthechargeris charging?
·WhentheSmartRapidchargersystemisplugged intothewall outletand connectedto
thebattery,theLEDchargingindicator onthecharger willbeRED,indicating itisin
Rapidchargemode. If theLEDshowsGREEN,thechargeris intricklemode andthe
batteryisfullycharged.
Q:Will chargersformyotherCygolitesystemsrechargethe MityCross800battery?
·Yes,thechargersforanyoftheotherMityCrossmodelsandthe Explorer650
will chargetheMityCross800correctly.
Q:Can Iusenon-Cygolitepartsfor thisunit?
·No,Cygolitepartsaremanufacturedtospecificquality specifications.Useof non-
Cygoliteparts willvoidthewarranty andmaycausedamage tothelight.
QUESTIONSABOUT CUSTOMIZINGLIGHTSETTINGS
Q:WhatifImessedup mysettingswhatshouldIdo?
·Youcangetbackintoprogrammodeandreprogrameachprogrammablesettingoryou
canrestorethelightback tothefactory defaultsettings.
(seeRestorefactorydefaultsettings)
Q:How doIknowIaminprogrammingmode?
· Thelightwillautomatically scrollbetweenthe4programmable settings every5
seconds, andthe3LED indicatorswillilluminateto showwhichprogrammable
settingyouarein.
Q:HowdoIknowwhichprogrammablesettingIamin?
· Theindicatoron thebuttonwillshowwhatprogrammablesetting youarein
(seeCUSTOMIZELIGHT SETTINGS)
Q:What happensifI aminprogrammingmodeandIdon’tchange anyofthesettings?
· Thelightwillretaintheoriginalsettings.
Q:When inprogrammingmode,Iam holdingdownthebuttonbut thebrightness(orflash
speed)isnotchanging,why?
· Thelightreachedthemaximumorminumumendpoint.Simplyreleasethe buttonthen
pressandholdthe buttonagain,andthe lightwillincrease ordecreaseinbrightness
(orflashspeed)in theoppositedirection.
Q:HowdoIknow thelightsavedmyprogrammedsetting?
· Ifyousetyourpreferredbrightesslevel,didnotpressthebuttonfor5seconds,andthe
lightswitched tothenext programmablesettingthenthe lightsavedthat setting.
Q:What ifIonlyprogram1 oftheprogrammablesettingsbut nottheothers?
· The lightwillusethe settingyouchosefor the thatsettingthenuse the original
settings fortheothersettings youdidnot program.
Q:While programming,ifIskippeda programmablesetting,howcanIprogramthesettingI
missed?
· Duringprogrammablemodethelight willcyclethrough theprogrammable settingsif
you don’t press thebutton,simplywaitforthelight to cycle backtothesettingyou
skipped, thenprogramit.
Q:WhatifIdon’twanttoprogramthe light,canI useitnormally?
· Yesyou canusethelightwith the factory defaultsettingsitcamewith.
Q:Are thereanumberoftimesIcan changemyprogrammablesettings?
· You canchangeyourprogrammablemodesasmanytimesasyouwish.
AddFoamPad
Spacers
1
1
RubberPad
24
5
3
6
The MityCross 800 features a BICYCLING MODE with 3 brightness
settings, and a SPECIAL MODE with 3 special settings. These modes are
controlled by the power button on the top of the headlight. Also, on top of
the headlight are 3 indicators lights that show which setting the headlight is
in. One of these indicators also works as a battery level indicator. The
diagram and instructions below indicate where these features are located on
the headlight and how to properly use them.
CAUTION: The light may get hot during use. Handle with care and turn
light off if stationary for more than 10 minutes.
THERMAL PROTECTION
The MityCross features a built in thermal protection to prevent the light from
overheating.Thethermalprotectionwillautomaticallydimthelight(approx.15%
brightnessreduction) until the light cools to a normal operating temperature. At
that time, the light will return to its normal brightness.
LIGHT MODE INDICTORS
The3 illuminated LEDs on the top of the headlight show which setting is in use.
BATTERYLEVELINDICATOR
The battery level indicator is the red LED closest to the back of the light next
to the power button. It flashes 3 different speeds to indicate the battery levels.
HEADLIGHT OPERATIONHEADLIGHT OPERATION
HEADLIGHT OPERATION
1 2
MOUNTING CONTINUED
1. Attach handlebar spacers to inside of handlebar bracket for standard
sized and remove them for oversized handlebars.
2. Swing thumbnut down from thumbnut slot to open bracket.
3. Attach rubber pad to handlebar spacer. First remove paper from
rubber pad to reveal adhesive side, align rubber pad holes to
handlebar spacer plugs and join together.
4. Wrap bracket around handlebar & return thumbnut to slotted space.
5. Twist thumbnut clockwise until tight.
6. Slide headlight downward into bracket until headlight clicks into place.
MOUNTING BATTERYMOUNTING BATTERY
MOUNTING BATTERY
1. An adhesive foam pad is included to provide cushion and grip between the
battery and the bike.Apply the foam padding to the center of the battery
above the velcro slot.
2. Thread the velcro strap through the velcro slot
3A (Stem mount). Wrap velcro strap around stem, through plastic loop, and
fasten to itself
3B (Frame mount). Wrap velcro strap around frame, through plastic loop,
and fasten to itself
BATTERY MOUNTING PRECAUTIONS: When mounting the battery to the
bike, make sure the battery cable and battery velcro strap do not interfere
with the brake cables or the ability to turn the handlebars.
VelcroSlot
BATTERY CHARGINGBATTERY CHARGING
BATTERY CHARGING
1. Connect the charger to wall outlet first then the battery to the charger
(Follow sequence for proper charging.)
NOTE:TheLEDchargingindicatoroncharger may take up to 30 secondstoturn
on after the battery and charger have been connected.
2. The LED on the Smart rapid charger shows red when charging then green
when fully charged.
3.
Allow approx. 4-8 continuous hours to fully charge a drained battery.
4. Disconnect charger and battery when charging is complete and not in use.
Smartrapid charger
LED charging indicator
RED=Charging
GREEN=Fully charged
WARNING: Charge the battery with the supplied charger only. Using any
other charger to charge the battery may result in damage. The Smart Rapid
charger is for indoor use only. Unplug the battery, and charger once the
battery is fully charged.
Allow approximately: 4 hours to fully charge (stem mount battery)
: 8 hours to fully charge (frame mount battery)
RUN TIMESRUN TIMES
RUN TIMESRUN TIMES
RUN TIMES
MOUNTING ON HANDLEBARSMOUNTING ON HANDLEBARS
MOUNTING ON HANDLEBARS
CUSTOMIZE LIGHT SETTINGSCUSTOMIZE LIGHT SETTINGS
CUSTOMIZE LIGHT SETTINGS
Begin
Programming
mode
Adjustbrightness
&flashsettings
Savesetting
End
Programming
mode
Restore
factorydefault
settings
(Option)
While HOLDING the power button, PLUG the battery
into the light, then RELEASE the button for program-
ming mode.
In programming mode, the light will scroll between the
4 programmable settings every 5 seconds if the
button is not pressed. The programming mode you are
in is indicated by the indicator on the top of the light.
PRESS and HOLD the power button to gradually
change the brightness.RELEASE the button and the
brightness will stop changing. PRESS and HOLD the
button again and the brightness will change in the
opposite direction. If the light doesn’t change
brightness while holding the button, it has reached its
end point (brightest or dimmest level). Repeat these
steps to fine tune your preferred brightness level.
For the flash settings, follow the same steps to
lenghten and shorten the time between flashes.
Once you’re reached your preferred brightness,
RELEASE the button and that setting is SAVED. Wait
5 seconds and the light will go into the next program-
mable setting. Continue to program the remaining
settings.
UNPLUG the battery from the headlight to exit
programming mode. RECONNECT the battery to the
headlight to start using the new settings.
With the battery plugged into the light headlight and
the light on, PRESS and HOLD the power button for 7
SECONDS. The light will turn off, then restart with the
factory default settings.
You can use the MityCross 800 with the factory default settings or use
OSP to customize your preferred settings. OSP (On-Site Programmable)
is smart technology that lets you customize your light’s brightness
settings and flashing speeds exactly how you want them directly to the
light.This light comes with 6 different light settings, 4 of these can be
programmed to your needs.
Default settings
Programmable
settings
HIGH
Default
N/A
WALKING
Default
N/A
MEDIUM
Program 1
5 sec
LOW
Program 2
5 sec
FLASH
Program 3
5 sec
S-PULSE
Program 4
5 sec
OSP SETTINGS CHART
if BUTTON is NOT PRESSED
light will cycle as shown above
TO REMOVE HEADLIGHT FROM THE HANDLEBARS
1. Press tab on bracket plate forward.
2. Slide headunit up.
TO ADJUST THE SIDE-TO-SIDE BEAM DIRECTION
Roll the headlight left to right to adjust the side-to-side direction.
POWERBUTTON
LIGHT MODE
INDICATORS
BATTERYLEVEL
INDICATOR
Power In
DC JACK
TurnON
BICYCLEMODE(3)
High > Med > Low
PLUG batterycable
intoheadlightDCJack
(Fromoffposition)
PRESSPowerbutton
SPECIALMODE(3)
DayFlash >SteadyPulse > Walking
(Fromoffposition)
PRESSpowerbuttonfor2seconds
andthenrelease
PRESS Powerbuttontoscrollbetweensettings
HOLD Powerbuttonfor2seconds
SeeCUSTOMIZELIGHTSETTINGS
INDICATOR
(Onbutton)
BICYCLEMode
SPECIALMode
HIGH
DAYFLASH
MEDIUM
STEADYPULSE
LOW
WALKING
Full to
1 hour left
ConstantwithBlink
Lessthan
3/4 hour left
Fast Flash
Lessthan
1/4 hour left
Slow Flash
Batteryempty
Headlightflashes
for20seconds
thenturnsoff
3A
Change Settings
Turn OFF
Customize settings
For a quick tutorial to customize the light settings, visit:
www.cygolite.com/tutorial
Battery
Outlet
The run times below are based on the factory default settings. Run times
will vary if you customize the light settings.
The MityCross 800 comes with a stem mount battery (standard model) or a
frame mount battery (Xtra model). Attach battery to the bike as followed:
S-Pulse
7
3:30
High
4
2
Med
6
3
Low
32
16
DayFlash
52
26
BicycleModes (hr:min) SpecialModesWalking
100
50
Model
MityCross800Xtra
MityCross800
Stemmount 3B Framemount

Other Cygolite Bicycle Accessories manuals

Cygolite Metro 500 User manual

Cygolite

Cygolite Metro 500 User manual

Cygolite CENTAURI-1000 User manual

Cygolite

Cygolite CENTAURI-1000 User manual

Cygolite Expilion User manual

Cygolite

Cygolite Expilion User manual

Cygolite Metro 420 User manual

Cygolite

Cygolite Metro 420 User manual

Popular Bicycle Accessories manuals by other brands

EZI-GRIP Advantage Owner's manual and instructions

EZI-GRIP

EZI-GRIP Advantage Owner's manual and instructions

Polisport BUBBLY MAXI+ manual

Polisport

Polisport BUBBLY MAXI+ manual

All-City Cycles Thunderdome instructions

All-City Cycles

All-City Cycles Thunderdome instructions

Shimano REVOSHIFT SL-RV100 instruction manual

Shimano

Shimano REVOSHIFT SL-RV100 instruction manual

Itm SIT'N'GO user manual

Itm

Itm SIT'N'GO user manual

Sync Ergonomics Project 0.2 Evo Setup guide

Sync Ergonomics

Sync Ergonomics Project 0.2 Evo Setup guide

Veloset VS 213 Installation and operation manual

Veloset

Veloset VS 213 Installation and operation manual

Crivit HG00734A Operation and safety notes

Crivit

Crivit HG00734A Operation and safety notes

Shimano FD-M661 user manual

Shimano

Shimano FD-M661 user manual

BOS Suspension RARE FCV Series user manual

BOS Suspension

BOS Suspension RARE FCV Series user manual

Scosche HANDLEIT PRO BM2N1 manual

Scosche

Scosche HANDLEIT PRO BM2N1 manual

Schwinn Spirit Trailer user manual

Schwinn

Schwinn Spirit Trailer user manual

KOSTKA FOOTSTEP manual

KOSTKA

KOSTKA FOOTSTEP manual

CAMPAGNOLO Ergopower Record 12s user manual

CAMPAGNOLO

CAMPAGNOLO Ergopower Record 12s user manual

tubus VEGA CLASSIC Assembly instructions

tubus

tubus VEGA CLASSIC Assembly instructions

AddBike Carry 'Box user guide

AddBike

AddBike Carry 'Box user guide

FUXON R-20 EB manual

FUXON

FUXON R-20 EB manual

Bike Fixation Bicycle Access Ramp installation instructions

Bike Fixation

Bike Fixation Bicycle Access Ramp installation instructions

manuals.online logo
manuals.online logoBrands
  • About & Mission
  • Contact us
  • Privacy Policy
  • Terms and Conditions

Copyright 2025 Manuals.Online. All Rights Reserved.