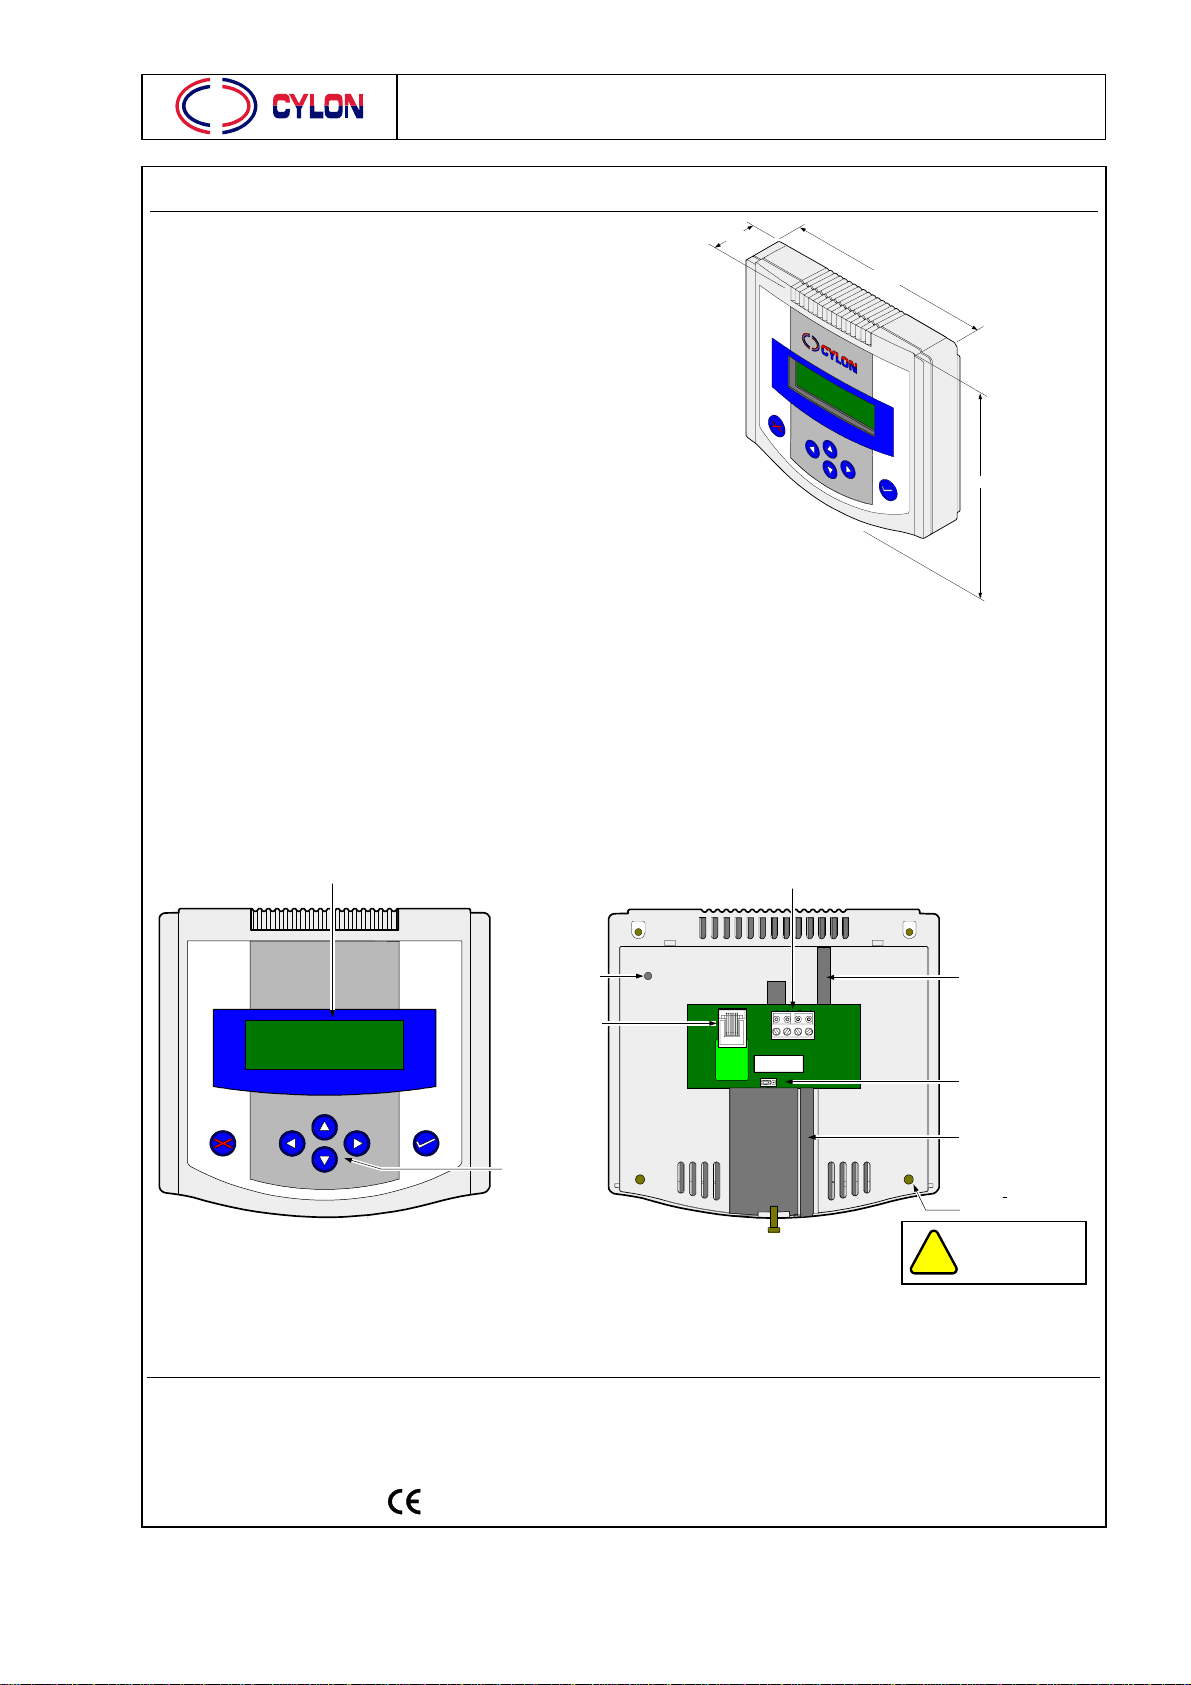
Unitron Accessories UCKRA420
UCDS-0035 rev 3.00 Cylon Controls Limited 2
UCKRA420 Installation Instructions
The UCKRA420 may be mounted
a) in a Panel Door (see Section 6)
b) on a Panel Backplate (see Section 5)
or c) on a Pattress Box (see Sections 3 and 4)
Note: mounting options are available for US, UK and European Pattress Boxes.
In all cases, the mounting bracket is removed from the UCKRA420, and cable attached by either RJ-11 or Screw-
Terminal connectors as detailed below.
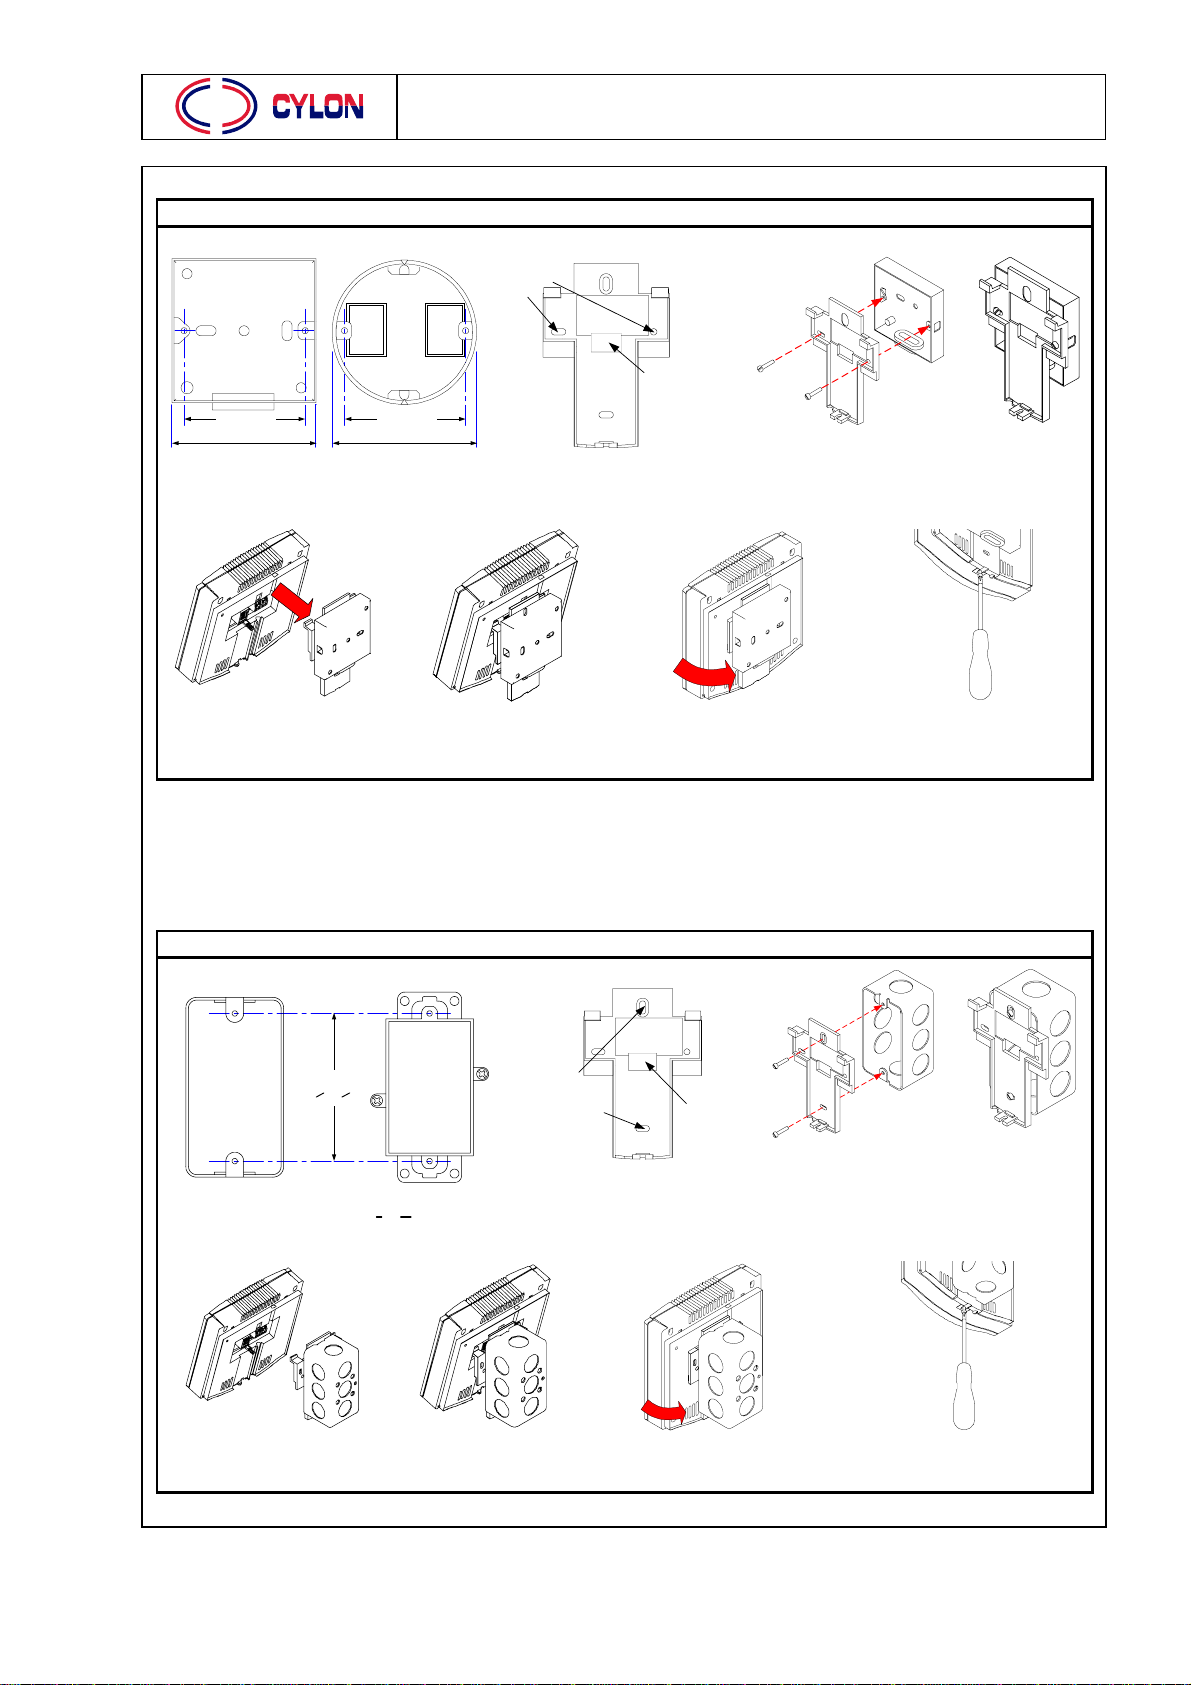
Section 1 - Removing the Mounting Bracket
Bracket locking
screw
Loosen the Bracket locking screw at the bottom of the
UCKRA420. (It is not necessary to fully remove the screw) Lift the bottom of the bracket away
from the UCKRA420, until it is clear
of the locking screw.
Unclip the top of the bracket by
pulling the bracket downwards
Section 2 - Connecting the UCKRA420 to UCxxPG-R controller
GND
T/X
R/X
Power
(not used)
(not used)
Power
R/X
T/X
GND
1. RJ-11 connector 2. Screw-terminal connector
Connect a cable to the UCKRA420 using an RJ11 plug OR a Screw-Terminal connector.
1. Downward cable channel OR 2. Upward cable channel
Route the cable through one of the cable channels so that the mounting bracket
can be re-attached. Connect the other end of the cable to the RJ-11 port
of a UC controller