D-Link DAP-3712 User manual

User Manual
Version 1.00 | 12/11/2020
DAP-3712
20 km Long Range 802.11ac Wireless Bridge

2D-Link DAP-3712 User Manual
Table of Contents
Product Overview.............................................................. 3
Package Contents......................................................................... 3
System Requirements................................................................. 4
Introduction ................................................................................... 5
Features............................................................................................ 6
Hardware Overview..................................................................... 7
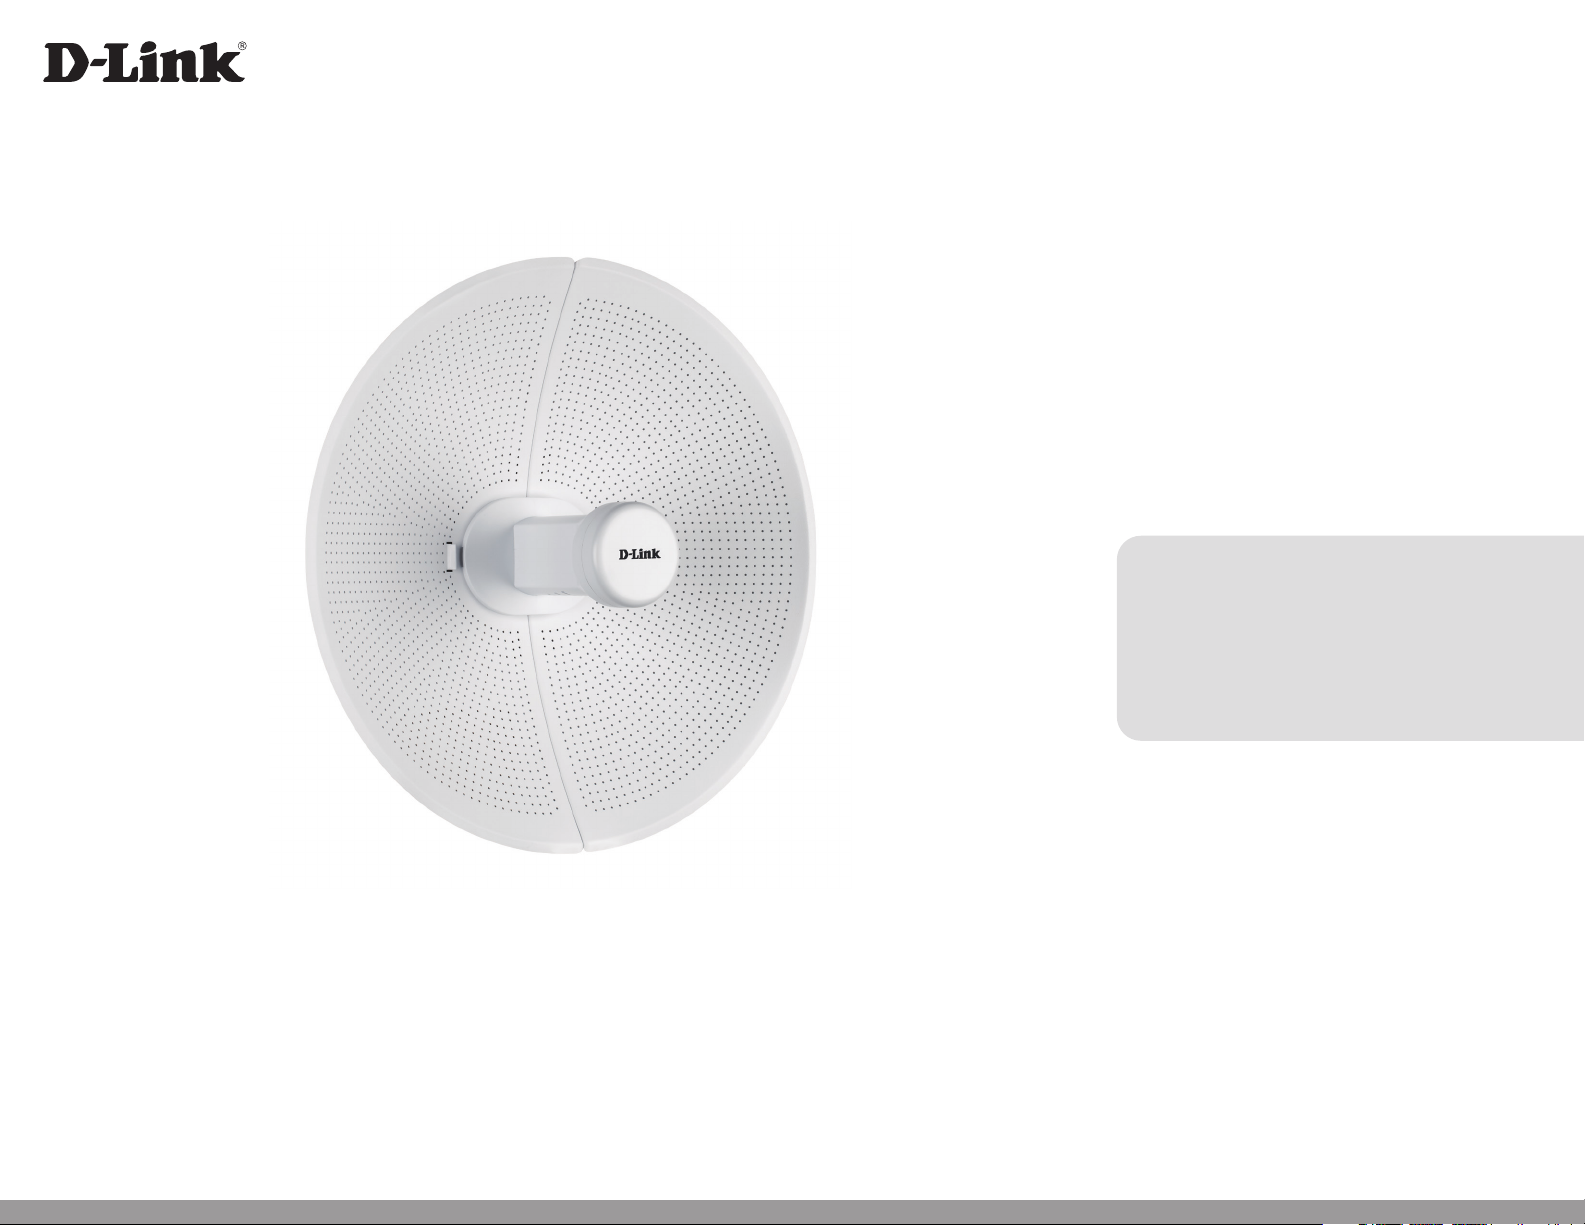
Connection ............................................................................. 7
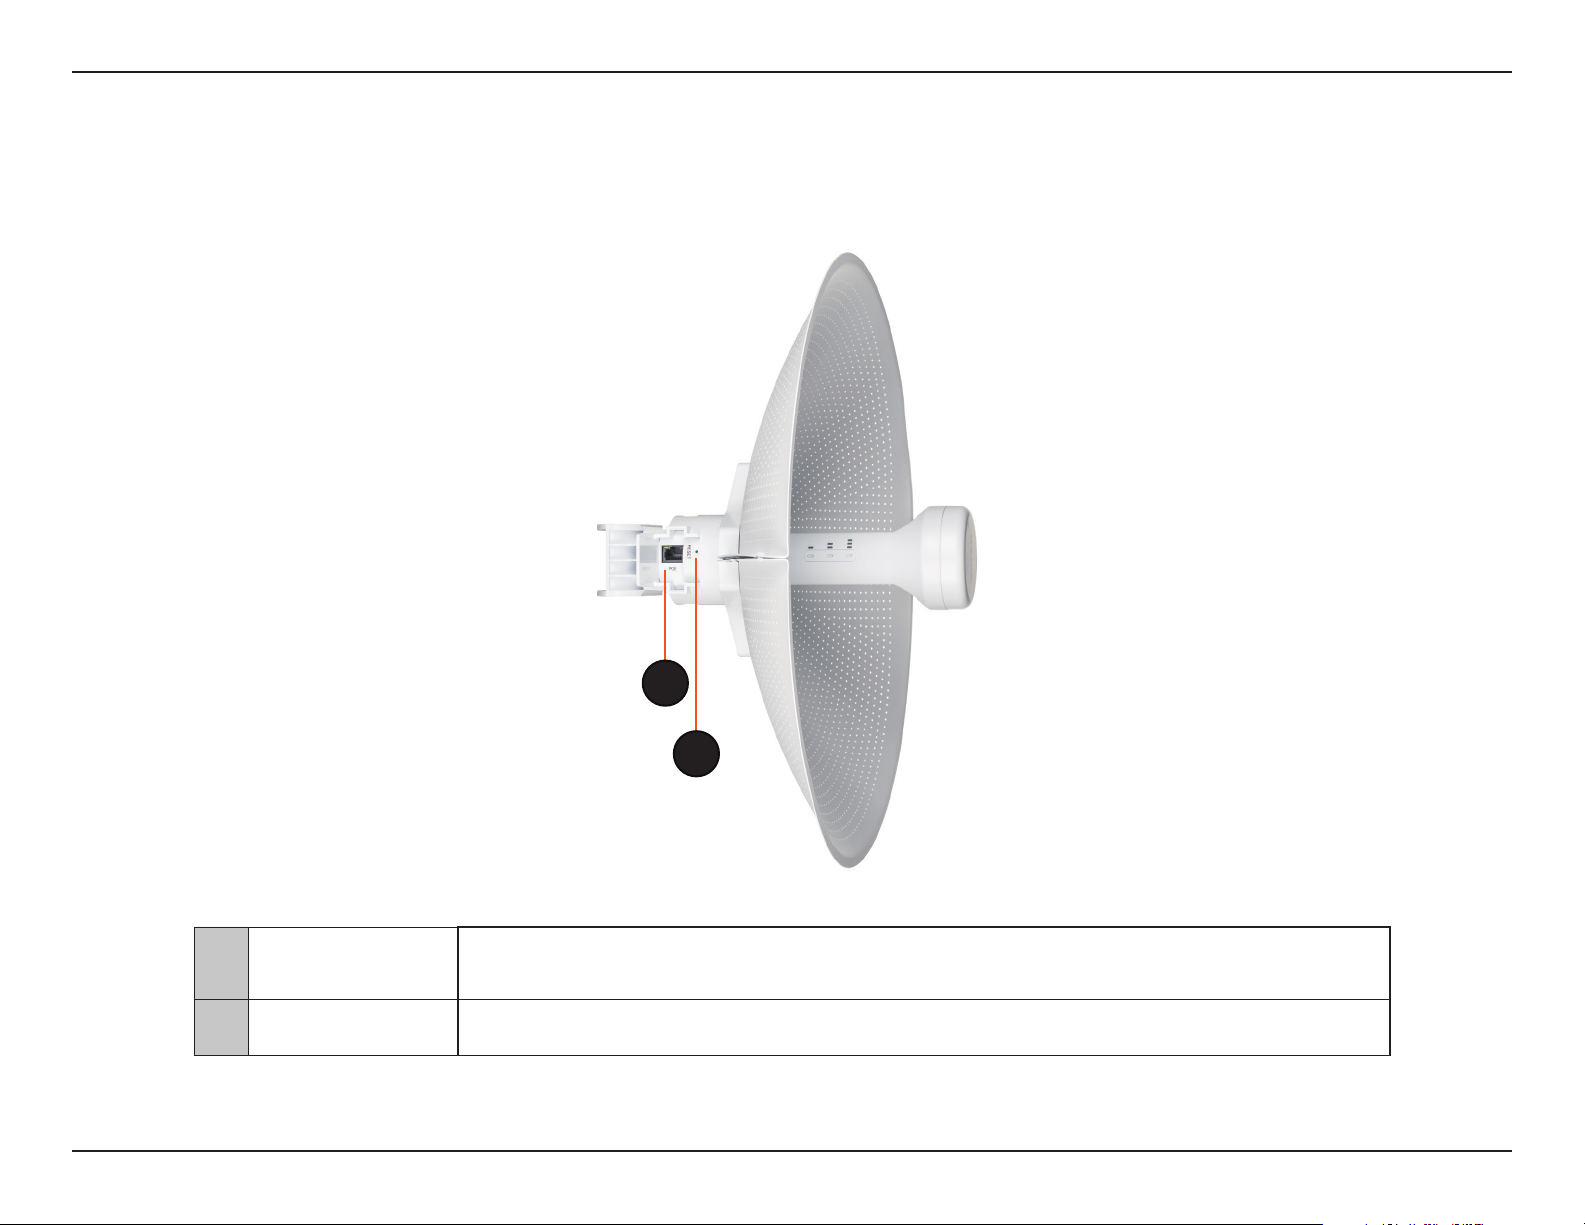
LED Indicators........................................................................ 8
Installation ......................................................................... 9
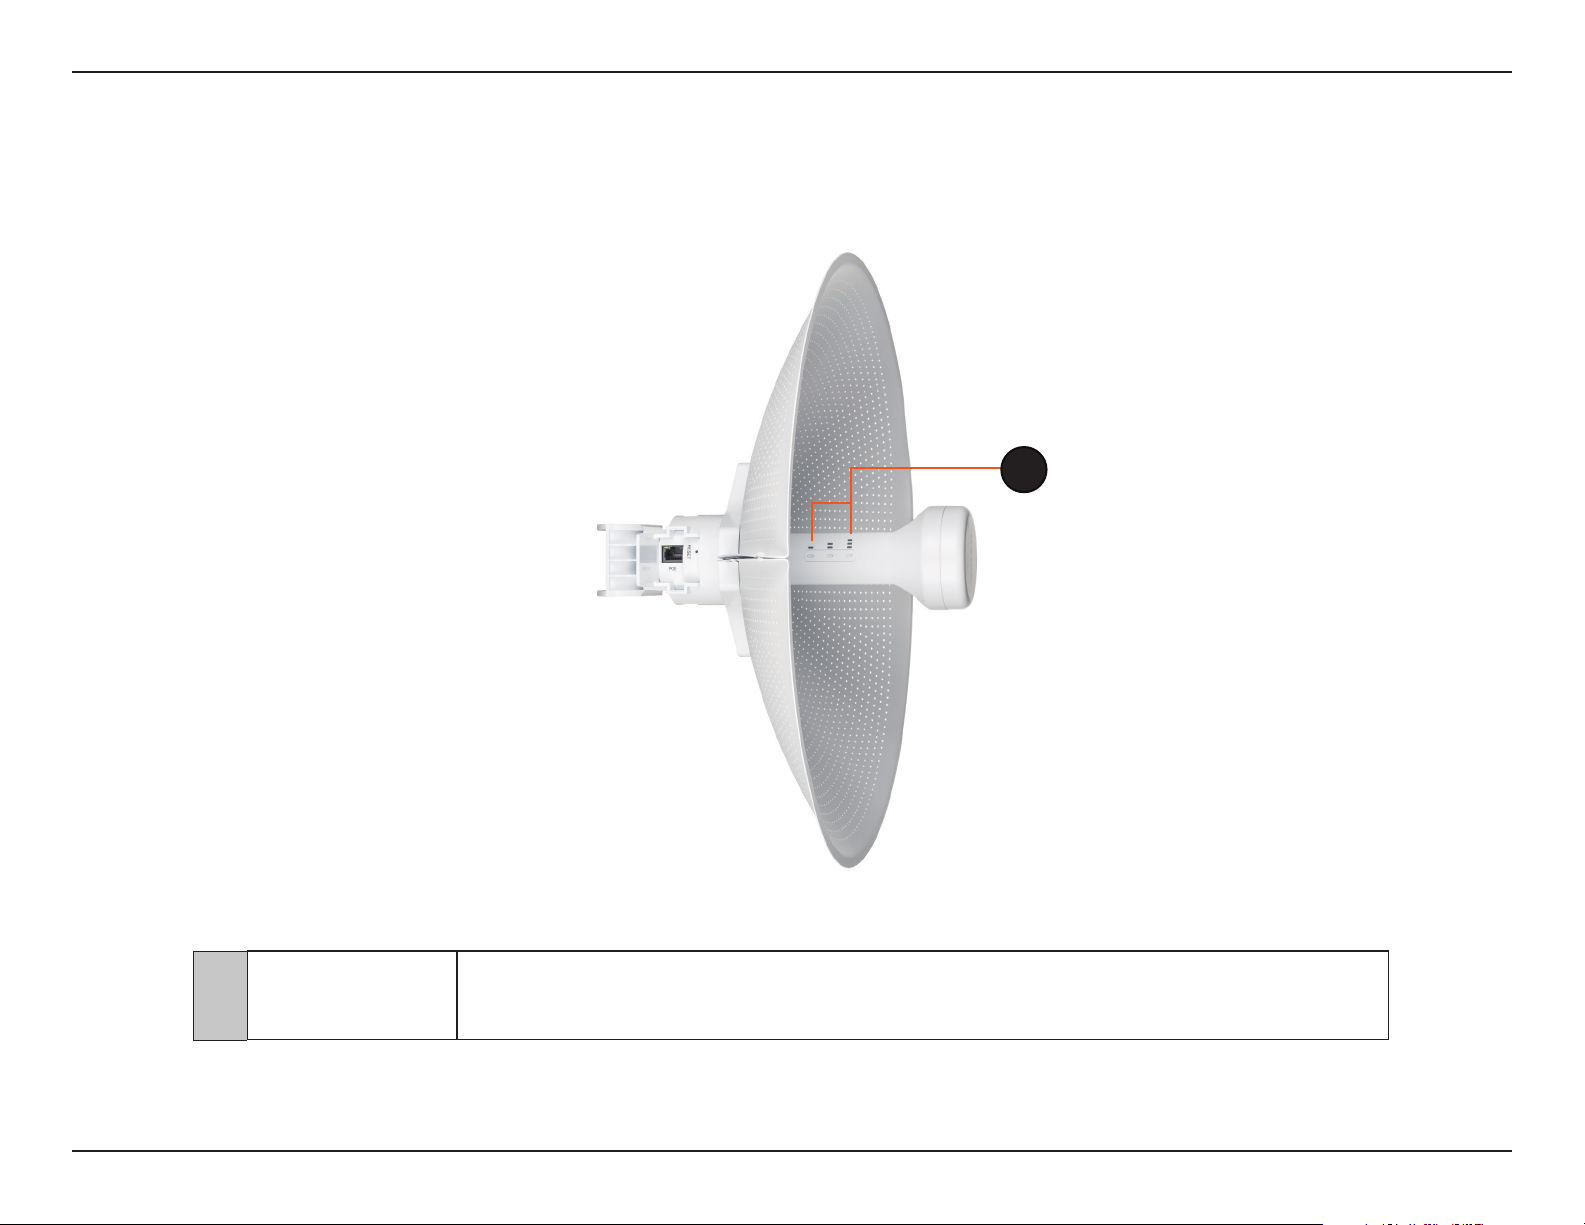
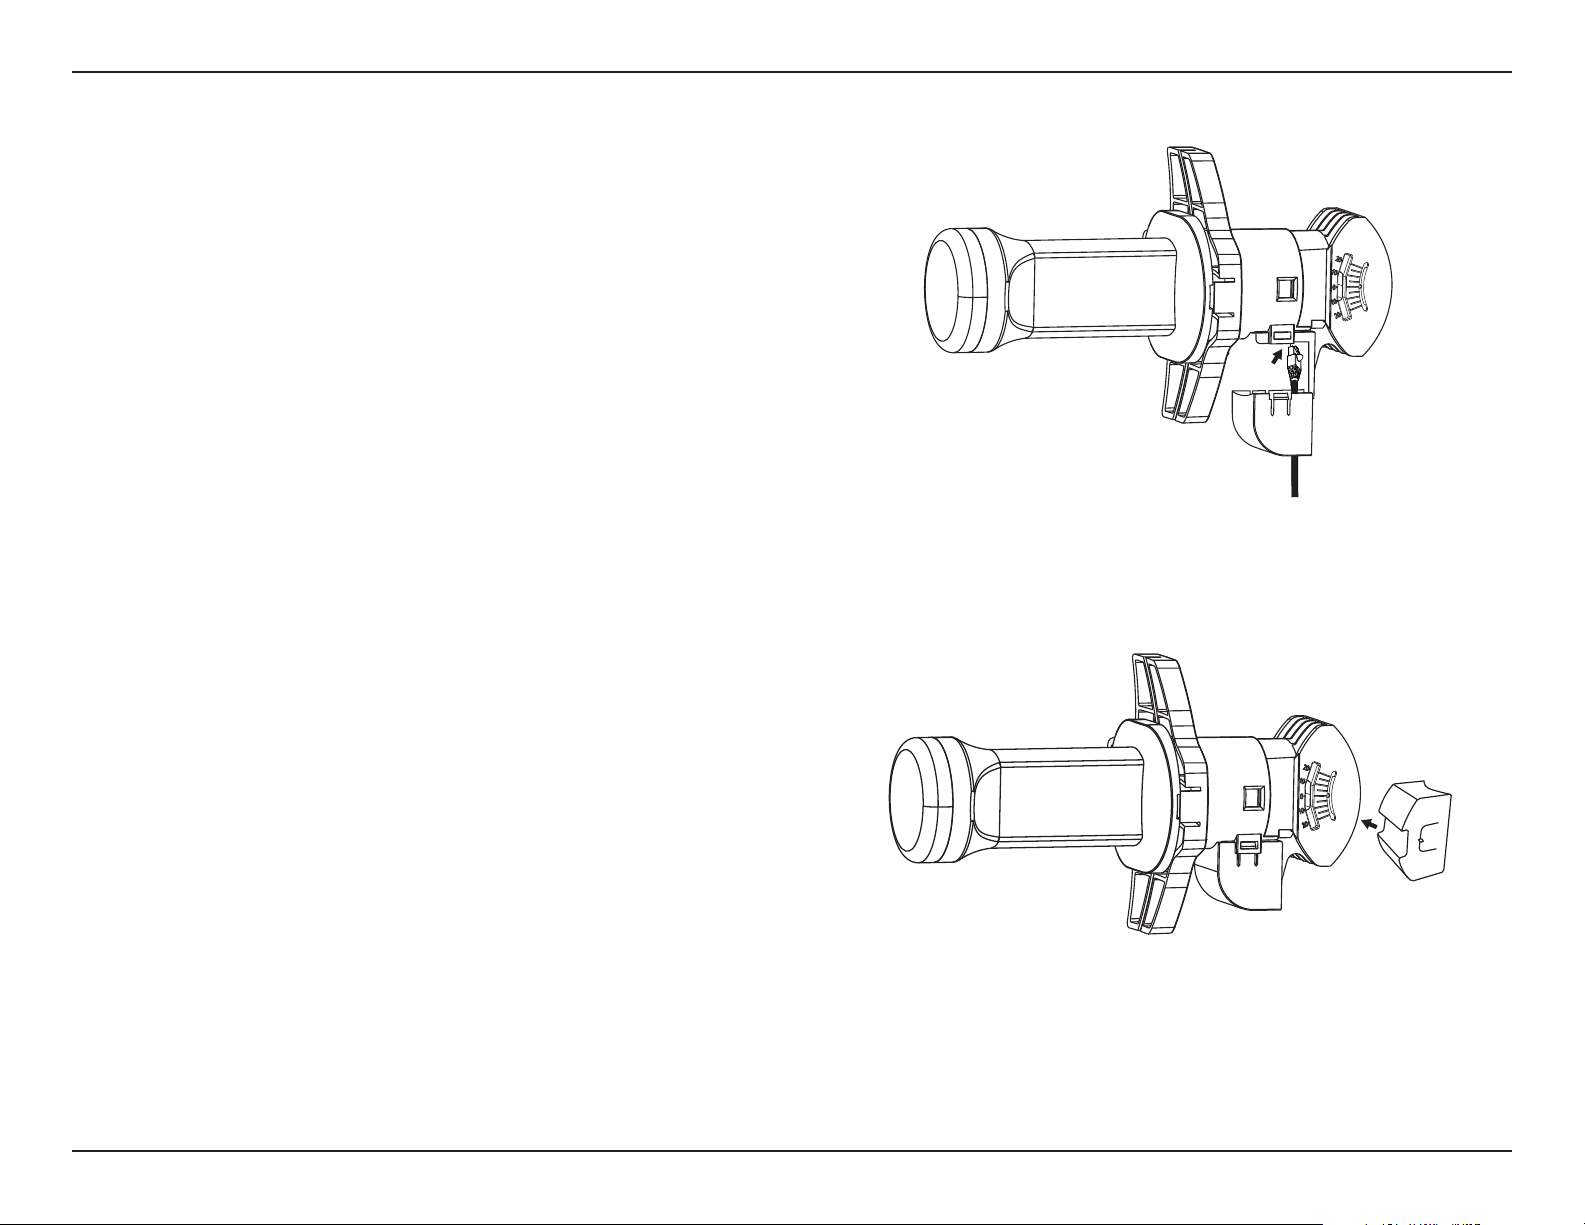
Assembling the Access Point............................................ 9
Preparation before Installation......................................11
Powering the Access Point ..............................................12
Conguring the First DAP-3712 in Access Point
Mode .......................................................................................12
Conguring the Second DAP-3712 in Client Mode14
Mounting the Device ........................................................15
Mounting on a Pole ...........................................................15
Conguration...................................................................17
Factory Default Setting ............................................................17
Web-based Conguration.......................................................18
Wizard.............................................................................................20
Basic Settings ...............................................................................23
Wireless ..................................................................................23
Network..................................................................................29
QoS...........................................................................................31
Service ....................................................................................34
System ....................................................................................37
Status ..............................................................................................39
Info ...........................................................................................39
Statistics .................................................................................41
Network..................................................................................42
Syslog Info.............................................................................43
Tools ................................................................................................44
Ping IP .....................................................................................44
Traceroute .............................................................................45
Link Test..................................................................................46
Antenna Alignment ...........................................................47
Spectrum Analyzer.............................................................48
Technical Specications..................................................49
Table of Contents

3D-Link DAP-3712 User Manual
Section 1 - Product Overview
Package Contents
DAP-3712 20 km Long Range 802.11ac Wireless Bridge
Quick Start Guide
Power Injector
Power cord
Mounting tie

4D-Link DAP-3712 User Manual
Section 1 - Product Overview
System Requirements
Web-based Conguration
Requirements
Computer with the following:
• Microsoft Windows®, Apple Mac OS, or a Linux-based operating
system
Browser Requirements:
• Microsoft Edge, Firefox 60.0, Safari ,or Chrome 68.0.3440.106

5D-Link DAP-3712 User Manual
Section 1 - Product Overview
Introduction
The DAP-3712 is a high-performance 802.11ac 2T2R outdoor-deployable wireless bridge that provides wireless connectivity
to multiple network locations. The DAP-3712 has a built-in 23 dBi dish antenna that can deliver connectivity at a distance of
up to 20 km.
Note: Actual data throughput will vary. Network conditions and environmental factors, including volume of network trac, building materials and construction, and network
overhead, lower actual data throughput rate.

6D-Link DAP-3712 User Manual
Section 1 - Product Overview
• High-performance 802.11ac 2×2 chip
• Max. transmission range: 20 km
• Max. transmission throughput: up to 867 Mbps
• Integrated TDMA, intelligent rate control, and Auto ACK timeout
• TDMA solves the hidden-node problem in 802.11 networks
• Supports 4 operation modes: Access Point, Client, WDS Access Point, WDS Client
• Supports point-to-point and point-to-multipoint connections
• Unique RF and antenna design enable long-range transmission
• Wireless multimedia optimization technology guarantees video/audio transmission QoS
• User-friendly web-based UI makes the installation and setup processes much easier
• Reliable PoE+ 802.3at standard power input
• Waterproof housing and protection from weather
Features

7D-Link DAP-3712 User Manual
Section 1 - Product Overview
Hardware Overview
Connection
1 PoE Port Uses a standard Ethernet cable to connect the device to a PoE power source such as a PoE
switch or PoE injector.
2 Reset Button Resets the device to its factory settings.
1
2

8D-Link DAP-3712 User Manual
Section 1 - Product Overview
Hardware Overview
LED Indicators
1
1 Signal Strength Signal strength indicators. One light indicates a weak signal. Two lights indicate a medium
signal. Three lights indicate a strong signal.

9D-Link DAP-3712 User Manual
Section 2 - Installation
Assembling the Access Point
1. Assemble the dish of the DAP-3712 by sliding the two
halves together until they lock in place.
2. Connect the antenna and base through the hole in the
center of the dish.
Installation

10D-Link DAP-3712 User Manual
Section 2 - Installation
3.Thread a standard RJ-45 Ethernet cable through the cover
for the PoE port on the underside of the DAP-3712. Insert
the cable into the PoE port, then attach the cover to the
device.
4. Connect the adjustment kit to the base of the DAP-3712
by pressing it in until it clicks and locks in place. Use the
adjustment kit to position the antenna at the desired.

11D-Link DAP-3712 User Manual
Section 2 - Installation
Preparation before Installation
Before installing the DAP-3712, check the distance between the two sides and ensure that they are within wireless signal
range of each other. It may be helpful to use a Graphic Information System (GIS) program such as Google Earth to check for
obstructions between the two sites. If there is an obstruction, it may help to install the DAP-3712 as high as possible to prevent
the signal from being blocked.
Note: Ensure that both devices have the same model number and are running the same firmware version. The radiation pattern and wireless protocol of
the DAP-3712 is designed for high-performance bridge connectivity. Using different models or models with mismatched firmware versions may cause
problems, such as performance degradation or a reduction in coverage area.

12D-Link DAP-3712 User Manual
Section 2 - Installation
Powering the Access Point
To power the DAP-3712, use a standard Ethernet cable to connect the PoE port on the DAP-3712 to a 48 V PoE injector.
Cable Requirements
Use a CAT 5 cable with an even sheath. The Ethernet ports on the DAP-3712 access point cannot accept a CAT 5 cable that has
an uneven sheath; the RJ-45 connector on the cable will not t properly into the receptacle on the access point.
Conguring the First DAP-3712 in Access Point Mode
1. Use an Ethernet cable to connect the LAN port on the
DAP-3712 to the PoE Out port on the PoE injector. Using
another cable, attach the PoE injector to your switch or
management computer.
2. Ensure the computer is congured with the static IP
address192.168.0.2anda subnet maskof 255.255.255.0.
3. Launch a web browser. Enter 192.168.0.50 in the
address eld of your browser.

13D-Link DAP-3712 User Manual
Section 2 - Installation
4. Log in to the administration user interface. The default
login information is:
Username: admin
Password: admin
5. Follow the Setup Wizard’s instructions to congure the
device in Access Point Mode.

14D-Link DAP-3712 User Manual
Section 2 - Installation
Conguring the Second DAP-3712 in Client Mode
1. Follow steps 1-4 of the instructions above to power on
the device. Launch the Setup Wizard to congure the
device in Client Mode.
2. To avoid an IP address conict, change the IPv4 address
so that it is dierent from the rst DAP-3712’s IP address
(for instance, by changing it to 192.168.0.51, as in the
following screenshot).
3. On step four of the SetupWizard (Wireless), select Client
from the drop-down list. Enter the same SSID and key
that you entered when conguring the rst device.
4. To conrm that wireless connectivity between the two
devices is congured correctly, navigate to the Status
page and check the information under Associated
Stations (shown below).

15D-Link DAP-3712 User Manual
Section 2 - Installation
Mounting the Device
If you plan to install the DAP-3712 on a pole, orient the front of the device (the dish and antenna) toward the intended coverage
area.
The antenna only transmits data in the direction it is pointed. Be sure to install the device at a height that ensures that the
alignment between the devices is visible and there are no obstructions in the middle.
Note: The DAP-3712 is designed to receive PoE power from an 802.3at-compliant source. Connecting the DAP-3712 to a PoE device that is not
approved by D-Link can damage the equipment.
Mounting on a Pole
1. Hold the DAP-3712 against the pole in the desired
position.
2. Thread the metal mounting tie through the hole on the
base of the DAP-3712 and wrap it around the pole. Fasten
the tie to secure the device against the pole.

16D-Link DAP-3712 User Manual
Section 2 - Installation
Once completed, your network will resemble the following
diagram.
PoE injectorPoE injector
DAP-3712
DAP-3712
Switch
PC1 PC2
Switch
PC3 PC4
AP modeClient mode

17D-Link DAP-3712 User Manual
Section 3 - Conguration
Conguration
Factory Default Setting
The following table shows the DAP-3712’s default settings.
Features Factory Default Setting
Username admin
Password admin
Operation Mode Bridge
Wi-Fi Mode Access Point
SSID dlink
Encryption WPA2-PSK
Key 1234567890abc
LAN
IP: 192.168.0.50
Subnet: 255.255.255.0
Gateway: 192.168.0.1
DHCP Server disable
802.11 mode 802.11 ac
Channel auto
Bandwidth 80 MHz
TDMA disable
This section will show you how to congure your New D-Link DAP-3712 using the web-based conguration utility.

18D-Link DAP-3712 User Manual
Section 3 - Conguration
Web-based Conguration
To log in the DAP-3712 web interface, you will need to congure your computer’s TCP/IP settings:
1. Right-click the Local Area Connection icon on your
computer and click Properties, then click Continue. The
Local Area Connection Properties dialog box will appear,
as seen below.

19D-Link DAP-3712 User Manual
Section 3 - Conguration
2. Select Internet Protocol (TCP/IP) and click the Properties
button, and the following dialog box will appear:
3. In the above gure, the IP address should be set to
192.168.0.*. Here, * can be any number between 1-255
(but not 50, since the DAP-3712’s default IP address is
192.168.0.50).

20D-Link DAP-3712 User Manual
Section 3 - Conguration
4. When you are done conguring the IP settings above,
enter the default IP address (192.168.0.50) into the
address bar of your web browser, and the following login
interface will appear.
Wizard
When you log into the DAP-3712 for the rst time, the Wizard page will automatic pop-up. You can also click Wizard in the top
right corner.
To congure the device, follow these steps:
Other manuals for DAP-3712
2
Table of contents
Other D-Link Microphone System manuals
Popular Microphone System manuals by other brands

Eaton
Eaton Roadranger TRDR0250 instructions

Allison Transmission
Allison Transmission AT Series Operator's manual

Monacor
Monacor IMG STAGELINE FLY-16R manual

Zerotech
Zerotech Zerotime Air ZT3024A user guide

IMG STAGE LINE
IMG STAGE LINE TXS-260SET instruction manual

IMG STAGE LINE
IMG STAGE LINE TXS-811SET instruction manual