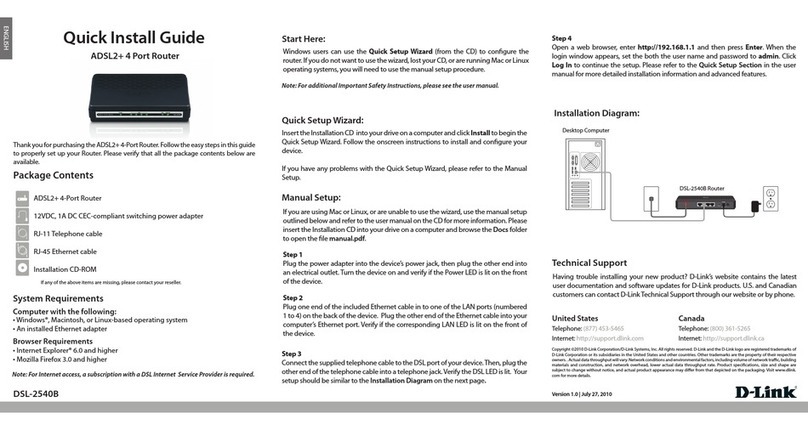
D-Link DIR-615A User manual

Quick Installation Guide
DIR-615A
Wireless N300 Router

DIR-615A Quick Installation Guide
BEFORE YOU BEGIN
Delivery Package
•Router DIR-615A
•Power adapter DC 12V/0.5A
•Ethernet cable CAT 5)
•“Quick Installation Guide” brochure).
If any of the items are missing, please contact your reseller.
The “User Manual” and “Quick Installation Guide” documents are available
on D-Link website see www.dlink.ru).
!Using a power supply with a different voltage rating than the one
included will cause damage and void the warranty for this product.
2

DIR-615A Quick Installation Guide
Default Settings
I address of wireless router 192.168.0.1
Username (login) admin
assword admin
Name of wireless network (SSID) DIR-615A
Network key ( SK password)
see WPS PIN on the
barcode label on the
bottom panel of the
device
!
Router DIR-615A with default settings cannot connect to the Internet.
To get started, please set your own password for access to the web-
based interface and change the WLAN name SSID); then, if needed,
configure other settings recommended by your ISP.
3

DIR-615A Quick Installation Guide
System Requirements and Equipment
•A computer with any operating system that supports a web browser.
•A web browser to access the web-based interface of the router:
◦Apple Safari 8 and later
◦Google Chrome 48 and later
◦Microsoft Internet Explorer 10 and later
◦Microsoft Edge 20.10240 and later
◦Mozilla Firefox 44 and later
◦Opera 35 and later.
•A NIC Ethernet or Wi-Fi adapter) to connect to the router.
•An 802.11b, g, or n Wi-Fi adapter to create a wireless network.
4

DIR-615A Quick Installation Guide
CONNECTING TO C
PC with Ethernet Adapter
1. Make sure that your PC is powered off.
2. Connect an Ethernet cable between any of LAN ports located on the back
panel of the router and the Ethernet port of your PC.
3. Connect the power cord to the power connector port on the back panel of
the router, then plug the power adapter into an electrical outlet or power
strip.
4. Turn on the router by pressing the POWER button on its back panel.
5. Turn on your PC and wait until your operating system is completely
loaded.
Now you should configure your PC to obtain an IP address automatically as
DHCP client).
5

DIR-615A Quick Installation Guide
Obtaining P Address Automatically
in OS Windows XP
1. Click the Start button and proceed to the Control anel > Network
and Internet Connections > Network Connections window.
2. In the Network Connections window, right-click the relevant Local
Area Connection icon and select the roperties line in the menu
displayed.
3. In the Local Area Connection roperties window, on the General
tab, select the Internet rotocol (TC /I ) line. Click the roperties
button.
6

DIR-615A Quick Installation Guide
4. Select the Obtain an I address automatically and Obtain DNS
server address automatically radio buttons. Click the OK button.
5. Click the ОК button in the connection properties window.
Now your computer is configured to obtain an IP address automatically.
7

DIR-615A Quick Installation Guide
Obtaining P Address Automatically
in OS Windows 7
1. Click the Start button and proceed to the Control anel window.
2. Select the Network and Sharing Center section. If the Control Panel
has the category view the Category value is selected from the View by
drop-down list in the top right corner of the window), choose the View
network status and tasks line under the Network and Internet
section.)
3. In the menu located on the left part of the window, select the Change
adapter settings line.
4. In the opened window, right-click the relevant Local Area Connection
icon and select the roperties line in the menu displayed.
5. In the Local Area Connection roperties window, on the
Networking tab, select the Internet rotocol Version 4 (TC /I v4)
line. Click the roperties button.
8

DIR-615A Quick Installation Guide
6. Select the Obtain an I address automatically and Obtain DNS
server address automatically radio buttons. Click the OK button.
7. Click the OK button in the connection properties window.
Now your computer is configured to obtain an IP address automatically.
9

DIR-615A Quick Installation Guide
PC with Wi-Fi Adapter
1. Connect the power cord to the power connector port on the back panel of
the router, then plug the power adapter into an electrical outlet or power
strip.
2. Turn on the router by pressing the POWER button on its back panel.
3. Turn on your PC and wait until your operating system is completely
loaded.
4. Turn on your Wi-Fi adapter. As a rule, modern notebooks with built-in
wireless NICs are equipped with a button or switch that turns on/off the
wireless adapter refer to your PC documents). If your PC is equipped
with a pluggable wireless NIC, install the software provided with your
Wi-Fi adapter.
Now you should configure your Wi-Fi adapter.
10

DIR-615A Quick Installation Guide
Configuring Wi-Fi Adapter in OS Windows XP
1. Click the Start button and proceed to the Control anel > Network
and Internet Connections > Network Connections window.
2. Select the icon of the wireless network connection and make sure that
your Wi-Fi adapter is on.
3. Search for available wireless networks.
4. In the opened Wireless Network Connection window, select the
wireless network DIR-615A and click the Connect button.
5. In the opened window, enter the network key see WPS PIN on the
barcode label on the bottom panel of the device) in the Network key and
Confirm network key fields and click the Connect button.
After that the Wireless Network Connection Status window appears.
!
If you perform initial configuration of the router via Wi-Fi connection,
note that immediately after changing the wireless default settings of the
router you will need to reconfigure the wireless connection using the
newly specified settings.
11

DIR-615A Quick Installation Guide
Configuring Wi-Fi Adapter in OS Windows 7
1. Click the Start button and proceed to the Control anel window.
2. Select the Network and Sharing Center section. If the Control Panel
has the category view the Category value is selected from the View by
drop-down list in the top right corner of the window), choose the View
network status and tasks line under the Network and Internet
section.)
3. In the menu located on the left part of the window, select the Change
adapter settings line.
4. In the opened window, select the icon of the wireless network connection
and make sure that your Wi-Fi adapter is on.
5. To open the list of available wireless networks, select the icon of the
wireless network connection and click the Connect To button or left-
click the network icon in the notification area located on the right side of
the taskbar.
12

DIR-615A Quick Installation Guide
6. In the opened window, in the list of available wireless networks, select the
wireless network DIR-615A and click the Connect button.
7. In the opened window, enter the network key see WPS PIN on the
barcode label on the bottom panel of the device) in the Security key
field and click the OK button.
8. Wait for about 20-30 seconds. After the connection is established, the
network icon will be displayed as the signal level scale.
!
If you perform initial configuration of the router via Wi-Fi connection,
note that immediately after changing the wireless default settings of the
router you will need to reconfigure the wireless connection using the
newly specified settings.
13

DIR-615A Quick Installation Guide
CONFIGURING ROUTER
Connecting to Web-based nterface
Start a web browser. In the address bar of the web browser, enter the IP
address of the router by default, the following IP address is specified:
192.168.0.1). Press the Enter key.
!
If the error “ The page cannot be displayed ” or “ Unable to display the
page ”/“ Could not connect to remote server ”) occurs upon connecting to
the web-based interface of the router, make sure that you have properly
connected the router to your computer.
If the device has not been configured previously or the default settings have
been restored, after access to the web-based interface the Initial Configuration
Wizard opens see the Initial Configuration Wizard section, page 17).
14

DIR-615A Quick Installation Guide
If you configured the device previously, after access to the web-based interface
the login page opens. Enter the username admin) in the Username field
and the password you specified in the assword field, then click the LOGIN
button.
15

DIR-615A Quick Installation Guide
The Summary page displays general information on the router and its
software.
The web-based interface of the router is bilingual English/Russian). You can
select the needed language upon the initial configuration of the web-based
interface of the router or in the System / Configuration section of the
menu.
To configure the router use the menu in the left part of the page. Go to the
relevant section and select the needed page or run the wizard in the Quick
Setup section.
16

DIR-615A Quick Installation Guide
nitial Configuration Wizard
In order to start the Initial Configuration Wizard manually, go to the Quick
Setup section and click the START button in the Initial Configuration
box.
Click the OK button and wait until the factory default settings are restored.
Then click the START button again.
If the device has not been configured previously or the default settings have
been restored, the Initial Configuration Wizard starts automatically upon
access to the web-based interface or upon opening a web site on the Internet.
1. Click YES in order to leave the current language of the web-based
interface or click NO to select the other language.
2. On the next page, click the CONTINUE button.
17

DIR-615A Quick Installation Guide
Selecting Operation Mode
In order to connect your device to a wired ISP, on the Device mode page,
from the Connection method list, select the Wired connection value.
Then from the Work mode list select the Router value. In this mode you can
configure a WAN connection, set your own settings for the wireless network,
configure LAN ports to connect an STB or VoIP phone, and set your own
password for access to the web-based interface of the device.
In order to connect your device to a wireless ISP WISP), on the Device
mode page, from the Connection method list, select the Wi-Fi value.
Then from the Work mode list select the WIS Repeater value. In this
mode you can connect your device to another access point, configure a WAN
connection, set your own settings for the wireless network, configure LAN
ports to connect an STB or VoIP phone, and set your own password for access
to the web-based interface of the device.
In order to connect your device to a wired router for adding a wireless network
to the existing local network, on the Device mode page, from the
Connection method list, select the Wired connection value. Then from
the Work mode list select the Access point value. In this mode you can set
your own settings for the wireless network and set your own password for
access to the web-based interface of the device.
18

DIR-615A Quick Installation Guide
In order to connect your device to a wireless router for extending the range of
the existing wireless network, on the Device mode page, from the
Connection method list, select the Wi-Fi value. Then from the Work
mode list select the Repeater value. In this mode you can connect your
device to another access point, set your own settings for the wireless network,
and set your own password for access to the web-based interface of the device.
In order to let wired PCs connected to your device access the network of a
wireless router, on the Device mode page, from the Connection method
list, select the Wi-Fi value. Then from the Work mode list select the Client
value. In this mode you can connect your device to another access point and
set your own password for access to the web-based interface of the device.
When the operation mode is selected, click the NEXT button.
19

DIR-615A Quick Installation Guide
Wi-Fi Client
This configuration step is available for the WIS Repeater, Repeater, and
Client modes.
On the Wi-Fi client page, in the Wireless Networks section, select the
network to which you want to connect. When you select a network, the SSID
and BSSID fields are filled in automatically.
If you cannot find the needed network in the list, click the Update list button.
1. If a password is needed to connect to the selected network, fill in the
relevant field.
If you connect to a hidden network, from the Connecting to network list
select the Connect to hidden network value. Enter the network name to
the SSID field. Then select a needed value from the Network
authentication list and then, if needed, enter the password in the relevant
field.
2. Click the NEXT button.
20
Other manuals for DIR-615A
1
Table of contents
Other D-Link Network Router manuals

D-Link
D-Link DSL-2650U User manual

D-Link
D-Link DSL-124 User manual

D-Link
D-Link DES-3010G User manual

D-Link
D-Link D-Link User manual

D-Link
D-Link DVG-6004S User manual

D-Link
D-Link DES-3010F User manual

D-Link
D-Link DIR-850L User manual

D-Link
D-Link DIR-2150 User manual

D-Link
D-Link mydlink DSP-W215 User manual

D-Link
D-Link DIR-822-US User manual

D-Link
D-Link DIR-853 User manual

D-Link
D-Link GLB-802C User manual

D-Link
D-Link DIR-822 User manual

D-Link
D-Link DAP-1325 User manual

D-Link
D-Link DIR-862L User manual

D-Link
D-Link DIR-602L User manual

D-Link
D-Link DIR-859 User manual

D-Link
D-Link DIR-868L User manual

D-Link
D-Link DSL-522T User manual

D-Link
D-Link DWR-555 User manual