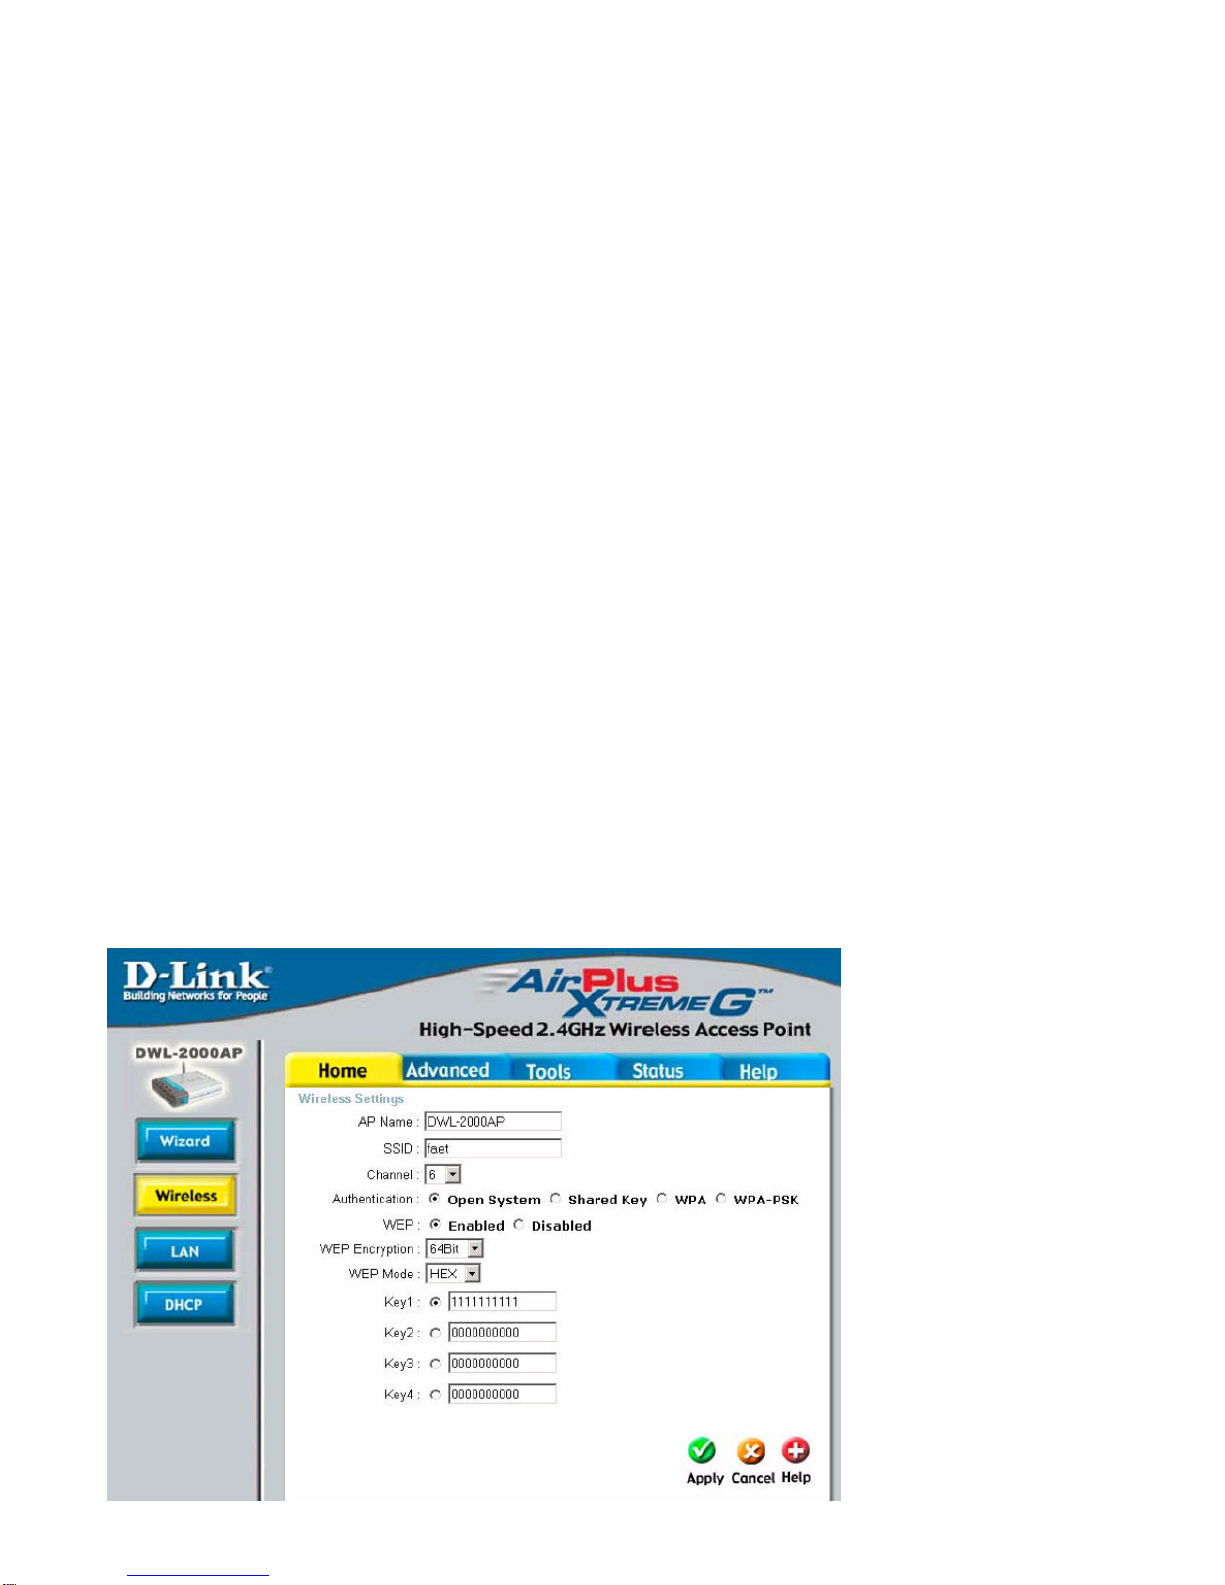
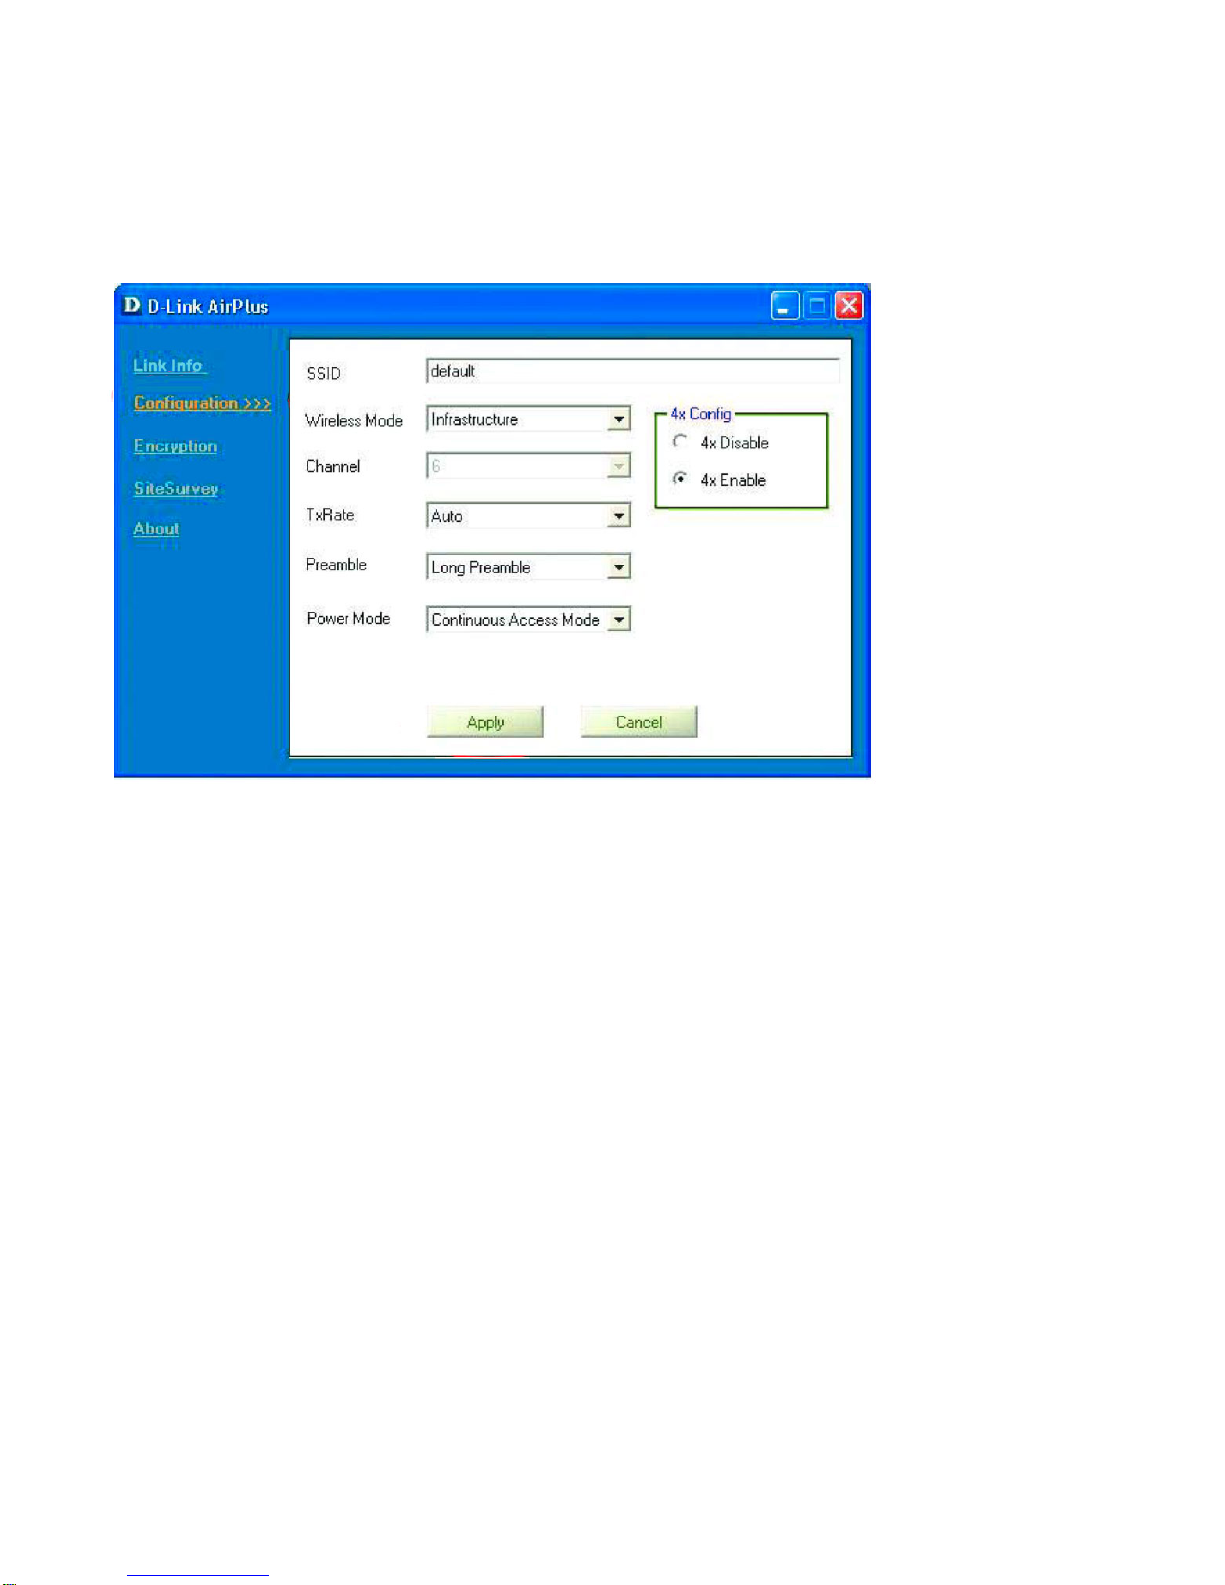
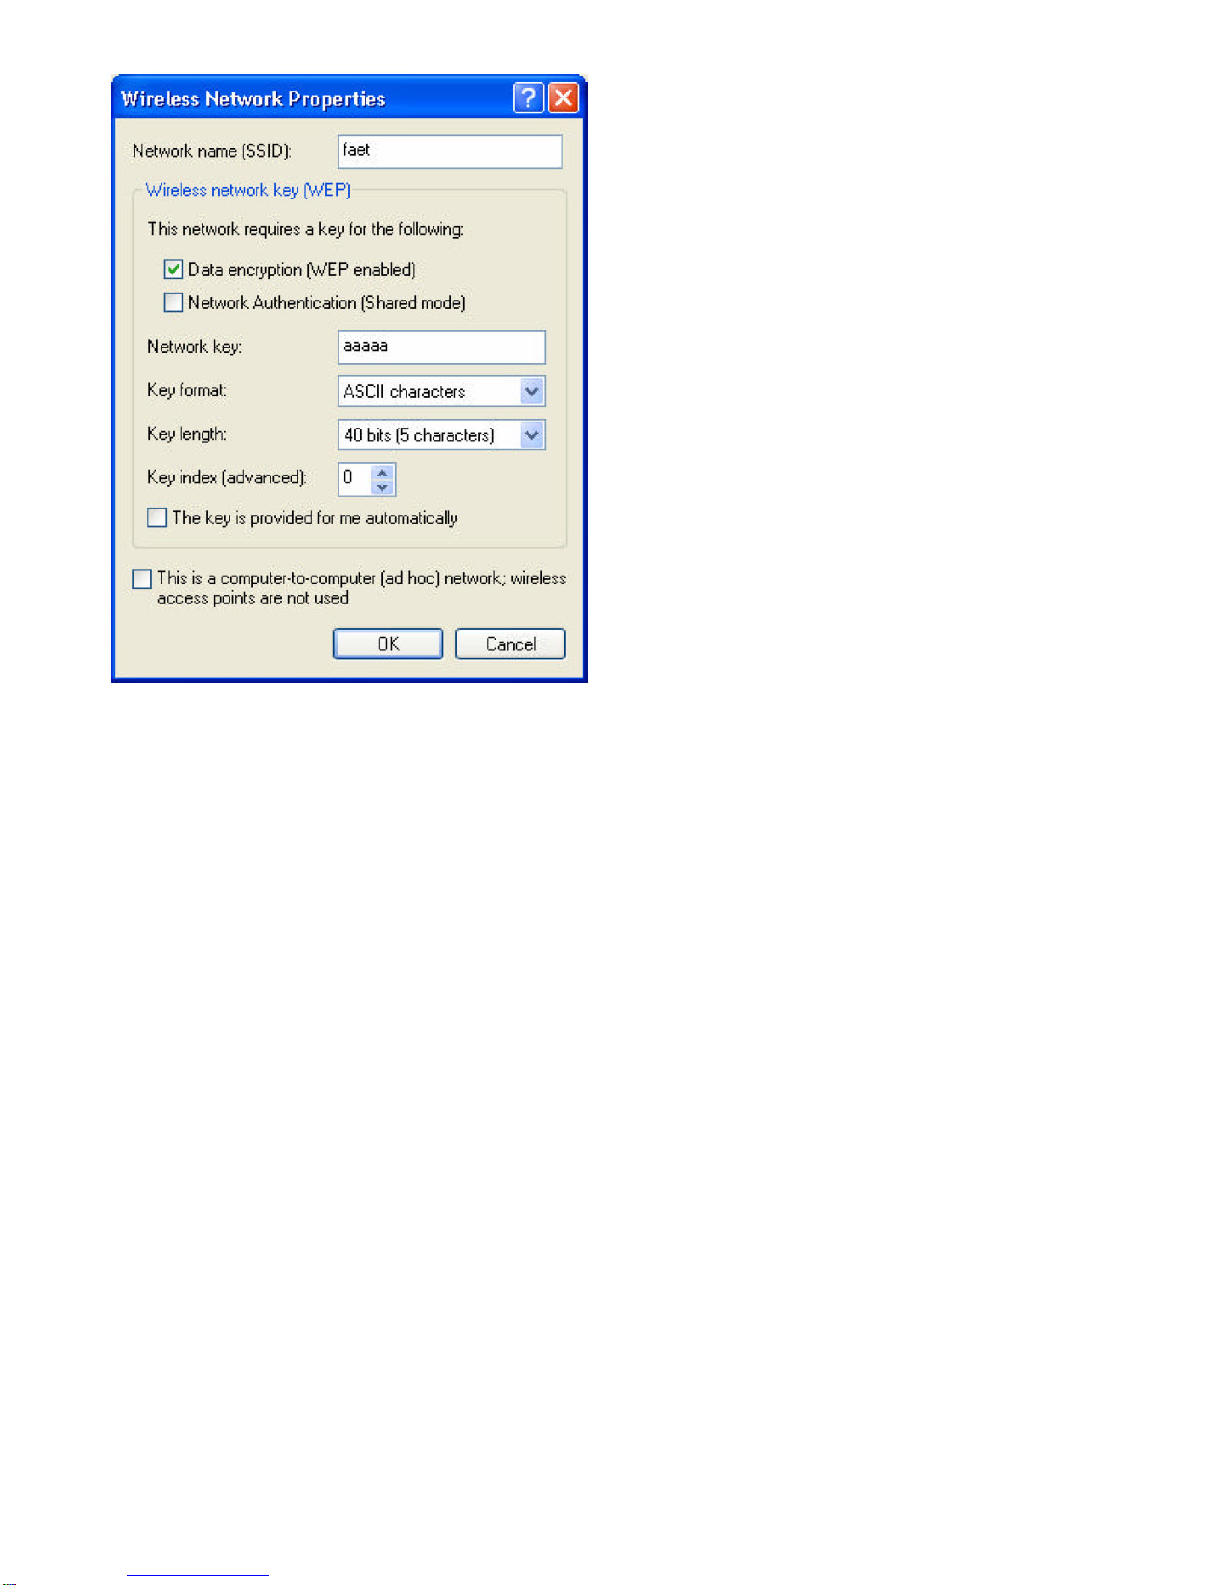
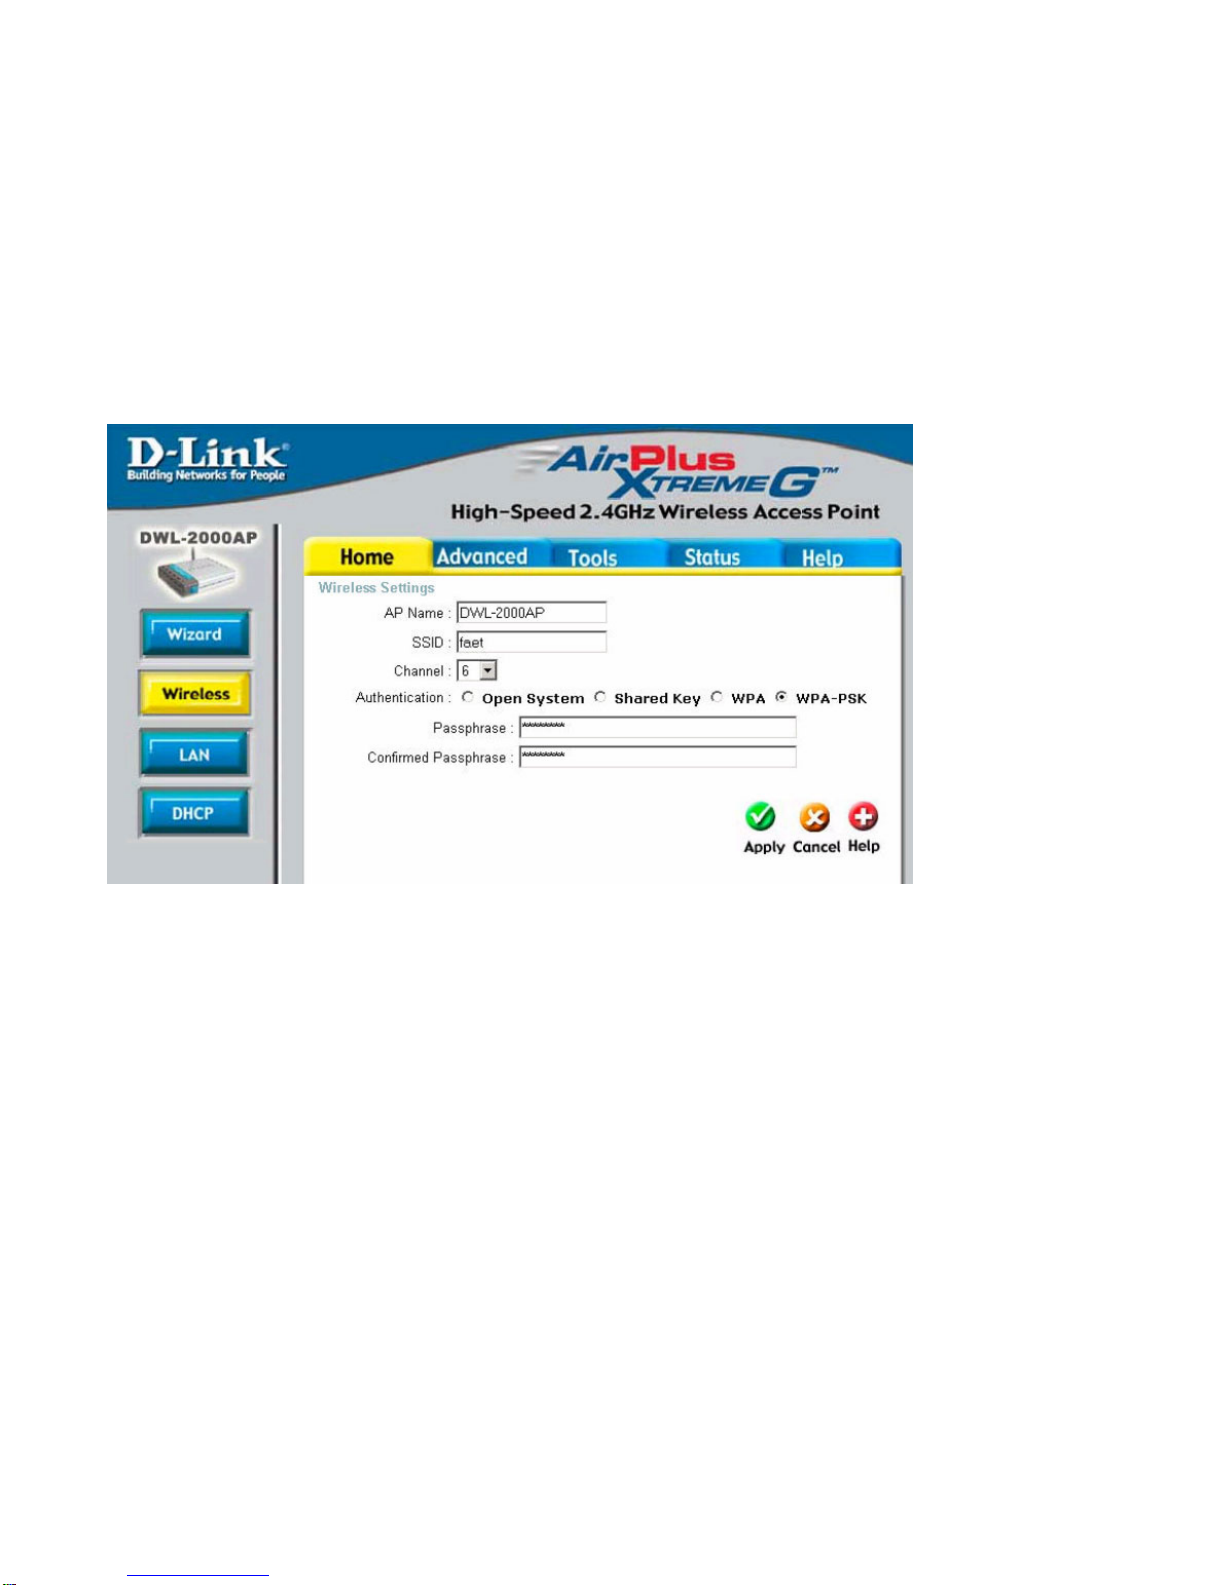
D-Link AirPlus Xtreme G DWL-2000AP User manual
Other D-Link Wireless Access Point manuals

D-Link
D-Link DWL-3200AP - AirPremier - Wireless Access... User manual

D-Link
D-Link DWL-1000AP Installation instructions

D-Link
D-Link DAP-2590 - AirPremier N Dual Band PoE Access... User manual

D-Link
D-Link DWL-2600AP Service manual

D-Link
D-Link DWL-2200AP - AirPremier - Wireless Access... User manual

D-Link
D-Link DAP-2620 User manual

D-Link
D-Link DWL-3500AP User manual

D-Link
D-Link xtreme n duo dap-1522 Quick guide

D-Link
D-Link DWL-8220AP - AirPremier Wireless Switch Dualband Access... User manual

D-Link
D-Link AirPremier N DAP-2310 User manual

D-Link
D-Link DWL-3600AP User manual

D-Link
D-Link DAP-2590 - AirPremier N Dual Band PoE Access... User manual

D-Link
D-Link DWL-3140AP - Web Smart PoE Thin Access Point User manual

D-Link
D-Link DBA-1210P User manual

D-Link
D-Link DWL-X8630APE User manual

D-Link
D-Link DAP-2230 Instruction sheet

D-Link
D-Link AirPremier N DAP-2360 User manual

D-Link
D-Link DAP-1155 User manual

D-Link
D-Link AirXpertDWL-7000AP User manual

D-Link
D-Link AirPremier N DAP-2690 User manual


 installation guide")