Dairy Tech Perfect Udder User manual

revJUNE2016
BAGPASTEURIZER/BAGWARMER
Owner Manual

BAGPASTEURIZER
& BAGWARMER
Owner Manual
TABLE OF CONTENTS
CE Declaration of Conformity 2
Introduction 3
Disclaimers 3
Product Warranty 4
Product Registration 4
Important Safety Instructions 4
Receiving Your Equipment 4
Installation 5
Location of Equipment 5
Lid Operation 5
Leg Kit 5
Connecting the Hoses for Water-Cooling 6
Water Quality 6
Electrical Requirements 7
External Fuse Board 7
Grounding 7
Heating Elements 7
Cleaning The System 8
Energy and Time Saving Tips 8
When Service Is Required 8
Quality Control and System Monitoring 9
Time and Temperature for Proper Pasteurization 9
How to Use the Perfect Udder Bag Pasteurizer 9
Using and Programming The Touchscreen Controller 10
Controller Button Legend 10
Adjusting Settings 11
Resetting the Password 11
Selecting a Language 12
Setting Date and Time 12
Calibrating Thermocouple Temperature 13
Celcius/Fahenhiet 14
Adjusting Feed and Cool Temperatures 14
Downloading Pasteurization Data 15
Testing the Heat Circuit 16
Using Your Bag PASTEURIZER 17
PASTEURIZE 17
Repeat Last 17
Feed Now 18
To Store 19
WARM 20
COOL 21
Helpful Hints For Successful Pasteurization 22
Using Your Bag WARMER 23
How Long Will It Take to Warm a Bag of Colostrum? 23

1
Perfect Udder® Bag PASTEURIZER/WARMER Owner ManualrevJUNE2016
For parts list and ordering
visit www.dairytechinc.com
You may also see the last pages of this user manual.
Contact Dairy Tech, Inc.
Dairy Tech, Inc.
34824 CR 29
Greeley, CO 80631
Toll Free: 1-866-384-2697
Local: 1-970-674-1888
Fax: 1-970-686-5871
Hours: M – F 7am – 4pm, MST
Web: www.DairyTechInc.com
eMail: oce@DairyTechInc.com
Trouble Shooting
Bag PASTEURIZER 24
Bag WARMER 27
Bag PASTEURIZER Replacement Parts 29
Bag PASTEURIZER Wiring Diagram
3 Phase Schematic 30
1 Phase Schematic 31
Bag WARMER Replacement Parts 32
Bag WARMER Wiring Diagram
3 Phase Schematic 33
1 Phase Schematic 34
Accessories 35
Leg Kit Assembly Instructions 36
A NOTE ABOUT WATER QUALITY
POOR WATER QUALITY WILL HAVE AN
ADVERSE EFFECT ON HEATING ELEMENT
LONGEVITY AS WELL AS THE OTHER
COMPONENTS OF THIS EQUIPMENT.
Dairy Tech Inc is not responsible for your water
quality and the eects that it may have on our
equipment.
Have a local water quality expert analyze both
samples. Local experts will be able to tell you if your
water quality will be detrimental to electric heating
elements and other components of our system. They
will also be able to tell you if the included Dairy Tech
Inc Water Filtration/Softener System is NOT adequate
for your needs. If so, then take steps to install a more
adequate system.
Read more about water quality on page 6

2Dairy Tech, Incorporated | All Rights Reserved
CE DECLARATION OF CONFORMITY
Industrial Milk Pasteurizer
DT30W: ~ 120 V, 1 ph, PE, 50/60 Hz, up to 10 A
(~240 V, 2 ph, PE, 50/60 Hz, up to 50 A heater circuit)
COMBI 10G/10GEU: ~200-240 V, 1 phase, PE, 50/60 Hz, up to 15 A total
DT30W-EU: ~240 V, 1 ph, PE, 50/60 Hz, up to 10 A
(~240 V, 1 ph, PE, 50/60 Hz, up to 30 A heater circuit)
Year of Issue: 2015
Applicable
Directives:
• 2006/95/EC - Low Voltage Directive - Laws for electrical equipment within certain voltage limits
• 89/336/EEC - EMC Directive - Laws relating to electromagnetic compatibility
Applicable
Standards:
• EN 61010-1: 1998 Safety requirements for electrical equipment for measurement, control, and
laboratory use – Part 1: General requirements
• EN 55011: 1998 Limits and methods of measurement of radio disturbance characteristics of
industrial, scientic and medical (ISM) radio-frequency equipment. (Group 2,
Class A)
• EN 61000-6-2: 1999 Electromagnetic Compatibility – Generic Standards – Immunity for
• Industrial Environments
NOTE:
1. This equipment must be installed and used in accordance with the conditions of use described in the user manual.
2. If this equipment is modied without the permission or direction of Dairy Tech, this declaration is no longer valid.
3. EMC compliance is only for that equipment listed above. If this equipment is expanded, modied or installed into a larger
system, the user is responsible to guarantee the EMC compliance of the overall system. If this equipment is used with external
components, the user must insure that EMC and safety requirements are not violated.
4. All equipment is HiPot and Ground-bond tested prior to nal packaging.
Declared Model Numbers: DT30W (30G) (30 gallon Internal Heater)
DT 30W-EU (30 gallon Internal Heater)
COMBI 10G, COMBI 30G, COMBI 60G
Testing performed by : Aldous Consulting
2845 Willow Tree Ln
Lab: 1625 Sharp Point Dr
Fort Collins, CO 80525
Scott Aldous - Proprietor

3
Perfect Udder® Bag PASTEURIZER/WARMER Owner ManualrevJUNE2016
INTRODUCTION
Thank you for purchasing a Dairy Tech, Inc. BAG Pasteurizer/
BAG Warmer. Your satisfaction with this product is very
important to us. This guide will help you understand how
your pasteurizer operates, and how to get the most benet
from it for you and your dairy operation.
DISCLAIMERS
THIS EQUIPMENT IS INTENDED TO BE USED IN THE
MANNER DESCRIBED IN THIS USE AND CARE GUIDE. IT
IS NOT INTENDED TO PASTEURIZE MILK OR OTHER
GOODS FOR HUMAN CONSUMPTION.
Dairy Tech, Inc. has provided this use and care guide to
assist you in the assembly, installation, and maintenance of
your BAG Pasteurizer/BAG Warmer (the Equipment). Serious
injury and even death to persons and livestock can occur
from improper installation and use of the Pasteurizer. Serious
property damage can result from improper installation
and use of the Pasteurizer. We recommend professional
installation by qualied plumbers and electricians familiar
with such devices
DAIRY TECH, INC. RECOMMENDS THAT
INSTALLATION OF ANY ELECTRICAL, MECHANICAL,
GAS OR PLUMBING DEVICES REQUIRED FOR THE
INSTALLATION, OPERATION AND MAINTENANCE OF
THE DAIRY TECH EQUIPMENT BE DONE ONLY
BY QUALIFIED INDIVIDUALS.
It is your responsibility or the responsibility of the electrician,
plumber or other qualied installation expert to obtain all
necessary permits and certications required by your town,
county, state or other jurisdiction before installation of the
Equipment. It is your responsibility to read and understand
the operational requirements of the equipment before
using it and to observe all safety precautions. It is also your
responsibility to see that your personnel are properly trained
to operate and maintain the Equipment.
DAIRY TECH, INC. PROVIDES YOU WITH
INSTRUCTIONS AND WARNINGS IN THIS USE AND
CARE GUIDE, BUT WE ARE UNABLE TO COVER ALL
POSSIBLE CONDITIONS AND SITUATIONS THAT MAY
OCCUR IN YOUR DAIRY OPERATION. IT MUST BE
UNDERSTOOD THAT COMMON SENSE, CAUTION AND
CAREFULNESS ARE FACTORS WHICH CANNOT BE
BUILT INTO THE PASTEURIZER. THESE FACTORS
MUST BE SUPPLIED BY THE PERSONS INSTALLING,
MAINTAINING OR OPERATING THE PASTEURIZER.
Under no circumstances is Dairy Tech, Inc., its directors,
ocers, shareholders or employees responsible for damage
to property or injury to persons or livestock resulting from
the improper installation or use of the Equipment. Installation
by an unqualied individual and improper use and improper
maintenance may also void any equipment warranty that
Dairy Tech, Inc. oers.
This use and care guide is based on information and data
considered to be accurate; however, no warranty is expressed
or implied regarding the accuracy of the information or data
herein or the results to be obtained from the use of this data
or information.
PLEASE READ THIS GUIDE CAREFULLY
AND THOROUGHLY BEFORE INSTALLING AND
OPERATING THE EQUIPMENT.
If you believe the Equipment is operating incorrectly, please
refer to the trouble shooting guide included with these
instructions before calling our service department. If you
still have questions, contact your local representative or call
1-866-384-2697 extension 2 and we will help you to address
your needs.
For your safety, the recommendations and information
in this manual must be followed to minimize the risk
of serious burn or electrocution, as well as to prevent
property damage, personal injury, or death.
If you are burned by the heating coil, hot water, steam
or hot colostrum: Contact a physician or other medical
personnel for expert advice, or go to an emergency treatment
facility.
Do not feed pasteurized colostrum to calves without rst
cooling it back down so that it is no hotter than 110°F (43°C).
Colostrum hotter than 110° can cause severe burns to the
calves.
Warning:
Hot Surface
Warning:
High Voltage
Caution:
Important
Information

4Dairy Tech, Incorporated | All Rights Reserved
PRODUCT WARRANTY
This product is warranted to be free of manufacturing defects.
For up to 12 months from the date of purchase., all parts will
be covered by a free replacement guarantee not including
shipping or service. This warranty is intended for equipment
in use under normal operating conditions and does not cover
damages incurred by improper use or unforeseen acts of
nature. Determination of covered defects, damages or repairs
is at the discretion of Dairy Tech, Inc. This warranty covers
only the cost of replacement parts at Dairy Tech, Inc. current
pricing. Service is not covered by this warranty. Parts replaced
under warranty must be returned to:
Dairy Tech, Inc.
34824 CR 29
Greeley, CO 80631
Parts not returned will be charged to customer at retail
pricing.
PRODUCT REGISTRATION
If this product was purchased directly from Dairy Tech in
Greeley, CO, it has already been registered and no further
action is required. If the product was purchased by a
distributor or other representative, please call Dairy Tech, Inc.
at 866-384-2697 within 10 days to register the product.
Failure to do so may result in a decreased or voided warranty
period for your unit. When calling, please have the serial
number which can be found on the back side of the control
housing or back panel.
You may also register on-line at www.dairytechinc.com
where you can“Contact Us”, ll in your information and in
the notes type the product model and serial number and the
word “Register”.
RECEIVING YOUR EQUIPMENT
Use care when unpacking your Equipment. It will have arrived
in one box or crate. Please make a note of any cautionary
labels that are used on the carton suggesting orientation,
where to cut with a knife, fragile, etc.
IMPORTANT SAFETY INSTRUCTIONS
WARNING: To reduce the risk of electric shock,
burns, serious injury or death to persons when using
the Equipment, follow these basic precautions:
1. Read all instructions before using the Equipment.
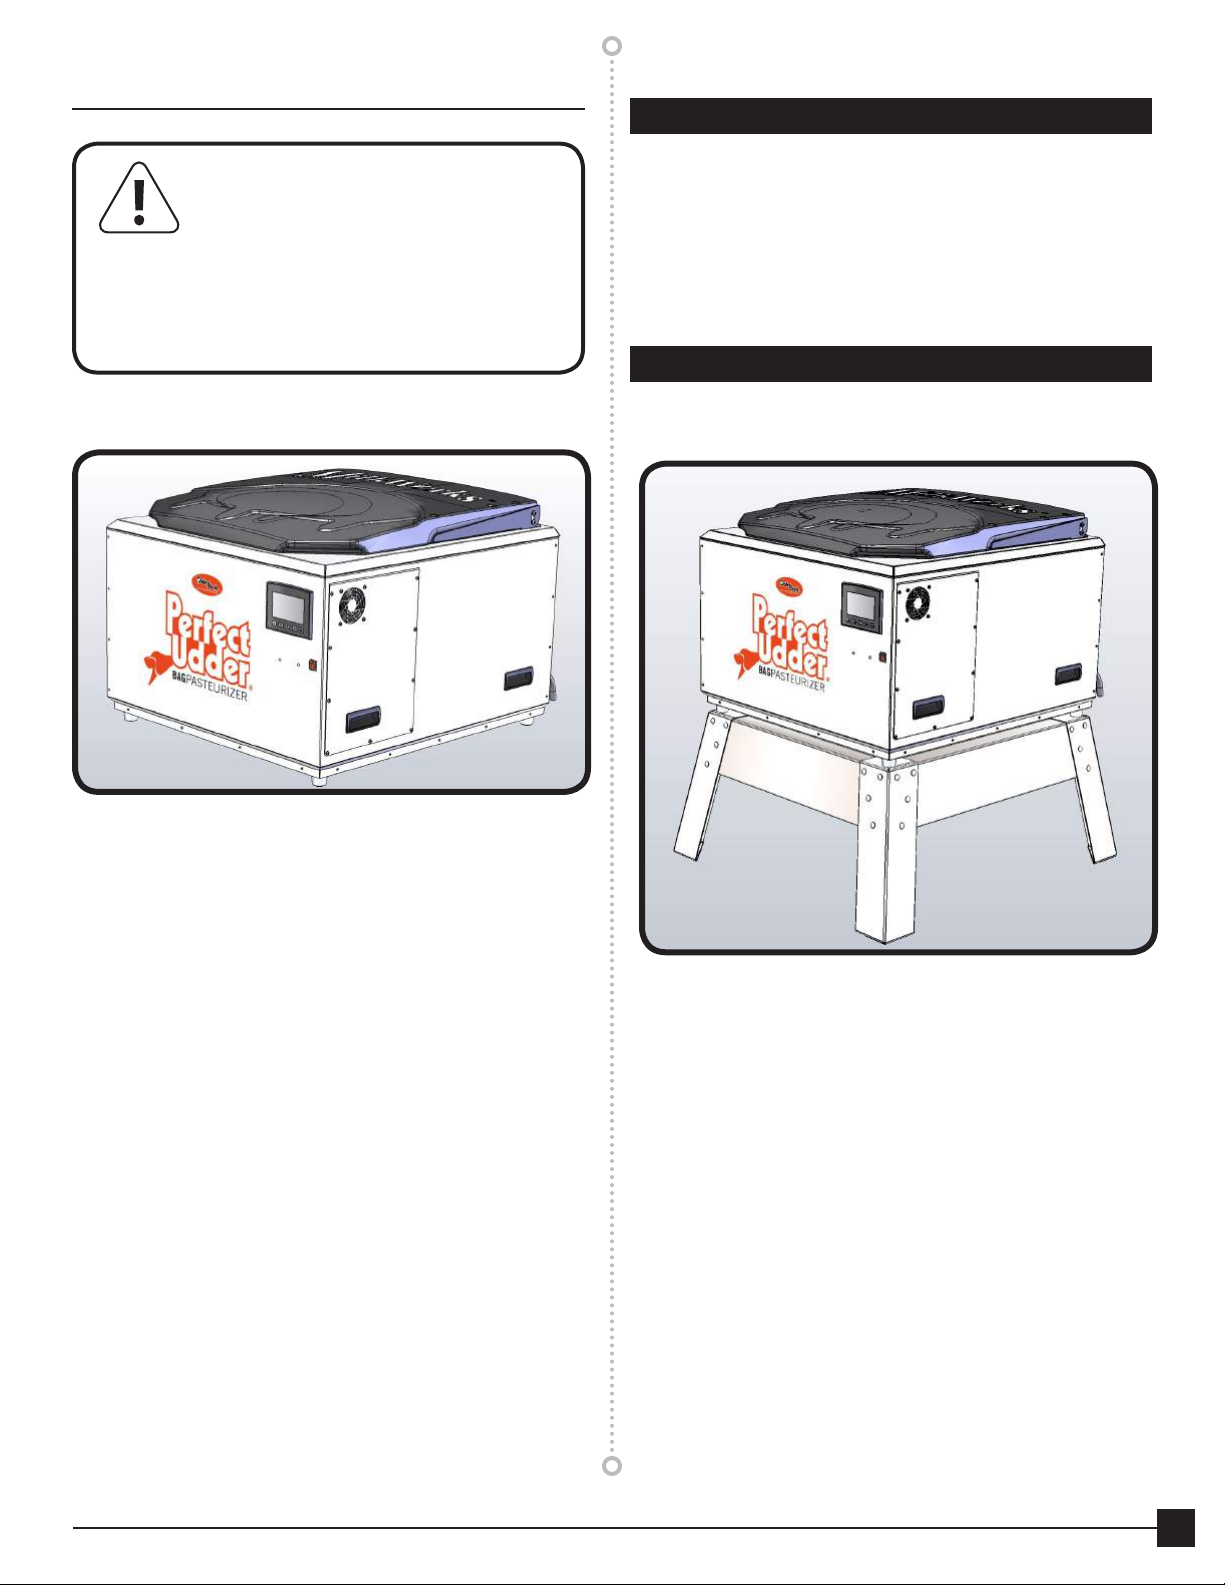
2. Make certain to install the Equipment on a sturdy table or
countertop or purchase the accessory leg kit. When full
of product the unit is quite heavy in excess of 250lbs.
3. Always disconnect the electrical power before
attempting service. All power sources must be
disconnected before any covers are removed for repair.
4. Do not allow children to operate or play around the
Equipment. Close observation of children is necessary
when the unit is used with children nearby.
5. Do not reach into the Equipment when the power is on
and the pump is circulating. This can cause serious burns.
6. Hot Surfaces include the edge of the lid, plumbing
xtures, electrical xtures, hoses, heater body, cabinet
surfaces, draining water and the containers of milk or
colostrum. Touching these surfaces during operation
may result in severe burns.
7. This equipment is designed to operate in an ambient
temperature range of 35°F (2°C) – 100°F (38°C), altitude
up to 2000m, maximum relative humidity 80% for
temperatures up to 31°C decreasing linearly to50% RH at
40°C, for indoor use only.
8. Do not try to change the settings in the Equipment
controller without consulting a technical expert at Dairy
Tech, Inc.
9. Do not repair or replace any part of the Equipment, or
attempt any servicing unless specically recommended
in the trouble-shooting portion of this manual.
Any modications made to the unit beyond these
instructions will void all warranties.
10. Always clean the unit immediately after each use,
according to the instructions in the “Cleaning of your
Equipment” section of this manual. Build up of residue
on the heating elements and inside of vessel will
decrease heating and cooling eciency, as well as harbor
potentially harmful pathogens.
11. During the heating cycle, always make certain the
Equipment lid is rmly seated on the sink top.
12. Do not force the lid into the closed position. It will close
slowly as an intended feature. Forcing the lid to close
faster than it is intended may permanently damage the
slow closure feature.
13. The lid may be hot. Do not touch while in operation.
14. Use the Equipment only for its intended purpose. This
is not an approved tool for milk intended for human
consumption as this product has not been approved for
such use.
15. Do not touch the tank of water, motor, hoses, lid, handle
or metal ttings while the unit is hot and working.
16. Do not attempt to tilt the machine while it is full. It is
extremely heavy and can cause severe injury to the
operator and may cause failure of the support structures.
17. To prevent severe burns, always allow the milk or
colostrum to cool completely before handling or feeding
to calves.
18. The Equipment must be electrically grounded. DO NOT
modify the plug that is provided with the Equipment; if it
will not t the outlet, have an electrician install a proper
electrical outlet.
19. The Equipment must be installed on a level surface to
evenly distribute weight to all the support structures.

5
Perfect Udder® Bag PASTEURIZER/WARMER Owner ManualrevJUNE2016
INSTALLATION
WARNING: INSTALL THE UNIT
ACCORDING TO THE INSTALLATION
INSTRUCTIONS. TO REDUCE THE RISK OF
FIRE, ELECTRIC SHOCK, SERIOUS INJURY
OR DEATH TO PERSONS, READ THE IMPORTANT
SAFETY INSTRUCTIONS BEFORE OPERATING THIS
EQUIPMENT. BEFORE USING THIS UNIT FOR THE
FIRST TIME, WASH OUT THE INSIDE OF THE SINK
WITH HOT SOAPY WATER AND RINSE CLEAN.
Location of the Equipment
The Equipment is shipped ready to be used on a countertop,
table or other suitable surface that is capable of holding
200lbs (91kg). The location should also have the following
characteristics:
• Close to your electrical power source
• Nearby source of cold water
• A drain line that will not create any back pressure on the
system
• Hot water source for cleaning purposes
• Enclosed area free of excessive dust
• Climate controlled enough to prevent freezing
• Avoid drafty areas
• Easy access for all day use by calf managers
Remove the unit from the packaging and place it in position
to be used. There is also an optional leg kit included as
described later in this document.
Operation of the Lid
The lid is already attached and fully operational. It is designed
with special resistance hinges that permit it to slowly lower
itself onto the cabinet. All that is required is a simple start by
hand and the lid can be released to close on its own. If force is
used to push the lid down quickly, it will destroy the damper
features of the lid and this benet will be lost. This will not
be repaired or replaced under warranty if the lid is forced to
close even one time.
Leg Kit
See the end of this owner manual for assembly instructions
pertaining to the leg kit.

6Dairy Tech, Incorporated | All Rights Reserved
Connecting the Hoses for Water Cooling
The Perfect Udder® Bag PASTEURIZER and Bag WARMER
are both water cooled machines. A 6’ black water supply
hose is included with the machine. This hose with factory
ends supplies all the cold water to cool the product when
pasteurization is nished or when the unit is used to pre-
chill colostrums bags. It can connect to any normal domestic
pressure cold water source including a hose but it MUST BE ON
AT ALL TIMES DURING OPERATION. Using the supplied hose,
attach one end where indicated on the back of the unit, with
the other end going to a regular hose bib supply. Pressure
reduction is provided by the orice of the solenoid valve.
Excess water leaves the unit by the interior drain line. This may
occur when bags or bottles are placed into the machine and
cause displaced water to overow the drain. This is normal.
A corrugated drain hose is also included. This is a free ow
zero-pressure hose that must fall to an open drain or into a
bucket. If you wish to have waste water scavenged for other
uses, place a sump pump into the bucket so that it can pump
water to your secondary source as needed while not creating
any back pressure.
It is important to keep water turned on anytime the Bag
PASTEURIZER is in operation to prevent damage to the
heating elements and pump.
Water Quality
POOR WATER QUALITY WILL HAVE AN ADVERSE EFFECT
ON HEATING ELEMENT LONGEVITY AS WELL AS THE
OTHER COMPONENTS OF THIS EQUIPMENT THAT ARE IN
CONTACT WITH WATER OF POOR QUALITY.
Dairy Tech Inc is not responsible for your water quality and
the eects that it may have on our equipment.
• The intent of this water ltration/softener combination is
provided to you as an aid when water quality may not be
ideal.
• This water ltration/softener equipment will not be
adequate to treat all bad water.
• Because the quality of water can vary so drastically from farm
to farm, Dairy Tech Inc cannot oer clear guidelines with
regards to how often to change lter/softener cartridge. This
information must be determined on each farm by utilizing
local water experts and results of tests performed on your
water.
DAIRY TECH RECOMMENDS THE FOLLOWING STEPS:
• Test a sample of water that will be used with the Dairy Tech
equipment.
• Install the water ltration/softener system (Included with
your equipment)
• Allow water to ow through the system at a slow rate and
collect a second sample after 1 minute of slow ow
• Have a local water quality expert analyze both samples.
Local experts will be able to tell you if your water quality
will be detrimental to electric heating elements and other
components of our system. They will also be able to tell
you if the included Dairy Tech Inc Water Filtration/Softener
System is NOT adequate for your needs. If so, then take
steps to install a more adequate system.
• If the starting water quality is acceptable, take additional
samples at monthly intervals to help determine how often
to replace the cartridges in your system
• Replace cartridges if they are visibly dirty or if water ow is
being compromised
THIS SYSTEM WILL NOT REMOVE CHEMICALS
OR DISINFECT WATER AND IS NOT INTENDED
FOR DRINKING WATER.
ELECTRICAL REQUIREMENTS
The standard electrical cord emerging from the back of the
machine should be plugged directly into a 240vac grounded
receptacle on a 30amp breaker for both the BAG Pasteurizer/
Warmer. Take special note of the electrical label on the back
of the machine to be sure. Failure to meet these requirements
will void the warranty and could result in serious damage
to the unit, bodily injury or death. The receptacle should be
tted with a water resistant cover for added protection.
ALL CONNECTIONS SHOULD BE PERFORMED
BY AN ELECTRICIAN OR OTHER TRAINED
PERSONNEL.
• The receptacle should be sharing minimal usage with
other equipment to avoid unexpected outages and
tripping. If the power is lost, but returns within 1 hour,
the cycle will resume automatically in most instances
with the Bag PASTEURIZER. Bag WARMERSs will need to
be restarted after power outages.
• BAG Pasteurizer/Warmer units at full power are rated at
19-22 amps, 1P. Do not install on circuit breakers greater
than 30 amps.
• Units designed for 3-Phase installations must be installed
by a certied electrician according to local electrical
ordinances. The main power consumption of the
machine is a 4500watt heater. Wire gauge and current
supply should be sized accordingly.
• DO NOT use an extension cord to operate the unit. Use
only the cord provided.
• Check your electrical system to make certain it is properly
grounded to avoid the possibility of electrical shock.

7
Perfect Udder® Bag PASTEURIZER/WARMER Owner ManualrevJUNE2016
External Fuse Board
The unit is equipped with 4 external fuses on the back of the
unit. These fuses protect delicate electronics and also serve as
a troubleshooting guide in cases of system malfunction. The
layout of the fuses is described below as well as on the unit
itself. Refer to Trouble Shooting for further information.
Grounding
The Pasteurizer is equipped with a cord having an equipment
grounding conductor and a grounding plug. The plug must
be inserted into an appropriate outlet that is installed and
grounded in accordance with all local codes and ordinances.
DO NOT modify the plug provided with the Pasteurizer; if it
will not t the receptacle, have a proper outlet or new plug
end installed by a qualied electrician.
WARNING: Component Ratings
Touch Screen Control: 120-240vac, 1amp, 1P, 50-60Hz
Circulating Pump: 240vac, 1P, 1 amp, 50/60Hz
Heating Elements: 1500watt, 240vac
Heating Elements
The heating elements are easily replaced when necessary by
rst unplugging the machine and draining all water from the
unit. Remove the FOUR (4) nuts that hold the element guard
in place. Set guard aside. Remove the wire ends from the
end terminals of the element. Remove the element from the
sink. Reverse the disassembly procedure to install the new
element. Make certain all connections are tight before lling
with water.
F4: VALVE 0.5A
F3: PUMP 0.5A
F2: Main L2 1A-SB
F1: Main L1 1A-SB
POWER SUPPLY
220-240VAC, 50/60Hz

8Dairy Tech, Incorporated | All Rights Reserved
CLEANING THE SYSTEM
Filling and Emptying the Water Bath
The unit does not need to be emptied completely between
every use; however, it is recommended that the unit be drained
every two days or any time that colostrum residue has spilled
into the bath. To drain the system, raise the lid and pull the
drain plug as shown in the view below. (This is also the tube
where overow water will exit the tank). Allow the unit to drain
completely and then rinse with warm water followed by a hot
water and detergent bath, nishing with a hot water rinse.
1. Drain the machine by lifting up the SS Plunger in the
right rear of the sink. Twist as shown to keep the drain
“Open”.
2. With the unit o and the pump stopped, raise the lid for
full access. Perform a warm water rinse to remove spilled
colostrum and dirt. (avoid hot water rinse as this can cause
calcium deposits to stick to surfaces at this step)
3. Clean the following surfaces with hot water and soap.
We routinely recommend a powerful dish soap such as
DAWN. Go over all the exposed surface areas with the
included scrub brushes and appropriate disinfectants. A
mild scrub pad may be used to remove any residue on
the following components:
• Thermocouple well at bottom of bath
• Underside of the Pasteurizer/Warmer lid
• Bottom strainer and the corner drain area
• Accessory spigots, pitchers or hoses
4. For stubborn residues or buildup, consult with your dairy
chemical distributor. Avoid the use of acids on non-stainless
steel surfaces as they may corrode some of the brass or
aluminum parts on the equipment. Follow manufacturers
handling recommendations for all chemicals.
5. Perform a nal hot water rinse of all surfaces and allow to
dry completely if possible.
6. Spray the stainless steel surfaces with a disinfectant and
allow it to dry on the surface. This will help to eliminate
the build-up of a biolm. (Dairy Tech recommends Eersan
reconstituted tablets as a proven disinfectant for the nal
spray of the milk surfaces. Call for ordering information.)
7. Replace SS Plunger by gently twisting back and forth as
it is pushed downward. If it is forced too quickly, it may
dislodge the rubber gasket in the bottom of the drain.
ENERGY AND TIME SAVING TIPS
1. Pasteurize the colostrum as quickly as possible after
collection to take advantage of the heat already in the
colostrum to improve energy eciency. This will also
prevent the immediate heavy growth of bacteria in this
fresh product.
2. Avoid placing the unit in an area of high drafts to prevent
convection heat losses while pasteurizing.
3. Colostrum can be stored in the refrigerator for 24-48
hours if it is handled cleanly once it has been pasteurized.
Filling Perfect Udder® Colostrum management bags
allows for a disposable system that makes it easy to keep
track of dates and colostrum quality. These bags also
allow the product to be warmed more quickly when they
are needed for the newborn and can then be fed without
recontamination of the product.
These can be ordered at: www.dairytechinc.com.
4. Always wear nitrile or latex gloves when handling the
milk or colostrum to prevent the spread of pathogens
from the skin surface.
WHEN SERVICE IS REQUIRED
If you purchased this equipment from an authorized dealer, contact
them directly with inquiries or repair questions. For prompt service,
work through the troubleshooting guide in this manual to give an
accurate description of the problem.
The Dairy Tech, Inc. Service & Parts department can also assist
when needed 1-866-384-2697 extension 2
Repair by an unauthorized service technician will void the warranty.
For parts list and ordering
visit www.dairytechinc.com
You may also see the last pages of this user manual.
Contact Dairy Tech, Inc.
Dairy Tech, Inc.
34824 CR 29 | Greeley, CO 80631
Toll Free: 1-866-384-2697
Local: 1-970-674-1888
Fax: 1-970-686-5871
Hours: M – F 7am – 4pm, MST
Web: www.DairyTechInc.com
eMail: service@DairyTechInc.com

9
Perfect Udder® Bag PASTEURIZER/WARMER Owner ManualrevJUNE2016
QUALITY CONTROL
AND SYSTEM MONITORING
The following recommendations should be carried out when the
system is rst installed and then on a monthly schedule to make
certain that the pasteurization process is working adequately.
1. Follow all instructions for proper installation by
thoroughly reading the manual.
2. Use quality colostrum in the machine. The process can
be overwhelmed if there are too many bacteria to begin
with.
3. Handle the colostrum cleanly after pasteurization to
prevent recontamination.
4. Verify display temperatures periodically with a second
thermometer to be sure that the displayed reading
matches closely with a trusted calibrated source.
TIME & TEMP FOR PROPER
PASTEURIZATION
· Colostrum 140°F (60°C)/ 60 minutes
THIS IS THE RESEARCH RECOMMENDED
COMBINATION.
HOW TO USE THE PERFECT UDDER
BAG PASTEURIZER Formerly the MilkWorks® Gold and Silver Models
The Perfect Udder® Bag PASTEURIZER was designed to be
an all-purpose colostrum management tool. This unit comes
equipped with the same touch screen control technology
that is found on our COMBI Pasteurizers. With this control
system, temperatures are able to be held within exacting
tolerances to ensure that colostrum is properly heat treated
without causing damage to the delicate immunoglobulin (Ig)
proteins.
When the system is rst plugged in and turned on, it will ll
itself with water to protect the heating elements and pump.
Once the oat valve detects that sucient water is available
for safe operation, power will be sent to the controller ready
for operation.
The water valve is designed to run for a brief period after
the ll line is reached so that waves in the bath do not aect
operation.

10 Dairy Tech, Incorporated | All Rights Reserved
USING AND PROGRAMMING THE TOUCHSCREEN CONTROLLER
VX:XXX
Logging Card OK
XX.XX °F
00/00/00
18:00
Pasteurize Warm Cool
VX:XXX
Logging Card OK
F2 F3 F4 ESCF1
Temperature
Month/Date/Year
Time
Settings
Program Version
CONTROLLER BUTTON LEGEND
Pasteurize Warm Cool Settings Back
Repeat Last Feed Now Store Home
Information STOP Adjust Down Adjust Up
XXX.XX
Adjustable Setting

11
Perfect Udder® Bag PASTEURIZER/WARMER Owner ManualrevJUNE2016
ADJUSTING SETTINGS
*** IMPORTANT WARNING***
DO NOT ALTER SETTINGS IN THE CONTROLLER
WITHOUT CONSULTING A DAIRY TECH
REPRESENTATIVE. ANY UNAUTHORIZED
ADJUSTMENTS WILL VOID THE PRODUCT WARRANTY
AND MAY LEAD TO SERIOUS HEALTH CONSEQUENCES FOR
THE CALVES.
Resetting the Password
1. Select “SETTINGS”
2. Select “SYSTEM PROFILES”
F2 F3 F4 ESCF1
XX.XX °F 00/00/00 18:00
Language Date & Time
System Profiles
Manual
3. Select “ENTER PASSWORD”
F2 F3 F4 ESCF1
XX.XX °F 00/00/00 18:00
Reset Password
Enter Password
Del
Esc
Enter Password
123
456
789
+/- 0 .
This information is protected by a
password. You will be asked to enter a
password to continue.
4. Enter the default password, “0” and press “RETURN/
BACK”. You now have access to the“SYSTEM PROFILES”.
5. Select “ENTER NEW PASSWORD”
F2 F3 F4 ESCF1
XX.XX °F 00/00/00 18:00
Factory Reset
System
System Profile
H M S
Pasteurize Temperature
Enter New Password
140.0 °F
Dwell Time 00:60:00
6. A new password screen will appear that shows the
default password “0”, or the last password saved.
Selecting this box will open a new screen that will allow
you to create your new password.
Enter New Password
0
Cancel Ok
7. Enter password of choice, then press “RETURN/BACK” .
Home End Del
Esc(Dec)
Exp Base
Variable 428
34512
8 9 06 7
C D FEA B
+/-
.
Keep your new password in a
safe place. If at any time the new
password is lost or cannot be
remembered, the system has
default password that can
retrieved by contacting your Dairy
Tech Dealer or our Service
Department.
8. If you are satised with your new password, press“OK” to
save or press “Cancel”to keep the previous password.
Enter New Password
0
Cancel Ok
9. Select “BACK” to complete

12 Dairy Tech, Incorporated | All Rights Reserved
Selecting a Language
1. Select “SETTINGS”
2. Select “LANGUAGE”
F2 F3 F4 ESCF1
XX.XX °F 00/00/00 18:00
Language Date & Time
System Profiles
Manual
3. Select a language from list on screen
F2 F3 F4 ESCF1
XX.XX °F 00/00/00 18:00
English
Language
English
Italian
German
Portugues
Spanish
Danish
F2
1/2
4. Select “BACK” to save your changes
Setting Date and Time
1. Select “SETTINGS”
2. Select “DATE & TIME”
F2 F3 F4 ESCF1
XX.XX °F 00/00/00 18:00
Language Date & Time
System Profiles
Manual
To adjust any of the elds, select the desired box with a blue
outline.
DATE: The First box is for the MONTH, and has a range
from 01 to 12, the Second Box is for DAY and has a range
from 01 to 31, and the Third Box is for YEAR and has a
range from 01 to 99. The First box is active and ready
TIME: First box is for HOUR and has a range from 01 to
24, the Second box is for MINUTES and has a range from
01 to 59. The Third Box is for SECONDS and has a range
from 01 to 59. Time is set as Military Time.
F2 F3 F4 ESCF1
XX.XX °F 00/00/00 18:00
M D Y
Click to Change Date
Click to Change Time
/ /
H M S
: :
01 01 16
10 55 16
3. After selecting a eld to adjust, a keypad will appear.
Del
Esc
123
0
456
789
+/- 0 .
Enter the desired number and select
“RETURN/BACK”to complete the change.
Repeat this step as needed until all elds
are correct.
4. Select “BACK” to save your changes

13
Perfect Udder® Bag PASTEURIZER/WARMER Owner ManualrevJUNE2016
Calibrating Thermocouple Temperature
It is a good idea to double check program temperatures.Allow a
cycle to climb to the pasteurization temperature and level out for
ve minutes. Now it is okay to check the temperature of the water
with a high quality thermometer. If the control reads high, reduce
oset, if the control reads low, increase oset.
1. Select “SETTINGS”
2. Select “SYSTEM PROFILES”
F2 F3 F4 ESCF1
XX.XX °F 00/00/00 18:00
Language Date & Time
System Profiles
Manual
Del
Esc
Enter Password
123
456
789
+/- 0 .
This information is protected by a
password. You will be asked to enter a
password to continue.
3. Enter your password, then press“RETURN/BACK”. You
now have access to the “SYSTEM PROFILES”.
4. Select “SYSTEM”
F2 F3 F4 ESCF1
XX.XX °F 00/00/00 18:00
Factory Reset
System
System Profile
H M S
Pasteurize Temperature
Enter New Password
140.0 °F
Dwell Time 00:60:00
5. Select “SCALE TEMPERATURE”
F2 F3 F4 ESCF1
XX.XX °F 00/00/00 18:00
Scale Temperature
PID Values
Stirring
120.0 °F
90.0 °F
Maximum Feed Adjust
Minimum Feed Adjust
120.0 °F
70.0 °F
Maximum Cool Adjust
Minimum Cool Adjust
Manual
°C
°F
PID Values
You will need to adjust the additive variable. You can adjust
the temperature by a (+,-) degree.
F2 F3 F4 ESCF1
XX.XX °F 00/00/00 18:00
Measured Temperature Scale & Offset Scaled Temperature
999.9 Deg F *-9.999 + -9.999 = 999.9 Deg F
Del
Esc
123
0
456
789
+/- 0 .
Enter the desired number and select
“RETURN/BACK”to complete the
change. Repeat this step as needed
until all elds are correct.
6. Select “BACK” to save your changes

14 Dairy Tech, Incorporated | All Rights Reserved
Celsius/Fahenhiet
Changing from Farenheit to Celcius is simple.
1. Select “SETTINGS”
2. Select “SYSTEM PROFILES”
F2 F3 F4 ESCF1
XX.XX °F 00/00/00 18:00
Language Date & Time
System Profiles
Manual
Del
Esc
Enter Password
123
456
789
+/- 0 .
This information is protected by a
password. You will be asked to enter a
password to continue.
3. Enter your password, then press“RETURN/BACK”. You
now have access to the “SYSTEM PROFILES”.
4. Select “SYSTEM”
F2 F3 F4 ESCF1
XX.XX °F 00/00/00 18:00
Factory Reset
System
System Profile
H M S
Pasteurize Temperature
Enter New Password
140.0 °F
Dwell Time 00:60:00
5. Select °F or °C
F2 F3 F4 ESCF1
XX.XX °F 00/00/00 18:00
Scale Temperature
PID Values
Stirring
120.0 °F
90.0 °F
Maximum Feed Adjust
Minimum Feed Adjust
120.0 °F
70.0 °F
Maximum Cool Adjust
Minimum Cool Adjust
Manual
°C
°F
PID Values
Your temperature choice will be reected throughout the
program.
F2 F3 F4 ESCF1
XX.XX °C 00/00/00 18:00
Scale Temperature
PID Values
Stirring
48.9 °C
32.2 °C
Maximum Feed Adjust
Minimum Feed Adjust
48.9 °C
21.1 °C
Maximum Cool Adjust
Minimum Cool Adjust
Manual
°C
°F
PID Values
6. Select “BACK” to save your changes
Adjusting Feed and Cool Temperatures
Dairy Tech Inc. has designed the feeding temperature
parameters and cooling temperature parameters to reect
university and industry research.
Currently, each controller is set up to have the below
parameters for feeding and cooling temperatures:
• Maximum Feeding Temperature: 115 degrees
• Minimum Feeding Temperature: 90 degrees
• Maximum Cooling Temperature: 110 degrees
• Minimum Cooling Temperature: 75 degrees
To change Maximum Feed and Cool Temperatures:
1. Select “SETTINGS”
2. Select “SYSTEM PROFILES”
F2 F3 F4 ESCF1
XX.XX °F 00/00/00 18:00
Language Date & Time
System Profiles
Manual
Del
Esc
Enter Password
123
456
789
+/- 0 .
This information is protected by a
password. You will be asked to enter a
password to continue.

15
Perfect Udder® Bag PASTEURIZER/WARMER Owner ManualrevJUNE2016
3. Enter your password, then press“RETURN/BACK”. You
now have access to the “SYSTEM PROFILES”.
4. Select “SYSTEM”
F2 F3 F4 ESCF1
XX.XX °F 00/00/00 18:00
Factory Reset
System
System Profile
H M S
Pasteurize Temperature
Enter New Password
140.0 °F
Dwell Time 00:60:00
Adjust the “FEED” or “COOL”temperatures by touching the
BLUE box that contains the temperature you want to change.
F2 F3 F4 ESCF1
XX.XX °F 00/00/00 18:00
Scale Temperature
PID Values
Stirring
120.0 °F
90.0 °F
Maximum Feed Adjust
Minimum Feed Adjust
120.0 °F
70.0 °F
Maximum Cool Adjust
Minimum Cool Adjust
Manual
°C
°F
PID Values
After selecting a eld to adjust, a keypad will appear.
Del
Esc
123
0
456
789
+/- 0 .
Enter the desired number and select
“RETURN/BACK”to complete the change.
Repeat this step as needed until all elds
are correct.
5. Select “BACK” to save your changes
Downloading Pasteurization Data
A micro-SD card is located on the right hand side of
the controller. You will see the word“SD” above the slot
containing the card.
When Data is needed, please remove the Micro SD Card and
connect to adapter of choice.
** Please note that the SD Adapter card is located
with the extra fuses. The user will be able to input the
micro-SD card to the large SD Adapter. This can easily
be adapted to a USB connector. **
Connect Large SD Card to a USB Connector then attach USB
connection to a computer and wait for documents to load.
You will nd an excel le of the data.

16 Dairy Tech, Incorporated | All Rights Reserved
Testing the Heat Circuit
Follow these steps to manually check each component of the
Heating Circuit.
1. Select “SETTINGS”
2. Select “MANUAL”
F2 F3 F4 ESCF1
XX.XX °F 00/00/00 18:00
Language Date & Time
System Profiles
Manual
3. Select “HEATERS”and check for Power
F2 F3 F4 ESCF1
XX.XX °F 00/00/00 18:00
PID Off Mixer Off
Heaters ON Water Valve Off
Selecting the button again will return it to the “OFF” state.
4. Select “MIXER” and check for Power
F2 F3 F4 ESCF1
XX.XX °F 00/00/00 18:00
PID Off Mixer ON
Heaters Off Water Valve Off
Selecting the button again will return it to the “OFF” state.
5. Select “WATER VALVE” and check for Power
F2 F3 F4 ESCF1
XX.XX °F 00/00/00 18:00
PID Off Mixer Off
Heaters Off Water Valve ON
Selecting the button again will return it to the “OFF” state.
6. Remember to deselect each button before returning to
the Home screen.
7. Select “BACK” to return to the Home screen

17
Perfect Udder® Bag PASTEURIZER/WARMER Owner ManualrevJUNE2016
USING YOUR BAG PASTEURIZER
Warning: Bags can cause severe burns if
handled before the product is completely
cooled. Always nish the cooling cycle
before handling the bag. Do not handle the colostrum
unless it has cooled.
PASTEURIZE
When“PASTEURIZE” is selected, four prole options will
appear. These options dictate what will occur when
pasteurization is complete.
1. REPEAT LAST
2. FEED NOW
3. TO STORE
XX.XX °F 00/00/00 18:00
PASTEURIZE
Repeat
Last
Feed Now To Store
REPEAT LAST
Selecting the “REPEAT LAST” Pasteurization Option will open
a screen that shows the parameters of the last Pasteurization
Option ran.
This example shows a “Pasteurize, To Store” Option.
XX.XX °F 00/00/00 18:00
PASTEURIZE TO STORE
START ADJUST
PASTEURIZE TEMPERATURE 140.0 °F
DWELL TIME 60:00:00 H:M:S
110.0°F
75.0°F
75.0 °F
COOL TEMPERATURE
You have 3 choices: BACK, ADJUST or START
1.
Press “BACK” button and return to the
“Pasteurize” menu to select from one of the other
3 options
2. ADJUST Press “ADJUST” to change the current
settings. Please refer to the “ADJUST
PROGRAM SETTINGS” instructions listed in the FEED
LATER Pasteurize Options section.
3. START When you are satised with your
adjustments, press “START” to begin the
program.
Once the program is in progress, the screen will indicate
which stage the program is in.
Upon completion, the Controller Screen will indicate
“COMPLETE”.
Pressing the “HOME” button will take the operator
back to HOME screen.

18 Dairy Tech, Incorporated | All Rights Reserved
FEED NOW
Selecting the “Feed Now” Pasteurization Option allows you
to pasteurize colostrum then feed at a selected temperature
when pasteurization is complete.
A screen will show all the parameters of the last “FEED NOW”
program ran.
XX.XX °F 00/00/00 18:00
PASTEURIZE FEED NOW
START
PASTEURIZE TEMPERATURE 140.0 °F
DWELL TIME 60:00:00 H:M:S
ADJUST
115.0°F
90.0°F
105.0 °F
FEED TEMPERATURE
You have 3 choices: BACK, ADJUST or START
1.
Press “BACK” button and return to the
“Pasteurize” menu to select from one of the other
3 options
2. ADJUST Press “ADJUST” to change the current
settings.
Adjusting Program Settings
Pressing the “ADJUST” button will highlight all available
adjustments that can be made to the current program.
A BLUE BOX will indicate the current active elds to be
adjusted.
XX.XX °F 00/00/00 18:00
PASTEURIZE FEED NOW
START ADJUST
PASTEURIZE TEMPERATURE 140.0 °F
DWELL TIME 60:00:00 H:M:S
105.0°F
FEED TEMPERATURE
115.0°F
90.0°F
Use the arrow buttons to adjust the
setting in the active BLUE BOX up or down.
To activate a dierent eld, simply touch it and it will turn
BLUE to indicate that it is now active.
XX.XX °F 00/00/00 18:00
PASTEURIZE FEED NOW
START ADJUST
PASTEURIZE TEMPERATURE 140.0 °F
DWELL TIME 60:00:00 H:M:S
115.0°F
90.0°F
105.0°F
FEED TEMPERATURE
3. START When you are satised with your
adjustments, press “START” to begin
the program.
Once the program is in progress, the screen will indicate
which stage the program is in.
XX.XX °F 00/00/00 18:00
PASTEURIZE FEED NOW
CURRENT TEMP 130°F
Increasing Temp to 140°F
Upon completion, the Controller Screen will indicate
“COMPLETE”.
XX.XX °F 00/00/00 18:00
PASTEURIZE FEED NOW
PROGRAM COMPLETE
Pressing the “HOME” button will take the operator
back to HOME screen.
WARNING: TEMPERATURES GREATER
THAN 120°F 49°C WILL BURN THE
ESOPHAGUS OF THE CALF AND CAUSE
SEVERE ILLNESS AND/OR DEATH.
Table of contents
Other Dairy Tech Farm Equipment manuals
Popular Farm Equipment manuals by other brands

Meyer
Meyer RT Series Installation & operator's manual

E-Z FRAME
E-Z FRAME 8X12 quick start guide

roost&root
roost&root Round-Top Walk-In Sun Room Assembly Drawings

turbocut
turbocut Blitz Series Translated Operating Instructions

Land Pride
Land Pride SGC0548 Operator's manual

Kongskilde
Kongskilde R+ 1410 S Operator's manual