DAS.4 SU20 User manual

SU20 User Manual
Thank you for choosing our smart watch. You can fully
understand the use and operaon of the equipment by
reading this manual.
The company reserves the right to modify the contents
of this manual without any prior noce.
The product contains: a packing box, a manual, a smart-
watch, and a USB cable.
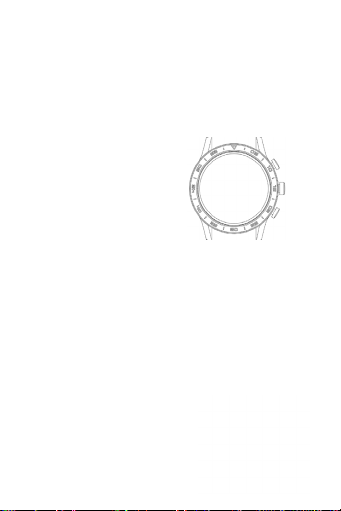
Watch funcon descripon
Buon descripon:
Up buon:
Turn on and o the screen; one press to return to the
main interface; long press to restart the watch.
Middle buon
Press the middle buon to open the main menu. Press 2
mes to change the navigaon style of the main menu.
Buon down
Short press to enter mul-sport mode.
In addion, when the watch has the screen o, the watch
can turn on the screen by pressing the buon.
Charging instrucons:
Magnec charging, as shown
in the gure below.

1.1 Shortcut funcon:
1) Swipe to the le to display the “+” icon, click the icon
to add part of the menu as a shortcut.
2) Slide down to display, Bluetooth connecon status,
me, power, brightness adjustment and other funcons.
3) Swipe to the right to display, me/date/week, the
latest message (enter to view mulple messages)/turn on
or o Bluetooth for calls and display some of the recently
used menu funcons.
4) Swipe up to enter the menu interface, and slide up
and down to nd the corresponding funcon.
5) Long press the watch face interface and slide to switch
the watch face, select a new one to set it successfully.
1.2 Push message
1) When the watch is bound to the APP, and the
nocaon permission is turned on, the new messages
received in the nocaon bar of the mobile phone will
be pushed to the watch, and a total of 10 messages can
be saved. Aer 10 messages the new ones will overwrite
the old ones.
2) Swipe to the boom to press the delete icon to clear
all message records.
1.3 Drop-down menu
From dial interface slide down to open the drop-down
menu interface.
1) Bluetooth connecon status; me display, power
display;
2) The rst icon, about
3) Sengs; enter the sengs

4) Adjustable screen brightness
5) Stopwatch
Click the stopwatch to enter the interface, and you can
record the me
1.4 Phone/Call History
1. Swipe le, tap the call icon to turn on / o Bluetooth,
turn on Bluetooth, search for your mobile Bluetooth
devices, nd the name and MAC address of your watch
(Select ‘Informaon’ on the watch) and select it to con-
nect. Once connected to Bluetooth successfully, you can
make and reject phone calls on your watch.
2. Call history, calls made and received can be saved.
More than 50 calls can be saved and will be automacally
replaced with new ones if they exceed 128. Press any
saved number to make a call.
3. You can dial any number via the keypad.
1.5 Messages
Once the smartwatch and applicaon are successfully
connected, you can acvate the corresponding applica-
ons to receive nocaons from your mobile phone
and synchronize with the smartwatch.
1.5.1. Incoming call nocaon:
Acvate the call reminder in the app. When the phone
receives the call reminder, the smartwatch will light up
and vibrate.
1.5.2. SMS nocaon:
Enable SMS nocaon in the applicaon. When you re-
ceive one or more SMS messages on your mobile phone,
the watch will receive one or more SMS reminders.

1.5.3. Other applicaon message nocaons:
Turn on the corresponding messaging switch for your
applicaons, such as Outlook, Facebook, and other appli-
caons. When the mobile receives message nocaons
for single / mulple applicaons, the watch will receive
the corresponding nocaons respecvely.
1.6 Frequently used contacts
Through the applicaon, you can synchronize up to 20
contacts with the watch for shortcut.
1.7 Fitness data
Exercise data are acvated from the factory. To view
tness data, swipe from boom to top to display the
current number of steps, distance, and calories recorded
by the watch. The data will be deleted at 12 in the
morning every day.
1.8 Sports modes (strike, running, cycling, skipping rope,
badminton, basketball, football)
1.8.1 Select the corresponding exercise mode. Click the
start buon on the screen to enter the corresponding
exercise mode. click calculated to stop the exercise, click
the end buon to end the exercise and save the data.
1.8.2 When the exercise me is longer than 1 minute,
the exercise data can be saved. When the exercise lasts
less than 1 minute, a message “Too lile data to save”
will appear.
1.9 Heart rate
Posion the watch correctly on your wrist, enter the
heart rate menu and you can measure the heart rate
value each me.

1.10 ECG
Posion the watch correctly on your wrist, enter the
ECG menu (you must open the “ECG monitor” from the
applicaon), you can measure the ECG value and the ECG
data will be stored in the applicaon at the same me.
For this funcon, the watch must be connected to the
applicaon for its use.
2.0 QR code
Scan the QR code with your mobile phone to download
the watch applicaon.
2.1 Calculator
You can do simple operaons with a calculator
2.2 Remote music
You can control the music of your mobile aer connect-
ing to the watch.
2.3 Sleep
Sleep recording from 18:00 to 10:00. The data is synchro-
nized with the applicaon.
2.4 Stopwatch
You can measure me
2.5 Weather
Aer the smartwatch is connected to the applicaon and
the data is synchronized, select the weather to see the
weather condions of the day.
2.6 Find mobile phone
Once the watch is connected to the app, you can search
for your mobile by selecng nd the device mode and
your mobile will start vibrang.
2.7 Meteorology
Through the weather funcon, you can see the indicators
of ultraviolet (UV) radiaon and the air pressure condi-

ons of the day.
2.8 Breathing
There are 3 breathing techniques: slow, moderate, and
fast where they can be selected. Adjust your breathing
according to the rhythm you have chosen.
2.9 Menu style
There are a variety of menu styles to choose from.
3.0 Sengs
1) Through the sengs you can change the language,
connect the applicaon, and synchronize the data. The
watch automacally connects to the default language
aer connecng to the mobile.
2) Change the smartwatch face, drag to the right to select
the next smartwatch face, select a face by pressing once.
3) Screen Waing. You can select a specic me that the
screen will remain open.
4) Vibraon intensity. You can set the reminder vibraon
volume.
5) Bluetooth for calls. Bluetooth for calls can be turned
on / o
6) Password. a 4-digit password can be set (if you forget
the password, enter 8762, which can restore access)
7) Reset to factory sengs. Click √ to enable factory reset
and click X to cancel factory reset.
Bind APP
1. APP download method
1.1 Scan the QR code to download
1.2 Applicaon market search and download
Android side:
On Google play app market search WearPro to
download it
IOS side:
On App Store search WearPro to download it
Android phones: When WearPro is installed the applica-
on icon is as shown in the gure
Apple phones: When WearPro is installed the applicaon
icon is shown in the gure:
2.Bind Bluetooth
2.1 Not connected:
Aer turning on the watch, Bluetooth is always on in the
device. Aer opening the applicaon, go to the “Device”
opon and click on “Connect now”, select and click on
the corresponding watch device name, to successfully
connect the watch to the applicaon.
2. Connected:
The smartwatch was successfully connected to the
applicaon and the me / date were synchronized at the
same me.
2.3 Bind audio call
On the Home screen, swipe from le to right and tap
the phone icon to change the source of the call. On the
Home screen, drag downwards to open the quick sengs
and press . You can see the Bluetooth name and MAC
address of the device. Turn on Bluetooth on your mobile
phone to search for the device name and tap connect.

3. Find the device
Once your watch is successfully connected to the app,
you can select the nd mode and the watch will start
vibrang to locate it.
4. Camera
Select the camera mode, tap the icon to take a photo
remotely and the photo will be automacally saved in
the mobile photo album.
5. Data synchronizaon
When the smartwatch is connected to the applicaon,
the watch data can be synchronized with the applicaon.
6. Raise your hand to brighten the screen
Wear the watch properly on your wrist. When you select
the opon, you can see the me simply by raising your
hand.
7. Do not disturb mode
In the applicaon you can set a specic me of day, not
to receive calls and nocaons on your watch.
8. Daily alarm clock
You can set a specic me in the app to nofy you.
9. Sedentary reminder
Set the start-end me and idle me (minutes) in the
app, click to enter the repeat seng only once, or select
the idle reminder date (week). When the device detects
a sedentary state, the smartwatch will vibrate and a
sedentary life alert icon will be displayed.
10. Drink water reminder
Warns you about water consumpon at a specic me.
11. Dial push
There is a selecon of dials from the collecon
Log in to the applicaon, go to “Device” -> “Call” ->
Select the dial you want.

12. Firmware version
The watch version is displayed and the user can choose
to upgrade the rmware version. Bind APP
Disclaimer
1) Please ensure that Bluetooth and mobile GPS are
turned on. When searching for the device via Bluetooth,
make sure that no other device is connected. When
searching for the device via Bluetooth, keep a close
distance between your mobile and smartwatch.
2) If the Bluetooth connecon is unstable during
operaon, try restarng the watch and connecng it to
the mobile again. Be sure to turn on the automac start
for the smartwatch applicaon, in the sengs of your
mobile phone. Also turn o the baery opmizaon
(without restricons) for the specic applicaon, so that
the connuous applicaon-smartwatch communicaon
is not interrupted.
3) If there is a problem with the watch or its use, please
contact the store where you purchased it.
4) The measurements of the watch are for reference
only and not for medical use. Please follow your doctor’s
instrucons and do not use the measurements to make
your own diagnosis.
5) The watch is waterproof with IP67 cercaon which
means that it can withstand accidental contact with wa-
ter. However, it can not be used for diving or being under
water for a long me. In addion, the watch should not
come in contact with hot water, as steam can penetrate
the seal and cause internal damage.
6) The company has the right to modify the contents of

this user manual without prior noce. Some funcons
dier depending on the soware they carry.
7) CAUTION: Do not use a power adapter that gives
more than 5v == 1A to charge the device. If you use a
charger larger than 1A for charging, the circuit and / or
baery may be damaged.
8) Once the watch is charging, disconnect the cable from
the power supply to prevent a short circuit if it comes in
contact with conducng objects.
9) Do not leave the peripherals and accessories in areas
where the temperature is too high or too low. Otherwise
the device may malfuncon.
10) Avoid hing the device to reduce the risk of
damage.
www.das-4.com
IP67: Dust resistant!
Seawater is prohibited.
The warranty terms that cover the
product are menoned in details on
the ocial website www.das-4.com.
Other DAS.4 Watch manuals


