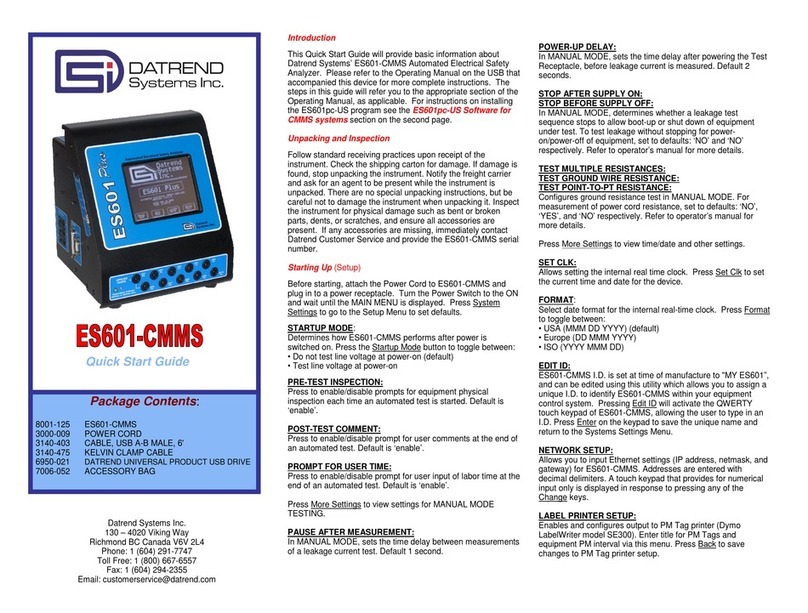
DATREND Systems ES601-US User manual

Operating Manual
ES601-US
Automated Electrical Safety Analyzer


ES601-US
Automated Electrical Safety Analyzer
Operating Manual
© 2012 - 2014 Datrend Systems Inc.
Unit 130 - 4020 Viking Way
Richmond, BC • CANADA • V6V 2L4
Tel 604.291.7747 or 800.667.6557 • Fax 604.294.2355
e-mail [email protected]


Page i
To order this manual, use Part Number 6100-432
Revision
Revision History
Description Date
B Improve Text 2012-Au -30
C Update Address & Lo o 2014-Nov-04
Copyright
Datrend Systems Inc. (“DSI”) agrees to a limited copyright release that allows you to reproduce manuals and other
printed materials for use in service training programs and other technical publications. If you would like other
reproductions or distributions, submit a written request to Datrend Systems Inc.
Unpacking and Inspection
Follow standard receiving practices upon receipt of the instrument. Check the shipping carton for damage. If
damage is found, stop unpacking the instrument. Notify the freight carrier and ask for an agent to be present while
the instrument is unpacked. There are no special unpacking Checkitems, but be careful not to damage the
instrument when unpacking it. Inspect the instrument for physical damage such as bent or broken parts, dents, or
scratches.
Claims
Our routine method of shipment is via common carrier. Upon delivery, if physical damage is found, retain all packing
materials in their original condition and contact the carrier immediately to file a claim.
If the instrument is delivered in good physical condition but does not operate within specifications, or if there are any
other problems not caused by shipping damage, please contact your local sales representative or DSI immediately.
Standard Terms and Conditions
Refunds & Credits
Please note only serialized products (products labelled with a distinct serial number) and accessories are eligible for
partial refund and/or credit. Non-serialized parts and accessory items (cables, carrying cases, auxiliary modules,
etc.) are not eligible for return or refund. In order to receive a partial refund/credit, the product must not have been
damaged, and must be returned complete (meaning all manuals, cables, accessories, etc.) within 90 days of original
purchase and in “as new” and resalable condition. The Return Procedure must be followed.
Return Procedure
Every product returned for refund/credit must be accompanied by a Return Material Authorization (RMA) number,
obtained from Datrend Customer Service. All items being returned must be sent prepaid (freight, duty, brokerage,
and taxes ) to our factory location.
Restocking Charges
Products returned within 30 days of original purchase are subject to a minimum restocking fee of 15%. Products
returned in excess of 30 days after purchase, but prior to 90 days, are subject to a minimum restocking fee of 20%.
Additional charges for damage and/or missing parts and accessories will be applied to all returns. Products which
are not in “as new” and resalable condition, are not eligible for credit return and will be returned to the customer at
their expense.
Certification
This instrument was thoroughly tested and inspected and found to meet DSI’s manufacturing specifications when it
was shipped from the factory. Calibration measurements are traceable to the National Research Council of Canada
(NRC) and/or the National Institute of Standards and Technology (NIST). Devices for which there are no NRC/NIST
calibration standards are measured against in-house performance standards using accepted Checklists.

Page ii
Warranty
Warranty and Product Support
Warranty and Product Support
Datrend Systems Inc. ("DSI") warrants this instrument to be free from defects in materials and workmanship under
normal use and service for one (1) year from the date of original purchase. This warranty will be automatically
extended on a yearly basis, to a maximum of five (5) years from the date of original purchase, provided that
calibration is performed on an annual basis by a Datrend Authorized Service Center. During the warranty period DSI
will, at our option, either repair or replace defects in materials and workmanship at no charge; provided the product
is returned (shipping, duty, brokerage and taxes prepaid) to DSI. Any and all transportation charges incurred are the
responsibility of the purchaser and are not included within this warranty. This warranty extends only to the original
purchaser and does not cover damage from abuse, neglect, accident or misuse or as the result of service or
modification by other than DSI. IN NO EVENT SHALL DATREND SYSTEMS INC. BE LIABLE FOR
CONSEQUENTIAL DAMAGES.
This warranty is subject to the following limitations:
!
Touch Screen LCD Display: 1 year limited warranty; punctures, dents and scratches are not covered
!
Standard Accessories: 90 day limited warranty
!
Damage due to activation of devices under test which are connected to the “applied parts” inputs is not covered
under the warranty
!
Re-calibration of the instrument, which has a recommended annual calibration frequency, is not covered under
the warranty.
No warranty shall apply when damage is caused by any of the following:
!
Power failure, surges, or spikes,
!
Damage in transit or when moving the instrument,
!
Improper power supply such as low voltage, incorrect voltage, defective wiring or inadequate fuses,
!
Accident, alteration, abuse or misuse of the instrument,
!
Fire, water damage, theft, war, riot, hostility, acts of God, such as hurricanes, floods, etc.
Only serialized products (those items bearing a distinct serial number tag) and their accessory items are covered
under this warranty. PHYSICAL DAMAGE CAUSED BY MISUSE OR PHYSICAL ABUSE IS NOT COVERED
UNDER THE WARRANTY. Items such as cables and non-serialized modules are not covered under this warranty.
This warranty gives you specific legal rights and you may have other rights, which vary from province to province,
state to state, or country to country. This warranty is limited to repairing the instrument to DSI's specifications.
When you return an instrument to DSI for service, repair or calibration, we recommend shipment using the original
shipping foam and container. If the original packing materials are not available, we recommend the following guide
for repackaging:
!
Use a double-walled carton of sufficient strength for the weight being shipped.
!
Use heavy paper or cardboard to protect all instrument surfaces. Use non-abrasive material around all projecting
parts.
!
Use at least four inches of tightly packed, industrial-approved, shock-absorbent material all around the
instrument.
DSI will not be responsible for lost shipments or instruments received in damaged condition due to improper
packaging or handling. All warranty claim shipments must be made on a prepaid basis (freight, duty, brokerage, and
taxes). No returns will be accepted without a Return Materials Authorization ("RMA”) number. Please contact
Datrend (refer to Chapter 9 of this manual) to obtain an RMA number and receive help with shipping/customs
documentation.

Page iii
Warranty Disclaimer
Should you elect to have your instrument serviced and/or calibrated by someone other than Datrend Systems,
please be advised that the original warranty covering your product becomes void when the tamper-resistant Quality
Seal is removed or broken without proper factory authorization. We strongly recommend, therefore, that you send
your instrument to Datrend Systems for service and calibration, especially during the original warranty period.
In all cases, breaking the tamper-resistant Quality Seal should be avoided at all cost, as this seal is the key to your
original instrument warranty. In the event that the seal must be broken to gain internal access to the instrument (e.g.,
in the case of a customer-installed firmware upgrade), you must first contact Datrend Systems at 1-800-667-6557.
You will be required to provide us with the serial number for your instrument as well as a valid reason for breaking
the Quality Seal. You should break this seal only after you have received factory authorization. Do not break the
Quality Seal before you have contacted us! Following these steps will help ensure that you will retain the original
warranty on your instrument without interruption.
WARNING
Unauthorized user modifications or application beyond the published specifications may result in electrical shock
hazards or improper operation. Datrend Systems will not be responsible for any injuries sustained due to
unauthorized equipment modifications.
DSI DISCLAIMS ALL OTHER WARRANTIES, EXPRESSED OR IMPLIED, INCLUDING ANY WARRANTY OF
MERCHANTABILITY OR FITNESS FOR A PARTICULAR PURPOSE OR APPLICATION.
THIS PRODUCT CONTAINS NO USER-SERVICEABLE COMPONENTS.
UNAUTHORIZED REMOVAL OF THE INSTRUMENT COVER SHALL VOID
THIS AND ALL OTHER EXPRESSED OR IMPLIED WARRANTIES.
Fluke® is a registered trademark of Fluke Corporation
SimCube® is a registered trademark of Pronk Technologies Inc.
Microsoft® and Windows® are registered trademarks of Microsoft Corp.

Page iv

ES601-US OPERATING MANUAL
Table of Contents
#
Page v
Table of Contents
A
BBREVIATIONS AND
D
EFINITIONS
....................................
XI
S
YMBOL
D
EFINITIONS
.............................................
XIII
1 S
PECIFICATIONS
................................................1
1.1 Electrical Safety Testing Standards . . . . . . . . . . . . . . . . . . . . . . . . . . . . . . . . . . 1
1.2AutomatedTesting ...............................................1
1.3ManualModeSafetyTests .........................................1
VoltageMeasurement.............................................2
LoadCurrent....................................................2
InsulationResistance .............................................2
GroundResistance...............................................2
LeakageCurrent.................................................2
1.4 Electrical Safety Measurement Terminals . . . . . . . . . . . . . . . . . . . . . . . . . . . . . . 2
TestReceptacle .................................................2
KelvinCable ....................................................2
AUX1Terminal ..................................................3
AUX2Terminal ..................................................3
ToDUTCaseTerminal............................................3
Applied Part (patient lead) Terminals . . . . . . . . . . . . . . . . . . . . . . . . . . . . . . . . . 3
1.5ECGSimulator ..................................................3
PerformanceWaveforms ..........................................3
ArrhythmiaWaveforms ............................................4
Defibrillator/AED Test Waveforms . . . . . . . . . . . . . . . . . . . . . . . . . . . . . . . . . . . 4
OutputAmplitude ................................................4
Accuracy.......................................................4
1.6UserInterface...................................................4
Display ........................................................4
Keypad ........................................................4
AudioIndicator ..................................................4
1.7Non-VolatileMemory .............................................5
MemoryType ...................................................5
DataCapacity...................................................5
1.8PrinterPortDataOutput ...........................................5
HardwareInterface ...............................................5
1.9RS-232PortDataOutput ..........................................5
HardwareInterface ...............................................5
SerialProtocol ..................................................5
1.10 USB Data Transfer/Capture . . . . . . . . . . . . . . . . . . . . . . . . . . . . . . . . . . . . . . . 6
HardwareInterface ...............................................6
Protocol .......................................................6
DataTransferRate ...............................................6

ES601-US OPERATING MANUAL
Table of Contents
#
Page vi
1.11 Ethernet Data Transfer/Capture . . . . . . . . . . . . . . . . . . . . . . . . . . . . . . . . . . . . 6
HardwareInterface ...............................................6
Protocol .......................................................6
DataTransferRate ...............................................6
1.12 Keyboard and Barcode Scanner Ports . . . . . . . . . . . . . . . . . . . . . . . . . . . . . . . 6
1.13ElectricalSpecifications ..........................................7
1.14EnvironmentforUse.............................................7
1.15Dimensions....................................................7
1.16Weight .......................................................7
1.17StandardAccessories............................................7
1.18OptionalAccessories ............................................8
1.19 Installed Software Modules . . . . . . . . . . . . . . . . . . . . . . . . . . . . . . . . . . . . . . . . 8
1.20 Compliance With Standards . . . . . . . . . . . . . . . . . . . . . . . . . . . . . . . . . . . . . . . 8
2 O
VERVIEW
....................................................9
2.1TestingElectricalSafety..........................................10
2.1.1InsulationResistance........................................10
2.1.2GroundResistance .........................................10
2.1.3LineVoltage...............................................10
2.1.4LoadCurrent ..............................................10
2.1.5LeakageCurrent ...........................................11
2.1.6 External Case Leakage Current . . . . . . . . . . . . . . . . . . . . . . . . . . . . . . . . 11
2.1.7 Internal Case Leakage Current . . . . . . . . . . . . . . . . . . . . . . . . . . . . . . . . 12
2.1.8LeadLeakageCurrent .......................................12
2.1.9 Lead-to-Lead Leakage Current . . . . . . . . . . . . . . . . . . . . . . . . . . . . . . . . 14
2.1.10 Alternative and Direct Methods of Leakage Current Measurement . . . . 15
2.1.11 Battery-Power Protocols . . . . . . . . . . . . . . . . . . . . . . . . . . . . . . . . . . . . . 16
2.1.12SafetyAutoSequences......................................16
2.2 Characteristics of ES601-US . . . . . . . . . . . . . . . . . . . . . . . . . . . . . . . . . . . . . . 18
2.2.1 Test Receptacle Configuration . . . . . . . . . . . . . . . . . . . . . . . . . . . . . . . . . 18
2.2.2StandardAccessories .......................................18
InstalledSoftwareModules........................................18
2.2.3OptionalAccessories ........................................18
2.3InterfaceLayout ................................................19
3 S
ETUP
......................................................21
3.1PoweringUp...................................................21
3.2SystemSettingsMenu#1.........................................22
3.3SystemSettingsMenu#2.........................................24
3.4SystemSettingsMenu#3.........................................28
3.5AbouttheQWERTYKeypad.......................................31
3.6 Safety AutoSequence Editor . . . . . . . . . . . . . . . . . . . . . . . . . . . . . . . . . . . . . . . 32

ES601-US OPERATING MANUAL
Table of Contents
#
Page vii
4 C
ONNECTING TO
ES601-US ......................................39
4.1 Connecting an AC-Powered DUT to ES601-US . . . . . . . . . . . . . . . . . . . . . . . . 39
4.2 Connecting a Battery-Powered DUT to ES601-US . . . . . . . . . . . . . . . . . . . . . . 41
4.3 Connecting Peripheral Devices . . . . . . . . . . . . . . . . . . . . . . . . . . . . . . . . . . . . . 42
5 M
ANUAL
T
ESTING
..............................................43
5.1ManualModeDisplay ............................................43
5.2DataBuffer ....................................................43
5.3SafetyStandards ...............................................44
5.4SafetyLimits...................................................45
5.5 Equipment Information Menu . . . . . . . . . . . . . . . . . . . . . . . . . . . . . . . . . . . . . . 45
5.6LineVoltageTest ...............................................47
5.7LoadCurrentTest...............................................48
5.8 Insulation Resistance Test . . . . . . . . . . . . . . . . . . . . . . . . . . . . . . . . . . . . . . . . 51
5.9GroundResistanceTest..........................................54
5.10LeakageCurrentTest...........................................61
5.11ViewingtheDataBuffer .........................................76
5.12SavingaTest .................................................76
5.13ReviewingTests ...............................................78
5.14 Viewing Test Data and Report Output . . . . . . . . . . . . . . . . . . . . . . . . . . . . . . 81
5.14.1ViewingaRecord.............................................81
5.14.2ReportOutput ...............................................86
5.14.3 Using HyperTerminal to Capture Test Results . . . . . . . . . . . . . . . . . . . . . . . 88
5.15ECGSimulator ................................................90
5.16CapturingTestTime............................................93
6 A
UTOMATED
T
ESTING
...........................................95
6.1AutoSequenceOverview .........................................95
6.1.1SafetyAutoSequences.......................................99
6.1.2ECGAutoSequences.......................................104
6.1.3TesterAutoSequences......................................106
6.1.4Checklists ...............................................112
6.1.5Checkitems ..............................................114
6.1.5.1 ThePCheckitem .....................................115
6.1.5.2 TheKCheckitem .....................................116
6.1.5.3 TheICheckitem......................................117
6.1.5.4 TheECheckitem .....................................118
6.1.5.5 TheCCheckitem .....................................119
6.1.5.6 TheRCheckitem .....................................120
6.1.5.7 TheMCheckitem.....................................121
6.1.5.8 TheDCheckitem .....................................124
6.1.5.9 TheACheckitem .....................................125
6.1.5.10 Checkitem Summary . . . . . . . . . . . . . . . . . . . . . . . . . . . . . . . . . 128
6.1.6PhysicalInspections........................................129

ES601-US OPERATING MANUAL
Table of Contents
#
Page viii
6.2EquipmentRecords ............................................131
6.2.1ControlNumberSearch .....................................131
6.2.2TestStartup..............................................132
6.2.3 Equipment Records by Checklist . . . . . . . . . . . . . . . . . . . . . . . . . . . . . . 132
7 C
OMPUTER
C
ONTROL
..........................................133
7.1 Overview of Computer Control . . . . . . . . . . . . . . . . . . . . . . . . . . . . . . . . . . . . 133
7.2Connections ..................................................134
7.3CommunicationSettings.........................................134
7.4Protocol .....................................................134
7.4.1 General Format of Data . . . . . . . . . . . . . . . . . . . . . . . . . . . . . . . . . . . . . 134
7.4.2SafetyTestExecution ......................................135
7.4.3TestReportDownload ......................................136
7.4.4 Format of Measurement Data . . . . . . . . . . . . . . . . . . . . . . . . . . . . . . . . 137
8 ES601
PC
-US
S
OFTWARE
.......................................141
8.1Installation ...................................................141
8.2InstallingUSBDrivers...........................................142
8.3RunningES601pc-US...........................................144
8.4BackupandRestore............................................145
8.5TestReportGenerator ..........................................146
8.5.1 Downloading Test Reports . . . . . . . . . . . . . . . . . . . . . . . . . . . . . . . . . . . 146
8.5.2"Pass"Indication ..........................................147
8.5.3"New"Indication...........................................147
8.5.4 Searching For Test Reports . . . . . . . . . . . . . . . . . . . . . . . . . . . . . . . . . . 147
8.5.5 Opening Existing Test Reports . . . . . . . . . . . . . . . . . . . . . . . . . . . . . . . . 147
8.5.6ViewingTestReports.......................................148
8.5.7PrintingTestReports.......................................149
8.5.8SavingTestReports .......................................149
8.5.8.1SavingasTXT........................................149
8.5.8.2SavingasCSV .......................................149
8.6 Safety AutoSequence Editor . . . . . . . . . . . . . . . . . . . . . . . . . . . . . . . . . . . . . . 150
8.6.1 Editing the AutoSequence Title . . . . . . . . . . . . . . . . . . . . . . . . . . . . . . . 150
8.6.2ChoosingtheStandard .....................................151
8.6.3Limits(AllStandards).......................................151
8.6.4EquipmentClass ..........................................151
8.6.5LineVoltage..............................................151
8.6.6InsulationResistance.......................................151
8.6.7LoadCurrent .............................................152
8.6.8GroundResistance ........................................152
8.6.9 Leakage Current (IEC60601 and AAMI-ES1) . . . . . . . . . . . . . . . . . . . . . 152
8.6.10 Leakage Current (VDE0751 and IEC62353) . . . . . . . . . . . . . . . . . . . . 152
8.6.11 Leakage Current (Battery-powered devices) . . . . . . . . . . . . . . . . . . . . 152
8.6.12 Leakage Current (IEC61010) . . . . . . . . . . . . . . . . . . . . . . . . . . . . . . . . 153
8.6.13EquipmentPower.........................................153

ES601-US OPERATING MANUAL
Table of Contents
#
Page i
8.6.14Polarity.................................................153
8.6.15Neutral ................................................153
8.6.16Ground.................................................153
8.6.17PatientLeads............................................154
8.6.18PatientLeadGroups ......................................154
8.6.19 Lead-to-Lead Leakages . . . . . . . . . . . . . . . . . . . . . . . . . . . . . . . . . . . . 155
8.6.20 Isolated Signals Inputs/Outputs . . . . . . . . . . . . . . . . . . . . . . . . . . . . . . 155
8.6.21 Exposed Ungrounded Metal Parts (IEC60601) . . . . . . . . . . . . . . . . . . . 155
8.6.22 Protocol (VDE0751 and IEC62353) . . . . . . . . . . . . . . . . . . . . . . . . . . . 155
8.6.23 Test Point-to-Point (IEC61010) . . . . . . . . . . . . . . . . . . . . . . . . . . . . . . 156
8.6.24 Uploading AutoSequences . . . . . . . . . . . . . . . . . . . . . . . . . . . . . . . . . . 156
8.6.25 Downloading AutoSequences . . . . . . . . . . . . . . . . . . . . . . . . . . . . . . . 157
8.6.26 Printing AutoSequences . . . . . . . . . . . . . . . . . . . . . . . . . . . . . . . . . . . . 157
8.6.27ReturntoMainMenu ......................................157
8.7SafetyLimitsEditor.............................................158
8.7.1EditingSafetyLimits .......................................158
8.7.2 Uploading Safety Limits . . . . . . . . . . . . . . . . . . . . . . . . . . . . . . . . . . . . . 160
8.7.3 Downloading Safety Limits . . . . . . . . . . . . . . . . . . . . . . . . . . . . . . . . . . . 160
8.8ECGAutoSequenceEditor.......................................161
8.8.1 Editing the AutoSequence Title . . . . . . . . . . . . . . . . . . . . . . . . . . . . . . . 162
8.8.2AddingaWaveform ........................................162
8.8.3RemovingaWaveform .....................................162
8.8.4 Modifying the Order of Waveforms in a Sequence . . . . . . . . . . . . . . . . . 162
8.8.5DeletingaSequence .......................................163
8.8.6 Uploading AutoSequences . . . . . . . . . . . . . . . . . . . . . . . . . . . . . . . . . . . 163
8.8.7 Downloading AutoSequences . . . . . . . . . . . . . . . . . . . . . . . . . . . . . . . . 163
8.8.8 Printing AutoSequences . . . . . . . . . . . . . . . . . . . . . . . . . . . . . . . . . . . . . 163
8.8.9ReturntoMainWindow .....................................163
8.9ChecklistModule ..............................................164
8.9.1UploadingChecklists .......................................165
8.9.2 Downloading Checklists . . . . . . . . . . . . . . . . . . . . . . . . . . . . . . . . . . . . . 165
8.9.3EditingaChecklist .........................................166
8.9.4 Checkitem Database Editor . . . . . . . . . . . . . . . . . . . . . . . . . . . . . . . . . . 167
8.9.4.1 Selecting the Op Code . . . . . . . . . . . . . . . . . . . . . . . . . . . . . . . . . 167
8.9.4.2 Selecting the Category . . . . . . . . . . . . . . . . . . . . . . . . . . . . . . . . . 168
8.9.4.3 Entering the Command/Prompt . . . . . . . . . . . . . . . . . . . . . . . . . . . 169
8.9.4.4 Configuring the "A" Checkitem . . . . . . . . . . . . . . . . . . . . . . . . . . . 170
8.9.5 Creating a New Checkitem . . . . . . . . . . . . . . . . . . . . . . . . . . . . . . . . . . 171
8.9.6FilteringCheckitems .......................................172
8.9.7DeletingaCheckitem.......................................172
8.9.8ImportingCheckitems ......................................173
8.9.9PrintingCheckitems........................................173
8.10 Inspections and User Testers . . . . . . . . . . . . . . . . . . . . . . . . . . . . . . . . . . . . 174
8.10.1 Uploading AutoSequences . . . . . . . . . . . . . . . . . . . . . . . . . . . . . . . . . . 176
8.10.2 Downloading AutoSequences . . . . . . . . . . . . . . . . . . . . . . . . . . . . . . . 176

ES601-US OPERATING MANUAL
Table of Contents
#
Page
8.10.3 Editing an Inspection or User Tester Sequence . . . . . . . . . . . . . . . . . . 177
8.11EquipmentRecordModule ......................................179
8.11.1 Creating a New Equipment Record . . . . . . . . . . . . . . . . . . . . . . . . . . . 180
8.11.2 Copying Equipment Records . . . . . . . . . . . . . . . . . . . . . . . . . . . . . . . . 180
8.11.3 Deleting Equipment Records . . . . . . . . . . . . . . . . . . . . . . . . . . . . . . . . 181
8.11.4 Editing Equipment Records . . . . . . . . . . . . . . . . . . . . . . . . . . . . . . . . . 181
8.11.5 Searching Equipment Records . . . . . . . . . . . . . . . . . . . . . . . . . . . . . . . 182
8.11.6 Importing Equipment Records . . . . . . . . . . . . . . . . . . . . . . . . . . . . . . . 183
8.11.7 Uploading Equipment Records . . . . . . . . . . . . . . . . . . . . . . . . . . . . . . . 184
8.11.8 Printing Equipment Records . . . . . . . . . . . . . . . . . . . . . . . . . . . . . . . . . 185
8.11.9 Record Viewing Options . . . . . . . . . . . . . . . . . . . . . . . . . . . . . . . . . . . . 185
8.12CMMSInterfaceModule ........................................187
8.12.1 Exporting CMMS Data to ES601-US . . . . . . . . . . . . . . . . . . . . . . . . . . 187
8.12.2 Importing a MUP File from ES601-US . . . . . . . . . . . . . . . . . . . . . . . . . 190
8.12.3ModifyingOptions ........................................191
8.12.3.1 Download Checkitems Option . . . . . . . . . . . . . . . . . . . . . . . . . . . 191
8.12.3.2 medTester-to-ES601 Translation Table . . . . . . . . . . . . . . . . . . . . 192
9 C
ALIBRATION AND
M
AINTENANCE
..................................193
APPENDIX
A.
S
AFETY
A
UTO
S
EQUENCES
.............................195
APPENDIX
B.
S
AMPLE
T
EST
R
ECORD
...............................207
APPENDIX
C.
A
UTOMATED
T
EST
E
XAMPLES
...........................213
APPENDIX
D.
I
MPORTING
E
QUIPMENT
R
ECORDS
.......................217

ES601-US OPERATING MANUAL
Definitions
#
Page i
Abbreviations and Definitions
The following abbreviations, terms and acronyms are used throughout this manual:
uA Micro-ampere
AAmpere
AAMI American Association of Medical Instrumentation
AutoSequence A series of measurements or test operations that are run automatically in
a predefined order, with or without user involvement.
Cct. Abbreviation for circuit (ie. electrical circuit in a power distribution system)
Checklist A type of AutoSequence that can be linked to the control number of a
device through an Equipment Record.
DUT Device Under Test. The electrical equipment or device being tested.
Earth Same as "GND" or "ground" (see below).
Equipment Record Contains the control number of a device and a reference to an associated
maintenance procedure (Checklist) for that device.
Flash Memory Non-volatile memory used for storing Test Records and other
configuration-related data such as user settings, AutoSequences,
Checklists and Equipment Records. The contents of the flash memory
are retained when the power to ES601-US is switched off.
GND or Ground The line (conductor) connected to a place that is maintained at “Ground”
or “Earth” potential.
Hz Hertz
IEC International Electrotechnical Commission
kHz kilohertz
L1 or Line 1 The “Hot” or “Live” line (conductor) of the AC supply.
L2 or Line 2 The “Neutral” line (conductor) of the AC supply.
LA Left arm ECG lead
LL Left leg ECG lead
MAINS The voltage provided by the building installation, nominally 120 VAC or
230 VAC depending on the country
M.A.P. / MAP Mains-on-Applied-Part(s). An isolation test of one or more patient leads.
Measurement Category I
Terminal Intended for measurements on circuits with no direct connection to
MAINS (CAT I)

ES601-US OPERATING MANUAL
Definitions
#
Page ii
Measurement Category II
Terminal Intended for measurements on circuits which may have a direct
connection to MAINS (CAT II)
MHz Megahertz
PE Protective Earth. The line (conductor) connected to a place that is
maintained at “Ground” or “Earth” voltage.
QWERTY Keypad The user interface device for entering text or numeric figures. The layout
of the keypad is that of a standard North American PC Keyboard.
RA Right arm ECG lead
RL Right leg ECG lead
RMS Root-Mean-Square measurement of amplitude.
Safety Standard Standards established by various national and international regulatory
agencies. The most recognized Standards Organizations include:
AAMI - Association for Advancement of Medical Instrumentation
IEC - International Electrotechnical Commission
VDE - Verband der Elektrotechnik, Elektronik und Informationstechnik
Test Record Safety, ECG and other test result data which have been saved to the
non-volatile flash memory as a record of all tests performed on a
particular device, as identified by the equipment control number. A Test
Record may be recalled from the flash memory for viewing on the LCD or
printing. Test Records can be downloaded in bulk to a PC using
ES601pc-US software.
Type B (Body) Non-patient equipment, or equipment with grounded patient connection.
Type BF (Body Floating) Equipment with a floating patient connection
Type CF (Cardiac Floating) Equipment with a floating connection intended for direct cardiac
application
VVolt
V1-V6 Precordial ECG leads
Vrms Volts rms

ES601-US OPERATING MANUAL
Definitions
#
Page iii
Symbol Definitions
The following symbols may be found on ES601-US:
CONSULT MANUAL FOR PROPER OPERATION
The operating manual provides valuable information on the proper use of ES601-US. It is highlyrecommended
the operator read the Checkitems thoroughly before operating the device. It is possible to damage the Device
Under Test (DUT) and/or cause harm to the operator if ES601-US is used incorrectly.
AUX1: LINE VOLTAGE TO FLOATING I/O ~264V max
During testing of the isolation of (floating) input/output connections on the DUT, an AC voltage of 110% of the
line voltage is applied to the AUX1 (CAT I) connector (Yellow 4mm banana jack), which is connected to the
(floating) input/output connector(s). This AC voltage may reach a maximum of ~264 VAC and, while current
limited, represents a serious shock hazard to theoperator. Properprecautions shouldbe taken whenperforming
a test which includes the applicationof this voltage tothe (floating) input/outputconnector(s). When ahazardous
voltage is present at the AUX1 connector, a red LED adjacent to the AUX1 connector will be ON .
APPLIED PARTS: Hazardous Voltage: 264 VAC or 500 VDC max
This warning appears on the Applied Parts (patient leads) label on the front of ES601-US. During testing of the
isolation of the DUT patient leads with respect to either ground, or to the power input leads, a voltage of either
110%oftheAClinevoltageor 500VDCmaybepresentontheappliedpart(CAT I) connectors.This voltagemay
reach a maximum of ~264 VAC or 500 VDC and, while current limited, represents a serious shock hazard to the
operator. Proper precautions should be taken when performing a test which includes the application of this
voltage to the applied part connectors. When a hazardous voltage is present at the connectors, a red LED
adjacent to the warning on the APPLIED PARTS label will be ON .
CAUTION: Electrical Shock Hazard, Refer Servicing to Qualified Personnel
CAUTION: Consult Accompanying Documents
These warnings appear on the serial number label of ES601-US. ES601-US contains hazardous electrical
voltagesinternallywhichWILLBEpresentwhenthecoversareremoved.TheoperatorshouldreadtheOperating
Manual to determine what actions to take in the event of failure of ES601-US. Refer to the Troubleshooting and
Maintenance Section of the Operating Manual.

ES601-US OPERATING MANUAL
Definitions
#
Page iv
Kelvin Cable
The Kelvin Cable (CAT I) is used to measure the Ground Resistance, using a 1A current. Consult the Operating
Manual for the proper operation of the Ground Resistance test.
DO NOT EXCEED THE FOLLOWING CURRENT LOAD ON THE D.U.T .
RECEPTACLE:
15AMPS @ 100 - 120 VAC, 60 Hz (in 20A circuit)
11AMPS @ 100 - 120 VAC, 60 Hz (in 15A circuit)
12AMPS @ 230 VAC, 50 Hz (in 16A circuit)
The regulatory requirements for loading a circuit (cct.) in a power distribution system sets a current limit on any
individualreceptacle to 80% of the value of the circuit breaker on that circuit. For instance, in a circuit with a 15A
circuit breaker (or fuse), the maximum current allowed to be drawn from any individual receptacle is 12A.
Allowing 1A for the circuitry, the load current for the Device Under Test (D.U.T.) should not exceed 11A. These
limits are set bythe Electrical Code in most jurisdictions in an attempt to avoid unexpected circuit overloads and
subsequent circuit failure. If the D.U.T. load is expected to approach the maximum value on a routine basis, it
is recommended that a circuit with only a single receptacle be provided for use with ES601-US.
WARNING: OPENING THE ES601 MAY COMPROMISE USER SAFETY.
REFER SERVICING TO DATREND AUTHORIZED AGENT.
ES601-US is a complex instrument which contains internallydistributed line voltages and other high voltages for
specific measurement purposes. Failure to observe appropriate measures when the instrument has been
opened, or failure to reassemble correctly may compromise the safety of the user.
WARNING: GROUNDING CIRCUIT CONTINUITY IS VITAL FOR SAFE
OPERATION. NEVER OPERATE THE ES601 WITH GROUNDING CONDUCTOR
DISCONNECTED.
Proper grounding is essential to ensure operator safety. Do not bypass the grounding provisions inherent in the
design of ES601-US, otherwise, the operator may be subjected to an electrical shock risk.
WARNING: HAZARDOUS VOLTAGES OR CONDITIONS MAY EXIST DURING
TESTS. CONSULT THE ACCOMPANYING DOCUMENTS FOR APPROPRIATE
PRECAUTIONS.

ES601-US OPERATING MANUAL
Definitions
#
Page v
During the execution of an electrical safety test on the D.U.T., ES601-US may apply high voltages (up to 264
VAC or 500 VDC) to the D.U.T. While these voltages are current limited, they do represent a shock hazard to
theoperatorifprecautionsarenotfollowed. Consulttheinstructionsinthismanualregardingpatientleadleakage
current tests and Insulation Resistance tests for further information.

ES601-US OPERATING MANUAL
Definitions
#
Page vi
Table of contents
Other DATREND Systems Test Equipment manuals
Popular Test Equipment manuals by other brands

Fluke
Fluke ScopeMeter 190-202 Service manual
Beha-Amprobe
Beha-Amprobe AT-6000-EUR Series quick start guide

Edgeonup
Edgeonup PT50 Sharp Instructions for use

SMART
SMART PLT600 user manual
JDS Uniphase
JDS Uniphase TestifierPRO user guide

Vibration Research Corporation
Vibration Research Corporation VibrationVIEW manual
