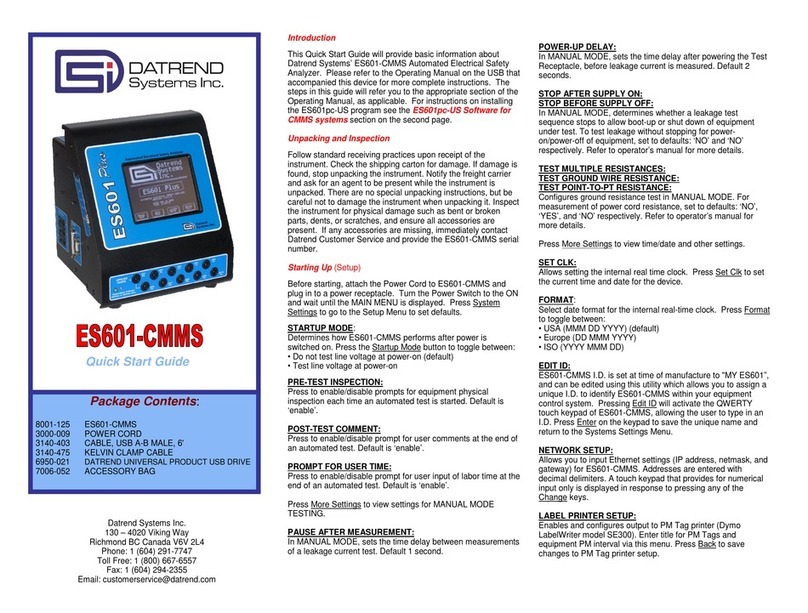
DATREND Systems medTester 5000B Installation and operating instructions

APPLICATION NOTE
INFUTEST
Series C & Series D
AN-17.2004: Page 1 of 4 1-800-667-6557 www.datrend.com
© Datrend Systems Inc.
Interface With medTester
1. INTRODUCTION
The medTester 5000B is part of an equipment
management database and testing system available
from DNI Nevada Inc.(now Fluke Biomedical Corp.). To
use Infutest with medTester, your medTester must
have the medCheck firmware option installed, plus you
must be able to use the equipment data base program
Sentinel, also by DNI Nevada.
2. SETTING UP
Use aDatrend Systems SSC-1 cable to connect
Infutest to COM2 of the medTester. Do notuse a
null modem cable or adaptor.
Do not connect medTester to Infutest using the
medTester serial cable supplied by DNI Nevada.
This is a null modem cable for connecting COM1 of the
medTester to a PC.
Power up medTester and select UTIL from the main
menu level, followed by PORTS.Set COM1 to OFF
and COM2 to ON.Return to the UTIL menu.
Select RS232 and then COM2.Program COM2 as
follows:
Set Baud Rate to 9600
Set Stop Bits to 1
Set Length to 8
Set Parity and CTS to OFF
3. DESIGNING CHECKLISTS
AChecklist is a list of instructions or "check items"
which medTester performs sequentially and
automatically, pausing occasionally for data input from
the user via the medTester keyboard, or from an
external device connected to medTester's COM2 port.
Checklists are created on a PC using the Sentinel
program, and then are downloaded from your PC into
medTester's memory.
To control Infutest with medTester, your Checklist
must included check items which begin with \M
followed by an Infutest remote control command. A
check item beginning with \M tells medTester to get
data from COM2, instead of from the medTester
keyboard. In executing a Checklist with \Mitems, the
medTester will transmit whatever characters follow \M
to the Infutest via COM2, and then will wait for data to
be returned via COM2. Depending on the command
which follows the \M,Infutest may return up to 40
characters of data to the medTester.
\M is also necessary to introduce delays into the
Checklist so the Infutest has time to start the test and
collect some measurement data. The syntax for this
is:
\M pause
where pause is the number of seconds (1 to 32000)
you want medTester to wait until it continues with the
next check item.
For example, your Checklist might begin with some
PASS/FAIL items (\Pitems) for inputting information
about the condition of the pump under test, such as the
line cord and front panel keys and displays, and it might
end with AutoSequence 10 to test electrical safety of
the pump.In between, you want to conduct a test on
Channel Ato check the flow at 100 ml/hr, and then
measure the occlusion pressure. To do the flow test,
your Checklist could include the following items:
\M RTA1
\M 180
\M STA
\M GSA1
This portion of a Checklist starts a Single Rate Test on
Channel Aand runs the test for three minutes. The
flowtest is stopped and medTester requests Infutest to
return the summary of the measurements made during
the test via the GSA1 command.
Now you want the medTester to tell Infutest to run the
Occlusion Pressure Test. To do that, the previous
check items would be succeeded by:
\M RTA4
\M 60
\M STA
\M GSA4
These check items startan Occlusion Pressure Test

APPLICATION NOTE
INFUTEST
Series C & Series D
AN-17.2004: Page 2 of 4 1-800-667-6557 www.datrend.com
© Datrend Systems Inc.
and run that test for one minute. The test is stopped
and medTester requests Infutest to return the
occlusion pressure measured via the GSA4 command.
Acomplete description of the Infutest remote control
commands is given in the Infutest Operating Manual.
4. ENTERING CHECKLISTS WITH SENTINEL
To input the Checklists described in the previous
section via DNI Nevada's Sentinel program, boot
Sentinel on your PC and press D to select "Reference
Databases" from the "Main Menu". Press C to select
"Procedures Maintenance", then press A to display the
"Relational Procedures Maintenance" screen. Press
the hkey to create a new procedure. Type INFUTEST
SR1 in the Procedure Name box, hit etwice, and then
press uto begin editing the new Checklist you have
just created.
On the PROCEDURE ITEMS MAINTENANCE
screen, press hto view the CHECK ITEM MASTER
LIST. Now press hagain to display the CHECK ITEM
RECORD input box. This box allows you to enter new
Check Items into Sentinel's Master List. For the
command
\M RTA1
in the checklist of the previous section, enter
INFUTEST in the "Type" box, enter RTA1 in the
"Desc." box, and enter Min the "Control" box. Now
press u to save this new Check Item.
NOTE: DO NOT enter \M RTA1 in the "Desc." box.
Enter only RTA1.Sentinel takes care of the \M
via the character you enter in the "Control"
box.
Press h again to add the 180-second delay command:
\M 180
to the Master List.In the CHECK ITEM RECORD
box, enter DELAY in the "Type" box, enter 180 in the
"Desc." box, and enter Min the "Control" box. Press u
to save this timed delay command in Sentinel's Master
List. Do not enter \M 180 in the "Desc." box. Enter only
180.Sentinel takes care of the \M via the character you
enter in the "Control" box.
Continue with this process, adding the remaining
INFUTEST and DELAY commands to Sentinel's
Master List. Once you have finished entering all the
new Check Items, use the wy keys to scroll through the
Master List and tag your new Check Items in the
correct order by pressing the kbar. Press uto copy
the tagged Check Items into your new Checklist
INFUTEST SR1. Exit the PROCEDURE ITEMS
MAINTENANCE screen by pressing the ^ key.Keep
pressing ^until you are back to Sentinel's Main Menu.
After downloading your Checklists from Sentinel to
medTester via Sentinel's Communications Menu,
press UTIL and PORTS on medTester's keypad and
set COM1 to OFF and set COM2 to ON. Now press
the UTIL, RS232 and COM2 keys on the medTester
and check the settings are 9600 baud, 1stop bit, parity
OFF, length 8bits, and CTS OFF. Connect
medTester's COM2 to Infutest using aDatrend SSC-1
cable. You can then execute the Infutest Checklist by
typing
INFUTEST SR1
on the medTester keypad and pressing "ENT".
5. medTester "BUGS"
DNI Nevada's medTester 5000B appears to have a
number of software bugs related to interface with
externally connected devices. The type of bugs you
may experience with your medTester will depend on
the software version and hardware configuration of
your instrument. This section lists bugs which we have
discovered or which have been reported by our
customers to date.
a. medTester software versions 3.55 and earlier
have problems in retrieving data via COM2. To
overcome this medTester bug, precede Infutest
"Get Summary" commands in checklists with a
PASS/FAIL prompt. The following example
illustrates the patch:
\M RTA1
\M 180
\M STA
\P GET DATA FROM INFUTEST
\M GSA1
The first command starts a Single Rate Test on
Infutest Channel A. The second command
provides adelay of 180 sec. The next command
stops the Infutest. The \P command which follows
makes medTester ready to receive data via COM2
(note medTester will wait at this point until you
press PASS or FAIL on the medTester keyboard).
The last command downloads the test summary
from the Infutest.

APPLICATION NOTE
INFUTEST
Series C & Series D
AN-17.2004: Page 3 of 4 1-800-667-6557 www.datrend.com
© Datrend Systems Inc.
b. Do not plug an external keyboard into
medTester when you are using medTester
COM2. medTester may default to reading data
from the external keyboard rather than
downloading data via COM2.
c. After downloading any Sentinel data from your PC
to medTester via COM1, check that medTester
COM1 is OFF, COM2 is ONand that COM2 stop
bits remains set to 1.
d. Depending on the version of your medTester,
the RTS line of COM2 may inadvertently
switch low after certain operations. In order
for Infutest to transmit data to medTester,
medTester'sRTS line must stay high (the
default). The best way to determine that RTS is
high is to install an RS-232 breakout box between
Infutest and medTester COM2 at the medTester
end. Note that medTester is the Data Terminal
Equipment (DTE).
If you don't have an RS-232 breakout box, you can
open the DB-25 shell on your Datrend SSC-1
cable and plug this end into medTester COM2.
Use a voltmeter to probe COM2 pin 4 (RTS) with
respect to pin 7(GND). The reading should be
higher than + 4 VDC. If the voltage is negative,
medTester's RTS signal will prevent Infutest from
downloading data.
To overcome this problem on the medTester, you
can modify your Datrend SSC-1 cable by opening
the DB-25 shells and cutting the wires connected
to pins 4 and 5. Solder a jumper lead so that pin 4
of the SSC-1 is shorted to pin 5.Perform this
modification at both ends of the SSC-1. This will
override Infutest's RTS/CTS signalling.
6. DEBUGGING YOUR SYSTEM
In debugging your medTester-Infutest setup, you
should start by using simple 4-item Checklists like the
examples given in this app note. Always use a Datrend
SSC-1 cable, or make a cable using the wiring
information given in Chapter 3, Section 3.3 of the
Infutest Operating Manual.
If the Infutest does not respond to "run test" commands
(e.g. RTA1) by starting aflow test, you are probably
having hardware problems (e.g. cable, serial port
setup, etc.). If the Infutest seems to respond to "run
test" and "stop test" commands, but won't return test
data to medTester, you are probably experiencing
medTester bugs like (a.), (b.) or (d.) discussed in the
previous section.
7. COMMAND SUMMARY
The table on the following page lists all the Infutest
commands which are compatible with the medTester
5000B. Further information on the format of data
returned by the Infutest in response to the "GS"
commands can be found in the Infutest Operating
Manual.

APPLICATION NOTE
INFUTEST
Series C & Series D
AN-17.2004: Page 4 of 4 1-800-667-6557 www.datrend.com
© Datrend Systems Inc.
Infutest 2000 Series C Remote Control Commands
Command description CHAN A
Command CHAN B
Command Data transmitted from Infutest
to medTester
Start a Single Rate Test RTA1 RTB1 *
Start a Dual Rate Test RTA2 RTB2 *
Start a PCA Pump Test RTA3 RTB3 *
Start an Occlusion Pressure
Test RTA4 RTB4 *
Start AutoSequence number X RSAX, X=1, 2...9 RSBX, X=1, 2...9 *
Stop a Test STA STB *
Download Single Rate Test
Summary Data GSA1 GSB1
hh:mm:ss VVVVV ml AAAAA ml/h
where hh:mm:ss = infusion time
VVVVV = infused volume
AAAAA = average infusion rate
Download Dual Rate Test
Summary Data
GSA1 for RATE#1
GSA2 for RATE
#2
GSB1 for RATE#1
GSB2 for RATE
#2
hh:mm:ss VVVVV ml AAAAA ml/h
where:
hh:mm:ss = infusion time
VVVVV = infused volume
AAAAA = average infusion rate
Download PCA Pump Test
Summary Data GSA3 GSB3
VVVVV ml AAAAA ml/h mm:ss
where:
VVVVV = average bolus volume
AAAAA = avg bolus delivery rate
mm:ss = average lockout time
Download Occlusion Pressure
Test
Summary Data GSA4 GSB4
<type> PP.P psi pppp mmHg at mm:ss
where:
<type> = MAX, NRS or OVP
PP.P = occlusion pressure, PSI
pppp = occlusion pressure, mmHg
mm:ss = time of occl. pressure
Identify instrument connected to
COM2 IDENT IDENT
INFUTEST 2000,VER X.X,N
where:
X.X = Infutest software version
N = # of channels (1, 2, or 4)
Notes:
1. To control RSM channels Cand D, replace "A" and "B" characters in commands above with "C" and "D"
respectively.
2. For Run Sequence ("RS") commands, ensure that Infutest AutoSequence parameter "OUTPUT TO"is set
to "Printer". Alternatively, AutoSequence AUTO-OUTPUT must be set to "Off".
3. Do NOT use Infutest "DL" or "GR" commands with medTester.
Other DATREND Systems Test Equipment manuals
Popular Test Equipment manuals by other brands

Rohde & Schwarz
Rohde & Schwarz RTM3000 Series user manual

EXFO
EXFO IQ-2600B instruction manual
Keysight
Keysight M9380A Startup guide
IDEAL INDUSTRIES
IDEAL INDUSTRIES 61-796 Technical manual
Precision Digital Corporation
Precision Digital Corporation PD9501 manual

Graco
Graco Matrix 249269 instruction manual
