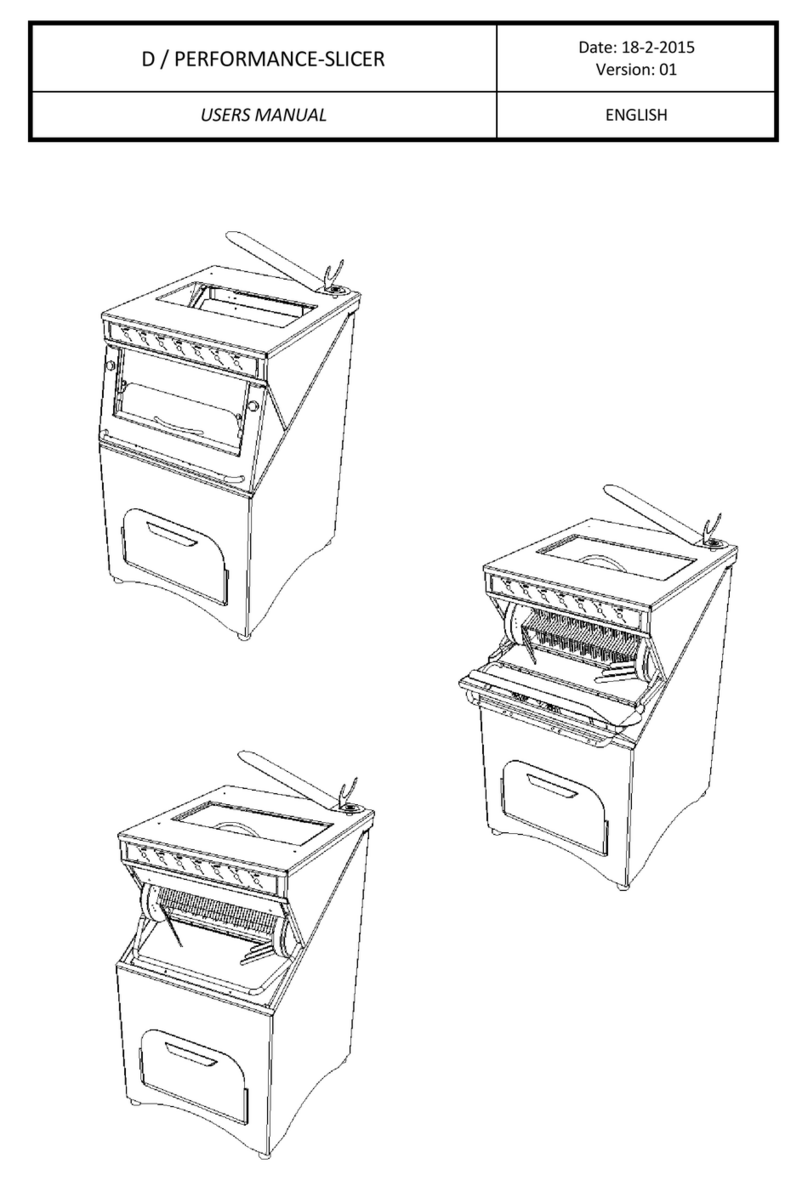
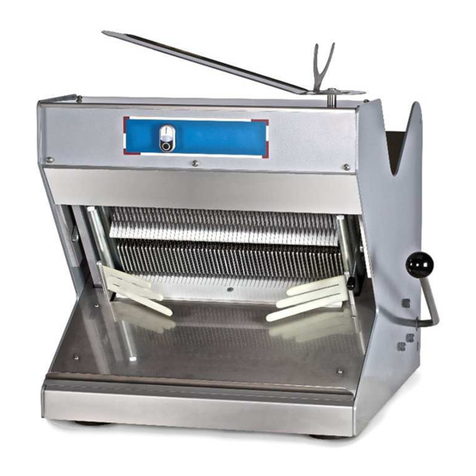
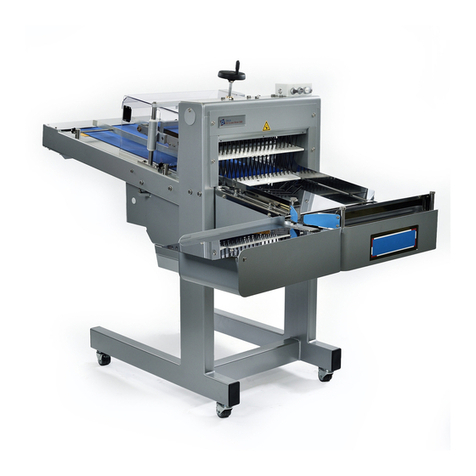
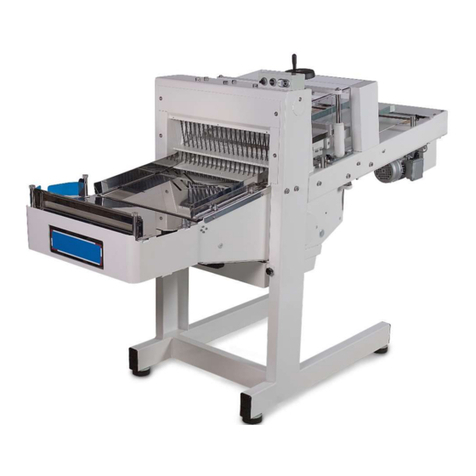
Daub Cross Slicer 208 User manual

CROSS-SLICER
208 Date: 23-2-2016
Version: 06
USERS MANUAL ENGLISH

CROSS-SLICER
208 Date: 23-2-2016
Version: 06
USERS MANUAL Page 2
GENERAL
It is important to read this manual and to comply with the suggestions and / or regulations
when unpacking, installing, using and maintaining the machine. If the machine is sold, this
manual should be handed over to the new owner.
Employees who have been instructed concerning the use of it and who have read this manual
may only operate the machine.
The guarantee obligation of Daub Bakery Machinery B.V. is only valid for defects which have
occurred in spite of a good use of the machine, such as described in this manual. Daub Bakery
Machinery B.V. can never be held responsible for damage or injuries to persons, if these are
caused by inaccurate use of the machine.
No part of this publication may be reproduced, multiplicated or distributed without the prior
written permission of the manufacturer.
Daub Bakery Machinery B.V. can not be held responsible for mistakes and / or misprints in this
manual.

CROSS-SLICER
208 Date: 23-2-2016
Version: 06
USERS MANUAL Page 3
TABLE OF CONTENTS
GENERAL............................................................................................................................. 2
TABLE OF CONTENTS ........................................................................................................ 3
1PRODUCT INFORMATION............................................................................................ 4
2DEFINITIONS ................................................................................................................ 5
2.1 Warnings................................................................................................................. 5
2.2 Description of parts of the machine......................................................................... 6
2.3Error notifications on diplay freq.converter .............................................................. 6
3SAFETY......................................................................................................................... 7
3.1 Safety regulations ................................................................................................... 7
3.2 Dangers because of mechanical components......................................................... 7
3.3 Dangers because of electrical components............................................................. 7
3.4 Dangers because of lack of hygiene........................................................................ 7
4TRANSPORT AND UNPACKING................................................................................... 8
4.1 Transport................................................................................................................. 8
4.2 Unpacking............................................................................................................... 8
5INSTALLATION.............................................................................................................. 9
5.1 Placing and maintenance........................................................................................ 9
5.2 Conditions............................................................................................................... 9
5.3 Electrical connection ............................................................................................... 9
5.4 Carrying off material...............................................................................................10
5.5 Taking out of operation...........................................................................................10
6PRODUCT DESCRIPTION...........................................................................................11
6.1 Purpose of the machine .........................................................................................11
6.2 Inadmissible use of the machine ............................................................................11
6.3 Description of the control panel..............................................................................12
6.4 Working of the control panel...................................................................................12
7WORKING WITH THE MACHINE .................................................................................13
7.1 Taking use of the machine .....................................................................................13
7.2 How to use the machine.........................................................................................14
8MAINTENANCE............................................................................................................15
8.1 Cleaning.................................................................................................................15
8.2 Maintenance ..........................................................................................................15
8.3 Instructions changing infeed belt............................................................................16
8.4 Instructions changing knives ..................................................................................16
9OILLUBRICATION OF THE KNIVES (OPTIONAL) .......................................................19
9.1 Adjustment of the oil quantity .................................................................................19
10 FAULT FINDING........................................................................................................20

CROSS-SLICER
208 Date: 23-2-2016
Version: 06
USERS MANUAL Page 4
1 PRODUCT INFORMATION
Manufacturer: Daub Bakery Machinery B.V.
Nieuwkerksedijk 10
5051 HT Goirle
P.O. box 51
5050 AB Goirle
The Netherlands
Tel: +31 13 5308700
Fax: +31 13 5308729
After sales service: Your supplier
Machine naming: CROSS-SLICER 208
Machine number: see machine plate
Date of manufacturing: see machine plate
Power: see machine plate
Voltage: see machine plate
Current: see machine plate
Weight: 240-260 kg
Sound: <65 dB(A)
Possible executions:
Voltage: 3*400V/50Hz+N, 3*230V/50Hz, 3*440V/60Hz+N, 3*230V/60 Hz
Other voltages on request
Technical information:
Depending the execution of the
slicer a maximum width of the bread
can be 40 cm or 52 cm
Options:
- Electronic oil lubrication of the knives
- Four wheels

CROSS-SLICER
208 Date: 23-2-2016
Version: 06
USERS MANUAL Page 5
2 DEFINITIONS
2.1 Warnings
The following signs warn the operator for a possible danger because of mechanical or
electrical components.
Figure 2.1.1 Figure 2.1.2
Figure 2.1.1 is a sticker which is used on the machine indicating the sharpness of the knives.
Do not come near the knives when machine is running.
Figure 2.1.2 is a sticker which is used on the machine indicating where electrical power is
present.
Before taking in use of the machine, you should carefully read this manual and follow the
instructions. Make sure that the warning stickers stay in good condition, and if necessary
replace them. When you use the machine for the first time, follow the instructions in this
manual carefully, so that you will not be surprised.
Do not allow unqualified employees to operate the machine.
Only qualified employees may operate the machine.
Be sure the machine is switched off during cleaning, maintenance and lubrication.
After maintenance of the machine do not forget to replace the safety covers, crumbtray and the
lid of the switchbox.
Qualified employees must do all repairs, mechanical as well as electrical.

CROSS-SLICER
208 Date: 23-2-2016
Version: 06
USERS MANUAL Page 6
2.2 Description of parts of the machine
Figure 3.3
2.3 Error notifications on diplay freq.converter
The display can show the following faults:
E05. OVERLOAD too much load OR too high speed OR blund knives
E14. GROUND FAULT ground not connected correctly, machine can be under voltage
Do not use the machine when E-notifications appears. Read first more information in
the supplied manual on the CD about the freq.converter which can be found in the
switch box.
Swivel to adjust
infeed height
Control panel
Outfeed
Infeed side
Switch box with
main power
switch
Infeed cover
Crumb tray

CROSS-SLICER
208 Date: 23-2-2016
Version: 06
USERS MANUAL Page 7
3 SAFETY
3.1 Safety regulations
Remove plug from the power supply when cleaning and/or maintaining the machine.
Only qualified or well instructed employees can do repairs of mechanical or electrical
nature.
Never put your hands into the infeed cover
Keep covers placed when operating the machine.
Do not use the machine when certain notifications (mentioned in chapter 3.4) appear in
the display. Read more about the error and what to do!
3.2 Dangers because of mechanical components.
Safety covers protect all parts. Keep the covers on during normal operation closed
When maintaining the machine and especially when removing parts without respecting
standard safety regulations, you might get injured when not carefull.
During cleaning be sure the power plug is not connected to a power suplly
By proper use of the machine as described in chapter 7 “Working with the machine” no
dangers will occur.
3.3 Dangers because of electrical components.
Please keep the boxes closed when machines is still connected to a power suplly
Do not use the machine when certain notifications (mentioned in chapter 2.4) appear
in the display. Read more about the error and what to do!
Broken or damaged cables and electrical componements should be replaced
immediately by an electricien.
3.4 Dangers because of lack of hygiene.
These dangers could occur if the measures, as described in chapter 11 “Maintenance”, will not
be followed up.

CROSS-SLICER
208 Date: 23-2-2016
Version: 06
USERS MANUAL Page 8
4 TRANSPORT AND UNPACKING
4.1 Transport
The machine must be transported in its original packing. In the means of transport the packing
must be secured against shoving. The machine should be moved with the right lift equipment.
Transport damage caused by not having followed above-mentioned regulations can not be
claimed. Moreover transport of goods is always at the buyers risk, unless explicitly agreed
otherwise.
Do not load anything on the top of the packing.
The machine should always be transported upright.
4.2 Unpacking
Leave the packing upright
Unpack the machine carefully and check if there are signs of transportation damages. Should
you find any, please inform the transport agent immediately. We advise you to take
photographs of the damage.
Remove the machine from the pallet by means of a lift truck or other lift equipment.
By shoving the arms of the lift truck under the foot of the machine, it can be taken from the
pallet
Weight of the machine is approximately 280 kgs.
Out of safety considerations it is advisable to keep enough distance when lifting the machine.

CROSS-SLICER
208 Date: 23-2-2016
Version: 06
USERS MANUAL Page 9
5 INSTALLATION
5.1 Placing and maintenance
Only qualified employees are allowed to install the machine.
The machine can only be used for its purpose: to slice bread products.
Guarantee can not be claimed if changes have been made to the machine without
the manufacturers permission and/or if not-original spare parts are used. The use of
not-original spare parts can damage the machine and/or harm the operator.
The machine should be placed on a solid and flat floor. The mahine can be levelled by
adjusting the height of the feet.
5.2 Conditions
Temperature: 15°C till 40°C
Relative humidity: 20% till 95%
5.3 Electrical connection
A qualified engineer must carry out the installation and an electrician should connect the
machine to the main supply. Always check first if the voltage and phases of the electrical
connection are in accordance with those of the machine (see machine plate). If this is not the
case, please contact your supplier.
Be aware the machine contains an electronic frequency converter, so stabilized power supply
is needed as well recommendable the power supply is galvanic separated.

CROSS-SLICER
208 Date: 23-2-2016
Version: 06
USERS MANUAL Page 10
5.4 Carrying off material
When carrying off a complete machine, parts or only the packing, you should comply with the
legal regulations. Specifications concerning the material of the parts can be asked for at the
manufacturers.
5.5 Taking out of operation
Switch off the machine by turning the main switch to “0”.
Then clean the machine and check the lubrication points of the moving parts as described in
chapter 8 “Maintenance”. Protect the machine for influences from outside and store it in a dry
and closed room.
Correct disposal of this product
This marking shown on the product or its literature indicates that it should not be disposed
with other household wastes at the end of its working life. To prevent possible harm to the
environment or human health from uncontrolled waste disposal, please separate this from
other types of wastes and recycle it responsibly to promote the sustainable reuse of
material resources.
Household users should contact either the retailer where they purchased this product, or
their local government office, for details of where and how they can take this item for
environmentally safe recycling.
Business users should contact their supplier and check the terms and conditions of the
purchase contract. This product should not be mixed with other commercial wastes for
disposal.

CROSS-SLICER
208 Date: 23-2-2016
Version: 06
USERS MANUAL Page 11
6 PRODUCT DESCRIPTION
6.1 Purpose of the machine
The purpose of the machine is to slice bread in pieces with equally thickness.
The machine is assembled from parts, wherein the parts that come in contact with the bread
are made of stainless steel, if desired Teflon-coated or are made from plastics approved for
use in the food industry.
6.2 Inadmissible use of the machine
The machine is only meant for activities such as described in paragraph 6.1.
The machine can only be cleaned with cleaning products, which are approved for use in the
foods industry. Never use corrosive products!
Be sure the machine is placed on a flat floor.
The machine can only be used when the covers and crumb tray are placed.
Never put your hands into the cover and knives when using the machine
(see figure 2.3).
Only use original spare parts.
Do not use bread or other products with metals, stones or other peculiar objects
inside.

CROSS-SLICER
208 Date: 23-2-2016
Version: 06
USERS MANUAL Page 12
6.3 Description of the control panel
Figure 7.3
Position Description
1. ON/OFF button bagblowing device
2. Speed control of infeedbelt
3. Reverse button of infeedbelt
4. START/STOP button of the machine
6.4 Working of the control panel
See figure 7.3
Position 1; On/Off button bagblowing device
With the button the ventilator can be start or shut off. When starting, the ventilator will blow the
plastic bags open to push the sliced bread into the bag
Position 2; Speed control infeedbelt
By rotating this knob the speed of the infeedbelt can be regulated. Depending on the hardness
of the bread the right speed must be selected.
Position 3; Reverse button of the infeedbelt
The last breads can not be sliced or sliced completely through. To take this bread away push
the reverse button; the belt will move reversly.
Position 4; Start/Stop button
Pressing the “I” the machine will start. By pressing the “O” the machine will stop
1
2
3
4

CROSS-SLICER
208 Date: 23-2-2016
Version: 06
USERS MANUAL Page 13
7 WORKING WITH THE MACHINE
7.1 Taking use of the machine
Check if the machine is placed correctly as described in chapter 5 “Installation”.
Check if it is necessary to clean the machine because of possible transport dirt.
Also check if the voltage on the machine plate is in accordance with that of your main supply.
Be sure the machine is place on a solid and flat floor.
Turn the main power to the machine by rotating the main switch to “I”
You can now proceed with the first test!
BE AWARE: after a couple of hours of use it is advisable the check the following items:
1. Tension of the knives as the complete construction may have set it self which can
cause a loss of tension.
- The tension of the knives is important for the results of the right thickness of the
sliced product
2. The position of the infeed belts; it is possible that the position of the belts are not in
the middle anymore thus moved to a side. See chapter 9.2 maintenance -> infeed
belt for more instructions

CROSS-SLICER
208 Date: 23-2-2016
Version: 06
USERS MANUAL Page 14
7.2 How to use the machine
Qualified employees older than 16 years may only operate the divider rounder.
1. Set the correct height of the infeed with the swivel (see figure 3.3) so the bread is
pushed a little bit in, but enough the belts will move the bread through the knives.
Adjust the height of the infeed belt only when the machine is running
2. Regulate the speed of the infeed belt to the type of bread by using knob 2, figure 7.2
a. Warm bread and hard crusted bread on a lower speed
If the result is not correct please check the tension of the knives or new knives
should be placed
3. On the frame of the infeed belt and the wrapping tray you will find bread guides. Those
bread guides can be adjusted easily to the length of the loaves.

CROSS-SLICER
208 Date: 23-2-2016
Version: 06
USERS MANUAL Page 15
8 MAINTENANCE
8.1 Cleaning
The numbers in the text refer to those in figure 3.3 .
Always turn the main switch to “0” (=off) before starting any kind of maintenance.
Never clean the machine with water. The use of water will cause oxidation and
electrical problems.
Only qualified employees may clean the machine.
Other persons should keep some distance.
Daily:
-Clean the crumb tray and the belts
-Clean the knives specially by using some oil to week the bread to remove more easily
Weekly
-Clean lower shaft and yellow belts and the space between the yellow belts (BA-15) and
the swivels (BA-08)
8.2 Maintenance
Periodically
- Every 400 hours grease bearings (BA-11). These bearings can be found by removing
the crumb tray, where the lower shaft is places. Each side you find to grease nipples
(BA-12)
- Check the tension of the V-belt (BD-04)
- Grease and check the tension of the chains
- If oil lubrication is used check the condition of the felt (see more information at chapter
10
- Infeed belt
The belt is tensioned in the factory and set in such a way that running over the red lines
is being avoided. If the belt does run over these lines do the following:
If the belt runs over the right, the right suspension bolt of the shaft driving roller (BH-25)
should be turned a quarter to the right. Let the belt run approximately 1 minute and
check again. Repeat the procedure until the belts runs straight.
Follow the same steps if the belt runs over to the left. Only now the left suspension bolt
should be turned a quarter to the right.
If the belt slips both suspensions bolts need to be turned
Check the chains between motor redactor and the infeed belt. It can be retightened
by damper BH-10

CROSS-SLICER
208 Date: 23-2-2016
Version: 06
USERS MANUAL Page 16
8.3 Instructions changing infeed belt
1. Remove the complete plug of the infeed bet, which is situated under the infeed belt
next to the switchbox
2. Remove the complete upper infeed belt construction (BJ)
3. Remove the guides (BH-19)
4. Remove the 4 bolts of the tubular rivets (BH-18). The table is loose now.
BE AWARE: Table is big and heavy
The table must be supported (by a second person)
5. Put the infeed table upside down on a working table
6. Loose damper (BH-10)
7. Remove cover (BH-07)
8. Remove the chain of the reductor
9. Loosen the bolts BH-25 and remove
10. Remove driving roller (BH-25) with chain
11. Remove roller BH-24
12. Remove the top of the infeed belt BH-07 with motor and reductor BH40+41
13. Remove infeed belt BH-20
8.4 Instructions changing knives
The knife should be positioned and tensioned correctly for the best slicing results
This should be done by a technician
Please read procedure carefully
Turn off the main switch of the machine
RECOMMENDABLE: Renew the yellow belts as well when changing the knives to have the
best slicing result
Before changing the knives do the following to get an impression of the right tension of the
knives; Press two knives to each other with thumb and forefinger. The tension you feel should
be at least the tension to the new knives.
1. remove the cover BL-01+02 and BK-07 at the top of the bach side of the machine
2. Remove upper pressure plate BJ-14 complete with support BJ-16
3. By removing the 4 bolts at the side of the frame (BK-10) and loosen the 2 bolts at the
inner side at the bottom of the out feed table you can tilt down the front table and lift it
out of the hooks. This is to be needed to have a good working space
4. Turn the 2 bolts which are behind the round plates (BK-08) 2 or 3 turns loose.

CROSS-SLICER
208 Date: 23-2-2016
Version: 06
USERS MANUAL Page 17
5. Turn the bolts at the the top of the machine by one turn each. The upper shaft BA-03
will come down horizontally. After 14 turns of eah bolt the blades can be taken out of
the knife holder (BA-06)
6. While removing the knives do not try to move the top swivels BA-05.
First check how the knives are placed. Remove the knives which should be replaced
and place the new knives.
In case you remove all the knives place first 2 knives most left and right to form a
crossing frame (see picture 7.1)
Figuur 7.1
There is more distance S at the right side than at the left side. The knife at the right is
placed one groove further in the knife board.
Now the knives can be placed one to each groove in the white knife guide boards and each to
a cross set of knife holders. The knives must be as close as possible positioned to the long
side of the knife holder (see detail in figure 7.2)
7. The knife holder should be free of the yellow belts after putting tension to the knives. If
not the belts will be damaged. Place before tensioning the belts a small piece of plastic
about 1 cm thick between the belts and the knife holder (see figure 7.2)
8. Now put the tension to the knives by turning the bolts on top of the frame stroke by
stroke. Aftre 14 strokes you are back to the original position (see 5.). Check the tension
to the knives with your fingers.
9. Check if the yellow belts are in the middle of the upper and lower swivels (BA-05 and
BA-08).

CROSS-SLICER
208 Date: 23-2-2016
Version: 06
USERS MANUAL Page 18
Figuur 7.2
Before putting the definitive tension to the knives check the distance between the knives. The
distance should be equal. If not move the two knife holder more to the correct position.
10. Now the tension can be pressed up
11. Remove the plastic pieces. Tighten the knives to its desired tension.
12. Check the distance of the yellow belts in the knife holder. Move the aluminium belt
guides with a screw driver into the opening (see figure 7.3)
Figure 7.3

CROSS-SLICER
208 Date: 23-2-2016
Version: 06
USERS MANUAL Page 19
Correct tension of the knives.
1. In case the tension of the knives are not sufficient the slices will be curved.
2. In case the knives are tensioned too much you will hear a knocking sound.
9 OILLUBRICATION OF THE KNIVES (OPTIONAL)
By use of a breadslicer with oil lubrication the knives will be greased through the upper knife
guide (BJ-14) in which a a piece of felt will be sprayed with oil. Due the capillary action of the
felt , the felt will saturate completely with oil. As lthe knives sliedes alang the felt the knives will
be greased.
Depending on the type of bread the felt must be cleaned or replaced regularly. We advise to do
it monthly.
The polution of the felt is less with cooled down bread.
9.1 Adjustment of the oil quantity
The upply of oil can be arranged by a timer in the switch box (BZ-21). The timing relay has a
“T-on” and a “T-off” turning knob. By turning the “T-off”-knob the requested oil quantity can be
set. The pause time will change, as well the oil quantity in time.
Do not use the “T-on”-knob as this one is regulating the running of the oil pump.
The yellow push button at the side of the switch box makes it possible to turn the oil pump on
or off. We advise not to use the machine too long without oil because the felt will dry up and
lose its working. Furthermore the knives will lost its lubrication and may become in contact with
the steel of the upper knife guide. A metallic contact appears which leads to a quicker wear of
the knives.
If the oil reservoir is almost empty the red warning light in the switch box will light up.
Fill the reservoir with an oil which may be used in the food enverimont, but as well harsh / resin
free to avoid the oil to get hard in time, which will harm the working of the pump, tubes and the
felt.

CROSS-SLICER
208 Date: 23-2-2016
Version: 06
USERS MANUAL Page 20
10 FAULT FINDING
The following faultfindings could appear in the display of the freq.controller
-E01 Overcurrent
Check if the motor is overloaded
-Transport belts are too tight
-Chains are too tight
-E05 Overload
Check if the motor is overloaded
-Transport belts are too tight tensioned or rubbing
-Chains are too tight or blocked
- E07 Overvoltage
Check if the power supply to the freq.controller is between 220 V and 240 Volt
Check the connection of the neutral (blue wire) at the power suplly
- E09 Undervoltage
Check power suplly
E14 Ground fault
Check earth/ground connection or short circuit
- E21 Temperature too high
Check the temperature of the surroundings is lower then 40 degrees as well in the
switch box itself
More information regarding the freq.controller can be found on the CD supllied in the
switchbox.
Table of contents
Other Daub Commercial Food Equipment manuals
Popular Commercial Food Equipment manuals by other brands

CombiSteel
CombiSteel 700 Series User and maintenance instructions

Casselin
Casselin CCAPS1G manual

Bonnet Neve
Bonnet Neve OFFLIP 3 ECO User instructions

Modular
Modular Simpli-Flex SFP2000 Instructions for use

Scharfen
Scharfen TC 11 operating instructions

Polar Electro
Polar Electro CC611 instruction manual