DB Industries DELTA 2 User manual

© Copyright 2008, DB Industries, Inc.
Form No.:5902502 Rev: E
GB READ GENERAL INSTRUCTIONS FOR USE AND MAINTENANCE BEFORE USING THIS EQUIPMENT: 5902392
D BITTE LESEN SIE SICH DIE ALLGEMEINE GEBRAUCHS- UND WARTUNGSANLEITUNG DURCH, BEVOR SIE DIESES PRODUKT
VERWENDEN: 5902392
SLÄS ALLMÄNNA ANVISNINGAR FÖR ANVÄNDNING OCH UNDERHÅLL INNAN DU ANVÄNDER DEN HÄR UTRUSTNINGEN: 5902392
I PRIMA DI USARE QUESTA ATTREZZATURA LEGGERE LE ISTRUZIONI PER L'USO E LA MANUTENZIONE: 5902392
P LEIA AS INSTRUÇÕES GERAIS DE UTILIZAÇÃO E MANUTENÇÃO ANTES DE UTILIZAR ESTE EQUIPAMENTO: 5902392
E LEA LAS INSTRUCCIONES GENERALES DE USO Y MANTENIMIENTO ANTES DE UTILIZAR ESTE EQUIPO: 5902392
CZ PŘED POUŽITÍM VÝSTROJE SI PŘEČTĚTE OBECNÉ POKYNY K POUŽITÍ A ÚDRŽBĚ: 5902392
DK LÆS DEN GENERELLE ANVISNING FOR BRUG OG VEDLIGEHOLDELSE, INDEN DETTE UDSTYR TAGES I BRUG: 5902392
FIN LUE YLEISET KÄYTTÖ- JA HUOLTO-OHJEET ENNEN LAITTEEN KÄYTTÖÄ: 5902392
F LIRE LE MODE D'EMPLOI ET D'ENTRETIEN AVANT D'UTILISER CE MATÉRIEL : 5902392
NLES LES GENERELL BRUKS- OG VEDLIKEHOLDSANVISNING FØR BRUK AV DETTE UTSTYRET : 5902392
RUS ПРЕЖДЕ ЧЕМ ПОЛЬЗОВАТЬСЯ ДАННЫМ СНАРЯЖЕНИЕМ, ПРОЧИТАЙТЕ ОБЩИЕ ИНСТРУКЦИИ ПО ЭКСПЛУАТАЦИИ И
ТЕХНИЧЕСКОМУ ОБСЛУЖИВАНИЮ: 5902392
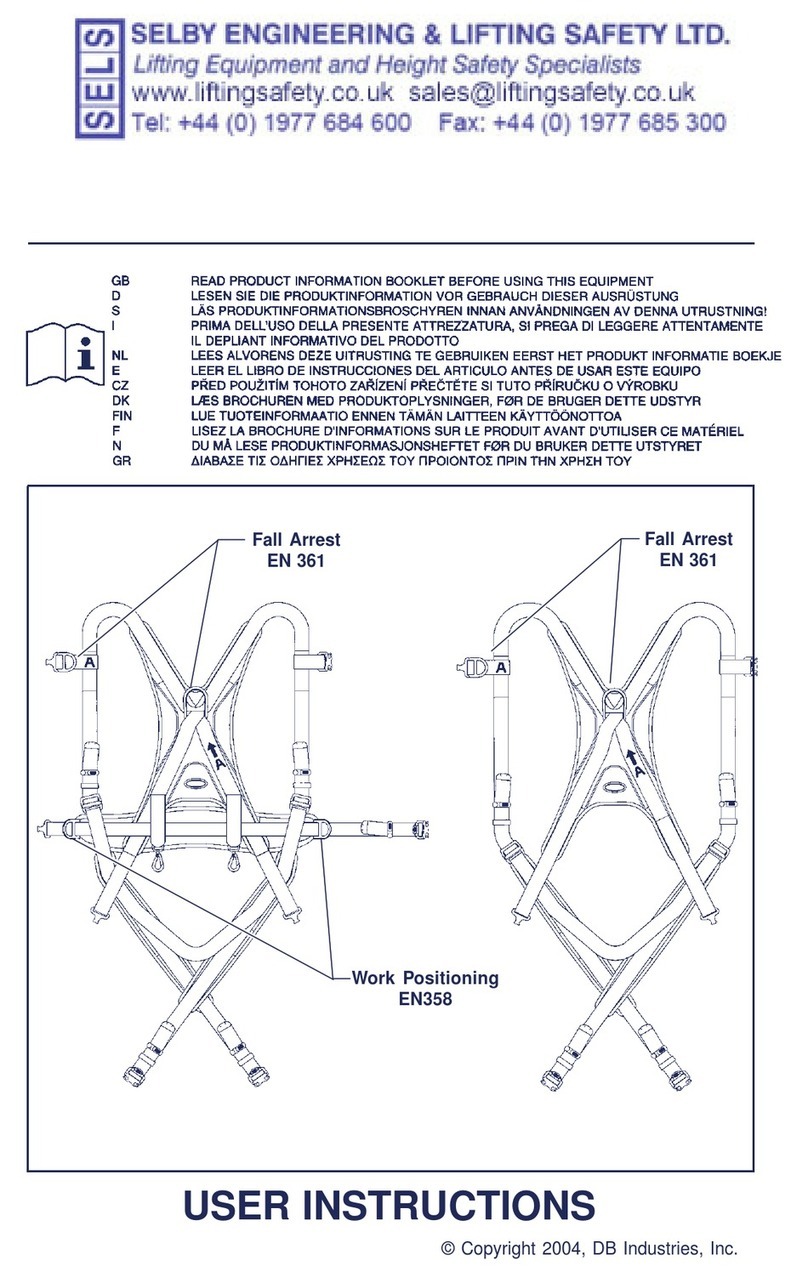
USER INSTRUCTIONS
Full Body Fall Arrest Harness
EN 1497:2007
EN 358:1999 EN 358:1999
EN 361:2002
BSI Product Services
0086
Kitemark House,
Maylands Ave.,
Hemal Hempstead,
HP2 4SQ, UK
TUV NEL Ltd. 0320
East Kilbride, Glasgow G75
0QU, UK
SATRA 0321
Wyndam Way
Telford Way
Kettering
Northants
NN16 8SD, UK
98 8
EN 361:2002

2
AB
F
DE
1
2
3
4
3
5
C
23
4
6
G
H
I
J
2
J

3
9
7
8
K
L-1 L-2
11
10
13
L
12

4
MN
14
17
16
15

5
PURPOSE: DBI-SALA full body harnesses are to be used as components in personal
fall arrest, restraint, work positioning, or rescue systems. See Glossary in General
Instruction (5902392) for identication of numbered items in a white box.
WARNING: Do not alter or intentionally misuse this equipment. Consult Capital Safety
when using this equipment in combination with components or subsystems other than
those described in this instruction. Some subsystem and component combinations may
interfere with the operation of this equipment. Use caution when using this equipment
around moving machinery, electrical and chemical hazards, and sharp edges.
DONNING THE HARNESS
STEP 1. Pick up the harness by the back D-ring (1). Ensure the straps are not
twisted. Figure A
Step 2. Pass your free arm through the shoulder straps (2) keeping the chest strap
(3) buckle to the front and the D-ring to the back. Pass your other arm
through the shoulder straps on the other side. Position the shoulder straps
on top of your shoulder. Figure B
Step 3. Draw the leg straps (4) between the legs and connect the respective
buckles. Figure C
Step 4. Fasten the chest strap (3) buckle. The chest strap should be 6 inches
(15.2 cm) down from the top of shoulders. Pass excess strap through the
loop keepers. Figure D
Step 5. Adjust shoulder straps (2) to a snug t by pulling excess strap through the
parachute buckles (5) on each side of the harness. Figure E
Step 6. If a belt (6) is present, bring the ends of the belt together at your waist and
fasten the buckle. Adjust the belt to a snug and comfortable t. Figure F
Buckle operation:
Step 7. Pass the male portion of the pass-through buckle completely through the
female portion and then position it on top of the female portion. Adjust the
straps to a snug, comfortable t. Figure G
Step 8. Insert the tongue of the quick connect buckle into the receptor until you
hear an audible “Click”. Give a sharp tug on the strap to ensure a secure
connection. Figure H
Step 9. Pull the strap with grommets through the buckle until snug and
comfortable, then insert the metal tongue into the closest grommet.
Figure I
Step 10. Tighten the straps by pulling the free end of the webbing away from the
buckle and loosen the strap by forcing webbing from the free end of the
strap back through the buckle. Figure J
Recommended Accessories: EN341 Descender, EN353 Guided Type Fall Arresters,
EN534 Lanyards, EN355 Shock Absorbers, EN360 Fall Arrest Devices, EN363 Fall
Arrest Systems, EN362 Connectors
INSPECTION
The i-Safe™ RFID tag (7) on this harness can be used in conjunction with the i-Safe
handheld reading device and the web based portal to simplify inspection and inventory
control and provide records for your fall protection equipment. To reveal the i-Safe
tag, peel back the velcro wrap around cover (8) and fold the labels (9) away from the
tag (7). See Figure K.
FREQUENCY: Before each use inspect the full body harness according to the inspection
steps below. The harness must be inspected by a competent person, other than
the user, at least annually. If you are a rst-time user, contact a Customer Service
representative in the US at 800-328-6146 or in Canada at 800-387-7484 or if you
have already registered, go to: www.capitalsafety.com/isafe.html. Follow instructions
provided with your i-Safe handheld reader or on the web portal to transfer your data to
your web log.
GB

6
Record the results of each formal inspection in the inspection and maintenance log in
the General Instruction (5902392) or use the i-Safe™ inspection web portal to maintain
your inspection records.
IMPORTANT: If the full body harness has been subjected to fall arrest or impact
forces it must be immediately removed from service and destroyed.
IMPORTANT: Extreme working conditions (harsh environments, prolonged use, etc.)
may require increasing the frequency of inspections.
INSPECTION STEPS:
Step 1. Inspect harness hardware (buckles, D-rings, back pad, loop keepers);
these items must not be damaged, broken, distorted, and must be free of
sharp edges, burrs, cracks, worn parts, or corrosion. PVC coated hardware
must be free of cuts, rips, tears, holes, etc. in the coating to ensure non-
conductivity. Ensure that the release tabs of the buckle work freely and that
a click is heard when the buckle engages. Inspect parachute buckle spring.
Step 2. Inspect webbing; material must be free of frayed, cut, or broken bers.
Check for tears, abrasions, mold, burns, or discoloration. Inspect stitching;
check for pulled or cut stitches. Broken stitches may be an indication that
the harness has been impact loaded and must be removed from service.
When performing the annual formal inspection on the XP models of the
ExoFit harness, remove the back pad and leg strap pads to facilitate
inspection of the webbing.
Step 3. Inspect the labels: All labels should be present and fully legible.
Step 4. Inspect each system component or subsystem according to manufacturer’s
instructions.
Step 5. Record the inspection date and results in the inspection and maintenance
log in the General Instruction (5902392).
Step 6. Inspect the impact indicator on the Delta Harness models with stand-up
“D” and impact indicator. See Figure L. L-1 shows the harness in a normal
condition. The D-ring (10) is seated in the pivot (11). If the dorsal D-ring of
the harness has experienced an impact (12)(L-2), a red-colored area at the
base of the D-ring will become visible (13) indicating that an impact has
occurred. The impact indicator cannot be reset and the harness must be
removed from service and destroyed.
If inspection reveals a defective condition, remove the unit from service immediately
and destroy it.
NOTE: Only DBI-SALA or parties authorized in writing may make repairs to this
equipment.
MAINTENANCE, SERVICING, STORAGE
A. WASHING INSTRUCTIONS FULL BODY HARNESS:
(See B. for Arc Flash Full Body Harness Washing Instructions)
Step 1. Spot clean the Delta full body harness with water and a mild soap solution.
The harness may be laundered by using a bleach-free detergent. Water
temperature for wash and rinse must not exceed 70° C (160° F).
Step 2. To launder the full body harness, remove the pads. See Figure M. To
remove the pads, undo the snaps and zippers (14). The pads will fall away
from the harness straps. Only one leg pad is shown for clarity (15).
Step 3. Place the harness in the supplied laundry bag. The bag is designed to
prevent entanglement of harnesses and to protect the washing machine
from damage. Use of the laundry bag to wash the pads is optional.
Note: Use a bleach-free detergent when washing both the harness and the
pads.
Step 4. Harness and pads may be air dried or tumble dried on low heat (not greater
than 90° C (200° F).

7
Step 5. Replace the pads before using the harness. See Figure N. To replace the
Comfort Pads, lay out the harness as shown and place the pads under the
straps. Then wrap the zippered aps (16) over the straps and close the
snaps and zippers. Note: The lower snap closure on the leg strap pad must
connect between the layers of the seat strap (17). Only one leg pad is
shown for clarity.
B. WASHING INSTRUCTIONS ARC FLASH FULL BODY HARNESS:
Step 1. Spot clean the Delta full body harness. Lay the webbing on a at surface
and clean each side using a mild bleach-free detergent with a sponge or
light brush, so as not to damage or bulk up the laments. Rinse thoroughly.
Water temperature for wash and rinse must be cool or cold.
IMPORTANT: ASTM F887-2004 rated harnesses should use a mild bleach-free
detergent rather than soap; as soap may leave a residue which could affect ame
resistance.
Step 2. To clean the comfort pads (Model 9501207), remove the pads. See Figure
M. Undo the snaps and zippers (14). The pads will fall away from the
harness straps. Only one leg pad is shown for clarity (15).
Step 3. Harness and pads should be thoroughly air dried before using. Do not dry
in a mechanical dryer.
IMPORTANT: A wet harness will have reduced strength.
Step 4. See step 5 above.
Step 5. See step 6 above.
IMPORTANT: An excessive buildup of dirt, paint, etc. may prevent the full body
harness from working properly, and in severe cases degrade the webbing to a point
where it weakens and should be removed from service.
More information on cleaning is available from Capital Safety. If you have questions
concerning the condition of your harness, or have any doubt about putting it into
service contact Capital Safety.
MATERIALS
Standards: All harnesses marked with ASTM F887-2004 meet all testing requirements
of the standard.
Webbing:
Standard Harness: 26.6 kN (6,000 lb.) tensile strength Polyester
Arc Flash Harness: 31 kN (7,000 lb.) tensile strength Nylon; 31 kN (7,000 lb)
tensile strength Nomex® covered Kevlar®
Pad and Label Cover: All outer fabric is Nomex® and Kevlar® blend. Hook and loop
fasteners are re resistant.
Optional Accessories:
• Hip pad with side D-rings
• Nomex® covered Kevlar® webbing
• Non-sparking/Non-conductive PVC coated hardware
• Arc-rated hip, leg, and back pads
• Polyurethane coated, arc-rated dorsal web loop
Note: Nomex® and Kevlar® are owned by DuPont

8
VERWENDUNGSZWECK: DBI-SALA-Auffanggurte können als Komponenten für die
Fallsicherung, Sicherung und Positionierung von Personen oder für Rettungssysteme
eingesetzt werden. Siehe Glossar in der Allgemeinen Anleitung (5902392), um
nummerierte Teile in der weißen Schachtel zu identizieren.
WARNHINWEIS: Diese Ausrüstung darf nicht verändert oder unsachgemäß gebraucht werden.
Wenden Sie sich an Capital Safety, bevor Sie diese Ausrüstung mit anderen als in diesem Handbuch
beschriebenen Komponenten oder Teilsystemen verwenden. Bestimmte Kombinationen von
Teilsystemen und Komponenten können die Funktion dieser Ausrüstung beeinträchtigen. Seien Sie
vorsichtig, wenn Sie diese Ausrüstung im Bereich von beweglichen Maschinen und scharfen Kanten
sowie bei Bestehen von elektrischen und chemischen Gefahren verwenden.
ANLEGEN DES AUFFANGGURTS
Schritt 1. Nehmen Sie den Auffanggurt am rückwärtigen D-Ring (1) auf. Stellen Sie sicher, dass
die Gurte nicht verdreht sind. Abbildung A
Schritt 2. Führen Sie den freien Arm durch die Schulterriemen (2). Der Schnellverschluss
des Brustgurts (3) muss sich auf der Vorderseite und der D-Ring auf dem Rücken
benden. Führen Sie den anderen Arm durch die Schulterriemen auf der anderen
Seite. Positionieren Sie die Schulterriemen auf der Oberseite Ihrer Schulter.
Abbildung B
Schritt 3. Führen Sie die Beingurte (4) zwischen den Beinen hindurch und xieren Sie sie mit
den entsprechenden Gurtverschlüssen. Abbildung C
Schritt 4. Schließen Sie den Brustgurt (3). Der Brustgurt muss sich ca. 15 cm unterhalb der
Oberkante der Schultern benden. Ziehen Sie die überschüssige Gurtlänge durch die
Gurtführungen. Abbildung D
Schritt 5. Ziehen Sie die Schulterriemen fest (2), indem Sie die überschüssige Gurtlänge durch
die Klemmschnallen (5) auf jeder Seite des Auffanggurts ziehen. Abbildung E
Schritt 6. Wenn ein Leibriemen (6) vorhanden ist, führen Sie beide Enden des Riemens vor dem
Bauch zusammen und schließen Sie den Gurtverschluss. Straffen Sie den Riemen,
sodass er fest und bequem sitzt. Abbildung F
Handhabung des Gurtverschlusses:
Schritt 7. Führen Sie das schmale Teil des Gurtverschlusses durch das breite Teil und platzieren
Sie es auf dem breiten Teil. Straffen Sie die Gurte so, dass sie fest und bequem
sitzen. Abbildung G
Schritt 8. Schieben Sie die “Verschlusslasche” des Schnellverschlusses in das Verschlussstück,
bis sie hörbar einrastet. Ziehen Sie ruckartig am Gurt, um eine sichere Verbindung
herzustellen. Abbildung H
Schritt 9. Ziehen Sie den Ösengurt durch den Verschluss ziehen und straffen Sie ihn. Stecken
Sie dann den Metalldorn in die nächstliegende Öse. Abbildung I
Schritt 10.
Ziehen Sie zum Straffen der Gurte das freie Gurtende vom Verschluss weg. Um die
Gurte zu lockern, schieben Sie den Gurt vom freien Gurtende ausgehend durch den
Verschluss zurück. Abbildung J
Empfohlenes Zubehör: EN 341 Abseilgeräte, EN 353 mitlaufendes Auffanggerät, EN 354
Verbindungsmittel, EN 355 Falldämpfer, EN 360 Höhensicherungsgeräte, EN 363 Auffangsysteme,
EN 362 Verbindungselemente
ÜBERPRÜFUNG
Der i-Safe™-RFID-Tag (7) auf diesem Auffanggurt kann in Verbindung mit dem i-Safe-Handlesegerät
und dem webbasierten Portal verwendet werden, um die Überprüfung und Bestandsprüfung zu
vereinfachen und Aufzeichnungen für Ihre Fallsicherungsausrüstung zu liefern. Um den i-Safe-Tag
freizulegen, ziehen Sie die Rückseite der Klettumhüllung (8) ab und falten Sie die Etiketten (9) in die
vom Tag (7) abgewandte Richtung. Siehe Abbildung K.
HÄUFIGKEIT: Überprüfen Sie den Ganzkörper-Auffanggurt vor jedem Gebrauch anhand des
folgenden Prüfverfahrens. Der Auffanggurt muss von einem Sachverständigen, bei dem es sich nicht
um den Benutzer handelt, einmal jährlich überprüft werden. Wenn Sie den Auffanggurt erstmals
gebrauchen, wenden Sie sich telefonisch unter 800-328-6146 (USA) oder unter 800-387-7484
(Kanada) an einen Kundendienstrepräsentanten. Wenn Sie sich bereits registriert haben, wechseln
Sie zu: www.capitalsafety.com/isafe.html. Befolgen Sie die mit Ihrem i-Safe-Handlesegerät
D

9
gelieferten Anweisungen bzw. die Anweisungen auf dem Webportal, um Ihre Daten an das
Webprotokoll zu übermitteln.
Erfassen Sie die Ergebnisse jeder formellen Überprüfung im Prüf- und Wartungsprotokoll der
allgemeinen Anleitung (5902392) oder verwenden Sie das i-Safe™-Überprüfungs-Webportal, um
Ihre Aufzeichnungen zu speichern.
WICHTIG: Wenn der Ganzkörper-Auffanggurt einer Fallsicherung oder Aufprallkräften ausgesetzt
wurde, muss er sofort ausgetauscht und unbrauchbar gemacht werden.
WICHTIG: Extreme Arbeitsbedingungen (raue Umweltbedingungen, andauernde Verwendung usw.)
können eine häugere Überprüfung erforderlich machen.
ÜBERPRÜFUNGSSCHRITTE:
Schritt 1. Überprüfen Sie die Komponenten des Auffanggurts (Gurtverschlüsse, D-Ringe,
Rückenpolster, Schlaufen). Diese dürfen nicht beschädigt, gebrochen oder
verbogen sein und dürfen keine scharfe Kanten, Einkerbungen, verschlissenen Teile
oder Korrosion aufweisen. PVC-beschichtete Teile müssen frei von Einschnitten,
Rissen, Abnutzung, Löchern usw. in der Beschichtung sein, um das Nichtleiten zu
gewährleisten. Vergewissern Sie sich, dass die Freigabelaschen des Gurtverschluss
ordnungsgemäß funktionieren und ein Klicken zu hören ist, wenn der Gurtverschluss
einschnappt. Überprüfen Sie die Feder der Klemmschnalle.
Schritt 2. Überprüfen Sie das Gurtband; das Material darf keine zerfransten, abgeschnittenen
oder gebrochenen Fasern aufweisen. Prüfen Sie das Gurtband auf Abnutzung,
Abwetzungen, Verformungen und Verfärbungen. Prüfen Sie die Nähte auf
ausgezogene oder gerissene Fäden. Defekte Nähte können darauf hinweisen, dass
der Auffanggurt einer hohen Belastung ausgesetzt wurde und ausgetauscht werden
muss. Entfernen Sie bei der jährlichen formellen Überprüfung der XP-Modelle des
ExoFit-Auffanggurts das Rückenpolster und die Beingurtpolster, um die Überprüfung
des Gurtbands zu erleichtern.
Schritt 3. Überprüfen Sie die Etiketten. Alle Etiketten müssen vorhanden und vollständig lesbar
sein.
Schritt 4. Überprüfen Sie alle System- oder Teilsystemkomponenten entsprechend den
Herstelleranweisungen.
Schritt 5. Erfassen Sie das Prüfdatum und -ergebnis im Prüf- und Wartungsprotokoll der
allgemeinen Anleitung (5902392).
Schritt 6. Die Belastungsanzeige an den Delta Harness-Modellen mit aufrechtem D-Ring und
Belastungsanzeige überprüfen. Siehe Abbildung L. L-1 zeigt den Auffanggurt im
normalen Zustand. Der D-Ring (10) sitzt im Drehgelenk (11). Wenn der dorsale
D-Ring des Auffanggurts einer hohen Belastung ausgesetzt wurde (12)(L-2), wird
eine rot gefärbte Fläche an der Basis des D-Rings sichtbar (13). Dies gibt an, dass
eine hohe Belastung aufgetreten ist. Die Belastungsanzeige kann nicht zurückgesetzt
werden. Der Auffanggurt muss ausgetauscht und unbrauchbar gemacht werden.
Wenn die Prüfung einen Defekt ergibt, tauschen Sie das Produkt aus und machen Sie
es unbrauchbar.
HINWEIS: Reparaturen an dieser Ausrüstung dürfen nur von DBI-SALA oder schriftlich
zugelassenen Parteien vorgenommen werden.
PFLEGE, WARTUNG, LAGERUNG
A. WASCHANLEITUNG FÜR GANZKÖRPER-AUFFANGGURT:
(Waschanleitung für Arc Flash-Ganzkörper-Auffanggurt siehe B.)
Schritt 1. Entfernen Sie Flecken vom Delta-Ganzkörper-Auffanggurt mit Wasser und einer
milden Seifenlösung. Der Auffanggurt kann mit einem bleichmittelfreien Waschmittel
gewaschen werden. Die Wassertemperatur beim Waschen und Spülen darf 70° C
(160° F) nicht übersteigen.
Schritt 2. Entfernen Sie vor dem Waschen des Ganzkörper-Auffanggurts die Polster. Siehe
Abbildung M. Um die Polster zu entfernen, öffnen Sie die Druckknöpfe und die
Reißverschlüsse (14). Die Polster lösen sich von den Gurten. Zur besseren Darstellung
wird nur ein Beinpolster (15) gezeigt.

10
Schritt 3. Platzieren Sie den Auffanggurt im mitgelieferten Waschbeutel. Der Beutel verhindert,
dass sich die Auffanggurte verheddern und schützt die Waschmaschine vor
Beschädigungen. Der Waschbeutel kann auch zum Waschen der Polster verwendet
werden. Hinweis: Verwenden Sie zum Waschen des Auffanggurts und der Polster ein
bleichmittelfreies Waschmittel.
Schritt 4. Der Auffanggurt und die Polster können an der Luft oder bei niedriger Temperatur im
Trockner (max. 90° C (200° F)) getrocknet werden.
Schritt 5. Setzen Sie die Polster vor Gebrauch des Auffanggurts wieder ein. Siehe Abbildung
N. Um die Komfortpolster wieder einzusetzen, legen Sie den Auffanggurt wie
gezeigt aus und platzieren Sie die Polster unter den Gurten. Wickeln Sie danach die
Reißverschlussbänder (16) um die Gurte und schließen Sie die Druckknöpfe und
Reißverschlüsse. Hinweis: Der untere Druckknopfverschluss auf dem Beingurt muss
zwischen den Schichten des Sitzgurtes (17) verschlossen werden. Zur besseren
Darstellung wird nur ein Beinpolster gezeigt.
B. WASCHANLEITUNG FÜR ARC FLASH-GANZKÖRPER-AUFFANGGURT:
Schritt 1. Entfernen Sie jegliche Flecken vom Delta-Ganzkörper-Auffanggurt. Legen Sie das
Gurtband auf einer ebenen Oberäche aus und reinigen Sie jede Seite mit einem
bleichmittelfreien Reinigungsmittel. Verwenden Sie einen Schwamm oder eine weiche
Bürste, um die Fasern nicht zu beschädigen oder zu lockern. Spülen Sie das Gurtband
sorgfältig aus. Verwenden Sie zum Waschen und Spülen lauwarmes oder kaltes
Wasser.
WICHTIG: Für nach ASTM F887-2004 zugelassene Auffanggurte sollte ein mildes, bleichmittelfreies
Reinigungsmittel anstelle von Seife verwendet werden. Seife kann Rückstände hinterlassen, welche
die Flammbeständigkeit beinträchtigen können.
Schritt 2. Entfernen Sie zur Reinigung der Komfortpolster (Modell 9501207) die Polster. Siehe
Abbildung M. Öffnen Sie die Druckknöpfe und Reißverschlüsse (14). Die Polster lösen
sich von den Gurten. Zur besseren Darstellung wird nur ein Beinpolster (15) gezeigt.
Schritt 3. Der Auffanggurt und die Polster sollten vor dem Gebrauch vollständig an der Luft
getrocknet werden. Trocknen Sie sie nicht in einem mechanischen Trockner.
WICHTIG: Nasse Auffanggurte haben eine eingeschränkte Festigkeit.
Schritt 4. Siehe obigen Schritt 5.
Schritt 5. Siehe obigen Schritt 6.
WICHTIG: Übermäßige Ablagerungen von Schmutz, Farbe usw. können die ordnungsgemäße
Funktion des Auffanggurts beeinträchtigen und das Gurtband angreifen, sodass es an Festigkeit
verliert und nicht mehr verwendet werden kann.
Weitere Informationen zur Reinigung erhalten Sie von Capital Safety. Wenn
Sie Fragen zum Zustand Ihres Auffanggurtes oder Zweifel bezüglich der
Verwendungsfähigkeit haben, wenden Sie sich an Capital Safety.
MATERIALIEN
Normen: Sämtliche Auffanggurte mit ASTM F887-2004-Kennzeichnung erfüllen alle
Prüfanforderungen der Norm.
Gurtband:
Standard-Auffanggurt: Polyester mit 26,6 kN (6000 lb) Dehnfestigkeit
Arch Flash-Auffanggurt: Nylon mit 31 kN (7000 lb) Dehnfestigkeit; Nomex®-beschichtetes Kevlar®
mit 31 kN (7000 lb) Dehnfestigkeit
Polster und Etikettenabdeckung: Sämtliche äußeren Gewebe bestehen aus einer Nomex®- und
Kevlar®-Mischung. Die Haken und Schlaufen sind feuerbeständig.
Optionales Zubehör:
• Hüftpolster mit seitlichen D-Ringen
• Nomex®-beschichtetes Kevlar®-Gurtband
• Funkenfreie/nichtleitende PVC-beschichtete Komponenten
• Lichtbogenbeständige Hüft-, Bein- und Rückenpolster
• Polyurethan-beschichtete, lichtbogenbeständige Rückenstegschlaufe
Hinweis: Nomex® und Kevlar® sind Marken von DuPont.

11
ÄNDAMÅL: DBI-SALA helkroppsselar är avsedda att användas som komponenter
i personligt fallskyddssystem, begränsningssystem, arbetspositionerings- eller
räddningssystem. Se Ordlista i Allmän instruktion (5902392) för identiering av
numrerade föremål i en vit ruta.
VARNING! Ändra eller missbruka inte avsiktligt den här utrustningen. Rådfråga Capital
Safety om du vill använda denna utrustning med komponenter eller subsystem som
inte beskrivs i den här anvisningen. Vissa subsystem och komponentkombinationer
kan störa utrustningens funktionsduglighet. Var försiktig vid användning av den här
utrustningen runt maskiner, elektriska och kemiskt riskfyllda miljöer samt skarpa
kanter.
SÄTTA PÅ SELEN
Steg 1. Lyft upp selen med den bakre D-ringen (1). Kontrollera att remmarna inte är
tvinnade. Figur A
Steg 2. För din fria arm genom axelremmarna (2) med bröstremspännet (3) från
och D-ringen på ryggen. För den andra armen genom axelremmarna på den
andra sidan. Placera axelremmarna högst upp på skuldran. Figur B
Steg 3. Dra benremmarna (4) mellan benen och anslut respektive spännen. Figur C
Steg 4. Sätt fast bröstremspännet (3). Bröstremmen ska sitta ca 15,2 cm nedanför
axlarnas ovansida. Trä överskjutande band genom hällorna. Figur D
Steg 5. Justera axelremmarna (2) till en jämn passning genom att dra överskottsrem
genom fallskärmsspännena (5) på selens båda sidor. Figur E
Steg 6. Om det nns ett bälte (6) drar du ihop änderna på över midjan och fäster
spännet. Justera bältet till en jämn och bekväm passning. Figur F
Spännets anvädning:
Steg 7. För handelen av spännet helt igenom hondelen och placera den sedan högst
upp på hondelen. Justera remmarna till en jämn och bekväm passning.
Figur G
Steg 8. Sätt in tungan till snabbanslutningsspännet i urtaget tills du hör ett "klick".
Ryck till i remmen för att säkerställa en säker anslutning. Figur H
Steg 9. Dra remmen med skydden genom spännet tills det sitter bra och bekvämt
och sätt sedan in metalltungan i det närmaste skyddet. Figur I
Step 10. Dra åt remmarna genom att dra den fria änden av väven bort från spännet
och lossa remmen genom att tvinga väven från den fria änden av remmen
tillbaka genom spännet. Figur J
Rekommenderade tillbehör: EN341 Descender EN353 Fallskydd av ledtyp, EN534
Taljerep, EN355 Stötdämpare, EN360 Fallskyddsenheter, EN363 Fallskyddssystem,
EN362 Kopplingar.
INSPEKTION
i-Safe™ RFID-etiketten (7) på selen kan användas tillsammans med den handhållna
i-Safe-avläsningsenheten och den webbaserade portalen för att underlätta inspektion
och inventeringskontroll och tillhandahålla poster för fallskyddssystemet. För att öppna
i-Safe-etiketten skalar du tillbaka kardborreskyddet (8) och viket ner märkena (11)
från etiketten (9). Se gur K.
FREKVENS: Inspektera före varje användning hela selen i enlighet med
nedanstående inspektionssteg. Selen måste inspekteras av en kompetent person
annan än användaren minst årligen. Om du är förstagångsanvändare kontaktar du
kundtjänstrepresentant i USA på 800-328-6146 eller i Kanada på 800-387-7484
eller om du redan är registrerad besöker du: www.capitalsafety.com/isafe.html. Följ
anvisningarna som medföljer din handhållna i-Safe-avläsare eller på webbportalen för
att överföra data till din webblogg.
Registrera resultaten från varje formell inspektion i inspektions- och underhållsloggen
i den allmänna instruktionen (5902392) eller använd i-Safe™-inspektionswebbportalen
för att underhålla inspektionsposterna.
S

12
VIKTIGT! Om den hela kroppsselen har utsatts för fallstopp eller kolliderande krafter
måste den omedelbart tas ur drift och förstöras.
VIKTIGT! Extrema arbetsvilkor (hård miljö, utsträckt användning osv.) kan erfordra
att inspektion görs oftare.
INSPEKTIONSSTEG:
Steg 1. Inspektera selens beslag (spännen, D-ringar, ryggstoppning, öglehållare) så
att de inte är skadade, brutna, skeva och måste vara fria från skarpa kanter,
sprickor, slitna delar eller korrosioner. PVC-överdragna beslag måste vara
fria från hack, repor, hål etc. i överdraget för att säkra att de inte är ledande.
Säkerställ att spännets frigöringsikar fungerar fritt och att ett klick hörs när
spännet stängs. Inspektera fjädern till fallskärmsspännet.
Steg 2. Vävmaterialet måste vara fritt från fransar, jack eller brutna brer.
Kontrollera med avseende på nötning, slitning, mögel, brännskador
eller missfärgning. Inspektera sömmar med avseende på drag-eller
skärmärken. Brustna sömmar kan vara en indikation på att selen har blivit
stötbelastad och måste tas ur bruk. Vid utförande av årlig formell inspektion
av XP-modeller av ExoFit-selen tar du bort den bakre stoppningen och
benremstoppningar för att underlätta inspektion av väven.
Steg 3. Inspektera etiketterna: Alla etiketter måste sitta på plats och vara fullt
läsliga.
Steg 4. Inspektera varje stystemkomponent eller subsystem enligt associerad
tillverkares instruktioner.
Steg 5. Anteckna inspektionsdatum och resultat i inspektions- och underhållsloggen i
den allmäna instruktionen (5902392).
Steg 6. Inspektera stötindikatorn på Delta-selmodellerna med uppåtstående "D" och
stötindikator. Se gur G. L-1 visar selen i normal kondition. D-ringen (10)
är placerad i hållaren (11). Om selens dorsala D-ring har utsatts för en stöt
(12)(L-2) blir ett rödfärgat område längst ner på D-ringen synligt (13) som
indikerar att en stöt har inträffat. Stötindikatorn kan inte återställas och
selen måste tas ut bruk och förstöras.
Om inspektion avslöjar ett defekt tillstånd tar du omedelbart enheten ur bruk och
förstör den.
OBSERVERA: Endast DBI-SALA eller skriftligt auktoriserade parter får reparera den
här utrustningen.
UNDERHÅLL, SERVICE, FÖRVARING
A. TVÄTTANVISNINGAR FÖR HEL KROPPSSELE:
Steg 1. Rengör Delta hel kroppssele med vatten och mild tvållösning. Selen kan
tvättas med en blekfritt rengöringsmedel. Vattentemperatur för tvätt och
sköljning får inte överskrida 70° C.
Steg 2. Ta bort stoppningarna när du skall tvätta den hela kroppsselen. Se gur H.
Ta bort stoppningarna genom att dra upp blixtlåsen (14). Stoppningarna
faller bort från selens remmar. Endast en benstoppning visas för klargörande
(15).
Steg 3. Placera selen i den medföljande tvättbagen. Bagen är utformad för att
förhindra att selen trasslar in sig och för att skydda tvättmaskinen från
skada. Användning av tvättbagen för att tvätta stoppningarna är valfritt.
Obs! Använd ett blekfritt rengöringsmedel när du tvättar både selen och
stoppningarna.
Steg 4. Sele och stoppningar kan lufttorka eller tumlas torra vid låg värme (inte
högre än 90° C).
Steg 5. Sätt tillbaka stoppningarna innan du använder selen. Se gur N. När du
skall sätta tillbaka stoppningarna lägger du ut selen som visat och placerar
stoppningarna under remmarna. Slå sedan om med de blixtlåsförsedda
ikarna (16) över remmarna och tryck igen knäppen samt dra igen
blixtlåsen. Obs! Den nedre knäppningen över benremmens stoppning måste

13
ansluta till sätesremmens lager (17). Endast en benstoppning visas för
klargörande.
B. TVÄTTANVISNINGAR FÖR HEL FLAMSÄKER KROPPSSELE:
Steg 1. Rengör Delta hel kroppssele. Lägg väven på en plan yta och rengör varje
sida med ett milt blekfritt rengöringsmedel med en svamp eller en lätt borste
så att inte brerna skadas eller byggs upp. Skölj grundligt. Vattentemperatur
för tvättning och sköljning skall vara sval eller kall.
VIKTIGT! ASTM F887-2004-klassade selar skall använda ett milt blekfritt
rengöringsmedel snarare än tvållösning eftersom såpa kan lämna rester som kan
påverka ammotståndet.
Steg 2. Ta bort stoppmnintarna när du ska rengöra dem (modell 9501207). Se gur
M. Använd knäppningarna och blixtlåsen (14). Stoppningarna faller bort från
selens remmar. Endast en benstoppning visas för klargörande (15).
Steg 3. Sele och stoppningar skall lufttorka ordentligt innan användning. Torka inte i
en mekanisk torkare.
VIKTIGT! En våt sele har reducerad styrka.
Steg 4. Se steg 5 ovan.
Steg 5. Se steg 6 ovan.
VIKTIGT: Tyngre ansamling av smuts, målarfärg etc. kan hindra selen att fungera
riktigt och i svåra fall försämra väven till en punkt där den skall tas ur bruk.
Mer information om rengöring nns tillgänglig från Capital Safety. Om du har några
frågor beträffande selens kondition eller är tveksam om hur den skall användas,
kontakta Capital Safety.
MATERIAL
Standarder: Alla selar märkta med ASTM F887-2004 uppfyller alla testkrav i
standarden.
Vävband:
Standardsele: 26,6 kN Polyester-spännstyrka
Flamsäker sele: 31 kN nylonspännstyrka; 31 kN Nomex®-överdragen Kevlar®-
spännstyrka
Stoppning och etikettskydd: All yttre vävnad är Nomex®- och Kevlar®-blandning.
Krok- och öglefästen är brandresistenta.
Rekommenderade tillbehör:
• Höftstoppning med sido-D-ringar
• Nomex®-överdragen Kevlar®-väv
• Icke-gnistbildande/icke-ledande PVC-överdragna beslag
• Bågmärkta höft-, ben- och ryggstoppningar
• Polyuretanöverdragen, bågmärkt dorsal vävögla
Obs! Nomex® och Kevlar® ägs av DuPont

14
SCOPO: Le imbragature complete DBI-SALA devono essere usate come componenti
di sistemi anticaduta personali, di ritenuta, di posizionamento del lavoro o di recupero.
Vedere Glossario nelle Istruzioni Generali (5902392) per l’identicazione degli elementi
numerati in una casella bianca.
AVVERTENZA: non alterare o usare intenzionalmente in modo improprio questa
attrezzatura. In caso di utilizzo con componenti o sottosistemi diversi da quelli descritti
nel presente manuale, contattare Capital Safety. Alcune associazioni di sottosistemi e
componenti potrebbero interferire con il funzionamento di questo equipaggiamento.
Fare attenzione quando si usa questa attrezzatura vicino a macchine in movimento,
pericoli elettrici, pericoli chimici e bordi taglienti.
INDOSSARE L'IMBRAGATURA
Fase 1. Afferrare l'imbragatura per l'anello a D sul retro (1). Accertare che le cinghie
non si attorciglino. Figura A
Fase 2. Passare le braccia attraverso le cinghie delle spalle (2) tenendo la bbia
della cinghia per petto (3) sul davanti e l'anello a D sul retro. Passare il
braccio esterno attraverso le cinghie delle spalle sull'altro lato. Posizionare le
cinghie per spalle sulle spalle. Figura B
Fase 3. Passare le cinghie per le gambe (4) fra le gambe e collegare le rispettive
bbie. Figura C
Fase 4. Fissare la bbia della cinghia del torace (3). L cinghia del torace deve essere
distante 6 pollici (15.2 cm) al di sotto della punta delle spalle. Passare la
cinghia in eccesso attraverso i passanti. Figura D
Fase 5. Regolare le cinghie delle spalle (2) per farle aderire tirando la parte in
eccesso attraverso le bbie da paracadute (5) su ogni lato dell'imbragatura.
Figura E
Fase 6. Se è presente una cinghia (6) unire i lati della cinghia in vita e ssare la
bbia. Regolare la cinghia in modo aderente e comodo. Figura F
Funzionamento della bbia:
Fase 7. Passare la parte maschio della bbia passante completamente attraverso
la parte femmina e posizionarla in alto sulla parte femmina. Regolare la
cinghia in modo aderente e comodo. Figura G
Fase 8. Inserire la linguetta della bbia a connessione rapida nella sede no a
sentire un "clic". Tirare con forza per garantire un collegamento sicuro.
Figura H
Fase 9. Tirare la cinghia con buchi attraverso la bbia no a sentirla aderente ma
comoda e inserire la linguetta di metallo nel foro più vicino. Figura I
Fase 10. Stringere le cinghie tirando il lato libero della cinghia lontano dalla bbia e
allentare la fettuccia forzando la cinghia lontano dal lato libero della cinghia
di nuovo attraverso la bbia. Figura J
Accessori consigliati: EN341 dispositivo di discesa, EN353 dispositivi di arresto
della caduta guidati, EN534 cordoncini, EN355 dissipatori di energia, EN360
dispositivi di arresto della caduta, EN363 sistemi di arresto della caduta, EN362
connettori
ISPEZIONE
L'adesivo i-Safe™ RFID (7) di questa imbragatura può essere usato insieme al
dispositivo manuale di lettura e al portale web per semplicare l'ispezione e il controllo
dell'inventario e per fornire registrazioni sui nostri dispositivi di arresto della caduta.
Per visualizzare l'etichetta i-safe, rimuovere il velcro intorno alla copertura (8) e
piegare le etichette (9) lontano dall'adesivo (7). Vedere Figura K.
FREQUENZA: prima di ogni uso ispezionare l'imbragatura completa in base ai passaggi
di ispezione descritti qui sotto. L'imbragatura deve essere controllata da una persona
competente, che non sia l'utente, almeno una volta l'anno. se si utilizza il dispositivo
per la prima volta, contattare un rappresentante del servizio clienti negli USA al
numero 800-328-6146 o in Canada al numero 800-387-7484 o se siete utenti registrati
consultare la pagina: www.capitalsafety.com/isafe.html. Seguire le istruzioni fornite con
I

15
il lettore manuale i-safe o sul portale web per trasferire i dati al web log.
Registrare i risultati di ogni ispezione formale nel log di ispezione e manutenzione nelle
istruzioni generali (5902392) o usare il portale di ispezione i-Safe™ per conservare le
registrazioni sull'ispezione.
IMPORTANTE: se l'imbragatura completa è stata sottoposta all'arresto di una caduta
o a forze d'impatto, deve essere immediatamente rimossa dall'esercizio e distrutta.
IMPORTANTE: condizioni estreme di lavoro (ambiente proibitivo, uso prolungato,
ecc.) possono richiedere un aumento della frequenza dei controlli.
PASSAGGI DELL'ISPEZIONE:
Fase 1. Ispezionare la parti siche dell'imbragatura (bbie, anelli a D, cuscinetto
posteriore, passanti); le parti non devono essere danneggiate, rotte,
storte e non devono avere bordi taglienti, sbavature, crepe, parti usurate o
corrose. Le parti rivestite in PVC non devono presentare tagli, lacerazioni,
usure, fori ecc. nel rivestimento, per garantire la non-conduttività. Accertare
che le linguette di rilascio della bbia siano libere e che si senta un clic
quando si bloccano. Ispezionare la molla della bbia da paracadute.
Fase 2. Ispezionare la tela; il materiale non deve presentare bre usurate, tagliate
o rotte. Vericare usura, abrasioni, pieghe, bruciature o scolorimenti.
Ispezionare le cuciture in relazione a punti tirati o tagliati. I punti rotti
possono indicare che l'imbragatura è stata sottoposta a carico con impatto
e in tal caso deve essere eliminata. Quando si esegue l'ispezione annuale
formale sui modelli XP dell'imbragatura ExoFit, rimuovere il cuscinetto
posteriore e le cinghie per gamba per facilitare l'ispezione della tela.
Fase 3. Ispezionare le etichette: tutte le etichette devono essere presenti e
completamente leggibili.
Fase 4. Controllare ciascun componente di sistema o sottosistema secondo le
relative istruzioni del produttore.
Fase 5. Registrare la date e i risultati dell'ispezione nell'apposito registro nelle
Istruzioni e manutenzioni generali (5902392).
Fase 6. Ispezionare l'indicatore di impatto sui modelli di imbragatura Delta con
indicatore di impatto e "D" verticale. Vedi gura L. L-1 illustra l'imbragatura
in condizione normale. L'anello a D (10) è alloggiato nel perno rotante (11).
Se l'anello a D dorsale dell'imbragatura ha subito un impatto (12) (L-2),
diventerà visibile un'area di colore rosso alla base dell'anello a D (13) che
indica che è avvenuto un impatto. L'indicatore di impatto non può essere
resettato e l'imbragatura deve essere eliminata dall'uso e distrutta.
Se l'ispezione rivela una condizione difettosa, eliminare l'unità dall'uso e distruggerla
immediatamente.
NOTA: solo DBI-SALA o parti autorizzate per iscritto possono riparare questa
attrezzatura.
MANUTENZIONE, INTERVENTI, CONSERVAZIONE
A. ISTRUZIONI PER IL LAVAGGIO DELL'IMBRAGATURA COMPLETA:
Fase 1. Togliere le macchie dall'imbragatura completa Delta con una leggera
soluzione di acqua e sapone. L'imbragatura può essere lavata usando un
detergente senza candeggiante. La temperatura del lavaggio e del risciacquo
non deve superare 70° C (160° F).
Fase 2. Per lavare l'imbragatura completa, rimuovere i cuscinetti. Vedi gura M.
Per rimuovere i cuscinetti aprire le cerniere e i bottoni (14). I cuscinetti
cadranno dalle cinghie dell'imbragatura. E' illustrato solo il cuscinetto per
gamba per chiarezza (15).
Fase 3.
Inserire l'imbragatura nel sacco di lavaggio fornito. Il sacco è studiato per evitare
l'ingarbugliamento dell'imbragatura e per proteggere la lavatrice da danni. L'uso
del sacco di lavaggio per il lavaggio dei cuscinetti è facoltativo. Nota: usare un
detergente senza candeggiante per lavare l'imbragatura e i cuscinetti.

16
Fase 4. L'imbragatura e i cuscinetti devono essere asciugati all'aria o in asciugatrice
a temperatura bassa (non superiore a 90° C (200° F).
Fase 5. Sostituire i cuscinetti prima di usare l'imbragatura. Vedi gura I. Per
sostituire i cuscinetti Comfort, disporre l'imbragatura come mostrato e
posizionare i cuscinetti al di sotto delle cinghie. Avvolgere i lembi chiusi (16)
sopra le cinghie e chiudere i bottoni e le cerniere. Nota: la chiusura a scatto
inferiore della cinghia per gamba deve essere collegata fra gli strati della
cinghia del seggiolino (17). E' illustrato solo il cuscinetto per gamba per
chiarezza.
B. ISTRUZIONI PER IL LAVAGGIO DELL'IMBRAGATURA COMPLETA ARC FLASH:
Fase1. Togliere le macchie dall’imbragatura completa Delta. Posizionare la tela
su una supercie piana e pulire ogni lato usando un detergente senza
candeggianti con una spugna o una spazzola morbida per non danneggiare
o irruvidire i lamenti. Sciacquare accuratamente. La temperatura dell'acqua
di lavaggio o risciacquo deve essere tiepida o fredda.
IMPORTANTE: per le imbragature classicate ASTM F887-2004 usare un detergente
neutro senza candeggiante piuttosto che sapone, in quanto il sapone potrebbe lasciare
residui che potrebbero inuire sulla resistenza alle amme.
Fase 2. Per pulire i cuscinetti confort (modello 9501207), rimuovere i cuscinetti.
Vedi gura M. Aprire i bottoni e le cerniere (14). I cuscinetti cadranno
dalle cinghie dell'imbragatura. E' illustrato solo il cuscinetto per gamba per
chiarezza (15).
Fase 3. L'imbragatura e i cuscinetti devono essere accuratamente asciugati all'aria
prima dell'uso. Non asciugare in asciugatrice meccanica.
IMPORTANTE: un' imbragatura umida ha una forza ridotta.
Fase 4. Vedi fase 5 qui sopra.
Fase 5. Vedi fase 6 qui sopra.
IMPORTANTE: sporco eccessivo, vernice ecc. possono impedire un funzionamento
corretto del cavo di salvataggio e in casi estremi può rovinare la cinghia o la corda al
punto da indebolirle e da renderle inservibili.
Maggiori informazioni sulla pulizia possono essere richieste a Capital Safety. In caso
di domande sulla condizione dell'imbragatura o di dubbi, contattare Capital Safety.
MATERIALI
Standard: tutte le imbragature marcate ASTM F887-2004 sono conformi a tutti i
requisiti di prova dello standard.
Cinghia:
Imbragatura standard: 26.6 kN (6.000 lb.) forza tensile poliestere
Imbragatura Arch Flash: 31 kN (7.000 lb.) forza tensile nylon; 31 kN (7.000 lb) forza
tensile Kevlar® rivestito di Nomex®
Cuscinetto e copertura etichetta: il tessuto esterno è misto Nomex® e Kevlar®.
I ganci e i ssaggi delle anse sono resistenti al fuoco.
Accessori opzionali:
• Cuscino per anca con anelli a D laterali
• Cinghie in Kevlar® rivestite di Nomex®
• Dispositivi sici ricoperti in PVC esente da scintille e non conduttivo
• Cuscinetti arc specici per anca, gamba e posteriori
• Circuito con cinghia dorsale rivestito in poliuretano, specico arc
Nota: Nomex® e Kevlar® sono di possesso di DuPont

17
OBJECTIVO: O arnês corporal completo DBI-SALA destina-se a ser utilizado como
um componente em sistemas pessoais de interrupção de quedas, de imobilização, de
posicionamento laboral ou de salvamento. Consulte o Glossário nas “Instruções gerais”
(5902392) para ver a identicação dos elementos numerados numa caixa branca.
AVISO: Não altere ou intencionalmente utilize indevidamente este equipamento. Consulte a
Capital Safety ao usar este equipamento juntamente com componentes ou subsistemas que não os
descritos nestas instruções. Algumas combinações de subsistemas e componentes podem interferir
com a utilização deste equipamento. Exerça os devidos cuidados ao utilizar este equipamento em
torno de maquinaria em movimento, perigos eléctricos e químicos e extremidades aadas.
COLOCAÇÃO DO ARNÊS
Passo 1. Pegue no arnês usando o anel em D traseiro (1). Certique-se de que as correias não
se encontram torcidas. Figura A
Passo 2. Passe o seu braço livre através das correias do ombro (2) mantendo a vela da correia
do tórax (3) virada para a frente e o anel em D virado para trás. Passe o outro braço
através das correias do ombro no outro lado. Posicione as correias do ombro em cima
do ombro. Figura B
Passo 3. Puxe as correias das pernas (4) entre as pernas e ligue as respectivas velas. Figura C
Passo 4. Prenda a vela da correia do tórax (3). A correia do tórax deve estar 15,2 cm (6 pol.)
para baixo a partir da parte de cima dos ombros. Passe a correia em excesso através
dos xadores do laço. Figura D
Passo 5. Ajuste as correias dos ombros (2) para um encaixe justo puxando o excesso de correia
através das correias das velas (5) de cada lado do arnês. Figura E
Passo 6. Se estiver presente um cinto (6), una as extremidades do cinto na cinta e prenda a
vela. Ajuste o cinto para um encaixe justo e confortável. Figura F
Funcionamento da vela:
Passo 7. Passe a parte do macho da vela de passagem completamente através da parte fêmea
e depois posicione-a em cima da parte fêmea. Ajuste as correias para um encaixe justo
e confortável. Figura G
Passo 8. Introduza a língua da vela de ligação rápida no receptor até ouvir um “Clique”. Puxe
fortemente a correia para se certicar de que a ligação está segura. Figura H
Passo 9. Puxe a correia com ilhóses através da vela até estar justo e confortável, e depois
introduza alíngua de metal dentro do ilhó mais próximo. Figura I
Passo 10. Aperte as correias puxando a extremidade livre das correias na direcção contrária à
da vela e solte a correia passando forçadamente as correias da extremidade livre da
correia de volta através da vela. Figura J
Acessórios Recomendados: EN341 Descensor, EN353 Dispositivo de Interrupção de Quedas
do Tipo Guiado, EN534 Cabos, EN355 Absorvedores de Choques, EN360 Dispositivos de
Interrupção de Quedas, EN363 Sistemas de Interrupção de Quedas, EN362 Conectores
INSPECÇÃO
A etiqueta i-Safe™ RFID (7) neste arnês pode ser utilizada juntamente com o dispositivo de
leitura portátil i-Safe e o portal com base na Web para simplicar o controlo da inspecção e do
inventário e fornecer registos de todo o seu equipamento de protecção contra quedas. Para
revelar a etiqueta i-Safe, puxe a cobertura completa de velcro (8) e dobre os rótulos (9) na
direcção contrária à da etiqueta (7). Consultar Figura K.
FREQUÊNCIA: Antes de cada utilização, deve inspeccionar o arnês corporal completo de
acordo com os passos de inspecção indicados a seguir. O arnês deve ser inspeccionado por um
técnico especializado, que não o utilizador, pelo menos uma vez por ano. Se estiver a utilizar o
dispositivo pela primeira vez, contacte um representante do Serviço de Apoio ao Cliente nos EUA
através do número 800-328-6146 ou no Canadá através do número 800-387-7484, se já estiver
registado, dirija-se a: www.capitalsafety.com/isafe.html. Siga as instruções fornecidas com o
leitor portátil i-Safe ou no portal da Web para transferir os seus dados para o registo da Web.
Registe os resultados de cada inspecção formal no registo da inspecção e manutenção nas
Instruções Gerais (5902392) ou use o portal da Web da inspecção i-Safe™ para manter os seus
registos da inspecção.
P

18
IMPORTANTE: Se o arnês corporal completo tiver sido sujeito a forças de interrupção de queda ou
de impacto, deve ser imediatamente removida de serviço e destruído.
IMPORTANTE: Condições de trabalho extremas (ambientes agrestes, utilização prolongada, etc.)
podem exigir um aumento da frequência das inspecções.
PASSOS DE INSPECÇÃO:
Passo 1. Inspeccione o hardware do arnês (velas, anéis em D, almofada traseira, xadores do
laço); estes itens não devem estar danicados, partidos, distorcidos e devem estar
livres de extremidades aadas, nós, ssuras, peças gastas ou sinais de corrosão. O
hardware revestido com PVC não deve ter cortes, fendas, rasgões, buracos, etc. no
revestimento para assegurar a não condutividade. Certique-se de que as patilhas
de libertação da vela funcionam livremente e que ouve um clique quando a vela
encaixa. Inspeccione a mola da vela do pará-quedas.
Passo 2. Inspeccione as correias; o material deve estar livre de bras gastas, cortadas ou
partidas. Inspeccione para detectar sinais de rasgões, abrasões, bolor, queimaduras ou
descoloração. Inspeccione os pontos; verique se existem pontos puxados ou cortados.
Os pontos partidos podem ser uma indicação de que o arnês sofreu uma carga de
impacto e deve ser retirado de serviço. Ao efectuar a inspecção formal anual nos
modelos XP do arnês ExoFit, retire a almofada traseira e as almofadas da correia da
perna para facilitar a inspecção das correias.
Passo 3. Inspeccione as etiquetas: Todas as etiquetas devem estar presentes e completamente
legíveis.
Passo 4. Inspeccione cada componente do sistema ou subsistema de acordo com as instruções
do fabricante.
Passo 5. Registe a data de inspecção e os resultados no registo da inspecção e manutenção nas
Instruções Gerais (5902392).
Passo 6. Inspeccione o indicador de impacto nos modelos de Arnês Delta com o “D” que se
levanta e o indicador de impacto. Consultar a Figura L. L-1 mostra o arnês numa
condição normal. O anel em D (10) encontra-se alojado no pivô (11). Se o anel em
D dorsal do arnês tiver sofrido um impacto (12)(L-2), uma área colorida a vermelho
na base do anel em D irá tornar-se visível (13) indicando que ocorreu um impacto.
O indicador de impacto não pode ser reinicializado e o arnês tem de ser retirado de
serviço e destruído.
Se a inspecção revelar uma condição defeituosa, retire a unidade imediatamente de
serviço e destrua-a.
NOTA: As reparações deste equipamento só podem ser efectuadas apenas pela DBI-SALA ou seus
representantes autorizados por escrito.
MANUTENÇÃO, ASSISTÊNCIA, ARMAZENAMENTO
A. INSTRUÇÕES DE LAVAGEM DO ARNÊS CORPORAL COMPLETO:
Passo 1. Limpe as nódoas localizadas do arnês corporal completo Delta com água e uma ligeira
solução de sabão. O arnês deve ser lavado usando um detergente sem lixívia. A
temperatura da água para lavar e passar por água não deve exceder os 70° C (160° F).
Passo 2. Deve retirar as almofadas para lavar o arnês corporal completo na máquina. Consultar
Figure M. Para retirar as almofadas, abra os clips e fechos de correr (14). As
almofadas irão cair das correias do arnês. Só é apresentada uma perna para ns de
esclarecimento (15).
Passo 3. Coloque o arnês no saco da lavandaria fornecido. O saco foi concebido para prevenir o
emaranhamento do arnês e proteger a máquina de lavar de quaisquer danos. O uso do
saco de lavandaria para lavar as almofadas é opcional. Nota: Use um detergente sem
lixívia para lavar o arnês e as almofadas.
Passo 4. O arnês e as almofadas devem ser secas ao ar ou na máquina com um nível de calor
baixo (não superior a 90° C (200° F).

19
Passo 5. Substitua as almofadas antes de usar o arnês. Consultar Figura N. Para substituir
as almofadas Comfort, congure o arnês conforme ilustrado e coloque as almofadas
debaixo das correias. Enrole depois as abas com fechos de correr (16) por cima das
correias e feche os clips e os fechos de correr. Nota: O encaixe do clip inferior na
almofada da correia da perna deve ligar-se entre as camadas da correia do assento
(17). Só é apresentada uma perna para ns de esclarecimento.
B. INSTRUÇÕES DE LAVAGEM DO ARNÊS CORPORAL COMPLETO ARC FLASH:
Passo 1. Limpe as manchas no arnês corporal completo Delta. Coloque as correias sobre
uma superfície plana e limpe cada um dos lados com um detergente sem lixivia e
uma esponja ou escova ligeira, para não danicar ou empilhar os lamentos. Passe
cuidadosamente por água. A água para lavar e passar por água deve estar morna ou
fria.
IMPORTANTE: O arnês classicado de acordo com a norma ASTM F887-2004 devem ser limpos
com um detergente suave sem lixívia e não sabão; o sabão pode deixar um resíduo que pode
afectar a resistência a chamas.
Passo 2. Retire as almofadas Comfort (Modelo 9501207) para as limpar. Consultar a Figura M.
Abra os clips e fechos de correr (14). As almofadas irão cair das correias do arnês. Só é
apresentada uma perna para ns de esclarecimento (15).
Passo 3. O arnês e as almofadas devem secar devidamente ao ar antes de serem utilizadas
novamente. Não secar numa máquina de secar mecânica.
IMPORTANTE: Um arnês molhado irá ter uma força menor.
Passo 4. Consultar o Passo 5 acima.
Passo 5. Consultar o Passo 6 acima.
IMPORTANTE: Uma acumalação excessiva de sujidade, tinta, etc., pode impedir o arnês corporal
completo de funcionar devidamente, e em situações graves degradar as correias até ao ponto onde
estas estão enfraquecidas e devem ser retiradas de serviço.
Pode obter mais informações sobre a limpeza através da Capital Safety. Contacte a
Capital Safety se tiver quaisquer questões sobre a condição do seu arnês, ou se tiver
alguma dúvida sobre a sua utilização em serviço.
MATERIAIS
Normas: Qualquer arnês assinalado com a indicação da norma ASTM F887-2004 cumpre todos
os requisitos de teste desta norma.
Correias:
Arnês padrão: Poliéster com 26.6 kN (6,000 lb.) de resistência à tracção
Arnês Arch Flash: Nylon com 31 kN (7,000 lb.) de resistência à tracção Nylon; Kevlar®
revestido com Nomex® com 31 kN (7,000 lb) de resistência à tracção
Almofada e Cobertura da etiqueta: Todo o tecido exterior é uma mistura de Nomex® e
Kevlar®. O gancho e xadores de laços são resistente ao fogo.
Acessórios opcionais:
• Almofada da anca com anéis em D laterais
• Correia de Kevlar® coberta com Nomex®
• Hardware revestido com PVC não igniscível/não condutor
• Almofadas da anca, perna e costas com classicação Arc
• Laço da correia dorsal revestido com poliuretano e com classicação Arc
Nota: Nomex® e Kevlar® são propriedade da DuPont

20
OBJETIVO: los arneses de cuerpo completo DBI-SALA se utilizan como componentes
en sistemas de protección personal contra caídas, de sujeción, de posicionamiento
de trabajo o de rescate. Para identicar las partes numeradas dentro de un cuadro
blanco, consulte el apartado Glosario de las Instrucciones generales (5902392).
ADVERTENCIA: No altere ni haga un uso malintencionado de este equipo. Consulte con Capital
Safety si se utiliza este equipo con componentes o subsistemas que no sean los descritos en
este manual. Algunas combinaciones de subsistemas y componentes pueden interferir con el
funcionamiento de este equipo. Tenga cuidado al utilizar este equipo alrededor de maquinaria móvil,
peligros eléctricos, peligros químicos y bordes alados.
COLOCACIÓN DEL ARNÉS
Paso 1. Agarre el arnés por la argolla D de la parte posterior (1). Las correas no deben estar
torcidas. Figura A
Paso 2. Pase el brazo libre por las correas de los hombros (2) de forma que la correa del pecho
(3) con la hebilla quede delante y la argolla D detrás. Pase el otro brazo por las correas
del hombro en el otro lado. Coloque las correas de los hombros en la parte superior del
hombro. Figura B
Paso 3.
Pase las correas de las piernas (4) entre éstas y conecte las hebillas respectivas. Figura C
Paso 4. Abroche la hebilla de la correa del pecho (3). La correa del pecho debe estar 15,2
cm por debajo de la parte superior de los hombros. Pase la correa que sobra por los
receptores de lazos. Figura D
Paso 5. Ajuste bien las correas de los hombros (2) pasando la correa sobrante por las hebillas
de paracaídas (5) a cada lado del arnés. Figura E
Paso 6. Si existe un cinturón (6), junte sus extremos en su cintura y abroche la hebilla. Ajuste
bien el cinturón de forma que quede cómodo. Figura F
Funcionamiento de la hebilla:
Paso 7. Pase la parte macho de la hebilla de paso completamente por la parte hembra y
después colóquela sobre la parte hembra. Ajuste bien las correas de forma que queden
cómodas. Figura G
Paso 8. Inserte el clavillo de la hebilla de conexión rápida en el receptor hasta que oiga un
“Clic”. Tire bien de la correa para garantizar una conexión segura. Figura H
Paso 9. Tire de la correa con ojales por la hebilla hasta que ajuste de forma cómoda; después
inserte el clavillo metálico por el ojal más cercano. Figura I
Paso 10. Apriete las correas tirando del extremo libre de la cincha en dirección opuesta a la
hebilla y aoje la correa volviendo a meter la cincha del extremo libre de la correa por
la hebilla. Figura J
Accesorios recomendados: dispositivo de descenso EN341, sistemas de
protección contra caídas tipo guiado EN353, cordones EN534, amortiguadores
de energía EN355, dispositivos de protección contra caídas EN360, sistemas de
protección contra caídas EN363, conectores EN362
INSPECCIÓN
La etiqueta RFID i-Safe™ (7) de este arnés puede utilizarse junto con el dispositivo
de lectura de mano i-Safe y el portal web para simplicar la inspección y el control
del inventario y proporcionar registros del equipo de protección contra caídas. Para
descubrir la etiqueta i-Safe, retire el envoltorio de velcro alrededor de la tapa (8) y
pliegue las etiquetas (9) en dirección opuesta a la etiqueta (7). Véase la gura K.
FREQUENCIA: Antes de cada uso, inspeccione el arnés de cuerpo completo siguiendo
los pasos que se indican abajo. El arnés debe ser inspeccionado por una persona
competente que no sea el usuario, al menos una vez al año. Si es un nuevo usuario,
debe comunicarse con un representante del servicio al cliente en EE.UU. en el +1
800-328-6146 o en Canadá en el 800-387-7484 o si ya se ha registrado, vaya a: www.
capitalsafety.com/isafe.html. Siga las instrucciones del lector de mano i-Safe o del
portal web para trasladar sus datos a su registro web.
E
Table of contents
Languages:
Other DB Industries Safety Equipment manuals
Popular Safety Equipment manuals by other brands
GemOne
GemOne Sapphire V2 troubleshooting guide
Scott Safety
Scott Safety FH6 Operating and maintenance instructions

Sabelt
Sabelt FIA 8856-2018 user manual
SEI Industries
SEI Industries BAMBI MAX Technical bulletin
D+H
D+H LDJ-1204-0085-1-ACB Original instructions

HABERKORN
HABERKORN Tape sling INSTRUCTIONS FOR USE AND TEST MANUAL
