DDS Calorimeters CAL3K Series User manual

!
!
DDS CALORIMETERS
OPERATIONS MANUAL
VERSION NO: 1.1
DATE: 2022
MANUFACTURED BY: DIGITAL DATA SYSTEMS

DDS CALORIMETERS OPERATIONS MANUAL V1.1 2022 Website: www.ddscalorimeters.com i
Digital Data Systems (Pty) Ltd.
CAL3K Advanced Bomb Calorimeters
www.ddscalorimeters.com
Table of Contents:
1!INTRODUCTION .................................................................................................................... 1!
2!PURPOSE OF THIS MANUAL .................................................................................................. 1!
3!SAFETY ................................................................................................................................. 1!
3.1!SAFE BURNING PROCESS ................................................................................................ 1!
3.2!SAFE ELECTRICAL INSTALLATION .................................................................................... 2!
3.3!SAFE HIGH PRESSURE OXYGEN ....................................................................................... 2!
3.4!OVER-PRESSURE ............................................................................................................. 3!
3.5!SAFE OXYGEN CONNECTIONS ........................................................................................ 3!
3.6!SAFE EXHAUST GAS CONNECTION ................................................................................. 3!
3.7!SAFE VESSEL HANDLING ................................................................................................. 4!
4!BASIC KEYBOARD OPERATIONS ............................................................................................ 5!
4.1!GENERAL KEYBOARD ACCESS ......................................................................................... 6!
4.2!COMMAND EXECUTION ................................................................................................. 6!
4.3!COMMAND NUMBER EXECUTION .................................................................................. 7!
5!TESTING ............................................................................................................................... 7!
5.1!TEST CAL3K HARDWARE ................................................................................................. 7!
5.2!TEST VESSEL HARDWARE ............................................................................................... 7!
5.3!TEST THE FAN ................................................................................................................. 8!
5.4!TESTING FOR OXYGEN LEAKS ......................................................................................... 8!
5.4.1!TEST OXYGEN SUPPLY ............................................................................................. 8!
5.4.2!TEST OXYGEN INTERNAL PLUMBING ...................................................................... 8!
5.4.3!TEST VESSEL LEAK ................................................................................................... 9!
6!PRINCIPLE OF COMBUSTION CALORIMETER ......................................................................... 9!
7!MODE CHANGES ................................................................................................................. 10!
8!CONNECTING ...................................................................................................................... 11!
8.1!USB PORT ..................................................................................................................... 11!
8.2!PORTD1 ........................................................................................................................ 11!
8.3!PORTD2 ........................................................................................................................ 11!
8.4!BALANCE PORT ............................................................................................................. 11!
8.5!USE OF PORT D1 ........................................................................................................... 11!
8.6!CONNECTING TO A PC WITH A RS232 PORT ................................................................ 12!
8.7!CONNECTING TO A PC FOR DATA COLLECTION ............................................................ 12!
8.8!CONNECTING TO A BALANCE ....................................................................................... 12!
9!OUTPUT ............................................................................................................................. 13!
9.1!OUTPUT PRINTING RESULTS TO PAPER, KEYBOARD INITIATED ................................... 13!
9.2!OUTPUT PRINTING, KEYBOARD INITIATED, OTHER ...................................................... 15!
9.3!OUTPUT PRINTING, INTERNAL INITIATED .................................................................... 16!
9.4!OUTPUT, NON-PRINTABLE ........................................................................................... 16!
9.5!OUTPUT, EXTERNAL INITIATED ..................................................................................... 17!
9.6!OUTPUT TO A SPEADSHEET .......................................................................................... 17!
9.7!OUTPUT TO AN EXTERNAL PC ...................................................................................... 17!
10!CYCLES ............................................................................................................................... 18!
10.1!CYCLE: PREPARATION ................................................................................................... 18!
10.2!CYCLE: FILLING (CAL3K-AP ONLY) ................................................................................. 18!

DDS CALORIMETERS OPERATIONS MANUAL V1.1 2022 Website: www.ddscalorimeters.com ii
Digital Data Systems (Pty) Ltd.
CAL3K Advanced Bomb Calorimeters
www.ddscalorimeters.com
10.3!CYCLE: INITIAL .............................................................................................................. 18!
10.4!CYCLE: MAIN ................................................................................................................. 19!
10.5!CYCLE: END ................................................................................................................... 19!
10.6!CYCLE: COOL ................................................................................................................. 19!
10.7!HELP DISPLAY ............................................................................................................... 19!
11!OPERATIONS ...................................................................................................................... 19!
11.1!LOADING DEFAULT PARAMETERS ................................................................................ 19!
11.2!ENTERING PASSWORD ................................................................................................. 20!
11.3!MASS ENTRY ................................................................................................................. 20!
11.4!MASS ERASING ............................................................................................................. 20!
11.5!SAMPLE IDENTIFICATION ............................................................................................. 21!
11.6!GROUP IDENTIFICATION ............................................................................................... 21!
11.7!BALANCE MASS ............................................................................................................ 21!
11.8!OPEN LID ...................................................................................................................... 21!
11.9!FIRE MANUALLY ........................................................................................................... 21!
11.10!READ RESULT ............................................................................................................ 22!
11.11!ABORT ...................................................................................................................... 22!
11.12!UNITS OF MEASURE ................................................................................................. 22!
12!CALIBRATION ..................................................................................................................... 23!
12.1!CALIBRATION CONDITIONS .......................................................................................... 23!
12.2!CALIBRATION IN DIFFERENT MODES ............................................................................ 24!
12.3!PERFORMING A CALIBRATION ...................................................................................... 24!
12.4!CALIBRATION AND RESULT GRADING .......................................................................... 24!
12.5!AVERAGE CALIBRATION ................................................................................................ 25!
12.6!CALIBRATION SUMMARY ............................................................................................. 26!
12.7!FACTORY CALIBRATION ................................................................................................ 26!
12.8!CALIBRATION FRQUENCY ............................................................................................. 26!
13!SPIKING .............................................................................................................................. 26!
13.1!SPIKE VALUE ................................................................................................................. 27!
13.2!SPIKE MASS .................................................................................................................. 27!
13.3!STEP BY STEP ENTERING THE SPIKE MASS .................................................................... 28!
13.4!EASY CAPSULE SPIKING ................................................................................................ 28!
14!CORRECTIONS .................................................................................................................... 29!
14.1!COTTON CORRECTION .................................................................................................. 29!
14.2!SULPHUR CORRECTION ................................................................................................ 29!
14.3!MOISTURE CORRECTION .............................................................................................. 30!
14.4!GELATINE CAPSULE CORRECTION ................................................................................ 30!
15!FIRING ................................................................................................................................ 31!
16!COMPENSATION ................................................................................................................. 31!
16.1!MOISTURE COMPENSATION ........................................................................................ 32!
16.2!FOOD COMPENSATION ................................................................................................ 32!
17!LIMITS ................................................................................................................................ 33!
18!TIME AND DATE ................................................................................................................. 34!
19!3K-AP PRESSURE COMMANDS ............................................................................................ 35!
20!PRINTING ........................................................................................................................... 38!
20.1!PRINTING: SETTING THE PORT SPEED .......................................................................... 38!

DDS CALORIMETERS OPERATIONS MANUAL V1.1 2022 Website: www.ddscalorimeters.com iii
Digital Data Systems (Pty) Ltd.
CAL3K Advanced Bomb Calorimeters
www.ddscalorimeters.com
20.2!PRINTING: SETTING A PRINTOUT FORM ...................................................................... 38!
20.3!PRINTING A FORM HEADER .......................................................................................... 39!
20.4!PRINT FILTER ................................................................................................................ 39!
20.5!PRINTING RESULTS FROM MEMORY ............................................................................ 39!
20.6!PRINTING RESULTS BY GID ........................................................................................... 39!
20.7!PRINTING ENABLE ........................................................................................................ 40!
20.8!PRINTING TODAYS RESULTS PER VESSEL ...................................................................... 40!
20.9!PRINT TODAYS RESULT IN FORM A-H ........................................................................... 40!
20.9.1!PRINT CAL INFO .................................................................................................... 40!
20.9.2!PRINT VESSEL INFO ............................................................................................... 40!
20.9.3!PRINT VESSEL CALIBRATION ................................................................................. 41!
20.10!PRINT ALL KEY COMMANDS ..................................................................................... 41!
21!PRINTING TO A PC .............................................................................................................. 41!
22!PRINTING REAL TIME .......................................................................................................... 42!
23!PRINT RESULT DUMPS ........................................................................................................ 43!
23.1!PRINT CALIBRATION DUMP .......................................................................................... 43!
24!REAL TIME PRINTING .......................................................................................................... 43!
25!CLEARING ........................................................................................................................... 44!
25.1!CLEAR RESULT MEMORY .............................................................................................. 44!
25.2!CLEAR HELP EVENTS ..................................................................................................... 45!
25.3!CLEAR VESSEL CAL HISTORY ......................................................................................... 45!
25.4!CLEAR CAL3K MAXIMUM ............................................................................................. 45!
25.5!CLEAR VESSEL MAXIMUM ............................................................................................ 45!
25.6!CLEAR PRESSURE RECORD ............................................................................................ 45!
26!READING ............................................................................................................................ 46!
27!BLUETOOTH ....................................................................................................................... 48!
28!SIMULATIONS ..................................................................................................................... 48!
28.1!SIMULATING CV PROCESS ............................................................................................ 48!
28.2!SIMULATING CALIBRATION PROCESS ........................................................................... 49!
28.3!SIMULATING A RESULT RECORD .................................................................................. 49!
28.4!SIMULATING A CALIBRATION RECORD ......................................................................... 49!
28.5!SIMULATING A HELP EVENT ......................................................................................... 50!
28.6!DEMO ........................................................................................................................... 50!
28.7!SIMULATING AN OVER-PRESSURE RECORD ................................................................. 51!
29!SETTING A STATE ................................................................................................................ 51!
30!ALL CAL3K COMMANDS ...................................................................................................... 53!
31!TEMPERATURE RISE ............................................................................................................ 67!
31.1!VERY SMALL SAMPLE MASS ......................................................................................... 67!
31.2!HOW TO MEASURE THE WIRE+COTTON RISE .............................................................. 68!
31.3!HOW TO MEASURE THE GELATIN CAPSULE RISE ......................................................... 68!
32!MAINTENANCE ................................................................................................................... 69!
32.1!DAILY USE ..................................................................................................................... 69!
32.2!MATERIALS TESTED ...................................................................................................... 69!
32.3!ENVIRONMENT ............................................................................................................. 69!
32.4!MAINTENANCE SCHEDULE (GUIDELINE) ...................................................................... 69!
33!WARRANTY – FOR NEW PRODUCTS .................................................................................... 71!

DDS CALORIMETERS OPERATIONS MANUAL V1.1 2022 Website: www.ddscalorimeters.com iv
Digital Data Systems (Pty) Ltd.
CAL3K Advanced Bomb Calorimeters
www.ddscalorimeters.com
33.1!PURPOSE OF PRODUCT WARRANTY ............................................................................. 71!
33.2!OWNER’S WARRANTY .................................................................................................. 71!
33.3!EXCLUDED (NON-WARRANTY) PARTS .......................................................................... 71!
33.4!WARRANTY – REPAIRED PRODUCTS ............................................................................ 72!
33.5!GENERAL – WARRANTY VOID ....................................................................................... 72!
33.6!WARRANTY REGISTRATION FORM ............................................................................... 73!

DDS CALORIMETERS OPERATIONS MANUAL V1.1 2022 Website: www.ddscalorimeters.com 1
Digital Data Systems (Pty) Ltd.
CAL3K Advanced Bomb Calorimeters
www.ddscalorimeters.com
1 INTRODUCTION
Digital Data Systems (Pty) Ltd (dds) specializes in the design and manufacture of scientific bomb
calorimeter systems for various types of industries and applications. dds bomb calorimeter systems are
the most advanced combustion calorimeter systems available today with the inclusion of Artificial
Intelligence (AI). The system is used to measure the calorific value of both solids and liquids. dds has a
wide range of systems to suit different applications and sample requirements.
This manual applies to all systems Firmware V6 and higher:
CAL3K-AP Automatic Oxygen Filling, 2-4 vessels, 4 modes
CAL3K-A Manual Oxygen Filling, 2-4 vessels, 4 modes
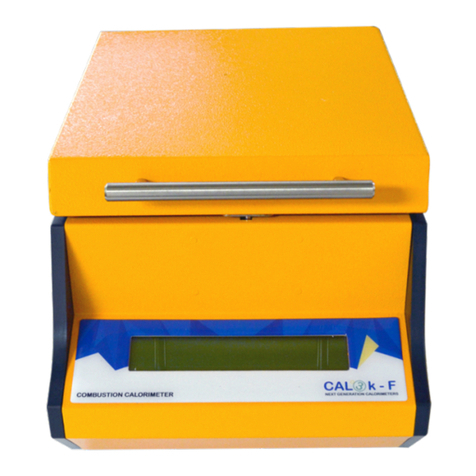
CAL3K-F Manual Oxygen Filling, 2-4 vessels
CAL3K-ST Manual Oxygen Filling, Internal Cooling, 2 vessels
CAL3K-S Manual Oxygen Filling, Internal cooling, 1 vessel
Please visit our website: www.ddscalorimeters.com to find out more.
2 PURPOSE OF THIS MANUAL
It serves as a short introduction to the CAL3K system. It saves as a reference for all keyboard and interface
operations. It explains the very basics of operation and guides you to perform hardware tests. If a
command section applies to a particular system only (like the CAL3K-AP, which has internal oxygen filling)
it is clearly marked.
Do not read this manual all at once. It appears to be complicated, but it isn’t. Read the section you need
and then perform the operation. This is a reference manual.
3 SAFETY
A ‘BOMB CALORIMETER’ uses a vessel (the bomb) which is filled with high pressure oxygen and the sample
material, and then the sample is ignited. The sample burns and the resultant temperature increase of the
vessel is measured and converted to a calorific value.
3.1 SAFE BURNING PROCESS
During the burning the oxygen temperature rises and the pressure increases. The pressure increase
depends on the speed of the burning process and to a lesser extent on the sample volume. The safety is
therefore mainly concerned with the burning process.
If the sample explodes then some sample material is settling unburned on the vessel wall (which makes
the result useless) and the pressure rises too high which is un-safe. Therefore:

DDS CALORIMETERS OPERATIONS MANUAL V1.1 2022 Website: www.ddscalorimeters.com 2
Digital Data Systems (Pty) Ltd.
CAL3K Advanced Bomb Calorimeters
www.ddscalorimeters.com
1. DO NOT burn powdery substances by loose inside the crucible. They can explode or will blow out
of the crucible during the oxygen filling process. It is preferable to use a gelatin capsule 3K-4-068
or press the sample material in to a tablet or pellet form using the DDS Pellet Press Die Set 3K-7-
041 and the Arbor Press 3K-7-042.
2. Choose a sample volume according to the following guidelines:
Low calorific value (sugar): ~0.75g
Medium calorific value (Benzoic Acid): ~0.5g
High calorific value (Oil, Fat) ~0.3g
3. Examine the vessel inner wall after a sample burn for any sample residue. If residue is found then
the sample has exploded inside the vessel.
4. DO NOT use oil on any part of the calorimeter. It may ignite under pressure and elevate the
temperature and may cause destruction of the apparatus.
3.2 SAFE ELECTRICAL INSTALLATION
• Connect the safety earth to the EARTH STUD on the back of the instrument. This is required
when the external power supply fails
• Do not open the CAL3K for any reason whatsoever. There are no serviceable parts inside the
unit.
DO NOT TAMPER WITH THE EARTHING - CONSULT A QUALIFIED ELECTRICIAN SO THAT THE
EARTHING CAN BE CHECKED.
3.3 SAFE HIGH PRESSURE OXYGEN
• The type of Oxygen to be used is the standard Industrial Oxygen used for welding. A purity of
99.5% will be suitable.
• Conform to the industry standard of handling procedures for oxygen bottles.
• Secure the bottle against a wall.
• Should the Oxygen supply be in another room, make sure there is a high pressure shut off
valve near the CAL3K calorimeter.
Start the oxygen regulator at a very low (Adjustor turned OUT) reading and then adjust it until
30bar = 3000KPA is indicated on the gauge.

DDS CALORIMETERS OPERATIONS MANUAL V1.1 2022 Website: www.ddscalorimeters.com 3
Digital Data Systems (Pty) Ltd.
CAL3K Advanced Bomb Calorimeters
www.ddscalorimeters.com
DO NOT USE ANY OTHER PIPE OTHER THAN THE HIGH-PRESSURE PIPE SUPPLIED FOR OXYGEN
FILLING.
DO NOT USE THE HIGH-PRESSURE PIPE IF IT HAS A SHARP BEND OR KINK, DISCARD
IMMEDIATELY
• FILL THE VESSEL WITH OXYGEN TO A MAXIMUM PRESSURE OF 3000KPA (30 bar=default).
NOTE: With some applications you may need to fill the Vessel to less than 3000KPA e.g., 1500KPA
(15 bar), however this is only applicable when you have a sample which is highly combustible,
for example powdery samples.
REMEMBER: You may fill the Vessel LESS than 3000KPA but NEVER more than 3000KPA.
3.4 OVER-PRESSURE
Over-pressure can exist in:
a) The oxygen feed line by incorrect oxygen regulator setting, or a faulty regulator. The max pressure
is 35bar (3500KPa). The filling operation will fill to the ‘’fill target setting” unless the time option is
selected. We do not recommend “time filling”.
The CAL3K-AP has a high pressure ‘CUT-OUT’: It deflates the vessel pressure when it reaches 80-90bar.
This cut-out is hard wired and is in addition to the settable pressure peak limit (Command=87), which can
be turned off.
3.5 SAFE OXYGEN CONNECTIONS
Install the high-pressure oxygen pipe without any sharp bends. A 4mm pipe connection is provided. The
oxygen source connection depends on the installation (oxygen regulator or piped in oxygen). It is
important that the oxygen connection is secured to the table to prevent ‘swiping’ in case it is cut
accidentally.
3.6 SAFE EXHAUST GAS CONNECTION
The exhaust gases should be routed to the outside. The exhaust smells and may contain corrosive gases
depending on the sample material. A deflating cap 3K-3-22 (manual deflation) and suitable low pressure
plastic hose is provided. The CAL3K-AP has a special exhaust port and the exhaust plumbing parts are
provided as well.
Note: There is no pressure in the exhaust pipe.

DDS CALORIMETERS OPERATIONS MANUAL V1.1 2022 Website: www.ddscalorimeters.com 4
Digital Data Systems (Pty) Ltd.
CAL3K Advanced Bomb Calorimeters
www.ddscalorimeters.com
3.7 SAFE VESSEL HANDLING
• Handle the vessel over a table or solid surface.
• DO NOT drop a vessel.
• DO NOT use any tools to open or close the vessel. If the vessel fails to deflate use the pre-scribed
‘emergency deflate’ procedure as outlined later on in this manual, which uses the 3K-3-18
EMERGENCY DEFLATE tool.
• DO NOT use any oil or grease on any of the oxygen fittings or the O-rings. A very small amount of high-
pressure (vacuum) grease is allowed on the O-ring to make them pliable. Wipe them clean afterwards.
• Store the vessel with the lid open. Never store a vessel under pressure, always deflate using the de-
filler cap / deflating cap.
• Clean the inside of the vessel with paper towel after every use.
• Weigh the crucible every week and discard it when it has lost 10% of its original mass.
• Discard the crucible when the bottom is distorted and extremely discoloured.
• Remove the deflector plate every week and clean the top surface. It does accumulate residue and
must be clean regularly.
NEVER OPERATE ANY UNSAFE VESSEL.
NEVER IMMERSE THE VESSEL INTO WATER WHEN COOLING. USE THE 3K-2 AIR COOLER OR
ALLOW THE VESSEL TO COOL DOWN NATURALLY.
• A SUITABLE INSPECTION WARNING PERIOD OF 2000 FIRINGS, AND A STOP OPERATING LIMIT OF
2500 FIRINGS ARE PRE-PROGRAMMED FROM THE FACTORY. THE EXACT WARNING LIMIT DEPENDS
ON THE TYPE OF VESSEL.
THE VESSEL MUST BE INSPECTED AT REGULAR INTERVALS DEPENDING ON THE USE. A SUITABLE
INSPECTION PERIOD CAN BE SET (By your agent!) AND THE UNIT WILL ISSUE AN INSPECTION
WARNING AND SOON AFTER THIS IT WILL SHUT-DOWN THE OPERATION.
NOTE: THE MANUFACTURER (DDS) AND ITS AGENTS CANNOT BE HELD RESPONSIBLE FOR ANY
LOSS OR DAMAGE RESULTING FROM NEGLIGENCE OR INCORRECT USE OF THEIR EQUIPMENT.
IT IS YOUR DUTY AND RESPONSIBILITY TO CHECK ALL SAFETY ASPECTS OF THE CAL3K SYSTEM
REGULARLY.

DDS CALORIMETERS OPERATIONS MANUAL V1.1 2022 Website: www.ddscalorimeters.com 5
Digital Data Systems (Pty) Ltd.
CAL3K Advanced Bomb Calorimeters
www.ddscalorimeters.com
4 BASIC KEYBOARD OPERATIONS
The ESC key serves as a: CLEAR/TERMINATE/ESCAPE
The ESC Key is safe to use at any time.
The ENTER key is: ACCEPT/ENTER
All other keys function normally!
The FUNCTION KEYS are assigned to re-occurring operations:
F1 Mass Entry
F2 Sample Identification (SID)
F3
F4 Spike Mass!
F5 Balance mass!
F6 Open the LID (Electronic locks only)!
F7 Test Vessel hardware!
F8 Terminate user test, print displayed result!
F9 Test CAL3K hardware
F10 Function or Fault explanation
F11 Saved Fault event explanation (AP, A, F)!
F12
The CAL3K has many keyboard commands of which you need only a few. The most popular and frequent
used are readily accessible, the others require a password to get access to. You are welcome to
experiment with all of these commands as you like. That is to say without reading the rest of this
manual.
The CAL3K-A and CAL3K-AP can operate in 4 different modes. All other units operate in one mode and
the following command is not required. Without explaining the modes set the mode to ZERO, which is
the DYNAMIC MODE. For details on mode changes see further on in this manual MODE CHANGE.
The keyboard commands below will be written in a different font, italic and indented.
82 SET OPS MODE 1
The CAL3K has four operational modes:
0 Dynamic
1 Adiabatic
2 Isothermal
3 Fast Dynamic
To reset the CAL3K to a working condition you need to install the default parameters by:

DDS CALORIMETERS OPERATIONS MANUAL V1.1 2022 Website: www.ddscalorimeters.com 6
Digital Data Systems (Pty) Ltd.
CAL3K Advanced Bomb Calorimeters
www.ddscalorimeters.com
10 PARA DEFAULTLOAD 0
This command loads ALL default values in to the operating parameters. Any changes done to the
parameters are over-written (lost). This command should be used whenever the parameters were
changed and the outcome is not desirable. We strongly suggest to operate the unit on the default
parameters unless a change is absolutely necessary.
4.1 GENERAL KEYBOARD ACCESS
All keyboard commands are in alphabetic order and the UP/DOWN keys will scroll through the
commands visible at this password level.
There are several ways to execute a command:
A) If you know the command then type it. After the first couple of letters and if no ambiguity exists
the command is auto-completed. Go to Command Execution.
B) Type the first letter of the command and then use the UP (Down) keys to show the full
command. Once you have the full command on the screen go to Command execution
C) Use a function key (when available). Then go to Command execution
D) Use the command index (if you know it). Press ‘XX’ once, then the command index and the
complete command appears on the screen. Then go to Command execution
NOTE: The ‘XX’ numerical command access switches the priority off and renders the password
superfluous.
4.2 COMMAND EXECUTION
At this point the full command is shown on your screen. Press ENTER to accept this command. Most of
the time the command is not executed except in special circumstances which have no consequence.
After acceptance one of the following happens:
A) The command is executed if it is of no consequence (e.g. Display firing voltage)
B) A NO/YES dialogue for operations with a consequence (e.g. ABORT)
C) A YES or NO display indicating the present state (e.g. CALIBRATION ON or OFF)
D) A number display indicating the PRESENT value
At this point you can either:
ESC Terminate, start fresh
Enter a NO, YES, Number, text
ENTER Make the change permanent: The NO, YES, Number, text takes affect

DDS CALORIMETERS OPERATIONS MANUAL V1.1 2022 Website: www.ddscalorimeters.com 7
Digital Data Systems (Pty) Ltd.
CAL3K Advanced Bomb Calorimeters
www.ddscalorimeters.com
4.3 COMMAND NUMBER EXECUTION
All the keyboard commands are indexed with a number, which is indicated in this manual with each key
sequence. This number is used to report a problem to the factory (Software bug) when a unit is used
with a foreign keyboard. It bridges any possible language barriers. The command index, Command text
and command priority is indicated. Example: CMD=54
54 D1 PORT SPEED 0
54 = Command Number Index
D1 PORT SPEED = Command text
0 = Priority, Open, No password required
To execute a command by the number you need to know its Index first. Type ‘XX’ once to enable
command number execution. No password entry is needed for command number execution. The ‘XX’
entry is cleared after the standard password timeout.
5 TESTING
5.1 TEST CAL3K HARDWARE
The test is activated by F9 or by:
13 CAL3K-TEST: 0
This command tests the CAL3K hardware. Once started the unit will cycle through all tests and will
‘hang’ on any fault. Individual test can be executed (without cycling through all preceding test) by
replacing the ‘YES’ entry by the test number.
This test should be repeated once a day. The vessel must not be in the well.
5.2 TEST VESSEL HARDWARE
This test is activated by F7 or:
14 VESSEL-TEST: 0
The vessel must be in the well.
CAL3K-AP only: The oxygen pressure must be connected. All vessel functions are tested and a summary
is displayed. The test must be repeated for each vessel.

DDS CALORIMETERS OPERATIONS MANUAL V1.1 2022 Website: www.ddscalorimeters.com 8
Digital Data Systems (Pty) Ltd.
CAL3K Advanced Bomb Calorimeters
www.ddscalorimeters.com
5.3 TEST THE FAN
This test does NOT apply to the CAL3K-F. This command puts the FAN on.
120 PUT FAN ON 1
5.4 TESTING FOR OXYGEN LEAKS
CAL3K-AP only : Applies to CAL3k-AP only.
Leaks are easily tested with soapy water, or dishwashing liquid (Bubble water) and a cotton bud.
The oxygen plumbing can be separated in to 3 sections:
5.4.1 TEST OXYGEN SUPPLY
This CAL3K requires a regulated oxygen supply with approx. 33bar max (30bar nominal) as indicated on
the oxygen regulator. A leak on this line is depleting the oxygen bottle, but doesn’t influence the unit’s
operation:
Check:
Oxygen bottle, regulator with pressure gauge
Optional shutoff valve
Flexible nylon pipe to CAL3K-AP bulkhead or filling station
Flexible nylon pipe from bulkhead to lid or filling head
Filter and throttle jet (not visible)
Open the oxygen bottle and observe that the regulated pressure increases to the prescribed setting.
Then close the bottle and observe that the pressure holds. If it decreases even slightly then you need to
find the leak by putting some ‘bubble water’ on each joint.
5.4.2 TEST OXYGEN INTERNAL PLUMBING
Replace the filling head nut (grey plastic) with the mushroom look alike blocking device. This blocks the
oxygen feed to the vessel. Insert the vessel WITHOUT the lid in to the well and close the lid. Then
activate command:
94 SYSTEM LEAK TEST 1
This is a service command to check if the system is leaking. The oxygen must be connected and a vessel
must be in the well, lid closed. Activate the test (YES) and the CAL3K will pressurise the system to the
PRESS LEAK TEST, CMD=99 value. Then it monitors the pressure and displays it. During the test one can
try to find any leak if the pressure is declining. Stop the test with ESC.
Note that the filling is very fast because the volume (no =Vessel) is very small.
Replace the filling nut again. The filling nut is plastic and must be tighten by hand. Do not use tools and
do not ‘cross thread’ it.

DDS CALORIMETERS OPERATIONS MANUAL V1.1 2022 Website: www.ddscalorimeters.com 9
Digital Data Systems (Pty) Ltd.
CAL3K Advanced Bomb Calorimeters
www.ddscalorimeters.com
5.4.3 TEST VESSEL LEAK
This test INCLUDES the vessel. Depending on the type of vessel used there are O-rings in the vessel lid
which could leak and require replacement. Use the same CMD=94 command:
94 SYSTEM LEAK TEST 1
Note that the filling is much slower because the vessel is filled. Monitor the pressure and if it is steadily
declining than a leak is present. It is normal that the pressure declines rapidly in the beginning and then
settles down. This is because a flow restriction is present in the vessel lid.
6 PRINCIPLE OF COMBUSTION CALORIMETER
In short, a known substance is burned in a contained environment (Vessel) and the resultant
temperature rise is recorded as a calibration. Then un-known samples are burned and the temperature
rise is compared to the calibration and the unknown calorific value is calculated.
The following sequence applies to a determination and a calibration. The broad difference is that the
calibration saves more data for further reference.
Here is a more detailed, but short sequence of events, assuming default settings.
1. Approx. 0.5g (0.2-0.8g) is precisely weighed and entered in to the CAL3K (electronic or manual
transfer)
2. The vessel is prepared (cotton, crucible, firing wire) and the CAP is closed
3. Manual filling: Place the vessel in the filling station and fill it with oxygen.
4. Place the prepared vessel in to the well and close the lid
5. If this vessel was never calibrated then the unit will ask you to do so.
6. CAL3K-AP automatic filling only: If everything is fine the unit will go into the filling period, open
the fill oxygen solenoid and monitor the filling progress. At the end of the filling process the unit
will switch to the INITIAL PERIOD.
7. All manual filling units: the CAL3K will switch to the INITIAL PERIOD
8. It waits approx. 3 minutes for the vessel to stabilise.
9. After 3 minutes the sample is fired: 25 volts are connected to the firing wire and a very large
current passes through it, the wire glows, the cotton ignites and the sample burns.
10. The unit enters the MAIN state (Final Period) and monitors the temperature rise of the vessel.
11. The temperature increases rapidly, peaks at approx. 1 minute and decreases thereafter.
12. At the end of the main period the Result is displayed on the screen and the End period starts.
13. CAL3K-AP: the vessel deflates automatically to the exhaust port and the lid opens.
14. CAL3K-A/F: The lid opens automatically.
15. CAL3K-S/ST: The lid must be opened manually.
16. Remove the vessel for cooling and subsequent new preparation.

DDS CALORIMETERS OPERATIONS MANUAL V1.1 2022 Website: www.ddscalorimeters.com 10
Digital Data Systems (Pty) Ltd.
CAL3K Advanced Bomb Calorimeters
www.ddscalorimeters.com
Notes (all units):
The Initial period is required to stabilise the vessel temperature. The main (Final, measuring) period
measures the temperature rise from firing to the end. During both periods data a captured which are
used when the result is calculated.
7 MODE CHANGES
The CAL3KA/AP have four operating modes, all other units work in mode=0.
Mode Initial time, Minutes Main Time, Minutes
Mode=0 DYNAMIC 3 4
Mode=1 ADIABATIC 3 5
Mode=2 ISOTHERMAL 4 5
Mode=3 FAST DYNAMIC 2 3
Each mode (and Vessel) must be calibrated if you intend using this mode. Once calibrated the mode can
be changed without re-calibration. Note that a max. of 4 vessels are allowed per mode.
The CAL3K-S/ST have one vessel or two respectively.
There is a trade-off between operating speed and accuracy. The decrease in accuracy is dependent on
the laboratory conditions and in the number of vessels you use.
The mode=3 FAST DYNAMIC can be used without any decrease in accuracy and repeatability if you use
four vessels and operate in airconditioned ambient temperature.
The operating mode can be set by:
82 SET OPS MODE 1
Each of these modes has its own calibration, which means the vessel(s) must be calibrated in the new
mode.
Each of the modes has its own default parameters. The most preferred mode is 0=dynamic, followed by
3=Fast Dynamic.

DDS CALORIMETERS OPERATIONS MANUAL V1.1 2022 Website: www.ddscalorimeters.com 11
Digital Data Systems (Pty) Ltd.
CAL3K Advanced Bomb Calorimeters
www.ddscalorimeters.com
8 CONNECTING
Different units have the following ports and default speeds:
Unit USB PORTD1 PORTD2 BALANCE
CAL3K-AP yes 19200 115200 2400
CAL3L-A yes 19200 115200 2400
CAL3K-F yes 19200 115200 2400
CAL3K-ST - 19200 - 2400
CAL3K-S - 19200 - 2400
8.1 USB PORT
It connects with a PC and the DDS Windows Software App. This App allows the display of data, the
setting of parameters, monitoring of conditions and the retrieval of results for storage on the PC. In
general terms a PC is not needed, but it is nice. USB only available on CAL3k-AP/A/F.
8.2 PORTD1
This is a RS232 port and good for everything as seen later on. Of course, it can be connected to a PC but
it is called the printer port.
8.3 PORTD2
This port is a RS232 port only available on the CAL3K-AP/A/F. Its speed is set at 115.2KB. Its main
purpose is to connect to a BLUETOOTH bridge.
72 BLUETOOTH NAME 1
This entry is important if you are using a BLUETOOTH bridge and if you have more than one BLUETOOTH
device. The name identifies the link to your PC.
8.4 BALANCE PORT
Again, this is a RS232 port. Its purpose is to receive the sample mass from the balance.
8.5 USE OF PORT D1
The RS232 D1 port must be configured to the same setting as the connecting port.
The CAL3k setting is: Data=8bit, Parity=none, Stop bit=1 (Standard).
The port speed is settable by:
54 D1 PORT SPEED 0
This entry sets the D1 RS232 port speed in baud. The default is 19200baud.
The speed can be set from: 1200 to 115200baud.

DDS CALORIMETERS OPERATIONS MANUAL V1.1 2022 Website: www.ddscalorimeters.com 12
Digital Data Systems (Pty) Ltd.
CAL3K Advanced Bomb Calorimeters
www.ddscalorimeters.com
This port can connect to:
Printer
PC
BLUETOOTH Bridge
8.6 CONNECTING TO A PC WITH A RS232 PORT
The PC must have a RS232 port configured to the same speed and a receiving the DDS Windows
Software App must run such as TERA TERM or any virtual port emulator.
The data output is initiated from the CAL3K keyboard or internally.
8.7 CONNECTING TO A PC FOR DATA COLLECTION
This method initiates data transfer on the PC. The DDS Windows Software App will upload data and save
them to the PC memory in a .CSV format. The physical connection can be:
1. RS232 cable
2. USB Cable
3. BLUETOOTH BRIDGE (if no RS232 port, or if USB cable to short)
Configure the DDS Windows Software App to suit any of the above methods.
If a BLUETOOTH BRIDGE is used then the D1-CAL3K port speed must set to 115200 by CMD=54.
The BLUETOOTH BRIDGE has a special application: It converts the RS232 (CAL3K) to a USB (PC). In other
words, if your PC (laptop) hasn’t got a RS232 port then the bridge will work.
8.8 CONNECTING TO A BALANCE
This step is not absolutely necessary. The weight (mass) of the sample can be entered on the keyboard.
The balance connection cable is included in the kit. If the calorimeter is installed near the balance then
we recommend it being connect up. The default balance speed is 2400baud. Set your balance to this
speed! Test the connection by pressing (F5). Then the stable balance weight should show on the display.
If you press (Enter) then the mass is locked. See MASS ENTRY to unlock it.
24 BALANCE SPEED 0
The balance must have the same setup as the CAL3K. The setting is:
Parity None
Stop bits 1
Data 8 bit
Default Speed 2400
The speed in the CAL3K can be adjusted from 1200 to 38400 baud.

DDS CALORIMETERS OPERATIONS MANUAL V1.1 2022 Website: www.ddscalorimeters.com 13
Digital Data Systems (Pty) Ltd.
CAL3K Advanced Bomb Calorimeters
www.ddscalorimeters.com
9 OUTPUT
The CAL3K has a D1 RS232 port which is its connection to the outside world. Some units have a D2
RS232 port and a USB port. These ports are designated as follows:
D1 RS232 PRINTING (and BLUETOOTH)
D2 RS232 BLUETOOTH
USB PC APP
The D1 RS232 port must be setup to match the speed of the connecting port.
54 D1 PORT SPEED 0
This entry sets the D1 RS232 port speed in baud. The default is 19200baud.
The D1 Port operates with: Parity=none, Data=8, Stop bits=1.
The speed can be set from: 1200 to 115200baud.
The output on the D1 port can be triggered by:
A CAL3K operator (keyboard) initiated
A CAL3K internal initiated
A PC DDS Windows Software App (external)
9.1 OUTPUT PRINTING RESULTS TO PAPER, KEYBOARD INITIATED
An Output appears when one of the PRT… commands are executed. The following command require
that an output format (for an 80-column printer) is specified.
Before printing can commence the printing must be enabled
86 SET RESULT ENABL 1
This command enables (YES) or disables (NO) the spontaneous printing of results after a determination.
The results are entered in memory and can be printed later by any of the print commands.
63 SET OUTFORM A-H: 0
This command specifies one of the eight output formats A-H. The outputs can be disabled by specifying
anything but A-H or by using CMD=86,SET RESULT ENABL=NO.
The formats are not set in stone, so it is best to print the HEADER of all formats. The text descriptions
give you are faint idea of what the number columns(data) are.
56 PRT A-H HEADER 0
The unit has 8 print (Output formats) named A-H. The format can be set by
77 SIMULATE RESULT 1

DDS CALORIMETERS OPERATIONS MANUAL V1.1 2022 Website: www.ddscalorimeters.com 14
Digital Data Systems (Pty) Ltd.
CAL3K Advanced Bomb Calorimeters
www.ddscalorimeters.com
This command simulates a result (junk data). If the print output is enabled (CMD=63, SET OUTFORM A-
H) and a printer is connected then the junk data appear on the output.
The following print outputs are possible:
69 PRT RESLTS FORM: 0
Enter the output form descriptor A-H and all results in the memory are printed. The selected (CMD=63)
form remains as specified.
52 PRT RESULT DAY: 0
Enter the day number 1-31 and all results recorded at this day are printed. The result memory should be
cleared every month, CMD=39.
64 PRT RESULT GID: 0
Each result in memory has a GID (Group Identification) of 16 characters. The GID can be an entered text
(CMD=3) or the date (CMD=122). Enter the GID (Up to 16 characters) and results are printed.
57 PRT TODAY FORM: 1
Enter an output format A-H and all results for today are printed.
67 PRT CV'S VESSEL: 0
The entry is a 4 character vessel serial number, printed on the vessel lid. The complete result memory is
searched for this serial number and all results are printed.
55 SET FILTER C,F: 1
A filter can be applied to the print output
The print outs can be filtered to exclude Calibrations (C) and Faults (F).

DDS CALORIMETERS OPERATIONS MANUAL V1.1 2022 Website: www.ddscalorimeters.com 15
Digital Data Systems (Pty) Ltd.
CAL3K Advanced Bomb Calorimeters
www.ddscalorimeters.com
9.2 OUTPUT PRINTING, KEYBOARD INITIATED, OTHER
The CAL3K can supply the following information:
58 PRT CALORI INFO 1
The command prints the relevant CAL3K information, including parameters and customer setting. This
printout is included in the shipment.
59 PRT VESSEL INFO 1
This command prints the vessel information. The vessel must be in the well.
107 PRT KEY CMD LIST 1
The command prints all installed keyboard commands as follows:
CMD NUMBER
KEYBOARD ENTRY
PRIORITY
85 PRT MAX DATA 0
The CAL3K (Chassis) accumulates maximum data. This command prints all maximums.
The maximum readings can be reset by CLEAR CAL3K MAX, CMD=40.
112 PRT HELP HISTORY 0
This feature applies to CAL3K_AP, A, F
The CAKL3K records all major operational or setup faults. This command prints all recorded events. After
64 events the unit overwrites the oldest one. The printout consists of:
Message Number Mxxx (M Number)
Date and Time
Short display text
101 PRT PRESS. RECRD 1
An CAL3K-AP command. This command prints all (Max 16) pressure recordings which are caused by
either:
Exceeding the PRESS PEAK LIMIT
Exceeding the internal max pressure setting 90bar
The pressure recordings can be reset by CLEAR PRESS RCRD, CMD=38. The records can be read out on
the display with CMD=115 and a junk record can be simulated with CMD=126.
This manual suits for next models
5
Table of contents
Other DDS Calorimeters Laboratory Equipment manuals
DDS Calorimeters
DDS Calorimeters CAL3K 3K-F User manual

DDS Calorimeters
DDS Calorimeters 3K-ST User manual

DDS Calorimeters
DDS Calorimeters CAL3K-AP User manual

DDS Calorimeters
DDS Calorimeters CAL3K-F User manual

DDS Calorimeters
DDS Calorimeters CALOK 3K-S User manual

DDS Calorimeters
DDS Calorimeters CAL3K-A User manual

