Extendable eyepoint adjuster
SZX2-EEPA
· This product is a precision instrument. Handle it with care and avoid subjecting it to a sudden or severe impact.
· Never disassemble any part of the product. Otherwise, failure could be caused.
· For cleaning, storage and operating environment of this product, refer to the instruction manual for your microscope.
· Before disposing of this product, be sure to follow the regulations and rules of your local government.
· Due to performance limitations, this product cannot be used in combination with the following products:
Intermediate attachments: SZX-SDO2
Fluorescence units: SZX2-RFA16 and SZX2-RFA16A
Stands: SZ2-STU1 and SZ2-STU3
Camera: DP80
· Do not use this product with the following product combinations. Otherwise the microscope may be tilted or fall over.
• LED transmitted light illumination base (SZX2-ILLTQ/ILLTS) + Optional column (SZH-P400/SZH-P600) + Fluorescence units
This product is the "extendable eyepoint adjuster" used in combination with the stereo microscope series SZX7, SZX10
or SZX16. For usage not described in this instruction manual, refer to the instruction manual for your microscope.
Use the Allen screwdriver provided with the stereo microscope to attach the units.
Item Specifications
Eyepoint height adjustment range 30 to 150 mm (difference from the height without the eyepoint adjuster)
Scale indicator is available
Total loaded weight limit 5 kg
Dimension 227(W) x 198(D) x 194(H) mm
Weight 2.1 kg
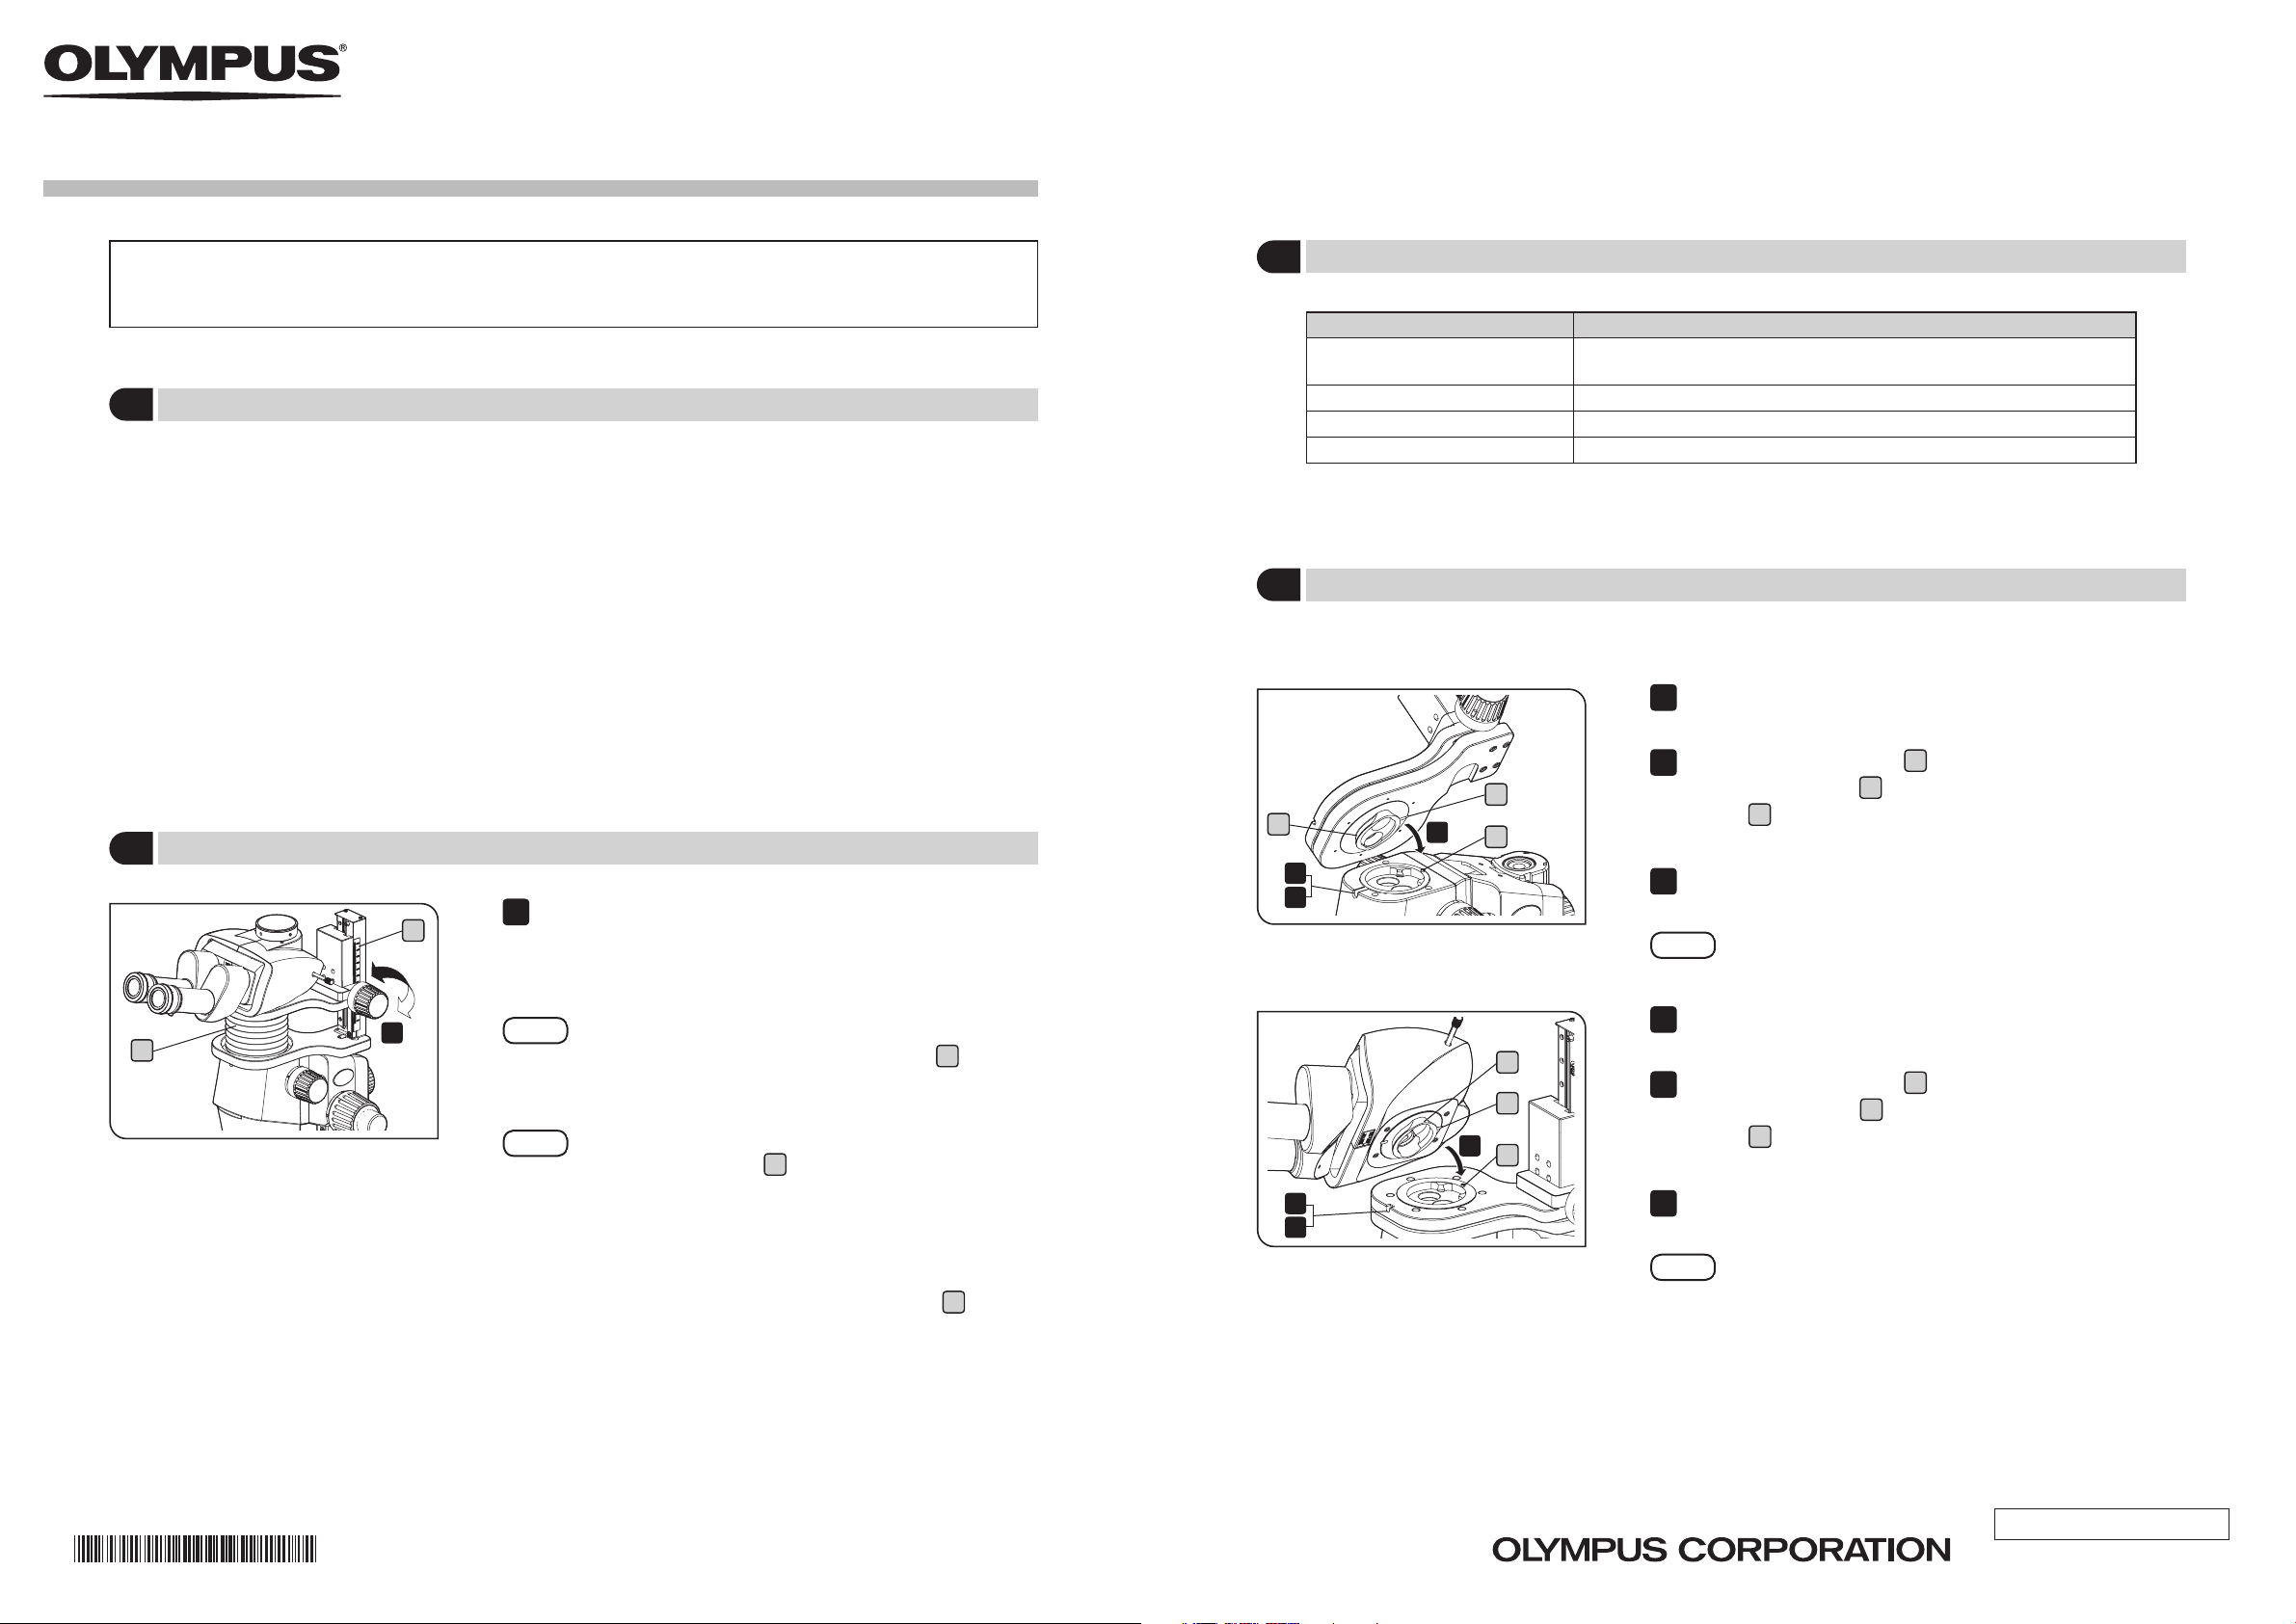
Loosen the clamping screw of the observation tube mount of the
zoom microscope body.
Aligning the positioning pin aof the observation tube mount to
the positioning groove bon the eyepoint adjuster, insert the male
dovetail cat the bottom of the eyepoint adjuster into the observation
tube mount.
While holding the eyepoint adjuster firmly in one hand, tighten the
clamping screw of the observation tube mount securely.
If the eyepoint adjuster is released before it is clamped
securely, it may be removed from the zoom microscope
body and fall down.
Loosen the clamping screw of the observation tube mount of the
eyepoint adjuster.
Aligning the positioning pin dof the observation tube mount to
the positioning groove eon the observation tube, insert the male
dovetail fat the bottom of the observation tube into the observation
tube mount.
While holding the observation tube firmly in one hand, tighten the
clamping screw of the observation tube mount securely.
If the observation tube is released before it is clamped
securely, it may be removed from the eyepoint adjuster
and fall down.
2
3
5
6
Turn the eyepoint height adjustment knob to move the movable part
up and down.
The eyepoint is raised/lowered by turning the knob clockwise/
counterclockwise.
The eyepoint height (difference from the height without the
eyepoint adjuster) can be checked by the scale alocated
on the right side. If you take note of your optimum eyepoint
height, it is convenient to read just the height easily next time.
·The eyepoint height should be set within the range from 30
to 150 mm of the scale a. If you use it outside of the range
(close to both ends of the height adjustment mechanism),
the observation image may be moved remarkably. Also, if
the movable part is pushed to the stoppers at both ends of
the height adjustment mechanism with a strong force, the
eyepoint height adjustment knob may rattle.
·Do not apply excessive force to the bellows bcovering
between the movable part and the fixed part of the eyepoint
adjuster. Otherwise the bellows may be deformed.
1
2
6
1Handling precautions
2Adjusting eyepoint height
3Specifications
INSTRUCTIONS
b
a
c
b
a
f
e
d
1
3
4Attaching the eyepoint adjuster and the observation tube
Optical Microscope Accessory
AX8808 03 Issued in March, 2019


