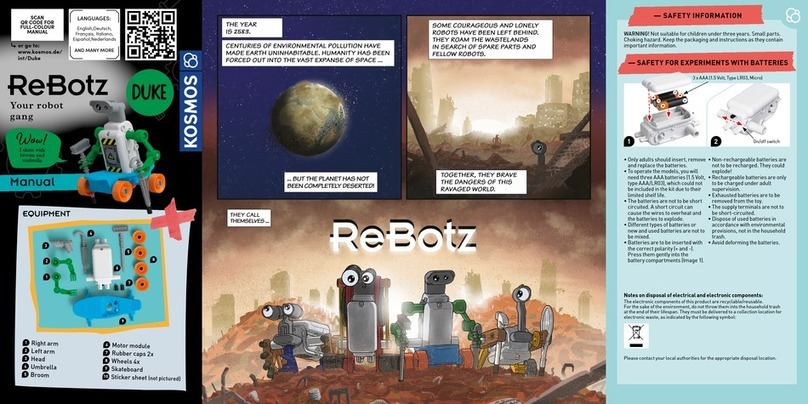
De Agostini R2-D2 User guide

1
R2-D2
BUILD YOUR OWN
START UP GUIDE
Please follow these instructions carefully, step-by-step, before turning on
and operating your R2-D2 unit.
R2-D2 is powered by six rechargeable batteries (which must be bought separately) that you
prepare using the included tester/charger and USB lead.
© & TM 2021 LUCASFILM LTD

2
Read this section very carefully before buying batteries for R2-D2.
Buying R2-D2’s batteries:
Essential information
‘Button-top’ batteries. ‘Flat-top’ batteries.
R2-D2 is designed to use rechargeable 18650 lithium
ion (Li-ion) batteries, installed in the battery box
provided. You will need to buy six. This type of battery
is made by many leading electronics companies –
such as LG, Panasonic, Samsung or Sony – as well as
less well-known brands. They are widely available
online, and in some retail outlets. Popular uses
include powering e-cigarettes, ashlights, digital
devices, and even some e-cars, such as Tesla.
It is essential to note that the specication of 18650
batteries varies, so the ones you buy must match the
specications in the panel on page 3.
Some 18650 batteries have one end terminal
raised (like a regular battery), but others have both
ends at. As a safety measure, R2-D2’s battery box is
designed so that the button-top type with a raised
terminal only make contact when they are tted into
the battery box the correct way round. Batteries with
at ends will not make contact and cannot be used in
R2-D2.
It is quite common to nd batteries that include
internal protection circuitry. Do not buy the type
described as ‘protected’, as R2-D2 has his own
protection circuit.
Make sure you buy batteries with a nominal voltage of
3.7V (it is rare to nd ones in R2-D2’s that don`t match
this). But note that their capacity – in milliamp hours
(mAh) – can vary; typically from 1250 to 3600mAh, or
even more. You need batteries with a capacity of at least
2000mAh, but we recommend ones between
2600-2800mAh. The higher the capacity, the longer
R2-D2’s standby/operating time, but the batteries will
take longer to charge fully.
You may nd batteries describes as ‘high drain’/’high
discharge’ (intended for use in high-power applications
such as power tools or vaping devices). These are ne to
use, so long as they are the right voltage (3.7V). R2-D2’s
battery box has protection circuitry that will ensure that
the cells are only drained at the correct rate.

3
The number3.7V should appear onthe battery itself somewhere.
‘Nominal’ means this is the average voltage: the maximum
(charging) is 4.2V, but as the battery is used, the voltage will drop
to the minimum, about 3.0V.
This is an idealcapacity, but R2-D2
will work with acapacity of 2000mAh
or over.
1) Type:
18650 lithium ion
2) Voltage:
3.7V (nominal)*
3) Terminals:
Button top
4) Protection:
No protection
5) Capacity:
2600mAh**
CHECKLIST: DO YOUR BATTERIES MEET ALL THESE SPECIFICATIONS?
INSTALLATION AND CHARGING
Be sure to buy six identical batteries, all at the same time, from the same batch.
Read the manufacturer’s safety instructions carefully before using them.
*
Button-top +
terminal
18650
lithium
ion
Capacity
2600mAh
**
Read this section very carefully before buying batteries for R2-D2.
Buying R2-D2’s batteries:
Essential information
It is very important to buy all six batteries at the same time, as a
batch from one manufacturer with the same specication. This
will ensure that they are all in the same starting condition. It is
characteristic of lithium ion batteries that the one with the
worst condition will determine the performance of the whole
pack. If one of the six batteries is ‘bad’ (with a very low power
level, or coming to the end of its recharge cycle), it has the
potential to damage other ‘good’ cells, and even the protection
circuitry.
We have provided a single-cell tester/charger unit that can be
plugged into any USB outlet. This both charges and gives a
readout of the condition of the batteries. Using it to set up each
of the six before they are put into the battery box will ensure
that they are in optimum condition and maximise the
performance of the whole battery pack. If you nd your
purchased cells do not match, do not use them in R2-D2.
Once you have carried out the initial testing/charging process,
the battery pack can be recharged as a whole using R2-D2’s
external charging socket. There is no need for any further
special maintenance. Keep the tester/charger safely in case you
need to replace batteries in the future. If you do, you will need
to use it to repeat the installation process with the full
replacement set.
When disposing 18650 batteries, be sure to always do so
safely, following recycling regulations.
18650 BATTERIES are available cheaply through auction sites, but be wary of buying any described as
‘used’, ‘job-lot’, ‘pre-owned’, etc – or any that are not in their original packaging. We recommend that you
shop at a reputable supplier, and only buy a recognised brand.
Note that while the nominal voltage
is 3.7V, you may see a reading of up
to 4.2V during charging.

4
Follow these vitally important steps before inserting any batteries into R2-D2’s battery box.
4
7
1 2
3
5 6
+
IMPORTANT
Preparing the batteries
Ensure all six batteries
are tested and
charged before
inserting them into
R2-D2’s battery box.
Double-check the specications of
your batteries match all of the
requirements listed on page 3 of
this start-up guide.
Leave the charger plugged in until the readout changes to ‘FUL’ to indicate that
the battery is fully charged. Unplug the charger and remove the battery. Please
note: if the reading doesn’t go up after 30 minutes or so, the battery is likely to
be ‘bad’ and should be discarded.
You will see a readout of the battery
condition. If a new cell shows a voltage of 3.3V
or less (or ‘LO’), the battery is highly likely to
be ‘bad’ and should not be used.
Plug the USB lead’s small
connector into the
tester/charger and plug the
other end into a suitable USB
socket.
When the lead is plugged in,
the last digit of the display will
ash, indicating that charging
has started.
Take the rst
battery and identify
the raised positive
(+) terminal.
Make sure that the tester/charger is not plugged in,
so it will operate as a voltage reader. Fit the battery
into the tester/charger this way round, matching
up the + terminal symbols.

5
If you have purchased, tested and charged the batteries in accordance with the instructions on the
previous pages, you are now ready to install the batteries and power up R2-D2.
…so you can slide it forward and
release it.
Fit the rst battery into the battery
box like this, noting that the
button-top positive (+) terminal goes
at the end without a spring.
Fit the other ve batteries, noting
that the positive terminals go at
opposite ends in pairs as shown.
Make sure that the main switch
under R2-D2 remains turned o
until step 13.
Unscrew the two screws holding the
battery box cover…
Undo the screws holding the battery
access panel, and slide it forward
and down…
…so you can take hold of the
battery box and slide it out.
Take your six prepared batteries and
a suitable crosshead screwdriver.
4
1
5
2
7
6
3
8
++ +
+
++
+
STOP!
Powering up
Did you purchase six
identical batteries at the
same time?
Are you sure they are the
correct specication?
Have you tested and
charged each battery as
described?

6
Ret the battery box cover and its
screws.
Slide the battery box back into its
mount.
Screw the access panel back in
place.
Press Button 6 on R2-D2’s front panel as shown.
14
11
910 11
12
Be aware that when you take step 14;
So please make sure R2-D2 has some room to
move and that nothing will restrict his head
from turning.
The red light on R2-D2’s front status display will
come on and he will jerk forward.
His head will rotate left and right, then centre.
The front status display will turn purple and the
rear status display will go green or yellow, then
R2-D2 will make a noise to indicate his readiness.
Plug the mains adaptor into R2-D2. Plug the other end
into the mains and turn it on. Leave it for a couple of
seconds, then turn o and unplug both ends. This is a
protection procedure to activate the battery, and
without doing this, R2-D2 won’t turn on.
When it’s time to recharge the batteries you do not
need to repeat this step. Simply connect to the mains
to recharge. If R2-D2 is turned on when you connect to
the mains, his front red/blue status light will change
colour and ashing sequence to indicate the charge
level. See the online User Guide for more details.
When you remove and replace the batteries, you will
need to repeat step 12 to activate the new batteries.
Turn on the main power switch under R2-D2’s body.
13

7
Button 1 Patrol mode
Button 4 Pairing/Connection mode
Use to connect to local Wi-Fi
Button 2 Arm control
Status: Extended/Retracted
Button 5 Switch mode button
Status: change between Direct
and Local Wi-Fi connection
Button 3 Lightsaber control
Status: Up/Down
Button 6 Power button
Long Press: force shut down
To control R2-D2’s advanced operations you’ll need to install his special free app.
For full details on how get the most from your R2-D2, please consult the separate USER GUIDE.
You can control several
functions directly from the
buttons on R2-D2’s front panel.
Note that in Patrol mode, R2-D2 will sense walls and vertical
obstacles at a distance of around 40cm, and his infrared staircase
sensor will also react if he starts running over a step. This is less
eective on dark oors, and he may nd it hard to reverse quickly
on slippery surfaces. Before you activate Patrol mode make sure
R2-D2 will have enough time for his sensors react to his current
location.
On Google Play search for “Build Your Own R2-D2”. On the App Store search for “R2-D2 droid control”. App
publisher is De Agostini Publishing Italia S.p.A.
Status: On/O
Short Press: on/o
Table of contents
Other De Agostini Robotics manuals
Popular Robotics manuals by other brands

Hasbro
Hasbro Marvel Avengers Infinity War Legends Infinity... quick start guide
ABB Robotics
ABB Robotics IRB 4600 manual

Yujin Robot
Yujin Robot GoCart250 Service manual

Robosen
Robosen Optimus Prime Trailer Kit Elite user manual

LEGO
LEGO MINDSTORMS Education EV3 Getting started
Pololu
Pololu Zumo user guide


