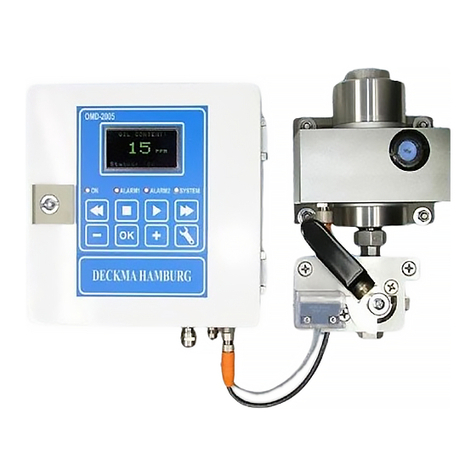
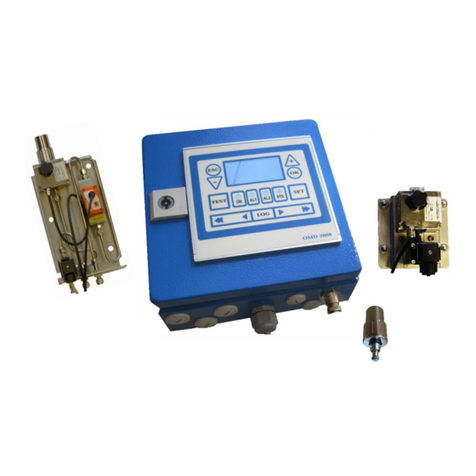
Deckma Hamburg OMD-24 Series User manual

We help to protect the Environment
INSTRUCTION MANUAL
OMD-24 Series
15 ppm Bilge Alarm
OMD-24 Series
Electric Valve –OMD-24 EV
Electric Valve Auto Clean –OMD-24 EVA
Auto Clean –OMD-24 A
Flow Control OMD-24 FC
(Optional: Manual Cleaning Unit MCU)

Page: 1
Usage of this instruction manual
This instruction manual will guide you how to use the OMD-24 Series. The instruction
manual is split into sections. Every section handles a specific part of the OMD-24 Series.
The first section gives you general information about the safety before using and servicing
the OMD-24 Series. Please take notice on this section.
You will also find information about the construction and the installation of
OMD-24 Series. The programming mode is explained in detail at the end of the instruction
manual.
This instruction manual also contains information about the service support and our
contact details. The symbols below will accompany for a better understanding.
Disposal
The crossed-out waste container icon on waste electrical or electronic device indicates
that this device must not be disposed of with household waste at the end of its life. There
are collection points available in your area for free. The addresses can be obtained from
find out further return options provided by our company.
Separate collection of waste electrical and electronic equipment (WEEE) is intended to
prevent the re-use, recycling other forms of use of WEEE as well as to avoid adverse
effects on the environment and human health from the disposal of potentially hazardous
substances contained in devices.
Symbols
This symbol is used for giving general advices.
i
This symbol is used to clarify a recommendation.
This symbol is used for giving advices about servicing.
This symbol is used to draw warning against hand injuries.
This symbol is used to show electrical voltage warnings.
This symbol is used to draw attention to hot surfaces.
This symbol is used for giving general warnings.
This symbol is used to draw attention to hazardous substances.

Page: 2
Safety hazard
Mechanical Risks
Risk of hand injuries
While closing the front cover hand injuries could be possible.
Electrical Risks
Electrical voltage warnings
Incorrect commissioning and wiring, touching live parts, and cable
breakage or faulty components can lead to electrical hazards.
Thermal Risk
Risk of scalding
High temperatures can occur on the surface of the measuring cell. Hot
water may spill and cause scalding.
Chemical Risk
Risk of chemicals
Material used during cleaning and maintenance can cause eye and skin
irritation.
Risk reduction
Risks
Recommended reduction
Risk level
(1)Low –(3)High
Risk of hand
injuries.
While opening and closing the front cover care must be taken.
1
Electrical risks.
Works on the units should be only be done by a qualified
person. Keep Terminal Cover closed at all times.
3
Risks of scalding.
It is recommended to wear protective clothing in the form of
heat-resistant gloves and protective goggles, if high
temperature sample is present.
1
High temperature
risks.
Do not open the cell cap until the sample water has cooled
down sufficiently. Stop any sample water flow prior to opening
the head screw.
2
Unexpected
movement of the
wiper piston.
Close pressurized air supply before working on the Autoclean
System or dismantling the Autoclean System.
2
Chemical Risk.
Material used for Cleaning and Maintenance may cause eye
and skin irritation. Cleaning solution may cause health
problems if ingested.
1
Risk of
environmental
damage.
Use instrument strictly within its specification. Keep instrument
properly maintained.
1
Risk of health
damage.
Do not touch or ingest any residue from sample stream.
2

Page: 3
IMPORTANT NOTICE
Replacement components for 15 ppm Bilge Alarms
General
All monitors in our range are inspected and tested to the related International Maritime
Organization IMO requirements at our factories prior to delivery.
In normal use the units should operate correctly and without fault over a long period of time
requiring only small amounts of maintenance to be carried out as outlined in the instruction
manual.
Service Exchange Units
In the event of a monitor malfunction due to electrical or electronic component failure it is our
recommendation that a service exchange unit be ordered.
The defective instrument should be returned to our works within 30 days of supplying the service
exchange unit, then only the repair charge is payable. Otherwise the whole cost of a service
exchange unit becomes payable.
This procedure is by far the easiest and most cost-effective way of ensuring the monitor on board
conforms to IMO resolution MEPC.107(49).
Remark
According the MEPC.107(49) § 4.2.11 the units have to be checked at IOPP Certificate renewal
survey by the manufacturer or persons authorized by the manufacturer. Alternatively, the unit
may be replaced by a calibrated 15 ppm Bilge Alarm.
The OMD-24 Series are designed in that way, that only the Measuring Cell needs to be changed,
as these units carry the Calibration Certificate. The Calibration Certificate with the date of the last
calibration check should be retained onboard for inspection purposes.
If for some reasons the Computer Unit needs to be changed, it has made sure, that the memory
card will remain on board for at least 18 months. The new Computer Unit will carry its own
memory card. The old card can be inserted into the new unit only for reading. Writing is only
possible with the card delivered with the new Computer Unit. For details see section 16.
Memory Card.
Warranty
Our warranty terms are 12 months after installation but maximum 18 months after delivery ex
works. The maker undertakes to remedy any defect resulting from faulty materials of
workmanship except wearing parts.
The maker's obligation is limited to the repairs or replacement of such defective parts by his own
plant or one of his authorized service stations.
The purchaser shall bear the cost and risk of transport of defective parts and repaired parts
supplied in replacement of such defective parts.
i
ANY DISMANTLING OR BREAKING OF A SEAL WILL VOID THE WARRANTY.

Page: 4
Content:
Usage of this instruction manual ........................................................................................... 1
Disposal ........................................................................................................................................1
Symbols ........................................................................................................................................1
Safety hazard ........................................................................................................................ 2
Risk reduction ...............................................................................................................................2
Revision ................................................................................................................................ 8
1. Introduction................................................................................................................... 9
2. Important Notes .......................................................................................................... 11
3. Principle of operation .................................................................................................. 12
3.1 Touch Panel.....................................................................................................................12
3.2 Measuring Principle.........................................................................................................12
3.3 Display Visualization........................................................................................................12
3.4 Alarms ............................................................................................................................13
3.5 Adjustment .....................................................................................................................13
3.5.1 Limited Adjustment Alarm Set Point..................................................................................................14
3.6 Active Current Interface...................................................................................................14
3.7 Inputs..............................................................................................................................14
3.8 EV (Electric clean water Valve).........................................................................................14
3.9 Automatic Cell Cleaning Device........................................................................................15
3.10 MCU (Manual Cleaning Unit)............................................................................................15
3.11 Features..........................................................................................................................16
3.12 Internal Back-Up Lithium Thionyl Chloride Battery ...........................................................16
4. OMD-24....................................................................................................................... 17
4.1 Specification OMD-24......................................................................................................18
4.2 OMD-24 Construction......................................................................................................19
4.3 OMD-24 Installation ........................................................................................................20
4.4 OMD-24 Piping ................................................................................................................21
4.5 OMD-24 Cabling ..............................................................................................................22
5. OMD-24 EV.................................................................................................................. 23
5.1 Specification OMD-24 EV .................................................................................................24
5.2 Construction OMD-24 EV .................................................................................................25
5.3 Installation OMD-24 EV ...................................................................................................26

Page: 5
5.4 Piping OMD-24 EV ...........................................................................................................27
5.5 Cabling OMD-24 EV .........................................................................................................28
6. OMD-24 EVA................................................................................................................ 29
6.1 Specification OMD-24 EVA...............................................................................................30
6.2 Construction OMD-24 EVA...............................................................................................31
6.3 Installation OMD-24 EVA .................................................................................................32
6.4 Piping OMD-24 EVA.........................................................................................................33
6.5 Cabling OMD-24 EVA .......................................................................................................34
7. OMD-24 A.................................................................................................................... 35
7.1 Specification OMD-24 A...................................................................................................36
7.2Construction OMD-24 A...................................................................................................37
7.3 Installation OMD-24 A .....................................................................................................38
7.4 Piping OMD-24 A.............................................................................................................39
7.5 Cabling OMD-24 A ...........................................................................................................40
8. OMD-24 FC (Conversion-Kit)......................................................................................... 41
8.1 Specification OMD-24 FC (Conversion-Kit)........................................................................42
8.2 Construction....................................................................................................................43
8.3 Installation......................................................................................................................44
8.3.1 Electrical Installation Step-By-Step ....................................................................................................44
8.3.2 Typical Piping Installation...................................................................................................................46
8.4 FC Principle of operation..................................................................................................47
8.4.1 FC (Flow Control).................................................................................................................................47
8.4.2 Description of Sensor-PCB LEDs..........................................................................................................47
9. Cleaning Devices.......................................................................................................... 48
9.1 Manual Cleaning Unit (MCU)/ Automatic Cell Cleaning Device..........................................48
9.1.1 Flow rate regulation on MCU, Auto Clean System..................................................................................48
10. Terminals description............................................................................................... 49
10.1 External Control System...................................................................................................51
11. Power Supply........................................................................................................... 52
12. Commissioning......................................................................................................... 53
12.1 Electrical and Piping.........................................................................................................53
12.2 Instrument Start-Up Sequence.........................................................................................54
12.3 Flow rate Adjustment......................................................................................................54
12.4 System Settings ...............................................................................................................56
12.5 Auto Clean Control Unit...................................................................................................56

Page: 6
12.5.1 Pressure Regulation .......................................................................................................................57
12.5.2 Using standard drainage SS ...........................................................................................................57
13. OMD-24 Series Operating instructions...................................................................... 58
13.1 Cleaning Options .............................................................................................................59
14. Operator Maintenance............................................................................................. 60
14.1 General Test....................................................................................................................60
14.2 Normal Operation ...........................................................................................................60
14.3 Cleaning Process..............................................................................................................61
14.4 Intensive Cleaning ...........................................................................................................61
14.5 System Test.....................................................................................................................61
14.6 Data Logger Checking ......................................................................................................62
14.7 MCU and Automatic Cell Cleaning Device.........................................................................62
14.8 Maintenance Recommendations......................................................................................63
15. Programming Mode ................................................................................................. 64
15.1 Buttons ...........................................................................................................................65
16. Memory Card........................................................................................................... 66
16.1 OMD-CR Memory Card Reader.........................................................................................67
17. Fault finding............................................................................................................. 68
17.1 Automatic Cell Cleaning Unit Fault Finding .......................................................................70
18. Calibration ............................................................................................................... 71
18.1 OMD-24 Series ................................................................................................................71
18.2 Calibration and Repeatability Check.................................................................................71
18.3 Function Test at Classification Survey and Port State Control............................................72
19.OMD-24 Series with 5 ppm Alarm Set Point.............................................................. 73
20. Spare Parts............................................................................................................... 74
20.1 Recommended On Board Spares......................................................................................75
21. Optional Equipment ................................................................................................. 76
22. REMARKS................................................................................................................. 77
23. Appendix I................................................................................................................ 78
23.1 Navigation Buttons..........................................................................................................78
23.2 Functional Buttons ..........................................................................................................79
23.2.1 Functional Button “TEST”...............................................................................................................79
23.2.2 Functional Button “ON” .................................................................................................................80
23.2.3 Functional Buttons AL1/ AL2/ SET .................................................................................................82
23.2.4 Functional Button “SYS”.................................................................................................................84

Page: 7
23.3 Data Logger Operation Buttons........................................................................................85
23.4 Activating the Memory Card ............................................................................................86
23.5 Software additional information......................................................................................87
24. Appendix III.............................................................................................................. 91
24.1 ALARMS ..........................................................................................................................91
25. Appendix IV. ............................................................................................................ 92
25.1 Operator Maintenance Quick Checklist ............................................................................92
26. Appendix V .............................................................................................................. 93
26.1 Servicing and Cleaning Manual.........................................................................................93
Index................................................................................................................................. 106
List of Figures .................................................................................................................... 107
Sales & Service Locations .......................................................................................... 108
Notes: ............................................................................................................................... 109
Type Approved by: ............................................................................................................ 110

Page: 8
Revision
Document-Name
Revision No.
Notation
Date
OMD-24 Series
R05_20221028
28.10.2022

Page: 9
1. Introduction
The OMD-24 Series Bilge Alarm Units have been designed specifically for use in
conjunction with 15 ppm oil-water separator units and have a specification and
performance which exceeds the requirements of the International Maritime Organization
IMO specifications for 15 ppm Bilge Alarms contained in Resolution MEPC.107 (49).
The units are supplied with 2 works-adjusted alarms at 15 ppm. Set points from 1 ppm to
15 ppm are possible and can be adjusted on site at any time by using the buttons at the
front panel.
If an alarm set point is exceeded, the alarms are visible at the front panel and the
appropriate relays are switched. In case of malfunction the “SYS LED” at the front panel
will change from blinking green to permanent red.
For the data logging function, the unit requires a status input from the separator.
A 0(4) - 20 mA signal output (equal to 0 - 30 ppm) is available for driving a recorder or
external meter.
By request the OMD-24 Series are also available with 5 ppm alarm set point. Additionally,
instrument versions equipped with a Measuring Cell Cleaning Unit or an Automatic Cell
Cleaning Device are available.
OMD-24 Series generally consist of a Computer Unit, a Measuring Cell, and further
equipment (e.g. Valve Assembly, Electrical Valve, Flow Control, and Automatic Cell
Cleaning Device).
The Computer Unit contains the display PCB with the data logger and the terminals for
external connections.
The Measuring Cell is built out of an anodized all-aluminum body with inlet and outlet
block made from stainless steel. This rugged cell contains optics and electronics and is
connected with the Computer Unit via a plugged data cable. The Measuring Cell is
mounted onto a valve support, which holds the valve assembly, too. Sample water and
clean water usage are controlled by an electric Switchover Valve. This assembly is
connected to the measuring cell by a push-in connector.
The Measuring Cell should be positioned vertical.
The OMD-24 units can be mounted on wall or as bulkhead installation. It is also possible
to split the computer unit from the Measuring Cell if the available space is not sufficient.
Optionally a connection cable for up to 5 m distance from Computer Unit to Measuring
Cell is available.
The OMD-24 Series should be located as close as possible to the oily water separator to
minimize response delays. According MEPC.107(49) the layout of the installation should
be arranged so that the overall response time (including the response time of the 15 ppm
Bilge Alarm, which is less than 5 sec.) between an effluent discharge from the 15 ppm
Bilge Separator exceeding 15 ppm, and the operation of the Automatic Stopping Device

Page: 10
preventing overboard discharge, should be as short as possible and in any case not more
than 20 sec.
Mount the OMD-24 Series instruments by means of M6 or M8 screws on to a rigid vertical
surface or frame and preferably with the display panel of the monitor at user
convenience. For service and maintenance sufficient space to all sides should be available.
Care must be taken at mounting of the pipes connections to avoid any torsion of the
housing and damage of the instrument.
For separator discharge pipes, up to 75 mm OD a standard "T"-type junction of the welded
or screwed type is satisfactory for the tapping point. For the separator discharge pipes of
80 mm OD and above a sample probe should be employed which protrudes into the
discharge piping by approx. 25 % of the ID of the pipe.
If connection to a vertical section of the separator outlet piping is impractical, the tapping
may be made into the side of the horizontal pipe. Avoid top or bottom entry.
Electrical connections are made through the metric cable gland openings prepared
underneath the instrument. Not all openings may be free. The electrical connections are
located inside the computer housing.
The Units must be connected to the mains supply via a suitable rated and approved fused
isolator unless such fusing / isolation is provided by associated equipment. When fitted,
the isolator should be close, readily accessible and marked as to function.
Close the terminal cover completely after electrical installation. Water and humidity
inside the instrument may result in corrosion and malfunction.
If the instrument is operated at high voltages, additional care has to be taken to provide
reliable ground connections. Ground (PE) must be connected direct to the PE terminal
or, if this is not sufficient according local rules, to the computer housing (PE bolt inside,
right side).

Page: 11
2. Important Notes
a) This equipment must be installed and operated in strict accordance with the
instructions contained in this instruction manual. Failure to do so will impair the
protection provided.
b) Installation and servicing must be undertaken by a competent and suitably skilled
person.
c) The equipment must be connected to the ground according relevant requirements.
d) The unit must be isolated from the electrical supply before any maintenance of the
equipment is attempted.
e) All national or local codes of practice or regulations must be verifying and, where
applicable, are deemed to take precedence over any directive or information
contained in this instruction manual.
f) In case of freezing conditions, the Measuring Cell should be emptied completely.
Some components mentioned in this instruction manual may not be present on the
instrument on site, and/or the instrument may have additional components.
g) Technical specifications are subject to change without notification.
h) If uncertain how to proceed, contact the maker.

Page: 12
3. Principle of operation
3.1 Touch Panel
The OMD-24 Series Touch Display consists of several buttons and LEDs. Each button/
LED has its own specific function. (For more information see 23. Appendix I.).
Figure 1 Touch Panel
3.2 Measuring Principle
An optical sensor array measures a combination of light scattered and absorbed by oil
droplets in the sample stream. The sensor signals are processed by a microprocessor to
produce linearized output.
If an alarm (set point form 1 ppm to 15 ppm) occurs, the two oil alarm relays are activated
after the adjusted time delay.
The microprocessor continuously monitors the condition of the sensor components and
associated electronics to ensure that calibration accuracy is maintained over time and
extremes of environmental conditions.
3.3 Display Visualization
The display visualizes the oil content status of the units. Using the buttons, it is also
possible to see information about the settings.
A.
+button
B.
OK button
C.
AL1/2 button/ LED
D.
SYS button/ LED
E.
SET button
F.
Arrow Slider
G.
LOG button
H.
TEST button
I.
ON button/ LED
J.
-button
K.
ESC button
L.
Display

Page: 13
3.4 Alarms
The units contain two independent oil alarm circuits. From the manufacturing both alarms
are set to 15 ppm (according IMO). The set points can be changed according to the
requirements on site, to any point between 1 ppm and 15 ppm. An alarm point setting
above 15 ppm is not possible. The adjustment can be done in the programming mode as
described in the appendix (See section 23.2.3 Functional Buttons AL1/ AL2/ SET).
Both alarm circuits are also related to an alarm LED on the front panel.
In case of malfunction the “SYS LED”will indicate some type of internal fault of the unit.
This LED is flashing green in normal conditions and is red in alarm conditions.
Additional to the alarm LEDs each alarm circuit is equipped with a relay with potential
free alarm contacts. These contacts can be used for external processing of the signal or
for control of further functions. The alarm circuits contain two independent alarm delays,
which can be set separately. In this mode, also the individual adjustment of the time
delays for the alarms can be done. An alarm delay is set to 4 sec. The flow sensor is
downstream of the Measuring Cell.
If a malfunction or failure of the power supply occurs, relays (both alarm relays) will switch
to alarm condition. (See Section 24. Appendix III. for an easily understandable example).
If the unit is off, both relays will be in alarm condition.
3.5 Adjustment
The unit is delivered with a works calibration according the IMO requirements. A
customer calibration on board is not permitted. This has to be done according IMO
Regulations by the manufacturer or persons authorized by the manufacturer.
The units contain two alarm delays. Alarm 1 is to be used for signing purpose and the
delay can be set from 1 sec. to 9 min. Alarm 2 is limited to control overboard discharge.
The Alarm 2 delay can be set from 1 sec. to 10 sec. max.
The "Zero" point is also works calibrated and is adjustable to ± 5 ppm.
On site by using the programming mode (See Section 23.2.3 Functional Buttons
AL1/ AL2/ SET ) and clean water you can adjust following points:
Settings
Min.
Max.
Default.
Alarm 1/ Alarm 2
1 ppm
15 ppm
15 ppm
Delay 1
1 sec.
9 min.
2 sec.
Delay 2
1 sec.
10 sec.
10 sec.
Offset
-5 ppm
5 ppm
0 ppm
Table 1

Page: 14
3.5.1 Limited Adjustment Alarm Set Point
By request units with alarm set point of 5 ppm max. are available. (For more information,
read section 19. OMD-24 Series with 5 ppm Alarm Set Point).
3.6 Active Current Interface
The active current interface represents a combination of measurements and
interpretations. The active current interface is adjustable to 0 to 20 mA or to 4 to 20 mA.
This complies the oil content from 0 to 30 ppm. In case of malfunction e.g. “EE”means
20 mA.
The maximum open-load voltage is about 5 V and it is strongly recommended not to
burden 150 Ω external load.
3.7 Inputs
The unit also has four active inputs, which can be used separately as well.
a) Separator Input is dedicated to be used according the MEPC.107 (49).
b) Reserve Input reserved for future use.
c) Optionally there is an active input for external flow switch (FLOW). The Unit will
be in alarm condition, whenever Terminals are opened/ disconnected. Normally
this input is delivered with a link.
d) An Input for fresh water switchover for units with an Electric Valve is available.
3.8 EV (Electric clean water Valve)
The OMD-24 EV is designed with an Electric Switchover Valve to switch the instrument
from the sample stream to supply of clean, oil free water. Whenever fresh water is
allowed to flow to the Measuring Cell, the OMD-24 EV will switch over to alarm condition
as required by MEPC.107(49), and it will also continue to display the measurement result.
The OMD-24 EV setup replaces the manual valve setup for the standard OMD-24, and also
allows remote flushing.

Page: 15
3.9 Automatic Cell Cleaning Device
The Automatic Cell Cleaning Device is a useful addition to the OMD range of monitoring
equipment. It was developed in order to ease the task of routine cleaning as described in
the manuals and to ensure that the measuring system of the monitoring equipment is
kept in good working order.
Auto Clean System provides a truly automatic cleaning device which is designed to run
only when the system is on. The Auto Clean System consists of:
a) Cylinder/ piston assembly for physical cleaning of the sample cell.
b) Air Regulation Filter Unit (different makes and types may be used).
c) Auto Clean logic control with valve. It determines the frequency of the cleaning
cycles.
i
The Automatic Cell Cleaning Device does not replace the operator maintenance
schedule but can reduce the maintenance workload.
3.10 MCU (Manual Cleaning Unit)
Optionally the instruments can be fitted with a Manual Cleaning Unit. The Manual
Cleaning Unit allows to clean the Sample Glass Tube without opening the Cell Cap, and
without interrupting the normal sample flow. Maintenance is made easier with the MCU.
Please note that operating the MCU may set the instrument to alarm condition for a few
seconds.

Page: 16
3.11 Features
OMD-24
Series Features
OMD-24
OMD-24
EV
OMD-24
EVA
OMD-24
A
OMD-24
FC
MEPC.107(49).
Solid suppression capability
Low maintenance
Easy installation
Constant readiness
Low spare part stock holding
Easy settings via menu
Works adjustment
Electric Valve
Auto Clean System
MCU (optional)
Robust Construction
Table 2
3.12 Internal Back-Up Lithium Thionyl Chloride Battery
Further the PCB of the computer unit is equipped with an internal back-up lithium thionyl
chloride battery, for the internal clock, if the computer unit is out of power.
The internal lithium battery of the OMD-24 Computer Unit has a low self-discharge
(<1% per year) and should have a calculated lifetime over 20 years, if handled properly.
In case the lithium thionyl chloride battery fails, it must be replaced by a qualified
technician in our factory. Please do not exchange the lithium battery by yourself. The
battery cannot be replaced with a standard battery.
See Section Disposal for more information.

Page: 17
4. OMD-24
The OMD-24 is the standard version of the OND-24 Series. The OMD24 consists of
Computer Unit and a Measuring Cell, which is equipped with two handles to control
sample water flow and clean water usage.

Page: 18
4.1 Specification OMD-24
Range:
0 –30 ppm, Trend indication 50 ppm
Accuracy:
According IMO MEPC. 107(49)
Linearity:
0 –30 ppm better than ± 2 %
Display:
Yellow Graphic Display
Power Supply:
24 V AC or DC +/- 10%
Consumption:
< 5 VA
Alarm Points 1 + 2:
Adjustable between 1 –15 ppm*
(Works adjustment 15 ppm)
Alarm 1 Operating Delay:
(for annunciation purpose)
Adjustable between 1 –540 sec.
(Works adjustment 2 sec.)
Alarm 2 Operating Delay:
(for control purposes)
Adjustable between 1 –10 sec.
(Works adjustment 10 sec.)
Alarm Indication:
(Alarm 1, 2, System Fault)
Red LEDs
Alarm Contact Rating:
(Alarm 1, 2, System Fault)
Potential free 1 pole change over contacts,
3 A / 240 V.
Output Signal:
0 –20 mA or 4 –20 mA selectable,
ext. Load < 150
Sample/ Fresh Water pressure:
0 –10 bar recommended range of installation
Sample Flow:
Approx. 0.1 –3 l/min
Sample Water Temperature:
+1 to +65 °C
Ambient Temperature:
+1 to +55 °C
Roll:
Up to 45°
Size:
Computer Unit
Measuring Cell Assembly
185 mm W x 210 mm H x 65 mm D
140 mm W x 160 mm H x 65 mm D
Distance Computer Unit to
Measuring Cell:
Up to 0.5 m
Weight: (with Measuring Cell)
2.5 kg
Degree of Protection:
IP 65
Pipe connections:
R ¼" Female
Technical specifications are subject to change without notification.
*By request the alarm set point can be set to 5 ppm max.

Page: 19
4.2 OMD-24 Construction
The OMD-24 consists of a Computer Unit and a Measuring Cell, which is equipped with
two handles, which control sample water flow and clean water usage. This assembly is
connected to the measuring cell by a push-in.
Figure 2. Construction OMD-24
1.
Computer Unit
5.
Clean Water Handle
9.
Desiccator Cap
2.
Measuring Cell
6.
Sample Handle
10.
Communication Cable
3.
Sample Valve
7.
Cell Cap
11.
Terminal Cover
4.
Clean Water Valve
8.
Valve Support
This manual suits for next models
5
Table of contents
Other Deckma Hamburg Security System manuals

