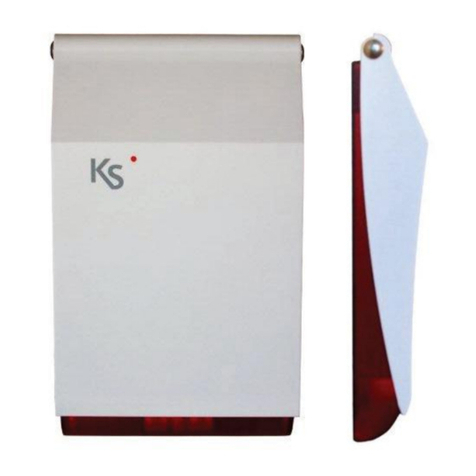
Ksenia imago wls 96 User manual

code R30019.101en www.kseniasecurity.com
ed.04/2020
imago wls
Outdoor siren
Installation guide
INTRODUCTION
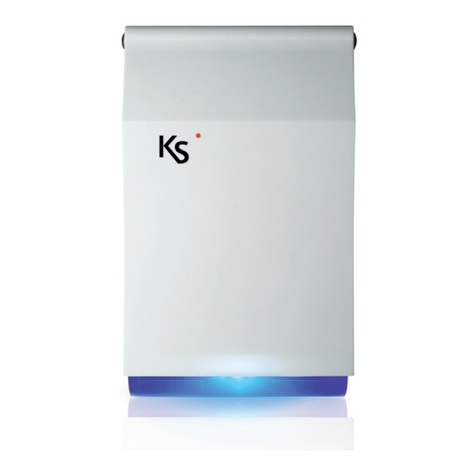
The imago wireless outdoor siren is an acoustic and optical professional alarm that combines an unique,
extremely compact and slim design (its maximum thickness is 6 cm.) with an advanced technology to obtain
the best possible performance with the highest energy saving: high sound pressure, 1W LED blinker and
auxiliary high-efficiency high efficiency warning LED.
The siren is handled by two microcontrollers:
• Main process microcontroller
• Communication microcontroller
imago wireless can use 2 different power supply systems:
• 1. A proprietary 7.5V 8Ah battery pack, not rechargeable (that will must be replaced once discharge)
separately sold as optional;
• 2. External power supply (12Vcc) with 6V 1.2Ah backup acid lead battery.
Warning! Battery may explode if the battery is replaced by an incorrect type or if mistreated. Do not
recharge, disassemble or dispose of in fire. Dispose of used batteries according to the instructions. The
status of the batteries charge and, if present, the level of external power supply are constantly monitored.
Every power supply or battery failure or disconnection is reported to the main system.
imago wireless is equipped with a temperature sensor and communicate to the panel:
• the temperature value
• the programmed thresholds.
imago wireless can measure the level of RF signal reception. During the maintenance, if the siren is placed in
a good wireless reception spot, imago beeps at each variation of the Tamper Switch.
imago wireless also presents protections:
• keep alive periodic signal
• Anti-opening and anti-removal tamper
Every communication from the imago wls to the main system will be repeated until acknowledged. Despite
of its extremely small size, imago hides a sturdy metal lid-Chamber; also, the plastic material involved (high
quality polycarbonate with UV protection) and the sophisticated design, guarantee durability in all weather
conditions.

code R30019.101en www.kseniasecurity.com
ed.04/2020
TECHNICAL DATA
• Modern Design with original and convenient rotating opening
• Solid PC housing (minimum thickness 3 mm.) with anti-UV pigment
• Front available in different colors
• Transparent base available in different colors: orange, red and blue
• Strong metallic zinc-plated under-cover (anti-smashing)
• High acoustic power piezoelectric Buzzer (>100dBA @ 1m)
• Protective and insulating treatment of the PCB (conformal coating)
• Power Supply: 9V(min.) - 13.8V max (not included)
• Reloadable Backup battery: 6Vcc – 1.2Ah (not included)
• Un-reloadable Main battery: 7.5Vcc – 8Ah non-reloadable (not included)
• Operative temperature range: -10° +55°C 95% humidity
• Protection class: IP44
• Dimensions: 195 x 330 x 60 mm
• Weight (without battery): Kg 1.200
• Wireless bi-directional communication; 868MHz frequency
• RF Range: 300 m. in open air
• Supervision for wireless diagnostic (programmable)
• Temperature sensor (switchable)
• Temperature thresholds managing (programmable)
• Management of the maximum duration of the alarm (programmable)
• Alarm output configurable as Bistable or Monostable
• Power LED output configurable as Bistable or Monostable
• Auxiliary LED output configurable as Bistable or Monostable
• Acoustic signals of RF level OK
Using imago wireless powered with main battery (7.5V - 8Ah), the lifetime expectancy is up to 3 years in the
following conditions:
• 4 daily cycles of turning on the auxiliary LEDs;
• Supervision interval programmed at 5 minutes;
• 1 monthly alarm cycle of 5 minutes each and 4 test alarm cycles;
Notes:
1. At temperatures below -5° C the siren may give a “wrong battery” message.
2. Working below -5°C significantly reduces battery life.
3. Replace the battery pack using only the model KSI7207580.000.
4. Warning! Risk of explosion if the battery is replaced by an incorrect type or if handled incorrectly –
do not recharge, open or throw on a fire.
5. Dispose of used batteries according to the instructions.

code R30019.101en www.kseniasecurity.com
ed.04/2020
DESCRIPTION OF THE PRODUCT
LEGEND
1 Cover
2 Stainless steel hinges (2)
3 Metallic zinc-plated undercover
4 Screws (2) for fixing the undercover
5 Eyelet for sabotage tamper activation
6 Transparent base
7 Base locking holes (5)
8 Undercover locking holes (2)
9 Removal tamper hole
10 Battery base
11 Chock (2)
12 Tamper protection/antitear micro-switch
13 Non-reloadable battery (KSI7207580.000)
connector
14 Power supply terminal blocks 12Vcc (*)
15 Tamper protection: Anti-opening
16 Buzzer connector
17 PCB - main board
18 PCB - RF interface
19 High efficiency LED (2)
20 Power central LED 1W
21 Cables (2) r/b with faston
22 Exponential Buzzer (120 dB)
23 SN label
24 Eyelet for cable pass-through
(*) The terminal blocks has 4 inputs. Please use only + (positive) and - (negative) for the power supply.
Do not use A and B blocks

code R30019.101en www.kseniasecurity.com
ed.04/2020
INSTALLATION
The imago wireless should be installed in a place hardly accessible to discourage any attempts of tampering;
of course sooner or later having to be reached if non-rechargeable battery replacement (if it is powered with
the latter), it must still be accessible for later intervention. The wall bracket must not show depressions and/
or bosses in order not to compromise the operation of tamper mechanism.
For a correct installation, please refer to the ‘Parts identification‘ paragraph and follow the steps here
below:
1. Insert the stainless steel hinges (included) and close the nuts (please not tight)
2. Open the polycarbonate cover using a plate screwdriver near the corners.
3. Remove the metallic undercover, paying attention to not damage the PCBA
4. Using a drill, bore the base fixing holes (the central one is already made to make the installation easier)
5. If you wants to power up the device with direct 12Vdc supply, pass the cables through the eyelet
6. Fix the polycarbonate base with Fishers plug (included)
7. If you chose to use external supply:
A - Link the power supply cable to the clamps following the correct polarity
B - Place and link the 6Vdc - 1.2Ah acid lead battery
• Place and link the non-rechargeable battery pack KSI7207580.000
8. Verify the correct power up
9. Re-insert the undercover starting from the top and paying attention to not damage the PCBA
10. Close the cover
Note: All fixing devices required for the proper installation are included in the package.
TAMPERS
The imago wireless siren has two protections: against opening the device and against forced removal from
the wall on which was fixed (two switches in series). The siren constantly checks the status of these two
switches and their eventual opening will be communicated to the lares 4.0. Then, subject to programming,
lares 4.0 may requires the activation of acoustic and luminous signals to report the attempted sabotage.
POWERING UP
The procedure to power up the imago requires to respect at least one of the following steps (refer to figure
in “Description of the product” paragraph):
• Connect the batteries to their connector (n.13) and place it on its base (n.10) as shown in next figure
OR

code R30019.101en www.kseniasecurity.com
ed.04/2020
• Connect the power supply poles + and - (12Vcc) to their clamps (n.14) and the acid lead backup battery
to the respective cables with faston (n.21) after been placed on its base (n.10) as shown in next figure
If wiring is correct, imago will show a single flash by the power LED and a short BEEP by the buzzer.
ENROLLING
To enrol imago wireless on the system, please follow the procedure here below:
1. On the ergo keypad, browse the programming menu till the ‘Enroll’ mode
2. Move the front anti-opening switch (open/close the cover of the imago)
3. On the ergo keypad, confirm the S.N. of the device.
If enrolling is successfully made, the red LED on RF PCB module will turns on as confirmation.
For any additional information, please see the lares 4.0 Programming Manual.
QUANTITY DATA
FUNCTIONS
The device programming and the panel configuration are made by basis SW.
The siren manages the outputs as:
• If imago is powered with the non-rechargeable battery (KSI7207580.000) the outputs will be managed
as below, regardless the programmed configuration:
• Alarm output: monostable with the same ON time as programmed on the Panel (default: 3 min.)
• Power LED output: monostable with fixed 20 sec. ON time
• Aux LED output: monostable with fixed 20 sec. ON time; this function is designed to save battery
• If imago wireless is powered with external 12Vdc supply and rechargeable acid lead battery, it will
manage the outputs as programmed.
During the programming phase, every time the imago sends a tamper signal to the panel and it is
acknowledged the red LED on the wireless PCN module will blink.
lares 4.0 models wls 96 16 40 40 wls 140 wls 644 wls
Maximum number of imago
wireless siren
333355

code R30019.101en www.kseniasecurity.com
ed.04/2020
Technical data, appearance, functionality and other product characteristics may change without notice.
CERTIFICATIONS
Europe - Rohs, CE
ENVIRONMENTAL CARE
imago wireless has been specifically designed and manufactured for the environment respect as follows:
1. PCB laminates are brome and lead free.
2. Low consumption
3. Packaging realized mainly with recycled fibers and materials
The complete Declaration of Conformity for each Device can be found at: www.kseniasecurity.com
Installation of these systems must be carried out strictly in accordance with the instructions
described in this manual, and in compliance with the local laws and bylaws in force. imago has been designed
and made with the highest standards of quality and performance adopted by Ksenia Security. Is
recommended that the installed system should be completely tested at least once a month. Test procedures
depends on the system configuration. Ask to the installer for the procedures to be followed. Ksenia Security
srl shall not be responsible for damage arising from improper installation or maintenance by unauthorized
personnel. The content of this guide can change without prior notice from KSENIA SECURITY.
Information for users: Disposal (RAEE Directive)
Warning! Do not use an ordinary dustbin to dispose of this equipment.
Used electrical and electronic equipment must be treated separately, in accordance with the relative
legislation which requires the proper treatment, recovery and recycling of used electrical and electronic
equipment.
Following the implementation of directives in member states, private households within the EU may return
their used electrical and electronic equipment to designated collection facilities free of charge*. Local
retailers may also accept used products free of charge if a similar product is purchased from them.
If used electrical or electronic equipment has batteries or accumulators, these must be disposed of separately
according to local provisions.
Correct disposal of this product guarantees it undergoes the necessary treatment, recovery and recycling.
This prevents any potential negative effects on both the environment and public health which may arise
through the inappropriate handling of waste.
* Please contact your local authority for further details.
This manual suits for next models
5
Table of contents
Other Ksenia Security System manuals