DeDietrich PRO 2,5 User manual

08/07/04 - 94858813
FRANÇAIS ENGLISH
DEUTSCH
Capteurs solaires
Flachkollektoren
Flat solar panels
PRO 2,5 - PRO 2,3
SUN 270 - SUN 230
Notice de montage - Installation en terrasse
capteurs verticaux juxtaposés
capteurs horizontaux juxtaposés
Flachdach-Montageanleitung
senkrecht nebeneinander
waagerecht nebeneinander
Instructions for flat-roof Installation
with panels vertical side by side
with panels horizontal side by side
F
D
GB
89804153 D

2
TABLE DES MATIÈRES INHALTSVERZEICHNIS CONTENTS
1. GÉNÉRALITÉS . . . . . . . . . 3
1.1 Principe du capteur solaire 3
1.2 Description du produit . . . . 4
1.3 Liste des fournitures
standard. . . . . . . . . . . . . . . 4
1.4 Instructions relatives à la sé-
curité et symboles . . . . . . . 5
1.5 Caractéristiques. . . . . . . . . 6
1.6 Conservation de la notice de
montage. . . . . . . . . . . . . . . 8
1.7 Montage. . . . . . . . . . . . . . . 8
1.8 Outillage nécessaire . . . . . 9
1.9 Matériaux à poser par le maî-
tre d'ouvrage . . . . . . . . . . . 9
2. NORMES ET
DIRECTIVES . . . . . . . . . . 11
3. MONTAGE SUR
TERRASSE . . . . . . . . . . . 12
4. SUPPORT DE MONTAGE
EN TERRASSE, VUE
D'ENSEMBLE . . . . . . . . . 13
4.1 Dimensions et écarts de fixa-
tion - PRO 2,5 / SUN 270. 14
4.2 Dimensions et écarts de fixa-
tion - PRO 2,3 / SUN 230. 15
4.3 Liste de colisage : Capteurs
verticaux juxtaposés . . . . 16
4.4 Liste de colisage : capteurs
horizontaux juxtaposés . . 18
5. MONTAGE DU
SUPPORT . . . . . . . . . . . . 19
6. VUE D'ENSEMBLE DU
MONTAGE DES CAP-
TEURS. . . . . . . . . . . . . . . 26
6.1 Schéma de raccordement
des capteurs (capteurs verti-
caux juxtaposés) . . . . . . . 27
6.2 Schéma de raccordement
des capteurs (capteurs hori-
zontaux juxtaposés). . . . . 28
6.3 Kit de raccordement des cap-
teurs. . . . . . . . . . . . . . . . . 33
6.4 Liaison des capteurs . . . . 34
6.5 Tube de liaison retour . . . 35
6.6 Sonde de température. . . 36
7. MISE EN SERVICE . . . . . 38
7.1 Fluide caloporteur . . . . . . 38
7.2 Instructions pour
l'exploitant . . . . . . . . . . . . 38
1. ALLGEMEIN. . . . . . . . . . . . 3
1.1 Funktionsbeschreibung. . . .3
1.2 Produktbeschreibung . . . . .4
1.3 Lieferumfang. . . . . . . . . . . .4
1.4 Sicherheitshinweise und
Symbole . . . . . . . . . . . . . . .5
1.5 Betriebsdaten . . . . . . . . . . .6
1.6 Aufbewahrung der Montage-
anleitung. . . . . . . . . . . . . . .8
1.7 Montage . . . . . . . . . . . . . . .8
1.8 Erforderliches Werkzeug . .9
1.9 Bauseits zu stellende Mate-
rialien . . . . . . . . . . . . . . . . .9
2. NORMEN UND RICHTLINI-
EN. . . . . . . . . . . . . . . . . . . 11
3. FLACHDACH-MONTAGE 12
4. FLACHDACHSTÄNDER,
MONTAGEÜBERSICHT .13
4.1 Abmessungen und Befesti-
gungsabstände - PRO 2,5 /
SUN 270. . . . . . . . . . . . . .14
4.2 Abmessungen und Befesti-
gungsabstände - PRO 2,3 /
SUN 230. . . . . . . . . . . . . .15
4.3 Kolliliste: Kollektoren senk-
recht nebeneinander. . . . .16
4.4 Kolliliste: Kollektoren Waage-
recht nebeneinander. . . . .18
5. FLACHDACHSTÄNDER-
MONTAGE . . . . . . . . . . . .19
6. KOLLEKTOR-MONTAGE-
ÜBERSICHT. . . . . . . . . . . 26
6.1 Kollektorverschaltung (senk-
recht nebeneinander) . . . .27
6.2 Kollektorverschaltung (waa-
gerecht nebeneinander) . .28
6.3 Kollektoranschluss-Set. . .33
6.4 Kollektorverbindung . . . . .34
6.5 Rücklauf-Brücke . . . . . . . .35
6.6 Temperaturfühler . . . . . . .36
7. INBETRIEBNAHME. . . . .38
7.1 Wärmeträgermedium . . . .38
7.2 Unterweisung des
Betreibers . . . . . . . . . . . . .38
1. GENERAL INFORMATION 3
1.1 Description of Solar-Panel
Function. . . . . . . . . . . . . . . 3
1.2 Product Description. . . . . . 4
1.3 Package Contents. . . . . . . 4
1.4 Safety Instructions and Sym-
bols . . . . . . . . . . . . . . . . . . 5
1.5 Specifications . . . . . . . . . . 6
1.6 Safekeeping of Installation In-
structions. . . . . . . . . . . . . . 8
1.7 Installation . . . . . . . . . . . . . 8
1.8 Tools Required . . . . . . . . . 9
1.9 Equipment and Materials to
be Provided . . . . . . . . . . . . 9
2. STANDARDS AND
RULES . . . . . . . . . . . . . . 11
3. FLAT-ROOF INSTALLA-
TION . . . . . . . . . . . . . . . . 12
4. PANEL SUPPORTING
FRAME, INSTALLATION
OVERVIEW . . . . . . . . . . 13
4.1 Dimensions and Fixing
Spacings - PRO 2,5 /
SUN 270 . . . . . . . . . . . . . 14
4.2 Dimensions and Fixing
Spacings - PRO 2,3 /
SUN 230 . . . . . . . . . . . . . 15
4.3 Packing List for Panels verti-
cal, side by side. . . . . . . . 16
4.4 Packing List for Panels, hori-
zontal, side by side . . . . . 18
5. INSTALLING THE SOLAR-
PANEL SUPPORTING
FRAME . . . . . . . . . . . . . . 19
6. SOLAR PANEL INSTALLA-
TION OVERVIEW . . . . . . 26
6.1 Connection of Solar Panels
(panels vertical, side by side)
. . . . . . . . . . . . . . . . . . . . 27
6.2 Connection of Solar Panels
(panels horizontal, side by
side). . . . . . . . . . . . . . . . . 28
6.3 Solar-Panel Connection
Set. . . . . . . . . . . . . . . . . . 33
6.4 Panel Connectors . . . . . . 34
6.5 Return pipe Link . . . . . . . 35
6.6 Temperature Sensor . . . . 36
7. COMMISSIONING . . . . . 38
7.1 Heat Transporting Fluid. . 38
7.2 Instructing the Operator. . 38
FD
GB

3
1. GÉNÉRALITÉS 1. ALLGEMEIN 1. GENERAL INFOR-
MATION
Cette notice de montage/d'utilisa-
tion décrit le montage des capteurs
solaires plans PRO 2,5, PRO 2,3,
SUN 270 et SUN 230 avec un sup-
port pour toiture en terrasse.
In dieser Montage- und Bedie-
nungsanleitung wird die Montage
der Flachkollektoren PRO 2,5,
PRO 2,3, SUN 270 und SUN 230
als Flachdach-aufständerung
beschrieben.
These Instructions for Installation
and Use describe the installation of
PRO 2,5, PRO 2,3, SUN 270 and
SUN 230 flat solar panels on a sup-
porting frame erected on a flat roof.
1.1 Principe du capteur
solaire 1.1 Funktionsbeschrei-
bung 1.1 Description of Solar-
Panel Function
Le rayonnement solaire direct
(ondes courtes) qui atteint le cap-
teur solaire est transformé en cha-
leur par un absorbeur à revêtement
sélectif. Par conduction de la cha-
leur, il passe dans le tube absorbeur
puis est véhiculé jusqu'au ballon par
le fluide calo-porteur qui transmet sa
chaleur au ballon tout en se refroi-
dissant. Le fluide caloporteur refroidi
retourne ensuite dans le capteur,
afin de se recharger en énergie
solaire. Une régulation intelli-gente
fait en sorte que le circuit ne fonc-
tionne qu'en cas de rayonnement
suffisant et optimise la collecte
d'énergie solaire.
Das auf den Kollektor auftreffende,
kurzwellige Sonnenlicht wird an
dem selektiv beschichten Absorber
in Wärme umgewandelt. Von dort
gelangt es per Wärmeleitung in das
Ab-sorberrohr und wird durch das
Wärmeträgermedium in den Spei-
cher geleitet. Die Solarflüssigkeit
erwärmt den Speicher mittels Son-
nenenergie und kühlt dabei selbst
ab. Der Abgekühlte Wärmeträger
fließt an-schließend wieder zurück
in den Kollektor, um neue Sonnen-
energie zu transportieren. Eine intel-
ligente Regel-ung sorgt dafür, dass
der Kreislauf nur bei ausreichender
Globalstrahlung zir-kuliert und opti-
miert so den Solarertrag.
The short-wave solar radiation (sun-
light) striking the solar panel is con-
verted into heat by the selective
coating on the absorber. From there
it is transferred by heat conduction
to the absorber pipe and carried by
the heat-transporting fluid to the cal-
orifier. The solar-panel fluid heats
the calorifier by means of the energy
absorbed from the sun and cools
down itself in the process. The
cooled heat-transporting fluid then
flows back to the solar panel in order
to collect more solar energy. An
intelligent control system ensures
that the circulation system is only
active when there is sufficient solar
radiation, thus optimising the collec-
tion of solar energy.
FD
GB

4
1.2 Description du pro-
duit 1.2 Produktbeschreibung 1.2 Product Description
Les kits sont conçus de telle sorte que
leur transport et leur installation soient
pra-tiques ; aucun des éléments fixes
de l'in-stallation à transporter n'excède
2 600 mm.
Die Sets sind transport- und monta-
gefreundlich aufgeteilt, sodass
keine fixen Bauteillängen weit über
2600 mm transportiert werden müs-
sen.
The sets are divided up for ease of
transport and installation so that no
rigid components with a length of
significantly over 2,600 mm have to
be transported.
La disposition des tuyaux dans le
capteur solaire plan est sous forme
de serpentin. La partie inférieure du
capteur solaire comporte en outre
une tubulure retour avec un com-
pensateur intégré. Cette tubulure
permet de simplifier et d'accélérer le
raccordement hydraulique des diffé-
rents capteurs solaires car la con-
duite de retour externe
normalement nécessaire entre
l'extrémité du capteur et le retour est
supprimée.
Die Verrohrung im Flachkollektor ist
als Mäander ausgeführt. Zusätzlich
befindet sich im unteren Teil des
Kollektors eine Rücklaufleitung mit
integriertem Kompensator. Diese
Leitung ermöglicht eine einfache
und schnelle hydraulische Verbin-
dung der Kollektoren untereinander,
da die externe Rückführung vom
Kollektorende zum Rücklaufrohr
entfällt.
The piping inside the flat solar panel
is laid out in a serpentine pattern. In
addition, there is a return pipe in the
bottom part of the panel with an inte-
gral compensator. This pipe pro-
vides for quick and easy hydraulic
interconnection of the flat solar pan-
els as it does away with the need for
an external return pipe from the end
of the panel to the return connection
point.
1.3 Liste des fournitures
standard 1.3 Lieferumfang 1.3 Package Contents
Il convient de transporter et stocker
les capteurs et les accessoires de
montage avec soin. Si l'emballage
devait toutefois être endommagé au
cours du trajet, le transporteur doit
en être avisé sans délai.
L'intégralité du kit de montage à
livrer doit être contrôlée avant instal-
lation à l'aide de la liste accompa-
gnant chaque kit.
Les emballages doivent être recy-
clés après l'installation conformé-
ment à la législation locale.
Die Kollektoren sowie das Montage-
Zubehör sind bei Transport und
Lage-rung sorgsam zu behandeln.
Sollte die Verpackung dennoch auf
dem Lieferweg beschädigt worden
sein, so ist der Schaden unverzüg-
lich bei dem Transpor-teur anzuzei-
gen und geltend zu machen.
Vor der Montage ist der Lieferum-
fang des Montage-Sets auf Voll-
ständigkeit zu prüfen, siehe
Packlisten der einzelnen Sets.
Das Verpackungsmaterial ist nach
der Installation umweltgerecht zu
entsorgen.
The solar panels and fittings should
be handled carefully during trans-
portation and storage. If the packing
has nevertheless been damaged
during transit, the damage must be
reported immediately to and claimed
against the carrier.
Before installation, the package
contents of the installation sets
should be checked for complete-
ness – refer to the packing lists for
the individual sets.
The packing material should be
properly disposed of after installa-
tion.
FD
GB
8980P179

5
1.4 Instructions relatives
à la sécurité et sym-
boles
1.4 Sicherheitshinweise
und Symbole 1.4 Safety Instructions
and Symbols
Respecter scrupuleusement les ins-
truc-tions de sécurité décrites ci-
après lors de l'installation. Les sym-
boles utilisés dans ce texte sont les
suivants :
Beachten Sie bei der Montage die
Sicher-heitshinweise in dieser Anlei-
tung! Nach-folgend sind die im Text
verwendeten Symbole erläutert:
When installing the panels, take
note of the safety instructions in this
document. The symbols used to
identify specific types of information
are explained below.
Ce symbole indique un
danger potentiel !
Dieses Symbol weist auf
eine mögliche Gefahr
hin!
This symbol draws at-
tention to a potential
hazard.
Information utile, recom-
mandation ou précision
d'ordre général.
Nützliche Information,
Emp-fehlung oder allge-
meiner Hin-weis.
This symbol indicates
useful information or a
general note.
FD
GB

6
1.5 Caractéristi-
ques 1.5 Betriebsdaten 1.5 Specifications
PRO 2,5 / SUN 270
Dimensions Maße Dimensions 1252 x 2152 x 98 mm
Superficie hors-tout Brutto-Kollektorfläche Gross collector area 2,70 m
2
Superficie d’absorption Absorberfläche Absorber area 2,52 m
2
Superficie d’entrée Aperturfläche Aperture area 2,51 m
2
Poids (à vide) Gewicht (leer) Weight (empty) ~56 kg
Raccords hydrauliques (
∅
)
Raccord à bague de serrage Rohranschlüsse (
∅
)
Klemmringverschraubung Piping connections (dia.)
Compression joints 12 mm
Absorbeur Absorbermaterial Absorber material Cuivre/Kupfer/Coopper
Matériau boîtier Gehäusematerial Casing material
Profilé châssis aluminium
anodisé Rahmenprofil Aluminium
eloxiert Profile-section frame
Anodised aluminium E6 / C35
Joints :EPDM / silicone Dichtungen: EPDM / Silikon Seals: EPDM / Silicon
Isolation thermique laine
de roche Wärmedämmung
Mineralwolle Heat insulation
Mineral wool 40 mm
Couverture frontale
Transmission verre
solaire > 91 %
Frontabdeckung
Solarglas
Transmission > 91 %
Front cover panel
Solarglas,
transmission > 91 %
4mm
Facteur de correction d'angle
I
AM
(50°) Winkelkorrekturfaktor
I
AM
(50°) Angle correction factor
I
AM
(50°) 0,96
Angle d'inclinaison de
l’installation Einbauneigungswinkel Fitted tilt angle
min. min. min. 20 ˚
max. max. max. 90 ˚
Type de montage
vertical, horizontal Einbauart
senkrecht, waagerecht Installation method
vertical, horizontal
Capacité nominale Nenninhalt Nominal capacity ~ 2 l
Rendement (
η
0
) Wirkungsgrad (
η
0
) Efficiency (
η
0
) ~ 80 %
Rendement (
η
0,05
) Wirkungsgrad (
η
0,05
) Efficiency (
η
0.05
) ~ 60 %
Déperdition thermique k1 Wärmeverlustbeiwert k1 Heat loss k1 ~ 3,5 W/m
2
K
Déperdition thermique k2 Wärmeverlustbeiwert k2 Heat loss k2 ~ 0,012 W/m
2
K
2
Revêtement absorbeur Absorberbeschichtung Absorber coating Sunselect
Facteur d’absorption Absorptionfaktor Absorption factor 95±1 %
Facteur d’émission Emissionfaktor Emission factor 5±1 %
Pression d’installation au-
dessus de la hauteur statique Anlagendruck über statischer
Höhe System pressure above
statichead
min. min. min. 0,5 bar
max. max. max. 10 bar
recommandé empfohlen recommended 3 bar
Pression d'essai Prüfdruck Testing pressure 20 bar
Débit min.
4 capt. en série
Durchfluss min.
4 Koll. In Reihe
Flow rate, min.
4 panels in series
2,5 L/min
Perte de pression low flow
4 capteurs en ligne
Druckverlust low flow
4 Kollektoren In Reihe
Pressure loss, low flow
4 panels in series
260 mbar
Perte de pression high flow
4 capteurs en ligne
Druckverlust high flow
4 Kollektoren In Reihe
Pressure loss, high flow
4 panels in series
600 mbar
Rendement ITW (Institut de
thermodynamique et de
technique thermique, Stuttgart)
(eau chaude sanitaire 200l/jour,
60 % de couverture solaire)
Ertrag nach ITW (WW 200l/
Tag, 60% Deckung) Yield to ITW (HW 200 l/day,
60% coverage) 512 kWh/m
2
a
Capacité de chaleur massique Spezifische Wärmekapazität Specific heat capacity ~ 5,5 KJ / m
2
K
Contrôle de la puissance
confor-mément à EN 12975-2 Leistungsprüfunf nach
EN 12975-2 Output tested to EN 12975-2 > 525 KWh/m
2
xa
Contrôle TÜV TÜV geprüft TÜV approval 6 SO34/99
Autorisation du type de
construction : Bauartzulassung: Type approval: 08-228-751
FDGB

7
PRO 2,3 / SUN 230
Dimensions Maße Dimensions 2037 x 1137 x 90 mm
Superficie hors-tout Brutto-Kollektorfläche Gross collector area 2,32 m
2
Superficie d’absorption Absorberfläche Absorber area 2,15 m
2
Superficie d’entrée Aperturfläche Aperture area 2,31 m
2
Poids (à vide) Gewicht (leer) Weight (empty) ~45 kg
Raccords hydrauliques (
∅
)
Raccord à bague de serrage Rohranschlüsse (
∅
)
Klemmringverschraubung Piping connections (dia.)
Compression joints 12 mm
Absorbeur Absorbermaterial Absorber material Cuivre/Kupfer/Coopper
Matériau boîtier Gehäusematerial Casing material
Profilé châssis aluminium
anodisé Rahmenprofil Aluminium
eloxiert Profile-section frame
Anodised aluminium C35
Joints
EPDM / silicone Dichtungen
EPDM / Silikon Seals
EPDM / Silicon
Isolation thermique laine de
roche Wärmedämmung
Mineralwolle Heat insulation Mineral
wool 20 mm
Couverture frontale
Transmission verre
solaire > 91 %
Frontabdeckung
Solarglas
Transmission > 91 %
Front cover panel
Solarglas,
transmission > 91 %
4mm
Facteur de correction d'angle
I
AM
(50°) Winkelkorrekturfaktor
I
AM
(50°) Angle correction factor
I
AM
(50°) 0,95
Facteur de correction d'angle Winkelkorrekturfakto Angle correction factor 0,92
Angle d'inclinaison de
l’installation Einbauneigungswinkel Fitted tilt angle
min. min. min. 20 ˚
max. max. max. 90 ˚
Type de montage
vertical, horizontal Einbauart
senkrecht, waagerecht Installation method
vertical, horizontal
Capacité nominale Nenninhalt Nominal capacity ~ 1,55 l
Rendement (
η
0
) Wirkungsgrad (
η
0
) Efficiency (
η
0
) ~ 77 %
Rendement (
η
0,05
) Wirkungsgrad (
η
0,05
) Efficiency (
η
0.05
) ~ 59 %
Déperdition thermique k1 Wärmeverlustbeiwert k1 Heat loss k1 ~ 3,8 W/m
2
K
Déperdition thermique k2 Wärmeverlustbeiwert k2 Heat loss k2 ~ 0,0145 W/m
2
K
2
Revêtement absorbeur Absorberbeschichtung Absorber coating Sunselect
Facteur d’absorption Absorptionfaktor Absorption factor 95±1 %
Facteur d’émission Emissionfaktor Emission factor 5±1 %
Pression d’installation au-
dessus de la hauteur statique Anlagendruck über statischer
Höhe System pressure above
statichead
min. min. min. 0,5 bar
max. max. max. 10 bar
recommandé empfohlen recommended 3 bar
Pression d'essai Prüfdruck Testing pressure 20 bar
Perte de pression TYFO L 40/
60 à 30°C et 100
kg
/
h
Druckverlust TYFO L
Ferigmischung 40/60 bei
30°C und 100
kg
/
h
Pressure loss TYFO L 40/60
to 30°C and 100
kg
/
h
~69 mbar
Capacité de chaleur massique Spezifische Wärmekapazität Specific heat capacity ~ 4,6 KJ /m
2
K
Contrôle de la puissance
conformément à EN 12975-2 Leistungsprüfunf nach EN
12975-2 Output tested to EN 12975-2 > 525 KWh/m
2
xa
Contrôle TÜV TÜV geprüft TÜV approval 6 SO34/99
Autorisation du type de
construction : Bauartzulassung: Type approval: 08-228-751
1.5 Caractéristi-
ques 1.5 Betriebsdaten 1.5 Specifications
FDGB

8
1.6 Conservation de la
notice de montage 1.6 Aufbewahrung der
Montageanleitung 1.6 Safekeeping of Instal-
lation Instructions
La notice de montage et d'utilisation
est à remettre à l'exploitant de l'ins-
tallation. Ce dernier est responsable
de la conservation des instructions
et assure leur mise à disposition en
cas de besoin.
Die Montage- und Bedienungsanlei-
tung ist dem Anlagenbetreiber aus-
zuhändigen. Dieser übernimmt die
Aufbewahrung, da-mit die Anleitung
im Bedarfsfall zur Ver-fügung steht.
The Instructions for Installation and
Use should be handed over to the
system operator. The operator is
then responsible for their safekeep-
ing so that they can be referred to in
the future if necessary.
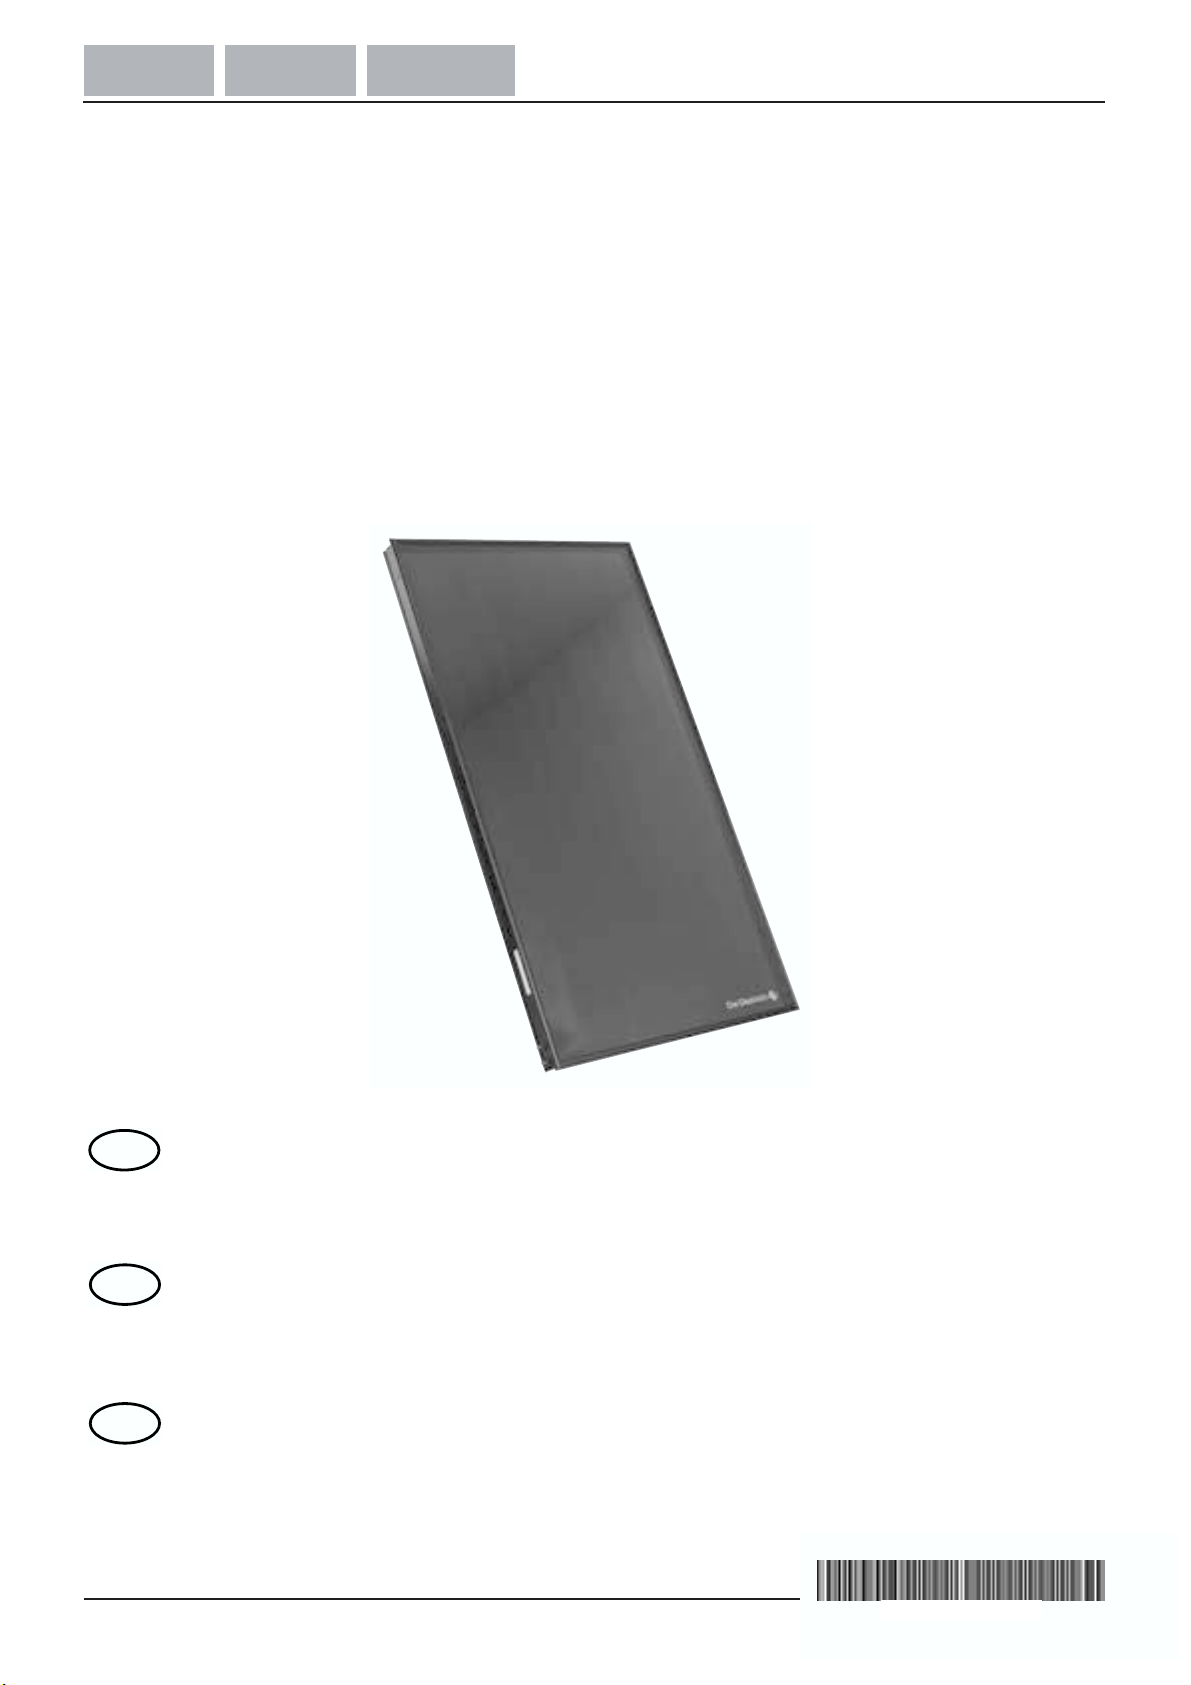
1.7 Montage 1.7 Montage 1.7 Installation
Lekit de montage est un système de
fixation spécifique aux capteurs
plans PRO 2,5, PRO 2,3, SUN 270
etSUN 230 et ne doit être utilisé que
conformément à l'Avis Technique
statique correspondant.
Dans certains cas, le montage doit
être adapté par le maître d'ouvrage.
Ce type d'opération doit être réalisé
dans les règles de l'art et respectant
les directives locales. Une utilisation
con-traire aux règlements ou des
modi-fications non autorisées lors
de l'in-stallation ou sur la construc-
tion elle-même dégagent le fabri-
cant de toute responsabilité.
L'installation doit donc être prise en
charge par un spécialiste qualifié.
Celui-ci doit également se confor-
mer aux lois, aux réglementations et
aux normes en vigueur.
La charge autorisée sur le toit ne
doit en aucun cas être dépassée. Le
cas échéant, un spécialiste de la
statique doit être consulté au préala-
ble.
Tous les travaux d'ordre électrique
doi-vent être réalisés par un électri-
cien spécialisé, dans le respect des
normes DTU, des directives de pré-
vention contre les accidents et des
directives des entreprises d'électri-
cité locales.
Das Montage-Set ist als Befesti-
gungssystem speziell für die Flach-
kollektoren PRO 2,5, PRO 2,3,
SUN 270 und SUN 230 konstruiert
und darf nur ihrem statischen Nach-
weis entsprechend verwendet wer-
den.
Unter Umständen muss die Mon-
tage den bauseitigen Bedingungen
an-gepasst werden. Dies darf
jedoch nur nach den gültigen
Regeln der Technik und unter
Berücksichtigung der örtlichen Vor-
schriften geschehen. Die bestim-
mungswidrige Verwendung sowie
unzulässige Änderungen bei der
Montage und an der Konstruktion
führen zum Ausschluss jeglicher
Haftungs-ansprüche. Die Montage
muss deshalb von einem entspre-
chend qualifizierten Fachmann aus-
geführt werden. Dieser ist auch
verantwortlich für die Beachtung der
bestehenden Gesetze, Vorschriften
und Normen.
Die zulässige Dachlast des Gebäu-
des darf zu keiner Zeit überschritten
werden. Gegebenenfalls ist vorher
mit einem Statiker Rücksprache zu
halten.
Alle elektrischen Arbeiten dürfen nur
von einer Elektrofachkraft nach den
geltenden DIN-Normen, VDE-Vor-
schriften, Unfall-verhütungsvor-
schriften und den Vor-schriften der
örtlichen Elektrizitäts-versorgungs-
unternehmen (EVU) ausge-führt
werden.
The installation set is designed spe-
cifically as a mounting system for
the PRO 2,5, PRO 2,3, SUN 270
and SUN 230 flat solar panels and
may only be used in accordance
with their building regulations
approval.
Under certain circumstances, instal-
lation may have to be adapted to the
specifics of the building. However,
any such work must always conform
to the recognised technical princi-
ples and comply with the local regu-
lations. Use of the equipment for a
purpose other than that for which it
is intended and any unauthorised
mo-difications made during installa-
tion or to the construction will void
any claims for liability. Installation
must therefore be carried out by an
appropriately qualified technician.
The installer is also res-ponsible for
compliance with the applicable leg-
islation, specifications and stand-
ards.
The permissible roof load of the
building must not at any time be
exceeded. If necessary, a structural
engineer should be consulted
before commencing work.
All electrical work must be carried
out by a qualified electrician and
must conform to the applicable
standards, specifications, safety
regulations and the requirements of
the local electricity supplier.
FD
GB

9
1.8 Outillage nécessaire 1.8 Erforderliches Werk-
zeug 1.8 Tools Required
Installation:
- Crayon
- Mètre à ruban ou mètre pliant
- Clé à fourche 13 mm
- Clé à fourche 17/19 mm (2)
- Tournevis (plat/cruciforme)
- Clé pour vis à six pans creux de
6 mm
- Tournevis électrique / perceuse
- Couteau / ciseaux
- Marteau
- Poignée de manutention pour
capteur solaire (EG 349)
Mise en service :
- Chariot de remblayage
Installation:
- Bleistift
- Bandmaß oder Gliedermaßstab
(Zollstock)
- Gabelschlüssel 13 mm
- Gabelschlüssel 17/19 mm
(2 Stck.)
- Schraubendreher (Schlitz/Kreuz-
schlitz)
- Schraubendreher für Innensechs-
kant 6 mm
- Akku-Schrauber / Bohrmaschine
- Messer / Schere
- Hammer
- Kollektor Tragegriffe (EG 349)
Inbetriebnahme:
- Spülwagen
For installation:
- Pencil
- Tape measure or folding rule
- Open-ended spanner, 13 mm
- Open-ended spanner, 17/19 mm
(2 off)
- Screwdriver (flat and cross-blad-
ed)
- Allen-key driver, 6 mm
- Cordless drill/power driver
- Knife/scissors
- Hammer
- Solar-panel carrying handles (EG
349)
For commissioning:
- Flusher unit
1.9 Matériaux à poser par
le maître d'ouvrage 1.9 Bauseits zu stellende
Materialien 1.9 Equipment and Mate-
rials to be Provided
- Sonde de température (régulation
Diemasol)
- Pâte conductrice pour la fixation
des sondes de température
- Matériau pour la fixation du sup-
port sur la terrasse ou poids de
lestage
- *Film de protection de la couvertu-
re*
- Temperaturfühler (aus Regelung
Diemasol)
- Wärmeleitpaste für Temperatur-
fühler
- Befestigungsmaterial für Flach-
dachständer an der Unterkon-
struktion oder Gewichte zur Be-
schwerung
- *Dachhautschutzfolie*
- Temperature sensor (from Die-
masol regulator)
- Heat conducting paste for tem-
pera-ture sensor
- Fixings for attaching support
frame to substructure or stabilising
weights
- *Sheet for protecting roof cover-
ing*
* Conseil :
Avant le montage des supports sur
la terrasse, poser un film/tapis de
protection (p. ex. en caoutchouc
régénéré, disponible chez les gros-
sistes en con-struction) sur la sur-
face correspondante du toit.
Dans le cas d’un toit plat présentant
un gravelage, retirer les graves
avant de poser le film protecteur sur
la zone de montage.
Pour le montage sur toiture en ter-
rasse des capteurs solaires plans,
préparer une base résistante et
lisse, parfaitement plane.
* Empfehlung:
Vor Aufbau der Flachdachständer
sollte eine Dachhautschutzfolie/
Bautenschutzmatte (z. B. aus Rege-
netat, erhältlich im Dachdecker-
Großhandel) auf der ent-sprechen-
den Dachfläche ausgelegt werden.
Bei Flachdächern, die eine Kies-
schüttung aufweisen, ist das Schütt-
gut vor Auflegen der Dachhaut-
schutzfolie an der Aufbaustelle zu
entfernen.
Für die Flachdach-Montage der Kol-
lek-toren muss ein tragfähiger und
ebener Untergrund ohne Neigung
bereitgestellt werden.
* Recommendation:
Before erecting the solar-panel sup-
porting frame on the flat roof, a pro-
tective sheet/mat (e.g. made of
recycled rubber, available from
roofer's suppliers) should be laid out
over the area of roof concerned.
In the case of flat rooves which have
a covering of gravel, the gravel
should be removed before laying out
the protective sheet in the area
where the supporting frame is to be
erected.
When installing the solar panels on
a flat roof, the area of roof chosen
should be sufficiently strong, as well
as flat and level.
FD
GB

10
Pour assurer la stabilité du support ,
il est nécessaire de le fixer sur une
base (non fournie) adaptée. Si la
stabilité du support n'est pas assu-
réepar vissage mais par lestage, les
poids doivent être placés de la
manière suivante dans le cas d'une
zone soumise au vent jusqu'à 8 m
de hauteur et /ou à des chutes de
neige jusqu'à 0,75 kN/m2:
Lestage 336 kg / capteur solaire
Des pierres utilisées parfois comme
bordures de pelouse peuvent servir
de poids par exemple. Les pierres
de bordure de dimensions 1 000 x
250 x 80 mm ont un poids d'environ
48 kg. Chaque capteur solaire
nécessite donc au moins 7 pierres
de lestage. Elles peuvent être glis-
sées et ajustées entre les supports
de montage des capteurs en ter-
rasse.
Um die Standsicherheit des Flach-
dach-ständers zu gewährleisten,
muss dieser an einer entsprechen-
den Unterkon-struktion (bauseits)
befestigt werden. Wird die Standsi-
cherheit des Flachdach-Montages-
tänders nicht durch Ver-schrauben
sondern durch Beschweren herge-
stellt, so müssen die Gewichte bei
einer Windlastzone bis 8 m Gebäu-
dehöhe und einer Schneelastzone
bis 0,75 kN/m
2
wie folgt ausgelegt
werden:
Beschwerung 336 kg / Kollektor
Als Gewichte können z. B. Rasen-
kanten-steine benutzt werden.
Rasenkanten-steine mit den
Abmessungen 1000 x 250 x 80 mm
haben ein Gewicht von ca. 48 kg, so
dass min. 7 Rasenkantensteine pro
Kollektor erforderlich sind. Sie kön-
nen passgenau zwischen in die
Flachdach-ständer eingelegt wer-
den.
In order to ensure that the solar-
panel supporting frame is suffi-
ciently secure, it must be attached to
a suitable sub-structure (not sup-
plied). If the supporting frame is
secured by weights rather than
being screwed down, the weights
must conform to the following speci-
fications for a wind exposure zone
covering a building height of up to 8
m and a snow exposure zone of up
to 0.75 kN/m2:
Required weight 336 kg / solar
panel
Slabs such as lawn edging stones
can be used as the weights. Lawn
edging stones measuring 1,000 x
250 x 80 mm weigh approximately
48 kg, so that at least 7 edging
stones per solar panel would be
required. Slabs with those dimen-
sions will fit exactly into the solar-
panel supporting frames.
Respecter la charge
maximale admise ! Zulässige Dachlast be-
achten! Do not exceed permissi-
ble roof load.
Eviter les tas de gravier,
car la charge maximale
admise pourrait en être
dépassée.
Anhäufungen von
Schüttgut sind zu ver-
meiden, da hierdurch
die zulässige Dachlast
überschritten werden kann.
Accumulations of aggre-
gates should be avoided
as this can result in the
per-missible roof load
being ex-ceeded.
FD
GB

11
2. NORMES ET DIRECTIVES
En plus des directives cités ci-dessous, les décrets locaux doi-
vent être pris en considération lors de l’étude, de l’installation
et de la mise en service.
• DTU 43.1 NF P84-204-1 (juillet 1994, mars 2001) :
Travaux d'étanchéité des toitures-terrasses avec éléments
porteurs en maçonnerie - Cahier des clauses techniques et
NF P84-204-2 Cahier des clauses spéciales
• DTU 43.3 NF P84-206-1 (juin 1995) Mise en œuvre des
toitures en tôles d’acier nervurées avec revêtement
d’étanchéité - Cahier des clauses techniques et NF P84-206-2
Cahier des clauses spéciales. Juin 1995
• DTU 43.4 NF P84-207-1 (mai 1993, décembre 1995) :
Toitures en éléments porteurs en bois et panneaux dérivés
du bois avec revêtements d'étanchéité - Partie 1 : Cahier
des clauses techniques et NF P84-207-2 (mai 1993) Partie
2 : Cahier des clauses spéciales
• DTU 59.1 NF P74-201-1 (DTU 59.1) (octobre 1994,
octobre 2000) : Peinture - Travaux de peinture des
bâtiments - Partie 1 : Cahier des clauses techniques et NF
P74-201-2 (octobre 1994, octobre 2000) Partie 2 : Cahier
des clauses spéciales
• DTU 65.12 NF P50-601-1 (mai 1993, octobre 1998,
octobre 2000) : Travaux de bâtiment - Réalisation des
installations de capteurs solaires plans à circulation de
liquide pour le chauffage et la production d'eau chaude
sanitaire - Cahier des clauses techniques et NF P50-601-2
Cahier des clauses spéciales.
2. NORMEN UND RICHTLINIEN
Neben den folgenden allgemeingültigen Vorschriften, Bestim-
mungen und Normen müssen u. U. noch regionale Bestim-
mungen bei Planung, Errichtung und Inbetriebnahme beachtet
werden.
Zur Einhaltung der Unfallverhütungsvorschriften kann die
Verwendung von Sicherungssystemen (Gurte, Ein-rüstun-
gen, Fangeinrichtungen etc.) erforderlich sein. Sie gehö-
ren nicht zum Lieferumfang und müssen gesondert
bestellt werden.
• VBG 4 - Unfallverhütungsvorschriften Elektrische Anlagen
und Betriebsmittel
• VBG 37 - Unfallverhütungsvorschrift Bauarbeiten
• DIN 18299 - Allgemeine Regelung für Bauarbeiten jeder Art
• DIN 18338 - Dachdeckungs- und Dachabdichtungsarbeiten
• DIN 18339 - Klempnerarbeiten
• DIN 18334 - Zimmer- und Holzbauarbeiten
• DIN 18360 - Metallbauarbeiten, Schlosserarbeiten
• DIN 18451 Gerüstarbeiten
• DIN 1055 Teil 4 - Lastenannahme für Bauten;
Verkehrslasten, Windlasten nicht schwingungsanfälliger
Bauwerke
• DIN 1055 Teil 5 - Lastenannahme für Bauten;
Verkehrslasten; Schneelast und Eislast
• DIN 4102 - Brandverhalten von Baustoffen und Bauteilen
• DIN 4109 - Schallschutz im Hochbau
• DIN VDE 0105-100 - Betrieb von elektrischen Anlagen
• DIN VDE 0185-1, DIN 57185-1 - Blitzschutzanlage,
Allgemeines für das Errichten
• DIN VDE 0190 - Einbeziehung von Gas- und
Wasserleitungen in den Hauptpotentialausgleich
• VDE0855-1,DIN 57855-1 - Errichtung und Betrieb (Erdung)
von Antennenanlagen
• DIN VDE 0100-725 - Errichten von Starkstromanlagen mit
Nennspannungen bis 1000 V; Hilfsstromkreise
• DIN VDE 0100-737 - Errichten von
Niederspannungsanlagen - Feuchte und nasse Bereiche
und Räume und Anlagen im Freien
• DIN 18381 - Gas-, Wasser- und
Abwasserinstallationsanlagen
• TRD 802 Dampfkessel der Gruppe III
• TRD 402 - Ausrüstung von Dampfkesselanlagen mit
Heißwassererzeugern der Gruppe IV
• DIN 4751 Teil 1 - Wasserheizungsanlagen: Offene und
geschlossene physikalisch abgesicherte
Wärmeerzeugungsanlagen bis 120 ˚C –
Sicherheitstechnische Ausrüstung
• DIN 4751 Teil 2 - Wasserheizungsanlagen: Geschlossene,
thermostatischabgesicherteWärmeerzeugungsanlagen mit
Vorlauftemperaturen bis 120 ˚C - Sicherheitstechnische
Ausrüstung
• DIN 4751 Teil 3 - Wasserheizungsanlagen: Geschlossene,
thermostatischabgesicherteWärmeerzeugungsanlagen mit
50 kW Nennwärmeleistung mit Zwangumlauf-
Wärmeerzeugern und Vorlauftemperaturen bis 95 ˚C;
Sicherheitstechnische Ausrüstung
• DIN 4753 Teil 1 - Wassererwärmer und
Wassererwärmungsanlagen für Trink- und Betriebswasser;
Anforderungen, Kennzeichnung, Ausrüstung und Prüfung
• DIN 4757 Teil 1 - Sonnenheizungsanlagen mit Wasser und
Wassergemischen als Wärmeträger; Anforderungen an die
sicherheitstechnische Ausrüstung
• DIN 4757 Teil 2 - Sonnenheizungsanlagen mit organischen
Wärmeträgern;Anforderungenandie sicherheitstechnische
Ausrüstung
• HeizAnlVO - Heizungsanlagenverordnung
• LBO’s - Landesbauordnungen der Bundesländer
• ZVH - Richtlinie 11.01 - Einbindung solartechnischer
Anlagen in die Hauswärmeversorgung
2. STANDARDS AND RULES
The German and French standards and directives cited above apply.
F
D
GB

12
3. MONTAGE SUR
TERRASSE 3. FLACHDACH-MON-
TAGE 3. FLAT-ROOF
INSTALLATION
Le kit de montage sur terrasse per-
met d’installer des capteurs solaires
PRO 2,5, PRO 2,3, SUN 270 et
SUN 230 sur des surfaces robustes
et planes. Le site d’installation ne
doit présenter aucune pente.
Un support constitué de profilés en
aluminium haute résistance est ins-
tallé pour maintenir les capteurs
solaires. Les capteurs solaires sont
fixés sur ce support, puis raccordés
hydrauliquement. Pour obtenir la
stabilité requise, le support doit être
solidement fixé à sa base ou suffi-
samment lesté.
S'il est nécessaire de percer la
base, elle doit être ensuite étanchée
soig-neusement et selon les règles
de l'art. De même, en cas de les-
tage, le poids supplémentaire ne
doit en aucun cas dépasser la
charge maximale admise. Eviter de
stocker le gravier en tas sur les toits
plats pour ne pas dépasser la
charge admise pendant le montage.
Das Flachdach-Montage-Set dient
zur Aufstellung von PRO 2,5,
PRO 2,3, SUN 270 und SUN 230
Flachkollektoren auf tragfähigen,
ebenen Flächen. Der Aufstellungs-
ort darf keine Neigung aufweisen.
Zur Aufständerung der Kollektoren
wird aus witterungsbeständigen Alu-
minium-Profilen ein Flachdachstän-
der montiert. Die Kollektoren
werden auf diesem Flachdachstän-
der befestigt und an-schließend
hydraulisch verschaltet. Um die
erforderliche Standsicherheit zu
erlangen, muss der Flachdachstän-
der mit der Unterkonstruktion fest
ver-bunden oder ausreichend
beschwert werden.
Falls eine Durchdringung des Unter-
grundes erforderlich ist, muss auf
eine sorgfältige und fachgerechte
Ab-dichtung geachtet werden.
Ebenso darf die spezifische Dach-
last bei einer Beschwerung durch
das zusätzliche Gewicht nicht über-
schritten werden. Damit die Dach-
last während der Montage nicht
überschritten wird, sind Anhäufun-
gen von Schüttgut auf Flach-
dächern zu vermeiden.
The flat-roof installation set is used
to install PRO 2,5, PRO 2,3,
SUN 270 and SUN 230 solar panels
on flat load-bearing surfaces. The
surface on which the panels are
erected must not slope.
A supporting frame made of
weather-proof profile-section alu-
minium is erected on the flat roof to
support the solar panels. The solar
panels are fixed to the supporting
frame and subseq-uently connected
up to the circulation system. In order
to provide the necessary stability,
the solar-panel supporting frame
must be permanently fixed to the
substructure or else adequately held
down by stabilising weights.
If the roof surface has to be pene-
trated, care must be taken to ensure
that it is made properly waterproof
again.Equally, if weights areused to
stabilise the solar-panel supporting
frame, the specific roof load must
not be exceeded. In order to prevent
the roof load being exceeded while
installation work is in progress,
accumulations of aggregates on the
flat roof should be avoided.
FD
GB

13
4. SUPPORT DE MON-
TAGE EN TER-
RASSE, VUE
D'ENSEMBLE
4. FLACHDACHSTÄN-
DER, MONTAGE-
ÜBERSICHT
4. PANEL SUPPORT-
ING FRAME,
INSTALLATION
OVERVIEW
Support pour 2 capteurs verticaux
juxtaposés avec pierres de lestage
partiellement posées
Flachdachständer für 2 Kollektoren,
senkrecht, nebeneinander mit teilw.
eingelegten Rasenkantensteinen
Panel supporting frame 2 vertical
panels, side by side showing use of
edging stones as weights
Désignation Bezeichnung Description
03-C Equerre de toiture en terrasse
04 Profilé de base
8 Vis à tête cylindrique
10 Vis à encastrer
15 Vis autoperforante
21 Rondelle-ressort
22 Entretoise
23 Ecrou à encastrer
24 Traverse croix
25 Rondelle plate
26 Ecrou
60 Lest (pierres)
03-C Flachdachwinkel
04 Basisprofil
8 Zylinderschraube
10 Formschluss-Schraube
15 Stanzschraube
21 Federring
22 Abstandshülse
23 Formschluss-Mutter
24 Sicherungskreuz
25 Unterlegscheibe
26 Mutter
60 Beschwerung (Rasenkanten-
steine)
03-C Flat-roof iron corner
04 Mounting rail
8 Cheese-head bolt
10 Interlock bolt
15 Punch bolt
21 Spring washer
22 Spacer
23 Interlock nut
24 Scissor stays
25 Washer
26 Nut
60 Stabilising weight (lawn edg-
ing stones)
FD
GB
23
22
21
15
03-C
60 04
24
26
25 08
25
26
10
8980N401

14
4.1 Dimensions et écarts
de fixation - PRO 2,5 /
SUN 270
4.1 Abmessungen und
Befestigungsab-
stände
- PRO 2,5 /
SUN 270
4.1 Dimensions and Fix-
ing Spacings
-
PRO 2,5 / SUN 270
●Capteurs verticaux juxtaposés ●Kollektoren senkrecht
nebeneinander
●Panels vertical, side by side
●Capteurs horizontaux juxtapo-
sés
●Kollektoren waagerecht
nebeneinander
●Panels horizontal, side by side
* Ecartement b=1 020 mm ; cet
espace doit impérativement être
respecté, car une traverse croix y
sera posée, ainsi que les pierres de
bordure servant au lestage.
* Abstandsmaß b=1020 mm ; dieser
Ab-stand muss exakt eingehalten
werden, da hier ein Sicherungs-
kreuz eingesetzt wird und die
Rasenkantensteine zur Beschwe-
rung eingelegt werden.
* Dimension b=1,020 mm; this
dimension must be exactly as spec-
ified because scissor stays are
attached here and the lawn edging
stones are placed in the frame as
stabilising weights.
FD
GB
2 capteurs / Kollektoren / panels 3 capteurs / Kollektoren / panels 4 capteurs / Kollektoren / panels
2 capteurs / Kollektoren / panels 3 capteurs / Kollektoren / panels
4 capteurs / Kollektoren / panels

15
4.2 Dimensions et écarts
de fixation
- PRO 2,3 /
SUN 230
4.2 Abmessungen und
Befestigungsab-
stände
- PRO 2,3 /
SUN 230
4.2 Dimensions and
Fixing Spacings
-
PRO 2,3 / SUN 230
●Capteurs verticaux juxtaposés ●Kollektoren senkrecht
nebeneinander
●Panels vertical, side by side
●Capteurs horizontaux juxtapo-
sés
●Kollektoren waagerecht
nebeneinander
●Panels horizontal, side by side
* Ecartement b=1 020 mm ; cet
espace doit impérativement être
respecté, car une traverse croix y
sera posée, ainsi que les pierres de
bordure servant au lestage.
* Abstandsmaß b=1020 mm ; dieser
Ab-stand muss exakt eingehalten
werden, da hier ein Sicherungs-
kreuz eingesetzt wird und die
Rasenkantensteine zur Beschwe-
rung eingelegt werden.
* Dimension b=1,020 mm; this
dimension must be exactly as spec-
ified because scissor stays are
attached here and the lawn edging
stones are placed in the frame as
stabilising weights.
FD
GB
2037
2374
=1020 ~170
1770
=1020*
60
8980N444
2037
3561
~85
~170
1770
60
=1020 =1020* =1020*
8980N445
4748
~170
2037
1770
=1020 =1020*
60
=1020 =1020*
~170
8980N446
5935
~170
1770
=1020 =1020*
60
=1020 =1020*
~170
2037
~85
=1020*
8980N447
2 capteurs / Kollektoren / panels
3 capteurs / Kollektoren / panels 4 capteurs / Kollektoren / panels
5 capteurs / Kollektoren / panels
=1020* ~530=1020* ~530=1020* ~530=1020* ~530
10435
870
60
=1020* ~530
1137
8980N439
=1020* ~530 =1020* ~530
4174
870
60
1137
8980N448
=1020* ~530 =1020* ~530=1020* ~530
6261
870
60
1137
8980N449
=1020* ~530 =1020* ~530=1020* ~530=1020* ~530
8348
870
60
1137
8980N450
2 capteurs / Kollektoren / panels
3 capteurs / Kollektoren / panels 4 capteurs / Kollektoren / panels
5 capteurs / Kollektoren / panels

16
4.3 Liste de
colisage :
Capteurs ver-
ticaux juxta-
posés
4.3 Kolliliste:
Kollektoren
senkrecht
nebeneinan-
der
4.3 Packing List
for Panels
vertical, side
by side
Nombre de capteurs
Anzahl Kollektoren
Number of panels
N˚/
Nr./
Set No. Désignation Bezeichnung Description N˚ art./
Art.-Nr./
Art. No. 2345
EG 301 Lot de 2 capteurs solaires
PRO 2,5 / SUN 270 PRO 2,5 / SUN 270
Kollektor 2er Kolli PRO 2,5 / SUN 270 Solar
Panel Twin Pack 89807301 1 0 2 -
EG 302 Lot de 3 capteurs solaires
PRO 2,5 / SUN 270 PRO 2,5 / SUN 270
Kollektor 3er Kolli PRO 2,5 / SUN 270 Solar
Panel Triple Pack 89807302 0 1 0 -
EG 331 Lot de 2 capteurs solaires
PRO 2,3 / SUN 230 PRO 2,3 / SUN 230
Kollektor 2er Kolli PRO 2,3 / SUN 230 Solar
Panel Twin Pack 89807331 1021
EG 332 Lot de 3 capteurs solaires
PRO 2,3 / SUN 230 PRO 2,3 / SUN 230
Kollektor 3er Kolli PRO 2,3 / SUN 230 Solar
Panel Triple Pack 89807332 0101
EG 303 Kit de montage sur toit -
2 capteurs verticaux
juxtaposés (PRO 2,5 /
SUN 270) :
4 tenons de montage
8 pattes de serrage
8 cales coulisseau
8 vis universelles
2 profilé de base
1 planche de montage 2 m.
1 notice de montage -
installation sur toiture
Aufdach-Set 2
Kollektoren senkrecht
nebeneinander(PRO 2,5
/ SUN 270) :
4 Montagehaken
8 Klemmhalter
8 Nutstein
8 Universalschrauben
2 Basisprofil
1 Montagebrett 2 m.
1 Montageanleitung
Aufdach
Roof-surface installation set
for 2 panels vert./side by
side (PRO 2,5 / SUN 270) :
4 Mounting hooks
8 Fixing brackets
8 Anchor blocks
8 Universal bolts
2 Mounting rails
1 Fixing batten 2 m.
1 Instructions for Roof-
Surface Installation
89807303 1 1 2 -
EG 304 Kit de montage sur toit -
1 capteur vertical juxtaposé
(PRO 2,5 / SUN 270) :
2 tenons de montage
4 pattes de serrage
4 cales coulisseau
4 vis universelles
2 profilés de base
1 planche de montage 2 m.
1 notice de montage -
installation sur toiture
Aufdach-Set 1 Kollektor
senkrecht
nebeneinander(PRO 2,5
/ SUN 270):
2 Montagehaken
4 Klemmhalter
4 Nutstein
4 Universalschraube
2 Basisprofil,
1 Montagebrett 2 m.
1 Montageanleitung
Aufdach
Roof-surface installation set
for 1 panel vert./side by side
(PRO 2,5 / SUN 270):
2 Mounting hooks
4 Fixing brackets
4 Anchor blocks
4 Universal bolts
2 Mounting rails
1 Fixing batten 2 m.
1 Instructions for Roof-
Surface Installation
89807304 0 1 0 -
EG 333 Kit de montage sur toit -
2 capteurs verticaux
juxtaposés (PRO 2,3 /
SUN 230)
4 tenons de montage
8 pattes de serrage
8 cales coulisseau
8 vis universelles
2 profilé de base
2 planche de montage 2 m.
1 notice de montage -
installation sur toiture
Aufdach-Set 2 Kollektoren
senkrecht nebeneinander
(
PRO 2,3 / SUN 230)
:
4 Montagehaken
8 Klemmhalter
8 Nutstein
8 Universalschrauben
2 Basisprofil
2 Montagebrett 2 m.
1 Montageanleitung
Aufdach
Roof-surface installation set
for 2 panels vert./side by side
(
PRO 2,3 / SUN 230)
:
4 Mounting hooks
8 Fixing brackets
8 Anchor blocks
8 Universal bolts
2 Mounting rails
2 Fixing batten 2 m.
1 Instructions for Roof-
Surface Installation
89807333 1122
EG 334 Kit de montage sur toit -
1 capteur vertical juxtaposé
(PRO 2,3 / SUN 230) :
2 tenons de montage
4 pattes de serrage
4 cales coulisseau
4 vis universelles
2 profilés de base
2 planche de montage 2 m.
1 notice de montage -
installation sur toiture
Aufdach-Set 1 Kollektor
senkrechtnebeneinander
(PRO 2,3 / SUN 230):
2 Montagehaken
4 Klemmhalter
4 Nutstein
4 Universalschraube
2 Basisprofil,
2 Montagebrett 2 m.
1 Montageanleitung
Aufdach
Roof-surface installation set
for 1 panel vert./side by side
(PRO 2,3 / SUN 230):
2 Mounting hooks
4 Fixing brackets
4 Anchor blocks
4 Universal bolts
2 Mounting rails
2 Fixing batten 2 m.
1 Instructions for Roof-
Surface Installation
89807334 0101
EG 305 Kit de raccordement des
capteurs :
2 flexibles de raccord +
isolation
1 tube de liaison retour +
isolation
3 blocs de raccord de câbles
3 serre-câbles
Kollektorfeld-Anschluss-
Set:
2 Anschlussschlauch +
Isolierung
1 Rücklauf-Brücke +
Isolierung
3 Kabelbinderblöcke
3 Kabelbinder
Solar-panel group
connection set:
2 Connecting hoses +
insulation
1 Return pipe link + insulation
3 Cable-tie clips
3 Cable ties
89807305 1 1 1 -
FDGB

17
EG 306 Kit de liaison hydraulique
entre 2 capteurs :
2 raccord à vis 12x12 bague
de serrage
2 gaine isolante Aeroflex +
bande
Kollektorverbinder:
2 Verschraubung 12x12
Klemmring
2 Aeroflex
Isolierschlauch + Tape
Solar-panel connection-Set:
2 fittings 12x12, clamping
ring
2 Aeroflex insulating hose +
tape
89807306 1 2 3 -
EG 307 Kit de couplage :
1 pièce de couplage
3 vis à tête cylindrique
M8x14
Kopplungsset:
1 Kopplungsstück
3 Zylinderschraube
M8x14
Rail connecting set:
1 Connecting plate
3 Cheese-head bolt, M8x14
89807307 0 1 1 -
EG 323 Support triangulaire pour
installation en terrasse de
1 capteur vertical :
2 kit d'équerre de toit en
terrasse, vertical
1 traverse croix
1 notice de montage en
terrasse
Flachdach-
Dreieckständer 1 Koll.:
2 Flachdachwinkel-Set
senkrecht
1 Sicherungskreuz,
1 Montageanleitung
Flachdach
Triangular supporting frame
for 1 vertical solar panel:
2 Flat-roof bracket sets,
vertical
1 Pair scissor stays
1 Instructions for Flat-Roof
Installation
89807323 0 1 0 -
EG 324 Support triangulaire pour
installation en terrasse de
2 capteurs :
3 kit d'équerre de toit en
terrasse, perpendiculaire,
1 traverse croix,
perpendiculaire,
1 notice de montage en
terrasse
Flachdach-Dreieckständer
2 Kollektoren:
3 Flachdachwinkel-Set
senkrecht,
1 Sicherungskreuz
senkrecht,
1 Montageanleitung
Flachdach
Triangular supporting frame
for 2 solar panels:
3 Flat-roof bracket sets,
vertical
1 Pair scissor stays, vertical
1 Instructions for Flat-Roof
installation
89807324 1 1 2 -
FDGB

18
4.4 Liste de
colisage :
capteurs
horizontaux
juxtaposés
4.4 Kolliliste:
Kollektoren
Waagerecht
nebeneinan-
der
4.4 Packing List
for Panels,
horizontal,
side by side
Nombre de capteurs
Anzahl Kollektoren
Number of panels
N˚/
Nr./
Set No. Désignation Bezeichnung Description N˚ art./
Art.-Nr./
Art. No. 2345
EG 301 Lot de 2 capteurs solaires
PRO 2,5 / SUN 270 PRO 2,5 / SUN 270
Kollektor 2er Kolli PRO 2,5 / SUN 270 Solar
Panel Twin Pack 89807301 1 0 2 -
EG 302 Lot de 3 capteurs solaires
PRO 2,5 / SUN 270 PRO 2,5 / SUN 270
Kollektor 3er Kolli PRO 2,5 / SUN 270 Solar
Panel Triple Pack 89807302 0 1 0 -
EG 331 Lot de 2 capteurs solaires
PRO 2,3 / SUN 230 PRO 2,3 / SUN 230
Kollektor 2er Kolli PRO 2,3 / SUN 230 Solar
Panel Twin Pack 89807331 1021
EG 332 Lot de 3 capteurs solaires
PRO 2,3 / SUN 230 PRO 2,3 / SUN 230
Kollektor 3er Kolli PRO 2,3 / SUN 230 Solar
Panel Triple Pack 89807332 0101
EG 307 Kit de couplage :
1 pièce de couplage
3 vis à tête cylindrique
M8x14
Kopplungsset:
1 Kopplungsstück
3 Zylinderschraube
M8x14
Rail connecting set:
1 Connecting plate
3 Cheese-head bolt, M8x14
89807307 1 2 3 -
EG 308 Kit de raccordement des
capteurs :
2 flexibles de raccord +
isolant
1 liaison capteur-capteur
courte 180˚ + isolant
3 blocs de raccord de câbles
3 serre-câbles
Kollektorfeld-Anschluss-
Set:
2 Anschlussschlauch +
Iso
1 Verbindung Koll-Koll
180˚ kurz + Iso
3 Kabelbinderblock
3 Kabelbinder
Solar-panel group
connection set:
2 Connecting hoses +
insulation
1 Panel-to-panel connection,
180˚ short + insulation
3 Cable-tie clips
3 Cable ties
89807308 1 1 2 -
EG 309 Kit d’extension pour
raccordement de capteurs :
1 liaison capteur-capteur
longue,
1 tube de liaison retour
3 blocs de raccord de câbles
3 serre-câbles
1 gaine isolante Aeroflex +
bande
Erweiterung-Anschluss-
Set:
1 Verbindung Koll-Koll
lang,
1 Rücklauf-Brücke
3 Kabelbinderblock
3 Kabelbinder
1 Aeroflex
Isolierschlauch+ Tape
Extension set for Solar-
panel connection:
1 Panel-to-panel connection,
long
1 Return pipe link
3 Cable-tie clips
3 Cable ties
1 Aeroflex insulating hose +
tape
89807309 0 1 0 -
EG 310 Kit de montage sur toiture
1 capteur horizontal
(PRO 2,5 / SUN 270) :
2 profilés de base pour un
montage horizontal des
capteurs
4 pattes de serrage
4 vis
4 cales coulisseaux
2 tenons de montage
2 planches de montage a
2m,
1 notice de montage sur
toiture
Aufdach-Set
1 Waagerechter Kollektor
(PRO 2,5 / SUN 270):
2 Basisprofile zur
waagerechten Koll
Montage
4 Klemmhalter
4 Schrauben
4 Nutsteine
2 Montagehaken
2 Montagebretter a 2 m,
1 Montageanleitung
Aufdach
Roof-surface installation set
1 horizontal panel (PRO 2,5
/ SUN 270):
2 Mounting rails for fitting
panels horizontally
4 Fixing brackets
4 Bolts
4 Anchor blocks
2 Mounting hooks
2 Fixing battens, 2m
1 Instructions for Roof-
Surface Installation
89807310 2 3 4 -
EG 335
Kit de montage sur toiture
1 capteur horizontal
(PRO 2,3 / SUN 230) :
2 profilés de base des
capteurs
4 pattes de serrage
4 vis
4 cales coulisseaux
2 tenons de montage
2 planches de montage
1 notice de montage en
terrasse
Aufdach-Set
1 Waagerechter Kollektor
(PRO 2,3 / SUN 230):
2 Basisprofile
4 Klemmhalter
4 Schrauben
4 Nutsteine
2 Montagehaken
2 Montagebretter
1 Montageanleitung
Aufdach
Roof-surface installation set
1 horizontal panel (PRO 2,3
/ SUN 230):
2 Mounting rails
4 Fixing brackets
4 Bolts
4 Anchor blocks
2 Mounting hooks
2 Fixing battens
1 Instructions for Flat-Roof
installation
89807335
2 3 45
EG 325 Support triangulaire pour
installation en terrasse de
1 capteur horizontal :
2 Kit d'équerre de toit en
terrasse, horizontal
1 traverse croix, horizontale
1 notice de montage en
terrasse
Flachdach-Dreieckständer
1Waagerechter Kollektor:
2 Flachdachwinkel-Set
waagerecht
1 Sicherungskreuz
waagerecht
1 Montageanleitung
Aufdach
Triangular supporting frame
for 1 horizontal panel:
2 Flat-roof bracket sets,
horizontal
1 Pair scissor stays,
horizontal
1 Instructions for Flat-Roof
installation
89807325 2 3 4 -
FDGB

19
5. MONTAGE DU SUP-
PORT 5. FLACHDACHSTÄN-
DER-MONTAGE 5. INSTALLING THE
SOLAR-PANEL
SUPPORTING
FRAME
Pour éviter d'endomma-
ger la couverture, il est
recommandé d'utiliser un
film protecteur (tapis de
protection) comme base pour le
support. Poser cette protection
avant de commencer le montage.
Um eine Beschädigung
der Dachhaut zu verhin-
dern, wird die Verwen-
dung von
Dachhautschutzfolie (Bauten-
schutzmatten) als Unterlage für den
Flach-dachständer empfohlen. Die-
ser Schutz ist vor Montagebeginn
auszulegen.
In order to prevent dam-
age to the roof covering,
the use of a protective
sheet or mat underneath
the supporting frame is recommend-
ed. The protective sheet should be
laid out before starting the installa-
tion work.
1. Poser les profilés de base (04)
sur la zone de montage, la rai-
nure large orientée vers le haut.
Ecart de profilé de base (a) pour
- Montage vertical = 1717 mm
- Montage horizontal = 817 mm
1. Die Basisprofile (04) mit der
breiten Nut nach oben auf die
Montagefläche legen.
Basisprofilabstand (a) bei
- senkrechter Montage = 1717 mm
- waagerechter Montage = 817 mm
1. Lay the mounting rails (04) with
the wide slot at the top on the
surface where the frame is to be
erected.
Mounting frame spacing (a) for
- vertical panels = 1,717 mm
- horizontal panels = 817 mm
2. Déplier la première équerre de
montage prémontée et poser le
profilé en Llong sur les profilés
de base de manière à ce que le
profilé en Tsoit orienté vers l'ar-
rière.
Ecartement b = ~300 mm ou
~500 mm
- voir paragraphe "4.1 Dimensions
et écarts de fixation - PRO 2,5 /
SUN 270", page 14
- voir paragraphe "4.2 Dimensions
et écarts de fixation - PRO 2,3 /
SUN 230", page 15.
2. Den ersten vormontierten FD-
Montagewinkel auf-klappen und
das lange L-Profil auf die Basis-
profile legen, so dass das T-Pro-
fil nach hinten zeigt.
Abstandsmaß b = ~300 mm bzw.
~500 mm
- siehe Tableau 4.1, “Abmessun-
gen und Befestigungsabstände -
PRO 2,5 / SUN 270”, page 14.
- siehe Tableau 4.2, “Abmessun-
gen und Befestigungsabstände -
PRO 2,3 / SUN 230”, page 15.
2. Unfold the first pre-assembled
flat-roof mounting bracket and
lay the L-section brace across
the mounting rails so that the T-
section brace is facing to the
rear.
Distance b = ~300 mm or
~500 mm,
- see paragraphe "4.1 Dimensions
and Fixing Spacings - PRO 2,5 /
SUN 270", page 14.
- see paragraphe "4.2 Dimensions
and Fixing Spacings - PRO 2,3 /
SUN 230", page 15.
FD
GB
=
,
,
>
03-C
04
04
8980N406

20
3. Fixer l'équerre de montage sur
le profilé de base à l'aide des vis
à encastrer (10), des rondelles
en éventail (25) et des
écrous (26) fournis.
3. Den FD-Montagewinkel mit den
beiliegenden Form-schluss-
Schrauben (10),
Fächerscheiben (25) und Mut-
tern (26) am Basisprofil befesti-
gen.
3. Fix the flat-roof mounting brack-
et to the mounting rails using the
interlock bolts (10), serrated
washers (25) and nuts (26) sup-
plied.
Bloquer les vis à encas-
trer dans le profilé de
base en les tournant de
90˚ ().
Die Formschluss-
Schrauben müssen
durch ver-drehen um
90˚ () im Basisprofil
gesichert werden.
The interlock bolts have
to be secured in the rails
by rotating them through
90˚ ().
4. Poser l'équerre de montage sui-
vante sur les profilés de base et
la fixer au moyen des vis à en-
castrer. Ne pas serrer les vis à
fond, car il pourra être nécessai-
re d'ajuster la position de
l'équerre par la suite.
Ecartement des équerres de mon-
tage: 1020 mm
- voir paragraphe "4.1 Dimensions
et écarts de fixation - PRO 2,5 /
SUN 270", page 14.
- voir paragraphe "4.2 Dimensions
et écarts de fixation - PRO 2,3 /
SUN 230", page 15.
4. Den nächsten FD-Montagewin-
kel auf die Basis-profile legen
und mit den Formschluss-
Schrauben fixieren. Die Schrau-
ben nicht fest anziehen, da ein
Nachjustieren des FD-Montage-
winkels erforderlich werden
kann.
Montagewinkel-Abstandsmaß:
1020 mm
- siehe Tableau 4.1, “Abmessun-
gen und Befestigungsabstände -
PRO 2,5 / SUN 270”, page 14.
- siehe Tableau 4.2, “Abmessun-
gen und Befestigungsabstände -
PRO 2,3 / SUN 230”, page 15.
4. Lay the next flat-roof mounting
bracket across the mounting
rails and fix in place using the in-
terlock bolts. Do not fully tighten
the bolts at this stage as it may
be necessary to re-adjust the
position of the flat-roof mounting
bracket.
Mounting bracket spacing:
1020 mm
- see paragraphe "4.1 Dimensions
and Fixing Spacings - PRO 2,5 /
SUN 270", page 14.
- see paragraphe "4.2 Dimensions
and Fixing Spacings - PRO 2,3 /
SUN 230", page 15.
FD
GB
03-C
04
26
25
10
13
8980N407
This manual suits for next models
3
Table of contents
Other DeDietrich Solar Panel manuals
Popular Solar Panel manuals by other brands

Hyundai
Hyundai HIS-M210RF installation manual

SFC Energy
SFC Energy XTREMESOLAR XTR-S290P Series installation manual

Gallagher
Gallagher G49521 Mounting instructions

patura
patura 144250 Installation and mounting instructions

Tsun
Tsun TSOL-ESK400-Air(V) Quick installation guide

Giacomini
Giacomini R557 Instruction

Dometic
Dometic NDS BS 115WP Short Operating Manual

TSI Instruments
TSI Instruments 8145-SO Operation and maintenance manual

SwitchDoc Labs
SwitchDoc Labs SolarMax Lead Acid ASSEMBLY AND TESTING GUIDE

Sonnenkraft
Sonnenkraft SKR500 Series manual

Campbell
Campbell SP5 user guide

Immergas
Immergas SOLARSMART 110 Instruction booklet and warning