Dejero LIVE+ EnGo User manual

LIVE+ EnGo
User Guide
2015
D-UG114-003
www.dejero.com

www.dejero.com
2|LIVE+ EnGo User Guide
Dejero Labs Inc.
412 Albert Street, Suite 100
Waterloo, Ontario, N2L 3V3
+1 519 772 4824
Copyright, Trademarks, and Patents
Copyright © 2015 Dejero Labs Inc.
Dejero and Dejero LIVE+ are trademarks of Dejero Labs Inc. All other trademarks are the
property of their respective owners.
Dejero products or portions thereof are protected by patents granted and pending.
Bluetooth is a trademark of Bluetooth SIG. HDMI is a trademark of HDMI Licensing, LLC. Wi-Fi
is a trademark of the Wi-Fi Alliance.
Symbols and Conventions
This document uses the following symbols and conventions:
Note: Shares important related information, reminders, recommendations, and
suggestions
Caution: Means that the action you take could cause harm to your
equipment/device, cause you to lose data, or void your warranty.
Warning: Describes an action that could cause you physical harm. Follow the
guidelines in this document or the device itself when handling electrical
equipment.

www.dejero.com
3|LIVE+ EnGo User Guide
Contents
Warranty and Liability................................................................................................................. 4
Safety Warnings and Hazards.................................................................................................... 4
Handling and Operating Conditions............................................................................................ 5
About the LIVE+ EnGo............................................................................................................... 7
Modes of operation.................................................................................................................... 8
Product configurations ............................................................................................................... 8
What’s included.......................................................................................................................... 9
About LIVE+ Control.................................................................................................................. 9
Attaching the EnGo to the camera ............................................................................................. 9
Starting the EnGo ...................................................................................................................... 9
Connecting video and audio....................................................................................................... 9
About connection ports .............................................................................................................10
Powering the EnGo...................................................................................................................10
Connecting Ethernet .................................................................................................................11
Connecting IFB.........................................................................................................................11
About the Preview screen .........................................................................................................12
Specifying the camera input type ..............................................................................................13
About the EnGo USB ports.......................................................................................................13
Configuring the transmitter........................................................................................................13
Configuring the connection type................................................................................................16
Transmitting live........................................................................................................................18
Managing Store & Forward clips ...............................................................................................18
Transferring files.......................................................................................................................21
About warning and error states.................................................................................................21
Using the remote control...........................................................................................................22
Configuring Auto Start...............................................................................................................22
Changing the display orientation...............................................................................................22
Viewing individual connection meters........................................................................................23
About stream indicators ............................................................................................................23
Troubleshooting........................................................................................................................24
Warning and error messages....................................................................................................26
Technical specifications............................................................................................................31
Additional help ..........................................................................................................................32

www.dejero.com
4|LIVE+ EnGo User Guide
Warranty and Liability
Reasonable care has been taken in preparing the information in this document. However, this
document may contain omissions, technical inaccuracies, or typographical errors. Dejero Labs
Inc. does not accept responsibility of any losses due to the use of this document. Product
specifications are subject to change without notice.
Due to the nature of wireless communication, transmission and reception of data can never be
guaranteed. While Dejero strives to provide high-quality video transmission without significant
delays, environmental and cellular network conditions beyond Dejero’s control may result in
data delay, corruption, or loss.
Dejero accepts no responsibility for and is not liable for any loss or damage, including, but not
limited to, revenue or personal injury, resulting from delays in, errors in, or failure to transmit or
receive data using the Dejero LIVE+ Platform.
Warranty on the Dejero LIVE+ EnGo is voided if the case is opened by anyone who has not
been trained and certified by Dejero. For details, see Handling and Operating Conditions below.
Safety Warnings and Hazards
Read this section in its entirety before operating the LIVE+ EnGo.
Class A device
This is a Class A product intended to be used in a commercial, industrial or business
environment. In a domestic environment this product may cause radio interference, in which
case the user may be required to take adequate measures.
Federal Communications Commission statement
LIVE+ EnGo complies with Part 15 of the FCC rules for a Class A device.
Industry Canada statement
LIVE+ EnGo complies with Industry Canada ICES-003 Class A specifications.
RF Exposure Notice
THIS DEVICE MEETS THE GOVERNMENT’S REQUIREMENTS FOR EXPOSURE TO RADIO
WAVES.
LIVE+ EnGo is a radio transmitter and receiver. It is designed and manufactured not to exceed
the emission limits for exposure to radiofrequency (RF) energy set by the Federal
Communications Commission of the U.S. Government and Industry Canada.
Explosive Atmosphere
The LIVE+ EnGo should be powered off in an area with a potentially explosive atmosphere such
as fuelling areas, fuel or chemical transfer or storage areas, below deck on boats, or in areas
where the air contains chemicals or particles such as grain, dust or metal powders. It is rare, but
there is potential for PC-like devices, such as the LIVE+ EnGo, to generate sparks, which could
trigger an explosion. Do not store the LIVE+ EnGo in the compartment of a vehicle that contains
flammable gas, liquid, or explosives.

www.dejero.com
5|LIVE+ EnGo User Guide
Blasting or Construction Sites
The Dejero LIVE+ EnGo should be powered off in areas where blasting is in progress, where
explosives may be present, or near any other equipment that is susceptible to radio
interference.
Hospitals
The Dejero LIVE+ EnGo should be powered off near medical equipment or life support systems,
or near any other equipment that is susceptible to radio interference. Hospitals or other medical
facilities often ask visitors, patients, and staff to switch off all electronic devices in some areas.
Please make sure that you follow any local rules and regulations.
Aircraft
The Dejero LIVE+ EnGo should be powered off and not operated in any aircraft, whether in
flight or on the ground; systems onboard the aircraft could be affected by radio interference.
Driving
The driver or operator of any vehicle should not operate the Dejero LIVE+ EnGo while in control
of a vehicle. Doing so will detract from the driver’s or operator’s control and operation of that
vehicle.
Personal Health and Safety
For personal health and safety, the operator should maintain a minimum distance of 10 mm
from the LIVE+ EnGo while it is powered on, except when using the touch screen.
Medical Implant Devices
It is possible that the radio modems in the LIVE+ EnGo may interfere with some types of
medical devices (such as cardiac pacemakers or implant defibrillators), when operated close to
the device. You should seek advice from your doctor before operating the LIVE+ EnGo. For
personal health and safety, persons concerned about exposure should maintain a minimum
distance of 10 mm from the LIVE+ EnGo while it is powered on, except when using the touch
screen.
Hearing Devices
People with hearing aids or cochlear implants may experience interfering noises when using
mobile devices, or when one is nearby. The level of interference depends on the type of aid or
implant, the type of mobile device, and the distance between the two. Increasing the distance
between the LIVE+ EnGo and the hearing device may reduce interference.
Electrical Safety
Disconnect all power sources before servicing the unit.
The socket-outlet shall be installed near the equipment and shall be easily accessible.
Handling and Operating Conditions
Read this section in its entirety before operating the LIVE+ EnGo.

www.dejero.com
6|LIVE+ EnGo User Guide
Handle Device with Care
While the LIVE+ EnGo case is durable, it is possible to damage or knock loose the electronics
inside if the device is dropped or thrown. Please handle with care. Damage sustained as the
result of mishandling the LIVE+ EnGo renders the warranty null and void.
Do Not Open the Case or Store Anything Inside
The LIVE+ EnGo case should remain sealed at all times to protect the sensitive electronics
inside and ensure the safety of the operator. Opening the case renders the warranty null and
void.
Do Not Disassemble the Product
Only authorized Dejero personnel can open, modify, or repair the LIVE+ EnGo unit. Unless
authorized by Dejero personnel, any attempt by the user to open, disassemble, or repair the
device renders the warranty null and void.
Keep Air Vents Clear
If the air vents are blocked, the LIVE+ EnGo may overheat and shut down. These vents are
located on the top and bottom of the device. (The intake is protected by the black plastic end
caps on the top and bottom.) Please keep these areas clear and unobstructed to ensure
adequate airflow.
Keep Device as Cool as Possible
For optimal performance, keep the LIVE+ EnGo in well-ventilated areas, away from heat
sources and direct exposure to sunlight. Do not operate the EnGo in temperatures outside of
the ambient range (0° C to +45° C / 32° F to 113° F).
Keep Device Dry
The LIVE+ EnGo carry case is designed to be weather-resistant, but not weatherproof. Keep it
covered during inclement conditions, while still ensuring adequate air flow to keep the LIVE+
EnGo cool. Do not expose it to liquid, moisture, or excessive humidity. Using the LIVE+ EnGo
with carry cases other than the one supplied is not recommended and will void the warranty.

www.dejero.com
7|LIVE+ EnGo User Guide
About the LIVE+ EnGo
The LIVE+ platform of hardware, software, and cloud-based services helps you capture,
transmit, manage, and distribute high-quality live video from virtually anywhere.
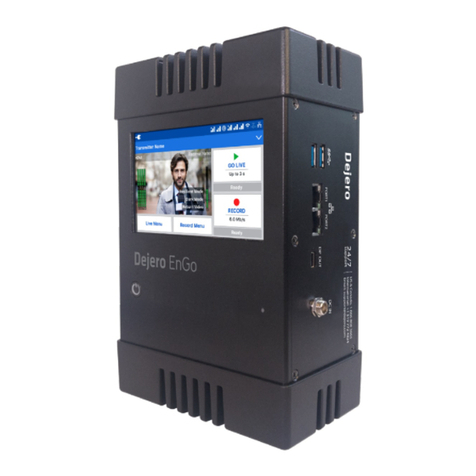
LIVE+ EnGo is a compact and modular mobile transmitter that encodes H.264 video and
transmits it over multiple IP networks. It reliably delivers exceptional picture quality with
extremely low latency—even in challenging network conditions.
Camera-mounted or wearable (in the supplied carry case), EnGo is ideal for newsgathering,
sports coverage, and live event broadcasting from remote locations, or while in motion.
Reliable and simple to use, LIVE+ EnGo is designed for mobile video contribution professionals
who require agility and versatility.
Built for speed
One-button start up and automatic video input and format detection allows fast set up. Camera-
mounted or body-worn, there are no more cables to trip over, so you can move locations
quickly.
Simple and intuitive
The simple and intuitive touch screen interface provides confidence monitoring, status
information, and easy operation. Built-in intelligence does most of the work for you so you can
focus on the shot.
Maximum versatility
The modular design of the EnGo enables you to attach swappable wireless modules. Connect
any SDI or HDMI® camera and mount it or wear it the way you want. EnGo redefines mobile
video contribution versatility.

www.dejero.com
8|LIVE+ EnGo User Guide
Broadcast from virtually anywhere
Cellular, Wi-Fi®, and portable satellite connections from a compact transmitter enable you to
broadcast live reliably from virtually anywhere. You can even broadcast live while moving.
Remarkable performance
Bonding up to eight network connections, EnGo reliably delivers exceptional picture quality with
low latency, even in challenging bandwidth conditions. Get your live shot where others can’t.
Cloud control
With LIVE+ Control and any web browser, you can geolocate, monitor performance, remotely
control preview feeds, and route your content –giving you ultimate control.
Modes of operation
Live: Transmit live video over bonded cellular, Wi-Fi, Ethernet, or satellite connections to the
LIVE+ servers.
Store & Forward: Record video for later transmission. Use this mode when a live feed is not
required, or when bandwidth is limited or not available.
Live and Store & Forward: Transmit live while also recording high-quality video to use later.
Use this mode when network bandwidth is limited but you need to broadcast live.
File Transfer:Quickly transfer photos, scripts, graphics, or edited video packages to the LIVE+
servers using bonded connections.
Product configurations
Your EnGo used one of following connection configurations:
Wi-Fi/ETH
Wi-Fi/ETH/2-Modem
Wi-Fi/ETH/4-Modem
Wi-Fi/ETH/6-Modem
Each option with cellular modems contains an integrated Radio Frequency (RF) module and is
available in North American and international versions. Some functionality only applies to EnGo
transmitters with RF modules.

www.dejero.com
9|LIVE+ EnGo User Guide
What’s included
The EnGo package includes the following items:
EnGo mobile transmitter with either the Gold
Mount or V-Mount battery plates
AC power adapter with locking connector
AC power cord
EnGo carry case
Right angle SDI cable adapter (for use in the
carry case)
Right angle HDMI cable (for use in the carry
case)
Right angle 1/8‖ adapter for IFB (for use in the carry case)
Quick Start Guide
Camera-mount adapter (optional)
About LIVE+ Control
When you use the EnGo with Dejero LIVE+ Control, you can:
Assign live and recorded video, as well as file transfers, from the EnGo to a LIVE+
server
Geolocate the EnGo mobile transmitter
Preview and route feeds from the EnGo
Remotely control and configure the EnGo
Review analytics about the EnGo performance
Attaching the EnGo to the camera
1. Slide the EnGo onto the battery plate of the camera so it is seated securely on the plate.
2. Slide a camera battery onto the EnGo.
Starting the EnGo
1. On the Preview screen side of the EnGo, press the Power button.
While the transmitter turns on and establishes a network connection, start-up messages appear
on the Preview screen.
Connecting video and audio
The EnGo support HDMI or SDI video input with embedded audio.
1. Plug the camera’s output cable into the video input port on the EnGo.

www.dejero.com
10 |LIVE+ EnGo User Guide
2. Make sure that all cables are firmly connected.
Powering the EnGo
You can use the following methods to power your EnGo:
Gold Mount or V-Mount hot-swappable battery
Supplied power adapter (19V DC output with locking connector)
Install the battery
On the battery side of the transmitter, slide the battery onto the battery mounting plate.
When properly inserted, the battery clicks into place and is seated securely on the plate. You
can replace the battery without interrupting the EnGo operation.
Recommended battery requirements
Nominal voltage of 14.4V (operating voltage of 12.0V to 16.8V)
95 WH battery, capable of 8.4A maximum at 12V, is recommended for powering EnGo,
camera, and accessories.
The EnGo selects the correct video input automatically. If you do not see video on the Preview
screen, make sure that the cables are connected properly and that you are using a supported
video format.
If the video format is not detected automatically, you may need to configure the video settings.
For more information, see Configuring the transmitter on page 13.
About connection ports
The connection ports are located on the I/O side of the EnGo.

www.dejero.com
11 |LIVE+ EnGo User Guide
Notes on power
The EnGo selects a power source in the following ways:
If the AC Power adapter is connected, it powers the EnGo only (the camera is notpowered when the AC adapter is connected.). Models with an internal backup battery
charge when the AC adapter is connected; the AC adapter does not charge the external
camera battery.
If the AC adapter is not connected, the external camera battery powers both the EnGoand the camera. A maximum of 60W can be provided to the camera and related
accessories. Models with an internal back-up battery enable five minutes of operation
while changing the main power source.
Remove the battery
1. Press the release mechanism on the battery mounting plate.
2. Slide the battery off the mounting plate.
Note: Do not leave the external battery attached when storing the EnGo. Leaving
the battery attached drains the battery.
Connecting Ethernet
Using an optional Ethernet connection, you can choose to transmit using Ethernet only or
broadcast over Ethernet and cellular networks simultaneously.
If multiple networks are available, you can plug in a second Ethernet cable for additional
throughput.
1. On the I/O side of the EnGo, plug an Ethernet cable into one of the ports.
2. Ensure that UDP port 6000 is open on the network for inbound and outbound traffic.
The Ethernet adapter is configured to obtain IP address details automatically using DHCP. For
more information, see Configuring the transmitter on page 13.
Connecting IFB
Interruptible Foldback (IFB) provides one-way communication from the LIVE+ Broadcast Server
to the EnGo. It enables communication and cueing from the studio crew to the reporter in the
field. The station sends a program feed to the reporter’s earpiece, which is connected to the
EnGo.
For more information on the LIVE+ Broadcast Server, refer to the LIVE+ Broadcast Server User
Guide.
Note: Connecting IFB is optional.
1. Connect your audio device (such as an earpiece, headset, or IFB amplifier input) to the
1/8‖ headphone jack on the I/O side of the EnGo.

www.dejero.com
12 |LIVE+ EnGo User Guide
As soon as a live stream starts, an IFB volume indicator appears on the right side of the
Preview screen. For more information about starting a stream, see page 18.
As the EnGo receives voice packets from the server, the sound level varies.
At the bottom of the IFB sound level meter, an IFB status indicator shows the following
information:
I = Idle
R = Receiving
.1-.9 = Active and the delay is less than 1 second
1-9 = Active and delay is less than 10 seconds
X = Active and the delay is 10 seconds or more
About the Preview screen
When the EnGo is on, the Preview screen appears.
The Preview screen is the hub of the EnGo transmitter. The touch screen shows the live camera
feed, as well information about the power level, network connections, stream health and any
errors. You can also use the screen to broadcast live or record clips quickly. On the Preview
screen, you can start a broadcast or record Store & Forward clips with a quick tap of the Go
Live or Record buttons.
From the Preview screen, you can use the menu to transfer files or show transmitter settings,
error messages, and connection details. The transparent display lets you keep an eye on the
live stream or recording while changing the transmitter configuration.
Below the Go Live button, the current stream profile appears. When you tap the Go Live button,
the Preview screen shows the live stream run time below the button, and the stream connection
health and the latency above the button.
Below the Record button, the current clip quality appears. When you tap the Record button, the
Preview screen shows the clip run time below the button. Above the button, the screen shows
the amount of remaining video time that you can record and store in the device storage.

www.dejero.com
13 |LIVE+ EnGo User Guide
From the Live Menu, you can quickly select the parameters for your live feed. Tap the Live
Menu button to access the three live feed latency profiles: Feed, Auto, or User.
Use the Feed profile to send video to the station in poor network conditions. You can
also use Feed when you have time to send the highest quality video or when recording
live events without anchor desk and reporter interaction.
Use the Auto profile to adapt to network conditions. It increases latency as needed.
Use the User profile if you set the configuration options manually. For more information,
see Configuring the transmitter on page 13.
The Record Menu lets you quickly set the quality of the Store & Forward clip quickly. You can
choose from: High, Medium, or Low.
Note: Your LIVE+ Control administrator must assign the transmitter before it can be
used. If your administrator has not assigned the transmitter, an error appears. Your
administrator can also change the server output destination using the LIVE+
Control.
For a list of possible error messages, see page 26.
Specifying the camera input type
After the camera is connected and a video preview appears on the EnGo, use the Configuration
screen to verify your settings, if necessary. On this screen, you can check your video and video
format type, connection type, and latency settings.
1. On the Preview screen, tap the menu.
2. Tap Settings.
3. Tap Input.
4. Tap Video Input.
For more information about the configuration settings, see page 13.
About the EnGo USB ports
The EnGo has two USB ports. You can use these ports to connect USB memory sticks (for file
transfers,) support peripherals (such as a keyboard or mouse,) or other supported devices.
Configuring the transmitter
Use the Settings screen to configure the transmitter settings.
Set the video input
By default, the transmitter automatically detects HDMI or SDI connections, frame rate, and
resolution. If the settings are not detected automatically, you can set them manually.
1. On the Preview screen, tap the menu.
2. Tap Settings.
3. Tap Input.

www.dejero.com
14 |LIVE+ EnGo User Guide
4. Tap Video Input.
5. Set the video input to Auto, SDI, or HDMI.
6. Tap Back.
7. If you selected SDI or HDMI, to set the frame rate, tap Input Frame Rate.
8. Tap a frame rate.
9. Tap Back.
10. To set the input resolution, tap Input Resolution.
11. Tap a resolution.
12. Tap Back.
Note: Depending on the frame rate that you select, the available input resolutions
change.
Configure the latency
Latency is the time that it takes for the video to arrive at the server. Glass-to-glass refers to the
delay from the time the camera detects an image to the time that it appears on a video monitor
connected to the SDI output of the LIVE+ Broadcast Server.
In an area of poor coverage or very high cellular network traffic, you might achieve better video
transmission results with a medium or long latency.
1. On the Preview screen, tap the menu.
2. Tap Settings.
3. Tap Live.
4. Tap Latency.
5. Tap a preset value: 1.5 seconds, 3 seconds, or 8 seconds.
6. Tap Back.
7. Tap Latency Mode.
8. Tap a latency mode: Fixed, Adaptive, or Up to.
Latency modes
Fixed Latency mode: In Fixed Latency mode, the system attempts to give the glass-to-glass
latency requested (either 1.5 seconds, 3 seconds, 8 seconds, or preset). If the current network
conditions cannot support the requested latency, a warning indicator appears on the screen.
Adaptive Latency mode: In Adaptive Latency mode, the system measures the network
conditions during the stream and gradually changes the requested latency to a value that the
current conditions support.
Up to Latency mode: In Up to Latency mode, the system measures the network conditions
during the beginning of the stream and provides the shortest possible latency available. If the
conditions worsen during the stream, the transmitter gradually increases the latency up to the
maximum latency that you set. When the transmitter reaches the maximum latency, the latency
remains fixed at the specified value.

www.dejero.com
15 |LIVE+ EnGo User Guide
Configure the Live Resolution setting
Live resolution is the resolution of the video, as transmitted over-the-air when broadcasting. It is
independent of the transmitter input and server output resolutions.
1. On the Preview screen, tap the menu.
2. Tap Settings.
3. Tap Live.
4. Tap Resolution.
5. Set the Live Resolution to Manual, Auto: SD, Auto: SD+, Auto: HD, or Auto: HD+.
6. Tap Back.
The transmitter monitors the available bandwidth and adjusts the transport resolution
automatically to give you the best possible video quality under the current network conditions.
The server output resolution does not change, so the video routed to your internal systems
remains constant.
Each Auto option has a different maximum bandwidth cap, appropriate for the base video
resolution that you send.
Live Resolution
Ethernet Type
Maximum Connection Bitrate
Auto: SD
Normal
2.5 Mb/s
Satellite
3.1 Mb/s
Auto: SD+
Normal
5.0 Mb/s
Satellite
6.2 Mb/s
Auto: HD
Normal
5.0 Mb/s
Satellite
6.2 Mb/s
Auto: HD+
Normal
10.0 Mb/s
Satellite
12.5 Mb/s
If you choose Manual, you set the maximum connection bitrate. This setting is useful if you want
to control your data usage or if you are broadcasting from an area with poor coverage and want
to cap the bandwidth at a low rate.
About audio-only mode
In areas of poor coverage, when the transmitter’s available bandwidth falls below 100 Kb/s, the
transmitter automatically sends only audio to the server and the last good frame of the video

www.dejero.com
16 |LIVE+ EnGo User Guide
remains on the screen. When the bandwidth increases and remains at 200 Kb/s or better, the
transmitter resumes sending video.
Note: If you set a maximum connection bitrate less than 400 Kb/s manually, the
transmitter does not switch to audio-only mode.
Configuring the connection type
You can set the type of connection to use when transmitting data.
1. On the Preview screen, tap the menu.
2. Tap Settings.
3. Tap Connections.
4. Tap Connection Types.
5. Set the Connection mode to All, Ethernet, or Modems.
6. Tap Back.
Connection modes
All: The transmitter sends data through all available connections, including cellular, Ethernet
and Wi-Fi. The transmitter uses only the connections that are available. If multiple connections
are available, the transmitter uses all connection types simultaneously.
Ethernet: The transmitter sends data over Ethernet or Wi-Fi or both. If you select this option but
do not have an Ethernet cable connected or a Wi-Fi connection configured, an error appears on
the screen.
Modems: The transmitter sends data over the modem connections only. Use this mode when
your Wi-Fi or Ethernet connection is poor, with high usage and low bandwidth. If your EnGo has
an RF module, this option applies. If you have purchased an Ethernet/Wi-Fi only EnGo, or no
modems are installed, this option is not available.
Set the Ethernet connection type
1. On the Preview screen, tap the menu.
2. Tap Settings.
3. Tap Connections.
4. Tap Ethernet Types.
5. Tap Normal or Satellite.
6. Tap Back.
Ethernet connection types
Normal: This connection type uses a regular Ethernet line, such as a cable DSL connection, a
hotel Internet link, or a corporate office Ethernet port.
Satellite: This connection type is for high-reliability, high-latency links. It is typical of a portable
satellite connection. In Satellite mode, the transmitter accounts for the long latency of the
connection, and uses any other available connections (cellular or Wi-Fi) to supplement the

www.dejero.com
17 |LIVE+ EnGo User Guide
satellite connection. This option is not suitable for satellite links that have congested bandwidth.
In situations with congested bandwidth, use the Normal type and a higher glass-to-glass
latency.
Define the SIM set
Selecting a SIM set is available if your EnGo is configured for multiple regions. If you did not
purchase an EnGo for multiple regions, the SIM set option is not available.
1. On the Preview screen, tap the menu.
2. Tap Settings.
3. Tap Connections.
4. Tap SIM Set.
5. Depending on your geographic location, tap Primary or Secondary.
Configure a Wi-Fi connection
1. On the Preview screen, tap the menu.
2. Tap Settings.
3. Tap Connections.
4. Tap Wi-Fi.
5. Scroll through the list of available Wi-Fi connections and tap your selection.
6. Tap Action.
7. Tap Connect.
8. If prompted, use the keyboard on the screen to type the password.
9. Tap the green checkmark.
Note: Tap ABC for uppercase letters and abc for lowercase letters. Tap 123.?! for
special characters. Tap it twice for more special characters.
Disconnect a Wi-Fi connection
1. On the Preview screen, tap the menu.
2. Tap Settings.
3. Tap Connections.
4. Tap Wi-Fi. The current Wi-Fi network is highlighted in green
5. Tap Action.
6. Tap Disconnect.
Delete a saved Wi-Fi profile
1. On the Preview screen, tap the Menu.
2. Tap Settings.

www.dejero.com
18 |LIVE+ EnGo User Guide
3. Tap Connections.
4. Tap Wi-Fi. The current Wi-Fi network is highlighted in green.
5. Tap Forget.
Check the details of a Wi-Fi connection
1. On the Preview screen, tap the menu.
2. Tap Settings.
3. Tap Connections.
4. Tap Wi-Fi. The current Wi-Fi network is highlighted in green.
5. Tap Info.
Transmitting live
Connect to cellular networks automatically
When the transmitter is on and set to either All or Modems as the connection type, it
automatically connects to all available cellular connections.
Start a transmission
After you connect your camera to the transmitter, you can start a transmission.
Prerequisite: Confirm that the latency settings as indicated on the Go Live button are
appropriate for the transmission. If you need to change the setting, tap Live Menu and tap Feed,
Auto, or User.
1. Tap Go Live.
You can monitor the video feed as it transmits.
Stop a transmission
1. On the Preview screen, tap Stop.
2. Tap Yes.
The Preview screen continues to show the input from the camera. The device remains ready to
resume broadcasting. To resume the transmission, tap Go Live.
Managing Store & Forward clips
With Store & Forward, you can record up to 40 hours of HD video clips directly onto the
transmitter. You can also transfer and delete clips. Recording a clip can happen independently
of a live transmission. You can also start and stop recording during a live transmission.
Each clip is named with the date and time that the clip finished recording, in the following
format: YYYY-MM-DD_hhmmss.
Transfer a clip
The server that receives the transferred clip is defined in LIVE+ Control. Clips are recorded
Store & Forward files.

www.dejero.com
19 |LIVE+ EnGo User Guide
Note: You cannot transfer a file when streaming live content.
1. On the Preview screen, tap the menu.
2. Click Transfer.
3. Tap Clips.
4. Scroll through the clips to find the correct clip.
5. Perform one of the following actions:
To select a clip, tap the checkbox.
To select all clips, tap All.
To cancel selecting all clips, tap All again.
6. Tap Action.
7. Tap Transfer.
8. Tap Back.
To stop transferring the clip, tap Stop.
View a clip’s information
The clip information includes the transfer server, the transfer complete percentage, as well as
the timestamp.
1. On the Preview screen, tap the menu.
2. Click Transfer.
3. Tap Clips.
4. Tap a clip.
5. Tap Actions.
6. Tap Info.
7. Tap Back.
Delete a clip
1. On the Preview screen, tap the menu.
2. Tap Transfer.
3. Tap Clips.
4. Tap a clip.
5. Tap Actions.
6. Tap Delete.
7. To delete the clip from the transmitter permanently, tap Yes.
8. Tap Back.

www.dejero.com
20 |LIVE+ EnGo User Guide
Import a clip
You can import your edited clips to the EnGo transmitter. Imported clips appear with the Store &
Forward clips. You can transfer them to your server to view and play them back from the LIVE+
Control.
1. On the back of the EnGo, insert a USB drive.
2. On the Preview screen, tap the menu.
3. Tap Transfer.
4. Tap Files.
5. Navigate to the file that you want to import using the arrows on the right side of the
screen.
6. Tap a file to select it.
7. Tap Action.
8. Tap Transfer.
Record a Store & Forward clip
Prerequisite: Confirm that the Store & Forward clip quality that appears on the Record button is
appropriate for the clip. To change the quality of the recorded video, tap Record Menu. Tap
High, Medium, or Low.
Note: You do not need to connect the EnGo to a network to record a Store &
Forward clip.
1. On the Preview screen, tap Record.
The Preview screen shows the video that you are recording.
Statistics about the current clip also appear above and below the Record button, including the
clip length, resolution, quality setting, and encode rate. Based on the available free disk space
and the current encode rate, the estimated time remaining for the current clip appears. The
format of the clip length and time remaining is: hh:mm:ss.
Stop recording
1. To stop recording, on the Preview screen, tap Stop.
2. Tap Yes.
The Preview screen continues to show the input from the camera. The device remains ready to
resume broadcasting. To resume the transmission, tap Record.
Transmit live and record a Store & Forward clip
1. On the Preview screen, tap Go Live.
2. Tap Record.
The Preview screen shows the video that you are recording.
Table of contents
Other Dejero Transmitter manuals
Popular Transmitter manuals by other brands

PROCASTER
PROCASTER AMTX100 Installation and operation

Dwyer Instruments
Dwyer Instruments 629 Series Installation and operating instructions

Honeywell
Honeywell oneWireless XYR 6000 Professional installation guide

Sentera Controls
Sentera Controls RSTHX-2 Mounting and operating instructions

Emerson
Emerson Micro Motion 5700 installation manual

Berker
Berker 2766 Operation and assembly instructions