Delfi DELFI RENTAL User manual

DELFI RENTAL
Quick guide

Page 2 of 12
DELFI RENTAL Quick guide ENG–r. 1.0.0.4
This document contains confidential information. Any unauthorized copying, disclosure or distribution of the information in this document is strictly forbidden.
Copyright © 2018 Delfi Technologies A/S.
/ WELCOME
You have rented a Delfi Technologies stock count kit, containing PDA(s) with
cradle(s).
At the following pages we will try to guide you through the setup process, making
your stock counting task as easy as possible.
Feel free to contact us if you have questions not covered in this guide.
/ WHAT YOU NEED
The hardware (PDA, cradle, power supply, and USB cable)
The software on the PDA (Delfi MobileForce)
Delfi Communication Center (DCC) (to handle the communication between PC
and PDA)
Windows Mobile Device Center (The driver between PC and PDA)
Contents
/ WHAT YOU NEED................................................................................................................................2
/ PACKAGE CONTENT ..........................................................................................................................3
/ INSTALLATION - HARDWARE ............................................................................................................3
/ PC SOFTWARE (DELFI COMMUNICATION CENTER)......................................................................6
/ INSTALL DCC ...................................................................................................................................6
/ CONFIGURE DCC ............................................................................................................................6
/ PDA SOFTWARE (DELFI MOBILEFORCE) ........................................................................................8
/ SET UP THE PDA.............................................................................................................................8
/ COMMUNICATE WITH THE PC.......................................................................................................9
/ BASIC KEYBOARD SHORTCUTS...................................................................................................9
/ PDA (DELFI MIRA/DELFI NOVA).......................................................................................................10
/ DELFI MIRA ....................................................................................................................................10
/ DELFI NOVA ...................................................................................................................................10
/ TROUBLESHOOTING........................................................................................................................11

DELFI RENTAL Quick guide ENG–r. 1.0.0.4
Page 3 of 12
This document contains confidential information. Any unauthorized copying, disclosure or distribution of the information in this document is strictly forbidden.
Copyright © 2018 Delfi Technologies A/S.
/ PACKAGE CONTENT
Installation guide
PDA(s) (Delfi Mira or Delfi Nova)
Cradle(s) (USB + Ethernet)
Power supply
USB cable
Page 4 of 12
DELFI RENTAL Quick guide ENG–r. 1.0.0.4
This document contains confidential information. Any unauthorized copying, disclosure or distribution of the information in this document is strictly forbidden.
Copyright © 2018 Delfi Technologies A/S.
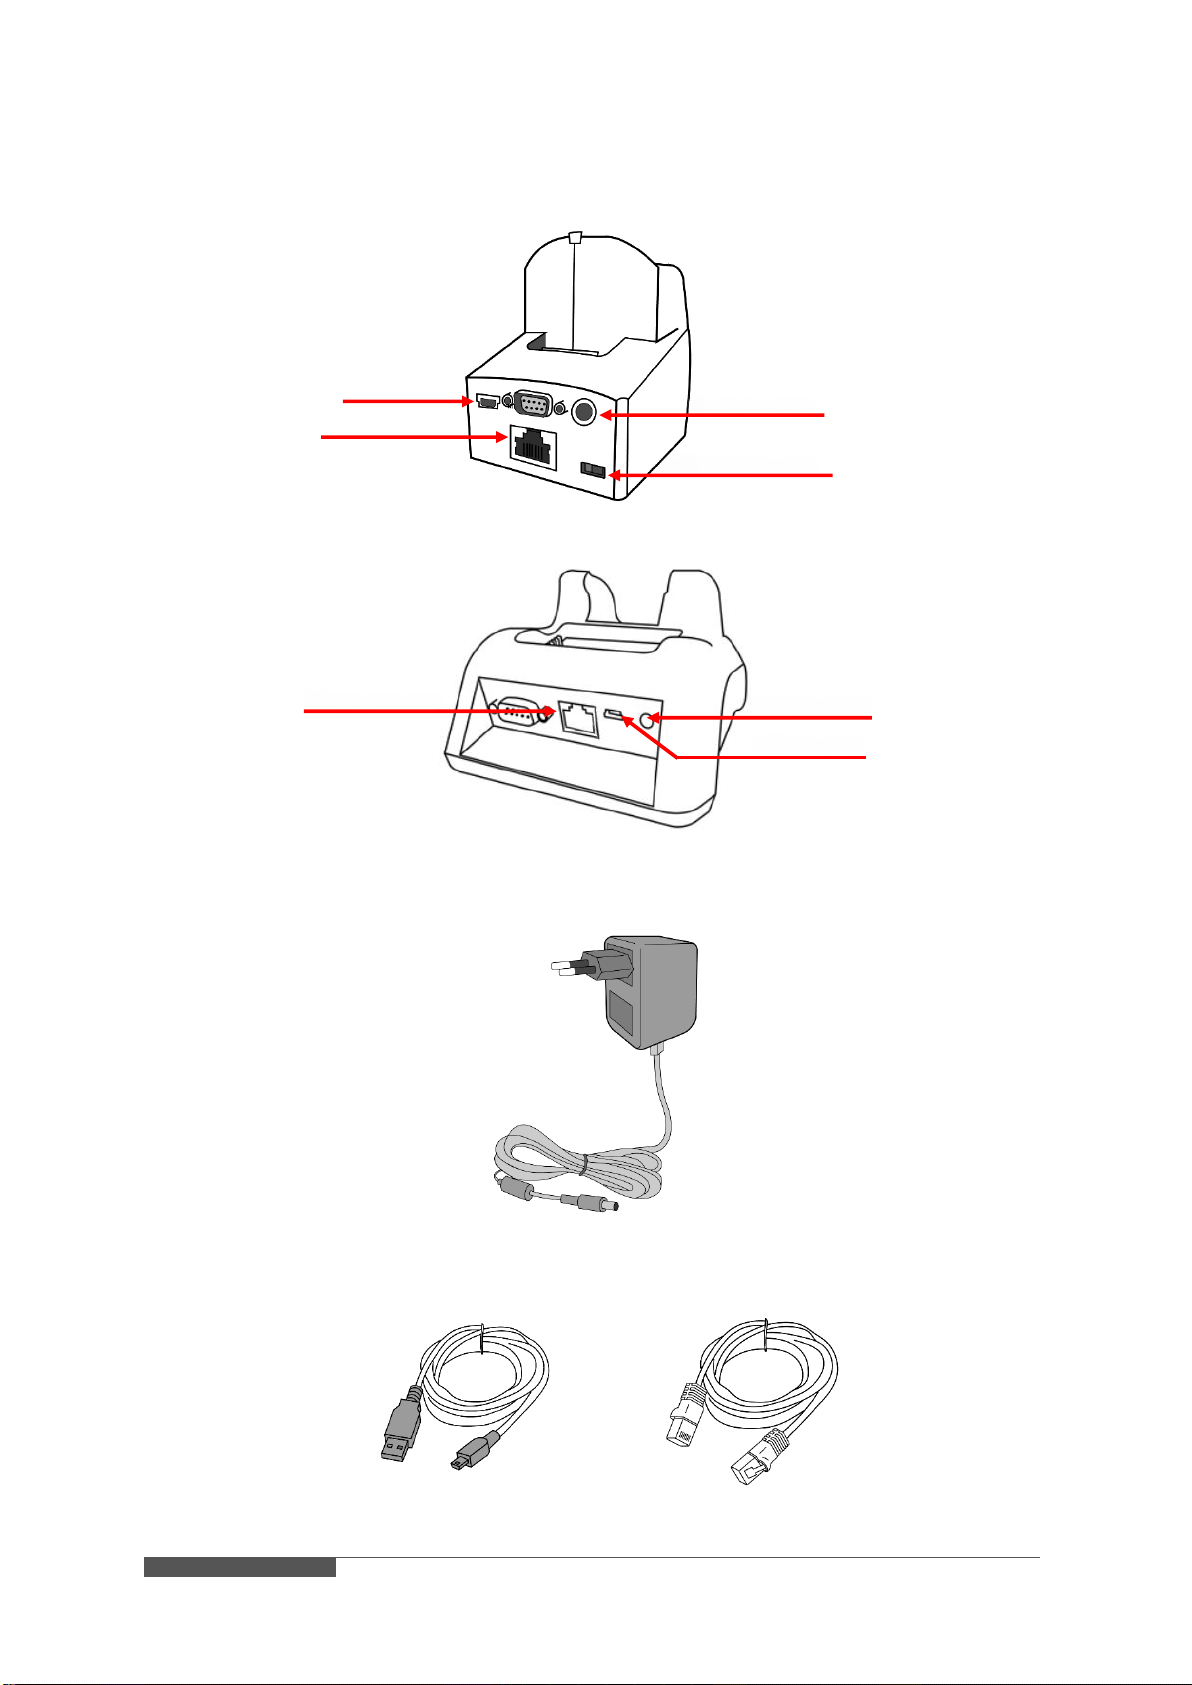
/ INSTALLATION - HARDWARE
1. Choose between Ethernet and USB at the back of the cradle
Delfi Mira Single Ethernet Cradle
Delfi Nova Single Ethernet Cradle
2. Plug the power supply into the cradle
3. Plug either the Ethernet- or USB cable into the cradle (depending on connection
type)
USB cable Ethernet cable
USB connector
Ethernet connector
Power connector
USB / ethernet switch
Ethernet connector
Power connector
USB connector
DELFI RENTAL Quick guide ENG–r. 1.0.0.4
Page 5 of 12
This document contains confidential information. Any unauthorized copying, disclosure or distribution of the information in this document is strictly forbidden.
Copyright © 2018 Delfi Technologies A/S.
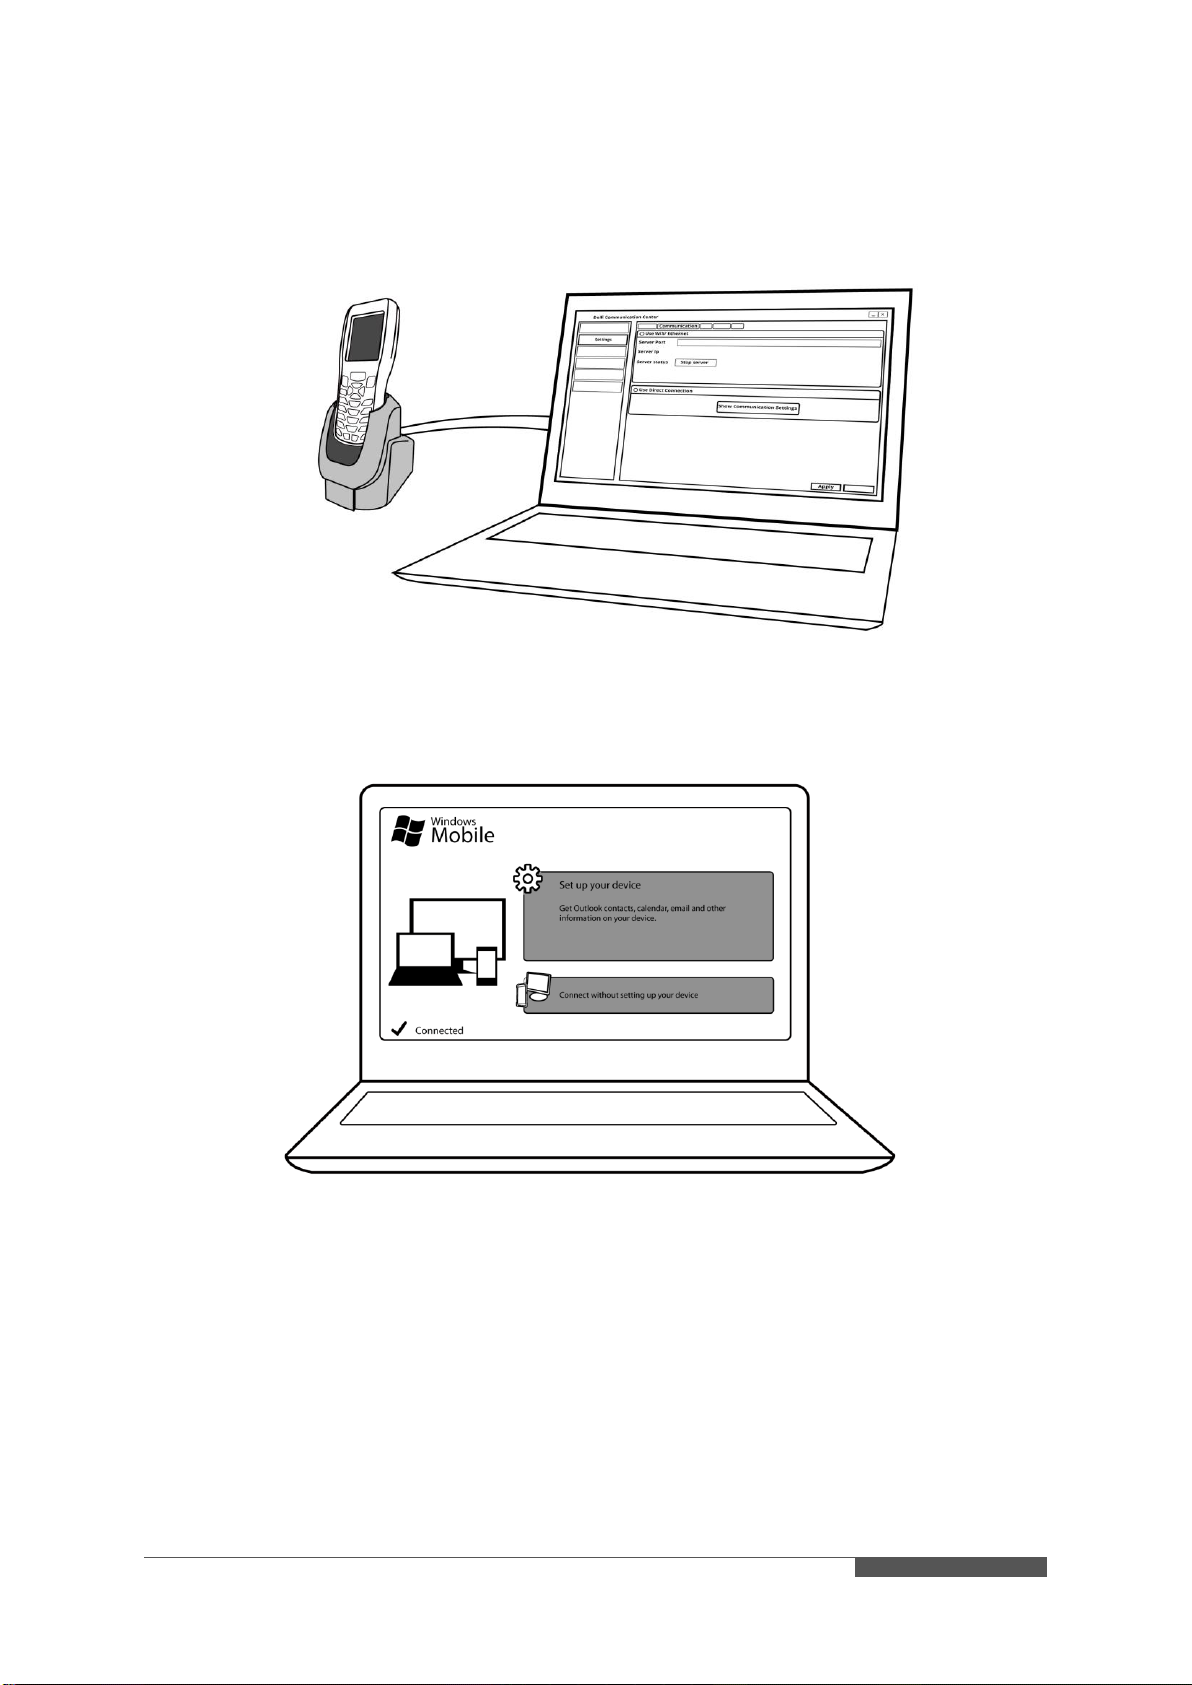
4. Install and set up Delfi Communication Center on your PC, see ‘PC Software,
page 6’ part for more in-depth guidance.
5. Open Windows Mobile Device Center to confirm availability. If not available, see
‘Troubleshooting, page 11’part for more in-depth guidance.
6. Turn on the PDA and set up the PDA, see ‘PDA Software page 8’for more in-
depth guidance.
7. Start using the PDA
Page 6 of 12
DELFI RENTAL Quick guide ENG–r. 1.0.0.4
This document contains confidential information. Any unauthorized copying, disclosure or distribution of the information in this document is strictly forbidden.
Copyright © 2018 Delfi Technologies A/S.
/ PC SOFTWARE (DELFI COMMUNICATION CENTER)
/ INSTALL DCC
1. Download the most recent version Delfi Communication Center:
http://bit.ly/downloadDCC
2. Follow the installation guidance
3. When asked to insert license key, insert the license key from your order
confirmation
4. Choose connection type (USB or Ethernet)
5. Finish installation
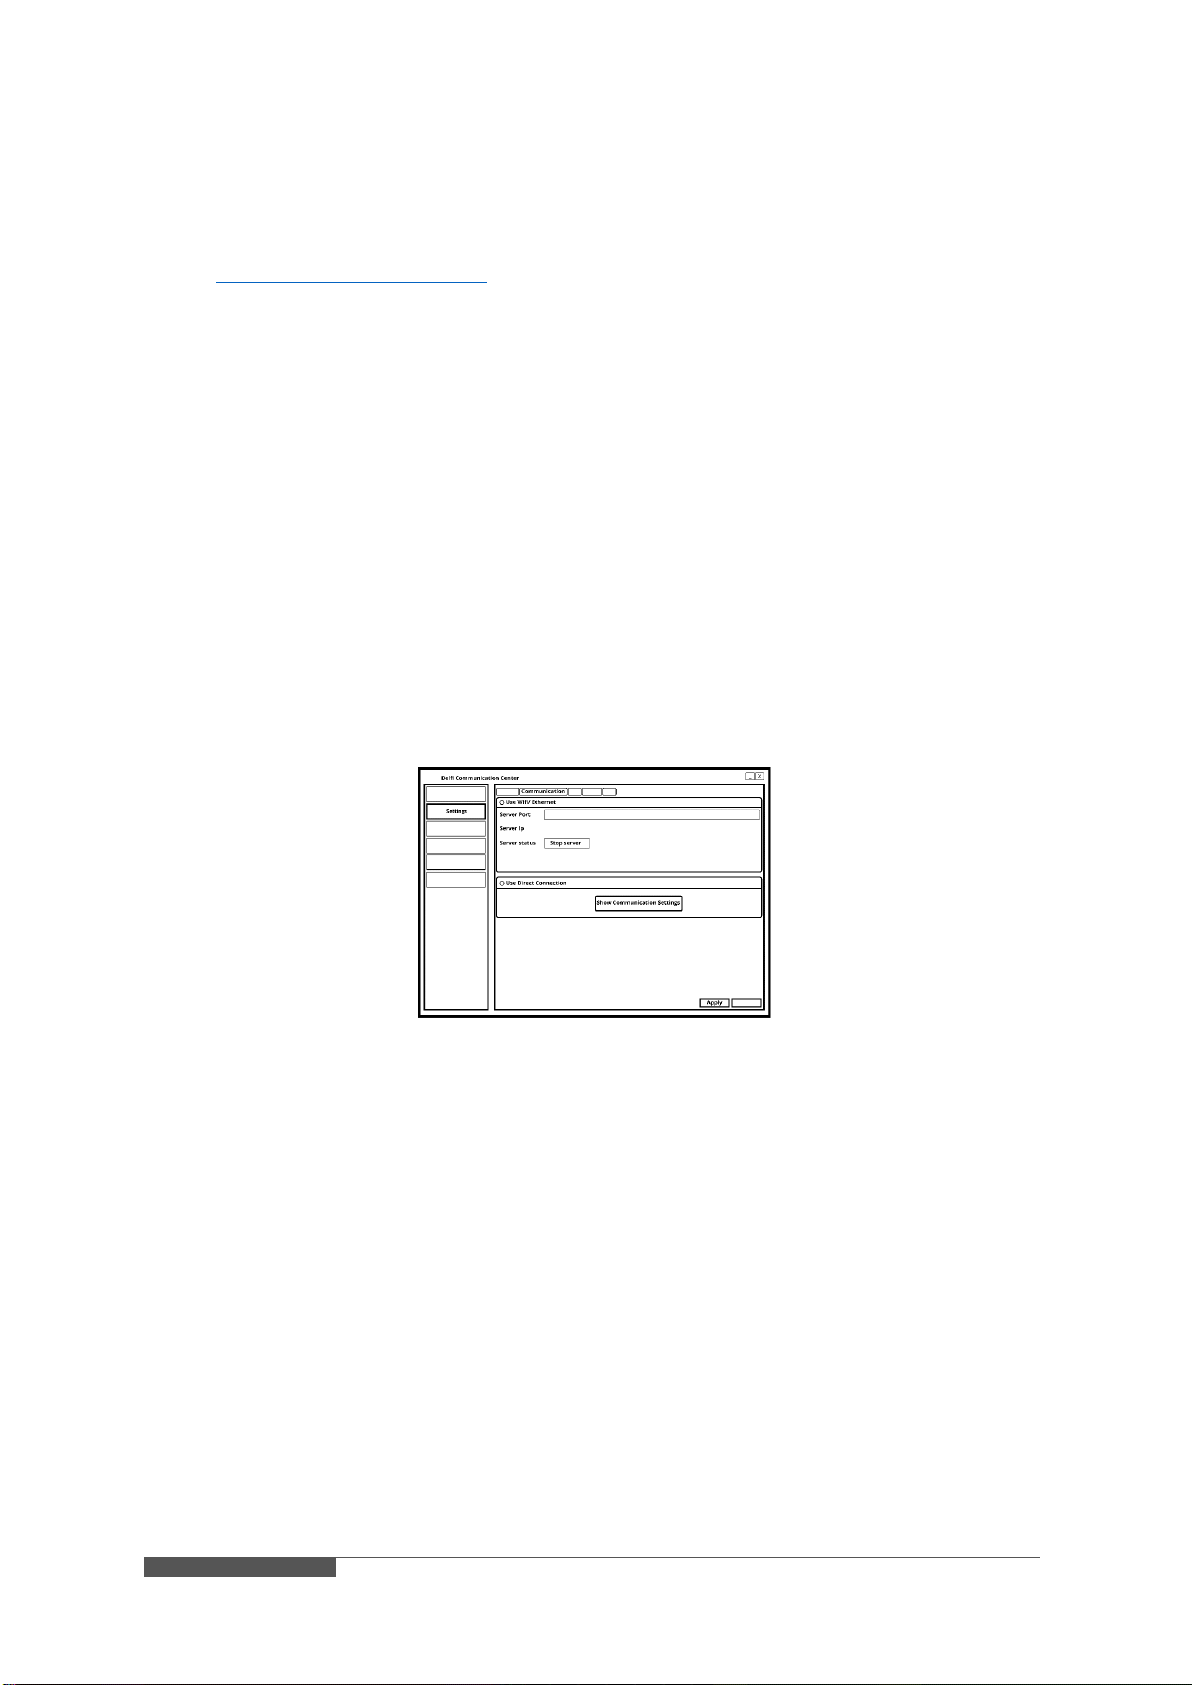
/ CONFIGURE DCC
Communication Settings:
1. Go to Settings
2. Press the Communication tab
3. Choose the preferred communication type
oUse Wifi / Ethernet
oUse Direct Connection (USB)
4. Press Apply
File Settings:
1. Go to Settings
2. Press the File tab
3. Change the settings, so it fit your needs.
4. Press Apply
File/Export (To Terminal)
Define the following things for export to PDA:
Export path
Unique directories
Parameters
Delete after transfer.
The export path can be separated into unique directories by e.g. serial number of
the clients, so they are not using every file in the export path but only those who
are designated in their directory named by their serial number. The “Parameter”
field decides how you want to use unique directories.
Delete after transfer is can global files, PDA specific files or both.
DELFI RENTAL Quick guide ENG–r. 1.0.0.4
Page 7 of 12
This document contains confidential information. Any unauthorized copying, disclosure or distribution of the information in this document is strictly forbidden.
Copyright © 2018 Delfi Technologies A/S.
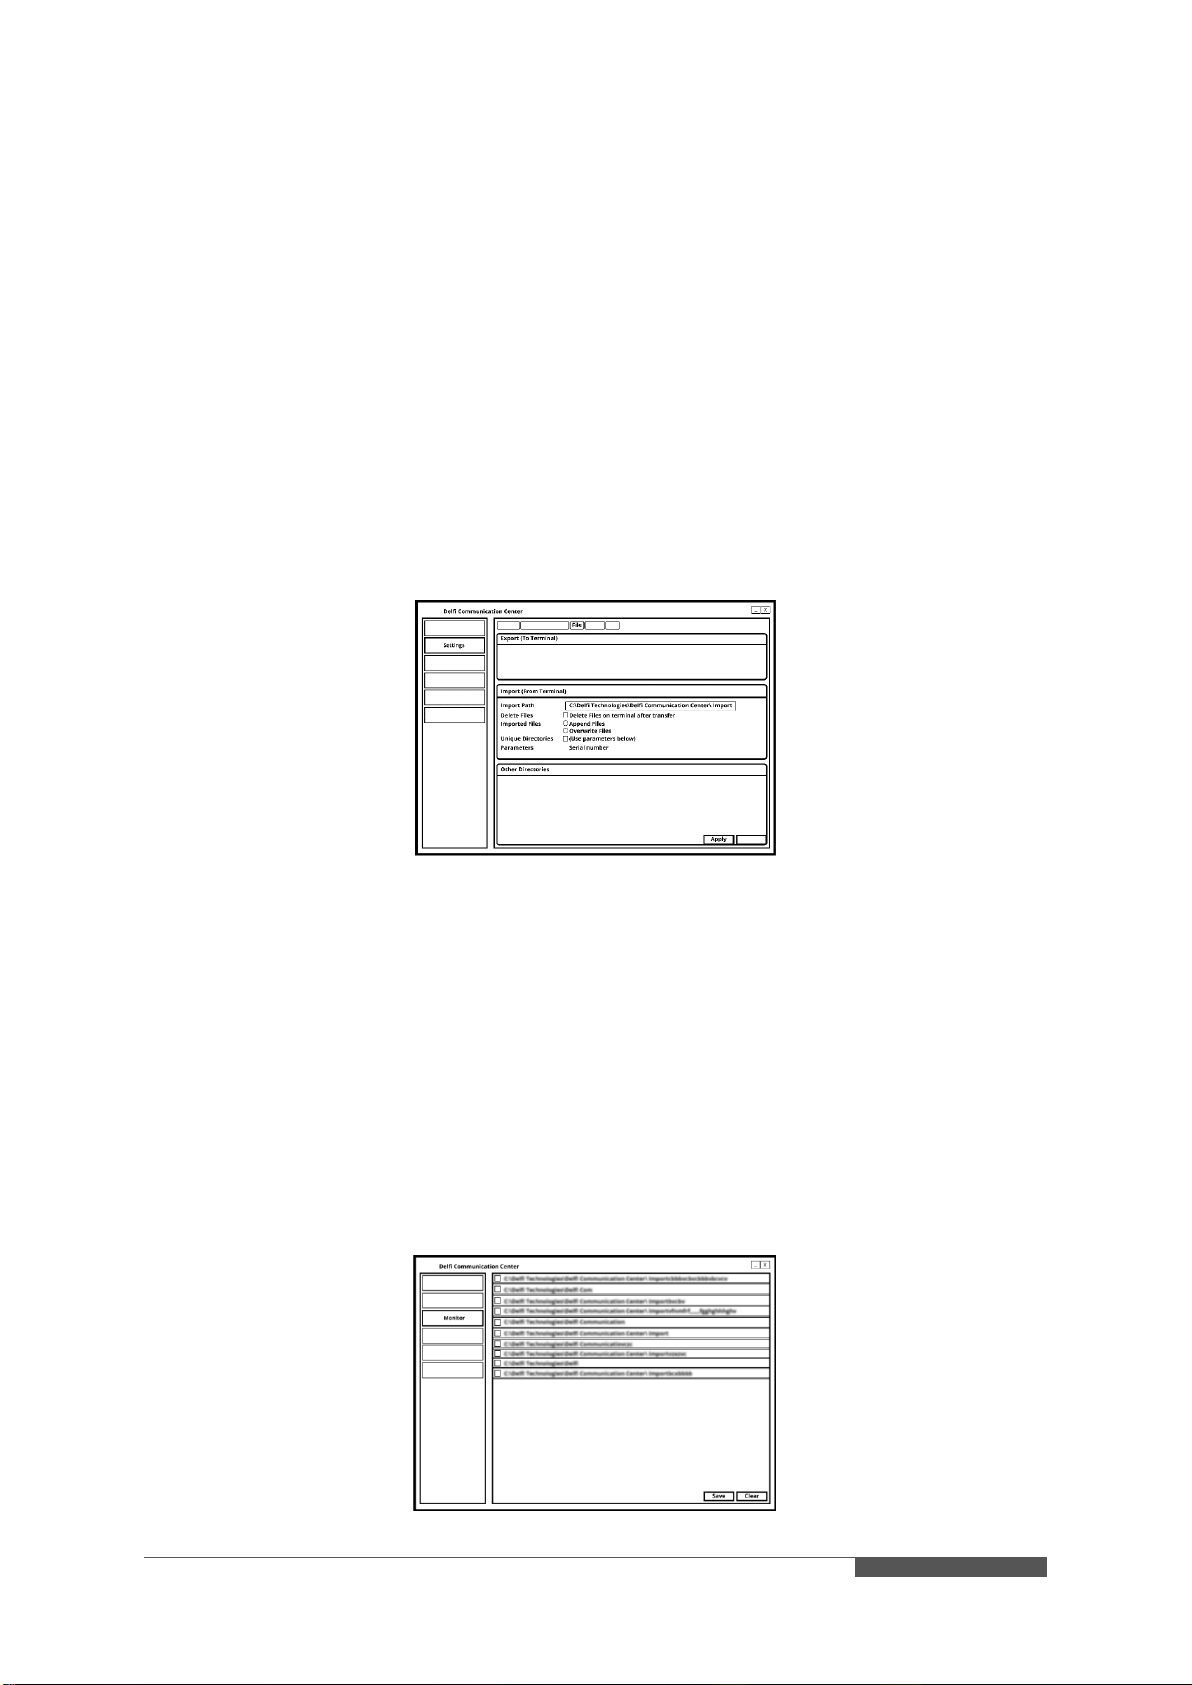
File/Import (From Terminal)
Define the following things for import from Terminal:
Import path
Delete files
Imported files
Unique directories
Parameters
The import path can be separated into unique directories by e.g. serial number of
the clients, so the PDA can deliver the files in the designated directory named by
their serial number. The “Parameter” field decides how you want to use unique
directories.
Delete Files should be checked if you want the files on the client to be deleted after
transfer to the Delfi COM Center.
Imported files can be handled by appending the existing files or to overwrite
existing files.
Monitor:
1. Go to Monitor
The Monitor tab lists a current overview of the clients communicating with the Delfi
Communication Center, whether it is by Ethernet Cradle, Wi-Fi or Direct
Communication (USB). The only major difference is when it is communicating by
TCP/IP, then the lines have the serial number of the clients as an ID. In the left
side of each line there is a clock icon, hovering over this will tell you the exact date
and time of the current event.
Each line is a new event and provides information of what is happening, e.g. now
a client sends a request to start communication, now the Delfi Communication
Center is receiving files from client etc. There are two buttons, one Save and one
Clear. Save is saving the lines in the monitor into an .XML file and Clear simply just
clears the Monitor list.
Page 8 of 12
DELFI RENTAL Quick guide ENG–r. 1.0.0.4
This document contains confidential information. Any unauthorized copying, disclosure or distribution of the information in this document is strictly forbidden.
Copyright © 2018 Delfi Technologies A/S.
/ PDA SOFTWARE (DELFI MOBILEFORCE)
/ SET UP THE PDA
Follow these steps:
1. Press F2
2. Enter the Delfi password: 70222555 and then ‘OK’
3. Press Settings
4. Press Settings
5. Press Communication
6. Choose either Direct Connection or Ethernet Cradle
7. If Ethernet Cradle is chosen, set the IP of the pc where DCC is installed
8. Server port: 8221
9. Press the save icon to save the settings
10.Press ‘left arrow’ button on the screen
11.Press ‘red cross’button on the screen
12.Press Application
13.Now the PDA is ready

DELFI RENTAL Quick guide ENG–r. 1.0.0.4
Page 9 of 12
This document contains confidential information. Any unauthorized copying, disclosure or distribution of the information in this document is strictly forbidden.
Copyright © 2018 Delfi Technologies A/S.
/ COMMUNICATE WITH THE PC
When using USB or Ethernet connection: Place the PDA into the cradle and
wait for file transfer.
When using Wi-Fi connection: Press the sync icon in the bottom of the main
menu and wait for file transfer.
/ BASIC KEYBOARD SHORTCUTS
Following standard shortcuts are available in Delfi MobileForce program:
/ Main menu:
The keyboard can be used to open menus, instead of using the touch screen
or navigating via the arrow keys. For example, if you want to open "4. Inventory",
press "4" button on the PDA.
F2 is used to enter the setup menu. Use here Delfi Password; "70222555"
(without "").
To close the program, open the setup menu and select red cross at the bottom
of the screen.
/ Registrations menu:
F1 to see saved records (Record menu).
F2 go back to main menu.
ESC is a multifunction button.
It can navigate back through the input fields or mark the input.
If a field is marked and contains input like number/text, the input will be deleted.
If a field is empty will you be moved to previous field. If the last field is
highlighted and pressed ESC, this will go back to the main menu.
Scan to active the scan-engine, instead of entering manually.
Enter to confirm manually input, this is useful if the barcode is damaged or
entering numbers in a quantity field
/ Record menu (only available in Registrations menu):
F1 for deleting a record.
F2 close record menu and go back to registrations menu.
ESC close record menu and go back to registrations menu.
Page 10 of 12
DELFI RENTAL Quick guide ENG–r. 1.0.0.4
This document contains confidential information. Any unauthorized copying, disclosure or distribution of the information in this document is strictly forbidden.
Copyright © 2018 Delfi Technologies A/S.
/ PDA (DELFI MIRA/DELFI NOVA)
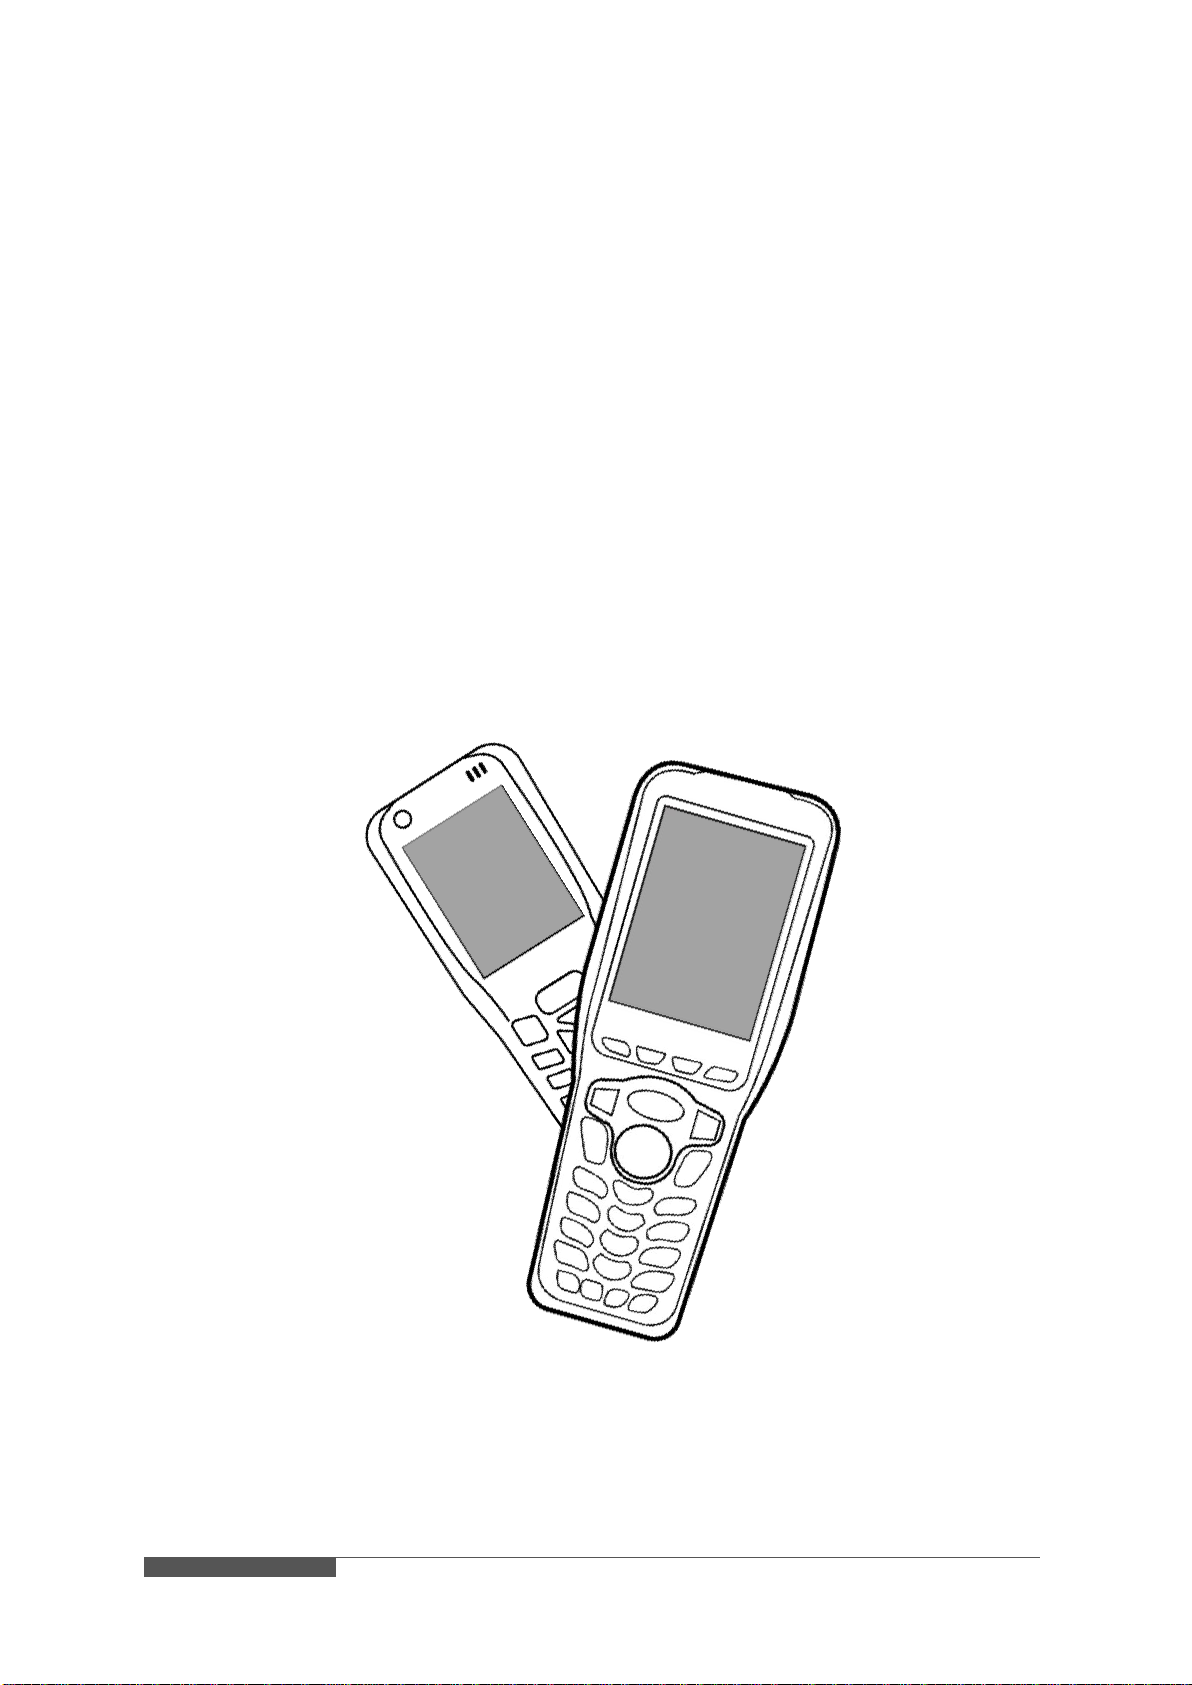
/ DELFI MIRA
Scan barcode: Press the orange SCAN button on the front of the PDA
Turn off the PDA: Press the POWER button on the top front of the PDA
Reboot the PDA: Press the ESC + Power button simultaneously
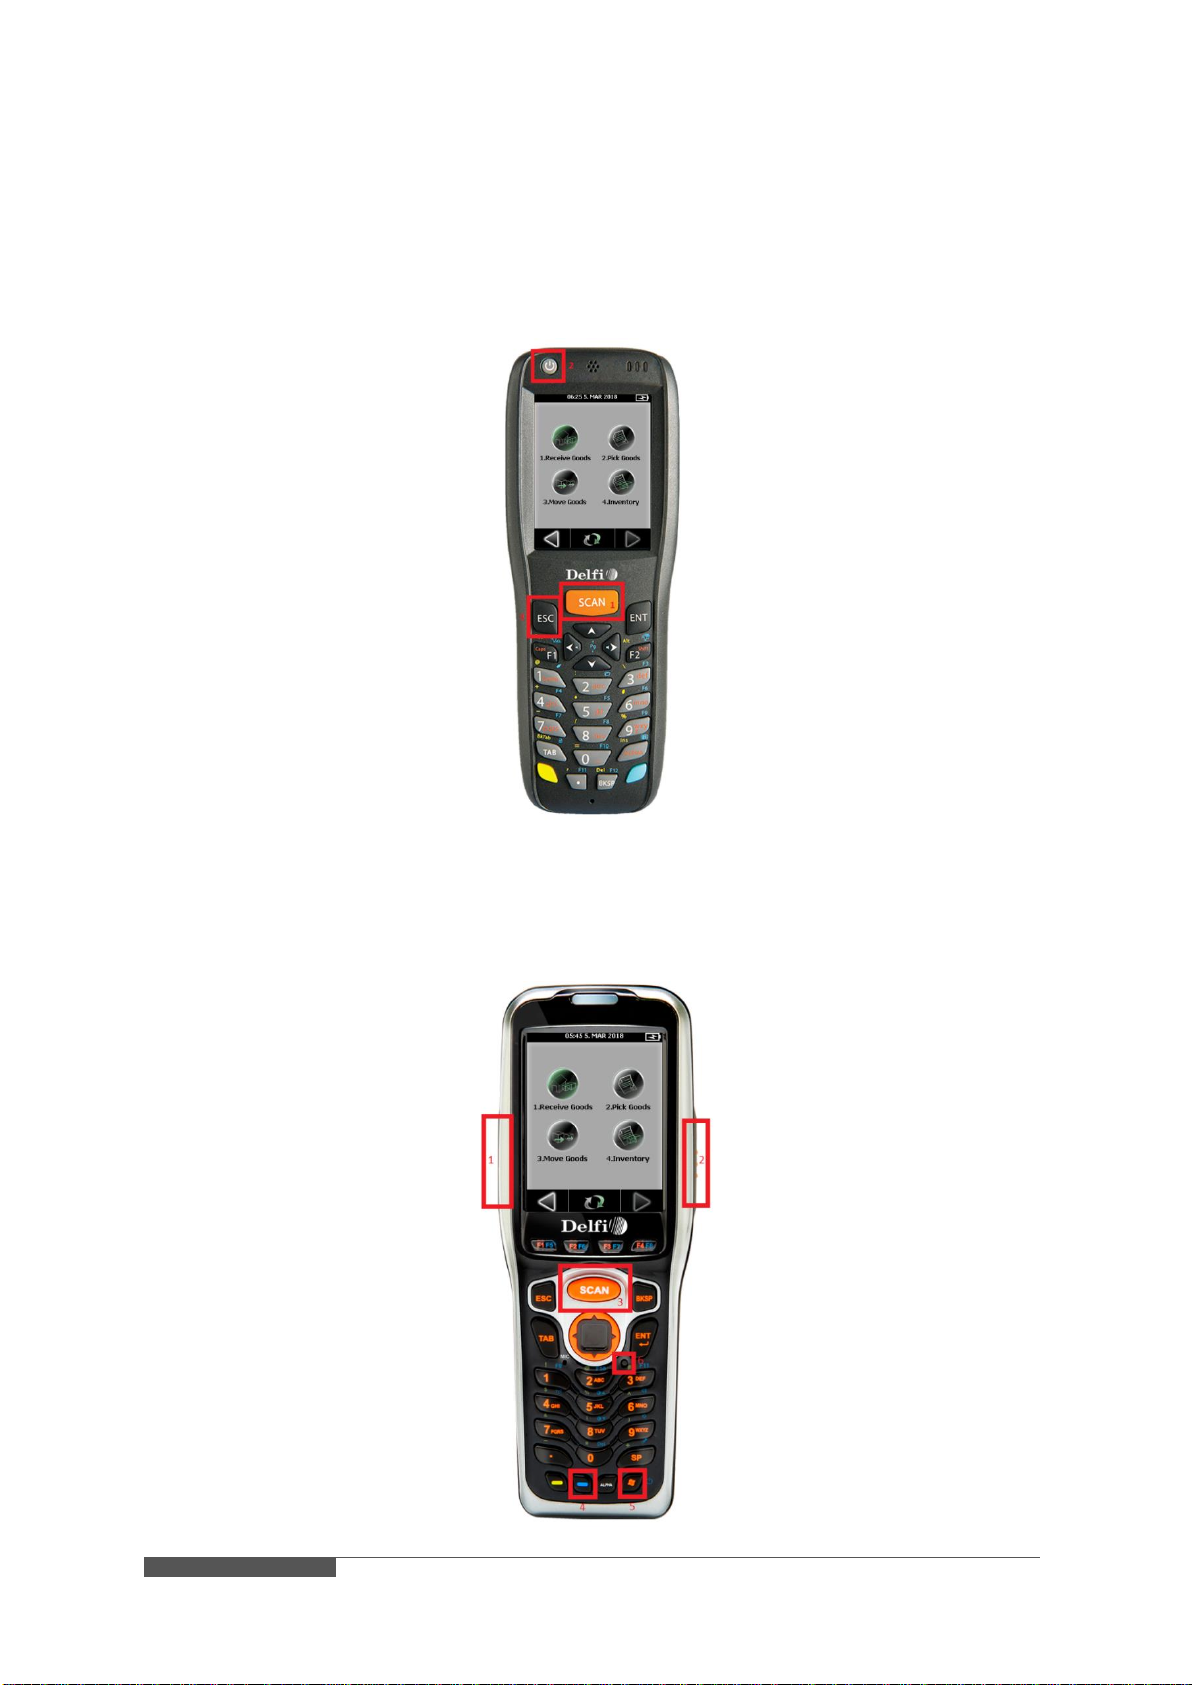
/ DELFI NOVA
Scan barcode: Press one of the three orange SCAN button either on the
front or the side of the PDA
Turn off the PDA: Press the BLUE button and then the WINDOWS button on
the front bottom of the PDA
Reboot the PDA: Press the little RESET button under the ENT button

DELFI RENTAL Quick guide ENG–r. 1.0.0.4
Page 11 of 12
This document contains confidential information. Any unauthorized copying, disclosure or distribution of the information in this document is strictly forbidden.
Copyright © 2018 Delfi Technologies A/S.
/ TROUBLESHOOTING
/ Reboot
If the PDA is acting strange in some way, try to reboot your PDA. Please see how to
do the reboot see page 10.
/ Windows Mobile Device Center won’t start
If the pc where Delfi Communication Center is installed is running Windows 10,
Windows Mobile Device Center may not open, if ‘Windows Fall Creator update’ has
been installed.
To fix this, please download the guide below and follow the instructions:
http://bit.ly/EnDCCSupport

If f
SUPPORT
If you have any questions,
please do not hesitate to contact Delfi support:
Phone: +45 78 768 555
Mon-Thu: 08.30-16.30
Fri: 08.30-15.00
Delfi Technologies A/S
Web: www.delfi.com
Table of contents


