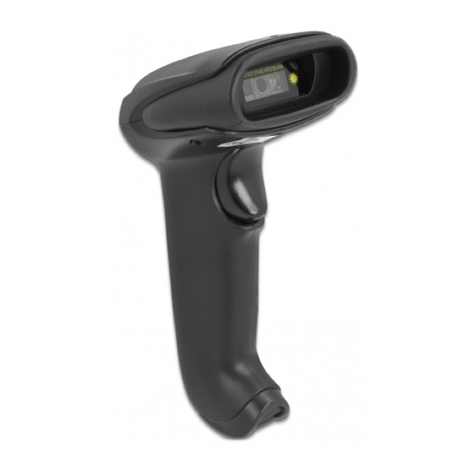
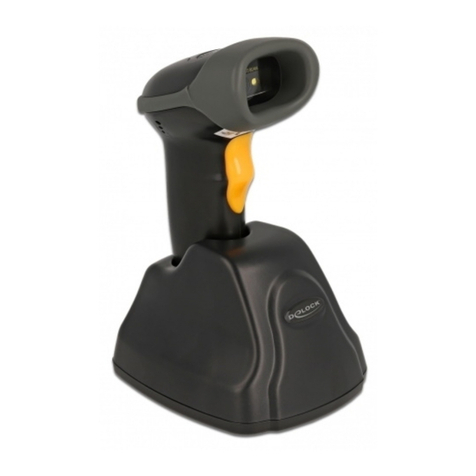
DeLOCK 90518 User manual

Declaration of conformity
Products with a CE symbol fulll the EMC directive (2014/30/EU) and
RoHS directive (2011/65/EU+2015/863+2017/2102), which were released by the
EU-comission.
The declaration of conformity can be downloaded here:
https://www.delock.de/produkte/G_90518/merkmale.html
WEEE-notice
The WEEE (Waste Electrical and Electronic Equipment)-directive, which became
eective as European law on February 13th 2003, resulted in an all out change
in the disposal of disused electro devices. The primarily purpose of this directive
is the avoidance of electrical waste (WEEE) and at the same time the support of
recycling and other forms of recycling in order to reduce waste. The WEEE-logo on
the device and the package indicates that the device should not be disposed in the
normal household garbage. You are responsible for taking the disused electrical
and electronical devices to a respective collecting point. A separated collection and
reasonable recycling of your electrical waste helps handling the natural resources
more economical. Furthermore recycling of electrical waste is a contribution to
keep the environment and thus also the health of men. Further information about
disposal of electrical and electronical waste, recycling and the collection points
are available in local organizations, waste management enterprises, in specialized
trade and the producer of the device.
Battery guideline (2006/66/EC)
The built in battery is recyclable. Please dispose of it by using the battery container
or dealer. Just dispose of the empty battery to gurantee the environmental
protection.
EU Import: Tragant Handels- und Beteiligungs GmbH
Beeskowdamm 13/15, 14167 Berlin, Germany
Support Delock
If you have further questions, please contact our customer support
You can nd current product information on our homepage: www.delock.com
Final clause
Information and data contained in this manual are subject to change without notice
in advance. Errors and misprints excepted.
Copyright
No part of this user's manual may be reproduced, or transmitted for any purpose,
regardless in which way or by which means, electronically or mechanically, without
explicit written approval of Delock.
Edition: 12/2021
User manual
Bedienungsanleitung
Product-No:90518
User manual no:90518-a
www.delock.com
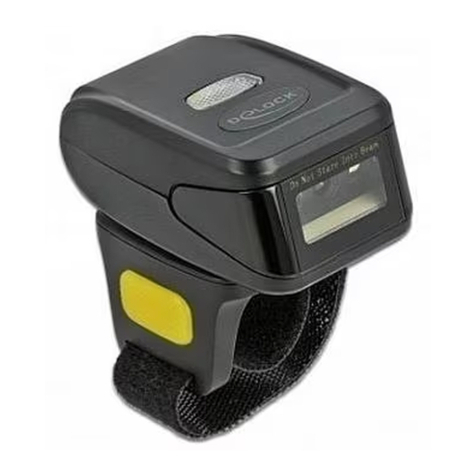
Barcode Scanner 1D and 2D with stand
2.4 GHz

Description
This barcode scanner by Delock can be wirelessly connected to a PC or laptop.
All common 1D and 2D barcode types can be precisely captured even at long
distances. Additionally, the scanner recognizes barcodes displayed on displays
and monitors.
Automatic adaptation to ambient brightness
The scanner automatically adapts to the ambient brightness and captures up to
200 scans per second under optimal lighting conditions.
In low ambient brightness, the barcode is illuminated by an additional white LED
and can therefore also be used in poor lighting conditions.
Charging station acts as interface
The data transfer of the scanned barcodes is done via the 2.4 GHz frequency
band. In addition to charging the hand scanner, the scanner's charging station also
functions as a 2.4 GHz interface and is connected to the system via USB cable.
Using an optional adapter cable, it is possible to connect the charging station to a
smartphone or tablet.
Specication
• Connector: 1 x USB 2.0 Type-B female
• Rechargeable battery: Li-Polymer battery 2000 mAh
• Decoding chip: ARM Cortex 32 Bit
• Resolution: max. 640 x 480
• Trigger: scan button
• Reading distance: ca. 40 mm to 250 mm
• Reading accuracy: 5 - 10 mil
• Range:
indoor area: up to 60 m
outdoor area: up to 100 m
• Internal memory: 16 MB
• Light colour: visible LED red
• Compensation light: LED white
• Sensor: linear CMOS image sensor
• Scan rate: up to 200 scans per second
• Scan angle: 60°
• Surrounding brightness: max. 100000 Lux
• Input voltage: 3.3 V
• Current consumption:
operation: max. 120 mA
standby: max. 500 mA
• Operating temperature: -20 °C ~ 60 °C
• Storage temperature: -40 °C ~ 70 °C
• Relative humidity: 5 - 95 % (non condensing)
• Colour: black
• Weight:
barcode scanner: ca. 146 g
charging cradle: ca. 118 g
• Dimensions (LxWxH):
barcode scanner: ca. 16.5 x 8.2 x 6.5 cm
charging cradle: ca. 12.0 x 9.5 x 8.0 cm
• Cable length without connectors: ca. 1 m
• 2.4 GHz
• Scancodes:
Codabar
Code 128
Code 39
EAN-8 / EAN-13
ISBN - 13
Data Matrix
PDF417
QR Code
System requirements
• Android 9.0 or above
• Chrome OS
• iPad Pro (2018)
• Linux Kernel 5.4 or above
• Mac OS 10.15.6 or above
• Windows 8.1/8.1-64/10/10-64
• PC or laptop with a free USB Type-A port for charging station
Package content
• Barcode scanner
• USB 2.4 GHz charging station
• USB charging cable
• User manual
English
Kurzbeschreibung
Dieser Barcode Scanner von Delock kann mit einem PC oder Notebook kabellos
verbunden werden. Es können alle gängigen 1D und 2D Barcodetypen auch auf
weite Entfernung präzise erfasst werden. Zusätzlich erkennt der Scanner auf
Displays und Monitoren dargestellte Barcodes.
Automatische Anpassung an Umgebungshelligkeit
Der Scanner passt sich automatisch an die Umgebungshelligkeit an und erfasst
unter optimalen Lichtverhältnissen bis zu 200 Scans in der Sekunde.
Bei geringer Umgebungshelligkeit wird der Barcode durch eine zusätzliche weiße
LED beleuchtet und ist somit auch bei schlechten Lichtverhältnissen einsetzbar.
Ladestation fungiert als Schnittstelle
Die Datenübertragung der gescannten Barcodes erfolgt über das 2,4 GHz
Frequenzband. Dabei fungiert die Ladestation neben dem Laden des
Handscanners auch als 2,4 GHz Schnittstelle und wird per USB Kabel mit dem
System verbunden.
Mit Hilfe eines optionalen Adapterkabels ist es möglich die Ladestation an einem
Smartphone oder Tablet anzuschließen.
Spezikation
• Anschluss: 1 x USB 2.0 Typ-B Buchse
• Akku: Li-Polymer 2000 mAh
• Dekodierungschip: ARM Cortex 32 Bit
• Auösung: max. 640 x 480
• Auslöser: Drucktaste
• Leseabstand: ca. 40 mm bis 250 mm
• Lesegenauigkeit: 5 - 10 mil
• Reichweite:
Innenbereich: bis zu 60 m
Außenbereich: bis zu 100 m
• Interner Speicher: 16 MB
• Lichtfarbe: sichtbare LED rot
• Kompensationslicht: LED weiß
• Sensor: linearer CMOS Bildsensor
• Scan Rate: bis zu 200 Scans pro Sekunde
• Scan Winkel: 60°
• Umgebungshelligkeit: max. 100000 Lux
• Eingangsspannung: 3,3 V
• Stromaufnahme:
Betrieb: max. 120 mA
Standby: max. 500 mA
• Betriebstemperatur: -20 °C ~ 60 °C
• Lagerungstemperatur: -40 °C ~ 70 °C
• Relative Luftfeuchtigkeit: 5 - 95 % (nicht kondensierend)
• Farbe: schwarz
• Gewicht:
Barcode Scanner: ca. 146 g
Ladestation: ca. 118 g
• Maße (LxBxH):
Barcode Scanner: ca. 16,5 x 8,2 x 6,5 cm
Ladestation: ca. 12,0 x 9,5 x 8,0 cm
• Kabellänge ohne Anschlüsse: ca. 1 m
• 2,4 GHz
• Scancodes:
Codabar
Code 128
Code 39
EAN-8 / EAN-13
ISBN - 13
Data Matrix
PDF417
QR Code
Systemvoraussetzungen
• Android 9.0 oder höher
• Chrome OS
• iPad Pro (2018)
• Linux Kernel 5.4 oder höher
• Mac OS 10.15.6 oder höher
• Windows 8.1/8.1-64/10/10-64
• PC oder Notebook mit einem freien USB Typ-A Port für Ladestation
Packungsinhalt
• Barcode Scanner
• USB 2,4 GHz Ladestation
• USB Ladekabel
• Bedienungsanleitung
Deutsch

Safety instructions
• Protect the product against moisture
• Protect the product against direct sunlight
• Do not look directly into the LED diode of the scanner
Charge battery
You can charge the scanner's battery by using the charging station. For this
purpose, the station must be connected to the system via USB cable. Then place
the scanner in the holder provided for this purpose.
Beep tones
5 melodical beeps Scanner is active
One short beep The scanner successfully reads the scanned barcode
Three short beeps The scanner reads a barcode although it is not
connected
One long beep Out of range, bad connection
or device switches o
Reset scanner to factory settings
With the code below you can reset the scanner to the factory settings.
Connection via 2,4 GHz
To connect the scanner to the system, please scan the following code.
Match
After connection via 2.4 GHz please scan below code to match
Scan Modus
The scanner has three dierent scan modes.
The continuous scan, the autoscan and the normal mode.
For normal mode please scan the following code
For the continuous mode scan this code
And for the autoscan mode, see below
Stand By settings
Use the following code to enter the menu for setting the standby time.
You can choose between four options.
Standby after 1 minute
Standby after 5 minutes
Standby after 20 seconds
never go into standby mode
English Change language settings
You can choose between below languages.
German
English
French
Italian
Spanish
Finnish
Portugese
Data transfer from the save mode
If you are outside the transmission range to the base station and the connected
system, you can save the scanned codes to the internal memory using the code
below.
Using the code below you can then enter the internal save mode.
The total amount of the memory is recorded by the following barcode.
You can now upload the stored data by scanning the barcode below.
Please make sure that you are in the reception area of your USB device and that
an ideal connection has been established.
To delete the internal memory afterwards, you can use the following code.
You can return to normal mode with the following code.
Transmission speed
Select the transmission speed according to the PC reception speed.
fast
medium
slow

Terminator setting
Clear terminator
%%EESE
Add tab terminator
%%ETAB
Add return terminator
%%ECR
Add carriage return and line feed
(double carriage return)
%%EEELFCR
Case conversation
All case
%%SM_CASE
Case is not converted
%%NO_CASE
Case reversal
%%TG_CASE
Full capital case
%%BG_CASE
ID setting
"ID display"/"ID hide" is to set directly. To edit ID, scan "Edit ID" and then scan 2
"digital barcodes" (from 0~9,A~F). After editing successfully, the buzzer will sound
2 times.
Notice: There is a space between ID and barcode data.
ID Display
%%ALL_XS
*ID HIDE
%%ALL_YC
EDIT ID
%%ALL_ID
Delete prex settings
"Prex deletion prohibited" and "Prex deletion enabled" are set directly. To “edit
delete prex”, rst scan "Edit delete prex" and then scan the "digital barcode".
The number of deletions is 0->15.
Prex deletion prohibited
%%DDEL_FBE
Prex deletion enabled
%%EDEL_FBE
Edit delete prex
%%SDEL_FBE
Delete sux settings
"Prohibit deletion sux" and "Enable deletion sux" are set directly. To “Edit
deletion sux”, scan "Edit deletion sux" rst and then scan the "digital barcode".
The number of deletions is 0->15.
Prohibit deletion sux
%%DDEL_EBE
Enable deletion sux
%%EDEL_EBE
Edit deletion sux
%%SDEL_EBE
Add prex settings
"Forbid adding prex" and "Enable adding prex" are set directly. To “Edit adding
prex”, rst scan "Edit adding prex" and then scan "digital barcode". The
maximum number of characters added is 16.
A character consists of 2 numbers. Look at Ascll's Attachment 1, the data ranges
from 0X01 to 0X7F. Character input method: input the high order rst, then the
low order. For example, for the character "A", rst input '4' and then input '1'. After
beeping twice, if you want to save, scan the "Save Data" setting barcode again.
Note: If you enable adding prex, the program actively controls the scanning
speed of the scanner.
*Forbid adding prex
%%DADD_FB
Enable adding prex
%%EADD_FB
Edit adding prex
%%EDIT_FB

Add sux settings
"Forbid adding sux" and "Enable adding sux" are set directly. To “Edit adding
sux”, rst scan "Edit adding sux" and then scan "digital barcode". The
maximum number of characters added is 16.
A character consists of 2 numbers. Look at Ascll's Attachment 1, the data ranges
from 0X01 to 0X7F. Character input method: input the high order rst, then the
low order. For example, for the character "A", rst input '4' and then input '1'. After
beeping twice, if you want to save, scan the "Save Data" setting barcode again.
Note: If you enable adding sux, the program actively controls the scanning speed
of the scanner.
*Forbid adding sux
%%DADD_EB
Enable adding sux
%%EADD_EB
Edit adding sux
%%EDIT_EB
Digital (hexadecimal) barcode and save codes
Digit 0
%%ALL*_0
Digit 1
%%ALL*_1
Digit 2
%%ALL*_2
Digit 3
%%ALL*_3
Digit 4
%%ALL*_4
Digit 5
%%ALL*_5
Digit 6
%%ALL*_6
Digit 7
%%ALL*_7
Digit 8
%%ALL*_8
Digit 9
%%ALL*_9
Digit A
%%ALL*_A
Digit B
%%ALL*_B
Digit C
%%ALL*_C
Digit D
%%ALL*_D
Digit E
%%ALL*_E
Digit F
%%ALL*_F
Save Data (for adding prex and sux)
%%ALL*_SAVE

Sicherheitshinweise
• Produkt vor Feuchtigkeit schützen
• Produkt vor direkter Sonneneinstrahlung schützen
• Schauen Sie nicht direkt in die LED Diode des Scanners
Akku laden
Sie können den Akku des Scanners mit Hilfe der Ladestation laden. Hierfür muss
die Station per USB Kabel mit dem System verbunden sein. Im Anschluss stellen
Sie den Scanner in die dafür vorgesehene Halterung.
Piep Töne
5 melodische Töne Scanner ist aktiv
Ein kurzer Ton Der Scanner liest erfolgreich den gescannten Barcode
Drei kurze Töne Der Scanner liest einen Barcode, obwohl er nicht
verbunden ist
Ein langer Ton Außerhalb der Reichweite oder schlechte Verbindung
oder Gerät schaltet sich aus
Scanner auf Werkseinstellungen zurücksetzen
Mit untenstehendem Code können Sie den Scanner auf die Werkseinstellungen
zurücksetzen.
Verbinden via 2,4 GHz
Um den Scanner mit dem System zu verbinden scannen Sie bitte nun den
folgenden Code.
Match
Nachdem Sie den Scanner mit dem 2,4GHz Band verbunden haben, scannen Sie
bitte unten stehenden Code zum matchen.
Scan Modus
Der Scanner verfügt über drei verschiedene Scan Modi.
Dem kontinuierlichem scannen, dem Autoscan und dem Normal Modus.
Für den Normal Modus scannen sie bitte folgenden Code
Für den kontiunuierlichen Modus diesen Code
Und für den Autoscan Modus den unten stehenden
Stand By Zeit einstellen
Über den folgenden Code gelangen Sie in das Menü zur Einstellung der Standby
Zeit.
Es kann zwischen vier Optionen entschieden werden.
Standby nach 1 Minute
Standby nach 5 Minuten
Standby nach 20 Sekunden
niemals in den Standby Modus gehen
Tastaur Sprache ändern
Folgende Tastatursprachen können eingestellt werden.
Deutsch
Englisch
Französisch
Italienisch
Spanisch
Finnisch
Portugiesisch
Datenübertragung aus dem Speichermodus
Falls Sie sich außerhalb der Übertragungsreichweite zu der Ladestation und dem
damit verbundenem System benden, können Sie die gescannten Codes mit dem
untenstehenden Code auf dem internen Speicher sichern.
Über den untenstehenden Code gelangen Sie anschließend in den internen
Speichermodus.
Die Gesamtmenge des Speicher erfassen Sie durch folgenden Barcode
Sie können nun die gespeicherten Daten hochladen indem Sie den
untenstehenden Barcode scannen
Bitte stellen Sie sicher, dass Sie sich im Empfangsbereich Ihres USB Gerätes
benden und eine ideale Verbindung hergestellt wurde.
Um den internen Speicher im Anschluss wieder zu löschen, können Sie folgenden
Code verwenden.
Wieder in den normalen Modus zurückkehren können Sie mit folgendem Code.
Übertragungsgeschwindigkeit
Wählen Sie die Übertragungsgeschwindigkeit entsprechend der PC-
Empfangsgeschwindigkeit.
schnell
medium
langsam
Deutsch

Terminator Einstellung
sämtliche Einstellungen löschen
%%EESE
Tab hinzufügen
%%ETAB
Zeilenumbruch hinzufügen
%%ECR
Zeilenumbruch und Tab Einstellung hinzufügen
(doppelter Zeilenumbruch)
%%EEELFCR
Case Conversation
All case
%%SM_CASE
Case wird nicht umgewandelt
%%NO_CASE
Case Umwandlung
%%TG_CASE
Full capital case
%%BG_CASE
ID Einstellung
"ID anzeigen"/"ID ausblenden" kann direkt eingestellt werden. Um die ID zu
bearbeiten, scannen Sie "ID bearbeiten" und dann 2. "digitale Barcodes" (von
0~9,A~F). Nach erfolgreicher Bearbeitung ertönt ein 2-maliger Signalton.
Bitte beachten: Zwischen der ID und den Barcode-Daten bendet sich ein
Leerzeichen.
ID anzeigen
%%ALL_XS
*ID verstecken
%%ALL_YC
ID bearbeiten
%%ALL_ID
Präx Einstellungen löschen
"Präxlöschung verboten" und "Präxlöschung aktiviert" werden direkt eingestellt.
Um Präx löschen zu bearbeiten, scannen Sie zuerst "Präx löschen bearbeiten"
und dann den "digitalen Barcode". Die Anzahl der Löschungen ist 0->15.
Löschenpräx verboten
%%DDEL_FBE
Löschpräx freigeben
%%EDEL_FBE
Löschpräx bearbeiten
%%SDEL_FBE
Sux Einstellungen löschen
"Löschsux verbieten" und "Löschsux freigeben" werden direkt eingestellt. Um
Löschsux zu bearbeiten, scannen Sie zuerst "Löschsux bearbeiten" und dann
den "digitalen Barcode". Die Anzahl der Löschungen ist 0->15.
Löschsux verbieten
%%DDEL_EBE
Löschsux freigeben
%%EDEL_EBE
Löschsux bearbeiten
%%SDEL_EBE
Präx Einstellungen hinzufügen
"Hinzufügen von Präxen verbieten" und "Hinzufügen von Präxen aktivieren"
werden direkt eingestellt. Um "Präx hinzufügen" zu bearbeiten, scannen Sie
zuerst "Präx hinzufügen" und dann den "digitalen Barcode". Die maximale Anzahl
der hinzugefügten Zeichen beträgt 16.
Ein Zeichen besteht aus 2 Zahlen. Siehe Tabelle: Ascll, die Daten reichen von
0X01 bis 0X7F.
Zeicheneingabemethode: Geben Sie zuerst den höchsten Wert ein, dann den
niedrigsten.
Zum Beispiel, für das Zeichen "A", wählen Sie zuerst '4' und dann '1'. Wenn Sie
speichern möchten, scannen Sie nach zweimaligem Piepton erneut den Barcode
für die Einstellung "Daten speichern".
Hinweis: Wenn Sie das Hinzufügen von Präxen aktivieren, steuert das Programm
aktiv die Scangeschwindigkeit des Scanners.
*Prex Anhang verbieten
%%DADD_FB
Prex Anhang ermöglichen
%%EADD_FB
Prex Anhang bearbeiten
%%EDIT_FB

Sux Einstellungen hinzufügen
"Hinzufügen von Suxen verbieten" und "Hinzufügen von Suxen aktivieren"
werden direkt eingestellt. Zur "Bearbeitung des Zusatzes" scannen Sie zuerst
"Zusatz bearbeiten" und dann den "digitalen Barcode". Die maximale Anzahl der
hinzugefügten Zeichen beträgt 16.
Ein Zeichen besteht aus 2 Zahlen. Siehe Tabelle: Ascll, die Daten reichen von
0X01 bis 0X7F.
Zeicheneingabemethode: Geben Sie zuerst den höchsten Wert und dann den
niedrigsten ein.
Zum Beispiel, für das Zeichen "A", wählen Sie zuerst '4' und dann '1'. Wenn Sie
speichern möchten, scannen Sie nach zweimaligem Piepton erneut den Barcode
für die Einstellung "Daten speichern".
Hinweis: Wenn Sie das Hinzufügen von Suxen aktivieren, steuert das Programm
aktiv die Scangeschwindigkeit des Scanners.
Sux Anhang verbieten
%%DADD_EB
Sux Anhang ermöglichen
%%EADD_EB
Sux Anhang bearbeiten
%%EDIT_EB
Digital (hexadecimal) Barcodes und Sicherungscodes
Digit 0
%%ALL*_0
Digit 1
%%ALL*_1
Digit 2
%%ALL*_2
Digit 3
%%ALL*_3
Digit 4
%%ALL*_4
Digit 5
%%ALL*_5
Digit 6
%%ALL*_6
Digit 7
%%ALL*_7
Digit 8
%%ALL*_8
Digit 9
%%ALL*_9
Digit A
%%ALL*_A
Digit B
%%ALL*_B
Digit C
%%ALL*_C
Digit D
%%ALL*_D
Digit E
%%ALL*_E
Digit F
%%ALL*_F
Datensicherung (für präx und sux)
%%ALL*_SAVE

Decimal Hexadecimal Character
0 0
1 1
2 2
3 3
4 4
5 5
6 6
7 7
8 8 backspace
9 9
10 0A
11 0B
12 0C
13 0D
14 0E
15 0F
16 10
17 11 1
18 12 2
19 13 3
20 14 4
21 15
22 16
23 17
24 18
25 19
26 1A
27 1B
28 1C
29 1D
30 1E
31 1F
32 20 space
33 21 !
34 22 "
35 23 #
36 24 $
37 25 %
38 26 &
39 27 '
40 28 (
41 29 )
42 2A *
–43 2B +
44 2C ,
45 2D -
46 2E .
47 2F /
48 30 0
Decimal Hexadecimal Character
98 62 b
99 63 c
100 64 d
101 65 e
102 66 f
103 67 g
104 68 h
105 69 i
106 6A j
107 6B k
108 6C l
109 6D m
110 6E n
111 6F o
112 70 p
113 71 q
114 72 r
115 73 s
116 74 t
117 75 u
118 76 v
119 77 w
120 78 x
121 79 y
122 7A z
123 7B {
124 7C |
125 7D }
126 7E ~
127 7F DEL
Decimal Hexadecimal Character
49 31 1
50 32 2
51 33 3
52 34 4
53 35 5
54 36 6
55 37 7
56 38 8
57 39 9
58 3A :
59 3B ;
60 3C <
61 3D =
62 3E >
63 3F ?
64 40 @
65 41 A
66 42 B
67 43 C
68 44 D
69 45 E
70 46 F
71 47 G
72 48 H
73 49 I
74 4A J
75 4B K
76 4C L
77 4D M
78 4E N
79 4F O
80 50 P
81 51 Q
82 52 R
83 53 S
84 54 T
85 55 U
86 56 V
87 57 w
88 58 X
89 59 Y
90 5A Z
91 5B [
92 5C \
93 5D ]
94 5E ^
95 5F _
96 60 `
97 61 a
Ascll Attached List
Other manuals for 90518
2
Table of contents
Languages:
Other DeLOCK Barcode Reader manuals
Popular Barcode Reader manuals by other brands

Wasp
Wasp WDI9600 Quick reference guide

Mitsubishi Electric
Mitsubishi Electric Melsensor CF37-SR Settings guide

Motorola
Motorola SYMBOL DS6707 quick start guide

Toshiba
Toshiba B-EX4 SERIES Maintenance manual

On Demand Automation
On Demand Automation BBU Operator's manual

zenpert
zenpert 4T520P Series user manual