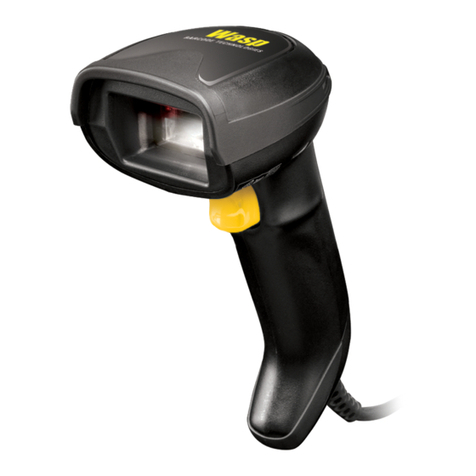
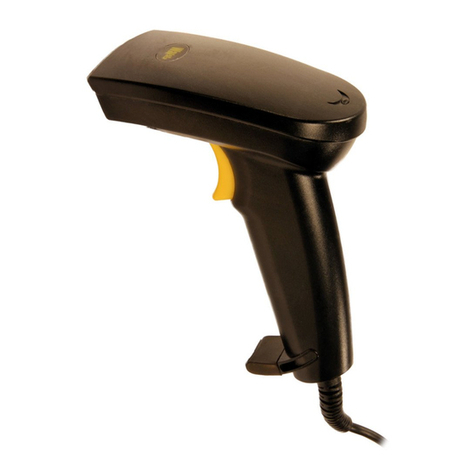
Wasp WDI9600 User manual

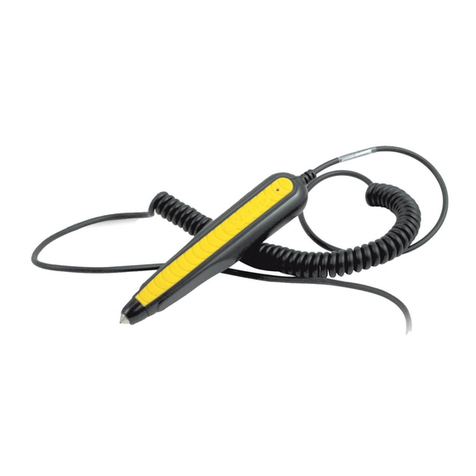
Wasp WDI9600
1D Barcode Reader
Quick Reference Guide

©2021 Wasp Barcode Technologies
All rights reserved. Without limiting the rights under copyright, no part of
this documentation may be reproduced, stored in or introduced into a
retrieval system, or transmitted in any form or by any means, or for any
purpose, without the express written permission of Wasp Barcode and/or
its affiliates.
Owners of Wasp products are hereby granted a non-exclusive, revocable
license to reproduce and transmit this documentation for the pur-
chaser's own internal business purposes. Purchaser shall not remove or
alter any proprietary notices, including copyright notices, contained in this
documentation and shall ensure that all notices appear on any reproduc-
tions of the documentation.
Electronic versions ofthis documentmaybedownloadedfromtheWasp
website (www.waspbarcode.com). If you visit our website and would like
to make comments or suggestions about this or other Wasp publica-
tions, please let us know via the "Contact" page.
Disclaimer
Wasp has taken reasonable measures to provide information in this
manual that is complete and accurate, however, Wasp shall not be liable for
technical or editorial errors or omissions contained herein, nor for inci-
dental or consequential damages resulting from the use of this material.
Wasp reserves the right to change any specification at any time without
prior notice.
Trademarks
Wasp Barcode Technologies and the Wasp logo are registered
trademarks of Wasp in many countries, including the U.S.A. and the E.U.
Patents
Contact Wasp Barcode Technologies for patent list.

QUICK REFERENCE GUIDE
III
TABLE OF CONTENTS
Description .................................................................... 1
Top Productivity for POS and Document Handling.............. 1
Decoding................................................................................ 1
Hands Free Stand/Holder ..................................................... 2
Setting Up the Reader .................................................... 3
Connecting to the Host Interface.......................................... 3
Disconnecting the Cable ................................................. 4
Using the Wasp WDI9600........................................ 4
Aiming System...................................................................... 4
Relative Size and Location of Aiming Pattern ............ 5
Linear Bar .................................................................... 5
Relative Size and Location of Green Spot .................. 5
Parts of the Reader ........................................................ 6
Selecting the Interface Type ........................................... 6
Interface Selection ................................................................ 6
Configuring the Interface................................................ 7
USB Interface ........................................................................ 8
Keyboard Wedge Interface ................................................. 10
Country Mode ............................................................ 12
Programming............................................................... 16
Using Programming Bar Codes ......................................... 16
Configure Other Settings .................................................... 16
Resetting Product Defaults ................................................ 16
Numlock ...................................................................... 17
Caps Lock State ........................................................... 18
Reading Parameters..................................................... 19
Good Read Green Spot Duration .................................... 19
Operating Modes .......................................................... 21
Scan Mode ........................................................................... 21
Technical Specifications ............................................... 24
LED and Beeper Indications .......................................... 27
Troubleshooting ........................................................... 28
Warranty ..................................................................... 29
Ergonomic Recommendations ....................................... 30
Technical Support ........................................................ 30
Support Through the Website ............................................ 30
Reseller Technical Support................................................. 30
QUICK REFERENCE GUIDE
1
WASP WDI9600
DESCRIPTION
With rich feature sets and extensive model options, the
WDI9600 from Wasp represents the premium level of
data collection equipment for general purpose
applications.
The Wasp WDI9600 readers’ ability to capture bar codes
from near to far, to read both high-density and low resolu-
tion codes, to decode hard-to-read, poor or damaged
codes and to easily read bar codes from mobile devices
make these readers the perfect choice for today’s
and tomorrow’s applications in retail and office
environments, pharmacies, light industrial, warehouses
and manufacturing plants.
Top Productivity for POS and Document Handling
Perfect for manual reading, the Wasp WDI9600 linear
imager uses Motionix™ motion detection technology
that detects the operator's natural actions to
automatically switch the scanner into "ready to read" scan
mode. The distinctive "soft line viewfinder" helps the
operator to easily identify the code to be read, making
easier and faster to point, shoot and decode the correct
label, reducing accidental readings in an environment
with multiple bar codes.
Decoding
The Wasp WDI9600 reliably decodes all standard 1D
(linear), including GS1 DataBar™ linear codes, Postal
Codes (China Post). The data stream - acquired from
decoding a symbol - is rapidly sent to the host. The reader
is immediately available to read another symbol.

Description
2
Wasp WDI9600
Hands Free Stand/Holder
An accessory is available which holds the reader at a con-
venient angle, allowing hands free scanning of items. It
can also be used as a holder. The reader automatically rec-
ognizes the insertion and changes its Scan Mode to allow
the user to operate in hands-free mode.
www.waspbarcode.com

Setting Up the Reader
QUICK REFERENCE GUIDE
3
SETTING UP THE READER
Follow the steps below to connect and get your reader up
and communicating with its host.
1. Connect the Cable to the reader and the Host as
shown below.
2. Configure the Interface (see page 7).
3. Program the Reader starting on page 16 (optional,
as needed).
Connecting to the Host Interface
USB
WEDGE
RS-232

Disconnecting the Cable
DISCONNECTING THE CABLE
To remove the interface cable from the reader, first locate
the hole on the back of the handle. Next, take a paper clip
and modify it as shown in the figure below. Insert the
end of the paper clip into the hole and press it to push on
the clip that holds the connector. As you apply pressure,
pull out the cable. When reinserting the cable, make sure
the connector clip is on the same side as the reader
release hole. Insert the cable, it should click when it is
fully inserted.
USING THE Wasp WDI9600
The Wasp WDI9600 normally functions by capturing and
decoding codes. The reader is equipped with an internal
Motionix™ motion-sensing function which activates the
aiming system on device motion. The intelligent aiming
system indicates the field of view which should be
positioned over the bar code:
Aiming System
NOTE: We recommend the use of a perfectly
straight new staple to make the operation easier
(see the pictures below).
4
Wasp WDI9600
www.waspbarcode.com

Using the Wasp WDI9600
QUICK REFERENCE GUIDE
5
Relative Size and Location of Aiming Pattern
Linear Bar
A red beam illuminates the label. The field of view indi-
cated by the aiming system will be smaller when the
reader is closer to the bar code and larger when it is far-
ther from the code. Symbologies with smaller bars or ele-
ments (mil size) should be read closer to the unit.
Symbologies with larger bars or elements (mil size) should
be read farther from the unit. If the aiming system is cen-
tered and the entire bar code is within the aiming field,
you will get a good read. Successful reading is signaled by
an audible tone plus a good-read green spot LED indicator.
Refer to the Wasp WDI9600 Product Reference Guide
(PRG) for more information about this feature and other
programmable settings.
Relative Size and Location of Green Spot

Parts of the Reader
PARTS OF THE READER
SELECTING THE INTERFACE TYPE
Upon completing the physical connection between the
reader and its host, proceed directly to Interface Selection
below for information and programming for the interface
type supported by the reader and scan the appropriate
bar code to select your system’s correct interface type,
according to your application.
For interfaces other than those listed in this manual,
see the Wasp WDI9600 Product Reference Guide (PRG),
available online at www.waspbarcode.com.
Interface Selection
The reader will support all the following host interfaces:
•RS-232 STD
•RS-232 WN
•IBM46XX port 9b (a specific cable's required)
•USB HID POS
•USB Toshiba TEC
•USB (Keyboard, COM, OEM)
•USB Composite (Keyboard + COM)
•USB for Magellan Scanners
•Keyboard Wedge
Information and programming options for each interface
type are provided in this section. For defaults and addi-
tional information associated with each interface, proceed
to the corresponding chapter in the Wasp WDI9600 PRG.
1. LED 2. Cable Release Hole
3. Scan Window 4. Trigger
6
Wasp WDI9600
www.waspbarcode.com

Configuring the Interface
QUICK REFERENCE GUIDE
7
CONFIGURING THE INTERFACE
Scan the appropriate programming bar code to select the
interface type for your system.
NOTE: Unlike some other programming features
and options, interface selections require that you
scan only one programming bar code label. DO
NOT scan an ENTER/EXIT bar code prior to scan-
ning an interface selection bar code.
Some interfaces require the scanner to start in
the disabled state when powered up. If additional
scanner configuration is desired while in this
state, pull the trigger and hold for 5 seconds. The
scanner will change to a state that allows pro-
gramming with bar codes.
RS-232
RS-232 standard interface
Select RS232-STD
RS-232 Wincor-Nixdorf
Select RS232-WN
RS-232 for use with OPOS/UPOS/JavaPOS
Select RS-232 OPOS

Configuring the Interface
USB Interface
The reader attaches directly to a USB host, or a powered
USB hub, and is powered by it. No additional power supply
is required. When using a USB interface, the reader auto-
detects the USB cable and defaults to the USB keyboard
interface.
IBM
IBM-46xx Port 5B reader interface
Select IBM-P5B
IBM-46xx Port 9B reader interface
Select IBM-P9B
USB
Select USB Keyboard (with standard key encoding)
Select USB-COM-STD (simulates RS-232 standard interface)
8
Wasp WDI9600
www.waspbarcode.com

Configuring the Interface
QUICK REFERENCE GUIDE
9
USB (CONTINUED)
Select USB Alternate Keyboard (with alternate key encoding)
Select USB-OEM
Select USB-KBD-APPLE (for Apple computers)

Configuring the Interface
Keyboard Wedge Interface
To use a Keyboard Wedge interface, scan the bar code for
the desired keyboard type.
KEYBOARD
Select KBD-AT
(AT, PS/2 25-286, 30-286, 50, 50Z, 60, 70, 80, 90 & 95
w/Standard Key Encoding)
Select KBD-AT-NK
(IBM AT PS2 with standard key encoding but without
external kbd.)
Select KBD-AT-ALT
(AT, PS/2 25-286, 30-286, 50, 50Z, 60, 70, 80, 90 & 95
w/Alternate Key)
Select KBD-AT-ALT-NK
(for IBM AT PS2 with alternate key encoding but without
external keyboard)
10
Wasp WDI9600
www.waspbarcode.com

Configuring the Interface
QUICK REFERENCE GUIDE
11
KEYBOARD (CONTINUED)
Select KBD-XT
(PC/XT w/Standard Key Encoding)
Select KBD-IBM-3153
(for IBM Terminal 3153)
Select KBD-IBM-M
(
for IBM Terminals 31xx, 32xx, 34xx, 37xx make only keyboard)
Select KBD-IBM-MB
(for IBM Terminals 31xx, 32xx, 34xx, 37xx make break
keyboard)
Select KBD-DIG-VT
(for DIGITAL Terminals VT2xx, VT3xx, VT4xx)

Configuring the Interface
Country Mode
This feature specifies the country/language supported by
the keyboard. Only the following interfaces support ALL
Country Modes.
•USB Keyboard (without alternate key encoding)
•AT, PS/2 25-286, 30-286, 50, 50Z, 60, 70, 80, 90 & 95
w/Std Key Encoding
•Keyboard Wedge for IBM AT PS2 with standard key
encoding but without external keyboard
•AT, PS/2 25-286, 30-286, 50, 50Z, 60, 70, 80, 90 & 95
without Alternate Key
•Keyboard Wedge for IBM AT PS2 without alternate
key encoding but without external keyboard
All other interfaces support ONLY the following Country
Modes: U.S., Belgium, Britain, France, Germany, Italy,
Spain, Sweden.
COUNTRY MODE
ENTER/EXIT PROGRAMMING MODE
Country Mode = U.S.
Country Mode = Belgium
Country Mode = Britain
12
Wasp WDI9600
www.waspbarcode.com

Configuring the Interface
QUICK REFERENCE GUIDE
13
COUNTRY MODE (CONTINUED)
Country Mode = Croatia*
Country Mode = Czech Republic*
Country Mode = Denmark*
Country Mode = France
Country Mode = French Canadian
Country Mode = Germany
*Supports only the interfaces listed in the Country Mode
feature description

Configuring the Interface
COUNTRY MODE (CONTINUED)
Country Mode = Hungary*
Country Mode = Italy
Country Mode = Japanese 106-key*
Country Mode = Lithuanian
Country Mode = Norway*
Country Mode = Poland*
*Supports only the interfaces listed in the Country Mode
feature description
14
Wasp WDI9600
www.waspbarcode.com

Configuring the Interface
QUICK REFERENCE GUIDE
15
COUNTRY MODE (CONTINUED)
Country Mode = Portugal*
Country Mode = Romania*
Country Mode = Slovakia
Country Mode = Spain
Country Mode = Sweden
Country Mode = Switzerland*
*Supports only the interfaces listed in the Country Mode
feature description

Programming
PROGRAMMING
The reader is factory-configur
ed with a set of standard
default features. After scanning the interface bar code from
the Interfaces section, select other options and customize
your reader through use of the programming bar codes avail-
able in the Wasp WDI9600 PRG. Check the correspond-ing
features section for your interface, and also the Data
Editing and Symbo
logies chapters of the PRG.
Using Programming Bar Codes
This manual contains
bar codes which allow you to reconfig-
ure your reader. Some programming bar code labels, like the
"Reset Default Settings" on page 16, require only the scan of
that single label to enact the change.
Other bar codes require the reader to be placed in Program-
ming Mode prior to scanning them. Scan an ENTER/EXIT bar
code once to enter Programming Mode; scan the desired
parameter settings; scan the ENTER/EXIT bar code again to
accept your changes, which exits Programming Mode and
returns the reader
to normal operation.
Configure Other Settings
Additional programming bar codes are available in the
PRG to allow for customizing programming features. If
your installation requires different programming than the
standard factory default settings, refer to the PRG.
Resetting Product Defaults
If you aren’t sure what programming options are in your
reader, or you’ve changed some options and want your cus-
tom factory settings restored, scan the bar code below to
reset the reader to its initial configuration. Reference the PRG
for other options, and a listing of standard factory settings.
Reset Default Settings
NOTE: Factory defaults are based on the interface
type. Be sure your reader is configured for the
correct interface before scanning this label. See
"Selecting the Interface Type" on page 6 for more
information.
16
Wasp WDI9600
www.waspbarcode.com
Table of contents
Other Wasp Barcode Reader manuals

Wasp
Wasp WWS110i User manual

Wasp
Wasp WWS800 User manual

Wasp
Wasp WPL308 User manual

Wasp
Wasp WLS8600 User manual

Wasp
Wasp WWS800 User manual

Wasp
Wasp N1181 Operating instructions

Wasp
Wasp CCD Scanner Operating instructions

Wasp
Wasp Wasp WDI7500 Installation and operation manual

Wasp
Wasp WLS 9500 User manual

Wasp
Wasp WLS8600 User manual

Wasp
Wasp WDI4500 User manual

Wasp
Wasp WDI4200 User manual

Wasp
Wasp WPA 1200 II User manual

Wasp
Wasp WWS800 User manual

Wasp
Wasp WWS800 User manual

Wasp
Wasp WLS 9500 User manual

Wasp
Wasp WDI4500 User manual

Wasp
Wasp Wasp WDI7500 User manual

Wasp
Wasp CCD - 80SIR User manual

Wasp
Wasp WLR8900 Operating instructions