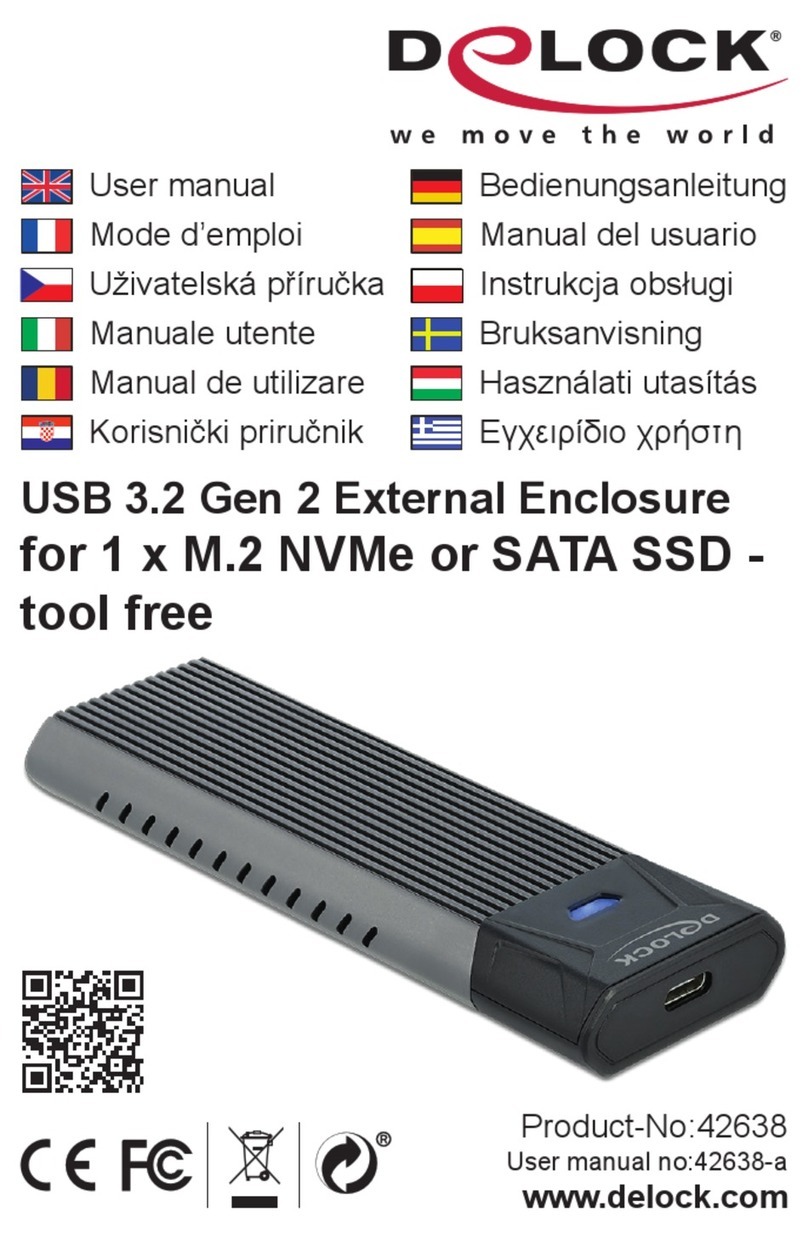
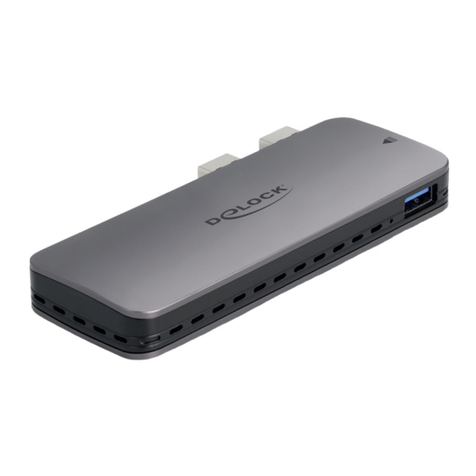
DeLOCK 42018 User manual

USB4™ 40 Gbps External Enclosure
for 1 x M.2 NVMe SSD
Product-No:42018
User manual no:42018-a
www.delock.com
User manual
Mode d’emploi
Uživatelská příručka
Manuale utente
Manual de utilizare
Korisnički priručnik
Bedienungsanleitung
Manual del usuario
Instrukcja obsługi
Bruksanvisning
Használati utasítás
Εγχειρίδιο χρήστη

-2-
English
Description
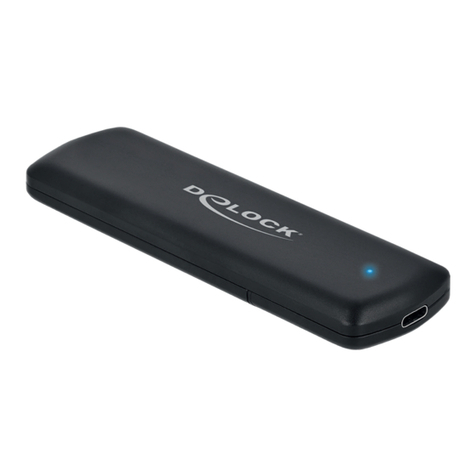
This enclosure by Delock enables the installation of an M.2 PCIe NVMe SSD
in 2280 format, it can be connected via Thunderbolt™ 3, Thunderbolt™ 4 or
USB-C™ to the PC or laptop. The robust metal housing with cooling ns ensures
an optimum temperature of the memory.
USB4™ 40 Gbps
Due to USB4™ compatibility, the Delock enclosure can be connected to
Thunderbolt™ 3 and 4 ports, as well as to all USB Type-C™ ports. The maximum
data transfer rate depends on the host device.
SSD installation without tools
The special feature of this enclosure is that no tools are required to install the M.2
SSD.
Note
Due to the USB to NVMe controller, the data transfer rate on a USB Gen 2x2 port
is only 10 Gbps.
Specication
• Connectors:
external: 1 x USB4™ 40 Gbps (Gen 3x2) USB Type-C™ female
internal: 1 x 67 pin M.2 key M slot
• Chipset: Intel JHL7440, Realtek RTL9210B
• Supports M.2 modules in format 2280 with key M or key B+M based on PCIe
(NVMe)
• Maximum height of the components on the module: 1.5 mm, application of
double-sided assembled modules supported
• Supports NVM Express (NVMe)
• Data transfer rate up to 40 Gbps
• LED indicator for power and access
• Metal housing
• Hot Plug, Plug & Play
• Dimensions (LxWxH): ca. 100 x 60 x 14 mm

-3-
English
System requirements
• Android 10.0 or above
• Chrome OS 90.0 or above
• iPad Air (4th Generation) or above
• Linux Kernel 5.13 or above
• Mac OS 12.4 or above
• Windows 8.1/8.1-64/10/10-64/11
• Device with a free USB Type-C™ port or with a free Thunderbolt™ 3 port or
• Device with a free Thunderbolt™ 4 port
Package content
• External enclosure M.2
• Thunderbolt™ 3 cable, length ca. 50 cm
• 2 x thermal conductive pad
• 2 x rubber nipple
• User manual
Safety instructions
• Protect the product against moisture
• Protect the product against direct sunlight
• Avoid anti-static electricity when installing the SSD
Hardware Installation
1. Open the housing. Therefor you need to push the cover upwards at the rear
recess.
2. Now you plug your M.2 SSD into the slot.
3. Fix the module with the help of the screws.
4. For better cooling of the SSD, you can stick the included thermal pad onto
the SSD; just remove the foil from the thermal pad.
5. Close the enclosure.
6. Connect the Thunderbolt™ cable with the enclosure and a free
Thunderbolt™ or USB-C™ port of your computer.

-4-
English
Driver Installation
1. Switch on your computer.
2. The external drive will be recognized and you can start using the device
immediately.
Support Delock
If you have further questions, please contact our customer support
You can nd current product information on our homepage: www.delock.com
Final clause
Information and data contained in this manual are subject to change without
notice in advance. Errors and misprints excepted.
Copyright
No part of this user manual may be reproduced, or transmitted for any purpose,
regardless in which way or by any means, electronically or mechanically, without
explicit written approval of Delock.
Edition: 09/2022

-5-
Deutsch
Systemvoraussetzungen
• Android 10.0 oder höher
• Chrome OS 90.0 oder höher
• iPad Air (4. Generation) oder höher
• Linux Kernel 5.13 oder höher
• Mac OS 12.4 oder höher
• Windows 8.1/8.1-64/10/10-64/11
• Gerät mit einem freien USB Type-C™ Port oder mit einem freien
Thunderbolt™ 3 Port oder
• Gerät mit einem freien Thunderbolt™ 4 Port
Sicherheitshinweise
• Produkt vor Feuchtigkeit schützen
• Produkt vor direkter Sonneneinstrahlung schützen
• Vermeiden Sie antistatische Auadung beim Einbau der SSD
Hardwareinstallation
1. Önen Sie das Gehäuse. Dazu müssen Sie lediglich den Deckel an der
hinteren Aussparung nach oben drücken.
2. Stecken Sie nun Ihre M.2 SSD in den Slot.
3. Befestigen Sie das Modul mit Hilfe der vorhandenen Schrauben.
4. Zur besseren Kühlung der SSD können Sie das beiliegende Wärmepad auf
die SSD kleben, dazu muss nur die Folie vom Wärmepad entfernt werden.
5. Schließen Sie das Gehäuse wieder.
6. Verbinden Sie das Thunderbolt™ Kabel mit dem Gehäuse und einem freien
Thunderbolt™ oder USB-C™ Port Ihres Computers.
Treiberinstallation
1. Schalten Sie den Computer ein.
2. Das externe Laufwerk wird sofort erkannt und Sie können das Gerät sofort
verwenden.

-6-
Français
Conguration système requise
• Android 10.0 ou version ultérieure
• Chrome OS 90.0 ou version ultérieure
• iPad Air (4ème génération) ou version ultérieure
• Linux Kernel 5.13 ou version ultérieure
• Mac OS 12.4 ou version ultérieure
• Windows 8.1/8.1-64/10/10-64/11
• Appareil avec un port USB Type-C™ libre ou avec un port Thunderbolt™ 3 libre
ou
• Appareil avec un port Thunderbolt™ 4 libre
Instructions de sécurité
• Protéger le produit contre l’humidité
• Protéger le produit contre la lumière directe du soleil
• Eviter l’électricité statique au moment de l’installation de votre SSD
Installation matérielle
1. Ouvrez le boîtier. Vous devez pousser l’arrière du capot vers le haut.
2. Vous pouvez à présent brancher votre SSD M.2 dans l'emplacement.
3. Fixez le module à l'aide des vis.
4. Pour mieux refroidir le SSD, vous pouvez coller le patin thermique inclus sur
le SSD ; retirer simplement le feuillet du patin thermique.
5. Fermez le boîtier.
6. Reliez le câble Thunderbolt™ entre le boîtier et un port Thunderbolt™ ou
USB-C™ disponible de votre ordinateur.
Installation du pilote
1. Allumez votre ordinateur.
2. Le lecteur externe est reconnu et vous pouvez immédiatement commencer à
l'utiliser.

-7-
Español
Requisitos del sistema
• Android 10.0 o superior
• Chrome OS 90.0 o superior
• iPad Air (4ª generación) o superior
• Linux Kernel 5.13 o superior
• Mac OS 12.4 o superior
• Windows 8.1/8.1-64/10/10-64/11
• Dispositivo con un puerto USB Type-C™ o con un puerto Thunderbolt™ 3
disponible o
• Dispositivo con un puerto Thunderbolt™ 4 disponible
Instrucciones de seguridad
• Proteja el producto contra el polvo
• Proteja el producto contra la luz solar directa
• Evite la electricidad estática cuando instale la unidad de estado sólido
Hardware Instalación
1. Abra la carcasa. Por ello, es necesario empujar la tapa hacia arriba en el
hueco trasero.
2. Ahora enchufe la unidad de estado sólido M.2 en la ranura.
3. Fije el módulo con la ayuda de los tornillos.
4. Para enfriar mejor el SSD, puede pegar la almohadilla térmica incluida en el
SSD; sólo tiene que quitar la lámina de la almohadilla térmica.
5. Cierre la carcasa.
6. Conecte el cable Thunderbolt™ a la carcasa y con un puerto Thunderbolt™
o USB-C™ disponible de su PC.
Instalación del controlador
1. Encienda su PC.
2. La unidad externa será reconocida y podrá comenzar a utilizar el dispositivo
inmediatamente.

-8-
České
Systémové požadavky
• Android 10.0 nebo vyšší
• Chrome OS 90.0 nebo vyšší
• iPad Air (4-mé generace) nebo vyšší
• Linux Kernel 5.13 nebo vyšší
• Mac OS 12.4 nebo vyšší
• Windows 8.1/8.1-64/10/10-64/11
• Zařízení s volným portem USB Type-C™ nebo volný port Thunderbolt™ 3 nebo
• Zařízení s volný port Thunderbolt™ 4
Bezpečnostní pokyny
• Chraňte produkt před vlhkostí
• Chraňte produkt před přímým slunečním světlem
• Vyhněte se anti-statické elektřině při instalaci SSD
Instalace hardware
1. Otevřte kryt PC. Proto musíte v zadním zahloubení zatlačit kryt nahoru.
2. Nyní připojte do slotu váš M.2 SSD.
3. Připevněte modul pomocí šroubů.
4. Pro lepší chlazení SSD můžete na SSD nasunout jednu z připojených
tepelných podložek; jen z tepelné podložky sejměte fólii.
5. Zavřete pouzdro.
6. Připojte Thunderbolt™ kabel ke skříňce a k volnému Thunderbolt™ nebo
USB-C™ portu počítače.
Instalace ovladače
1. Zapněte počítač.
2. Je rozpoznán externí disk a můžete jej začít používat.

-9-
Polsku
Wymagania systemowe
• Android 10.0 lub nowszy
• Chrome OS 90.0 lub nowszy
• iPad Air (4. generacja) lub nowszy
• Linux Kernel 5.13 lub nowszy
• Mac OS 12.4 lub nowszy
• Windows 8.1/8.1-64/10/10-64/11
• Urządzenie z wolnym portem USB Type-C™ bądź z wolnym złączem
Thunderbolt™ 3 lub
• Urządzenie z złączem Thunderbolt™ 4
Instrukcje bezpieczeństwa
• Produkt należy zabezpieczyć przed wilgocią
• Produkt należy zabezpieczyć przed bezpośrednim światłem słonecznym
• Podczas instalowania SSD należy unikać elektryczności statycznej
Instalacja sprzętu
1. Otwórz obudowę. Dlatego należy nacisnąć pokrywę do góry przy tylnym
zagłębieniu.
2. Podłącz dysk M.2 SSD do gniazda.
3. Przymocuj moduł za pomocą śrubek.
4. Dla lepszego chłodzenia SSD można nakleić jedną z załączonych mat
termicznych na SSD; wystarczy ściągnąć folię z maty.
5. Zamknij obudowę.
6. Połącz kabel Thunderbolt™ ze złączem obudowy i wolnym portem
Thunderbolt™ lub USB-C™ komputera.
Instalacja sterownika
1. Włącz komputer.
2. Napęd zewnętrzny zostanie wykryty automatycznie i od razu można
korzystać z urządzenia.

-10-
Italiano
Requisiti di sistema
• Android 10.0 o superiore
• Chrome OS 90.0 o superiore
• iPad Air (4° generazione) o superiore
• Linux Kernel 5.13 o superiore
• Mac OS 12.4 o superiore
• Windows 8.1/8.1-64/10/10-64/11
• Dispositivo con una porta USB Type-C™ disponibile o con una porta
Thunderbolt™ 3 disponibile o
• Dispositivo con una porta Thunderbolt™ 4 disponibile
Istruzioni per la sicurezza
• Proteggere il prodotto dall'umidità
• Proteggere il prodotto dalla luce solare diretta
• Evitare l'elettricità antistatica durante l'installazione dell'SSD
Installazione dell'hardware
1. Aprire l'alloggiamento. Pertanto, è necessario spingere il coperchio verso
l'alto nella rientranza posteriore.
2. Collegare l'SSD M.2 nello slot.
3. Fissare il modulo con l'ausilio delle viti.
4. Per un migliore rareddamento dell'SSD, si può incollare il cuscinetto termico
incluso sull'SSD; è suciente rimuovere la pellicola dal cuscinetto termico.
5. Chiudere l'alloggio.
6. Collegare il cavo Thunderbolt™ all'alloggiamento e ad una porta
Thunderbolt™ o USB-C™ librera del computer.
Installazione del driver
1. Accendere il computer.
2. L'unità esterna viene riconosciuta ed è possibile iniziare ad utilizzare
immediatamente il dispositivo.
-11-
Svenska
Systemkrav
• Android 10.0 eller högre
• Chrome OS 90.0 eller högre
• iPad Air (4:e generationen) eller högre
• Linux Kernel 5.13 eller högre
• Mac OS 12.4 eller högre
• Windows 8.1/8.1-64/10/10-64/11
• Enhet med en ledig USB Type-C™-port eller med en ledig Thunderbolt™ 3-port
eller
• Enhet med en ledig Thunderbolt™ 4-port
Säkerhetsinstruktioner
• Skydda produkten mot fukt
• Skydda produkten mot direkt solljus
• Undvik antistatisk elektricitet när du installerar SSD:n
Hårdvaruinstallation
1. Öppna höljet. Därför måste du trycka höljet uppåt vid den bakre
fördjupningen.
2. Koppla in din M.2 SSD i facket.
3. Fixera modulen med hjälp av skruvarna.
4. För bättre kylning av SSD-enheten kan du fästa den medföljande termiska
kudden på SSD-enheten. Avlägsna bara foliepappret från den termiska
dynan.
5. Stäng höljet.
6. Anslut Thunderbolt™-kabeln till höljet och till en ledig Thunderbolt™ eller
USB-C™-port på datorn.
Installation av drivrutiner
1. Slå på datorn.
2. Den externa enheten kommer att hittas och du kan börja använda enheten
omedelbart.

-12-
Română
Cerinte de sistem
• Android 10.0 sau superior
• Chrome OS 90.0 sau superior
• iPad Air (generația a-4-a) sau superior
• Linux Kernel 5.13 sau superior
• Mac OS 12.4 sau superior
• Windows 8.1/8.1-64/10/10-64/11
• Dispozitiv cu un port USB Type-C™ liber sau cu un port Thunderbolt™ 3 liber
sau
• Dispozitiv cu un port Thunderbolt™ 4 liber
Instrucţiuni de siguranţă
• Protejaţi produsul împotriva umidităţii
• Protejaţi produsul împotriva luminii directe a soarelui
• Evitaţi electricitatea antistatică atunci când instalaţi SSD
Instalarea componentelor hardware
1. Deschideţi carcasa. Prin urmare, trebuie să împingeți capacul în sus la nișa
din spate.
2. Acum puteţi conecta unitatea SSD M.2 la fantă.
3. Fixaţi modulul cu ajutorul şuruburilor.
4. Pentru o mai bună răcire a SSD-lui, puteți lipi placa termică inclusă pe SSD;
trebuie doar să îndepărtați folia de pe placa termică.
5. Închideți incinta.
6. Conectaţi cablul Thunderbolt™ la incintă şi la un port Thunderbolt™ sau
USB-C™ liber de pe computer.
Instalarea driverului
1. Porniţi computerul.
2. Unitatea externă va recunoscută şi puteţi începe să utilizaţi imediat
dispozitivul.

-13-
Magyar
Rendszerkövetelmények
• Android 10.0 vagy újabb
• Chrome OS 90.0 vagy újabb
• iPad Air (4. generáció) vagy újabb
• Linux Kernel 5.13 vagy újabb
• Mac OS 12.4 vagy újabb
• Windows 8.1/8.1-64/10/10-64/11
• Egy szabad USB Type-C™ porttal vagy egy szabad Thunderbolt™ 3 porttal
rendelkező eszköz vagy
• Egy szabad egy szabad Thunderbolt™ 4 porttal rendelkező eszköz
Biztonsági óvintézkedések
• Óvja a terméket a nedvességtől.
• Óvja a terméket a közvetlen napsugárzástól.
• Kerülje az elektrosztatikus kisüléseket az SSD beszerelése közben
Hardvertelepítés
1. Nyissa ki a számítógépházat. Ezért szökséges a fedőt felfelé nyomni a hátsó
mélyedésben.
2. Csatlakoztassa az M.2 SSD-t a nyílásba.
3. Rögzítse a modult a csavarok segítségével.
4. Az SSD job hűtésére beleragaszthatja az SSD-be a mellékelt hűtőpárnát,
csak vegye le róla a fóliát.
5. Zárja vissza a ház burkolatát.
6. Kösse össze a házat és a számítógép szabad Thunderbolt™ vagy USB-C™-
csatlakozóját az Thunderbolt™-kábellel.
Illesztőprogram telepítése
1. Kapcsolja be a számítógépet.
2. Megtörténik a külső meghajtó felismerése, és azonnal használatba veheti az
eszközt.

-14-
Hrvatski
Preduvjeti sustava
• Android 10.0 ili noviji
• Chrome OS 90.0 ili noviji
• iPad Air (4. generacija) ili noviji
• Linux Kernel 5.13 ili noviji
• Mac OS 12.4 ili noviji
• Windows 8.1/8.1-64/10/10-64/11
• Uređaj sa slobodnim USB Type-C™ priključkom ili slobodnim Thunderbolt™ 3
priključkom ili
• Uređaj sa slobodnim Thunderbolt™ 4 priključkom
Sigurnosne upute
• Zaštitite proizvod od vlage
• Zaštitite proizvod od izravne sunčeve svjetlosti
• Izbjegavajte antistatički elektricitet prilikom postavljanja SSD-a
Ugradnja hardvera
1. Otvorite kućište. Stoga biste trebali gurnuti poklopacprema gore na
stražnjem udubljenju.
2. Sada ukopčajte M.2 SSD u utor.
3. Vijcima pričvrstite modul.
4. Za bolje hlađenje SSD-a možete umetnuti isporučenu termalnu podlošku na
SSD; samo uklonite foliju s termalne podloške.
5. Zatvorite kućište.
6. Spojite Thunderbolt™ kabel na kućište i na Slobodan Thunderbolt™ ili
USB-C™ priključak na računalu.
Instalacija upravljačkog programa
1. Uključite vaše računalo.
2. Vanjski pogon će se prepoznati i moći ćete odmah početi s upotrebom
uređaja.

-15-
ελληνικά
Απαιτήσεις συστήματος
• Android 10.0 ή νεότερο
• Chrome OS 90.0 ή νεότερο
• iPad Air (4η γενιά) ή νεότερο
• Linux Kernel 5.13 ή νεότερο
• Mac OS 12.4 ή νεότερο
• Windows 8.1/8.1-64/10/10-64/11
• Συσκευή με μια ελεύθερη θύρα USB Type-C™ ή με μια ελεύθερη θύρα
Thunderbolt™ 3 ή
• Συσκευή με μια ελεύθερη θύρα Thunderbolt™ 4
Οδηγίες ασφάλειας
• Προστατεύστε το προϊόν από την υγρασία
• Προστατεύστε το προϊόν από την άμεση ηλιακή ακτινοβολία
• Αποφύγετε στατικό ηλεκτρισμό όταν τοποθετείτε τη μονάδα SSD
Εγκατάσταση υλικού
1. Ανοίξτε το περίβλημα. Γι’ αυτό θα χρειαστεί να πιέσετε το κάλυμμα προς τα
πάνω στο οπίσθιο άνοιγμα.
2. Τώρα τοποθετήστε την M.2 SSD σας μέσα στη θύρα.
3. Επιδιορθώστε τη μονάδα χρησιμοποιώντας βίδες.
4. Για καλύτερη ψύξη του SSD, μπορείτε να κολλήσετε το συμπεριλαμβανόμενο
θερμικό επίθεμα πάνω στο SSD; απλά αφαιρώντας το λεπτό φύλλο από το
θερμικό επίθεμα.
5. Κλείστε το περίβλημα.
6. Συνδέστε το καλώδιο Thunderbolt™ με το περίβλημα και μία ελεύθερη θύρα
Thunderbolt™ ή USB-C™ του υπολογιστή σας.
Εγκατάσταση προγράμματος οδήγησης
1. Ενεργοποιήστε τον υπολογιστή σας.
2. Η εξωτερική μονάδα θα αναγνωριστεί και μπορείτε να ξεκινήσετε
χρησιμοποιώντας τη συσκευή αμέσως.

Declaration of conformity
Products with a CE symbol fulll the EMC directive (2014/30/EU) and
RoHS directive (2011/65/EU+2015/863+2017/2102), which were released by the
EU-comission.
The declaration of conformity can be downloaded here:
https://www.delock.de/produkte/G_42018/merkmale.html
WEEE-notice
The WEEE (Waste Electrical and Electronic Equipment)-directive, which became
eective as European law on February 13th 2003, resulted in an all out change
in the disposal of disused electro devices. The primarily purpose of this directive
is the avoidance of electrical waste (WEEE) and at the same time the support of
recycling and other forms of recycling in order to reduce waste. The WEEE-logo
on the device and the package indicates that the device should not be disposed
in the normal household garbage. You are responsible for taking the disused
electrical and electronical devices to a respective collecting point. A separated
collection and reasonable recycling of your electrical waste helps handling the
natural resources more economical. Furthermore recycling of electrical waste is
a contribution to keep the environment and thus also the health of men. Further
information about disposal of electrical and electronical waste, recycling and
the collection points are available in local organizations, waste management
enterprises, in specialized trade and the producer of the device.
Cet appareil et
ses accessoires
se recyclent
Points de collecte sur www.quefairedemesdechets.fr
EU Import: Tragant Handels- und Beteiligungs GmbH
Beeskowdamm 13/15, 14167 Berlin, Germany
Table of contents
Languages:
Other DeLOCK Enclosure manuals

DeLOCK
DeLOCK 42019 User manual

DeLOCK
DeLOCK SuperSpeed 42015 User manual

DeLOCK
DeLOCK 42595 User manual

DeLOCK
DeLOCK SuperSpeed 42636 User manual

DeLOCK
DeLOCK 42365 User manual

DeLOCK
DeLOCK 42633 User manual

DeLOCK
DeLOCK 42402 User manual

DeLOCK
DeLOCK 42371 User manual

DeLOCK
DeLOCK 42003 User manual

DeLOCK
DeLOCK 42513 User manual
Popular Enclosure manuals by other brands

Lenovo
Lenovo ThinkSystem DW612S Neptune DWC instructions

Natec
Natec OYSTER PRO user manual

Thermaltake
Thermaltake Versa Series user manual

Kingston Technology
Kingston Technology StorCase Technology Rhino JR RJR110 user guide

LEGRAND
LEGRAND ON-Q ENP2050-NA installation instructions

Gumdrop
Gumdrop SLIMTECH Installation