DeLOCK 42003 User manual

USB Type-C™ External Enclosure
for 1 x M.2 SATA SSD
Product-No:42003
User manual no:42003-a
www.delock.com
User manual
Mode d’emploi
Uživatelská příručka
Manuale utente
Manual de utilizare
Korisnički priručnik
Bedienungsanleitung
Manual del usuario
Instrukcja obsługi
Bruksanvisning
Használati utasítás
Εγχειρίδιο χρήστη

-2-
English
Description
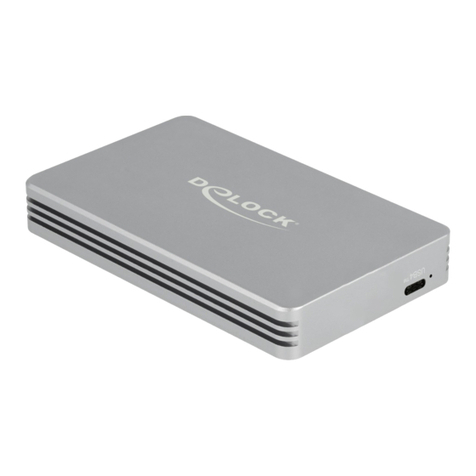
The aluminium enclosure by Delock enables the installation of a M.2
SSD in 2280, 2260, 2242 and 2230 format, which can be connected
via USB to the PC or laptop. The robust metal housing ensures an
optimum temperature of the memory.
Specication
• Connectors:
external: 1 x SuperSpeed USB 10 Gbps (USB 3.2 Gen 2) USB
Type-C™ female
internal: 1 x 67 pin M.2 key B slot
• Chipset: Asmedia ASM235CM
• Supports M.2 modules in format 2280, 2260, 2242 and 2230 with
key B or key B+M based on SATA
• Maximum height of the components on the module: 1.5 mm,
application of double-sided assembled modules supported
• Bootable
• Data transfer rate up to 6 Gbps
• LED indicator for power and access
• Dimensions (LxWxH): ca. 110 x 40 x 9.5 mm
• Hot Plug, Plug & Play
System requirements
• Android 9.0 or above
• Chrome OS 83.0 or above
• iPad Pro (2018)
• Linux Kernel 5.4 or above
• Mac OS 10.15.6 or above
• Surface Pro 7
• Windows 8.1/8.1-64/10/10-64
• PC or laptop with a free USB Type-C™ port
• PC or laptop with a free Thunderbolt™ 3 port
-3-
English
Package content
• External enclosure M.2
• Screwdriver
• Mounting material
• Cable USB-C™ male to USB-C™ male, length ca. 45 cm
• User manual
Safety instructions
• Protect the product against moisture
• Protect the product against direct sunlight
• Avoid anti-static electricity when installing the SSD
Hardware Installation
1. Open the enclosure with the help of the supplied screwdriver.
Just remove the two screws on the side of the USB connector
and remove the panel.
2. Pull out the PCB.
3. Now you plug your M.2 SSD into the slot.
4. Fix the module with the help of the screws.
5. Slide the PCB with the module into the enclosure.
6. Close the enclosure. Use the screws to attach the panel to the
housing.
7. Connect the USB cable with the enclosure and a free USB port
of your computer.
Driver Installation
1. Switch on your computer.
2. The external drive will be recognized and you can start using
the device immediately.

-4-
English
Support Delock
If you have further questions, please contact our customer support
You can nd current product information on our homepage:
www.delock.com
Final clause
Information and data contained in this manual are subject to change
without notice in advance. Errors and misprints excepted.
Copyright
No part of this user manual may be reproduced, or transmitted
for any purpose, regardless in which way or by any means,
electronically or mechanically, without explicit written approval of
Delock.
Edition: 11/2020

-5-
Deutsch
Packungsinhalt
• Externes Gehäuse M.2
• Schraubendreher
• Befestigungsmaterial
• Kabel USB-C™ Stecker zu USB-C™ Stecker, Länge ca. 45 cm
• Bedienungsanleitung
Sicherheitshinweise
• Produkt vor Feuchtigkeit schützen
• Produkt vor direkter Sonneneinstrahlung schützen
• Vermeiden Sie antistatische Auadung beim Einbau der SSD
Hardwareinstallation
1. Önen Sie das Gehäuse mit Hilfe des beigelegten
Schraubendrehers. Dabei entfernen Sie die beiden Schrauben
an der Seite des USB Anschlusses und nehmen die Blende ab.
2. Ziehen Sie die Leiterplatte heraus.
3. Stecken Sie nun Ihre M.2 SSD in den Slot.
4. Befestigen Sie das Modul mit Hilfe der vorhandenen
Schrauben.
5. Schieben Sie nun die Leiterplatte mit dem eingesteckten Modul
wieder in das Gehäuse.
6. Schließen Sie das Gehäuse. Verwenden Sie die beiden
Schrauben um die Blende an dem Gehäuse zu befestigen.
7. Verbinden Sie das USB Kabel mit dem Gehäuse und einem
freien USB Port Ihres Computers.
Treiberinstallation
1. Schalten Sie den Computer ein.
2. Das externe Laufwerk wird sofort erkannt und Sie können das
Gerät sofort verwenden.

-6-
Français
Contenu de l’emballage
• Boîtier externe M.2
• Tournevis
• Matériel de montage
• Câble USB-C™ mâle vers USB-C™ mâle, longueur env. 45 cm
• Mode d’emploi
Instructions de sécurité
• Protéger le produit contre l’humidité
• Protéger le produit contre la lumière directe du soleil
• Eviter l’électricité statique au moment de l’installation de votre
SSD
Installation matérielle
1. Ouvrez le boîtier à l'aide du tournevis fourni. Retirez seulement
les deux vis sur le côté du connecteur USB et retirez le
panneau.
2. Sortez le circuit imprimé.
3. Vous pouvez à présent brancher votre SSD M.2 dans
l'emplacement.
4. Fixez le module à l'aide des vis.
5. Faites coulisser le circuit imprimé avec le module dans le
boîtier.
6. Fermez le boîtier. Utilisez les vis pour xer le panneau au
logement.
7. Reliez le câble USB entre le boîtier et un port USB disponible
de votre ordinateur.
Installation du pilote
1. Allumez votre ordinateur.
2. Le lecteur externe est reconnu et vous pouvez immédiatement
commencer à l'utiliser.

-7-
Español
Contenido del paquete
• Carcasa externa de M.2
• Atornillador
• Material de montaje
• Cable USB-C™ macho a USB-C™ macho, longitud aprox. 45 cm
• Manual del usuario
Instrucciones de seguridad
• Proteja el producto contra el polvo
• Proteja el producto contra la luz solar directa
• Evite la electricidad estática cuando instale la unidad de estado
sólido
Hardware Instalación
1. Abra la carcasa con la ayuda del destornillador suministrado.
Quite los dos tornillos del lateral del conector USB y retire el
panel.
2. Extraiga la placa PCB.
3. Ahora enchufe la unidad de estado sólido M.2 en la ranura.
4. Fije el módulo con la ayuda de los tornillos.
5. Deslice la placa PCB con el módulo insertándola en la carcasa.
6. Cierre la carcasa. Utilice los tornillos para acoplar el panel a la
carcasa.
7. Conecte el cable USB a la carcasa y con un puerto USB
disponible de su PC.
Instalación del controlador
1. Encienda su PC.
2. La unidad externa será reconocida y podrá comenzar a utilizar
el dispositivo inmediatamente.

-8-
České
Obsah balení
• Externí pouzdro M.2
• Šroubovák
• Montážní materiál
• Kabel USB-C™ samec na USB-C™ samec, délka cca. 45 cm
• Uživatelská příručka
Bezpečnostní pokyny
• Chraňte produkt před vlhkostí
• Chraňte produkt před přímým slunečním světlem
• Vyhněte se anti-statické elektřině při instalaci SSD
Instalace hardware
1. Otevřte kryt pomocí dodaného šroubováku. Jen odšroubujte
dva šroubky na straně USB konektoru a odstraňte panel.
2. Vytáhněte PCB.
3. Nyní připojte do slotu váš M.2 SSD.
4. Připevněte modul pomocí šroubů.
5. Zasuňte PCB s modulem do skríně.
6. Uzavřete skříň. Pomocí šroubů připevněte panel ke skříni.
7. Připojte USB kabel ke skříňce a k volnému USB portu počítače.
Instalace ovladače
1. Zapněte počítač.
2. Je rozpoznán externí disk a můžete jej začít používat.

-9-
Polsku
Zawartość opakowania
• Kieszeń zewnętrzna M.2
• Śrubokręt
• Materiał montażowy
• Przewód USB-C™, męski na USB-C™, męski, długości ok. 45 cm
• Instrukcja obsługi
Instrukcje bezpieczeństwa
• Produkt należy zabezpieczyć przed wilgocią
• Produkt należy zabezpieczyć przed bezpośrednim światłem
słonecznym
• Podczas instalowania SSD należy unikać elektryczności
statycznej
Instalacja sprzętu
1. Otwórz obudowę przy użyciu dostarczonego śrubokręta.
Wystarczy odkręcić dwie śrubki znajdujące się z boku złącza
USB i zdjąć panel.
2. Wyciągnij płytkę PCB.
3. Podłącz dysk M.2 SSD do gniazda.
4. Przymocuj moduł za pomocą śrubek.
5. Wsuń płytkę PCB z modułem do obudowy.
6. Zamknij obudowę. Za pomocą śrubek przymocuj panel do
obudowy.
7. Połącz kabel USB ze złączem obudowy i wolnym portem USB
komputera.
Instalacja sterownika
1. Wyłącz komputer.
2. Napęd zewnętrzny zostanie wykryty automatycznie i od razu
można korzystać z urządzenia.

-10-
Italiano
Contenuto della confezione
• Alloggio esterno M.2
• Cacciavite
• Materiale di montaggio
• Cavo USB-C™ maschio - USB-C™ maschio, lunghezza
ca. 45 cm
• Manuale utente
Istruzioni per la sicurezza
• Proteggere il prodotto dall'umidità
• Proteggere il prodotto dalla luce solare diretta
• Evitare l'elettricità antistatica durante l'installazione dell'SSD
Installazione dell'hardware
1. Aprire l'alloggiamento con l'ausilio del cacciavite in dotazione
Basta rimuovere le due viti sul lato del connettore USB e
rimuovere il pannello.
2. Estrarre la PCB.
3. Collegare l'SSD M.2 nello slot.
4. Fissare il modulo con l'ausilio delle viti.
5. Far scorrere la PCB con il modulo nell'alloggiamento.
6. Chiudere l'alloggiamento. Utilizzare le viti per ssare il pannello
nell'alloggiamento.
7. Collegare il cavo USB all'alloggiamento e ad una porta USB
librera del computer.
Installazione del driver
1. Accendere il computer.
2. L'unità esterna viene riconosciuta ed è possibile iniziare ad
utilizzare immediatamente il dispositivo.

-11-
Svenska
Paketets innehåll
• Externt hölje M.2
• Skruvmejsel
• Monteringsmaterial
• Kabeln USB-C™ (hane) till USB-C™ (hane), längd ca 45 cm
• Bruksanvisning
Säkerhetsinstruktioner
• Skydda produkten mot fukt
• Skydda produkten mot direkt solljus
• Undvik antistatisk elektricitet när du installerar SSD:n
Hårdvaruinstallation
1. Öppna höljet med hjälp av den medföljande skruvmejseln. Ta
bort de två skruvarna på sidan av USB-kontakten och ta bort
panelen.
2. Dra ut kretskortet.
3. Koppla in din M.2 SSD i facket.
4. Fixera modulen med hjälp av skruvarna.
5. Skjut in kretskortet med modulen in i höljet.
6. Stäng höljet. Använd skruvarna för att fästa panelen till höljet.
7. Anslut USB-kabeln till höljet och till en ledig USB-port på
datorn.
Installation av drivrutiner
1. Slå på datorn.
2. Den externa enheten kommer att hittas och du kan börja
använda enheten omedelbart.

-12-
Română
Pachetul contine
• Incintă externă pentru unitate M.2
• Șurubelniță
• Material de montare
• Cablu USB-C™ tată la USB-C™ tată, lungime aprox. 45 cm
• Manual de utilizare
Instrucţiuni de siguranţă
• Protejaţi produsul împotriva umidităţii
• Protejaţi produsul împotriva luminii directe a soarelui
• Evitaţi electricitatea antistatică atunci când instalaţi SSD
Instalarea componentelor hardware
1. Deschideţi incinta cu ajutorul şurubelniţei furnizate. Scoateţi
două şuruburi de pe partea laterală a conectorului USB şi
scoateţi panoul.
2. Scoateţi placa de circuite imprimate.
3. Acum puteţi conecta unitatea SSD M.2 la fantă.
4. Fixaţi modulul cu ajutorul şuruburilor.
5. Glisaţi placa de circuite imprimate cu modulul în incintă.
6. Închideţi incinta. Utilizaţi şuruburile pentru a ataşa panoul pe
carcasă.
7. Conectaţi cablul USB la incintă şi la un port USB liber de pe
computer.
Instalarea driverului
1. Porniţi computerul.
2. Unitatea externă va recunoscută şi puteţi începe să utilizaţi
imediat dispozitivul.

-13-
Magyar
A csomag tartalma
• Külső ház M.2
• Csavarhúzó
• Rögzítőanyag
• Kábel USB-C™ csatlakozódugóval és USB-C™
csatlakozódugóval, hossza kb. 45 cm
• Használati utasítás
Biztonsági óvintézkedések
• Óvja a terméket a nedvességtől.
• Óvja a terméket a közvetlen napsugárzástól.
• Kerülje az elektrosztatikus kisüléseket az SSD beszerelése
közben
Hardvertelepítés
1. Nyissa fel a ház burkolatát a tartozékként kapott csavarhúzó
segítségével. Távolítsa el az USB-csatlakozó oldalán lévő két
csavart, és vegye le a panelt.
2. Húzza ki a PCB-t.
3. Csatlakoztassa az M.2 SSD-t a nyílásba.
4. Rögzítse a modult a csavarok segítségével.
5. Csúsztassa be a PCB-t a modullal a házba.
6. Zárja vissza a ház burkolatát. Erősítse hozzá a panelt a házhoz
a csavarok segítségével.
7. Kösse össze a házat és a számítógép szabad USB-
csatlakozóját az USB-kábellel.
Illesztőprogram telepítése
1. Kapcsolja be a számítógépet.
2. Megtörténik a külső meghajtó felismerése, és azonnal
használatba veheti az eszközt.

-14-
Hrvatski
Sadržaj pakiranja
• Vanjski Kućište M.2
• Izvijač
• Materijal za montiranje
• Kabel USB-C™ muški na USB-C™ muški, duljina oko 45 cm
• Korisnički priručnik
Sigurnosne upute
• Zaštitite proizvod od vlage
• Zaštitite proizvod od izravne sunčeve svjetlosti
• Izbjegavajte antistatički elektricitet prilikom postavljanja SSD-a
Ugradnja hardvera
1. Otvorite kućište pomoću priloženog odvijača. Samo uklonite
dva vijka na strani USB priključka i uklonite ploču.
2. Izvucite tiskanu pločicu.
3. Sada ukopčajte M.2 SSD u utor.
4. Vijcima pričvrstite modul.
5. Ukližite tiskanu pločicu s modulom u kućište.
6. Zatvorite kućište. Vijcima pričvrstite ploču na kućište.
7. Spojite USB kabel na kućište i na Slobodan USB priključak na
računalu.
Instalacija upravljačkog programa
1. Uključite vaše računalo.
2. Vanjski pogon će se prepoznati i moći ćete odmah početi s
upotrebom uređaja.

-15-
ελληνικά
Περιεχόμενα συσκευασίας
• Εξωτερικό περίβλημα M.2
• Κατσαβίδι
• Υλικό στερέωσης
• Καλώδιο USB-C™ αρσενικό σε USB-C™ αρσενικό, μήκους
περ. 45 cm
• Εγχειρίδιο χρήστη
Οδηγίες ασφάλειας
• Προστατεύστε το προϊόν από την υγρασία
• Προστατεύστε το προϊόν από την άμεση ηλιακή ακτινοβολία
• Αποφύγετε στατικό ηλεκτρισμό όταν τοποθετείτε τη μονάδα SSD
Εγκατάσταση υλικού
1. Ανοίξτε το περίβλημα με τη βοήθεια του κατσαβιδιού που
παρέχεται. Απλά αφαιρέστε τις δύο βίδες στην πλευρά του
συνδέσμου USB και αφαιρέστε το πλαίσιο.
2. Τραβήξτε προς τα έξω την πλακέτα τυπωμένου κυκλώματος
(PCB).
3. Τώρα τοποθετήστε την M.2 SSD σας μέσα στη θύρα.
4. Επιδιορθώστε τη μονάδα χρησιμοποιώντας βίδες.
5. Ωθήστε την PCB μαζί με τη μονάδα στο εσωτερικό του
περιβλήματος.
6. Κλείστε το περίβλημα. Χρησιμοποιήστε τις βίδες για να
στερεώσετε το πλαίσιο στο περίβλημα.
7. Συνδέστε το καλώδιο USB με το περίβλημα και μία ελεύθερη
θύρα USB του υπολογιστή σας.
Εγκατάσταση προγράμματος οδήγησης
1. Ενεργοποιήστε τον υπολογιστή σας.
2. Η εξωτερική μονάδα θα αναγνωριστεί και μπορείτε να
ξεκινήσετε χρησιμοποιώντας τη συσκευή αμέσως.

Declaration of conformity
Products with a CE symbol fulll the EMC directive (2014/30/EU)
and RoHS directive (2011/65/EU+2015/863), which were released
by the EU-comission.
The declaration of conformity can be downloaded here:
http://www.delock.de/service/conformity
WEEE-notice
The WEEE (Waste Electrical and Electronic Equipment)-directive,
which became eective as European law on February 13th 2003,
resulted in an all out change in the disposal of disused electro
devices. The primarily purpose of this directive is the avoidance
of electrical waste (WEEE) and at the same time the support of
recycling and other forms of recycling in order to reduce waste.
The WEEE-logo on the device and the package indicates that the
device should not be disposed in the normal household garbage.
You are responsible for taking the disused electrical and electronical
devices to a respective collecting point. A separated collection
and reasonable recycling of your electrical waste helps handling
the natural resources more economical. Furthermore recycling
of electrical waste is a contribution to keep the environment and
thus also the health of men. Further information about disposal of
electrical and electronical waste, recycling and the collection points
are available in local organizations, waste management enterprises,
in specialized trade and the producer of the device.
EU Import: Tragant Handels- und Beteiligungs GmbH
Beeskowdamm 13/15, 14167 Berlin, Germany
Table of contents
Languages:
Other DeLOCK Enclosure manuals

DeLOCK
DeLOCK 42365 User manual

DeLOCK
DeLOCK 42635 User manual

DeLOCK
DeLOCK SuperSpeed 42636 User manual

DeLOCK
DeLOCK 42593 User manual

DeLOCK
DeLOCK 42513 User manual

DeLOCK
DeLOCK 42019 User manual

DeLOCK
DeLOCK SuperSpeed 42015 User manual

DeLOCK
DeLOCK 42638 User manual

DeLOCK
DeLOCK 42633 User manual

DeLOCK
DeLOCK 42595 User manual
Popular Enclosure manuals by other brands

AirClean systems
AirClean systems POWDERSAFE AC794BE Operator's manual

Pioneer
Pioneer UD-SW120D instruction manual

hager
hager univers Mounting instructions

Extron electronics
Extron electronics Cable Cubby 300C user guide

Aquadart
Aquadart ASINO 6 installation instructions

Vantec
Vantec NexStar LX user manual