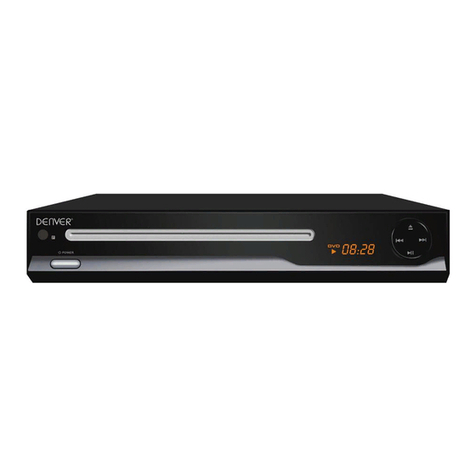
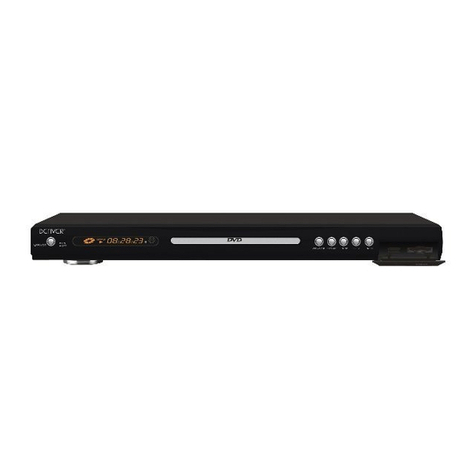
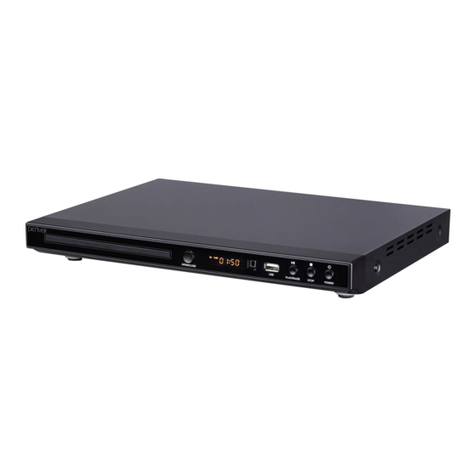
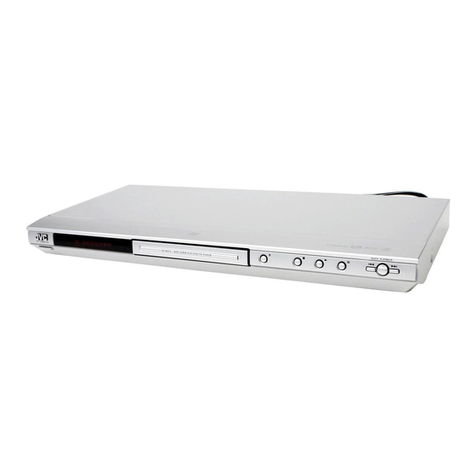
Denver DVH-1238DVBT User manual

1

Important Safety and Function Instructions
To reduce the risk of fires and electric shocks, do not expose this unit to rain or moisture.
CAUTION: To reduce the risk of fire and electric shock, do not remove the cover (or back) of the unit. Refer
servicing only to qualified service personnel.
This lighting flash arrowhead symbol, within an equilateral triangle, is intended to alert user to the presence of
un insulated dangerous voltage within the product’s enclosure that may be of sufficient magnitude to constitute
a risk of electric shock to persons.
The exclamation point within an equilateral triangle is intended to alert user to the presence of important
operation and maintenance (servicing) instructions in the literature accompanying the appliance.
The marking of products using lasers. The making will be shown at the rear panel of the unit, means the unit
have been classified as Class 1, and is utilizing laser beams that are of weaker class. There is no danger of
hazardous radiation outside the unit.
Invisible laser radiation when open and interlock failed or defer avoid direct exposure to laser beam
SELECT A DVD DISC
DVD discs and DVD players are manufactured under the worldwide agreed DVD regional code system that the
player will operate only with corresponding disc of the same regional code. DVD regional CODE:
Regional Code Region
1 Canadá, USA
2 Europe (incl. Poland, Romania, The Czech republic), Japan, Middle East
(incl. Saudi Arabia, Egypt, Iran, south
3 East Asia (incl. Hongkong, Taiwan, South Korea), South-East Asia
4 Australia, Caribbean, Central & South America, Mexico, New Zealand
5 Africa, Former Soviet Union, India, North Korea, Pakistan
6China
Important Safety and Function Instructions
When using this DVD player, basic precautions should always be followed, including the following.
1) Read these instructions
2) Keep these instructions
3) Heed all warnings
4) Follow all instructions
5) Do not use this apparatus near water
6) Clean only with dry cloth
7) Do not block any ventilation opening. Install in accordance with manufacturer’s instructions.
8) Do not install near any heat sources such as radiators, hear registers, sloves, or other apparatus
(including amplifiers) that produce heat.
9) Do not defect the safety purpose of the polarized plug. A polarized plug has two blades with one wider
than the other. The wide blade is provided for your safety. If the provided plug does not fit into your
outlet, consult an electrician for replacement of the obsolete outlet.
10)Protect the power cord from being walked on or pinched particularly at plaugs, convenience
receptacles, and the point where they exit from the apparatus.
11) Only use attachments/accessories specified by the manufacturer.
12) Use only with the cart, stand, tripod, bracket, or table specified by the manufacturer, or sold with the
apparatus. When a cart is used, use caution when moving the cart/apparatus combination to avoid
injury from tip-over.
13)Unplug this apparatus during lighting storms or when unused for long periods of time.
14) Warning: To reduce the risk of file or electric shock, do no expose this apparatus to rain or moisture.
15) Refer all servicing to qualified service personnel. Servicing is required when the apparatus has been
damaged in any way, such as power-supply cord or plug is damaged liquid has been spilled or objects
have fallen into apparatus, the apparatus has been exposed to rain or moisture, dose not operate
normally, or has been dropped.
2

WARNING:To reduce the risk of fire or electric shock, do not expose this apparatus to rain or
moisture. The apparatus shall not be exposed to dripping or splashing and that no objects filled with
liquids, such as vases, shall not be placed on apparatus.
WARNING:The battery (battery or batteries or battery pack) shall not be exposed to excessive heat
such as sunshine, fire or the like.
WARNING: The mains plug is used as disconnect device, the disconnect device shall remain readily
operable.
This is CLASS II apparatus with double insulation, and no protective earth provided.
Invisible laser radiation when open and interlocks defeated. Avoid exposure to beam of laser.
“THE DISPOSAL OF ELECTRICAL AND ELECTRONIC EQUIPMENT WASTE PRODUCTS ON THE PART
OF FINAL USERS IN THE EUROPEAN UNION”
This symbol on the product or on the container indicates that this product cannot be eliminated with the general
waste. The user is responsible for eliminating this kind of waste by throwing them away at a “recycling point”
specifically for electrical and electronic waste. Selective collection and electrical equipment recycling contribute
to preserve natural resources and warrant waste recycling to protect environment and health. In order to
receive further information about electrical and electronic waste collecting and recycling, contact your Local
Council, the service of household waste or the establishment where the product was acquired.”
Remote control
1. Power ON/OFF
2. OPEN/CLOSE: opens or closes the disc tray subtitle languages
3. PROG
4. SUBTITLE: display the dialogue in different language. COPY: Press
COPY button to copy AVI, CD or movies to hard disc or USB
5. DISPLAY: displays information on the playback status on the TV
screen. Display program detail mation
6. Repeat key: this key is used to return to previous menu of system
setup or PBC operation.
VCD, CD, AVI Playback:Repeat1, Repeat ALL and OFF
DVD, AVI Playback: Repeat Charpter, Repeat Title, Repeat ALL
and OFF
7. STEP: To change the picture to next frame
8. A-B key: setup repeat play segment
9. V-MODE: choose the AV sources
10. ZOOM make the size of the object being photographed appear
bigger/smaller
11. N/P: select the TV system, PAL or NTSC
12. PBC: To select PBC on OR PBC off during VCD / SVCD playback
13. TEXT/TITLE: display the chapter number
14. TV/RADIO: To change the TV/RADIO mode
15. DVD/DVB: Switch working mode between DVD and DVB-T
16. AUDIO: To switch the sound mode between left, right and stereo
17. SETUP: the device setting
18. RETURN: when PBC on, select item
19. UP ARROW
3

20/21. DIRECTIONAL BUTTON
22. ENTER key: opens or closes the disc tray/confirm your selection
23. Angle key: select various angle to view.
24. USB/CARD: in stop mode, press USB/CARD button to show dialog on TV screen for choose read
USB/CARD or disc.
25. DOWN ARROW
26. STOP. To stop and hold playback. PVR:When working in DVB-T mode, choose the TV channel you
want to record
27. PLAY/PAUSE
28. VOL+/VOL- raise/lower the volume level a little
29. INFO
30. MUTE: To turn off / resume the sound
31. Numerical Key: press the number keys to make a direct selection
32. GO TO: setting the time of the device
33-35. Press it to play fonward and backward
34-36. Press it to play PREV and NEXT
37-38-39-40. When turn into DVB mode, press red, yellow, green, blue button to search page, this function
is based on DVB mode with teletext.
38. FAV: Save favorite channels
41. MENU: press this button to change the configuration of the DVB-T module
42. EPG: EPG/PBC Electronic program guide (it Depends on the service) Switch PBC on/off
USB/CARD
Choose this button to setup DVD and USB mode
Disc only: if you’re only playing Disc (but no usb and card), after you put disc into the tray then it will play disc
automatically.
USB or Card Only: if you’re only playing USB or Card (but no Disc), after you insert USB into USB port or insert
Card into card reader, you have to press 'USB' button on the remote control, then you can see Disc shown on
the screen, press UP/DOWN button to choose USB or Card and then press Enter button to confirm.
USB/Card Reader/DISC: if you put disc in the tray, insert USB into the USB port and SD/MMC/MS Card into
card reader at the meantime, then it will play the disc automatically, if you want to switch to play USB or Card,
you have to press 'stop' button, then press 'USB' button and choose USB or Card by pressing “up/down”
button, then press “enter” button to confirm. And if you want to switch to the “Disc” again, then also you have to
press “stop” button, then press “USB” button again, choose “DISC” and press “Enter” button thus could play
disc.
Notice: USB-Extension cable should have a max. length of 25cm
CD RIPPING
1. CD DISK
After read CD, plug USB into USB port, press COPY button, there are OPTIONS, TRACKS, START and QUIT
displayed on screen, if you want to copy all songs,use down direction button move cursor to START and press
ENTER; if you want to make selective copy, use down direction button move cursor to TRACKS and press right
button to move cursor to TRK, press ENTER, all songs displayed on screen,then use down button to select the
song you desired to copy, return cursor to START and press ENTER to begin copy.
2. AVI DISK
After read AVI disc, press STOP/RETURN to enter into songs selecting, select the song you disired to copy,
then press COPY to begin copy.
SCART CABLE
4

Max. length of Scart-cable shall not exceed 2 m.
FRONT PANEL AND REAR PANEL ILLUSTRATION
FRONT PANEL
The front of the DVD player
1. STANDBY
2. CD DOOR
3. OPEN/CLOSE
4. PREV
5. STOP
6. PLAY/PAUSE
7. NEXT
8. SD/MMC/MS CARD FAUCET
9. REMOTE SENSOR
10. USB FAUCET
The back of the DVD player
1. RIGHT output jack
2. Digital signal COAXIAL output jack
3. Pr/Cr output jack
4. S-Video output jack
5. OPTICAL output jack
6. RF IN
7. RF LOOP
8. LEFT output jack
9. Y output jack
10. Pb/Cb output jack
11. VIDEO output jack
12. Scart output jack
13. POWER
The supplied remote can be used to control the player. Insert two “AAA” type batteries into the compartment,
matching and as indicated on the inside of the battery housing. The remote must be pointed directly at the
player.
NOTE:
1. Avoid exposing the remote control to extremes of temperature e.g. direct sunlight.
2. Ensure that no foreign objects enter the battery housing, especially metal objects.
3. If the player’s infra-red sensor is bathed in strong direct sunlight, or intense artificial light, then it may
not be able to detect signals sent from the handset.
4. If the remote is not to be used for an extended period then please remove the batteries to avoid
leakage and corrosion.
5

Connecting to TV
Note: Before connect this STB to other devices, please SHUT DOWN all devices.
Put the terrestrial aerial’s connector jack into the STB receiver’s “ANTENNA IN
2 socket on its rear panel. “ANTENNA OUT” socket also can be connected to another STB, which provides
same aerial signals.
Plug the STB’s power cord into the AC90~230 power socket on the wall. The STB starts in a normal state of
“playback the program that is received”.
Plug the STB’s power cord into the AC100~220V power socket on the wall. The STB starts in a normal state of
“playback the program that it received”.
IF STB “NOT” PLAY THE PROGRANM REFER TO 1.4.2 “AUTO SEARCHING” IN USER MANUAL.
WORKING IN DVB MODE
1. First Installation
1.1. At the First time Installation menu, select YES and press ENTER on the remote controller to
proceed.
1.2. Enter your regional settings, include your country, OSD language and select area. Make sure to
select the country you are located. The player will scan the channels based on the bandwith of the
country you selected. Then select NEXT to proceed.
1.3. Select YES to start the automatic channel search.
1.4. Wait to complete the scanning. “To stop the scanning, press the STOP key. The channels already
found will still be stored.
1.5. When finished, all active channels found will be stored automatically. The first found channel will
be played. Now you are ready to watch digital terrestrial TV channels and radio broadcasts. In case
you skip the First Time Installation screen, you can still specify your regional settings and conduct
channel scan via the on-screen setup menu.
2. Basic Operations
Once channel search is completed, you can start to watch digital terrestrial TV channels and radio
broadcasts. Some typical operations are given in this chapter.
2.1. Freezing
When watching a channel, you can freeze the current screen by pressing the Pause key. Pressing it
again to resumes play.
2.2. Watching Favorite List
You can press the left right keys to watch your preset favorite channels in corresponding group (eg.
Favor, News, show, movie group). To create your favorite list, go to Main Menu > Program List.
2.3. Displaying information
Press the “INFO” key to display the detailed information of the current channel.
2.4. Choosing Subtitle
You can press the Subtitle key to select *subtitles on the screen. The available subtitles depend on the
broadcaster.
2.6. Displaying EPG
To view the EPG (electronic program guide) provided by the content provider:
6

Press the EPG key and then highlight a desired channel to preview the EPG.
To view today’s complete EPG, press the Right key.
When EPG is displayed, use the Up/Down key to select channel. To view the EPG of next/previous
day. Press the left/right key to see the highlighted EPG details.
2.7. Volume Control
Adjust volume: Press Volume+/Volume- key on the remote controller at No menu state.
Mute: Press Mute key on the remote controller at No menu state.
2.8. Displaying text
Press the TEXT key to open a teletext page (if teletext is transmitted). Press TEXT key again to close
it.
2.9. HDMI Function
1.Connect HDMI cable HDMI output of the rear panel of DVD player and TV.
2.Set TV mode to'HDMI' mode.
3.Press'setup'button on remote control,in system setup/HD output,please chooes the HDMI
mode(720P,1080i,1080P)you want.
3. Using the On-Screen Setup Menu
3.1. TV Channel
When enter the TV channel menu, there would be the electronics programme guide, such as the
window of the video, programme introduction and channel Nº. And may full screen display if press
ENTER key. Press the OSD/INFO key to view the channel with order A-Z, Z-A.
3.2. Radio Channels
When enter the RADIO channel menu, there would be the electronics programme guide, programme
introduction and channel Nº.
And may full screen display if press ENTER key. Press the DISPLAY key to view the channel with
order A-Z, Z-A.
3.2.1. Channel Class
Under the menu of channel class. This feature allows you to group your favorite channels into news,
movie and show category to create your favorite groups.
3.2.2. Channel Edit
When you enter the TV channel edit menu, select the TV channel, press the ENTER key, then MOVE
or DELETE to edit the channel list.
3.2.3. DVB Booking
This feature allows you to book 15 programmes in advance, but the programmes can’t be on at the
same time. Under the interface of EPG, press ENTER the book the TV program to book, double press
ENTER key to cancel the booking. The program booked would be display in yellow & green highlight.
3.2.3.1. Book under menu interface
Under the menu of channel guide, enter the interface of book list, the program would display as list,
press ENTER key to edit the booked programme. Press left key to delete, press right key to add new
booking.
3.3. System Config
This feature allows you to set your device to your personal preferences.
3.3.1. Video Setting
Enter the video setting menu, screen display as below: BRIGHTNESS, CONTRAST, HUE,
SATURATION
You may select the setting you want.
3.3.2. Audio Setting
Change your sound settings.
3.3.3. Language
The feature allows you the choose the system language.
3.3.4. Parent Control
When you select “Parent Control” menu, you can set lock or modify your Pin code. The default Pin
code is 8888.
3.3.5. Time Setting
You may set the time, time zone and sleep function on the menu.
3.3.6. System Info
This features contains the software version, tuner version, system info.
3.4. Installation
7

If the STB does not play the program. Please enter the menu.
3.4.1. Auto Scan
The feature allows you the auto scan the programme, in the interface of autoscan, first select area and
then startscan, the system may auto scan and store the TV programme.
3.4.2. Manual Scan
You may preset the area, scan type and start channel in advance, and start scan by pressing enter.
3.4.3. Default setup
From this menu, we can select “Default Setup” menu. Delete all the data currently saved, and reset the
system to the default status. If program is playing, it will be aborted. The system will enter First Time
Installation menu.
3.4.4 Read memory card
3.4.4.1 This player default read disc.
3.4.4.2 Default read USB/Card directly if no disc in player.
3.4.4.3 Please use button USB/CARD to select what you want to read when player having
disc/USB/memory card in
3.4.4.4 Select file in USB/card what you want to play.
Note: this player can support max 2GB memory card
3.5 PVR OPERATION
(NOTE: some usb stick with low speed cannot be used for this PVR function)
3.5.1 When working in DVB-T mode, choose the TV channel you want to record, insert U-stick or removable
HARD-DISK into the unit.
Note: The memory capacity of storage medium must be enough to save the TV program.
3.5.2 Press 'PVR' on remote control, and then it starts recording, at the meantime, on TV screen, it will also
show 'Record starting....'
3.5.3 then player will automatically detect the U-stick or removable HARD-DISK, if the TV screen shows
'Good USB write speed', then, pls. continue recording as it is, but, if the TV screen shows 'Bad USB write
speed', then pls. change another good USB for recording.
3.5.4 Press STOP/PVR button on the remote control to start recording . Then player will check the storage
mediums automatically first , if storage mediums damaged or not inserted properly, invalid symbol will be
shown .
Note : Length of time to record the TV depends on the memory capacity of storage mediums.
3.5.5.1 Press Setup on the remote control and into Book List, select Enter,
and then, press Right arrow key in remote to effect Timer recording.
3.5.5.2 you can also book timer in EPG mode. Choose the program by using Arrow keys and confirm with
Enter button on the remote – afterwards, you have to enter Book List to set Recorder to ON – now the
Timer is set
3.5.6 Press STOP/PVR on the remote control again to stop recording .
Note : When storage mediums are filled in , player will show the prompt and quit PVR mode automatically.
8

3.6. Games
The system with 3 games, Boxman, Burning Tetris, Hit Rat.
Game Operations:
1. Pause the game: Press the “Enter” button on the remote control.
2. Move: Press the “up/down/left/right” button to move the object.
3. Rotate: Press the “UP” button to change the direction of tetris.
A) Menu Play (compatile with DVD ETC discs)
a) Press Menu Button TV screen displays the DVD Root Menu when a DVD disc is loaded.
b) When a DVD disc is loaded, you can press Arrow buttons to highlight the menu item you want to
choose.
c) Press Enter or Play button, you can begin play with the highlighted.
d) Return when playing: When a DVD disc is playing, press Menu button, and you can return to Root
Menu.
e) Stop
- When you press Stop button for the first time, the player tums into pre stop state. At the same time the
OSD appears “pre Stop”. To begin the title over, press Stop twice.
Select Rat-Press “0-9” number botton to select the rat that you want to hit.
Exit: Press the “Setup” or “exit” button to exit.
- In pre stop state, the player remembers where you stopped, when you start playing the disc again, the
DVD player picked up where you left off.
- In stop state, when you press Play, the player enters sequence playback mode.
- For the disc protection, before you press Open / Close button to eject the disc tray when playing, please
press Stop button at first. After taking out the disc, press Open / Close again to close the tray.
- You’re not going to use the DVD player for a long time, be sure to remove the electronic plug.
B) Title Play (compatible with DVD discs only)
a) During DVD playback, press Title button to display the DVD title content.
b) Press the Arrow buttons to highlight the title you want to choose, and press Enter; Also you can press
numeric buttons to choose.
c) The DVD player begins with the chapter 1 of the chosen tittle.
C) Program Play (compatible with DVD, CD, ETC discs)
The Program Playback options allows you to enter the order you want then to play. Then press Play or use
Arrow buttons to highlight the “PLAY” item and press Enter. The chapters / tracks will play in the
programmed order.
You can program maximum 16 titles / chapters / tracks.
- According to the Direction indicator on the menu, you can press Arrow buttons to highlight where you
want to enter.
- During Program Playback, if Program button pressed, the programmed order and the contents will be
displayed on the screen, and the Program Playback will order in which you want chapters or tracks to play,
maximum to 16.
DVD discs:
Operation will turn PBC off
While the chapters / tracks plays in programmed order.
- According to the highlight, use the Numeric buttons to enter the chapters / tracks in the be stopped; Also
you can press Stop and Play to resume normal playback.
Notes:
To clear the programmed order, use Arrow buttons to highlight the “CLEAR” item, then press Enter.
Chapter 2 Additional Operation
1. Skipping Tracks (compatible with DVD ETC discs)
A) Skip forward to the beginning of the next title / chapter / track ona disc, press Next on the remote or
the front of the player.
B) Skip backward to the beginning of the preceding title / chapter / track on a disc, press Prev on the
9

remote or the front of the player.
C) If a DVD disc is loaded, it varies according to how the disc was configured.
2. Multispeed Fast Motion Playback (compatible with DVD, CD ETC discs)
You can search in forward or reverse mode during playback.
A) Press the F.F. button on the remote during playback to search through a disc. Press the button
again on the remote to search at the next speed. Fast Forward Playback has four speeds: x 2, x 4, x 8,
x 20. With each consecutive press of the button, the search speed increases. If you press the button
five times, Fast Forward Playback cycles back to normal playback speed.
During DVD playback, when Fast Forward Playback gets to the beginning of the next title / chapter, it
resumes normal playback.
a) Press Play button to resume normal playback.
B) Press the F.R. button on the remote during playback to search through a disc. Press the button
again on the remote to search at the next speed. Fast Reverse Playback has four speeds: x 2, x 4, x8,
x 20. With each consecutive press of the button, the search speed increases. If you press the button
five times. Fast Reverse Playback cycles back to normal playback.
During DVD playback, when Fast Reverse Playback gets to the beginning of the playing title / chapter,
it resumes normal playback.
a) Press Play button to resume normal playback.
3. Multispeed slow motion playback (compatible with DVD discs)
Press slow button when pictures moving, you can enter slow motion playback mode.
Press the slow button on the remote during playback. Press the button again on the remote to play at
the next speed. Slow motion playback has six speeds: 1/ 2, 1/ 3, 1/ 4, 1/ 5, 1/ 6, 1/ 7. With each
consecutive press of the button, the play speed decreases. If you press the button seven times, Slow
Motion Playback cycles back to normal playback. Press Play button to resume normal playback.
4. Freeze Frame and Frame Advance (compatible with DVD, CD ETC discs)
A) During CD ETC playback, press Pause once to freeze playback. Pres the Pause button again or
Play button to resume normal playback.
B) During DVD playback, press Pause once to freeze playback; Press of the Pause button again to
advance the picture one frame at a time; Press Play to resume normal playback.
5. Using the Repeat Feature (compatible with DVD, CD ETC discs)
While a disc is playing, press Repeat button once, and the repeat banner appears to show current
repeat mode.
A) In CD, ETC sequence playback mode, press Repeat button again to turn on repeat mode.
Press the button again on the remote to turn to the next repeat mode. There are three repeat options:
Off, Track Repeat, and Disc Repeat. With each consecutive press of the button, the repeat mode
switches. If you press the button four times, repeat mode cycles back to Off.
B) In DVD playback, press Repeat button again to turn on repeat mode.
There are three repeat options: Off, Chapter Repeat, and Title Repeat. With each consecutive press of
the button, the repeat mode switches. If you press the button four times, repeat mode cycles back to
Off.
C) In ETC playback, press Repeat button again to turn on repeat mode.
There are four repeat options: Off, Track Repeat, Directory Repeat, and Disc Repeat.
With each consecutive press of the button, the repeat mode switches. If you press the button five
times, repeat mode cycles back to Off.
6. Using the Display Feature (compatible with DVD, CD ETC discs)
Subtitle */* (the serial number of playing subtitle / the amount of optional subtitles) or Off, Angle */* (the
serial number of playing angle / the amount of optional angles) or Off.
Press the button for the third time, the display menu fades out.
a) Loading and playing CD ETC discs. Press Display button once to show the first page: “Disc Type,
Track */* (the playing track / total tracks), Mute, Repeat Mode, Elapsed Time of the Playing Track”.
Press the button again, the display menu fades out.
7. Using the Search Feature (compatible with DVD, CD ETC discs)
You can use Search feature to select a title / chapter / track number or go to a specific point in a title.
Firstly, press Search (Go to) button on the remote controller to bring up the search menu and enter the
edit state; Secondly, press Arrow buttons to highlight the title / chapter / track number or the time
option; Thirdly, use Numeric buttons to enter the title / chapter / track you want to play or the elapsed
time you want to go to in that title; At last, press Enter button to start playback. For example, entering
01:23:56 will start playback one hour, twently-three minutes and fifty-six seconds into the title. If the
input number is illegal, the error information “INVALID KEY” will be displayed on the screen.
Notes:
10

This feature does not work in Program Play mode.
If PBC is on, it will turn off automatically when Search Playback starts.
8. Changing the Soundtrack (compatible with CD ETC discs)
A) Press the button can switch soundtracks.
B) Press the button again on the remote to turn to next soundtrack.
When playing a CD, or ETC disc, there are four: Stereo (L/R), L/L and mix mono R/R,
9. Changing the Audio Language (compatible with DVD ETC discs)
During disc playback, press Audio on the remote once, and the audio language info banner appears.
When a DVD ETC is recorded with multiple soundtracks, you can use the Audio feature to temporarily
change the audio language (the language of the soundtrack).
There are 8 supported languages: German,Danish, Spanish,Portuguese,Swedish,English and Off. With
each consecutive press of the Audio button, the audio language switches and the corresponding serial
number appears on the screen. For example, “Language Icon: (1 English DTS 6CH) or (Off)” (the
availability of the languages are disc-dependent).
10. Subtitles (compatible with DVD ETC discs)
Press the Subtitle button on the remote once, and the subtitle info banner appears.
When a DVD ETC is recorded with subtitles, you can use the Subtitle feature to view the subtitles on-
screen. By default, subtitles are off. The info banner will display Subtitle Off.
To display subtitles, press the Subtitle button again. The default language with its corresponding serial
number will be displayed in the info banner and subtitles will be displayed in that language. There are 8
supported subtitles: Chinese, English, Japanese, French, Spanish, Portuguese, German and Latin.
With each consecutive press of the Subtitle button, the subtitle switches. For example, “Language Icon:
(1 English DTS 6CH) or (Off)” (the availability of the languages are disc-dependent). To turn subtitles
off, press the Subtitle button until Subtitle Off is displayed.
11. Changing the Camera Angle (compatible with DVD discs)
During disc playback, press Angle on the remote once, and the angel icon appears. Some DVDs
contain multiple angles of a particular scene or sequence, so you can use the Angle feature to view.
Press the Angel button again to go to the next camera angle. If multiple camera angles are available,
the Angle icon displays the current angle number and the number of angles available. For example:
“Angle Icon: (*/*) or (Off)”; 1 / 3 indicates that angle one is being displayed, and there are three different
angles available. (This feature is disc-dependent. If no additional camera angles are available, the
“Invalid Key” will be displayed.)
12. Changing the TV System (compatible with DVD, CD ETC discs)
Press P / N button on the remote to display current TV system. Press the P / N button again to change
to the next TV system. There offers four systems: NTSC, PAL and AUTO. With each consecutive press
of the P / N button, the TV system switches. If you press the button five times, the TV system cycles
back.
Notes:
If AUTO TV system selected, it can auto reach the highest definition depends on the disc.
If it isn’t full screen state (note: Wide Screen program would never reach full screen state) or in black
and white, press the P / N button to adapt TV System to the TV set of NTSC or PAL.
When playing in different TV system, some discs may not have their features entirely fulfilled in some
certain standard.
Auto System of TV set is recommended
13. Mute the Audio Output (compatible with DVD, CD ETC discs)
Pressing the Mute button allows you to reduce sound to an inaudible level, and “MUTE” will be
displayed on screen. Press the button again or press the Vol +/- button to return to the normal
condition.
14. Zoom in the Video Image (compatible with DVD ETC discs)
The Zoom Function allows you to enlarge or zoom out the video image and to pan through the image.
Press Zoom repeatedly to activate the function and choose the required zoom factor:
(Zoom 1, Zoom 2, Zoom 4, Zoom 1 / 2, Zoom 1 / 3, Zoom 1 / 4, Zoom Off)
Note
This feature does not work when the Disc Menu appears.
Use the Arrow buttons to pan across the screen when the zoom factor is 1, 2 or 4.
15. Repeat a Specific Segment on the Disc that You Define (compatible with DVD, CD ETC discs)
A) During the normal or fast motion playback, press the A-B button once, and “REPEAT A-” will
appears on the screen. This indicates the start of the loop to be repeated.
B) During the normal of fast motion playback, press A-B again, and “REPEAT A-B” will appears on the
11

screen. It indicates the end of the loop.
C) Looping will run from set point A to set point B until you turn off Repeat.
- Press A-B again to cancel A-B loop mode.
- When playing a DVD disc, you can repeat a specific segment only in one title / chapter.
16. Through USB read WMA, JPG discs (files)
Player can read WMA, JPEG discs (files) through USB
17. Volume control (compatible with DVD, CD ETC discs)
You can press the Volume button on the front of TV set or the amplifier to control the sound level.
Pressing the Vol+ button on the remote allow you to amplify the sound level; Pressing Vol- will reduce
the sound level.
Chapter 3 The Setup Menu System
1. General Steps of Setup Menu
A) Press the Setup button, the main setup menu appears.
When the main menu displayed, the DVD system will auto pause.
B) Press the Left and Right arrow buttons to highlight the icon of the desired page, then press the
Down or Right arrow button to activate that page; for example, if you want to setup the video page,
press Right to highlight the video icon, the video page will be displayed on the screen.
A) Press the Down arrow button to highlight the desired option. Press Enter or press Right to select,
the choices of that option appear on the right. For example, press the Down arrow button to hightlight
the BRIGHTNESS option, then press Enter to select, the brightness choices appear on the right.
B) Press the Arrow buttons to highlight the Exit Setup option, then press Enter or Setup again to exit
Setup Menu.
2. Setup Items Introduction
A) TV SYSTEM
According to the Colour System of the TV, you can choose the TV System.
a) AUTO: Choose this settings if your DVD player is connected to a multi-system TV.
b) NTSC: Choose this setting if your DVD player is connected to a NTSC TV.
c) PAL: Choose this settings if your DVD player is connected to a PAL TV.
B) SCREEN SAVER
If the screen saver is on, when your DVD player is in Stop, Open, or No Disc state, or there is a frame
frozen for more than 3 minutes, the screen saver will be displayed. This feature can protect the screen
from damage.
a) ON: Choose this setting to activate the screen saver.
b) OFF: Choose this setting to cancel the screen saver. The default setting is ON.
C) VIDEO
TV-RGB: Choose this setting if your DVD player is connected to a TV with an S-Video cable composite
video cables.
a) P-SCAN: Choose this setting if your DVD player is connected to a progressive scan TV with Y, Cb,
Cr video cables.
Notes:
When your DVD player output composite video, you can choose the setting randomly. Choose TV-
RGB / P-SCAN if your DVD player is connected to a progressive scan TV.
D) TV TYPE
a) 16 : 9 (Wide Screen): Choose this setting if your DVD player is connected to a wide screen TV. If
you choose this setting and you don’t have a wide screen TV, the images on the screen may appear
distorted due to vertical compression.
b) 4 : 3 LB (Letter Box): Choosing this setting if your DVD player is connected to a normal ratio TV,
connector. You’ll see the movies in their original aspect ratio (height-to-with ratio). You’ll see the entire
frame of the movie, but it will take up a smaller portion of the screen vertically. The movie might appear
with black bars at the top and bottom of the screen.
c) 4 : 3 PS (Pan & Scan): Choosing this setting if your DVD player is connected to a normal ratio TV.
You can fill the movie to the entire screen of your TV. This might mean that parts of the picture (the left
and right edges) won’t be seen.
Notes:
The image display ratio is related to the recorded disc format. Some disc can not display images in the
aspect ratio you choose. If you play a disc recorded in 4:3 format on a wide screen TV, black bars will
appear on the left and right side of the screen.
You must adjust the screen setting depending on the type of the television you have.
E) PASSWORD
The password option is initialized locked, and you cannot set the ratings limit or change the password.
In order for the Ratings feature work, the password mode must be turned on. If you want to set the
12

ratings limit, you will need to enter the default password, which is 8888, then press Enter to confirm. To
change the password, you will be prompted for the old password, then be prompted for a new. Enter a
4-digit number (this is your password).
F) RATING
The Rating feature is a rating limit system, like movie ratings. It works with DVD discs that have been
assigned a rating. This helps you control the types of DVDs that your family watches.
a) and KID SAFE.
b) Select the VIEW ALL option to cancel the rating limit.
The default setting is VIEW ALL.
Notes:
If the password option is locked, you cannot set the ratings limit; the rating limit does not work when
the password option unlocked.
G) DEFAULT
Choose this option to resume all the setup options to default settings.
a) OSD LANGUAGE
Highlight the OSD language option, and press the arrow buttons to choose the OSD language you
prefer, press enter to confirm, and it will display OSD in that language.
B) AUDIO LANG
Highlight the audio language option, and press the arrow buttons to choose the audio language you
prefer, press enter to confirm, if the disc you are playing has that language available, it will output audio
in that language; there are 6 optional audio languages:
German,Danish,Spanish,Portuguese,Swedish,English and Off.
C) SUBTITLE LANG
Highlight the subtitle language option, and press the arrow buttons to choose the subtitle language you
prefer, press enter to confirm, if the disc you are playing has that language available, it will displays
subtitles in that language: there are 6 optional audio languages: German,Danish,
Spanish,Portuguese,Swedish,English and Off.
D) MENU LANG
Highlight the menu language option, and press the arrow buttons to choose the subtitle language you
prefer, press enter to confirm, if the disc you are playing has that language available, it will displays
subtitles in that language; there are 6 optional audio languages: German,Danish,
Spanish,Portuguese,Swedish,English and Off.
3. Notes:
If your preferred language isn’t available, the disc’s default language will be played.
The default language of your DVD player is spanish.
AUDIO SETUP
The audio setup options are illustrated below:
A) AUDIO OUT
Highlight the audio out option, and press the arrow buttons to choose the audio output mode you
prefer, press enter to confirm; there are 3 optional audio output modes: SPDIF / OFF, SPDIF / RAW,
and SPDIF / PCM.
a) SPDIF / OFF: From the Coaxial Output jack and the Optical Output jack, no signal is output.
b) SPDIF / RAW: Choose this setting if your DVD player is connected to a power amplifier with a
coaxial cable or an optical cable. When playing a disc recorded with Dolby Digital, DTS and MPEG
audio formats, the corresponding digital signals will be output from the Coaxial Output jack. This
player’s digital output jacks are designed for a connection to a Dolby Digital, DTS or MPEG receiver or
decoder.
c) SPDIF / PCM: Choose this setting if your DVD player is connected to a 2-channel digital stereo
amplifier. When playing a disc recorded with Dolby Digital and MPEG audio formats, audio signals will
be modulated into a 2-channel PCM signal, and it will be output from the Coaxial Output jack or Optical
Output jack.
B) Key
Use the Up and down arrow button to move the scroll and adjust the key.
VIDEO SETUP
A) BRIGHTNESS
Use the Up and Down arrow button to move the scroll and adjust the brightness.
B) CONTRAST
Use the Up and Down arrow button to move the scroll and adjust the contrast.
C) HUE
Use the Up and Down arrow button to move the scroll and adjust the hue.
D) SATURATION
13

Use the Up and Down arrow button to move the scroll and adjust the saturation.
SPEAKER SETUP
A) DOWNMIX
a) LT / RT: Choose this setting, it will be sound like in a movie theatre if the original movie the disc was
recorded from was encoded in the Pro Logic Dolby Digital Format.
b) STEREO: Choose this setting, when 5.1-channel sound playing, two channels of signals will be output
from the left and right soundtrack, when 2-channel sound playing, stereo signal will be output.
DIGITAL SETUP
The video setup options are illustrated below:
A-OP MODE
a) LINE OUT: Choose this setting to line out the input signal. It will be more suitable for playing in the night
time, for the output volume is low.
b) RF REMOD: It will be more suitable to choose this setting for playing in the day time, for the output
volume is high.
B) DYNAMIC RANGE
When “line out” is selected, choose.
This setting to adjust the line out ratio and get different effect, if adjusting to full, the audio signal peak
value will be the minimum; while adjusting to off, maximum.
Choose this option to setup the L and R mono output mode. There are four modes in this option: STEREO,
MONO L, MONO R, and MIX MONO.
REFERENCE:
To protect your DVD player, the interval between two consecutive power button operations must be above
30 seconds.
If not using for a period of time, please pull out the plug from the electronic outlet.
Chapter 4 Technical Specification
Play mode NTSC/PAL/AUTO
M P E G4/XV I D/D V D/V C D/C D/ DOLBY DIGITAL/AC-3/MP3/ JPEG/KODAR
CD/MPEG-01/02;CD-R/CD-RW/DVD-R/ DVD-RW/DVD+R/DVD+RW
Demodulator Mode~ COFDM: 2Kand 8K
Frequency Range~ VHF:177.5 ~ 226.5MHz UHF:474~850 MHz
Bandwidth 7M/8M
Input Signals Voltage~ -78~-10 dBm
Video Decoder~ MPEG2 compatible (Main Profile @ Main Level )
1.5-15Mb/s(720 *576)
Audio Decoder MPEG2 Layer I & II
A/V Output SCATR OUT/CVBS/S-VIDIO/YUV/COAXIAL/OPTICAL
Input Voltage 110 V-240 V 50/60 Hz
Power Consumption 15W
- The player should be operated only on condition that the type of power supply corresponds to the marking
label. Otherwise, is doesn’t work or even be damaged.
- The player may not be compatible with some encrypted discs.
- If the player stops playback by accident, please power it on again
Chapter 5 Troubleshooting
When you encounter a problem with this unit, please check the table below for a solution.
Fault
Phenomenon Probably Reasons How to fix it..
Power on, but
no Display on
screen
Please carefully check the
power plug to see if it is in
so cket of wall or not? Is power
interrupted?
Put firmly the power plug to the socket on wall.
14

“No signal”
Is the aerial installed correctly? Reinstall the aerial and calibrate it
DTT input is not connected Connect the DTT aerial to STB
The transmission station is not
broadcasting Attempt until the signals broadcast again
There is interference with the signal Reattempt later
The program set-up is incorrect Set the proper parameters of received programs in
the system settings menu,236
STB plays
strange sound The channel contains
more audio tracks or audio
languages.
User can use the “Audio” button on the
RCU to select the correct audio track or audio
language.
Packing:
User’s Manual 1 pc
Remote control 1 pc
AAA battery for remote control 2 pc
- Our Company reserves the right for the improvement of the product. All specifications, features and photos of
the product are subject to change without notice!
15

16
Table of contents
Other Denver DVD Player manuals

Denver
Denver DVD-438 User manual

Denver
Denver DVH-1214 User manual

Denver
Denver DVD-842K User manual

Denver
Denver DWM-100 User manual

Denver
Denver DVH-1213K User manual

Denver
Denver DVD-7779 MK2 User manual

Denver
Denver MTW-754 TWIN User manual

Denver
Denver MPG-1013 PLL User manual

Denver
Denver DVU-1009 User manual

Denver
Denver DVD-202 User manual

Denver
Denver DVD-948 User manual

Denver
Denver DVU-1112 User manual

Denver
Denver DWM-110 User manual

Denver
Denver DVH-1212MK2 User manual

Denver
Denver DRS-1218 User manual

Denver
Denver DVH-7781 MK2 User manual

Denver
Denver DHD-160 User manual

Denver
Denver DVD-808 User manual

Denver
Denver DVH-7779D User manual

Denver
Denver DVD-7742 User manual