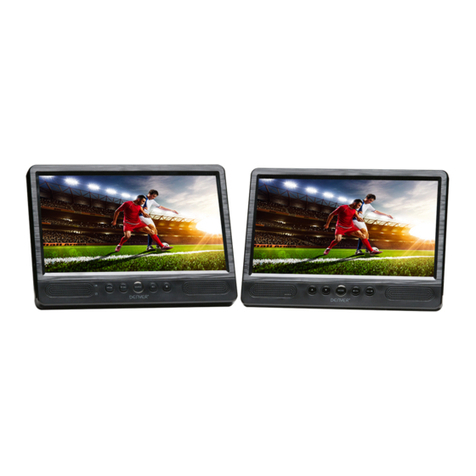
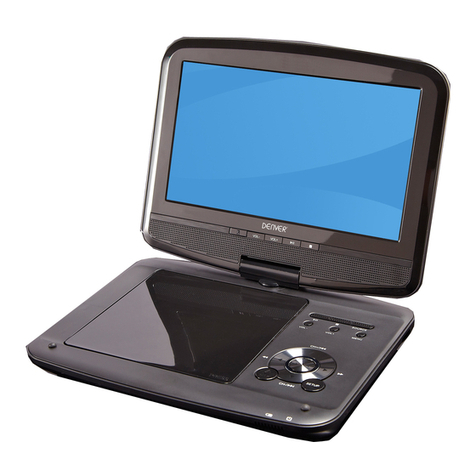
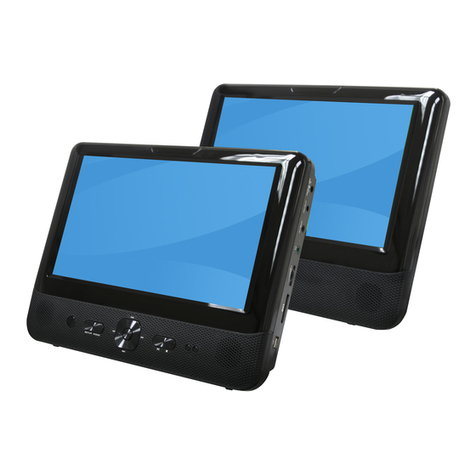
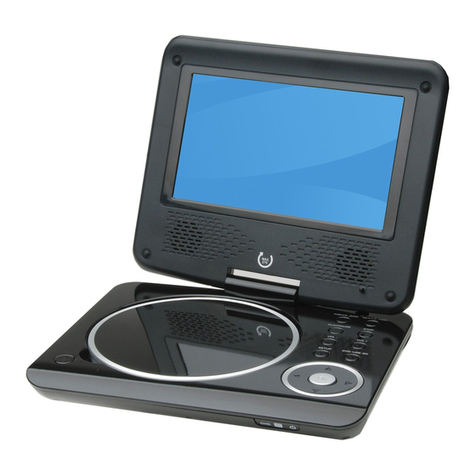
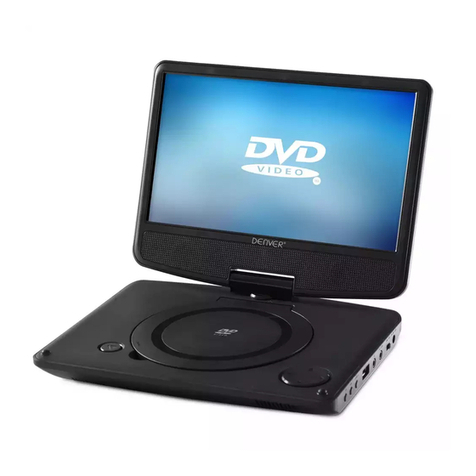
Denver MT-766 User manual

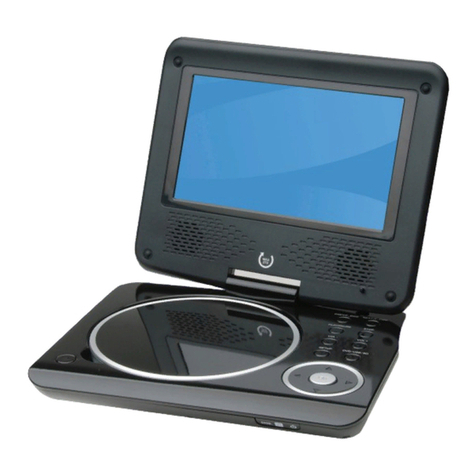
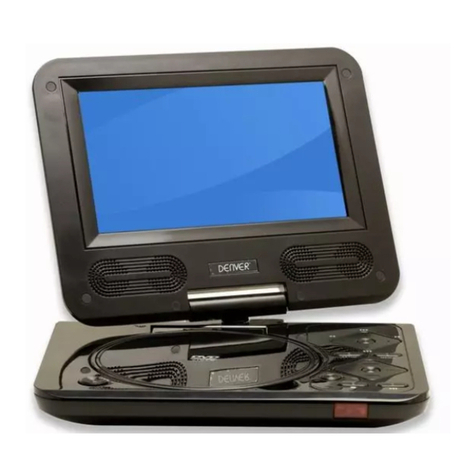
PORTABLE DVD
Before connecting, operating or adjusting this product,
please read this user's manual carefully and completely.
USER'S MANUAL
MT-766

Table of Contents
1
Contents
P2
Safety Precautions
P3-P4
Before Use(Continued)
P1
Table of Contents
P5-P7
Identification of Controls
P5
Main Unit
P6
Remote control unit
P7
DVD Introduction
Getting Started P7-P9
P7
Insert the battery
P15-P22
SETUP Menu Setting
P9-P10
P15
General Operation
P9-P10
P15-P17
General Setup Page
P9-P10P9-P10P9-P10
P23-P24
Parameters and specifications
P9-P10
P25
Troubleshooting tips
P9-P10P9-P10
P26
Definition of terms
Audio Setup Page
P17
P9-P10
Dolby Digital Setup
P19
P9-P10
Preference Page
P20-P22
P10
Playing an Audio CD or WMA
Basic operation P10-P14
P11
Audio CD and WMA Disc Features
P11-P12
Playing a JPEG Disc
P8-P9
Playing a DVD or Video CD(Operation)
P12
Playing a MPEG4 Movie Disc
P13
Program playback(not for Picture CD)
DIGITAL CARD and USB Play operation
P14
Speaker Setup Page
P18-P19
P9-P10
Video Setup Page
P20
P9-P10
Password Setup Page
P22

NNotes on Copyrights:
It is forbiddenby law tocopy, broadcast,show,broadcast via
cable, play inpublic, or rentcopyrighted material without
permission.
This product featuresthe copy protectionfunction developed by
Macrovision.Copy protection signalsare recorded onsome discs.
When recording andplaying the picturesof these discspicture
noise will appear.This product incorporates copyright protection
technology that isprotected by methodclaims of certainU.S.
Patents and otherintellectual property rightsowned by Macrovision
Corporation and otherrights owners.Use ofthis copyright protection
technology must beauthorized by MacrovisionCorporation, and is
intended for homeand other limitedviewing uses only unless
otherwise authorized bymacrovision Corporation. Reverse
engineering or disassemblyis prohibited.
SERIAL NUMBER:
You can find the serial number on the back of the unit.This number
is unique to this unit and not available to others.You should record
requested information here and retain this guide as a permanent
record of your purchase.
Model No. ______________________________
Serial No. ______________________________
Date of Purchase_________________________
Warning:To reduce the risk of electric shock,do not remove
the cover orback of thisproduct.There are nouser-serviceable
parts inside. Referservicing to qualifiedservice personnel.
2
Safety Precautions
Before using the player, please ensure that the local AC voltage is suitable for this unit.
N
Warning: when the unit using by child, parents must make sure
to let thechild understand allcontents in Instructionbook how
battery using toguarantee using batterycorrectly all thetime.
Warning: when find battery overheat, swell or dour, please
stop using batteryand contact servicecentre for getting
replacement.
Warning: do not charging battery on the place of insufficient
ventilation such as:mattress, sofa, cushion, soft mat......
Warning: we will not take any responsibility if user incorrectly
use battery,not following ourwarning instruction labelon the
battery case.
More than 250mmUSB extension Cordis prohibited to USB
for USB port.
Warning: To reduce therisk of fireor electric shock,do not
expose this productto dripping orsplashing water,rain, or
moisture. Do notplace objects filledwith water such as vases,
on the Product.
Warning: Thisdigital video discplayer employs a laser system.
Use of controls,adjustments,or the performanceof procedures
other than thosespecified herein mayresult in hazardous
radiation Exposure.
Warning: To prevent directexposure to laserbeam,do not open
the enclosure.Visible laserradiation when open.
Warning: Never stare directly into the laser beam.
Caution: Do notinstall this productin a confined space such
as a bookcase or similarunit.
RISK OF ELECTRIC SHOCK
DO NOT OPEN
WARNING
charge
over
heat
40 C
strong
impact
The above items are true of not only this unit but also most of the household electronic products.
Before Use(Continued)
3
To ensure proper use of this product, please read this owner's manual
carefully and retain for future reference.
This manual provides information on the operation and maintenance of
your DVD player. Should the unit require service, contact an authorized
service location.
Symbol Used in this Manual
The lightning flash symbol alerts you to the presence of dangerous
voltage within the product enclosure that may constitute a risk of
electric shock.
The exclamation point alerts you to the presence of important
operating and maintenance / servicing instructions.
Indicates hazards likely to cause harm to the unit itself or other
material damage.
Note:
Indicates special notes and operating features.
Introduction
Tip:
Indicates tips and hints for making the task easier.A section whose title
has one of the following symbols is applicable only to the disc
represented by the symbol.
Video CDs
Audio CDs
WMA Discs
JPEG Discs
MPEG4 Discs
DVD
VCD
CD
WMA
JPEG
MPEG4
About the Symbol Display
¡° ¡±may appear on your TV display during operation and indicates
that the function explained in this owner's manual is not available on
that specific DVD video disc.
N
N
Storing Discs
After playing,store thedisc in itscase.Do not exposethe disc todirect
sunlight or sourceof heat andnever leave itin a parkedcar exposed
to direct sunlight.
Cleaning Discs
Fingerprints and duston the disccan cause poorpicture quality and
sound distortion. Beforeplaying,clean the discwith a cleancloth.
Wipe the discfrom the centerout.
Notes on Discs
Handling Discs
Do not touchthe playback sideof the disc.Hold the discby the edges
so that fingerprintsdo not geton the surface.Never stick paperor tape
on the disc.
Do not usestrong solvents suchas alcohol,benzine,thinner,
commercially available cleaners,or anti-static sprayintended for older
vinyl records.
DVD and finalized DVD+R/RW

Before Use (Continued)
4
Notes:
Dirty disc may cause bad picture.
This indicates aproduct feature thatis
capable of playingDVD-RW discs
recorded with VideoRecording format.
1.Depending on theconditions of therecording equipment orthe
CD-R/RW (or DVD-R, DVD +R,DVD-RW, DVD+RW) disc itself,
someCD-R/RW (or DVD-R, DVD +R, DVD -RW,DVD +RW) discs
cannot be playedon the unit.
2.Do not attachany seal orlabel to eitherside (the labeledside or
the recorded side)of a disc.
3.Do not useirregularly shaped CDs(e.g., Heartshaped or
octagonal)since they mayresult in malfunctions.
4.Some playback operationsof DVDs andVideo CDs maybe
intentionally programmed bysoftware manufacturers. Thisunit
plays DVDS andVideo CDs accordingto disc content designed
by the softwaremanufacturer, thereforesome playback features
may not beavailable or otherfunctions may beadded.
Manufactured under licensefrom Dolby Laboratories."Dolby",
"Pro Logic", andthe double-D symbolare trademarks of
Dolby Laboratories.
Region code
This DVD playeris designed andmanufactured for
playback of region"2"encoded DVD software.
This unit canplay only DVDdiscs labeled "2"or "ALL".
Notes on RegionCodes
Most DVD discshave a globewith one ormore numbers in it clearly
visible on thecover. Thisnumber must match your DVD player's
region code orthe disc cannotplay. Ifyou try to play a DVD with
a different regioncode from your player,the message "Check
region Code" appearson the TVscreen.
N
N
2
_________________________________________
_________________________________________
_________________________________________
_________________________________________
_________________________________________
Video CD (VCD)
(8 cm / 12 cm disc)
DVD
(8 cm / 12 cm disc)
Types of Playable Discs
Audio CD
(8 cm / 12 cm disc)
In addition, this unit plays , DVD -R, DVD +R,DVD -RW,DVD +RW,
Kodak Picture CDs, SVCD, and CD-R / CD-RW that contains audio
titles,WMA,JPEG and MPEG4 files.
RW
C0MPATIBLE

Weak batteries can leak and severely damage the remote control unit.
Identification of Controls
5
Main Unit
1.TFT screen
2.Speakers
3.SOURCE
Select input source, DVD,card,usb.
4.PREV/NEXT
5.SETUP
6.STOP
.
7.MENU
8.PLAY/PAUSE
9. ENTER.
10. (Up/down/Left/right)
Select an item in the menu.
11.Open
12.POWER ON LED INDICATOR
13.USB
14.Volume control
15.Headphone out jacks
16.Digital Audio out(coaxial)
17.AV OUT
18.ON/OFF
19.DC IN 9-12V
20.SD/MS/MMC
11
88
77
99
22
33
55
1212 1313
22
44
66
1010
1111
1414 1515 1616 1717 1818 1919
2020

SOURCE
SLOW
STEP
GOTO
Turn off the power and keep AC cord pulled out from the outlet when connecting the systerm. 6
Remote control unit
1. PLAY/PAUSE ( )
Starts playback orpause playback.
2. STOP ( )
Stops playback.
3. Reverse Skip( )
Go to previouschapter / trackor to the
beginning.
4. Forward Skip( )
Go to thenext chapter /track.
5.ZOOM
Enlarges video image.
6.REPEAT
Repeat chapter,track, title all.
7.A B
Repeat sequence.
8. PROGRAM
Place a trackon the programlist.
9.MUTE
Disable Audio output.
10.TITLE
Return to DVDtitle menu.
11.POWER
Switches DVD Playerstandby mode.
12.0-9 NUMBER BUTTON
Selects numbered itemsin a menu.
13.ENTER
Confirms menu selection.
14. MENU
Accesses menu ona DVD disc.
(Left/right/up/down)
15.DISPLAY
Accesses On-Screen display.
16.AUDIO
Selects an audiolanguage (DVD).
17.SUBTITLE
Selects a subtitlelanguage.
18.ANGLE
Selects a DVDcamera angle ifavailable
19.SETUP
Accesses or removessetup menu.
20.10+ BUTTON
Add 10+ whileyour selection ismore than10.
21.STEP
Step the motionin DVD mode.
22. BUTTON
Fast backward.
23. BUTTON
Fast forward.
24. PBC
PBC on/off switch.
25.SLOW
Slow playback
26.GOTO
Goto time point, title orchapter you want in
DVD Mode
27. SOURCE
DVD,USB,card.
1111 99
1616
55
1818
88
1414
2121
11
22
66
77
2222
2323
1212
2020
1919
1313
44
33
2424
1515
1717
1010
2525
2626 2727
Identification of Controls

Identification of Controls
7
Insert the battery DVD Introduction
Getting Started
Refer to thedrawing, take theback cover ofthe remote controloff
and remove theempty battery receptacle.
Prior to shipping,a separating filmwas applied to the battery.
Remove this film.
Insert the batteryinto the receptacleand insert thereceptacle into
the remote.
For the bestresults,aim the remotetowards at theplayer's receiving
window. Staywithin 15 feetand angles of60 degrees orless.
Under normal usethe battery willlast for oneyear.
Remove battery duringstorage or whenyou are not using the DVD
player for along time.
1.Open the batterydoor. 2.Insert twoAAA sizebatteries.
12
DVD+R/RW
DVD -R andDVD +R aretwo different standardsfor recordable DVD
drives and discs.This format allowsinformation to be recorded onto
the DVD disconly once. DVD+RW and DVD-RW are twostandards
for re-writable media,meaning the DVDcontent can beerased and
re-recorded. Single-sided discscan hold 4.38gigabytes and
double-sided discs holdtwice as much.Thereare no duallayer
single sided recordablediscs.
VCD (Video CD)
A VCDholds up to74 minutes (650MB disc) or80 minutes (700MB
disc) of MPEG-1full-motion video alongwith quality stereosound.
MPEG
MPEG is aninternational standard forvideo and audiocompression.
MPEG-1 is usedin encoding videofor VCD andprovides for
multichannel surround soundcoding such asPCM, Dolby Digital,
and MPEG audio.
WMA
Windows media audiofile. Atype of coding/ decoding developed by
Microsoft Corp.
JPEG
Joint Pictures ExpertGroup. JPEG isa compressed fileformat that
allows you tosave images withno limit onthe number ofcolors.
MPEG4
MPEG4 is thename of arevolutionary new videocodec.which is based
On the newMPEG-4 compression standardfor video.You will be
able to playMPEG4 movies usingthis DVD player.
Title (DVD videodiscs only)
A titleis generally adistinct section ofa DVD disc.For example the
main feature couldbe title 1,a documentary describinghow the film
was made couldbe title 2,and cast interviewscould be title3. Each
title is assigneda reference numberenabling you tolocate it easily.

Getting Started
Playback Setup
1. turn onthe power switchat the left side of the product.
2. Press OPENto open thedisc tray and insert your chosen
disc in thetray, withthe playback side down.
3. Close thetray. Playbackwill start automatically.
Use the buttonsto select thetitle/chapter you want to
view, thenpress ENTER tostart.Press MENU to return to the
menu screen.
Use the numberbuttons to select the track you want to view and
press MENU toreturn to the menu screen. Menu settings and
operating procedures maydiffer.Follow theinstructions on the
each menu screen.
Notes:
1.If parental controlis set and the disc isn't fit for the rating
setting you mustinput the password.(See "parental" on page 21).
2.DVDs may havea region code.Your player does not play
discs that havea region code different from yourplayer.
3.Unless stated otherwise,all operations described use the
remote control.Some featuresmay also be available on the
setup menu.
Playing a DVD or Video CD(Operation)
VCD
DVD
N
Most of the functions can be controlled by remote control unit.Most of the functions can be controlled by remote control unit.
8
Specifications and design are subject to change without prior notice.
Most of the functions can be controlled by remote control unit.Most of the functions can be controlled by remote control unit.
DVD VCD
Moving to anotherCHAPTER/TRACK
When a titleon a dischas more thanone chapter ora disc has
more than onetrack, you canmove to anotherchapter/track as
follows:
1.Press SKIP or briefly during playbackto select the next
(or previous)chapter/track orto return tothe beginning ofthe current
chapter/track.
2.Press SKIP twicebriefly to step back to the previous
chapter/track.
3.Togo directly toany chapter duringDVD playback, inputthe
chapter/track number .
Changing the Audio Channel
Press AUDIOrepeatedly during playbackto hear adifferent audio
channel (Stereo, Left,or Right).
Repeat A-B
Torepeat a sequence.
1. PressA-B at yourchosen starting point" A". Appears
briefly on theTV screen.
2. PressA-B again atyour chosen endpoint." AB"appears
briefly on theTV screen andthe repeat sequence begins.
3. PressA-B again tocancel.
Repeat
You can play a title/chapter/all/track on a disc repeatedly.
Press REPEATduring playback toselect a desiredrepeat mode.
VCD
DVD VCD
DVD VCD

Getting started
9
DVD Video Discs- "Repeat Chapter / Title/All"
Chapter: repeats thecurrent chapter. Chapter
Title: repeats the current title.
All : repeatsall the trackson a disc.
Off : doesnot play repeatedly.
Video CDs, discs- "Repeat Track/All"
Track : repeats the current track
All : repeatsall the trackson a disc.
Off : doesnot play repeatedly.
Notes:
1.On a VideoCD with PBC, you must set PBC to Off to use the
repeat function.
2.If you pressSKIP ( or ) once duringRepeat Chapter(Track)
playback, the repeatplayback cancels
Zoom
Use zoom toenlarge the videoimage:
1.Press ZOOM duringplayback or stillplayback to activatethe
Zoom function. Thesquare frame appears briefly in the right bottom
of the picture.
2. Each pressof the ZOOMbutton changes theTV screen inthe
following sequence:
3. Use the buttons to movethrough the zoomedpicture.
4. To resume normal playback, press ZOOM button until screen
becomes 1X.
Note:Zoom may notwork on some DVDs.
Playing a DVD or Video CD(Operation)
N
DVD VCD
N
DVD MENU
1. Press DVDMENU.If the currenttitle has amenu, the menuappears
on the screen.Otherwise, the discmenu may notappear.
2. The DVDMENU offers featuressuch as cameraangles,spoken
language and subtitleoptions, and chaptersfor the title.
3. Press DVDMENU to exit.
Camera Angle
If the disccontains scenes recordedat different cameraangles, you
can change toa different cameraangle during playback. Press
ANGLE repeatedly duringplayback to selecta desired angle.Note
that the numberof the currentangle appears onscreen.
Note:
The angle indicatorwill blink onthe TV screenduring scenes
recorded at differentangles as an indication that angle switching is
possible.
Changing the Audio Language
Press AUDIOrepeatedly during playbackto hear adifferent audio
language or audiotrack.With DVD-RW discsrecorded in VR mode
that have botha main anda Bilingual audiochannel, you can
switch between Main(L), Bilingual (R),or a mixof both (Main+
Bilingual) by pressingAUDIO.
Subtitles
Press SUBTITLE repeatedlyduring playback tosee the different
subtitle languages.
DVD
DVD
DVD
N
TITLE button
DVD disc:
Press TITLE button, then the DVD menu or titles available on the disc
will be displayed. Then you can use " " and ENTER button to select
programs.
Special DVD FeaturesChecking the contentsof DVD discs:
Menus DVDs may offermenus that allow you to access special
features. To use the disc menu, press MENU. Input the
corresponding number oruse the buttonsto highlight
your selection.Then pressENTER.
DVD

Basic operation
10
File names shouldhave a maximum of 8 letters and must incorporate
an "wma" extension.
They should notcontain special letters such as "/? * : < > l "etc.
The total numberof files on one disc should be less than 650.
This DVD playerrequires discs and recordings tomeet certain
technical standards inorder to achieve optimal playback quality.
Pre-recorded DVDs areautomatically set to these standards. There
are many differenttypes of recordable disc formats(including CD-R
containing or WMAfiles) and theserequire certain pre-existing
conditions (see above)to ensure compatible playback.
Customers should notethat permission is required in order to
download WMAfiles and music from the Internet. Our company
has no rightto grant such permission. Permission should always be
sought from thecopyright owner.
WMA
WMA
WMA
WMA
Disc
The DVD playercan play CDand WMAformatted recordings
on CD-R,CD-RW,DVD+Rand DVD+RW discs.
Audio
Once anAudio CD isinserted it willbe played automatically.Its
playblack information willbe show onscreen,such as chapter
elapse time.
1. Press to select a folder, and press ENTER to see the folder
contents.
2. Press to select a trackthen press PLAY or ENTER.Playback
starts.
disc compatibility withthis player is limited as follows:
1.Sampling frequency: within32 - 48kHz ( ).
2.Bit rate: 32- 192kbps ( ).
The player cannotread an filethat has afile
extension other thanWMA.
CD-R physical formatshould be ISO9660.
If you record WMA filesusing software thatcannot create
a file system(eg. Direct-CD) itis impossible toplayback WMA
files.We recommend thatyou use Easy-CD Creator,which creates
an ISO 9660file system.
CD
WMA
Audio CD and WMA Disc Features

11
Pause
1. Press PLAY/PAUSE duringplayback.
2. To return to playback, press PLAY/PAUSE again.
Moving to anotherTrack
1. Press SKIP( or ) briefly during playback to go to the next
(or previous) trackor to returnto the beginning of the currenttrack..
2. Press SKIP twice briefly togo back tothe previous track.
3. You can play any track by inputting its number.
Repeat Track/Folder/All/Off
You can play a track/folder/all on a disc.
1. Press REPEAT when playinga disc. The repeat icon appears.
2. Press REPEAT to selecta desired repeat mode.
Track: repeatsthe current track.(CD)
Folder: repeats thecurrent folder.
All: repeatsall the trackson a disc.(CD)
Off(No display): normalplayback.
Note:
If you pressSKIP ( )onceduring Repeat Track playback,
the repeat playbackcancels.
Repeat A-B
1.Torepeat a sequenceduring disc playbackpress A-Bat your
chosen starting point.The Repeat icon"A"appear on the menu
screen.
2.Press A-Bagain at yourchosen end point.TheRepeat icon
"AB" appear onthe menu screen,and the sequencebegins to
play repeatedly.
3.Toexit the sequenceand return tonormal play,pressA-B
again.The Repeat icondisappears from themenu screen.
WMACD
CD
N
Basic operation
Slide Show
There are 16types for slideshow.
You can press Program repeatly to select the slide show Mode.
Still Picture
1. Press PLAY/PAUSE duringslide show.Theplayer will now go into
PAUSE mode.
2. To return to the slide show, press PLAY/ PAUSE again.
Viewing a JPEGDisc
Using this DVDPlayer you canview Kodak PICTURE CDs and discs
with JPEG files.
1.Insert a discand close thetray. The file menu appears on the TV
screen.
2. Press toselect a folder, and pressENTER. Alist of filesin the
folder Appears.If you are in a file list and want to return to the
previous Folder list,use the buttons on the remote to highlight and
press ENTER.
3. If youwant to viewa particular file, press to highlight a file and
press ENTER orPLAY. Viewing thefile proceeding starts.
4.If the DISCyou insert isa Kodak Picture CD it will be played
automatically.
NOTE:
Press" " tomove to thenext page , " " to return to previons
folder,and "MENU" return to menu.
Zoom
1.Press 'ZOOM' .
2,Used " "to enlarge,or " " to shorten the picture.
JPEG
JPEG
JPEG
N
Playing a JPEG Disc
Playing an Audio CD or WMA
WMACD
WMACD

Playing a JPEG Disc
12
To rotatepicture
Press or duringshowing a pictureto rotate thepicture invert ,mirror,
clockwise ,counter clockwise.
To listento WMA music watching picture
You can display files while listering to WMA music files
recorded on thesame disc.
1.select a WMAdesired.
2.select a picture.
JPEG disc compatibilitywith this playeris limited as follows:
1.Depending upon thesize and numberof JPEG files,it could take
a long timefor the DVDplayer to readthe disc¡¯s contents. Ifyou
don¡¯t see an on screen display after several minutes, some of the
files may betoo large reducethe resolution of the JPEG filesto
less than 2Mpixels as 2760x 2048 pixelsand burn anotherdisc.
2.The total numberof files andfolders on thedisc should beless
than 650.Some discsmay be incompatibledue to a different
recording format orthe condition ofdisc.Ensure that allthe
selected files havethe." jpg" extensionswhen copying intothe CD
layout. If thefiles have. "jpg"or. "jpeg"extensions, please rename
them as."jpg" file.Filenames without."jpg" extensionwill not be
able to beread by thisDVD player.Even though thefiles are shown
as JPEG imagefiles in WindowsExplorer.
JPEG
Basic operation
Playing a MPEG4 Movie Disc
Using this DVDPlayer you canplay MPEG4 disc.
1. Insert adisc and closethe tray.Thefolder menu appears on the
TV screen.
2. Press to select a folder, and pressENTER. Alist of filesin
the folder appears.If you arein a file list and want to return to the
Folder list,use the or button onthe remote tohighlight or
button and pressENTER.
3. If youwant to viewa particular file,press / to highlighta file
and press ENTERor PLAY.
4. Press STOPto exit.
5.Press NEXT tomove to the next chapter.
MPEG4 disc compatibilitywith this playeris limited asfollows:
1.Available resolution sizeof the MPEG4 file is under 720x576 (W xH)
pixel.
2.The file nameof the MPEG4 subtitle is available by 56 characters.
3.If there isimpossible code toexpress in theMPEG4 file, itmay be
displayed as "_ "mark onthe display.
If the numberof the screenframe is over30 per second,this
unit may notoperate normally.
If the videoand audio structureof recorded fileis not interleaved,
either video oraudio is outputted.
Playable MPEG4 file
".avi ", ".mpg", ".mpeg".
Playable Audio format
"AC3 ", "PCM", "WMA".Sampling frequency:
within 32 -48kHz (WMA) Bitrate:
32 - 192kbps(WMA)

Program playback(not for Picture CD)
When this unit is not used, please turn off the power and leave no disc inside.
DVD
The program functionenables you tostore your favourite tracks from
any disc inthe player memory.
1. Press PROGRAM
The program menuappears.
2.Use the numericalkeypad(0-9) to directinput the titles,tracks or
chapters (single tracknumber with digit'0' in front,for example '05').
3.Move the cursorby pressing toselect START.
4. To resume normal playback from programmed playback,Press
PROGRAM and pressSTOP button on the program menu.
Helpful Hint:
- Program canbe activated onlywhen a discis in the DVD player.
- When theprogram menu appears,the setup menusetting is
forbiddened.
Program:TT(06)/CH(- -)
Exit NEXT
TT: CH:
TT: CH:
TT: CH:
TT: CH:
2
3
4
5
TT: CH:
TT: CH:
TT: CH:
TT: CH:
TT: CH:
6
7
8
9
10
TT: CH:
1
Program:TT(06)/CH(- -)
Exit NEXT
TT: 05 CH:01
TT: CH:
TT: CH:
TT: CH:
2
3
4
5
TT: CH:
TT: CH:
TT: CH:
TT: CH:
TT: CH:
6
7
8
9
10
TT: 06 CH:01
1
Start
Program:TT(06)/CH(- -)
Exit NEXT
TT: 05 CH:01
TT: CH:
TT: CH:
TT: CH:
2
3
4
5
TT: CH:
TT: CH:
TT: CH:
TT: CH:
TT: CH:
6
7
8
9
10
TT: 06 CH:01
1
Stop
Basic operation
13

Digital cards (MMC/SD&MScard) and USB with
Pictures (.jpg) may be played and displayed through the unit.
MMC/SD/MS cards maybe directly input through the
card reader slot.The USB Socketcan be used to supply signals to
the unit fromUSB sources.
How to select DIGITAL USB/CARD to play
1. Turnthe unit on.
2. Insert eithera USB sourceor a Card into the appropriate USB
connection point onthe right or the MMC/SD card reader on the left.
3. Press the "SOURCE" button onthe units main panel ,select MEDIA
and the unitswould auto detectthe USB/CARD socket.
4. If USB/CARDis selected, theunit will begin to read the CARD or
USB connected toit .
Basic operation
14
DIGITAL CARD Play operationand USB
How to playDIGITAL USB/CARD
1. Press "USB/CARD"button on theremote control toswitch.
Example:
2. Press "SOURCE"button on theremote control toswitch.
If insert cardsthe screen display¡°CARD¡±
NOTE: Accordingto the contentof the USBand DIGITALCARD,
the display picturewill be different.
SOURCE
USB

SETUP Menu Setting
General Operation
1.Press SETUP toenter the Setup Menu.
2.Press ENTER to the next level submenu or confirm your
selection.
3.Press to enterthe submenu or returen to the previous menu
4.Press to highlight the desired menu.
To exitfrom the menu
Press SETUP The settings will be stored in the player's memory
even if theplayer is switched off.
enter
Normal/PS
If you have a normal TV and want both sides of thepicture to be
trimmed or formatted tofit your TVscreen.
Normal/LB
If you have a normal TV. In thiscase , a wide picture with black
bands on theupper and lowerportions of the TV screen will be
displayed.
Wide
If you have a wide-screen TV.
16:9
Wide
4:3
Letter Box
4:3
Pan Scan
General Setup Page
The options includedin General Setup page are:" TVDisplay","Angle
Mark","OSD lang","Captions","Screen Saver".
Follow the stepsbelow:
1.Press SETUP toenter the setup menu.
2.Press to selectthe 'General Setup page'.
TV Display
Set the aspectratio of theDVD Player according to the TVyou have
connected.
1.Press to highlight'TV Display'.
2.Enter its submenuby pressing .
3.Move the cursorby pressing to highlight the selected item.
General Operation&General Setup Page
15
- - GENERAL SETUP PAGE - -
GOTO GENERAL SETUP PAGE
TV DISPLAY Wide
ANGLE MARK ON
OSD LANGUAGE ENG
CLOSED CAPTIONS ON
SCREEN SAVER ON
- - GENERAL SETUP PAGE - -
SET TV DISPLAY MODE
TV DISPLAY Wide 4:3 PANSCAN
ANGLE MARK OFF 4:3 LETTERBOX
OSD LANGUAGE ENG 16:9
CLOSED CAPTIONS ON Wide Squeeze
SCREEN SAVER ON

OSD Lang
You can select your own preferred language seetings.This DVD
system will automaticallyswitch to the selected language whenever
you load adisc.If the language selected is not available on the disc,
the disc's defaultlanguage will be used instead. TheOSD language
in the systemmenu will remain once selected.
1.Press the keys to highlight 'OSD Lang'.
2.Enter its submenuby pressing .
3.Move the cursorby pressing the to highlight the selected item.
4.Select a languageand press ENTER.
Angle Mark
Displays current anglesetting information on the right hand corner
of the TFT screen if availableon the disc.
1.Press to highlight'Angle Mark'.
2.Enter its submenuby pressing .
3.Move the cursorby pressing to highlight the selected item.
On:Enable Angle Mark.
Off:Disable the currentangle setting display.
SETUP Menu Setting
General Setup Page
16
Closed Captions
Closed captions aredata that are hidden in the video signal of some
discs.Captions are differentfrom subtitles because captions hearing
are impaired byshowing the soundeffects(e.g.,"phone ringing" and
" footsteps"),while subtitlesdo not.
Before you selectthis function,please ensurethat the disccontains
closed captions informationand your TVset also has this function.
- - GENERAL SETUP PAGE - -
SET ANGLE MARK
TV DISPLAY Wide
ANGLE MARK OFF ON
OSD LANGUAGE ENG OFF
CLOSED CAPTIONS ON
SCREEN SAVER ON
- - GENERAL SETUP PAGE - -
SET OSD LANGUAGE
TV DISPLAY Wide
ANGLE MARK OFF
OSD LANGUAGE ENG
CLOSED CAPTIONS ON
SCREEN SAVER ON
ENGLISH
SPANISH
GERMAN
DANISH
SWEDISH
FINNISH

1.Press to highlight'Closed Captions'.
2.Enter its submenuby pressing .
3.Move the cursorby pressing tohighlight the selecteditem.
On:Enable Closed Captions.
Off:Disable Closed Captions.
Screen Saver
This function isused to turnthe screen saverOn or Off.
1.Press to highlight'Screen Saver'.
2.Enter its submenuby pressing .
3.Move the cursorby pressing tohighlight the selecteditem.
On:In STOP,PAUSE orNo DISC mode,if no actions are performed
about 3 minutes,theScreen Saver willbe activated.
Off:Screen Saver isdisabled.
Speaker Setup Page
The options includedin Speaker SetupPage is 'Downmix'.
'Digital output','Dolby digital'.
1.Press SETUP.
2.Press to select the 'Audio Setup page'.
Downmix
This options allowsyou to setthe stereo analog output of your
DVD Player.
SETUP Menu Setting
General Setup Page Audio Setup Page
17
- - GENERAL SETUP PAGE - -
CLOSED CAPTION
TV DISPLAY Wide
ANGLE MARK OFF
LANGUAGE ENG
CLOSED CAPTIONS ON ON
SCREEN SAVER ON OFF
OSD
- - GENERAL SETUP PAGE - -
SCREEN SAVER
TV DISPLAY Wide
ANGLE MARK OFF
OSD LANGUAGE ENG
CLOSED CAPTIONS ON
SCREEN SAVER ON ON
OFF
- - AUDIO SETUP PAGE - -
GO TO SPEAKER SETUP PAGE
DOWNMIX STR
DIGITAL OUTPUT RAW
DOLBY DIGITAL
- - AUDIO SETUP PAGE - -
SET DOWNMIX MODE
DOWNMIX
DIGITAL OUTPUT RAW
DOLBY DIGITAL
STR LT/RT
STEREO

SETUP Menu Setting
Speaker Setup Page&Dolby Digital Setup
1.Press the keys to highlight 'Downmix'.
2.Enter its submenu by pressing .
3.Move the cursor by pressing the keys to highlight the selected
item.
LT/RT :Select this option if yourDVD Player is connected to a
Dolby Pro Logic decoder.
Stereo :Select this option when output delivers sound from only
the two front speakers.
18
SPDIF Output
The function isused to select the SPDIF Output:SPDIF Off,SPDIF/
RAW,SPDIF/PCM.
1.Press the keys to highlight 'SPDIF Output'.
2.Enter its submenuby pressing .
3.Move the cursorby pressing the keys to highlight the
selected item.
Set the SPDIFOutput according to your optional audio equipment
connection.
SPDIF Off: Turns off the SPDIF output.
SPDIF/RAW: If you have connected your DIGITAL AUDIO OUT
to a multi-channeldecoder/receiver.
SPDIF/PCM: Only if yourreceiver is not capable of decoding
multi-channel audio.
Dolby digital
Goto dolby digitalsetup page
- - AUDIO SETUP PAGE - -
SETUP SPDIF
RAW
DOWNMIX STR
DIGITAL OUTPUT RAW
DOLBY DIGITAL
SPDIF/OFF
SPDIF/RAW
SPDIF/PCM

1.Press the keysto highlight 'DualMono'.
2.Enter its submenuby pressing .
3.Move the cursorby pressing the keys to highlightthe selected
item.
Toselect the settingthat matches thenumber of speakersyou have
connected.
Stereo:Left mono soundwill send outputsignals to Leftspeaker
and Right monosound will sendoutput signals toRight speaker.
L-Mono:Left mono soundwill send outputsignals to Leftspeaker
and Right speaker.
R-Mono:Right mono soundwill send outputsignals to Left speaker
and Right speaker.
Mix-Mono:Left and Rightmixed mono soundwill send output
signals to Leftand Right speakers.
Dynamic
To optimize the dynamic sound output high volume outputs are
softened, enabling you to watch your favourite movie without
disturbing others.
The levels fordynamic selection:Full,7/8,3/4,5/8,1/2,3/8,1/4,1/8
and Off.
Dual Mono
19
Dolby Digital Setup
Dolby Digital Setup
The options includedin Dolby Digital Setup are: 'Dual Mono ' and
'Dynamic '.
1.Press SETUP.
2.Press to select the 'Dolby Digital Setup'.
SETUP Menu Setting
- - DOLBY DIGITAL SETUP - -
DUAL MONO (1+1) SETUP
DYNAMIC
STEREO
L-MONO
R-MONO
MIX-MONO
DUAL MONO STR
- - DOLBY DIGITAL SETUP - -
SET DRC TO 1/8
DUAL MONO
DYNAMIC
-
-
-
-
-
-
-
-
-
-
-
-
-
-
-
-
-
-
FULL
OFF
-
- - DOLBY DIGITAL SETUP - -
DUAL MONO (1+1) SETUP
DYNAMIC
STEREO
L-MONO
R-MONO
MIX-MONO
DUAL MONO STR
Table of contents
Other Denver Portable DVD Player manuals

Denver
Denver MT-910 User manual

Denver
Denver MTW-735 TWIN User manual

Denver
Denver MT-774 User manual

Denver
Denver MT-1063 User manual

Denver
Denver MT-1150T2H User manual

Denver
Denver MTW-727 TWIN User manual

Denver
Denver MT-1080T2H User manual

Denver
Denver MTW-751 TWIN User manual

Denver
Denver MT-983 User manual

Denver
Denver MT-776 WHITE User manual

Denver
Denver MT-752 User manual

Denver
Denver MT-1002 BLACK User manual

Denver
Denver MT-732B User manual

Denver
Denver MT-750 User manual

Denver
Denver MT-768 User manual

Denver
Denver MTW-746 TWIN User manual

Denver
Denver MT-723 TWIN User manual

Denver
Denver 12809S User manual

Denver
Denver MT-777 WHITE User manual

Denver
Denver MTW-745 TWIN User manual