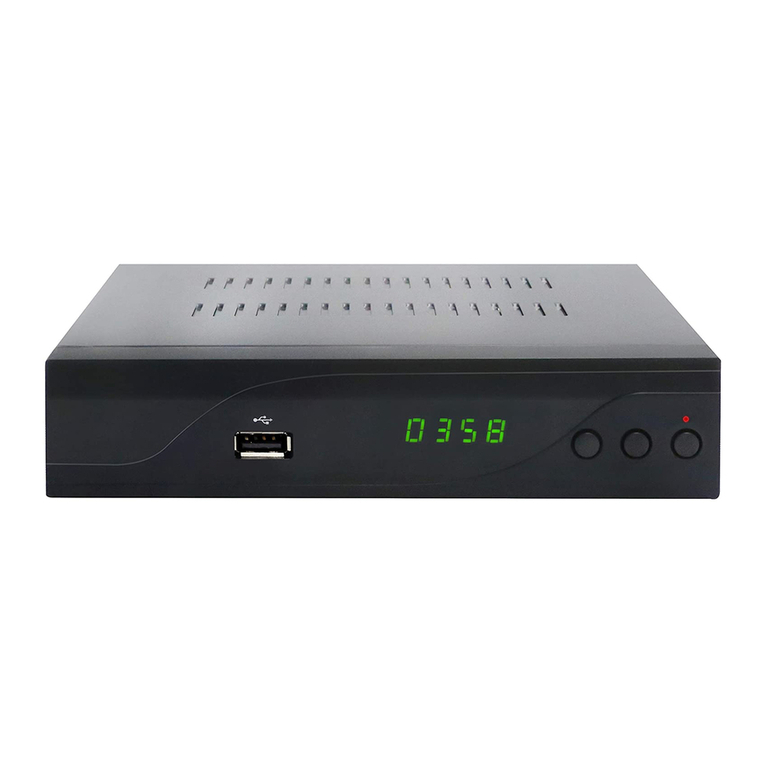
Denver DVBT-1 User manual

Digital Terrestrial Receiver
User Manual
DENVER DVBT-1
www.denver-electronics.com
Thank you for purchasing the new DVB-T receiver. For perfect operation and security,
read the manual carefully and keep it for future reference.

SAFETY INSTRUCTIONS
Read all the safety instructions before first use of your DVB-T
Receiver.
Power source
The STB unit power should be supplied by the adaptor. The adaptor power’s cord should be plugged into a
100V to 230V AC, 50/60Hz supply.
Safety considerations
zPosition the power supply lead and other leads so that they are not likely to be walked on or pinched by
things placed on or against them.
zDo not use the appliance in humid or damp conditions. Do not allow the appliance to get wet, i.e. dripping or
splashing, as this may be dangerous. Do not place water filled object, such as vases, on top of the
appliance.
zMake sure that no naked flame sources, such as candles, are placed on top of the appliance.
Cleaning
Unplug the appliance before you clean it.
zDo not use liquid or aerosol cleaners.
zClean your appliance with a soft damp (not wet) cloth.
Ventilation
zAny slots and opening on the appliance are for ventilation. Do not cover or block them as is could lead to

overheating.
zNEVER let children push anything into the holes or slots on the case.
Servicing
There are no user serviceable parts in your DVB-T receiver.
When servicing, refer to qualified service personnel.
Consult the helpline if you are ever in doubt about the installation, operation or safety of your equipment.
Battery disposal
Please ensure batteries are disposed of safety.
Electrical information
Make ensure that the voltage of your electricity supply is the same as that indicated on the rear place.
Device disposal
This symbol on the product or in the instructions means that your electrical and electronic
equipment should be disposed at the end of its life separately from your household waste. There
are separate collection systems for recycling in the EU.
For more information, please contact the local authority or your retailer where you purchased the
product.

INDEX
1. GETTING STARTED..............................................................1
1.1 USE REMOTE CONTROLLER 2
1.2 STB UNIT 4
1.3 CONNECTING TO TV 5
1.4 REMOTE CONTROLLER 6
2. MAIN MENU...........................................................................7
3. EDIT........................................................................................8
3.1 CHANNEL MANAGER 8
3.2 ADD FAVOURITE CHANNELS 9
3.3 FAVOURITE MANAGER 10
4. SCAN....................................................................................11
4.1 AUTO SEARCH 11
4.2 MANUAL SEARCHING 12
4.3 TIMER SETTING 13
5. CONFIG................................................................................15
5.1 CLEAR DATA 15
6. TV SETTING.........................................................................16
6.1 SET TIME 16
6.2 SYSTEM UPGRADE 17
6.3 SYSTEM INFORMATION 17
7. PLAYBACK..........................................................................18
7.1 PROGRAM INFORMATION 18
7.2 TV/RADIO LIST 19
7.3 FAVOURITE LIST 19
7.4 EPG 20
7.5 VOLUME CONTROL 21
7.6 INFO 21
7.7 TELETEXT 22
8. PREFERENCE .....................................................................23
8.1 LANGUAGE 23
8.2 OSD SETTING 24
8.3 PARENT LOCK 24
9. GAME...................................................................................25
10. TECHNICAL SPECIFICATION ..........................................26
11. TROUBLESHOOTING .......................................................27

1
1. Getting Started
Remove your STB unit carefully from the box. You may wish to store the packaging for future use.
In the box
Included in this package should be:
① STB unit
② Remote control
③ Power adaptor
④ Remote Receiver
⑤ Batteries x 2 for remote controller
l

2
⑥ User Guide
Read these instructions before use.
⑦ Quick startup guide
⑧ Scart Cable
1.1 Use Remote Controller
1. Open the battery compartment.
2. Insert two AAA batteries, make sure to match “+” and “-” of the batteries to the marks in the battery
compartment.

3
3. Close the battery compartment.
1 2 3
Control STB Unit
Point it at the front of the remote receiver; press
the relevant button to choose demand function.
The remote control will work up to 6 metres from
the STB unit and at an angle of up to 45 degrees.
Do not block the path of the beam from the
remote control to the remote receiver, Dark walls
direct sunlight or bright light will reduce the remote
control sensitivity.
Notes:
Batteries can last for about 6 months
generally. Change the batteries of the
remote controller if it does not work.
If the remote controller is not used for a long
time, remove the batteries to prevent
battery leakage.

4
1.2 STB Unit
Fig 1.1

5
1.3 Connecting to TV
Note: Before connect this STB to other devices, please SHUT DOWN all devices.
Fig 1.2
zDirectly plug STB unit into the Scart socket in TV set;
zPut the Terrestrial aerial’s connector jack into the STB receiver’s “ANTENNA IN” socket on its rear panel. ”ANTENNA OUT”
socket also can be connected to another STB, which provides same aerial signals.
zPlug the adaptor’s power cord into the AC100~230 power socket on the wall. Connect adaptor DC cable plug into STB unit.
The STB starts in a normal state of “playback the program that it received”.
IF STB “NOT” PLAY THE PROGRAM, REFER TO THE CHAPTER 4 “AUTO SEARCHING” IN USER MANUAL.

6
1.4 Remote Controller
1. POWER: Turns the receiver power on/off.
2. Numeric Key (0-9): You can change channel by input the channel number directly.
3. FAV: Press to display the favorite List.
4. EPG: The EPG menu of the current TP is displayed.
5. MENU: Press to access the system menu.
6. UP: Up move, move to the previous channel.
7. LEFT: Left Move.
8.DOWN: Down move, move to the next channel.
9. VOLUME +/-: Increase/decrease the audio output level.
10. TEXT: Press to show the rich text of the current channel.
11. LANG: Shows the list of the audio language available in the current channel.
12. TV/RADIO: Switch from TV to Radio or on the contrary.
13. PREVIEW: Preview program in the list in nine-picture.
14. MUTE: Mutes the current channel audio.
15. ALT: Shift the current channel to last channel you turned.
16. INFO: If you press the INFO button once, a banner is displayed on the upper part of the screen, and if you press the button again
before the upper banner is disappeared, the banner will show the details of the currents channel.
17. EXIT: Close current active menu and go back to up menu.
18. OK: You can select an item in the SAT, SUBTITLE or LANG list. Program list is displayed according to TV/Radio Mode.
19. RIGHT: Right move.
20. LIST: Display the satellite list, and select available satellites.
21. SUBTITLE: Enter subtitle menu.
22. AUDIO: Sets the current channel audio to stereo/left-mono/right-mono.
23. PAUSE: Press to pause the current program playback.
24. GAME: Enter game menu.
25. AUTOSCAN: Press to search the programs.
Fig 1.3

7
2. Main Menu
The STB contains a facilitated user interface, this function is to make user easy to call all device functions.
Operation Steps: Press <MENU>, you can see this main menu.
Fig 2.1
zWhen no menu is appeared on the screen, you press the <MENU> key that will display the main menu. The focus is stopped in
the first item until the user select it.
zWhen menu is appeared on the screen, you press the <MENU> key that will return to the up-level menu.
z<OK> key:When you press the key that will go to current sub-level menu item.
z<> key:The focus will move up or down.
z<EXIT> key:Close all menus.

8
3. Edit
Use the main menu, you can press left or right key to select
“Edit” icon (see Fig 3.1).
From this menu, we can select “Channel Manger”, “Add
Favourites” and “Favourite Manger” items.
Fig. 3.1
3.1 Channel Manager
You can edit channel information in the “Channel Manager” Menu
(Fig 3.2).
Use “TV/Radio” key to view TV or radio channel list.
With the help of menu, you can set the channel status.
Fig. 3.2

9
3.2 Add Favourite Channels
Use “Add Favorites”, you can designate the channels of the current TV/Radio list as favorite channels.
Fig.3.3 Fig 3.4
Move cursor to the required channel with Up/Down key, and then press “Red” key on the remote controller to set channel as favorites. If
“Red” key is pressed again the selected channel is un-selected from your favorite list.
To select Radio channel in the TV list, use “TV /Radio” key on the remote controller, and use “TV /Radio” key to select TV channel in the
Radio channel list.
When you want exit from this menu, please press “MENU” key, you can see a dialog (Fig 3.4); this dialog let you confirm your operation.
You can see the favorite list if you press the “Fav” key while you are watching TV (or listening Radio channel) in normal state.

10
3.3 Favourite Manager
The function is basically the same as the channel manager menu.
Fig 3.5
Lock: Same as the Lock function in “Channel Manager” menu.
Skip: Same as the skip function in “Channel Manager” menu.
Rename: Same as the rename function in “Channel Manager” menu.
Sort: Same as the Sort function in “Channel Manager” menu.

11
4. Scan
Use the main menu, you can press left or right key to select
“Scan” icon. (Fig 4.1)
From this menu, we can select ”Auto Searching”, ”Manual
Searching” and “Timer Setting” items.
Fig 4.1
4.1 Auto Search
From “Scan” menu (Fig 4.1), you can select “Auto Searching”
menu (Fig 4.2).
User can select this menu to search the whole programs of the
default frequency range.
Fig 4.2

12
4.2 Manual Searching
From “Scan” menu (Fig 4.1), you can select “Manual Searching” menu (Fig 4.3).
zSet the “TP Frequency” and “Bandwidth”.
zSet “Auto Mode” to “NO”.
zSet “Trans Mode” (Fig 4.4) and “Guard Interval” (Fig 4.5) parameter.
zIf there is some signal displayed in “Signal Power” and “Signal Quality” items. Press “RED” key to search program. If you can not
see any signal, please check the parameter setting.
Fig4.3 Fig4.4 Fig 4.5

13
4.3 Timer Setting
From “Scan” menu (Fig 4.1), you can select “Timer Setting” menu
(Fig 4.8). This menu can set 8 timers to make the receiver perform
the designated actions.
Fig 4.8
Use the “Up/Down” button to select the timer. If you press “OK” to
select a timer, you can see the current setting state of this timer
(Fig 4.9).
Fig 4.9

14
If you use this timer, please set “Timer State” to “Enable” status.
You can see an extended menu (Fig 4.10).
zUse the “Up/Down” button to select item, and change the
parameters
zUse “Left/Right” button. If you have completed the timer
settings, use “Red” or “Blue” button to save timer setting.
z“Timer Number”: You can select up to 8 timers.
zTimer Cycle: You can set the cycle of the action designated
in the timer mode. “One Time”, ”Every Day” and ”Every
Week”
zTimer Service: You can set the timer service mode (“Sleep”,
“Wakeup”, “VCR Record”).
zDate: You can set the starting date of the timer action if you
press “OK”, calendar action.
zStart Time: You can set the starting time of the timer action.
zEnding Time: You can set the ending time of recording when
the “Timer Service” is “VCR Record”.
zChannel: You can select the program channel to record
when the “Timer Service” is set to “VCR Record”. When
“Timer Service” is “Wakeup”, this channel is viewed by
receiver
Note:
zPlease verify your “Current Date” and “Current Time”
setting.(ref 5.3)
The timer function could be used in playback or standby mode. If
you turn off the power switch, all timers will be erased.
Fig 4.10

15
5. Config
Use the main menu, you can press left or right key to select
“Config” icon (see Fig 5.1). From this menu, we can select
“Clear Data”, “TV Setting”, “Set Time”, ”System Update”
and ”System Information” items.
Fig 5.1
5.1 Clear Data
From “Config” menu (Fig 6.1), you can select “Clear Data” menu
(Fig 5.2)
Fig 5.2
- Delete All Programs: Delete only the saved channel data, other
setting values are not deleted.
- Reset to Default: Delete all the data currently saved, and reset
the system to the default status.

16
6. TV Setting
From “Config” menu (Fig 5.1), you can select “TV Setting” menu
(Fig 6.1) to set video and RF output.
Fig 6.1
6.1 Set Time
From “Config” menu (Fig 5.1), you can select “Set Time” menu
(Fig 6.2) to set your STB’s time. This function is useful for EPG
and some timer functions.
If a broadcaster provides GMT, you can set the time using GMT or
set your own time by yourself.
If the “GMT usage” is set to “On”, “Current time” is automatically
set and you can only set the time zone.
If you set “GMT Usage” to “OFF”, button on the item then calendar
window is displayed. You can select the date from calendar.
Fig 6.2
Table of contents
Other Denver Receiver manuals

Denver
Denver MC-7200 User manual

Denver
Denver DVBS-200HD User manual

Denver
Denver DMB-117SD User manual

Denver
Denver DVBC-123CI User manual

Denver
Denver DAB-10 User manual

Denver
Denver DMB-112HD User manual

Denver
Denver DVBC-120 HD MK4 Operating and maintenance manual

Denver
Denver DVBS-202HD User manual

Denver
Denver DMB-111HD User manual

Denver
Denver DVBC-123CI User manual
Popular Receiver manuals by other brands

Huawei
Huawei EV750 quick guide

Elsema
Elsema Gigalink GLR2708 manual

Sony
Sony STR-GX800ES - Fm Stereo Fm-am Receiver operating instructions

Edision
Edision picco T265+ user guide

Ramsey Electronics
Ramsey Electronics FR-10 Assembly and instruction manual

Boss Audio Systems
Boss Audio Systems BE7ACP user manual