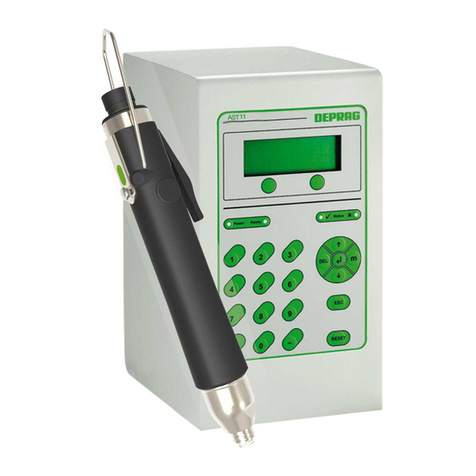
Deprag AST40-1 User manual

013749en
Operating Instruction Booklet
- Translation of the original instruction -
Sequence controller
AST40-1 385588 A
NOTICE ALLDOCUMENTATIONS !
Before beginning work this operating instruction booklet and the enclosed
safety instructions (no. 016000, pink-colored booklet) have to be read through
carefully. Always follow the instructions during operation. Give this operating in-
struction booklet and the appropriate safety instructions to the operator.

2
Table of contents
1DEFINITION OF SIGNAL WORDS AND SYMBOLS............................................................... 10
2SAFETY INSTRUCTIONS........................................................................................................ 11
3INTENDED USE ....................................................................................................................... 11
4SCOPE OF DELIVERY............................................................................................................. 12
5BRIEF DESCRIPTION.............................................................................................................. 12
6HARDWARE DESCRIPTION................................................................................................... 13
6.1 AST40 Views ......................................................................................................................... 13
6.1.1 Front view........................................................................................................................ 13
6.1.2 Connection side .............................................................................................................. 13
6.2 Interface description............................................................................................................... 14
6.2.1 MINIMAT–EC-Servo Screwdriver ................................................................................... 14
6.2.2 Power Supply .................................................................................................................. 14
6.2.3 Ethernet........................................................................................................................... 14
6.2.4 USB................................................................................................................................. 14
6.2.5 Emergency Stop.............................................................................................................. 14
6.2.6 Printer (optional)..............................................................................................................14
6.2.7 I/O interfaces................................................................................................................... 15
6.2.7.1 Voltage supply for I/O interfaces .................................................................................. 15
6.2.7.2 Interface SPS 1 ............................................................................................................ 15
6.2.7.3 Interface SPS 2 ............................................................................................................ 16
6.2.7.4 Interface 3 .................................................................................................................... 16
6.2.8 Fieldbus interface (optional)............................................................................................ 17
6.2.8.1 Profibus ........................................................................................................................17
6.2.8.2 Profinet......................................................................................................................... 17
6.2.8.3 EtherNet/IP................................................................................................................... 17
6.2.8.4 EtherCAT ..................................................................................................................... 17
7START-UP................................................................................................................................ 18
7.1 Dimension sheet .................................................................................................................... 18
7.2 Assembly ............................................................................................................................... 19
7.3 Method of operation of the sequence controller AST40......................................................... 21
7.4 Instructions on programming the sequence controller ........................................................... 21
7.5 Connection to a higher level controller................................................................................... 21
7.6 Connection on a master controller via the Fieldbus (optional)............................................... 22
7.6.1 Profibus DP / Profinet...................................................................................................... 22
7.6.1.1 General Information ..................................................................................................... 22
7.6.1.2 Hardware configuration ................................................................................................ 22
7.6.1.3 Software ....................................................................................................................... 23
7.6.2 EtherNet/IP...................................................................................................................... 35
7.6.2.1 General Information ..................................................................................................... 35
7.6.2.2 Bus configuration ......................................................................................................... 35
7.6.2.3 Software - Import.......................................................................................................... 39
7.6.2.4 Software - description of data types............................................................................. 49
7.6.2.5 Ethercat........................................................................................................................56
8USERS...................................................................................................................................... 57
9OPERATION USING THE INTEGRATED TOUCH DISPLAY ................................................. 58
9.1 Control elements .................................................................................................................... 58
9.1.1 Buttons ............................................................................................................................ 58
9.1.2 Selecting between two options........................................................................................ 58
9.1.3 Selecting between several options.................................................................................. 59
9.1.4 Text and numerical input................................................................................................. 59
9.2 Description of the menu structure .......................................................................................... 60
9.2.1 Overview ......................................................................................................................... 60

3
9.2.2 Open modules................................................................................................................. 60
9.2.3 Registration ..................................................................................................................... 61
9.2.4 Process Data Menu Area ................................................................................................ 62
9.2.4.1 Process display ............................................................................................................ 62
9.2.4.2 Statistics....................................................................................................................... 63
9.2.4.3 Graphic.........................................................................................................................64
9.2.5 System Menu Area.......................................................................................................... 65
9.2.5.1 System data ................................................................................................................. 65
9.2.5.2 System setup ............................................................................................................... 65
9.2.5.3 User Administration...................................................................................................... 70
9.2.5.4 Tool data ...................................................................................................................... 71
9.2.5.5 Screwdriver settings..................................................................................................... 72
9.2.5.6 Maintenance................................................................................................................. 72
9.2.6 Menu Area – Screwdriving Sequence............................................................................. 73
9.2.6.1 Screwdriving Sequence ............................................................................................... 73
9.2.7 Menu Area - Diagnosis.................................................................................................... 75
9.2.7.1 Tool status.................................................................................................................... 75
9.2.7.2 Tool test .......................................................................................................................76
9.2.7.3 I/O interface.................................................................................................................. 76
9.2.7.4 Fieldbus (optional)........................................................................................................ 80
9.2.7.5 System Image .............................................................................................................. 84
10 OPERATIONS USING THE WEB-BASED USER INTERFACE............................................ 86
10.1 Requirements....................................................................................................................... 86
10.1.1 Hardware....................................................................................................................... 86
10.1.2 Software ........................................................................................................................86
10.1.3 Connecting to the AST40 sequence controller.............................................................. 86
10.2 Preparing to use the web interface ...................................................................................... 86
10.2.1.1 Setting up the AST40 sequence controller................................................................. 86
10.2.1.2 Setting the browsers/operating systems .................................................................... 86
10.3 Description of the menus ..................................................................................................... 87
10.3.1 Start............................................................................................................................... 87
10.3.2 The menu structure ....................................................................................................... 89
10.3.3 System Menu Area........................................................................................................ 90
10.3.3.1 System data ............................................................................................................... 90
10.3.3.2 System settings.......................................................................................................... 90
10.3.3.3 Screwdriver data ........................................................................................................ 96
10.3.3.4 Screwdriver settings................................................................................................... 96
10.3.3.5 Tool status.................................................................................................................. 97
10.3.3.6 Maintenance............................................................................................................... 97
10.3.3.7 Log in ......................................................................................................................... 98
10.3.4 Menu Area – Screwdriving sequence ........................................................................... 98
10.3.4.1 Program Menu ........................................................................................................... 98
10.3.4.2 Create / Load Backup .............................................................................................. 101
10.3.5 Process Data Menu Area ............................................................................................ 102
10.3.5.1 Final values .............................................................................................................. 102
10.3.5.2 Statistics................................................................................................................... 102
10.3.5.3 Graphic..................................................................................................................... 103
10.3.6 Menu Area Extras ....................................................................................................... 104
10.3.6.1 Manuals.................................................................................................................... 104
10.3.6.2 Additional programs ................................................................................................. 104
10.3.6.3 Fieldbus.................................................................................................................... 105
10.3.6.4 Updates.................................................................................................................... 105
10.3.6.5 Unlocking ................................................................................................................. 106
10.3.6.6 System Image (only visible for logged in users)....................................................... 107
11 SETTINGS............................................................................................................................ 109
11.1 Description of the adjustable parameter ............................................................................ 109
11.1.1 Controller..................................................................................................................... 109

4
11.1.1.1 System Setting Parameters ..................................................................................... 109
11.1.1.2 Fieldbus system parameters (optional) .................................................................... 110
11.1.2 MINIMAT–EC-Servo Screwdriver ............................................................................... 111
11.2 Default values .................................................................................................................... 111
11.2.1 Controller..................................................................................................................... 111
11.2.1.1 Standard values for system settings ........................................................................ 111
11.2.1.2 Standard values for user data .................................................................................. 111
11.2.1.3 Standard values for fieldbus systems (optional) ...................................................... 112
11.2.2 MINIMAT–EC-Servo Screwdriver ............................................................................... 112
12 SCREWDRIVING STRATEGIES AND COMMANDS .......................................................... 113
12.1 Screwdriving Strategy ........................................................................................................ 113
12.1.1 Tighten / loosen to Torque .......................................................................................... 113
12.1.2 Extended screwdriving to torque................................................................................. 114
12.1.3 Screwdriving - tighten / loosen to angle ...................................................................... 115
12.1.4 Fasten / Loosen to external Stop-Signal ..................................................................... 117
12.1.5 Find ............................................................................................................................. 118
12.1.6 Friction Value Package (optional) ............................................................................... 119
12.1.6.1 Friction Value Measurement .................................................................................... 119
12.1.6.2 Screwdriving with a Differential Torque.................................................................... 120
12.1.6.3 Screw assemblies depending on friction.................................................................. 122
12.2 Commands......................................................................................................................... 125
12.2.1 Waiting for input .......................................................................................................... 125
12.2.2 Setting the output ........................................................................................................ 125
12.2.3 Resetting the output .................................................................................................... 125
12.2.4 Display values ............................................................................................................. 125
12.2.5 Save values................................................................................................................. 125
12.2.6 Statistics......................................................................................................................125
12.2.7 Waiting time ................................................................................................................ 125
12.2.8 Printing ........................................................................................................................126
12.2.9 Hold position ............................................................................................................... 126
13 DOCUMENTATION.............................................................................................................. 127
13.1 Final values........................................................................................................................ 127
13.2 Curve display ..................................................................................................................... 129
13.3 Statistic .............................................................................................................................. 130
13.4 Print output......................................................................................................................... 130
14 MAINTENANCE AND SERVICING...................................................................................... 133
14.1 General .............................................................................................................................. 133
14.2 Updating the software ........................................................................................................ 134
14.2.1 Main controller and display ......................................................................................... 134
14.2.2 Power Unit................................................................................................................... 134
14.2.3 Screwdriver Logic........................................................................................................ 134
14.3 Calibrating the touch display.............................................................................................. 135
15 ERROR DISPLAY AND TROUBLESHOOTING .................................................................. 136
15.1 System error ...................................................................................................................... 136
15.1.1 MINIMAT–EC-Servo Screwdriver ............................................................................... 136
15.1.2 Power unit ................................................................................................................... 136
15.1.3 Main controller............................................................................................................. 138
15.1.4 Communication ........................................................................................................... 138
15.1.5 I/O interface................................................................................................................. 138
15.2 Error in the Screwdriving Sequence................................................................................... 140
16 HELP WITH FAULTS........................................................................................................... 141
17 ACCESSORIES.................................................................................................................... 142
17.1 Power cord ......................................................................................................................... 142
17.2 Emergency Stop Connector............................................................................................... 142
17.3 AST40 – PC Connection Cable.......................................................................................... 142
17.4 Fieldbus modules............................................................................................................... 142

5
17.4.1 Profibus ....................................................................................................................... 142
17.4.2 Profinet........................................................................................................................142
17.4.3 EtherCAT .................................................................................................................... 142
17.4.4 EtherNet/IP.................................................................................................................. 142
17.5 Printer Interface ................................................................................................................. 142
17.6 Stand.................................................................................................................................. 143
17.7 Touch-Pen ......................................................................................................................... 143
17.8 Optional software packages............................................................................................... 143
17.8.1 Friction value software package.................................................................................. 143
17.8.2 DataLogger ................................................................................................................. 144
17.8.3 GRAPH10 – curve overlapping ................................................................................... 145
17.8.4 TC30-PC Statistics...................................................................................................... 146
18 GLOSSARY.......................................................................................................................... 147
19 DECOMMISSIONING AND STORAGE................................................................................ 150
20 TECHNICAL DATA .............................................................................................................. 151
21 EC DECLARATION OF INCORPORATION ........................................................................ 152
22 SERVICE LOCATIONS AND AUTHORIZED PARTNERS.................................................. 153

6
List of figures
Figure 1: Front view of AST40 ..................................................................................................... 13
Figure 2: AST40 connection side................................................................................................. 13
Figure 3: Dimension sheet ........................................................................................................... 18
Figure 4: Hardware configuration of Profibus DP......................................................................... 22
Figure 5: Hardware configuration of Profinet ............................................................................... 23
Figure 6: Directory of the modules............................................................................................... 24
Figure 7: Creating Ethernet / IP - new module............................................................................. 36
Figure 8: Creating Ethernet / IP – select module ......................................................................... 37
Figure 9: Creating Ethernet / IP – confirm settings ...................................................................... 37
Figure 10: Import AST40.L5X – “Add-On-Instruction”.................................................................. 39
Figure 11: Import AST40.L5X – Confirm Import........................................................................... 40
Figure 12: Import AST40.L5X – “Final Name”.............................................................................. 40
Figure 13: Import AST40.L5X – Menu tree .................................................................................. 41
Figure 14: Import AST40_Cntrl.L5X – „Data Types“, „User-Defined“ and „Import Data Type“ .... 41
Figure 15: Import AST40_Cntrl.L5X – Confirm Import ................................................................. 41
Figure 16: Import AST40_Cntrl.L5X – Final Name ...................................................................... 42
Figure 17: Import AST40_Cntrl.L5X – Menu tree......................................................................... 42
Figure 18: Import Controller-Tags.csv – “Tags and Logic Comments” ........................................ 43
Figure 19: Import Controller-Tags.csv – “Import” ......................................................................... 43
Figure 20: Import Controller-Tags.csv – Error display ................................................................. 44
Figure 21: Import Controller-Tags.csv – Display controller tags .................................................. 44
Figure 22: Import AST40_Control.L5X – “Import Routine”........................................................... 45
Figure 23: Import AST40_Control.L5X – Confirm “Import”........................................................... 45
Figure 24: Import AST40_Control.L5X – Change „Final Name“ and „Description“ ...................... 46
Figure 25: Import AST40_Control.L5X – Menu tree..................................................................... 46
Figure 26: Import AST40_Control.L5X – Description of the module ............................................ 47
Figure 27: Import AST40_Control.L5X – Add-On instruction call................................................. 48
Figure 28: Selecting between two options ................................................................................... 58
Figure 29: Selecting between several options ............................................................................. 59
Figure 30: Numerical block for numerical input............................................................................ 59
Figure 31: Keyboard for text input................................................................................................ 59
Figure 32: Main menu .................................................................................................................. 60
Figure 33: Open modules ............................................................................................................ 60
Figure 34: User log in................................................................................................................... 61
Figure 35: Process Data Menu Area............................................................................................ 62
Figure 36: Process display, Alternative 1..................................................................................... 62
Figure 37: Process display, Alternative 2..................................................................................... 63
Figure 38: Statistics ..................................................................................................................... 63
Figure 39: Graphic ....................................................................................................................... 64
Figure 40: System Menu Area ..................................................................................................... 65
Figure 41: System data ................................................................................................................ 65
Figure 42: System setup – Language .......................................................................................... 66
Figure 43: System setup – Network ............................................................................................. 66
Figure 44: System setup – Date / Time ....................................................................................... 67
Figure 45: System setup – General, Page 1 ................................................................................ 67
Figure 46: System setup – General, Page 2 ................................................................................ 68
Figure 47: System setup – Fieldbus, example without fieldbus ................................................... 68
Figure 48: System setup – Fieldbus, EtherCAT example ............................................................ 68
Figure 49: System setup – Fieldbus, EtherNet/IP example ......................................................... 69
Figure 50: System setup – Fieldbus, Profibus example............................................................... 69
Figure 51: System setup – Fieldbus, ProfiNet example ............................................................... 69
Figure 52: System setup – Process display selection.................................................................. 70
Figure 53: System setup – Setting standard values..................................................................... 70
Figure 54: System setup – Users................................................................................................. 71
Figure 55: Change user data ....................................................................................................... 71

7
Figure 56: Screwdriver Data, Page 1 ........................................................................................... 72
Figure 57: Screwdriver settings ................................................................................................... 72
Figure 58: Adjustment of the touch display.................................................................................. 73
Figure 59: Menu Area – Screwdriving Sequence......................................................................... 73
Figure 60: Creating a Default Program ........................................................................................ 74
Figure 61: Changing the Screwdriving Sequence........................................................................ 74
Figure 62: Menu Area - Diagnosis ............................................................................................... 75
Figure 63: Tool status – Page 1.................................................................................................. 75
Figure 64: Tool status – Page 2.................................................................................................. 76
Figure 65: Tooltest ....................................................................................................................... 76
Figure 66: Diagnosis I/O-Port, Inputs (Page 1)............................................................................ 77
Figure 67: Diagnosis I/O-Port, Program choice (Page 2)............................................................. 78
Figure 68: Diagnosis I/O-Port, Outputs (Page 3) ......................................................................... 78
Figure 69: Diagnosis I/O-Port, I/O interface (Page 4) .................................................................. 79
Figure 70: Diagnosis I/O-Port, Status (Page 5)............................................................................ 80
Figure 71: Diagnosis Fieldbus, Communication Flags (Page 1) .................................................. 81
Figure 72: Diagnosis Fieldbus, Inputs (Page 2)........................................................................... 81
Figure 73: Diagnosis Fieldbus, Program Selection (Page 3) ....................................................... 82
Figure 74: Diagnosis Fieldbus, Outputs (Page 4) ........................................................................ 82
Figure 75: Diagnosis Fieldbus, Universal Inputs and Outputs (Page 5) ...................................... 83
Figure 76: System Image............................................................................................................. 84
Figure 77: The home page........................................................................................................... 87
Figure 78: Start page ................................................................................................................... 88
Figure 79: Web interface menu structure..................................................................................... 89
Figure 80: System data ................................................................................................................ 90
Figure 81: Submenu items - System setup .................................................................................. 90
Figure 82: System setup .............................................................................................................. 91
Figure 83: System setup – Fieldbus, example without fieldbus ................................................... 92
Figure 84: System setup – Fieldbus, EtherCAT example ............................................................ 92
Figure 85: System setup – Fieldbus, EtherNet/IP example ......................................................... 93
Figure 86: System settings – Fieldbus, Profibus example ........................................................... 93
Figure 87: System setup – Fieldbus, ProfiNet example ............................................................... 94
Figure 88: Date / Time ................................................................................................................. 94
Figure 89: User Administration..................................................................................................... 95
Figure 90: Screwdriver data......................................................................................................... 96
Figure 91: Screwdriver settings ................................................................................................... 97
Figure 92: Tool status .................................................................................................................. 97
Figure 93: Adjustment of the touch display.................................................................................. 98
Figure 94: Submenu item – Screwdriving Sequence ................................................................... 98
Figure 95: Screwdriving sequence – empty program................................................................... 99
Figure 96: Screwdriving Sequence – complete program ........................................................... 100
Figure 97: Final Values .............................................................................................................. 102
Figure 98: Submenu item Statistics ........................................................................................... 102
Figure 99: Statistics ................................................................................................................... 103
Figure 100: Downloading graphic .............................................................................................. 103
Figure 101: Manuals .................................................................................................................. 104
Figure 102: Additional programs ................................................................................................ 105
Figure 103: Fieldbus .................................................................................................................. 105
Figure 104: Update .................................................................................................................... 106
Figure 105: Unlock Extension .................................................................................................... 106
Figure 106: System Image ......................................................................................................... 107
Figure 107: Screwdriving Application to torque.......................................................................... 113
Figure 108: Extended screwdriving to Torque ........................................................................... 114
Figure 109: Screwdriving to Angle ............................................................................................. 115
Figure 110: Loosening on Angle ................................................................................................ 116
Figure 111: Fasten / Loosen to external Stop-Signal................................................................. 117
Figure 112: Friction Value Measurement................................................................................... 119
Figure 113: Screwdriving on differential Torque ........................................................................ 120

8
Figure 114: Screw assemblies depending on friction................................................................. 122
Figure 115: DataLogger ............................................................................................................. 144
Figure 116: GRAPH10E............................................................................................................. 145
Figure 117: TC30-PC Statistics program ................................................................................... 146

9
List of tables
Table 1: Scope of delivery ........................................................................................................... 12
Table 2: Configuration Interface Emergency stop........................................................................ 14
Table 3: Configuration Interface Printer ....................................................................................... 14
Table 4: Configuration I/O interface SPS1................................................................................... 15
Table 5: Assignment of LEDs to pins at interface SPS1 .............................................................. 15
Table 6: Configuration I/O interface SPS2................................................................................... 16
Table 7: Configuration I/O interface 3 .......................................................................................... 16
Table 8: Configuration Interface Profibus .................................................................................... 17
Table 9: Modules and UDT's for the control................................................................................. 23
Table 10: Transfer parameters (FB12)......................................................................................... 24
Table 11: Data structure of the control signals (UDT21).............................................................. 26
Table 12: Data structure of the status signals (UDT22)............................................................... 29
Table 13: Status Signal Error Codes............................................................................................ 30
Table 14: Data structure of the screwdriving data (UDT22)......................................................... 33
Table 15: Creating Ethernet / IP – conform settings .................................................................... 38
Table 16: Software - Import.......................................................................................................... 39
Table 17: Import AST40_Control.L5X – Add-On Instruction ........................................................ 48
Table 18: Data structure AST40_Cntrl......................................................................................... 49
Table 19: Data structure AST40_IN_Signals ............................................................................... 51
Table 20: Data structure AST40_IN_FinalValues ........................................................................ 54
Table 21: Data structure AST40_OUT_Signals ........................................................................... 55
Table 22: Rights of the various user types................................................................................... 57
Table 23: Diagnosis I/O-Port, Inputs (Page 1) ............................................................................. 77
Table 24: Diagnosis I/O-Port, Program choice (Page 2).............................................................. 78
Table 25: Diagnosis I/O-Port, Outputs (Page 3) .......................................................................... 79
Table 26: Diagnosis I/O-Port, I/O interface (Page 4) ................................................................... 79
Table 27: Fieldbus, Inputs Diagnosis (Page 2) ............................................................................ 81
Table 28: Diagnosis Fieldbus, Program Selection (Page 3) ........................................................ 82
Table 29: Diagnosis Fieldbus, Outputs (Page 4) ......................................................................... 83
Table 30: Diagnosis Fieldbus, Universal Inputs and Outputs (Page 5)........................................ 84
Table 31: Adjustable parameters ............................................................................................... 110
Table 32: Configurable Profibus parameters ............................................................................. 110
Table 33: Configurable Profinet parameters .............................................................................. 110
Table 34: Adjustable EtherNet/IP Parameters ........................................................................... 110
Table 35: Adjustable Parameters MINIMAT–EC-Servo Screwdriver ......................................... 111
Table 36: Default values ............................................................................................................ 111
Table 37: Standard values - User data ...................................................................................... 111
Table 38: Default values for Profibus......................................................................................... 112
Table 39: Default values for Profinet.......................................................................................... 112
Table 40: Standard values EtherNet/IP...................................................................................... 112
Table 41: MINIMAT–EC-Servo Screwdriver Standard Values................................................... 112
Table 42: Structure of the data set in the files 1-7.csv and actual.csv....................................... 127
Table 43: Structure of the data set in the file actual_extended.csv............................................ 128
Table 44: Commands Printout ................................................................................................... 131
Table 45: System error MINIMAT–EC-Servo screwdriver ......................................................... 136
Table 46: System error - power unit........................................................................................... 137
Table 47: System error - Master control unit.............................................................................. 138
Table 48: System error – Communication.................................................................................. 138
Table 49: System Error - I/O Interface ....................................................................................... 139
Table 50: Sequence errors ........................................................................................................ 140
Table 51: Error Rectification....................................................................................................... 141
Table 52: Technical Data ........................................................................................................... 151

10
1 Definition of signal words and symbols
The signal words and symbols used in the technical documentation (safety instructions,
operating instruction booklet, et c.) have the following meaning:
DANGER
Indicates an immediate danger which causes serious injuries or even
death if not avoided.
WARNING
Indicates a threatening danger which can cause serious injuries or even
death if not avoided.
CAUTION
Indicates a danger or unsafe procedure which can cause injuries to a per-
son or material damages if not avoided.
NOTICE
Indicates a potentially dangerous situation which can cause damage to
the product or its surroundings if not avoided.
IMPORTANT
Indicates tips and other useful information.
In each case the symbol used does not replace the safety text. The text must always be
read full
y
. In some cases other s
y
mbols will be us ed with the si
g
nal words.

11
2 Safety instructions
Reading the enclosed safety instruction booklet no. 016000 (pink-coloured booklet) is
essential for working with the equipment.
WARNING
Fires, electric shocks and other injuries, or damages to components can be
caused if the safety guidelines are ignored.
WARNING
Risk of fatal injury due to electrocution!
Disconnect the electric equipment from the power supply before starting
any wor k on the tool (e.g. installation, changing of accessories or machine
tools, removal of covers prior to longer downtimes, maintenance works,
etc.).
Switch off the mains switch and pull out the mains plug!
3 Intended use
The sequence controller AST40 is designed exclusively for fittings in industrial use. And
must only be operated with DEPRAG MINIMAT–EC-Servo screwdrivers of the series
311E... . The system is especially suitable for applications requiring the highest demand of
quality, flexibility and documentation.
Use beyond its intended use is considered unauthorized and therefore improper.
Furthermore, DEPRAG is not liable for damage resulting from the misuse of the
instrument; the user alone is liable.
The correct use of the instrument includes compliance with all operating, maintenance and
repair instructions.
IMPORTANT
Please contact your DEPRAG Representative, our international service
centers or contact DEPRAG SCHULZ GMBH u. CO. directly if you have
any questions.
Visit our website at www.deprag.com.

12
4 Scope of Delivery
Check that the shipment is complete and that there have been no damages in transit.
Quantity Designation Part no.
1 AST40 Sequence controller 385588 A
1 Quick-Start instructions of AST40 with 311E… 013722xx
1 Safety Instructions 016000
Table 1: Scope of delivery
5 Brief Description
The Sequence Controller AST40 is a controller with integrated power electronics to
operate Series 311 DEPRAG MINIMAT–EC-Servo screwdrivers. The torques, rotating
speeds, waiting times and direction of rotation can be individually adapted to the screw
assembly tasks within the performance range of the screwdrivers.
Extensive operating options as well as programming, controller and documentation
interfaces provide maximum flexibility during integration into existing process
environments. The diversified communication possibilities involve I/O and various
(optional) fieldbus interfaces as well as a 7 inch touch display and an integrated web
server for the purpose of parameterization, saving data and displaying curves via Ethernet.
All the usual screw processes are stored in the sequence controller in the form of basic
programs. This means the system can be put into operation using just a few steps. All the
functions required for this are provided in the web desktop and the touch display so that no
additional software has to be installed.
Comprehensive diagnostics help to identify errors in the screw process, on the MINIMAT–
EC-Servo screwdriver or in the sequence controller.

13
6 Hardware Description
6.1 AST40 Views
6.1.1 Front view
Figure 1: Front view of AST40
6.1.2 Connection side
Figure 2: AST40 connection side
Interfaces
GX1: DEPRAG MINIMAT–
EC-Servo screwdriver
GX2: I/O interface SPS1
GX3: I/O interface SPS2
GX4: I/O interface 3
GX5: Printer (optional)
GX6: USB
GX7: Ethernet
GX8: Power Supply
GX9: Emergency Stop
GX10: Fieldbus (optional)
GS1: Main switch
LEDs
LED 1 System OK (MC + PU)
LED 2 Ready
LED 3 OK
LED 4 NOT OK
LED 5 Emergency stop (STO1)
active
LED 6 Emergency stop (STO2)
active
LED 7 Logic supply power unit OK
LED 8 Power unit OK
LED 9 Logic supply main unit OK
LED 10 24V external OK
LED 11 Not in use
LED 12 Not in use

14
6.2 Interface description
6.2.1 MINIMAT–EC-Servo Screwdriver
Designation: GX1
Plug connector: Hybrid circular connector
6.2.2 Power Supply
Designation: GX8
Plug connector: Hirschmann STASEI 200
6.2.3 Ethernet
Designation: GX7
Plug connector: Female connector RJ45 BULGIN PX0833
6.2.4 USB
Designation: GX6
Plug connector: Female connector BULGIN PX0844/A/0M50/A
6.2.5 Emergency Stop
Designation: GX9
Plug connector: Binder plug connector, 4 pin, round and straight
Pin Designation
1 STO1
2 STO2
3 GND
4 24V
Table 2: Configuration Interface Emergency stop
IMPORTANT
The integrated I/O module of the AST40 must be fed with 24V DC to use
the emergency stop circuit.
This is done by feeding 24V DC via pins 3 and 4 at plug connector GX9
(emergency stop).
6.2.6 Printer (optional)
Designation: GX5
Plug connector: SUB-D 9-pole (bushing)
Pin Designation
1 --
2 TXD
3 RXD
4 --
5 GND
6 --
7 --
8 --
9 --
Table 3: Configuration Interface Printer
Interface setting:
9600 Baud - 8 data bits - 1 stop bit - No parity bit - No hardware flow control

15
6.2.7 I/O interfaces
6.2.7.1 Voltage supply for I/O interfaces
IMPORTANT
24V external: The integrated I/O module of the AST40 must be fed
with 24V DC to use the inputs / outputs as well as the
emergency stop circuit.
This is done by feeding 24V DC via the pins 2/3 and
21/22 at plug connector GX2 (interface SPS ) or via
pins 3 and 4 at plug connector GX9 (emergency
stop).
24V internal: Internal 24V DC of the AST40.
This output may be loaded with max. 150 mA.
6.2.7.2 Interface SPS 1
Designation: GX2
Plug connector: SUB-D 37-pole (bushing)
Pin Designation Type Pin Designation Type
1 24V internal - 20 GND internal (HGND) -
2 24V external - 21 GND external (GND) -
3 24V external - 22 GND external (GND) -
4 Program selection 0 Input 23 Not in use Input
5 Program selection 1 Input 24 Program selection 4 Input
6 Program selection 2 Input 25 Program selection 5 Input
7 Program selection 3 Input 26 Program selection 6 Input
8 external stop, digital Input 27 Start Input
9 external stop, analog Input 28 ready Outlet
10 Not in use Input 29 OK Output
11 System OK (MC + PU) Output 30 NOT OK Output
12 Emergency stop1 active (STO1) Output 31 Status MC Reserve Output
13 Emergency stop2 active (STO2) Output 32 Sequence 1 Input
14 Screwdriving cycle active Output 33 Sequence 2 Input
15 Status PU Reserve Output 34 Sequence 3 Input
16 Sequence 1 Output 35 Sequence 4 Input
17 Sequence 2 Output 36 Sequence 5 Input
18 Sequence 3 Output 37 Sequence 6 Input
19 Sequence 4 Output
Table 4: Configuration I/O interface SPS1
CAUTION
Maximum load per output of 50 mA. The total current for all the interfaces
must not exceed 600 mA.
LED Pin Designation
1 11 System OK (MC + PU)
2 28 ready
3 29 OK
4 30 NOT OK
5 12 STO1
6 13 STO2
Table 5: Assignment of LEDs to pins at interface SPS1

16
6.2.7.3 Interface SPS 2
Designation: GX3
Plug connector: SUB-D 25-pole (bushing)
Pin Designation Type Pin Designation Type
1 24V - 14 GND internal -
2 24V external - 15 GND external -
3 Not in use Input 16 n.c.
4 Sequence 5 Input 17 n.c.
5 Sequence 6 Input 18 Sequence 9 Input
6 Sequence 7 Input 19 Sequence 10 Input
7 Sequence 8 Input 20 Sequence 11 Input
8 Sequence 5 Output 21 Sequence 12 Input
9 Sequence 6 Output 22 Sequence 9 Output
10 Sequence 7 Output 23 Sequence 10 Output
11 Sequence 8 Output 24 Sequence 11 Output
12 n.c. 25 Sequence 12 Output
13 n.c.
Table 6: Configuration I/O interface SPS2
CAUTION
Maximum load per output of 50 mA. The total current for all the interfaces
must not exceed 600 mA.
6.2.7.4 Interface 3
Designation: GX4
Plug connector: SUB-D 15-pole (bushing)
Pin Designation Type Pin Designation Type
1 Not in use Input 9 Not in use Input
2 24V Out - 10 GND external -
3 24V Out - 11 GND external -
4 24V Out - 12 GND external -
5 Not in use Input 13 Not in use Output
6 Not in use Output 14 Reload Output
7 n.c. 15 GND external -
8 24V Out -
Table 7: Configuration I/O interface 3
CAUTION
Maximum load per output of 50 mA. The total current for all the interfaces
must not exceed 600 mA.
IMPORTANT
24V Out: 24 V DC power supply for the supply of external sensors.

17
6.2.8 Fieldbus interface (optional)
6.2.8.1 Profibus
Designation: GX10
Plug connector: SUB-D 9-pole (bushing)
Pin Designation Description
1 -- --
2 -- --
3 RX/TX-P Send / Receive data ; Data line B
4 PB_RTS
5 PB-GND Mass (Ground):
6 PB-5V Voltage supply +5V
7 -- --
8 RX/TX-N Send / Receive data ; Data line A
9 -- --
Table 8: Configuration Interface Profibus
6.2.8.2 Profinet
Designation: GX10
Plug connector: 2x Female connector RJ45 BULGIN PX0833
6.2.8.3 EtherNet/IP
Designation: GX10
Plug connector: 2x Female connector RJ45 BULGIN PX0833
6.2.8.4 EtherCAT
Designation: GX10
Plug connector: 2x Female connector RJ45 BULGIN PX0833

18
7 Start-up
7.1 Dimension sheet
Figure 3: Dimension sheet

19
7.2 Assembly
WARNING
Risk of fatal injury due to electrocution!
Switch off the AST6 sequence controller at the main switch and
disconnect the power plug before connecting the screwdriver!
Commissioning may only be performed by qualified personnel.
CAREFUL
Injuries due to electricity and/or damage to the device
Before connecting to the electrical supply, compare the rating of the
AST40's sequence control system with the building's internal power
supply (also see 20 Technical Data)
Plug in the EC-Servo screwdriver using the
motor cable (interface GX1) and fasten the
connector with a quarter rotation to the right.
Plug in the connector for the I/O interface SPS1
(interface GX2) and firmly tighten the retaining
screws.
Connect the emergency stop cable (interface
GX9).
Silver colored
bracket
Connect the voltage supply cable (interface
GX8) and fasten the cable using the silver
colored bracket.

20
Switch the AST40 sequence controller on using
the main switch (GS1).
ATTENTION
Damage to the device due to overheating!
Make sure that there is sufficient ventilation for the device.
Do not operate the sequence controller in lying position and make sure,
that there is free space at the ventilation slots on the back side of the
device.
More details on the interfaces can be found in Section 6.1.2 Connection side and
6.2 Interface description.
CAUTION
Observe the minimum bending radii for motor cable.
Non-observance can lead to damages!
During constant movement:
Minimum bending radius: 110 mm
For one-time bending:
Minimum bending radius: 55 mm
It is necessary to ensure that there is no mechanical stress on the cables
during operation.
The motor cable must also be firmly connected to the sequence controller
or the EC servo screwdriver, to ensure a safe contact.
Table of contents
Other Deprag Controllers manuals