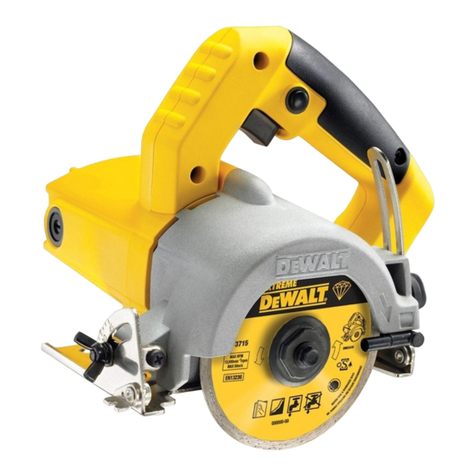
DeWalt D28700 User manual

1
D28700

2
Copyright DEWALT
English 7
Korean 14
Chinese 21
Thai 28

3
A
6
1
3
2
4
5
7
9
10
11
13
12
8 14

4
B1
B2 B3
5
18
17
16
14
4
15
20 19
6
21
12

5
C1
C2
25 24 22 23
27
26

6
11
33
C3
DE
29
8
C4
3231 29 30 8
28 27

7
ENGLISH
CHOPSAW D28700
EC-Declaration of conformity
D28700
DEWALT declares that these power tools have been
designed in compliance with: 98/37/EEC, 89/336/EEC,
73/23/EEC, 86/188/EEC, EN 55014-2, EN 61029,
EN 55014, EN 61000-3-2 & EN 61000-3-3.
For more information, please contact DEWALT at the
address below, or refer to the back of the manual.
D28700
L
pA
(sound pressure) dB(A) 98.5
L
WA
(acoustic power) dB(A) 107
Weighted RMS acceleration value m/s
2
4.3
K
pA
(sound pressure uncertainty) dB(A) 2.8
K
WA
(acoustic power uncertainty) dB(A) 2.8
Director Engineering and Product Development
Horst Großmann
DEWALT, Richard-Klinger-Straße 11
D-65510, Idstein, Germany
Congratulations!
You have chosen a DEWALT tool. Years of
experience, thorough product development and
innovation make DEWALT one of the most reliable
partners for professional power tool users.
Technical data
D28700
Voltage V 220-240
Power input W 2,200
No-load speed min
-1
3,800
Min. peripheral speed cutting disc m/s 80
Disc diameter mm 355
Disc bore mm 25.4
Disc body thickness mm 2.66
Type of cutting disc straight, non-recessed
Cross-cutting capacity at 90°
circular mm 115
square mm 119 x 119
rectangular mm 115 x 130
angular mm 137 x 137
Cross-cutting capacity at 45°
circular mm 98
square mm 98 x 98
rectangular mm 115 x 98
angular mm 98 x 98
Weight kg 18
The following symbols are used throughout this manual:
Denotes risk of personal injury, loss of life
or damage to the tool in case of non-
observance of the instructions in this
manual.
Denotes risk of electric shock.
Fire hazard.

8
ENGLISH
Safety instructions
When using power tools, always observe the
safety regulations applicable in your country to
reduce the risk of fire, electric shock and
personal injury.
Read all of this manual carefully before operating
the tool. Save this manual for future reference.
General
1 Keep work area clean
Cluttered areas and benches can cause accidents.
2 Consider work area environment
Do not expose the tool to rain. Do not use the
tool in damp or wet conditions. Keep the work
area well lit (250 - 300 Lux). Do not use the tool
where there is a risk of causing fire or explosion,
e.g. in the presence of flammable liquids and
gases.
3 Keep children away
Do not allow children, visitors or animals to come
near the work area or to touch the tool or the
mains cable.
4 Dress properly
Do not wear loose clothing or jewellery, as these
can be caught in moving parts. Wear protective
hair covering to keep long hair out of the way.
When working outdoors, preferably wear suitable
gloves and non-slip footwear.
5 Personal protection
Always use safety glasses. Use a face or dust
mask whenever the operations may produce
dust or flying particles. If these particles might be
considerably hot, also wear a heat-resistant
apron. Wear ear protection at all times. Wear a
safety helmet at all times.
6 Guard against electric shock
Prevent body contact with earthed surfaces (e.g.
pipes, radiators, cookers and refrigerators).
When using the tool under extreme conditions
(e.g. high humidity, when metal swarf is being
produced, etc.), electric safety can be improved
by inserting an isolating transformer or a (FI)
earth-leakage circuit-breaker.
7 Do not overreach
Keep proper footing and balance at all times.
8 Stay alert
Watch what you are doing. Use common sense.
Do not operate the tool when you are tired.
9 Secure workpiece
Use clamps or a vice to hold the workpiece. It is
safer and it frees both hands to operate the tool.
10 Connect dust extraction equipment
If devices are provided for the connection of dust
extraction and collection facilities, ensure that
these are connected and properly used.
11 Remove adjusting keys and wrenches
Always check that adjusting keys and wrenches
are removed from the tool before operating the
tool.
12 Extension cables
Before use, inspect the extension cable and
replace if damaged. When using the tool
outdoors, only use extension cables intended for
outdoor use and marked accordingly.
13 Use appropriate tool
The intended use is described in this instruction
manual. Do not force small tools or attachments
to do the job of a heavy-duty tool. The tool will
do the job better and safer at the rate for which it
was intended. Do not force the tool.
Warning! The use of any accessory or attachment
or performance of any operation with this tool
other than those recommended in this instruction
manual may present a risk of personal injury.
14 Check for damaged parts
Before use, carefully check the tool and mains
cable for damage. Check for misalignment and
seizure of moving parts, breakage of parts,
damage to guards and switches and any other
conditions that may affect its operation. Ensure
that the tool will operate properly and perform its
intended function. Do not use the tool if any part
is damaged or defective. Do not use the tool if
the switch does not turn it on and off. Have any
damaged or defective parts replaced by an
authorised DEWALT repair agent. Never attempt
any repairs yourself.
15 Unplug tool
Switch off and wait for the tool to come to a
complete standstill before leaving it unattended.
Unplug the tool when not in use, before changing
any parts of the tools, accessories or
attachments and before servicing.
16 Avoid unintentional starting
Do not carry the tool with a finger on the switch.
Be sure that the tool is switched off before
plugging in.

9
ENGLISH
17 Do not abuse cord
Never carry the tool by its cord. Never pull the
cord to disconnect from the socket. Keep the
cord away from heat, oil and sharp edges.
18 Store idle tools
When not in use, tools must be stored in a dry place
and locked up securely, out of reach of children.
19 Maintain tools with care
Keep the tools in good condition and clean for
better and safer performance. Follow the
instructions for maintenance and changing
accessories. Keep all handles and switches dry,
clean and free from oil and grease.
20 Repairs
This tool is in accordance with the relevant safety
regulations. Have your tool repaired by an
authorised DEWALT repair agent. Repairs should
only be carried out by qualified persons using
original spare parts; otherwise this may result in
considerable danger to the user.
Additional safety instructions for chopsaws
• Always wear regular working gloves while
operating this tool.
• Keep hands away from the cutting disc. Never
cut workpieces that require manual action closer
than 15 cm from the rotating cutting disc.
• Do not cut workpieces less than 1.2 mm in
thickness when using the cutting disc supplied
with this tool.
• Do not operate this tool without guards in place.
• Do not perform any operation freehand. Use the
material clamp to clamp the workpiece securely.
• Never reach in the back of the cutting disc.
• Always position the tool on a flat, stable surface
that is well maintained and free of loose
materials, e.g. chips and cut-offs.
• Before using, inspect the cutting disc for cracks
or flaws. Discard the cutting disc if a crack or
flaw is evident.
• Make sure the cutting disc is not contacting the
workpiece before the tool is switched on.
• In operation, avoid bouncing the cutting disc or
giving it rough treatment. If this occurs, stop the
tool and inspect the cutting disc.
• Do not operate the tool while standing in line with
the cutting disc. Keep other persons away from
the work area.
• Be aware of cutting chips and the material being
cut. They may be sharp and hot. Allow cut off
parts to cool before handling.
• The spark deflector becomes hot during use.
Avoid touching or adjusting the spark deflector
immediately after operation.
• Switch off the tool and wait for the cutting disc to
stop before moving the workpiece or changing
the settings.
• After switching off, never attempt to stop the
cutting disc by pressing against the side of the
disc.
• Do not use cutting fluids. These fluids could
ignite or cause electrical shock.
• Check that the workpiece is properly supported.
• Use the cutting discs recommended by the
manufacturer only. Never use circular saw blades
or any other types of toothed blades.
• The max. allowable speed of the cutting disc must
always be equal to or greater than the no-load
speed of the tool specified on the nameplate.
• Do not use cutting discs that do not conform to
the dimensions stated in the technical data.
• Ensure that the cutting disc is mounted correctly
before use.
• Let the tool run at no-load in a safe position for at
least 30 seconds. If there is a considerable
vibration or if any other defect occurs, stop the
tool and check it to determine the cause.
• Do not use cutting discs for side grinding.
• Do not cut concrete, brick, tile or ceramic materials.
• Do not cut wood, plastic or synthetic materials.
• Do not cut cast-iron materials.
• Never cut magnesium materials.
• Do not cut electrically live material.
• Use this tool in a well-ventilated area. Do not
operate the tool near flammable liquids, gases or
dust. Sparks or hot chips from cutting or arcing
motor brushes may ignite combustible materials.
• Regularly clear the ventilation slots when working
in dusty conditions. If it should become necessary
to clean the slots, remember to unplug the tool
first.
• Always store cutting discs well-protected and in
a dry place, out of reach of children.
•Warning! Use of this tool can generate dust
containing chemicals known to cause cancer,
birth defects or other reproductive harm.
Use appropriate respiratory protection.

10
ENGLISH
The following factors are of influence to noise
production:
– the material to be cut
– the type of the cutting disc
– the feed force
Take appropriate measures for the
protection of hearing.
Residual risks
The following risks are inherent to the use of these
machines:
– injuries caused by touching the rotating parts
– injuries caused by disruption of the cutting disc
These risks are most evident:
– within the range of operation
– within the range of the rotating machine parts
In spite of the application of the relevant safety
regulations and the implementation of safety
devices, certain residual risks cannot be avoided.
These are:
– Impairment of hearing.
– Risk of accidents caused by the uncovered parts
of the rotating cutting disc.
–
–
Risk of injury when changing the disc.
Risk of squeezing fingers when opening the guards.
Package contents
The package contains:
1 Chopsaw
1 Cutting disc
1 Allen key
1 Instruction manual
1 Warranty card
1 Service Address card
• Check for damage to the tool, parts or
accessories which may have occurred during
transport.
• Take the time to thoroughly read and understand
this manual prior to operation.
Description (fig. A)
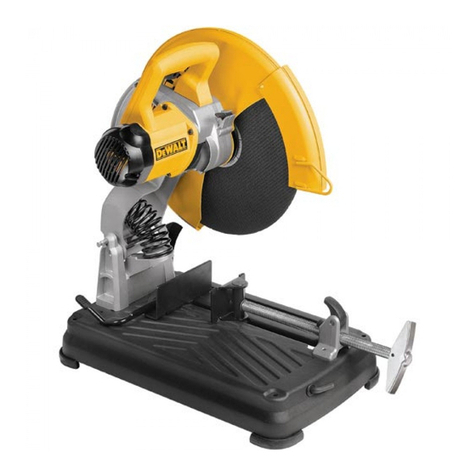
Your D28700 chopsaw has been designed for the
cutting of variously shaped steel materials.
1 On/off switch
2 Operating handle
4 Guard
3 Carrying handle
5 Cutting disc
6 Spindle lock
7 Material clamp
8 Fence
9 Mounting holes
10 Cutting table
11 Spark deflector
12 Depth stop
13 Lock-down pin
14 Allen key
Electrical safety
The electric motor has been designed for one
voltage only. Always check that the power supply
corresponds to the voltage on the rating plate.
Your tool is double insulated in
accordance with EN 61029; therefore no
earth wire is required.
Using an extension cable
If an extension cable is required, use an approved
extension cable suitable for the power input of this
tool (see technical data).
The minimum conductor size is 1.5 mm2.
When using a cable reel, always unwind the cable
completely. Also refer to the table below.
Conductor size (mm
2
) Cable rating (Amperes)
0.75 6
1.00 10
1.50 15
2.50 20
4.00 25
Cable length (m)
7.5 15 25 30 45 60
Voltage Amperes Cable rating (Amperes)
115 0-2.0 66 66 610
2.1 - 3.4 6 6 6 6 15 15
3.5 - 5.0 6 6 10 15 20 20
5.1 - 7.0 10 10 15 20 20 25
7.1 - 12.0 15 15 20 25 25 -
12.1 - 20.0 20 20 25 - - -

11
ENGLISH
Voltage Amperes Cable rating (Amperes)
230 0 - 2.0 6 6 6 6 6 6
2.1 - 3.4 6 6 6 6 6 6
3.5 - 5.0 6 6 6 6 10 15
5.1 - 7.0 10 10 10 10 15 15
7.1 - 12.0 15 15 15 15 20 20
12.1 - 20.0 20 20 20 20 25 -
Connecting to the mains
The mains supply to be used for this machine must
be equipped with a 16 A cut-out fuse with time delay.
Voltage drops
Inrush currents cause short-time voltage drops.
Under unfavourable power supply conditions, other
equipment may be affected.
If the system impedance of the power supply is lower
than 0.25 Ω, disturbances are unlikely to occur.
Assembly and adjustment
Prior to assembly and adjustment always
unplug the tool.
Bench mounting (fig. A)
Mounting holes (9) have been provided to facilitate
bench mounting.
Removing and fitting a cutting disc (fig. B1 - B3)
• With the arm in the rest position, use the lip (15)
to slide the guard (4) back. Leave the guard
retracted (fig. B1).
• Press and hold down the spindle lock (6) (fig. B2).
• Rotate the cutting disc (5) until it locks.
• Using the Allen key (14), remove the bolt (16) by
turning counterclockwise and then remove the flat
washer (17) and the retaining flange (18) (fig. B2).
• Check that the spacer (19) is in place against the
flange (20).
• Replace the cutting disc (5). Make sure that the
new disc is placed onto the spacer (19) in the
correct rotational direction.
• Secure the blade with the retaining flange (18),
the flat washer (17) and the bolt (16).
• Move the guard back down and release the
spindle lock (6).
• Adjust the cutting depth as necessary (fig. B3).
Adjusting the cutting depth (fig. B3)
The cutting depth can be adjusted to meet the wear
of the cutting disc.
• Make a dry run with the tool switched off and
check for clearance.
• If adjustment is required, proceed as follows:
• Loosen the lock nut (21) a few turns.
• Turn the depth stop bolt (12) in or out as to
achieve the required cutting depth.
• Tighten the lock nut (21).
Always adjust the depth stop to its original
position when replacing the cutting disc.
Clamping the workpiece in position
(fig. A & C1 - C4)
The tool is equipped with a material clamp (6) (fig. A).
• Pull the lever (22) toward the handle (23) (fig. C1).
• Push the clamp shaft (24) forward until the jaw
(25) is almost touching the workpiece.
• Press the lever (22) toward the jaw (25) until it
engages with the clamp shaft (24).
• Rotate the handle (23) clockwise and clamp the
workpiece securely.
• To release the workpiece, rotate the handle (23)
counterclockwise.
• To increase the cutting capacity, place a
spacer block (26) under the workpiece
(27). The spacer block should be slightly
narrower than the workpiece (fig. C2).
• Support long workpieces using a piece
of wood (28) (fig. C3). Do not clamp the
cut off end (27).
Quick travel feature (fig. C1)
The clamp has a quick travel feature.
• To release the clamp, rotate the handle (23) one
or two turns counterclockwise and pull the lever
(22) toward the handle (23).
Setting the clamping position (fig. C4)
The clamping position can be set to match the
cutting disc.
• Remove the fence bolts (29) using the Allen key (14).
• Move the fence (8) as required.
• Re-fit the fence bolts (29) and tighten them to
lock the fence (8).

12
ENGLISH
Adjusting the angle of cut (fig. D)
The tool can be used for mitre cuts up to 45°.
• Loosen the fence bolts (29) to release the fence (8).
• Set the fence (8) to the required angle. The angle
can be read on the scale (30).
• Tighten the fence bolts (29) to lock the fence (8).
Checking and adjusting the mitre scale (fig. A & D)
• Loosen the fence bolts (29) to release the fence
(8) (fig. D).
• Pull down the arm and lock it in this position by
pushing in the lock-down pin (13) (fig. A).
• Place a square (31) against the fence (8) and the
left side of the cutting disc creating a perfect 90°
(fig. D). Check that the 0°marking on the scale
(30) aligns with the marking on the table (31).
• Tighten the fence bolts (29) to lock the fence (8).
• Pull out the lock-down pin (13) and return the
arm to its upper rest position (fig. A).
Adjusting the spark deflector (fig. E)
• Loosen the screw (32).
• Set the spark deflector (11) as appropriate.
• Tighten the screw (32).
Instructions for use
• Always observe the safety instructions
and applicable regulations.
• Do not apply excessive pressure to the tool.
• Avoid overloading. Should the tool
become hot, let it run a few minutes
under no load condition.
Prior to operation:
• Install the appropriate cutting disc. Do not use
excessively worn discs. The maximum rotation
speed of the tool must not exceed that of the
cutting disc.
• Make sure the disc rotates in the direction of the
arrows on the accessory and the tool.
• Secure the workpiece.
• Always set the spark deflector correctly.
Performing a cut (fig. A)
• Place the material to be cut against the fence (8)
and secure using the material clamp (7).
• Switch on the tool and pull down the control
handle (2) to cut the workpiece. Allow the motor
to reach full speed before cutting.
• Allow the disc to cut freely. Do not force.
• After completing the cut, switch off the tool and
return the arm to its upper rest position.
Switching on and off (fig. A)
The on/off switch (1) is mounted in the operating
handle (2).
• To run the tool, press the on/off switch (1).
• Keep the on/off switch depressed while
performing the operation.
• To stop the tool, release the switch.
Do not switch the tool on or off when
under load.
Do not cut magnesium.
Consult your dealer for further information on the
appropriate accessories.
Transporting (fig. A)
The tool is equipped with a lock-down pin (13) which
locks the tool in closed-down position for carrying.
• Lower the guard (4) onto the cutting table (10)
and secure the tool in this position by pushing in
the lock-down pin (13).
• Transport the tool using the carrying handle (3).
• To release the tool, depress the operating handle
slightly and pull out the lock-down pin (13).
Maintenance
Your DEWALT power tool has been designed to
operate over a long period of time with a minimum
of maintenance. Continuous satisfactory operation
depends upon proper tool care and regular cleaning.

13
ENGLISH
Lubrication
Your power tool requires no additional lubrication.
Cleaning
Keep the ventilation slots clear and regularly clean
the housing with a soft cloth.
Protecting the environment
Separate collection. This product must
not be disposed of with normal
household waste.
Should you find one day that your DEWALT product
needs replacement, or if it is of no further use to you,
do not dispose of it with household waste. Make this
product available for separate collection.
Separate collection of used products
and packaging allows materials to be
recycled and used again. Re-use of
recycled materials helps prevent
environmental pollution and reduces the
demand for raw materials.
Local regulations may provide for separate collection
of electrical products from the household, at
municipal waste sites or by the retailer when you
purchase a new product.
DEWALT provides a facility for the collection and
recycling of DEWALT products once they have
reached the end of their working life. To take
advantage of this service please return your product
to any authorised repair agent who will collect them
on our behalf.
You can check the location of your nearest
authorised repair agent by contacting your local
DEWALT office at the address indicated in this
manual. Alternatively, a list of authorised DEWALT
repair agents and full details of our after-sales
service and contacts are available on the Internet at:
www.2helpU.com

한국어
고속절단기 D28700
축하드립니다!
귀하께서는 “디월트”제품을 선택하셨습니다. 수년간의
사업경험을 통한 제품개발과 혁신능력은 디월트를 전
세계 공구 전문 사용자들에게 가장 신뢰할수 있는
동반자로 만들었습니다.
기술 자료
D28700
전압 V220
소비전력 W2,200
무부하회전수 min-1 3,800
최대선속도 m/s 80
절단지석 직경 mm 355
절단지석 내경 mm 25.4
절단지석 두께 mm 2.66
절단지석 유형 직선,오프셋이 없는 형태
90 도크로스 커팅기능
원형 mm 115
정방형 mm 119 x 119
장방형 mm 115 x 130
삼각형 mm 137 x 137
45 도크로스 커팅기능
원형 mm 98
정방형 mm 98 x 98
장방형 mm 115 x 98
삼각형 mm 98 x 98
무게 kg 18
다음은 본설명서에서 사용되는 기호입니다.
본설명서의 안전 사항을 지키지 않을 경우
신체상해, 사망, 혹은 제품 손상이 발생할
가능성이 있음을 표시합니다.
감전 위험이 있음을 표시합니다.
화재 위험을 표시합니다。
본제품은 EC 표준을 준수합니다.
D28700
디월트 전동공구의 설계는 아래 각표준에
부합됩니다.98/37/EEC、89/336/EEC、73/23/EEC、
EN50144、EN50144-2 EN55014-1、EN61000-3-2-8 &
EN61000-3-3
더필요한 정보는 아래 주소의 디월트나 사용설명서
뒷면의 주소로 연락하십시오.
D28700
LpA (음압) dB(A) 98.5
LWA (음출력) dB(A) 107
가중 RMS 가속도 m/s24.3
KpA (불확정음압) dB(A) 2.8
KpA (불확정음출력) dB(A) 2.8
엔지니어링 및제품개발 담당자
Horst Großmann
DEWALT, Richard-Klinger-Straße 11
D-65510, Idstein, 독일
14

한국어
안전지침
전동공구를 사용할 경우, 화재, 감전, 신체상해 및
제품손상을 일으킬수 있는 위험을 줄이기위해
각국가에서 적용되는 안전법규를 항상 준수하십시오.
제품을 조작하기 전, 본설명서를 상세히 읽으십시요.
본설명서를 잘보관하여 수시로 참조할 수있도록
하십시오.
일반수칙
1 작업장의 청결을 유지합니다.
작업지역과 작업장이 어지럽혀져 있으면 사고가
일어나기 쉽습니다.
2 작업지역의 환경을 고려합니다.
제품을 비바람에 노출하거나 습한 환경에서
사용해서는 않됩니다. 작업장의 조명을
유지하십시오. (250-300 럭스).화재나 폭팔사고가
일어나기 쉬운 환경에서 (주위에 불에 잘타는
액체나 기체가 존재하는 경우) 전동공구를
사용해서는 않됩니다.
3 작업장에 어린이가 출입하지 않도록 합니다.
어린이, 견학자, 동물을 작업장에 출입시키거나
전동공구 혹은 전기공급회로에 만지도록해서는
않됩니다.
4 옷차림은 간편하게 합니다.
헐렁한 옷을 입거나 장식품을 달면 작업중의
작동부품에 걸릴 수가 있습니다. 작업용 모자를
써서 머리카락이 풀어 헤치는 것을 방지해야합니다.
실외에서 작업할 경우 적합한 장갑을 끼고 미끄럽지
않은 신을 신어야 합니다.
5 몸의 보호
항상 보안경을 써야 합니다. 만약 조작중에 먼지나
미립자가 튈가능성이 있으면 안면 마스크나 방진
마스크를 착용해야 합니다. 분진의 온도가 너무
높으면 방열에이프런을 입어야 합니다. 항상
안전모와 귀마개를 써야 합니다.
6 전기감전 방지
신체를 접지한 표면과 접촉시켜서는 않됩니다.(예를
들면 파이프, 방열기, 취사도구 및냉장고).
극한상황(습도가 너무 높거나 작업과정에서
금속분진이 생기는 등)하에 전동공구를 사용할
경우에는 절연변압기 혹은(F1) 접지 전기차단기를
사용하면 전기안전이 향상됩니다.
7 신체평형을 유지합니다.
항상 똑바로 서서 신체평형을 유지합니다.
8 항상 주의하십시요
작업과정에 집중하고 올바른 방법을 사용하십시오.
피곤할 때는 전동공구를 사용해서는 않됩니다.
9 부품을 확실하게 고정시켜 주십시오.
클램프나 바이스로 부품을 고정시키면 더욱
안전할뿐만아니라, 두손으로 동시에 전동공구를
조작할 수있습니다.
10 먼지 제거 장치를 접속합니다.
먼지 제거 혹은 먼지를 모을 수있는 장치를 갖고
있으면 장치가 연결되어있는지 확인하고 정확하게
사용합니다.
11 조정키와 렌치를 제거합니다.
제품을 작동하기 전반드시 조정키와 렌치를
제품에서 제거하십시오.
12 연장케이블
제품을 사용하기 전연장케이블을 확인해야 합니다.
손상되었으면 교체해야 합니다. 실외에서 제품을
사용할 경우, 실외 전용이거나 규격에 맞는
연장케이블을 사용해야 합니다.
13 용도에 맞는 제품을 사용해야 합니다.
본설명서는 제품의 지정된 용도에 알맞게
사용하도록 되어있습니다. 중형 제품으로만 가능한
작업을 소형 제품으로 하지 마십시오. 제품을
성능에 맞는 작업에 사용하면 보다 오래 동안
안전하게 사용할 수있습니다.과부하작업은 하지
마십시오.
경고:본설명서에서 추천한 부품이외의 부품을
사용하거나 본설명서에서 추천한 작업이외에
쓰면,신체 상해를 일으킬 위험이 있습니다.
14 파손된 부품의 검사
제품을 사용하기 전에 제품과 코드가 파손되었는가
주의깊게 검사해야 합니다. 회전부품이 걸렸는지
부품이 정렬되어 있는지 검사합니다. 또한 부품이
망가지거나 보호가이드나 스위치가 파손되었는지,
기타 작동에 영향을 준부분이 있는가를 검사해야
합니다. 제품의 정상적인 작동을 보증하고 지정한
기능을 수행할 수있도록 합니다. 부품이
파손되거나 고장이 있으면 사용하지마십시오.
전동공구의 스위치가 온오프 작동이 안되면
제품을 사용하지 마십시오. 파손되거나 고장이 난
경우에는 디월트 서비스센터에 맡기고, 스스로
수리하지 마십시오.
15 전동공구의 플러그를 뽑는다.
스위치를 끈후, 전동공구작동이 완전히 멎을 때
까지 그곳에서 떠나서는 않됩니다. 제품을
사용하지 않을 경우, 부품이나 액세서리를
교체하거나 정비하기 전에는 플러그를 뽑으십시오.
16 제품이 부주의로 작동하는 것을 방지하십시요.
제품을 휴대할 때손가락을 스위치에 놓아서는
않됩니다. 전원을 넣기 전에 제품의 스위치를
껏는지 확인해야 합니다.
15

한국어
17 코드를 잡고 플러그를 뽑지 마십시오.
코드만 잡고 플러그를 콘센트에서 잡아당기거나,
제품을 들지 마십시오. 코드를 불, 기름이나
날카로운 것에 닿지않게 하여 주십시오.
18 제품 보관
제품을 사용하지 않을 경우 반드시 건조한 곳에
놓아두시고 어린이의 손에 닿지 않게 하십시오.
19 제품정비
제품을 깨끗한 환경에 보관하여 보다 좋은 성능을
유지하게 합니다. 제품정비와 부품을 교체할
경우에는 본설명서의 관련규정에 따르며 핸들과
스위치의 건조, 청결함을 유지하고 기름이나
그리스에 닿게 하지 마십시오.
20 유지 및보수
본제품은 해당 안전법규에 부합합니다. 제품의
수리는 지정된 디월트 서비스센터에 맡기시기
바랍니다. 수리는 정규 수리교육을 이수한 인원만이
할수있으며 정품 부품만을 사용하여 수리하여
제품에 무리가 따르지 않도록 합니다.
고속절단기를
위한
추가
안전수칙
• 제품을 조작할 때작업용 장갑을 끼십시오.
• 절단지석과 두손에 일정한 거리를 두어야 합니다.
회전하는 절단지석에서 15cm 이하 떨어진 곳에서
수공작업으로 해야하는 가공물을 절단하지
마십시오.
• 본제품의 절단지석으로 두께가 1.2mm보다 작은
가공물을 절단하지 마십시오.
• 보호커버가 제위치가 아니면 본제품을
작동시켜서는 않됩니다.
• 손으로 잡고 아무런 작업도 하지 말아 주십시오.
클램프로 가공물을 확실하게 고정시켜 주십시오.
• 손을 절단지석뒤에 놓아서는 않됩니다.
• 본제품을 평탄하고 안정성이 좋은 평면에 놓아야
안정되게 놓여지며 절단된 부스러기나 금속 칩등
잘모여집니다.
• 사용하기 전에 절단지석에 갈라진 금이나 하자가
있는가 검사해야 합니다. 만약 갈라진 금이나
하자가 있으면 이절단지석을 버려야 합니다.
• 절단지석이 전동공구가 작동하기 전에 가공물에
닿지 않도록 합니다.
• 작업과정에서 절단지석에 부딪치거나 거칠게
대해서는 않됩니다. 이런 일이 생기면 제품의
작동을 정지시키고 절단지석을 검사합니다.
• 절단지석과 일직선 방향에서 전동공구를 조작하지
마십시오. 기타 사람을 작업장소에 접근 못하게
하십시오.
• 절단 시생기는 칩은 온도가 높고 날카롭기 때문에
주의하십시오. 이것은 냉각된 후에 처리하십시오.
• 스파크 배출판은 사용하는 과정에서 뜨거워지므로
작업직후 바로 만지거나 조절해서는 않됩니다.
• 가공물을 움직이거나 재고정하기 전에 제품의
전원을 끊고 절단지석이 정지한 후에 조작하십시오.
• 전원을 끊은 후디스크 측면을 눌러 절단지석의
회전을 강제로 정지시켜서는 않됩니다.
• 절단유를 사용하면 불이 붙거나 감전될 가능성이
있기때문에 사용하지 마십시오.
• 가공물이 정확하게 고정됬는가 검사합니다.
• 메이커가 추천하는 절단지석을 사용하십시오.
원형톱날 혹은 기타 유형의 톱날을 사용하지
마십시오.
• 절단지석의 최대허용속도는 반드시 내임플레이트에
표시한 무부하회전수와 같거나 그보다 커야 합니다.
• 기술자료와 설명에 부합하지 않은 직경의
절단지석을 사용하지 말아 주십시오.
• 사용하기 전에 절단지석이 정확하게 장착됬는가
확인해야 합니다.
• 전동공구가 무부하상태의 안전한 위치에서
30초이상 작동하게 합니다. 눈에띄는 진동 혹은
기타 문제가 발생하면 전동공구를 정지시키고
원인을 찾아냅니다.
• 절단지석으로 측면 연마하지 마십시오.
• 콘크리트、벽돌、타일 혹은 도자기재료를
절단해서는 않됩니다.
• 나무、플라스틱 혹은 합성재료를 절단해서는
않됩니다.
• 주철 재료를 절단해서는 않됩니다.
• 마그네슘 재료를 절단해서는 않됩니다.
• 전기가 통하고 있는 재료를 절단해서는 않됩니다.
• 본제품을 바람이 잘통하는 곳에서 사용해주기
바랍니다. 불에 잘타는 액체, 기체 혹은 분진
부근에서 사용하지 말아 주십시오. 절단과정에
전동기 카본브러시에서 생긴 스파크 혹은 뜨거운
칩이 가연성재료에 불이 붙게 할가능성이
있습니다.
• 먼지나 가루가 많은 환경에서 작업할 때늘
통풍구를 청소해야 합니다. 청소할 때먼저 제품의
전원을 끊어야 합니다.
• 절단지석을 보존조건이 좋고 건조한 곳에
놓아두시고 어린이의 손에 닿지 않게 하십시오.
• 경고:본제품을 사용으로 암을 발생시키거나 불임증
혹은 기타 생식에 관련된 질병을 일으킬수 있는
가루가 생깁니다.
적당한 호흡기 보호조치를 취하십시오.
16

한국어
아래 요소가 소음에 영향이 있습니다:
– 절단하는 재료
– 절단지석의 종류
– 기계에 가하는 힘
적당한 조치를 취해 청각을 보호하십시오.
잔여
위험
이기계를 사용할 경우 아래 위험이 있습니다:
– 회전하고 있는 부품에 손을 대면 상해를 입게
됩니다.
– 절단지석이 부서지면 상해를 입습니다.
이런 위험은 아래 상황에서 가장 심합니다.
– 작업반경 범위내에 있을 때
– 회전하는 절단지석의 범위내에 있을 때
관련 안전규칙과 안전시설을 채용했다 하더라도 어떤
남아있는 위험은 피할수 없습니다.
이런 위험에는 아래와 같은 것이 있습니다.
– 청각의 손상.
– 회전절단지석의 노출부분에서 생긴 사고위험.
– 절단지석을 교체할 때상처를 입을 위험
– 보호 커버를 열때손가락이 끼일 위험
패키지 내용물
본제품의 패키지에는 다음과 같은 것이 있습니다.
고속절단기 1대
절단지석 1개
앨런 키1개
사용설명서 1권
보증서 1장
서비스 주소카드 1장
• 운송 중제품, 부품, 악세서리에 손상이 있는지 확인
하십시오.
• 제품 사용 전설명서를 충분히 읽고 사용하시기
바랍니다.
그림 설명 (그림 A)
귀하께서 선택하신 D28700 고속절단기는 여러가지
모양의 금속 재료를 절단하는데 사용할수 있습니다.
1 온/오프스위치
2 작업용 핸들
3 이동용 핸들
4 보호 커버
5 절단지석
6 스핀들 록
7 클램프
8 펜스
9 설치 구멍
10 베이스
11 스파크 배출판
12 깊이 조절장치
13 록다운 핀
14 앨런 키
전기 안전
전기 모터는 단하나의 전압 하에서 사용되도록 고안
되었습니다. 제품에 표시된 전압과 항상 일치되는지
확인 하시기 바랍니다.
본제품은 EN61029표준에 따라 이중절연이
있습니다. 따라서 접지선이 요구되지
않습니다.
연장 케이블 사용
연장 케이블을 사용하려면 본제품 입력을 적합한(기술
데이터 참조) 전기안전 승인을 받은 연장케이블을
사용해야 합니다.
적어도 도체의 단면적이 1.5평방밀리미터인 케이블을
사용해야 합니다.
케이블릴을 사용할 경우, 반드시 케이블을 완전히 풀어
놓아야 합니다.
아래표를 참조하십시오.
도체 단면적크기(평방밀리미터)케이블전류치(암페어)
0.75 6
1.00 10
1.50 15
2.50 20
4.00 25
케이블길이(미터)
7.5 15 25 30 45 60
전압 암페어 케이블전류치(암페어)
115 0-2.0 6 6 6 6 6 10
2.1- 3.4 6 6 6 6 15 15
3.5-5.0 6 6 10 15 20 20
5.1-7.0 10 10 15 20 20 25
7.1-12.0 15 15 20 25 25 -
12.1-20.0 20 20 25 - - -
230 0-2.0 6 6 6 6 6 6
2.1-3.4 6 6 6 6 6 6
3.5-5.0 6 6 6 6 10 15
5.1-7.0 10 10 10 10 15 15
7.2-12.0 15 15 15 15 20 20
12.1-20.0 20 20 20 20 25 -
17

한국어
주전원에 연결
본제품에 사용하는 전원에 반드시 시간지연기능을
갖춘 16암페어 푸즈장치를 장착해야 합니다.
전압강하
전류는 시동할 때단시간의 전압강하를 일으킵니다.
전력 공급이 좋지 않을 경우, 다른 장비에 영향을
미칠수도 있습니다.
전원의 시스템 임피던스가 0.25옴보다 낮을 경우에는
기대하지 않은 장해가 있을수 있습니다.
조립 및조정
조립 및조정 전에는 반드시 플러그를
뽑으십시오.
벤치
조립
(
그림
A)
고속절단기를 벤치에 고정시킬수 있도록 설치구멍
(9)이있습니다.
절단지석의
장착과
제거
(
그림
B1-B3)
• 아암을 정지위치에 놓고 립(15)으로 보호
커버(4)를뒤로 이동합니다. 보호커버가
젖혀진상태로 있게 합니다.(그림 B1)
• 스핀들 록(그림 B2)을누릅니다.
• 절단지석(5) 을잠길때까지 회전시킵니다.
• 앨런 키(14)를시계반대 방향으로 돌려
나사(16)를풀은 다음 와셔(17)와플랜지(18)를
뺍니다.
• 스페이서(19)가플랜지(20)에맞게 제대로
위치하는지 확인합니다.
• 절단지석(5)을교체합니다. 스페이서(19)위에 놓은
새원반의 회전방향이 맞는지 확인합니다.
• 고정 플랜지(18)、플랫 와셔(17)와볼트(16)로
블레이드를 고정합니다.
• 아래로 이동하여 보호커버가 원래의 위체에
복귀시킨 후스핀들 록(6)를풉니다.
• 수요에 따라 절단깊이를 조절합니다(그림 B3)
절단깊이의 조절(그림 B3)
절단깊이는 절단지석의 마모 정도에 따라 조절할수
있습니다.
• 전원을 끈상태에서 돌려보아 간격을 검사합니다.
• 조절할 필요가 생길 경우 계속 아래의 절차에
따릅니다.
• 록너트(21)를몇바퀴 돌려 풀읍니다.
• 안쪽 혹은 바깥쪽으로 깊이 조절장치 볼트(12)를
돌려 수요하는 절단깊이를 얻습니다.
• 록너트(21)를조입니다.
절단지석을 교체할 때깊이 조절장치를
최초의 위치에 조절해 놓으십시오.
가공물
클램프고정
.
(
그림
A&C1-C4)
본제품에는 클램프(6)(그림 A)가장착되어 있습니다.
핸들(23)방향을 향해 레버(22)를당깁니다.(그림 C1)
• 클램프 나사축(24)을앞으로 밀어 고정판(25)이
가공물에 거의 닿게 합니다.
• 고정판(25)방향으로 레버(22)를밀어 클램프
축(24)과맞물리게 합니다.
• 핸들(23)을돌려 가공물을 단단히 고정합니다.
• 가공물을 풀려면 시계반대 방향으로 핸들(23)을
돌리십시오.
• 절단능력을 향상시키려면 가공물(27)밑에
스페이서 블록(26)을끼워 넣으십시오. 스페이서
블록은 가공물보다 조금 좁아야 합니다(그림 C2).
• 나무조각(28)으로 긴가공물을 받칩니다(그림 C3).
절단한 쪽으로(27) 클램프를 고정하지 마십시오.
빠른이송기능(그림 C1)
클램프는 빠른 이송기능이 있습니다.
• 클램프를 풀려면 시계반대 방향으로 핸들(23)을
한번 내지 두번 돌린 다음 핸들(23)방향으로
레버(22)를당깁니다.
클램프 고정 위치(그림 C4)를설정.
클램프 위치를 조절하여 절단지석과 맞게 합니다.
• 앨런 키(14)를사용하여 펜스 볼트(29)를
풀러냅니다.
• 원하는 위치로 펜스를(8) 이동합니다.
• 펜스 볼트(29)을다시 장치한 다음 펜스(8)를꽉
조임니다.
절단각
(
그림D
)
의
조절
.
본제품은 45 도까지 각도절단에 사용할 수있습니다.
• 펜스 볼트(29)를돌려 펜스(8)를풉니다.
• 펜스(8)를원하는 각도로 설정합니다. 이각도는
눈금자(30)에서 읽을수 있습니다.
• 펜스 볼트(29)를꽉죄여 펜스(8)을채웁니다.
각도
확인
및
조절
(
그림A과D
.
• 펜스 볼트(29)를돌려 펜스(8)을풉니다.
• 아암을 당기고 록다운 핀(13)을눌러 현
위치(그림A)에채웁니다.
• 직각자(31)를펜스(8)과절단지석 좌측사이에
놓아 세밀하고 정확한 90도직각을
만듭니다(그림D). 스케일(30)위의 0도표지와
베이스(31)위의 표지가 맞는지 확인합니다.
18

한국어
• 펜스 볼트(29)를돌려 펜스(8)를고정합니다.
• 록다운 핀(13)을빼낸 다음 아암을 그윗쪽의
정지 위치에(그림A)밀어놓읍니다.
스파크
펜스
(
그림E
)
을
조절
.
• 나사(32)를풉니다.
• 스파크 펜스(11)을적당한 위치에 조절해
놓습니다.
• 나사(32)를꽉죕니다.
사용 지침
• 항상 설명서의 적용 규정을 안전하게
준수하시기 바랍니다.
• 제품에 너무 큰압력을 가하지 말아
주십시오.
• 과부하작업을 하지 말아 주십시오.
제품이 너무 뜨거우면 제품을
무부하상태에서 몇분간 공회전시켜
주십시오.
사용하기 전
• 적합한 절단지석을 장착합니다. 지나치게 마손된
절단지석을 사용하지 말아 주십시오. 제품의
최대회전속도는 절단지석의 속도보다 커서는
않됩니다.
• 절단지석이 액세서리와 제품에 표시한 방향대로
회전하는가 확인합니다.
• 가공물을 고정합니다.
• 항상스파크 배출판을 알맞게고정해 놓습니다.
절단작업을
진행
.(
그림A
)
• 펜스(8)에절단하려는 재료를 놓고 클램프(7)로
고정해 놓습니다.
• 제품에 전원을 연결하고 조작 핸들(2)을내려서
가공물을 절단합니다. 절단하기 전최고
회전속도에 도달하게 합니다.
• 절단지석을 스스로 절단하게 하며 힘을 가하지
말아 주십시오.
• 절단이 끝난후 전원을 끄고 아암을 그윗쪽의
정지 위치에 밀어놓습니다.
스위치
온
/
오프
(
그림
A)
• 스위치(1)는조작 핸들(2)에위치하고 있습니다.
• 제품을 작동시키려면 온/오프스위치(1)를눌러
줍니다.
• 작동중에 온/오프스위치가 눌려진 상태에 있게
합니다.
• 구동을 멈출 시스위치를 놓습니다.
전동공구에 작업중 부하가 걸려있는
상태에서 스위치를 작동하거나 정지시키지
말아 주십시오.
마그네슘 재료를 절단해서는 않됩니다.
적절한 악세서리에 관한 문의는 판매 대리점와
상의하시기 바랍니다.
운송
(
그림
A)
본제품에 록다운 핀(13)이한개장착되었으며 운송
시제품을 접힌 위치로 고정할 수있습니다.
• 보호 커버(4)를베이스(10)에내려 놓고 록다운
핀(13)를누르면 제품을 이위치에 고정할 수
있습니다.
• 운송 핸들(3)을잡고 제품을 운송합니다.
• 제품을 풀려면 작업용 핸들을 살짝 누르고
록다운 핀(13)을빼면 됩니다.。
유지 및보수
디월트 전동공구는 성능이 우수하고 장기적으로
사용할 수가 있어 최소한의 유지보수만 요구 됩니다.
연속적이고 만족스러운 사용을 위해서는 적당한
보수와 정기적인 청소가 요구됩니다.
구리스
(
윤활
)
본제품은 추가적인 윤활유 보충이 필요없습니다.
청결
통풍구의 청결을 유지하고 부드러운 천을 사용하여
정기적으로 제품을 닦아주시기 바랍니다.
환경 보호
분리수거. 본제품을 보통 생활 쓰러기와
함께 처리해서는 않됩니다.
디월트 제품을 교체할 필요가 있거나 쓸모가 없다고
여길 때그것을 생활 쓰레기와 함께 처리하지 마시고
분리수거 해주십시오.
사용한 제품과 포장재를 종류대로 재활용과
재사용을 위해 분리수거하십시오. 재활용
재료의 재사용으로 환경오염을 방지하고
19

한국어
원자재 소비를 감소시킬수 있습니다.
지자제 쓰레기 처리장 혹은 제품의 소매 상인으로부터
현지의 전기 제품 분리수거에 관한 규정을 제공받을수
있습니다.
제품이 수명에 도달했을 경우 디월트는 회수와
재활용의 관련 설비를 제공해 드리겠습니다. 이런
서비스를 충분히 활용하시려면 수리 지정점에게
반납하여 본회사 대신에 낡은 제품을 회수하겠습니다.
본설명서의 주소대로 현지의 디월트 센터와 연락하여
제일 가까운 수리 지정점을 찾을 수있습니다. 그밖에
인터넷 주소 www.dewalt.co.kr 에서도 디월트 수리
지정점, 애프터서비스 및연락방식 등상세한 정보를
얻을 수있습니다.
20
Other manuals for D28700
3
Table of contents
Languages:
Other DeWalt Saw manuals

DeWalt
DeWalt DW328 User manual

DeWalt
DeWalt D27111 User manual

DeWalt
DeWalt DCS376 User manual

DeWalt
DeWalt DCS377 User manual

DeWalt
DeWalt DW710 TYPE 2 User manual

DeWalt
DeWalt DCS391B User manual

DeWalt
DeWalt DWS779 User manual

DeWalt
DeWalt DWE7485 User manual

DeWalt
DeWalt DW390 User manual

DeWalt
DeWalt DCS571 User manual

DeWalt
DeWalt DE7023 User manual

DeWalt
DeWalt DW937 User manual

DeWalt
DeWalt DCS361 User manual

DeWalt
DeWalt DW717 User manual

DeWalt
DeWalt DW713 User manual

DeWalt
DeWalt DW712 User manual

DeWalt
DeWalt DWS780 User manual

DeWalt
DeWalt 12" COMPOUND MITER SAW DW705 User manual

DeWalt
DeWalt SS200 User manual

DeWalt
DeWalt DCS312N-XJ User manual