Dexcom G4 PLATINUM
Sensor and Transmitter
Quick Start Guide
Part of the Animas®Vibe™System
1Get to Know Your Animas®Vibe™System
2Set up Transmitter ID
3Set Alert Sounds & Levels
4Insert Sensor & Place Transmitter
5Start Sensor Session
6Calibrate
7CGM Trend & Data Screens
8End Sensor Session
!Sensor Troubleshooting ?Frequently Asked QuestionsHelpful Hints
Making the Animas®Vibe™System
part of your life
The Dexcom G4 PLATINUM Sensor and Transmitter are not a
replacement for your traditional blood glucose (BG) meter. When
you use the Dexcom G4 PLATINUM Sensor and Transmitter, you
will see real-time continuous glucose readings on your Animas®
Vibe™Insulin Pump display every 5 minutes, for up to 7 days. These
readings will help you detect trends and patterns in your glucose
levels. This way, you can see where your glucose levels have been,
which direction they are headed, and how fast they may be rising
or falling.
This Quick Start Guide will help you set up the CGM part of your
Animas®Vibe™System. Before you begin or anytime you have
questions, review the Animas®Vibe™Owner’s Booklet. You may
also contact Customer Support.
NOTE: The CGM is optional with your Animas®Vibe™Insulin Pump and is sold separately.
Review all Contraindications, Warnings, Precautions, and detailed procedures
in the Animas®Vibe™Owner’s Booklet before using the Dexcom G4 PLATINUM
Sensor and Transmitter.
You must take a fingerstick test (blood glucose test using a blood sample from
your fingertip) with your BG meter and use that BG value to make any insulin
or treatment decisions. Insulin dosing decisions should not be based solely on
results from the Dexcom G4 PLATINUM Sensor and Transmitter.
What can the CGM do for me?
The CGM gives you a continuous picture of your glucose levels to help you detect trends and
patterns in your glucose levels. Trends let you see where your glucose levels have been, which
direction they are headed, and how fast they may be rising or falling.
Does the CGM replace my traditional BG meter?
No, it is meant to be used IN ADDITION TO your BG meter. When you use the CGM, you need to
take two fingerstick tests with your BG meter to start/calibrate your Sensor session. You will
also need to take at least 1 fingerstick test every 12 hours.
Should I make treatment decisions based on the results from my Animas®Vibe™System?
You must take a fingerstick test with your BG meter and use that BG value to make any insulin
or treatment decisions. Insulin dosing decisions should not be based solely on results from
the CGM readings.
Is it okay if my CGM readings and fingerstick BG readings do not match exactly?
Yes. This is normal.
Is my Transmitter reusable?
Yes. DO NOT THROW AWAY YOUR TRANSMITTER. Your Transmitter is reusable.
How close do my pump and Transmitter have to be?
They need to be within 12 feet of each other at all times, including the Startup period and
while you are sleeping.
If I confirm a CGM Alert/Alarm, does my insulin delivery continue?
Yes.
Do my CGM alerts and alarms get progressively louder if I do not confirm them the first time
they sound?
No. The sound for the CGM alerts and alarms does not get progressively louder over time.
What is the warranty for my Animas®Vibe™System?
The warranty for your pump is 4 years. The warranty for your Transmitter is 6 months.
What do I do if I see instead of a glucose value?
Unknown CGM glucose readings ( on the CGM Data and Trend screens) are periods
of time when the System does not understand the CGM glucose readings. This is usually
temporary. Your CGM will normally correct itself, after which you will see CGM glucose
readings again.
When I prime the pump, change the insulin cartridge, or when there is an occlusion alarm, do
my CGM readings continue to be received and displayed on the pump?
Yes – CGM readings will continue to be received and displayed during these pump functions.
When I put my pump in Suspend mode, do my CGM readings continue to be received and
displayed on the pump?
No – You will not receive CGM readings when your pump is in Suspend mode.
What do I do if I have questions?
Contact Customer Support.
Is the Animas®Vibe™System water resistant?
Yes. Your pump is water resistant up to 12 feet for 24 hours. Your Sensor and Transmitter are
water resistant up to 8 feet for 24 hours.
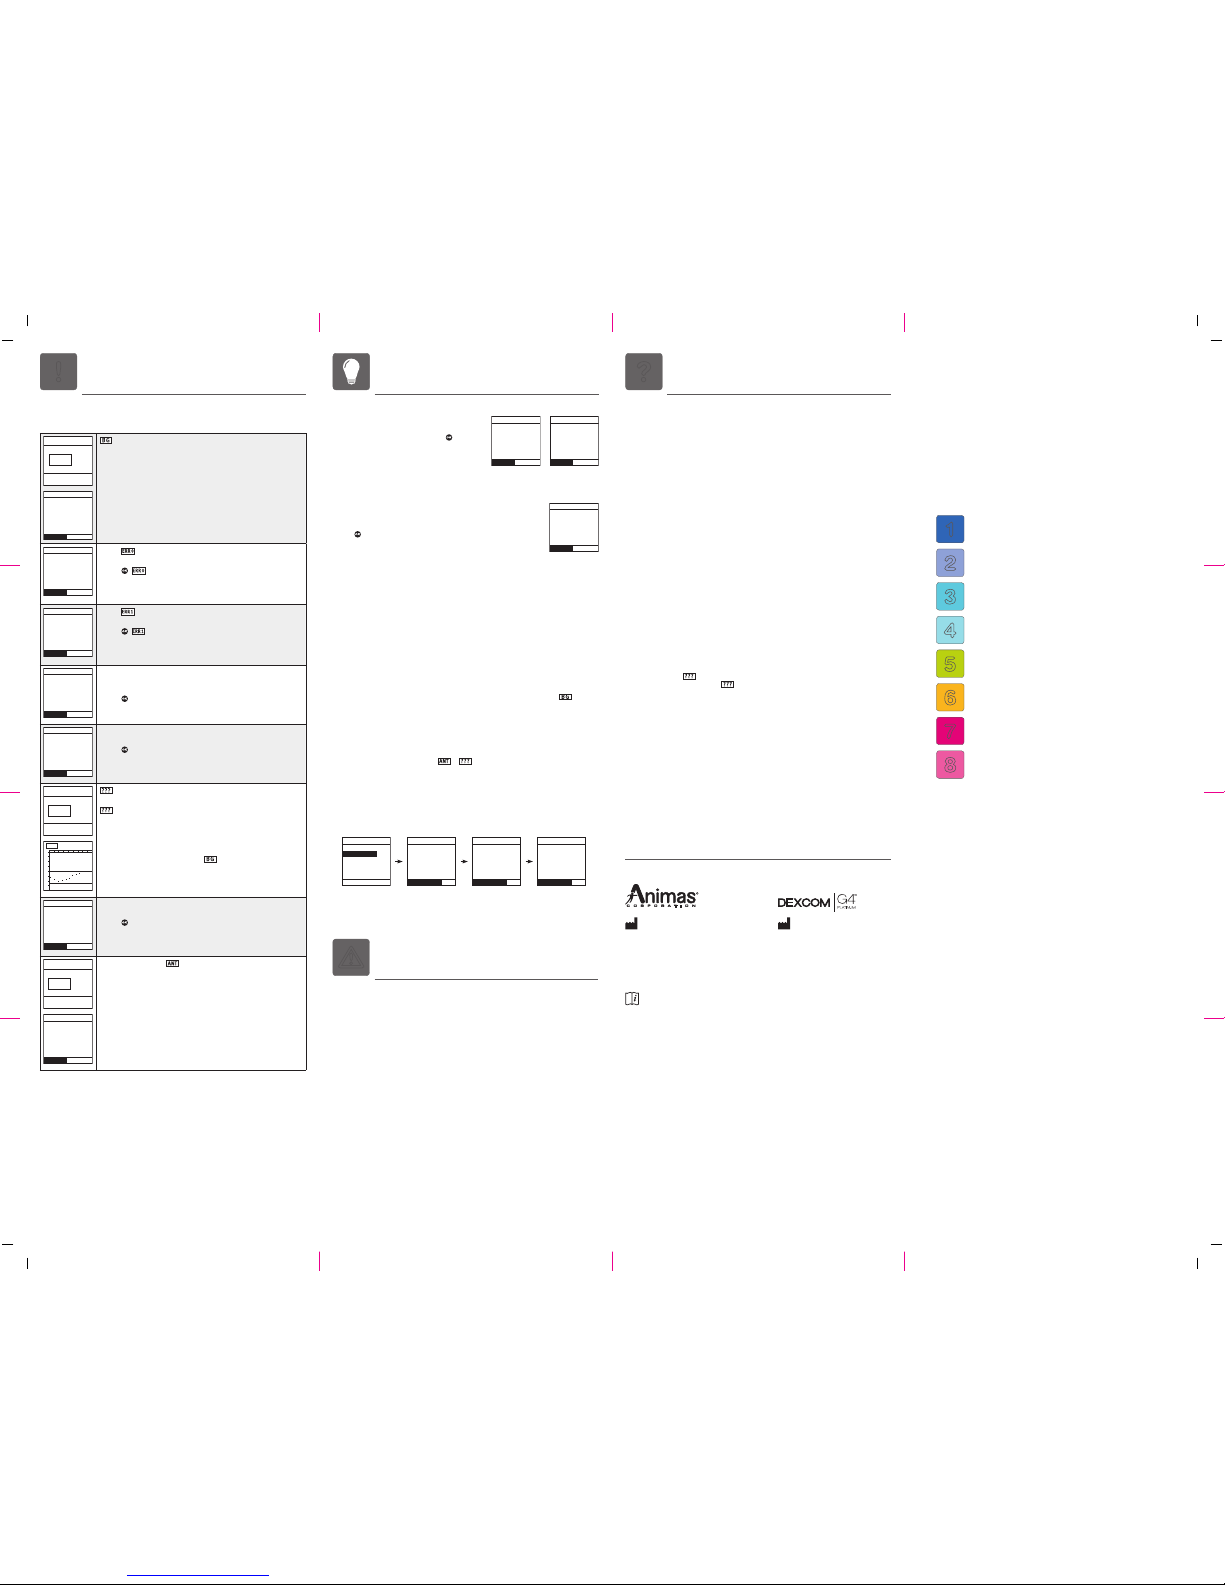
High/Low Glucose Alerts
• With High/Low Glucose Alerts, insulin delivery
continues.
• If Alerts are not conrmed by pressing ,
the Alert will repeat every 3 minutes.
• You can enable/disable and set Alert sounds based
on your health care professional recommendations
or your personal preferences.
Low Glucose Alarm
• The CGM has an automatic Low Glucose Alarm set at 55 mg/dL. You
cannot disable this Alarm, or change the Alarm level or its re-alert
settings. If this Alarm occurs:
• Press to confirm.
• You will be notied again in 30 minutes if your glucose reading is still
at or below 55 mg/dL.
NOTE: In a pediatric clinical study, a significant number of low glucose events were not detected
by CGM. Also in the pediatric study, larger differences were observed between CGM readings
and actual blood glucose values, compared to those differences observed in the adult clinical
study. Whenever you set your Low Glucose Limit, and whenever your current CGM reading falls
below that limit and/or 55 mg/dL, a series of pump CGM Warning screens will be displayed to
make you aware of these differences. Refer to the Owner’s Booklet for complete information.
Calibration - What to do
• Wash hands before each calibration.
• Use same BG meter for all calibrations.
• Quality-check BG meter to make sure your BG meter is giving accurate values for calibration.
• Entering the correct ngerstick BG value is critical to obtaining accurate Sensor readings.
Use proper technique when performing a fingerstick test.
• Calibrate at any time as long as you see a CGM glucose reading or BG symbol ( ) on the
CGM Data or Trend screen.
• Calibrate a minimum of once every 12 hours.
• Calibrate whenever your glucose levels are rising or falling1.
Calibration - What NOT to do
• DO NOT calibrate when you see the or symbol on the CGM Trend or Data screen.
• DO NOT calibrate if your BG is higher than 400 mg/dL or lower than 40 mg/dL.
• DO NOT use sampling sites other than your ngertips to get BG values for calibration.
CGM History
• From the CGM Menu, you can access and review a history of CGM sessions, BG calibrations
and CGM Warnings.
12:34 PM
IOB 5.54U
BG
CGM Warning
Confirm
Enter BG
Symbol on CGM Data/Trend screens
Calibration needed.
• Perform calibration.
References
1. Kamath A, Mahalingam A, Brauker J. Analysis of time lags and other sources of error of the
Dexcom SEVEN continuous glucose monitor. Diabetes Technol Ther. 2009;11(11):689-695.
mImportant information
mWarnings
• DO NOT use glucose readings from the G4 PLATINUM Sensor and Transmitter to make
treatment decisions, such as how much insulin you should take. The Sensor and Transmitter
do not replace a BG meter and BG values may differ from Sensor glucose readings. Using
glucose readings from the Sensor and Transmitter to make treatment decisions can result in
serious injury or death.
• Your Animas®Vibe™System will not automatically make insulin adjustments based on the
CGM readings.
• You should calibrate the CGM at least once every 12 hours.
CONTRAINDICATIONS
• Remove the Dexcom G4 PLATINUM Sensor and Transmitter prior to Magnetic Resonance
Imaging (MRI), Computed Tomography (CT) Scan, or diathermy treatment. The Dexcom
G4 PLATINUM Sensor and Transmitter have not been tested during MRI or CT Scans or
with diathermy treatment. The magnetic fields and heat could damage the Sensor and
Transmitter so that they might not record or transmit Sensor glucose readings or provide
alerts, and you might miss a low or high blood glucose value.
• Taking medications containing acetaminophen while wearing the Sensor may falsely raise your
Sensor glucose readings. The level of inaccuracy depends on the amount of acetaminophen
active in your body and may be different for each person.
This product is covered by one, or more, U.S. patents including 6,656,148. Other patents
pending. Animas®and Vibe™are trademarks of Animas Corporation. Dexcom, Dexcom
G4 PLATINUM, and The Glucose Sensor Company are either registered trademarks or
trademarks of Dexcom, Inc. in the United States and/or other countries. All other trademarks
and copyrights are property of their respective owners.
© 2015 Animas Corporation. All rights reserved.
P/N: 41031200 Rev. A 08/2015
Customer Support is available
24 hours a day, 7 days a week.
U.S. and Puerto Rico:
1 877 YES-PUMP (937-7867)
Visit us at www.Animas.com.
200 Lawrence Drive
West Chester, PA 19380 USA
Compatible with
Consult Owner’s Booklet
Dexcom, Inc.
6340 Sequence Drive
San Diego, CA 92121 USA
41031200 RevA_QSG_Vibe_USen_Peds_R3.indd 1 8/7/15 2:34 PM