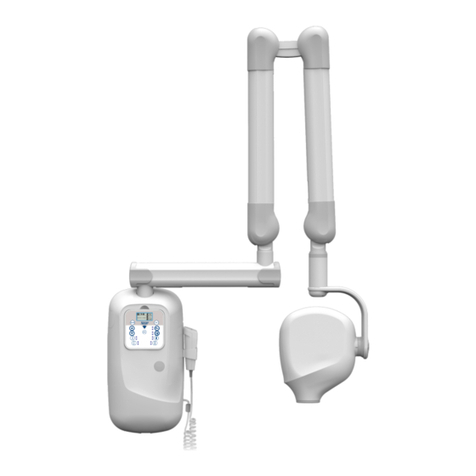
DEXIS NOMAD Pro 2 User manual

Handheld X-ray System
for Intraoral Radiographic Imaging
OperatOr Manual
NOMADTM

Thank you for choosing the NOMAD Pro 2
At Dental Imaging Technologies Corporation we value your business and we would like to hear
from you because your feedback and suggestions are important to us. If you have comments, please
email us:
DO NOT OPERATE THIS DEVICE UNTIL YOU HAVE READ THIS MANUAL AND REVIEWED THE
ACCOMPANYING MATERIALS.
Disclaimer: NOMAD Pro 2 is sold with the understanding that the user assumes sole responsibility
for radiation safety (as well as any state, provincial, or local regulatory compliance) and that Dental
Imaging Technologies Corporation, its agents or representatives, do not accept responsibility for:
a) injury or danger to personnel from X-ray exposure,
b) image over/under exposure due to poor operating techniques or procedures,
c) equipment not properly serviced or maintained in accordance with instructions
contained in this publication, and
d) equipment which has been damaged, modified, or tampered with in any way.
Product protected in other countries by one or more issued patents. U.S. patents issued: 7,224,769
and 7,496,178. Other United States and international patents pending. AU Pat No. 2005216184;
CA Pat No. 2,555,005, CN Pat No. ZL200580012535.X; IN Pat No. 254529. All other brand and
product names are trademarks or registered trademarks of their respective companies.
Further information about DEXIS intellectual intellectual property available: www.dexis.com

Table of Contents
1.0 Getting Started 5
1.1 Indications for Use 5
1.2 Warnings and Precautions 5
1.3 Unpack, Check, Register, and Clean NOMAD Pro 2 System 5
1.4 Charging the Handsets 6
2.0 Safety Precautions 8
2.1 Radiation Safety 8
2.2 Studies and Data on Leakage and Scatter 10
2.3 Usage and Duty Cycle 12
2.4 Cleaning 13
2.5 Security, Storage, and Transportation 14
2.6 Product Symbols 15
2.7 Location of Device Labels 17
3.0 Setup and Power Check 18
3.1 The Backscatter Shield 18
3.2 Attaching a Charged Handset 18
3.3 Checking for Power 18
3.4 Checking for Handset in Sleep Mode 19
3.5 Optional Checks 20
4.0 Operation 21
4.1 Powering Up 21
4.2 Lock/Unlock the X-ray 21
4.3 Ensuring the Right Exposure Time is Set 21
4.4 Ready the Device 22
4.5 Initiating and Completing an X-ray Exposure 23
4.6 Powering Off 23
4.7 Exposure Techniques 24
4.8 Ensuring Image Quality 25
4.9 Technique Factors Settings and Adjustments 26
4.10 Settings Menu 27
5.0 Handset Replacement and Care 31
6.0 NOMAD Pro 2 Care and Upkeep 33
6.1 Alarms and Alerts 33
6.2 Troubleshooting 36
7.0 Maintenance and Repair 39
7.1 Maintenance Schedule 39
7.2 Calibration Checks 41
7.3 Maintenance Log Sheets 42
7.4 Repair 42
8.0 Technical Description 44
8.1 Basic Technical Specifications 44
8.2 X-ray Tube Specifications and Characteristics 48
8.3 Manufacturer’s Declaration 50
8.4 Cables 56

54
NOMAD Pro 2
NOMAD Pro 2 Handheld X-ray System is a battery-powered, portable dental X-ray source
designed for handheld operation. It is designed to produce diagnostic quality images utilizing
either film or digital imaging techniques. The NOMAD Pro 2 Handheld X-ray System is designed
for use in a dental office. It can also be used in other similar environments (orthodontic
office, general practitioner’s office, hospital ward, etc.) where appropriate safeguards are
implemented. The device uses a rechargeable battery to allow for the use of the NOMAD
Pro 2 Handheld X-ray System where transportation or use of other x-ray devices might be
prohibitive due to the other device’s size and/or lack of mobility.
The NOMAD Pro 2 Handheld X-ray System is an X-ray device with a DC generator. The
handheld device features a main unit (tube head), rechargeable battery (handset), charger,
and charger AC/DC power supply. The power is supplied by a rechargeable Lithium Ion battery
core pack built into a handset. This facilitates portability of the device. A beam-limiting cone
is incorporated within the device. Internal and external shielding provide sufficient radiation
protection to allow the clinician to remain in the operatory with the patient.
To make the system as simple as possible for the operator, NOMAD Pro 2 Handheld Xray
System uses a fixed tube voltage of 60kV and a fixed tube current of 2.5mA. The only operator-
adjustable parameter is the exposure time. This adjustment can be quickly accomplished
through the user-friendly control panel.
Control buttons, display, and a trigger provide the primary operator interface. Settings can
be selected and displayed. Voltage (60 kV) and current (2.5 mA) are fixed with the exposure
time varying based on patient type, detector type, and anatomical feature. Exposures can be
completed using the trigger. The device can be used with three detector types: film, digital
imaging intraoral sensors, and phosphor plates.
NOMAD Pro 2 has a beneficial effect on the dental health of the patient, and results in the
meaningful (relevant to the patient) and measurable positive impacts on outcomes related
to diagnosis, such as allowing a correct diagnosis to be made, providing early diagnosis of
diseases or specifics of diseases, or identifying patients more likely to respond to a given
treatment.

54
NOMAD
1.0 Getting Started
1.1 Indications for Use
The NOMAD Pro 2 Handheld X-ray System is indicated for use only by a trained and
qualified dentist or dental technician for both adult and pediatric subjects as an extraoral
diagnostic dental X-ray source to produce X-ray images using intraoral image receptors.
1.2 Warnings and Precautions
The device is designed for use with patients of any overall health status, as solely
determined by the practitioner, with the following considerations for specific circumstances:
• Pregnant women. The medical practitioner must weigh the benefits conferred by use of
the device against the potential hazard to the pregnant woman and fetus resulting from
radiation exposure. If use of the device is considered justified, the practitioner must take
the appropriate precautions, such as use of radiation safety garments, to limit radiation
exposure beyond the maxillofacial complex.
• Pediatric. The medical practitioner must weigh the benefits conferred by use of the
device against the potential hazard to the child resulting from radiation exposure,
considering the maturity of the child’s physical development. If use of the device is
considered justified, the practitioner must take the appropriate precautions, such as use of
radiation safety garments, to limit radiation exposure beyond the maxillofacial complex.
• Patients with medical conditions causing involuntary movements. For patients who
experience seizures or who have been diagnosed with conditions such as Parkinson’s
Disease which can cause difficulty in controlling physical movements, the medical
practitioner must weigh the benefits conferred by use of the device against the potential
hazard to the patient resulting from additional radiation exposure due to a re-scan in the
event that an involuntary movement renders an image unusable for diagnostic purposes.
• Some components of the NOMAD may have the presence of Nickel greater than 0.1%
by article weight. Contact may result in an allergic reaction due to Nickel sensitivity. Use of
a sheath that covers the sensor positioning system may reduce the risk of exposure to the
patient. Use of gloves while handling the alignment bar may reduce the risk of exposure
to the operator.
1.3 Unpack, Check, Register, and Clean NOMAD Pro 2 System
Report any damaged components to the shipping company and any missing components
to your dealer within 24 hours of receiving the shipment.
Unwrap individual components from the protective plastic and check for any
noticeable signs of damage. The package system includes the following items:
• NOMAD Pro 2 Device
• Charging Cradle
• Two Rechargeable Battery Handsets

76
• AC/DC Power Supply
• Universal Alignment Bar
• Short Endodonic Alignment Bar
• Short Bitewing Alignment Bar
• NEMA 1-15p USA pin Cord
• Certificate of Conformance, Getting Started Guide, Product Registration Card, and
NOMAD Pro 2 Operator Training CD
Preliminary Checks:
Item Check
Device Labels Verify that the serialised device label is in place (located on lower side of
unit).
Other Labels Verify that the serial number on the warranty/registration card matches
the device serial number on the device and the device serial number on
the carrying case. Verify that the handsets’ label (located on the top of
each handset) and the charging cradle label (located on the bottom of the
charging cradle) are all in place.
Collimator Cone and
Backscatter Shield
These two items provide operator protection and should be inspected for
shipping damage.
Trigger Switch Should freely move in and out when depressed and released.
Device Housing Should be free of cracks or fractures.
Complete the product registration card and mail it with proper postage to Dental
Imaging Technologies Corporation today, or go on-line at dexisimaging.com/en-us/product-
warranty-registration. Registering your device will activate your DEXIS Complete (the first
year is free). For terms and conditions of NOMAD Pro 2, please visit www.dexis.com.
Clean the NOMAD Pro 2. Use a non-acetone based disinfectant wipe or a cloth to
wipe the exterior surfaces of the NOMAD Pro 2 and charger. Do not use cleaners intended
for hard surfaces, since certain chemical combinations may deteriorate the NOMAD Pro 2
plastic prematurely.
1.4 Charging the Handsets
NOMAD Pro 2 charging system includes rechargeable handsets, a Charging Cradle and
an AC/DC Power Supply. The AC/DC Power Supply has a removable power cord which
plugs into an AC electrical outlet (universal voltage accommodated).
DEXIS NOMAD handsets and DEXIS NOMAD charging cradles are compatible with both
DEXIS and KaVo branded Charging Cradles, Handsets and AC/DC Adapters.
• Handsets must be charged before initial use. Alternate handsets each week to
maximise service life.
• Do not spray disinfectant or cleansers directly on to the handsets.
• Do not attempt to charge below 10oC or above 40oC.
• Charge the Handsets before use and after any extended period of inactivity.

76
NOMAD
Use only the supplied AC/DC power supply. Unwrap
the power cord of the power supply and connect it to the
charging cradle, then to an AC electrical outlet (universal
voltage accommodated). The charger will flash red lights
as it initiates, followed by a single green circle that will
illuminate to indicate there is adequate power to the
charging cradle. If the green circle does not illuminate, the
charging cradle is not receiving adequate power and may
need to be sent to a manufacturer authorized service centre for repairs.
Position the charging cradle away from the normal patient environment and ensure the
AC plug remains easily accessible. A plug adapter may be needed to accommodate the
local AC configuration.
Invert one of the handsets and carefully slide it onto the charging cradle (do not
force the handset onto the charging cradle or damage
may result). Expect charge time to be less than five hours.
The handset, charging cradle, and AC power supply may
become warm to the touch while charging.
When the handset is first slid onto the charging
cradle, the first bar will illuminate green for approximately
two seconds to indicate that the cradle and handset are
communicating. If the bars illuminate or flash red, see the troubleshooting guide section
6.2.10. Authorized service
will also be required if no illumination occurs upon sliding the handset onto the charging
cradle.
After illuminating green, the first bar will begin flashing to indicate that charging has
begun. When the first bar turns solid green, the handset is 1/3 charged, and the second
bar will begin flashing green. When the second bar turns solid green, the handset is 2/3
charged, and the third bar will begin flashing green. Once the third bar turns solid green,
the handset is fully charged. Remove the handset from the charging cradle once it is fully
charged.
Receiving Adequate Power
Contact manufacturer
for Service
Handset 1/3 Charged Handset Fully ChargedHandset 2/3 Charged

98
2.0 Safety Precautions
2.1 Radiation Safety
The NOMAD Pro 2 was designed to be used in clinical settings (e.g., dental office), with
controlled settings, where transportation or use of other X-ray devices might be prohibitive
due to the device’s size and/or mobility.
This X-ray unit may be dangerous to patient and operator unless safe exposure factors,
operating instructions, and maintenance schedules are observed.
This X-ray unit must only be operated by trained personnel in a controlled setting.
Within such a setting, ensure that only the patient is in the direct beam of the x-ray,
and that any ancillary personnel are a minimum of 6 feet away from the patient. If it is
necessary for any ancillary personnel to be closer than 6 feet, these personnel should
stay out of the direct beam and wear personal protective equipment, such as an apron
and thyroid collar.
• The NOMAD Pro 2 provides a high degree of
protection from unnecessary radiation. However,
no practical design can provide complete protection
nor prevent operators from exposing themselves or
others to unnecessary radiation. It is important to
restrict use and follow all applicable government
radiation protection regulations. Pregnant women
should not be exposed to X-rays unless necessary.
Proper safety precautions should be taken to
minimize dose to the fetus.
• Operators must be fully acquainted with industry
safety recommendations, established maximum
permissible doses, and local jurisdiction
requirements for use.
• Optimal operator radiation backscatter protection
exists when the following measures are taken:
a) the backscatter shield is positioned at the outer end of the collimator cone,
b) the backscatter shield is close to the patient,
c) the patient tilts his or her head when needed to accommodate exposures (see Section 4.7
Exposure Techniques), and
d) the operator remains within the significant zone of occupancy immediately behind the device
shield.

98
NOMAD
• Do not enable the NOMAD Pro 2 until patient and operator are positioned and ready
for the exposure, preventing interruption and inadvertent exposure of anyone to
X-rays.
• Do not attempt an exposure if anyone other than the patient is in the direct beam. If
others are assisting, then they should wear protective covering as required by local
jurisdictions.
• When selecting and using sensors, preference should be given to models that allow
the backscatter shield to remain at the outer end of the collimator cone for maximum
operator protection.
• An exposure can be terminated for any reason by prematurely releasing the depressed
trigger (for more information, see Section 4.0 Operation).
• As shown in graphic representations, maximum protection (green area) from
backscatter radiation (red area) exists when the NOMAD Pro 2 is positioned near the
patient, is perpendicular to the operator (with the patient’s head tilted if needed),
and the backscatter shield is fully extended toward the patient and parallel to the
operator.
Stay in the
ZONE
Proper Position Held Back Shield slid back Non-perpendicular
Protection:MaxiMuM MiniMized
• Operation outside the protection zone (or with a diminished protection zone) requires
proper precautions such as the use of an apron and thyroid collar, according to
requirements of local jurisdictions.
• Do not operate if the backscatter shield or collimator cone is broken.
• For further information on the tests performed to ensure NOMAD Pro 2 safety as a
handheld device, please see Section 2.2 Studies and Data on Leakage and Scatter.
In implementing a radiation protection program, consult all applicable regulations
governing radiation protection and the use of X-ray equipment, and ensure full
compliance with any such regulations.

1110
2.2 Studies and Data on Leakage and Scatter
Besides direct beam, potential exposure from X-ray devices has only two other possibilities:
1) leakage radiation and
2) scatter radiation from the
patient/subject in the direct beam.
Leakage
Unique internal shielding of
NOMAD Pro 2 encases the X-ray
tube, practically eliminating leakage
radiation. This makes it safe to use
Pro 2 as a handheld device during
exposures.
FDA regulations specify that
leakage radiation from X-ray devices not exceed 0.88mGy/hr, while IEC regulations
stipulate that devices stay below 0.25mGy/hr, an even tighter limit. In response to these
regulations, Dental Imaging Technologies Corporation will only ship product that tests below
0.88mGy/hr (at 1 meter), 0.25mGy/hr (at 1 meter), 0.02mGy/hr (at 5 cm) for leakage.
In order to verify compliance with this leakage requirement, each individual device is
tested with a calibrated survey meter at 12 points on the device housing, as shown in the
following diagram. The highest measurement out of these 12 points is reported on the
device Certificate of Conformance (which is shipped with every device) and must be lower
than 0.02mGy/hr in order for the device to successfully pass product release testing.
Test points for product release testing
A, B, C, D axis
G, H, I axis
H
I
G
F
E
BA
D
C
Primary Protective
Shielding
X-ray Source
Focal Spot
Focal Beam lim-
iting Devices
Backscatter
Radiation
Shielding

1110
NOMAD
Scatter
As discussed in Section 2.1 Radiation Safety, the transparent shield on the NOMAD Pro 2
collimator, when properly oriented, acts as a barrier against backscatter radiation, making
it safe for the operator to stay in the room. The NOMAD Pro 2 backscatter shield may
contain lead dependent on its date of manufacture to attenuate scatter radiation.
The significant zone of occupancy for operators has been further verified by internal
testing. A NOMAD Pro 2 device was remotely fired into a water phantom repeatedly, with
an ion chamber recording radiation readings at 336 points in the room, first to establish
the vertical significant zone of occupancy and then to establish the horizontal significant
zone of occupancy for unit located 100 cm above the floor. Each exposure was taken at
1.00 seconds in order to simulate “worse case scenario” results. The vertical significant
zone of occupancy measures 60 cm X 200 cm, while the horizontal significant zone of
occupancy is 60 cm X 60 cm. A calibrated survey dosimeter can be used in order to
confirm radiation data shown in the following diagrams.
For further information on these tests, please contact Dental Imaging Technologies
Corporation
Scatter Results using Lead-Free Shield
Horizontal Plane,
Significant Zone of Occupancy:
60 cm x 60 cm
Vertical Plane,
Significant Zone of Occupancy:
60 cm x 200 cm
NOTE: Depictions of the user are for reference only.

1312
Scatter Results using Lead Shield
Horizontal Plane,
Significant Zone of Occupancy:
60 cm x 60 cm
Vertical Plane,
Significant Zone of Occupancy:
60 cm x 200 cm
2.3 Usage and Duty Cycle
As a safety feature, the NOMAD Pro 2 will not emit X-rays with insufficient voltage (low
battery).
The NOMAD Pro 2 is also designed to avoid damage from overheating. The minimum
duty cycle rating for maximum exposure (the relationship between duration and
frequency of exposures taken during a rolling 60 second period) is 1:60. This duty cycle is
programmed into your NOMAD Pro 2.
The NOMAD Pro 2 is a reusable device, but depending on usage patterns, handling, and
maintenance, service life may vary. If any of the conditions below are observed, the device
should be immediately removed from service. In this case, it may be possible for the
device to be factory repaired and returned to service for the remainder of its design life.
Contact Customer Service for details.
• Reduction in performance
• Cracks on the housing, collimator cone, and/or backscatter shield
• System dropped
• Subject to moisture (wetting, immersing, or soaking)

1312
NOMAD
• Exposed to heat or fire
• Housing opened
The NOMAD Pro 2 Handset is considered a consumable with a 1-2 year service life
depending on usage patterns. The handset should be replaced when it no longer powers
the device for 3 days of typical use without re-charging.
Do not operate the NOMAD Pro 2, the handset, charging cradle, or AC power
supply if equipment was subjected to moisture (wetting, immersing, or soaking).
Return to DEXIS or authorised service centre for service.
• Do not open the housings. Doing so will void the warranty. There are no user
serviceable parts inside the NOMAD Pro 2, handset, charging cradle, or AC power
supply.
• The NOMAD Pro 2 should not be used in environments where flammable cleaning
agents are present.
• Locate the charging cradle away from the normal patient environment.
• Connect only items that are specified as part of the system or that are specified as
being compatible with the system.
2.4 Cleaning
Use a non-acetone based disinfectant wipe or a cloth to wipe the exterior surfaces
of the NOMAD Pro 2 and charger. Do not use cleaners intended for hard surfaces, since
certain chemical combinations may deteriorate the NOMAD Pro 2 plastic prematurely.
Leave the handset connected to the NOMAD Pro 2 and wipe down all surfaces of the
device.
Unplug the charging cradle before cleaning.
NOTE: The NOMAD Pro 2, the handsets, the charging cradle, and the AC power supply
are not designed to be subjected to any kind of sterilisation procedure.
Alignment Bars
It is recommended to follow facility established cleaning and disinfection procedures. If the
infection control guidelines in your country permit, the alignment bars can be disinfected
using appropriate cleaning agents. Refer to cleaning agent manufacturer instructions.
Do not spray disinfectant or cleaners directly on the NOMAD Pro 2, handsets, charging
cradle, or AC power supply. The connecting areas are open to ingress and damage to
your device may result.

1514
2.5 Security, Storage, and Transportation
• Do not store the NOMAD Pro 2, handsets, charging cradle, or AC power supply in
extreme conditions: below –20°C or above +50°C, or beyond 90% relative humidity
(non-condensing). The optimal storage location is cool, dry, and away from direct
sunlight.
• DITC recommends that the NOMAD Pro 2 (like all electronic equipment) be allowed to
acclimate before use when switching between temperature extremes (i.e., cold storage
area to a warm use area or hot storage area to a cool use area).
• When finished for the day with the NOMAD Pro 2, detach the handset.
• The X-ray Lock and Unlock (Section 4.2) serves as the device security key to prevent
unauthorised use. In addition, it is recommended that the device be locked away when
not in use. For a further level of security, securely store handsets in a separate location.
• Take steps to ensure the NOMAD Pro 2 will not be knocked to the ground when not in
use. Lay it on its top, side, or in the accessory tabletop stand. Power will automatically
shut off after a period of inactivity (approximately three minutes).
• Some battery charge may be lost during extended inactivity (leading to fewer
exposures between handset charging cycles).
• The NOMAD Pro 2 should not be operated if it has been dropped or if performance
degrades; it should be returned to the manufacturer or an authorised service centre
for an evaluation.
• When finished for the day with the NOMAD Pro 2, detach the handset.
• Handset should be at least 2/3 charged for long term storage. Do not store
haphazardly or in contact with metal objects. Store in a cool, dry place.

1514
NOMAD
2.6 Product Symbols
Caution: U.S. Federal law restricts this device to sale by or on the order of a
physician or other licensed practitioner.
Type BF Equipment (providing a degree of protection against electric shock,
pertaining particularly to allowable leakage currents) complying with IEC 60601-1
Warning of ionizing radiation
CAUTION: X-RAYS
The positive and negative connections (the polarity) of a d.c. power supply.
Filtration value
X-ray source assembly
Focal Spot
Marking indicating that product is compliant with certain North American safety
standards
Power Switch
General warning
Caution
Recycling instructions
Used Electrical and electronic products should not be mixed with general
household waste
Manufacturer
Date of manufacture

1716
Model/Catalogue number
Serial number
Follow Operating Instructions for Use
Refer to Instruction Manual
Dangerous Voltage: Electrical Shock Hazard
The maximum and minimum temperature limits at which the item shall be stored
transported or used
Kept away from rain and in dry conditions
To indicate that the content of the transport package are fragile and the package
shall be handled with care
Audible signal, indicating audible cues emitted by device during operation
The acceptable upper and lower limits of relative humidity for transport and
storage
Medical Device
REF
SN

1716
NOMAD
2.7 Location of Device Labels
The Handheld X-ray System and Charger have identification labels that specify the model
number and applicable product approval listings.
Not for sale in U.S.
Complies with FDA radiation performance standards
21 CFR, subchapter J.
Location: Bottom surface of the NOMAD handheld
device.
Standard Trigger Handset
Refer to Instructions for Use for
compatible Charging Cradle
Contains Li-ion Battery
Location: Top of device handset
(visible when detached from device).
Charging Cradle
Use only with compatible handset and AC/DC
adapter. Refer to Instructions for Use
Max Input
Max Output
Location: Bottom surface of Charging Cradle

1918
3.0 Setup and Power Check
Carefully follow setup, assembly and alignment procedures defined in this manual, to
ensure quality image captures of defined areas of the patient’s anatomy.
3.1 The Backscatter Shield
In addition to the radiation shielded cone, the backscatter shield provides additional
protection to the operator and can be adjusted to permit exposures made at various
angles.
You may find that the backscatter shield needs to be
adjusted to accommodate sensors or angled exposures.
If adjustments are needed, gently glide the shield up or
down along the cone using equal pressure to maintain a
perpendicular alignment and to avoid binding.
To keep the shield securely on the cone, a cap is
permanently attached at the outer cone end. Do not
attempt to remove this cap or to remove the backscatter
shield. Attempting to do so will result in damage to your
device and will void the warranty.
3.2 Attaching a Charged Handset
With the NOMAD Pro 2 placed bottom
up on a secure surface, properly orient and
carefully slide the charged handset onto
the base of the NOMAD Pro 2. (A properly
oriented handset should click into place
with firm pressure.)
The clicking sound ensures the locking
mechanism has secured the NOMAD Pro
2 to the handset. To verify this lock, apply
slight pressure in the release direction.
There are electric voltages present at the handset terminals. Protect the handset from
damage; do not probe with fingers or conductive objects.
3.3 Checking for Power
After locking a handset in place press the Power button.
The display panel will activate with a battery power level icon in the upper right
corner. Five bars is an indication of a fully charged handset.

1918
NOMAD
The Recharge Handset Alarm consists of the
user interface alternately flashing the two
screen shown above.
If the battery charge is too low,
the NOMAD Pro 2 will not emit an
X-ray and the Recharge Handset
alarm will display.
When a battery is depleted to the
single bar level , it is recommended
the handset be recharged. Remove the
handset from the charging cradle once
it is fully charged.
Replace a low charge handset
with the secondary handset (which
should be charged in advance). It
is recommended that you keep one
handset fully charged at all times to
ensure continuous operation.
3.4 Checking for Handset in Sleep Mode
Occasionally, a Handset may enter sleep mode and disable itself. This feature is designed
to extend the useful life of the battery. Sleep mode occurs when the Handset is not used
for an extended period of time or when stored while attached to the device.
To check if your handset is in sleep mode, remove handset from the Charger or device and
wait 5 seconds. Looking at the top of the Handset, pull and hold the trigger and watch
for a small red light flashing one or more times. If no light is seen, the Handset is in sleep
mode. To enable the Handset, follow the three steps below.
Unplug the cord from the Charging Cradle.
Put the Handset on the Charging Cradle.
Plug in the cord and watch for the
charging indicator to begin flashing.

2120
To prevent an immediate return to sleep mode, do not remove until second bar starts
flashing.
To avoid sleep mode in the future, store handset detached from device and fully charge
every two months.
Note: Charging a handset from the sleep mode may take up to 5 hours. If the process
described above fails to enable the Handset after 3 attempts, authorized service may be
required.
3.5 Optional Checks
The NOMAD Pro 2 is factory calibrated and tested prior to release (see your Certificate of
Conformance). A self-diagnostic is completed each time an exposure is taken. However,
the optional checks listed below may be performed periodically as desired. Some locations
may require initial and periodic checks as a condition of use.
The NOMAD Pro 2 has an X-ray disable feature that allows the X-rays to be disabled for
training purposes. Test firing this X-ray unit may otherwise be dangerous to the testing
technician or bystanders. See Section 4.2 for more information.
• Power On/Off: Attach a fully charged handset to the NOMAD Pro 2 device. Press the
Power button and verify that the device correctly powers on and off.
• Increase/Decrease Exposure Time: With the device on, select the patient size, the
image receptor type, and the tooth type. The exposure time corresponding to the
selections will display on-screen. Press the Increase and the Decrease buttons,
and verify that the exposure time changes appropriately. When the
Increase or Decrease buttons are pressed and held, the rate at which the
displayed time setting changes on screen accelerates.
• Triggering: With the device on and an exposure time selected, press and release
the trigger once. This will ready the device, and the display will indicate the Ready
state. To end the Ready state, press any button on the user interface panel or wait
approximately 15 seconds for the time-out.
• Automatic Shut-down: With the device on, allow approximately three minutes of
inactivity to pass for the system to automatically shut down.
The NOMAD Pro 2 should not be operated if it has been dropped or if performance
degrades; it should be returned to the manufacturer or an authorised service centre for an
evaluation.
(See Section 6.1 Alarms and Alerts for more information.)
Table of contents
Other DEXIS Dental Equipment manuals
Popular Dental Equipment manuals by other brands
EMS
EMS miniPiezon Operation instructions
DENTAURUM
DENTAURUM discovery sl 2.0 Instructions for use
KaVo
KaVo ARCUS digma operating instructions

Renfert
Renfert SILENT powerCAM TC quick start guide
Dentsply Sirona
Dentsply Sirona CEREC Primescan AC operating instructions
Coltene
Coltene CanalPro Jeni Assembly guide
