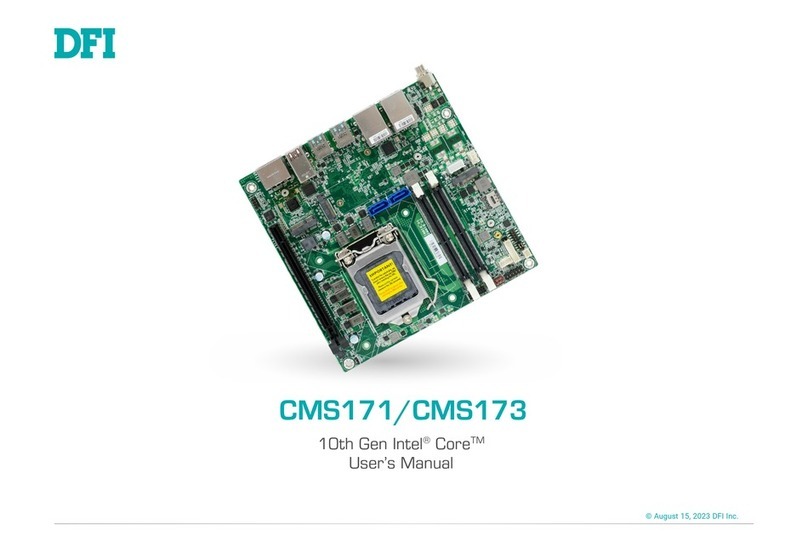
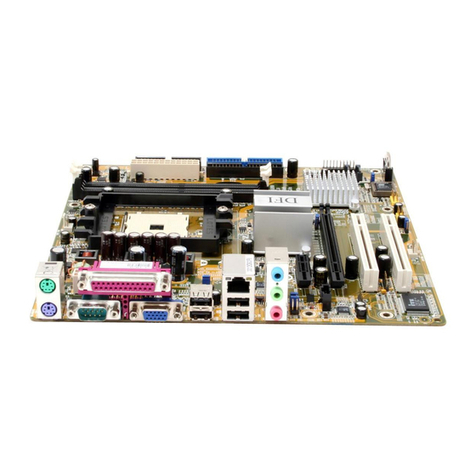
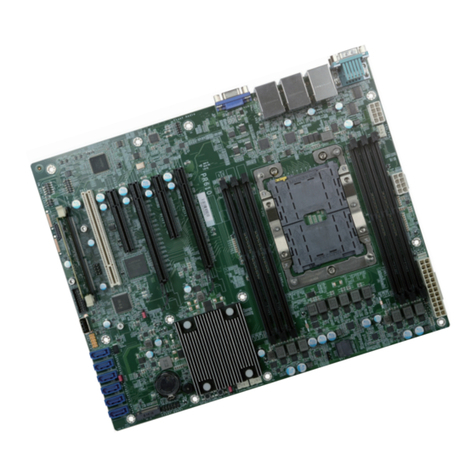
DFI P5BTX/L User manual

P5BTX/L
Rev. A+
System Board
User’s Manual
34371013

Copyright
Thispublicationcontainstheinformationthatisprotectedbycopyright.
Nopartofitmaybereproducedinanyformorbyanymeansorused
to make any transformation/adaptation without the prior written
permissionfromthecopyrightholders.
Thispublication is providedfor informational purposesonly. The
manufacturermakesnorepresentationsorwarrantieswithrespectto
thecontentsoruseofthismanualandspecificallydisclaimsanyexpress
orimpliedwarrantiesofmerchantabilityorfitnessforanyparticularpurpose.
Theuserwillassumetheentireriskoftheuseortheresultsoftheuseof
thisdocument.Further,themanufacturerreservestherighttorevisethis
publicationandmakechangestoitscontentsatanytime,withoutobligation
tonotifyanypersonorentityofsuchrevisionsorchanges.
AllRightsReserved.
Trademarks
Microsoft®MS-DOS®,WindowsTM andWindows®95areregistered
trademarksofMicrosoftCorporation.IntelandPentiumareregistered
trademarksofIntelCorporation.Cyrix,6x86,6x86Land6x86MXare
registeredtrademarksof Cyrix Corporation.AMD,K5and K6 are
registeredtrademarksofAdvancedMicroDevices,Inc. IBMisaregistered
trademarkofInternationalBusinessMachineCorporation.Awardisa
registeredtrademarkofAwardSoftware,Inc.Othertrademarksand
registeredtrademarksofproductsappearinginthismanualarethe
propertiesoftheirrespectiveholders.
Caution:
Danger of explosion if battery incorrectly replaced.
Replace only with the same or equivalent type recommended by the
manufacturer.
Dispose of used batteries according to the battery manufacturer’s
instructions.

FCC and DOC Statement on Class B
This equipment has been tested and found to comply with the limits
for a Class B digital device, pursuant to Part 15 of the FCC rules.
These limits are designed to provide reasonable protection against
harmful interference when the equipment is operated in a residential
installation. This equipment generates, uses and can radiate radio
frequency energy and, if not installed and used in accordance with
the instruction manual, may cause harmful interference to radio
communications. However, there is no guarantee that interference
will not occur in a particular installation. If this equipment does cause
harmful interference to radio or television reception, which can be
determined by turning the equipment off and on, the user is
encouraged to try to correct the interference by one or more of the
following measures:
•Reorient or relocate the receiving antenna.
•Increase the separation between the equipment and the receiver.
•Connect the equipment into an outlet on a circuit different from
that to which the receiver is connected.
•Consult the dealer or an experienced radio TV technician for
help.
Notice:
1.The changes or modifications not expressly approved by the
party responsible for compliance could void the user's authority
to operate the equipment.
2.Shielded interface cables must be used in order to comply with
the emission limits.

TableofContents
Chapter 1 - Introduction
1.1Features and Specifications...................................................................
1.2Package Checklist.......................................................................................7
10
Chapter 3 - Award BIOS Setup Utility
3.1The Basic Input/Output System........................................................
3.1.1Standard CMOS Setup.......................................................
3.1.2BIOS Features Setup.............................................................
3.1.3Chipset Features Setup.......................................................
3.1.4Power Management Setup................................................
3.1.5PNP/PCI Configuration.......................................................
3.1.6Load Fail-Safe Settings..........................................................
3.1.7Load Optimal Settings..........................................................
3.1.8Integrated Peripherals...........................................................
3.1.9Supervisor Password............................................................
3.1.10User Password.........................................................................
3.1.11IDE HDDAuto Detection................................................
3.1.12Save & Exit Setup...................................................................
3.1.13Exit Without Saving................................................................
35
35
39
43
44
47
49
49
50
53
54
54
55
55
Chapter 2 - Hardware Installation
2.1System Board Layout .............................................................................
2.2Installation Steps..........................................................................................
2.2.1Installing System Memory........................................................
2.2.2Installing a Processor..................................................................
2.2.3Setting the Jumpers on the System Board..................
2.2.4Installing Expansion Cards......................................................
2.2.5Connecting the Ribbon Cables and Wires of the
Ports and Connectors..............................................................
2.2.6Installing the System Board....................................................
12
13
13
18
22
23
25
33
Appendix A - Identifying Processors
A.1Intel Processors...........................................................................................
A.2Cyrix Processors........................................................................................
A.3AMD Processors........................................................................................
62
62
63
Appendix B - System Error Report
B.1POST Beep...................................................................................................
B.2Error Messages............................................................................................65
65
Appendix C - Troubleshooting
C.1 Troubleshooting Checklist.....................................................................68
Chapter 4 - Supported Softwares
4.1Desktop Management Interface........................................................
4.2IDE Drivers...................................................................................................57
60

P5BTX/L System Board User’s Manual
1
6
Introduction
CHAPTER

1
Introduction
7
1.1 Features and Specifications
1.1.1 Features
Chipset
•Intel82430TX PCIset chipset
Processor
The system board is equipped with a 321-pin ZIF socket (Intel
Socket 7). This socket is designed for easy removal of an old
processor and easy insertion of an upgrade processor. The system
board is also equipped with a switching voltage regulator that
supports 2.8V to 3.5V core voltage for various processors.
•Intel Pentiumprocessor with MMXTM technology-166/200/
233MHz
•Intel Pentium90/100/120/133/150/166/200MHz
•Cyrix6x86L PR150+/PR166+ and 6x86MX-PR166/PR200
•AMDK5 PR90/PR100/PR120/PR133/PR166
•AMDK6-166, K6-200, K6-233 and future K6 processors
System Memory
The system board supports 8MB to 256MB of memory. It is
equipped with two DIMM and four SIMM sockets. The 168-pin
DIMM sockets use x64 EDO (60/70ns), fast page mode (60/70ns),
or SDRAM (10/12/13ns), 3.3V. The 72-pin SIMM sockets use EDO
or fast page mode, 60/70ns, x32 DRAM, 5V.
Level 2 Cache Memory
•512KB pipeline burst, direct map write-back cache installed on
the system board.
Expansion Slots
The system board is equipped with 4 dedicated PCI slots and 3
dedicated 16-bit ISA slots. All PCI and ISA slots are bus masters.

P5BTX/L System Board User’s Manual
1
8
Desktop Management Interface (DMI)
The system board comes with DMI 2.0 built into the BIOS. The
DMI utility in the BIOS automatically records various information
about your system configuration and stores these information in
the DMI pool, which is a part of the system board's Plug and Play
BIOS. DMI, along with the appropriately networked software, is
designed to make inventory, maintenance and troubleshooting of
computer systems easier.
Onboard I/O
•Two NS16C550A-compatible serial ports
•One SPP/ECP/EPP parallel port
•One floppy drive interface supports up to 2.88MB floppy
drives.
•One PS/2 mouse port
•One PS/2 or AT keyboard port
•One 12-pin standard AT power supply connector
PCI Bus Master IDE Controller
•Two PCI IDE interfaces support up to four IDE devices
•Ultra DMA/33 supported (Synchronous DMA mode - data
transfer rate up to 33MB/sec.)
•PIO Mode 3 and Mode 4 Enhanced IDE (data transfer rate up
to 16.6MB/sec.)
•Bus mastering reduces CPU utilization during disk transfer
•ATAPI CD-ROM supported
•LS-120 and ZIP supported
IrDA Interface
The system board is equipped with an IrDA connector for
wireless connectivity between your computer and peripheral
devices.
USB Ports
The system board is equipped with a header for external USB
ports. USB allows data exchange between your computer and a
wide range of simultaneously accessible external Plug and Play
peripherals.

1
Introduction
9
BIOS
•Award BIOS, Windows95 Plug and Play compatible
•Flash EPROM for easy BIOS upgrades
Power Supply Connector
The system board is equipped with an AT power supply connector
for connecting an AT power supply.
1.1.2 Technology
SDRAM
Synchronous Dynamic Random Access Memory (SDRAM) is a
DRAM technology that uses the clock on the chip to synchronize
with the CPU clock so that the timing of the memory chips and
the timing of the CPU are synchronized. This saves time during
transmission of data, subsequently increasing system performance.
Ultra DMA/33 Bus Master IDE
The system board supports Synchronous Ultra DMA mode that
provides data transfer rate at 33MB/sec, which is double the data
transfer rate of Enhanced IDE or ATA-2. This enables the CPU to
operate more efficiently when handling simultaneous events.
1.1.3 Intelligence
RTC Timer to Power On the System
The RTC installed on the system board allows your system to
automatically wake up on the set day and time. Set the day and
time you would like your system to power on in the “Resume By
Alarm” field (Power Management Setup) of the Award BIOS.

P5BTX/L System Board User’s Manual
1
10
Virus Protection
Most viruses today destroy data stored in hard drives. The system
board is designed to protect the boot sector and partition table
of your hard disk drive. If an attempt is made to write to the
boot sector or partition table of the hard disk drive, the BIOS will
halt the system and an error message will appear. Refer to the
“Virus Warning” field in the BIOS Features Setup section of this
manual (Chapter 3).
1.2 Package Checklist
The system board package contains the following items:
þThesystemboard
þA user’s manual
þSerial, mouse and printer port cables
Option 1:
-One card-edge bracket with a 9-pin and 25-pin serial port
cables
-One card-edge bracket with a 25-pin printer port cable
and a PS/2 mouse port cable
Option 2:
-One card-edge bracket with two 9-pin serial port cables
and a PS/2 mouse port cable
-One 25-pin printer port cable for chassis mounting
þOne 40-pin IDE hard disk cable
þOne 34-pin floppy disk drive cable
þOne utility diskette
þFive spare jumpers
¨Onecard-edge bracketwithtwoUSBports(optional)
If any of these items are missing or damaged, please contact your
dealer or sales representative for assistance.

Hardware Installation
CHAPTER

P5BTX/L System Board User’s Manual
2
12
2.1 System Board Layout

2
Hardware Installation
13
2.2 Installation Steps
Warning:
Electrostatic discharge (ESD) can damage your processor, disk
drives, add-in boards, and other components. Perform the
upgrade instruction procedures described at an ESD
workstation only. If such a station is not available, you can
provide some ESD protection by wearing an antistatic wrist
strap and attaching it to a metal part of the system chassis. If
a wrist strap is unavailable, establish and maintain contact with
the system chassis throughout any procedures requiring ESD
protection.
The following outlines the basic installation steps prior to installing
the system board into the chassis.
2.2.1Install the System Memory
2.2.2Install the Processor
2.2.3Set the Jumpers on the System Board
2.2.4Install the Expansion Cards
2.2.5 Connect the Ribbon Cables and Wires of the Ports and
Connectors
2.2.6Install the System Board
2.2.1 Installing System Memory
The system board supports two kinds of memory modules: DIMM
and SIMM. DIMM, which sometimes uses SDRAM, performs better
than SIMM, which uses DRAM. When you are purchasing DIMMs,
please specify you want the Intel compatible type. (There are DIMMs
made for other types of computers that are not compatible.)
Note:
DIM and SIM modules cannot exist on the system board at
the same time. Use either SIMM or DIMM only.

P5BTX/L System Board User’s Manual
2
14
2.2.1.1 DIMM
The two 168-pin DIMM
(Dual In-line Memory
Module) sockets use x64
EDO, FPM and SDRAM.
The system board can
support 8MB to 256MB
memory. The table below
summarizes the DIMM
sockets and modules
needed for the corres-
ponding memory sizes.
MemorySize
8MB
8MB
16MB
16MB
16MB
24MB
24MB
32MB
32MB
32MB
40MB
40MB
48MB
48MB
64MB
128MB
256MB
DIMM 1
8MB
none
16MB
none
8MB
8MB
16MB
32MB
none
16MB
8MB
32MB
16MB
32MB
32MB
64MB
128MB
DIMM 2
none
8MB
none
16MB
8MB
16MB
8MB
none
32MB
16MB
32MB
8MB
32MB
16MB
32MB
64MB
128MB

2
Hardware Installation
15
1.Pull the “tabs” which are at the ends of the socket to the side.
2.Position the DIMM above the socket with the “notches” in the
module aligned with the “keys” on the socket.
3.Seat the module vertically into the socket. Make sure it is
completely seated. The tabs will hold the DIMM in place.
Pin 1
Notch
KeyTab
Tab
Installing the DIM Module
A DIM module simply snaps into a socket on the system board. Pin
1 of the DIM module must correspond with Pin 1 of the socket.
2.2.1.2 SIMM
The SIMM sockets are
divided into two banks on
the system board, Bank 0
and Bank 1. Each bank
consists of 2 SIMM sockets.
The system board supports
8MB to 256MB of memory
using 1MBx32, 2MBx32,
4MBx32, 8MBx32 or
16MBx32 72-pin SIMMs
(Single In-line Memory
Module). You will need 2 or 4 pieces of SIM modules, depending
on the amount of memory you intend to install. Make sure you
insert the same type of SIMMs in one bank. You can install SIMMs
in either banks but you must populate one bank first before going
to the next bank.

P5BTX/L System Board User’s Manual
2
16
SIMM1
4MB
—
8MB
—
4MB
4MB
8MB
16MB
—
8MB
4MB
16MB
8MB
16MB
32MB
—
16MB
4MB
32MB
8MB
32MB
16MB
32MB
64MB
—
32MB
MemorySize
8MB
8MB
16MB
16MB
16MB
24MB
24MB
32MB
32MB
32MB
40MB
40MB
48MB
48MB
64MB
64MB
64MB
72MB
72MB
80MB
80MB
96MB
96MB
128MB
128MB
128MB
Bank0
SIMM2
4MB
—
8MB
—
4MB
4MB
8MB
16MB
—
8MB
4MB
16MB
8MB
16MB
32MB
—
16MB
4MB
32MB
8MB
32MB
16MB
32MB
64MB
—
32MB
SIMM4
—
4MB
—
8MB
4MB
8MB
4MB
—
16MB
8MB
16MB
4MB
16MB
8MB
—
32MB
16MB
32MB
4MB
32MB
8MB
32MB
16MB
—
64MB
32MB
Bank1
SIMM3
—
4MB
—
8MB
4MB
8MB
4MB
—
16MB
8MB
16MB
4MB
16MB
8MB
—
32MB
16MB
32MB
4MB
32MB
8MB
32MB
16MB
—
64MB
32MB
The following table summarizes the bank locations and modules
needed for the corresponding memory sizes.

2
Hardware Installation
17
1.Position the SIMM above the socket with the “notch” in the
module aligned with the “key” on the socket.
2.Seat the module at a 45° angle into the bank. Make sure it is
completely seated. Tilt the module upright until it locks in place in
the socket.
Installing a SIM Module
A SIM module simply snaps into a socket on the system board. Pin
1 of the SIM module must correspond with Pin 1 of the socket.
notch
key
SIMM1
4MB
64MB
8MB
64MB
16MB
64MB
32MB
64MB
64MB
MemorySize
136MB
136MB
144MB
144MB
160MB
160MB
192MB
192MB
256MB
Bank0
SIMM2
4MB
64MB
8MB
64MB
16MB
64MB
32MB
64MB
64MB
SIMM4
64MB
4MB
64MB
8MB
64MB
16MB
64MB
32MB
64MB
Bank1
SIMM3
64MB
4MB
64MB
8MB
64MB
16MB
64MB
32MB
64MB

P5BTX/L System Board User’s Manual
2
18
2.2.2 Installing a Processor
The system board is equipped with a 321-pin Zero Insertion Force
(ZIF) socket The ZIF socket is designed for easy removal of an old
processor and easy insertion of an upgrade processor. If you need
to apply excessive force to insert the processor, you are not installing
the processor correctly.
1.To raise the handle of the ZIF socket, push it down, slightly pull it
out to the side, then raise it as far as it will go. It may be
necessary to initially apply a small amount of sideways force to
free the handle from its retaining “tab”. Once clear of the “tab”,
the handle will open relatively easily. The top plate will slide back.
2.Insert the processor until the pins are in their corresponding
holes. Make sure pin 1 of the processor is aligned with pin 1 of
the socket. To prevent improper processor installation, the ZIF
socket has a Plug/Keying mechanism. Several holes in the socket
are plugged so that the processor will go in only one way.
3.Push the handle down until the handle locks into place. The top
plate will slide forward.
Warning:
The processor must be kept cool by using a fan with heatsink.
Otherwise, the processor will overheat and damage the
processor and the system board.
TabHandle
Pin1

2
Hardware Installation
19
2.2.2.1 Jumper Settings of the Processors
A processor’s internal clock speed is the actual internal operating
clock of the processor. Its frequency ratio differs from one processor
to another. An Intelprocessor will multiply the external bus clock by
the frequency ratio to become the internal clock speed. Internal clock
speed is the commonly known speed of Intelprocessors in the
market and is the actual operating clock of the processor (external
bus clock x frequency ratio = internal clock speed). Cyrixand
AMDprocessors use the PR-rating system which is the overall
processor performance rating.
The voltage of the processors are divided into Single voltage and
Dual voltage processors. Single voltage processors include Intel
Pentium, Cyrix6x86 and AMDK5 processors. Dual voltage
processors include Intel Pentiumprocessors with MMX technology,
Cyrix6x86L and 6x86MX, and AMDK6 processors. Make sure
all jumpers are set correctly before applying power or you may
damage the processor or system board. Use a needle-nosed plier to
move the jumpers if necessary.
The table below shows the External System Bus Clock of the
processors supported by the system board and their corresponding
PCI Clock and ISA Bus Clock.
Ext. System Bus Clock
60MHz
66MHz
PCI CLK
30MHz
33MHz
ISA Bus CLK
7.5MHz
8.25MHz
JP1
JP2
JP3
JP6
JP7
JP8

P5BTX/L System Board User’s Manual
2
20
Jumper Settings for Intel Processors
90MHz - 60MHz - 1.5x
100MHz - 66MHz - 1.5x
120MHz - 60MHz - 2x
133MHz - 66MHz - 2x
150MHz - 60MHz - 2.5x
166MHz - 66MHz - 2.5x
200MHz - 66MHz - 3x
MMX166MHz*- 66MHz - 2.5x
MMX200MHz - 66MHz - 3x
MMX233MHz - 66MHz - 3.5x
JP6
Processors-Ext. Bus Clk-Ratio 1-2 Off, 3-4 Off,
5-6 On, 7-8 On
1-2 Off, 3-4 Off,
5-6 On, 7-8 On
1-2 Off, 3-4 Off,
5-6 On, 7-8 On
1-2 Off, 3-4 Off,
5-6 On, 7-8 On
1-2 Off, 3-4 Off,
5-6 On, 7-8 On
1-2 Off, 3-4 Off,
5-6 On, 7-8 On
1-2 Off, 3-4 Off,
5-6 On, 7-8 On
1-2 On, 3-4 On,
5-6 Off, 7-8 Off
1-2 On, 3-4 On,
5-6 Off, 7-8 Off
1-2 On, 3-4 On,
5-6 Off, 7-8 Off
JP3
1-2 Off
2-3 On
1-2 Off
2-3 On
1-2 Off
2-3 On
1-2 Off
2-3 On
1-2 Off
2-3 On
1-2 Off
2-3 On
1-2 Off
2-3 On
1-2 Off
2-3 On
1-2 Off
2-3 On
1-2 Off
2-3 On
JP2
1-2 Off
2-3 On
1-2 On
2-3 Off
1-2 Off
2-3 On
1-2 On
2-3 Off
1-2 Off
2-3 On
1-2 On
2-3 Off
1-2 On
2-3 Off
1-2 On
2-3 Off
1-2 On
2-3 Off
1-2 On
2-3 Off
JP8
1-2 Off, 3-4 Off,
5-6 Off
1-2 Off, 3-4 Off,
5-6 Off
1-2 On, 3-4 Off,
5-6 Off
1-2 On, 3-4 Off,
5-6 Off
1-2 On, 3-4 On,
5-6 Off
1-2 On, 3-4 On,
5-6 Off
1-2 Off, 3-4 On,
5-6 Off
1-2 On, 3-4 On,
5-6 Off
1-2 Off, 3-4 On,
5-6 Off
1-2 Off, 3-4 Off,
5-6 Off
JP1
1-2 On
2-3 Off
1-2 Off
2-3 On
1-2 On
2-3 Off
1-2 Off
2-3 On
1-2 On
2-3 Off
1-2 Off
2-3 On
1-2 Off
2-3 On
1-2 Off
2-3 On
1-2 Off
2-3 On
1-2 Off
2-3 On
Jumper Settings for Cyrix Processors
6x86L PR150+ - 60MHz - 2x
6x86L PR166+ - 66MHz - 2x
6x86MX PR166 - 60MHz -
2.5x
6x86MX PR200 - 66MHz -
2.5x
JP6
1-2 On, 3-4 On,
5-6 Off, 7-8 Off
1-2 On, 3-4 On,
5-6 Off, 7-8 Off
1-2 On, 3-4 On,
5-6 Off, 7-8 Off
1-2 On, 3-4 On,
5-6 Off, 7-8 Off
JP3
1-2 Off
2-3 On
1-2 Off
2-3 On
1-2 Off
2-3 On
1-2 Off
2-3 On
JP2
1-2 Off
2-3 On
1-2 On
2-3 Off
1-2 Off
2-3 On
1-2 On
2-3 Off
JP8
1-2 On, 3-4 Off,
5-6 Off
1-2 On, 3-4 Off,
5-6 Off
1-2 On, 3-4 On,
5-6 Off
1-2 On, 3-4 On,
5-6 Off
JP1
1-2 On
2-3 Off
1-2 Off
2-3 On
1-2 On
2-3 Off
1-2 Off
2-3 On
Processors-Ext. Bus Clk-Ratio
Locations of Jumpers JP1-JP3 and JP6-JP8
This manual suits for next models
2
Table of contents
Other DFI Motherboard manuals

DFI
DFI M8MP553 User manual

DFI
DFI LanParty UT RDX200 series User manual

DFI
DFI ak75-ec A+ User manual

DFI
DFI G586IPC User manual

DFI
DFI SR330-N User manual

DFI
DFI 661FX-MLV User manual

DFI
DFI CS103-C246 User manual

DFI
DFI LanParty DK 790GX-M2RS User manual

DFI
DFI 865PE-ALE User manual

DFI
DFI SD631-C236 User manual
Popular Motherboard manuals by other brands

Analog Devices
Analog Devices ADAU1772 user guide

NXP Semiconductors
NXP Semiconductors LPC55S16-EVK user manual

ASROCK
ASROCK IMB-156J user manual

Texas Instruments
Texas Instruments ADS7861 EVM user guide

Texas Instruments
Texas Instruments DS90UB95 Q1EVM Series user guide

Nexcom
Nexcom PEAK872VL2 Quick reference guide