Diagon Coag2D User manual
semi-automated coagulometer
User Manual
Reference No.: 11000102EN
Internal Reference No.: DIAB102AEN

2
Ref. No. Internal Ref.
No. SW Version Document
Date
11000102EN DIAB102AEN 2.x June 2018
This document applies to the latest software version listed and higher
versions.
When a subsequent software version changes the information in this
document, a new electronic edition is released and supplied by Diagon
Ltd.
Copyright © 2018. ALL RIGHTS RESERVED. DIAGON Ltd
H-1047 Budapest, Baross Street 48-52.

3
Table of Contents
1. Introduction 5
1.1. Legal Information ..............................6
1.2. Limited Warranty ..............................6
2. Package and Accessories 7
3. List of Symbols 8
3.1 Data Table Symbols ............................8
3.2 Symbols on Accessories .........................8
3.3 Symbols on the Packaging .......................9
4. Safety Guidelines 10
4.1. Conditions of Intended Use .....................10
4.2 General Usage Information ......................10
4.3 Placement of the Coag 2D ......................11
4.4 Electrical Network Requirements .................11
4.5 Accident and Injury Prevention ...................12
4.6 Precautions ..................................12
4.7 Reagent Safety Guide..........................13
5. Technical Description of the Coag 2D ...............14
5. Operating Principle 14
5.2 Specications ................................17
6. Components of the Coag 2D 18
6.1 Structure of the Instrument ......................18
7. Installation of the Coag 2D 20
7.1 Installation Requirements .......................20
7.2 Connecting to the Electrical Network ..............20
7.3 Testing the Functionality of the Instrument ..........20
8. Setup Menu 22
8.1 Setup of Nephelometric Test Parameters ...........23
8.2 Setup of Turbidimetric and Chromogenic Test .......24
Parameters .....................................24
9. System Menu 25
9.1 Available Options..............................25
9.2 Error Messages...............................26
10. Sample Measurement 27
10.1 Preparation of Materials .......................27
10.2 Measurement Screen .........................28
11. Calibration 31
11.1 Calibration of Clotting Tests.....................31
11.2 Calibration of Turbidimetric Tests ................33
11.3 Calibration of Chromogenic Tests ................33
11.4 Producing a Dilution Series .....................33
12. Retrieving Measured Data 34

4
12.1 Filter ......................................34
12.2 Detailed Display .............................35
12.3 Action Screen ...............................35
13. Quality Control 36
13.1 Setting Target Values .........................37
13.2 Control Measurement .........................38
13.3 Processing Control Results.....................38
14. Maintenance of the Coag 2D 39
14.1 Cleaning the Measuring Unit....................39
14.2 Cleaning the Screen ..........................39
14.3 Cleaning the Housing .........................39
14.4 Troubleshooting..............................40
14.5 Disposal of the Instrument. . . . . . . . . . . . . . . . . . . . . .40
Appendix A 41
Appendix B 42
Appendix C 44
Appendix D 47

5
1. Introduction
Thank you for choosing Diagon by purchasing our product, the Coag 2D
semi-automated coagulometer.
The Coag 2D is a 2-channel semi-automated coagulation analyzer made
for in vitro diagnostic use. The Coag 2D is capable of analyzing blood
samples with great accuracy. The instrument is suitable for detecting
clotting time, performing chromogenic and immunological assays on
plasma specimens prepared from sodium-citrate anticoagulated blood
samples collected into standard sample tubes.
For the best Coag 2D experience, read this manual carefully and comply
with its instructions.
Feel free to contact us if you need assistance, such as ordering stocks,
replacement parts and consumables or technical support and
maintenance.
Diagon Ltd.
H 1047 Budapest, Baross u. 48-52.
tel: (+36 1) 369 6500
fax: (+36 1) 369 6301
www.diagon.com

6
1.1. Legal Information
All information presented is illustrative and is not meant to be used for
clinical or maintenance evaluation. The data shown in sample printouts,
screens do not reect actual patient names or test results.
These instructions are meant for Diagon Ltd. trained personnel or other
professionals who have experience with the operation and maintenance
of the product identied. Those who lack such experience may only use
the product under direct supervision of representatives of Diagon Ltd.
Diagon Ltd. will not take responsibility for any damage or loss that result
from, or are in connection with the actions of persons who did not receive
full training from Diagon Ltd. This limitation does not apply to trained pro-
fessionals and representatives of Diagon Ltd.
Communication (written or spoken) between the user and Diagon Ltd.
does not constitute as a condential relationship. Such information is
considered non-condential, which means Diagon Ltd. may reproduce,
publish or use it without limitation for research, development, manufac-
ture, service or usage purposes and for the sale of products that entail
such information. Anyone who contacts Diagon Ltd. is responsible for
the accuracy and sincerity of the information transmitted. They are also
responsible for information that violates any person’s proprietary rights.
Diagon Ltd. is not engaged in rendering medical advice or services.
The information provided is subject to change – always refer to the latest
documents for current information.
None of the contents and/or media of this manual may be reproduced,
stored, retrieved or transmitted by any form or means without written per-
mission from Diagon Ltd.
1.2. Limited Warranty
The distributor provides warranty appropriate for the national regulations
valid in the country of distribution.

7
2. Package and Accessories
Make sure all items listed are present in the package when unboxing.
Coag 2D analyzer 1 pc.
Power supply unit 1 pc.
Magnetic mixer (2 pcs / set) 1 set
User Manual (this document) 1 pc

8
3. List of Symbols
3.1 Data Table Symbols
3.2 Symbols on Accessories
Serial Number
Catalogue Number
In Vitro Diagnostic Device
CE Conformity
Read the Manual
Manufacturer information
Requires specic disposal
Single use only
Non-sterile
Sucient for nuses

9
3.3 Symbols on the Packaging
Fragile
Keep Dry
Proper Storage
Suitable Temperature Range
Suitable Humidity Range

10
4. Safety Guidelines
Please make sure to read this manual thoroughly and comply with the
instructions provided before installing and operating the instrument. To
ensure the best experience while using Coag 2D, keep this manual for
future reference.
4.1. Conditions of Intended Use
The Coag 2D was designed solely for in vitro diagnostic use. The primary
test specimen is plasma separated with centrifugation from
sodium-citrate anticoagulated human whole blood. Any other usage of
the instrument constitutes as misuse, which may cause damage to the
instrument and may negatively inuence test results. False test results
and/or damage to the instrument can be averted by the exclusive use of
manufacturer approved consumables (such as reagents, cleansers and
cuvettes). For the list of manufacturer approved consumables, visit the
ocial Diagon website (www.diagon.com).
Compliance with this manual is also part of the conditions of intended use
– make sure to follow these instructions regarding cleaning and mainte-
nance procedures to prevent any issues that may arise while operating
the Coag 2D.
The Coag 2D coagulometer is an In Vitro Diagnostic instrument
suitable for healthcare professional use according to the Directive
98/79/EEC.
4.2 General Usage Information
The unboxing, installation and set-up of the Coag 2D may only be done
by your local representative.
The user may not open the exterior of the instrument and may not come
into physical contact with or touch its internals or circuits.
In case of any malfunctions or any unusual odors, fume coming from the
instrument, hit the main switch and disconnect the power cord immedia-
tely. After taking these measures, contact your local maintenance team to
resolve the underlying issue.

11
Avoid spilling samples, reagents or any liquids into the instrument as fore-
ign objects and liquids may cause the instrument to short circuit or to set
on re. In the case spillage does happen and it disrupts the function of the
instrument, hit the main switch and disconnect the power cord immedia-
tely. After taking these measures, contact your local maintenance team.
4.3 Placement of the Coag 2D
The Coag 2D is designed for indoor use. Do not place the instrument
outside or in an unsheltered area.
Make sure to position the Coag 2D where the main switch is easily ac-
cessible.
The Coag 2D must be placed in an area where it is free of moisture,
dust, direct sunlight, radiating heat, high humidity or any other damaging
eects.
Place the Coag 2D on a surface that is at, still and has the adequate
weight capacity.
Place the Coag 2D in a room with good ventilation.
Make sure that there is no device that emits electromagnetic radiation or
electronic interference in the proximity of the Coag 2D, and avoid placing
it near electronic wires.
Do not place the Coag 2D near sources of ammable gases, such as
containers of oxygen, hydrogen or anaesthetics.
Only connect standardized devices recommended by the manufacturer
to the Coag 2D. Make sure that the cords used to connect such devices
conform to the manufacturer’s recommendations and are intact.
4.4 Electrical Network Requirements
Only connect the Coag 2D to an electrical network that conforms to the
parameters presented in this manual with a suitable power cord. To pre-
vent electrocution or re, make sure the instrument is grounded.
Handle the power cord with care. To prevent electrocution or re, make
sure not to put strain on or damage the power cord by placing heavy ob-
jects on it or unplugging it from the socket with extreme force. If the power
cord does get damaged, contact your local maintenance team.

12
Only connect the Coag 2D into a wall socket with appropriate grounding
with a power cord that complies with local standards.
4.5 Accident and Injury Prevention
Always follow your local safety regulations when operating the Coag 2D.
The external barcode reader of the Coag 2D emits low energy laser radia-
tion, looking directly into them may cause eye pain or permanent damage
to the eye. Avoid looking directly into the laser beam.
4.6 Precautions
The entire surface of the instrument is considered potentially biologically
hazardous.
Always wear gloves when handling blood samples as they are
considered biohazardous.
The controls and the calibrator are considered potentially infectious.
Always take the necessary protective measures when using them.
The liquid and solid waste produced during operating must not touch skin
or soft tissue, wear the necessary protective gloves and clothing when
handling them. In case you do come into contact with potentially hazar-
dous agents, wipe the exposed areas dry, rinse them with plenty of water
and take the necessary antiseptic measures specied by the laboratory.
Take the necessary protective measures when removing liquid and solid
waste from the instrument. Follow the relevant safety regulations to
prevent contamination or infection.
Do not eat, drink or smoke near the instrument.

13
4.7 Reagent Safety Guide
Always follow the instructions for use packaged with the reagents and
read the labels of the reagent containers before use.
Store reagents at a temperature that is specied in the instructions for
use.
If the reagents are not used for a long stretch of time, make sure to store
them in a refrigerator with the cap tightly closed. Improper storage may
negatively inuence test results.
Make sure to keep reagents from dust or infectious agents to avoid con-
tamination.
Never use reagents that are past their expiration date. Expired reagents
are hazardous waste and should be disposed of accordingly.
Make sure the reagents do not come into contact with skin or soft tissue.
If the reagent comes into contact with your eyes, rinse them with plenty of
water and then seek medical aid.
Do not ingest reagents – if you do swallow the reagent, immediately force
yourself to vomit by drinking a large amount of warm, salted water and
then seek medical aid.
Always wear appropriate protective gear when treating samples and rea-
gents, and wash your hands after every measurement with a disinfectant
to prevent infection.
For further information on the use of reagents, refer to the instructions
for use packaged with them or the ocial Diagon website (www.diagon.
com). Please note that the product selection may be subject to change –
always obtain the most current information regarding the reagents from
the manufacturer or the website mentioned above.

14
5. Technical Description of the Coag 2D
The Coag 2D is a 2-channel semi-automated coagulation analyzer. The
instrument was developed to be used in laboratories by personnel who
have experience in laboratory diagnostics and have received full training
from representatives of Diagon Ltd. or the authorized distributor.
The Coag 2D is suitable for analyzing the following parameters:
Clotting tests:
Screening tests (PT, APTT, Fibrinogen, TT)
Factors (II, V, VII, X, VIII, IX, XI, XII)
Turbidimetric test:
D-Dimer
Chromogenic tests:
AT III, Plasminogen, Protein C
Inhibitor tests:
APC, LA, Protein S
User dened tests:
Nephelometric, Turbidimetric, Chromogenic
5. Operating Principle
5.1.1 Clotting Time Determination
The blood plasma and the reagent are mixed in a plastic cuvette with the
appropriate timing. The cuvette is placed in the measurement position
located in the measurement block which is kept at a stable temperature.
The interior of the measurement position is black to prevent light
reection. The content of the cuvette is illuminated with a 640 nm wavel-
ength monochromatic controlled light source.
The photo detector is positioned at 90 degrees to the direction of
illumination. When coagulation is tested, a blood sample of a specic
volume is incubated, then mixed with the reagent which induces the coa-
gulation process during which brinogen becomes brin.
If there is no coagulant in the mixture, the scattering of light at 90 degrees
is low, and as coagulation starts, the scattering of light gradually

15
increases until complete coagulation takes place.
Coagulation time starts when the reaction mixture is prepared, and its
completion can be determined from the time function of the intensity of
the light scattering.
The algorithm is in the Setup menu, which plays a role in the determina-
tion of the endpoint of the coagulation time.
Clotting test result calculation:
Rate=time/Normal Value
In this formula, ‘time’ corresponds to the measured
coagulation time in relation to the ‘Normal Value’,
which is the mean coagulation time of normal plasma.
International Normalized Ratio (INR)
Power method calculated INR: INR (Power) =
Rate ISI (ISI stands for International Sensitivity Index)
Concentration/Percentage
The concentration or percentage value is calculated
from the blood coagulation time(s). The software of
the instrument places a calibration curve on the
input function points, and based on the curve
unknown concentration or percentage values can
be determined based on the measured coagulation
time. The points of the calibration curve may be
provided by the manufacturer of the reagent, if
such points are absent, they must be determined by
the user from a dilution series.
INR (Calibrated)
A calibration curve can also be used to determine
the INR value. The points of the curve are provided
by the manufacturer of the reagent, which are based
on a known INR value calibration series. The input
process is the same as the input of the coagulation
time concentration function points.
5.1.2 Turbidimetric measurement
The instrument has a specic function for measuring D-Dimer. For this
purpose, the instrument is equipped with measuring positions that conta-
in 1 photometer unit that operates at a 570 nm wavelength.
During turbidimetric measurements a sample of a specic volume is in-

16
cubated for a specied amount of time. The immunology reagent is then
dispensed into the sample, which creates optical turbidity by the antibo-
dy-antigen binding complex. This changes the light intensity at a certain
wavelength, and such change is proportional to the concentration of the
reaction mixture.
Following the preparation of the sample and the reagent, the optical
density (OD) is measured. After a few minutes have elapsed, a second
measurement takes place, after which the two ODs measured are com-
pared in terms of light intensity change, the value of which is given in
ΔOD.
Turbidimetric Test Result Calculation:
Concentration
The concentration value (µg FEU/ml) is calculated
from the change of light intensity (ΔOD). The software
of the instrument places a calibration curve on the
input function points, and based on the curve,
unknown concentration values can be determined
from the measured light intensity change. The
calibration curve points may be provided by the
manufacturer of the reagent. If such points are
absent, they have to be determined from a dilution
series by the user.
5.1.3 Chromogenic Measurement
The instrument has a specic function for measuring AT III and Protein
C and Plasminogen. For this purpose, the instrument is equipped with
measuring positions that contain 1 photometer unit that operates at a 405
nm wavelength.
During chromogenic measurements a sample of a specic volume is in-
cubated for a specied amount of time. The reagent substrate is then
dispensed into the sample, which alters its optical quality, as can be seen
in its light intensity at a certain wavelength. The transmitted light intensity
change is proportional to the relative concentration of the reaction mixt-
ure.
Following the preparation of the sample and the reagent, the optical

17
density (OD) is measured. After a few minutes have elapsed, a second
measurement takes place, after which the two ODs measured are com-
pared in terms of light intensity change, which is given in OD/min.
Chromogenic Test Result Calculation:
Percentage:
The percentage value is calculated form the
transmitted light intensity change per minute
(OD/min). The software of the instrument places a
calibration curve on the input function points, and
based on the curve, unknown relative concentration
values can be determined from the measured
light intensity change. The points of the calibration
curve must be determined from a dilution series by
the user.
5.2 Specications
External power supply: GTM41060-1809
Input voltage: 100-240VAC, 50-60 Hz, 25W
Max. power consumption: 0.6 A
Output voltage: 9 V DC, 2,0 A
Insulation class: II
Optimal Operating temperature: 15-30°C
Optimal Humidity: 10-85%
Optimal Storage temperature: -20 - +50°C
Dimensions: 50x102x165mm (analyzer)
Weight: 0.4 kg

18
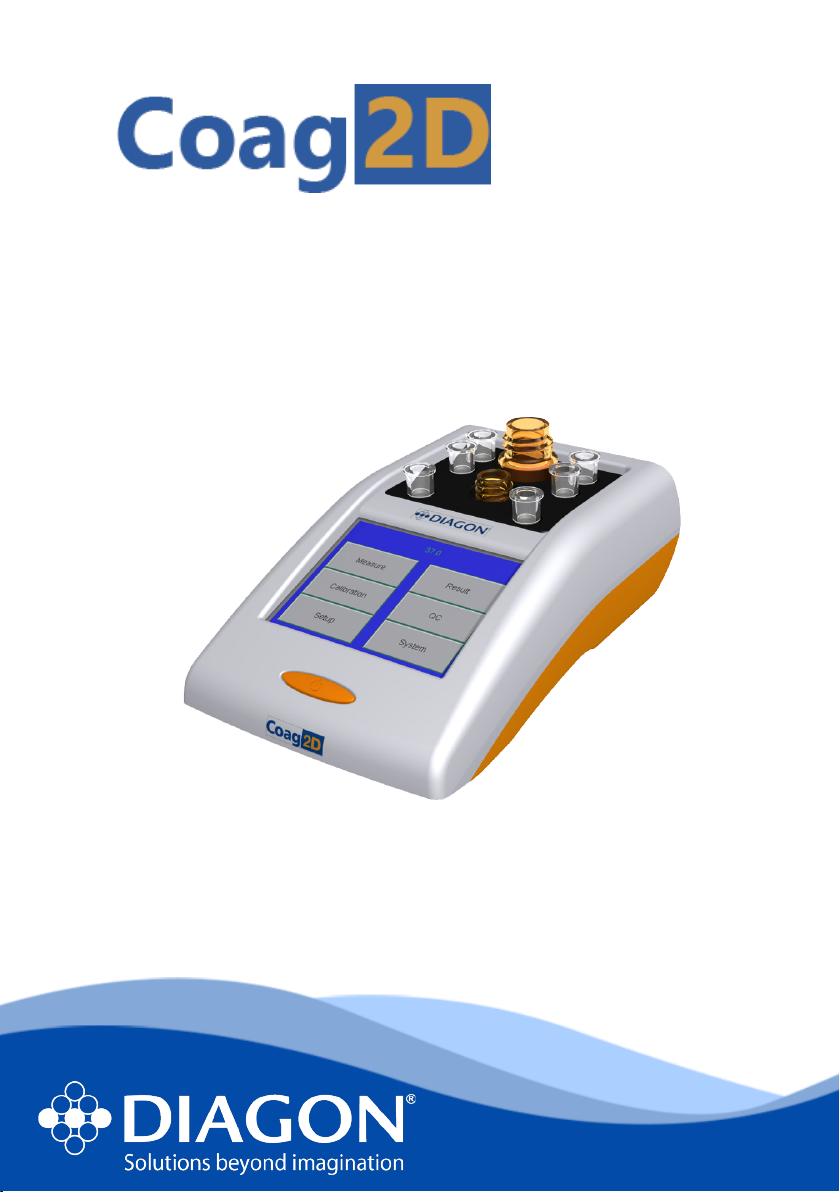
6. Components of the Coag 2D
6.1 Structure of the Instrument
Figure 6.1 - Top overview
On/O switch – for powering the instrument on and o.
Display – A color graphic liquid crystal touchscreen for operating and
navigating in the analyzer software.
Incubation Area - The incubation area is a monolithic aluminium block
regulated to 37 °C. It has four pre-heated cuvette positions, two measure-
ment locations and two reagent positions for reagent vessels.
Reagent Positions - There is a rotating magnetic eld at the reagent
positions, which mixes the reagents intermittently by rotating the mag-
netic rod placed in the reagent vessel. The mixing can be switched o in
service menu only.
Measurement locations - Two nephelometric measurement positions
are available for the measurement of coagulation and photometric para-
meters.

19
Status indicators – located on the lower part of the screen. Used for
monitoring the status of measurement position
Figure 6.2 - Rear overview
Externalpowersupplyconnector-GTM41060-182509GTM21097-4509
type power supply unit, with input voltage 100-240V AC, and output vol-
tage.
Master USB connector – for connecting peripherals. Peripherals, such
as barcode readers or a printers must be connected while the instrument
is o. Unlike other peripherals, USB storage devices may be
connected while the instrument is on; however, a 5-10 second waiting
period is required before any action may be performed on them.
Slave USB connector – for connecting the instrument to a computer as
an external device.
Only use the original power supply that is packaged
with the instrument. Using a third-party unit may
negatively inuence test results and may cause the
instrument to malfunction due to radio frequency
interference.
The size of the pendrive intended to be used with
the instrument must not exceed 16 GBs in size and
must be formatted to FAT32 le system.

20
7. Installation of the Coag 2D
7.1 Installation Requirements
Place the instrument on a horizontal laboratory table. It requires an empty
space at least 300x300mm in size.
Place the instrument near a grounded mains power connector that has a
maximum of 1.5 A input current.
Place the instrument in a way that the power cord can be easily
disconnected if necessary. Do not place the instrument in direct sunlight.
7.2 Connecting to the Electrical Network
Connect the DC cable of the power unit to the socket on the rear of the
device.
7.3 Testing the Functionality of the Instrument
Turn on the instrument and check whether the main menu appears after
the software has nished loading. Check the temperature displayed, then
wait until it turns green. Note that the instrument will only allow measure-
ments within the prescribed temperature range (37°C + 0.1).
Figure 7.1 - Main menu
Table of contents
Popular Laboratory Equipment manuals by other brands


Globe Scientific
Globe Scientific GCC-P quick start guide

SP Scientific
SP Scientific LYOSTAR II Operator's manual

Loctite
Loctite CARTESIAN 200 series Operation manual

BrandTech
BrandTech Transferpette operating manual

Nordson
Nordson ProcessMate 5000 operating manual

Agilent Technologies
Agilent Technologies TS-8989 PXI user guide


