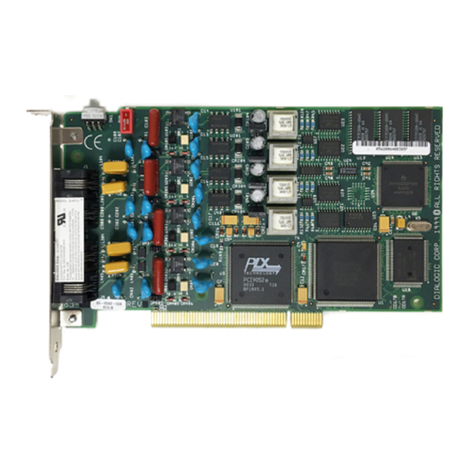
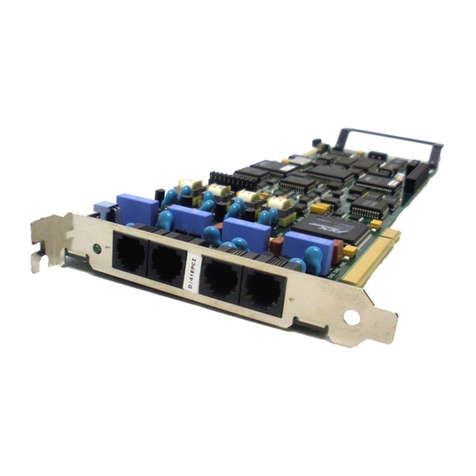
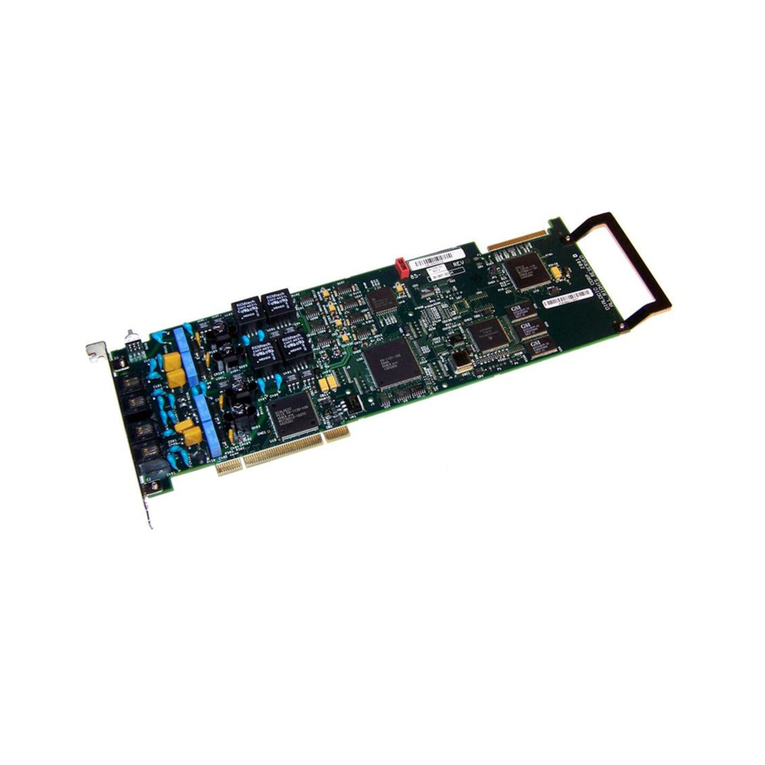
Dialogic D/41ESC Use and care manual

OneBox and Ericsson are registered trademarks of Ericsson Enterprise AB. Dialogic is a registered trademark and D/41ESCand D/160SC-LS are trademarks of
Dialogic Corporation, an Intel company. Brooktrout is a trademark of Brooktrout Technology, a Brooktrout Company.
All other products, brand names, or companies mentioned in this document may be trademarks or registered trademarks of their respective companies.
R3B Copyright ãEricsson Enterprise AB 1997–2001
All rights reserved.
Dialogic SCbus Linecard
Installation and Replacement
Inside This Document:
Before You Begin.........................................................................................................................................2
Technical Specifications of Dialogic SCbus Linecards................................................................................3
Preparing for Service...................................................................................................................................4
Preparing Dialogic SCbus Linecards for Installation ...................................................................................5
Installing Dialogic SCbus Linecards in the Platform ..................................................................................10
Cabling Dialogic D/41ESC Linecards to the Telephone System .............................................................. 12
Cabling Dialogic D/160SC-LS Linecards to the Telephone System ..........................................................15
Removing Dialogic System Software.........................................................................................................18
Installing Dialogic System Software...........................................................................................................20
Adding or Removing SCbus Linecards in the Dialogic System Software..................................................27
Changing the PCM Encoding Scheme Used by SCbus Linecards ..........................................................32
Troubleshooting Dialogic SCbus Linecards...............................................................................................33
Configuring Lines in OneBox Configuration ..............................................................................................34
This document explains how to install or replace one or more Dialogic D/41ESC™or
D/160SC-LS™linecards in a OneBox®platform. The information in this document pertains to
platforms running OneBox version 1.1 or later.
We recommend that you read this entire document before beginning disassembly.
IMPORTANT
Dialogic SCbus linecards cannot be used in a computer platform containing Dialogic PCI linecards (includes
D/4PCI, D/41EPCI, D/120JCT-LS, and D/240PCI-T1) or Dialogic D/41D cards. If Dialogic PCI linecards or D/41D
linecards are currently installed in the platform, they must be removed prior to installing the SCbus
linecards. Dialogic SCbus linecards can be used in conjunction with all Brooktrout™ fax cards.
Dialogic SCbus Linecard Installation and Replacement
R3B ãAug 2001 Ericsson Enterprise AB
2
Before You Begin
Review this section before performing any of the procedures in this document
Electrostatic Discharge (ESD) Warning
Computer components are extremely sensitive to electro-static discharge (ESD). You
must wear an anti-static wrist strap and install the linecard at an ESD-safe workstation.
Do not open the static-protective bag until necessary. Before removing the linecard from
the static-protective bag, touch the bag to a grounded, unpainted metal surface for at least
two seconds (this drains the static electricity from the bag and from your body). Turn off
and unplug your computer before removing the case.
Gathering Tools and Equipment
Before you begin disassembling the OneBox platform, verify that you have the following
required tools and equipment:
• This document
• #2 Phillips screwdriver
• One or more Dialogic SCbus linecards
• SCbus cable to connect multiple SCbus cards
• If the addition of SCbus linecards increases the number of ports for which you are
currently licensed, a new feature key diskette
• OneBox Telephony Server program CD-ROM
• Dialogic System Software SR5.01 CD-ROM (if applicable)
• If you are installing a D/41ESC and linecords from the telephone system are two-pair
(have RJ-14 plugs), two RJ-11–to–RJ-14 converters for each D/41ESC
• If you are installing a D/160SC-LS, a D/160 adapter cable (with a DB-37 connector
on one end and a RJ-21 at the opposite end) for each D/160SC-LS
• If you are installing a D/160SC-LS and linecords from the telephone system end in
RJ-14 plugs, an RJ-21–to–RJ-14 converter, also known as a harmonica, for each
D/160SC-LS card

Dialogic SCbus Linecard Installation and Replacement
R3B ãAug 2001 Ericsson Enterprise AB 3
Technical Specifications of Dialogic SCbus Linecards
OneBox functions with linecards designed for the Signal Computing bus (SCbus). The
SCbus is a hardware standard, created by Dialogic and the Signal Computing System
Architecture (SCSA) steering committee, that allows hardware components from
different manufacturers to interoperate in the same platform. Multiple SCbus components
are connected together through the use of an SCbus cable. The following Dialogic SCbus
linecards are approved for use with OneBox:
• D/41ESC 4-port linecard
• D/160SC-LS 16-port linecard
Tables 1 and 2 list the technical specifications of each of the previously mentioned
linecards.
Note The telephone company may require some of these specifications, such as the
FCC registration number, if the linecard is connected directly to central office (CO) lines.
Table 1. D/41ESC technical specifications
Feature Value
Number of ports 1–4; the OneBox port assignment is determined by the card’s linecard
identification number.
Dialing DTMF
FCC registration number EBZUSA-75385-VM-T
Analog network interface On-board loop-start interface circuits
Voice coding PCM
Table 2. D/160SC-LS technical specifications
Feature Value
Number of ports 1–16; the OneBox port assignment is determined by the card’s linecard
identification number.
Dialing DTMF
FCC registration number EBZUSA-21286-VM-E
Analog network interface On-board loop-start interface circuits
Voice coding PCM

Dialogic SCbus Linecard Installation and Replacement
R3B ãAug 2001 Ericsson Enterprise AB
4
Preparing for Service
Follow these steps to begin the process of installing and/or replacing a Dialogic
SCbus linecard.
To prepare for service:
1. Determine how to configure Dialogic System Software.
If the Dialogic System Software is… Then…
Not installed on the platform Skip to step 6.
Installed on the platform and is DNA 2,
DNA 3.3, or SR5.01
Continue to the next step.
2. From the Start menu, point to Programs, point to Dialogic System Software and select
Dialogic Configuration Manager – DCM.
3. From the Service menu, point to Startup and select Manual.
4. From the File menu, click Exit.
5. Shut down all running programs and Windows NT Server.
6. Turn off the computer, unplug its power cord, and remove its cover.
Proceed to “Preparing Dialogic SCbus Linecards for Installation.”

Dialogic SCbus Linecard Installation and Replacement
R3B ãAug 2001 Ericsson Enterprise AB 5
Preparing Dialogic SCbus Linecards for Installation
Before installing a Dialogic SCbus linecard in the OneBox platform, you need to
determine the ports it will handle so you can configure its linecard identification number
and, in the case of the D/41ESC, configure its default line state.
To prepare a Dialogic SCbus linecard for installation:
1. Select the linecard identification number for the linecard by dialing the rotary switch
SW1 (refer to the section “Configuring the Linecard Identification Number,” on the
next page, for instructions).
If you are… Then…
Replacing an existing
linecard with one of the
same model
Select the linecard identification number previously
used by the linecard you are replacing.
Replacing an existing
linecard with one of a
different model
If the replacement linecard is a D/41ESC or D/160SC-
LS linecard, select the linecard identification number
previously used by the linecard you are replacing.
Adding another card Select a new linecard identification number for the
linecard.
2. Set the default line state (hook switch state) of the linecard to offhook.
If you are preparing a… Then…
D/41ESC Flip the SW2 switch position 1 on the D/41ESC to the ON
position.
Refer to “Configuring the Default Line State (Hook Switch
State)” for information about setting the default line state.
D/160SC-LS No configuration is necessary. The default line state for
these cards is offhook.
Continue to the section “Installing Dialogic SCbus
Linecards in the Platform.”

Dialogic SCbus Linecard Installation and Replacement
R3B ãAug 2001 Ericsson Enterprise AB
6
Configuring the Linecard Identification Number
Each Dialogic linecard installed in the OneBox platform must be configured with a
unique linecard identification number, referred to by Dialogic as the Board ID, Board
Locator ID, or Board Locator Technology ID. This number, from 0 through 15 hex (1–16
decimal), is used by Dialogic System Software to determine which card is sending a
signal. Linecard identification numbers must be assigned in ascending order to each
linecard starting at 0. OneBox assigns line numbers in ascending order based on the
linecard identification number. For example, if a D/41ESC is installed in the platform and
its linecard identification number is 0, the four ports provided by the linecard will be
assigned line numbers 1–4. If another D/41ESC linecard is installed in the platform and
its linecard identification number is 1, the four ports provided by the linecard will be
assigned line numbers 5–8.
If the linecard will be used to replace an existing linecard and it is the same model
number, be sure to configure this replacement linecard to use the same linecard
identification number.
IMPORTANT
Do not set two linecards to the same linecard ID number. The Dialogic System Software
(device driver) will be unable to locate these linecards.
To set the linecard identification number:
• Dial the rotary switch SW1 to select a unique linecard identification number.
Refer to Figure 1 and Table 3, later in this section, for information about the D/41ESC
linecard; refer to Figure 2 and Table 4 for additional information about the D/160SC-LS
linecard.

Dialogic SCbus Linecard Installation and Replacement
R3B ãAug 2001 Ericsson Enterprise AB 7
Configuring the Default Line State (Hook Switch State)
Each Dialogic D/41ESC linecard has a configurable default line state (hook switch state).
This setting determines how the D/41ESC will respond to incoming telephone calls when
the OneBox platform is turned on but the OneBox server is not running or the Dialogic
System Software device driver is not started.
Dialogic configures each D/41ESC linecard at the factory with onhook as its default line
state, which means the linecard will respond to all incoming telephone calls with ring no
answer (RNA) when OneBox is not running or the Dialogic System Software device
driver is not started.
We recommend that each Dialogic D/41ESC linecard be configured to offhook as its
default line state. When the default line state is set to offhook, the linecard will respond to
all incoming telephone calls with a busy signal when the OneBox platform is turned on
but OneBox is not started or the Dialogic System Software device driver is not started.
To change the default line state to offhook:
• Flip the SW2 switch position 1 on the D/41ESC to the ON position.
Refer to Figure 1, on the next page, for assistance in locating the SW2 switch.

Dialogic SCbus Linecard Installation and Replacement
R3B ãAug 2001 Ericsson Enterprise AB
8
SW1 SW2
1 2
O
N
CTS 2
SW2
SW1
1
CH1
CH2
CH3
CH4
Figure 1. Layout of the Dialogic D/41ESC linecard
Table 3. D41/ESC switch settings
Linecard SW1 (Thumbwheel) SW2 Switch 1 SW2 Switch 2
1 0 On (Busy Signal) Off
2 1 On (Busy Signal) Off
3 2 On (Busy Signal) Off
4 3 On (Busy Signal) Off
5 4 On (Busy Signal) Off
6 5 On (Busy Signal) Off
7 6 On (Busy Signal) Off
8 7 On (Busy Signal) Off
9 8 On (Busy Signal) Off
10 9 On (Busy Signal) Off
11 A On (Busy Signal) Off
12 B On (Busy Signal) Off
13 C On (Busy Signal) Off
14 D On (Busy Signal) Off
15 E On (Busy Signal) Off
16 F On (Busy Signal) Off

Dialogic SCbus Linecard Installation and Replacement
R3B ãAug 2001 Ericsson Enterprise AB 9
Figure 2. Layout of the Dialogic D/160SC-LS
Table 4. D/160SC-LS switch settings
Linecard SW1 (Thumbwheel)
1 0
2 1
3 2
4 3
5 4
6 5
7 6
8 7
9 8
10 9
11 A
12 B
13 C
14 D
15 E
16 F
SW1SCbus connector

Dialogic SCbus Linecard Installation and Replacement
R3B ãAug 2001 Ericsson Enterprise AB
10
Installing Dialogic SCbus Linecards in the Platform
After the switches have been configured on the Dialogic SCbus linecards, the linecards
can be installed in the OneBox platform.
IMPORTANT
Dialogic SCbus linecards cannot be used in a computer platform containing Dialogic PCI linecards
(includes D/41EPCI and D/240PCI-T1) or Dialogic D/41D cards. If Dialogic PCI linecards or D/41D
linecards are currently installed in the platform, they must be removed prior to installing the Dialogic
SCbus linecards. Dialogic SCbus linecards can be used in conjunction with all Brooktrout fax cards.
To install Dialogic SCbus linecards:
1. Verify that the linecard identification number and the default line state, if applicable,
are set for each linecard (refer to “Preparing Dialogic SCbus Linecards for
Installation” for instructions).
2. Determine the telephone lines each linecard will handle.
3. Select an ISA expansion slot.
If the linecard… Then…
Replaces an existing linecard Remove the existing linecard from the ISA
expansion slot.
Adds ports to the OneBox platform Select an empty ISA expansion slot, remove the
slot’s retaining screw and access cover plate.
4. Insert the card’s edge connector into the bus slot. Apply pressure only to the top edge
of the card, and gently rock the card forward and backward to seat the edge connector
into the slot.
5. Install the retaining screw.
If the screw is not installed when you attach the SCbus cable, it can unseat the card
from the slot.
6. Repeat steps 1–5 for each linecard.

Dialogic SCbus Linecard Installation and Replacement
R3B ãAug 2001 Ericsson Enterprise AB 11
7. If you have more than one SCbus card installed, cable the cards together.
IMPORTANT
Do not place PEB terminators on any cards on the SCbus. The SCbus is self-terminating, so no
terminators are required.
a. Plug the first (end) connector on the SCbus cable to the SCbus connector on the
first SCbus card installed in the platform as shown in Figure 3.
b. Plug the last (opposite end) connector on the SCbus cable to the SCbus connector
on the last SCbus card installed in the platform.
c. Plug a free connector on the SCbus cable to the SCbus connector on each
remaining SCbus card installed in the platform.
8. Replace the cover on the platform and reattach its power cord.
9. Continue to the appropriate section to connect the SCbus linecards to the telephone
system. You will find a section for each of the linecards covered in this document.
Figure 3. SCbus cable connected to the SCbus Connector

Dialogic SCbus Linecard Installation and Replacement
R3B ãAug 2001 Ericsson Enterprise AB
12
Cabling Dialogic D/41ESC Linecards to the
Telephone System
After D/41ESC linecards have been installed into the platform, they need to be cabled to
the telephone system (switch).
OneBox assigns line numbers in ascending order based on the linecard identification
number. For example, if a D/41ESC linecard is installed in the platform and its linecard
identification number is 0, the four ports provided by the linecard will be assigned line
numbers 1–4. If another D/41ESC linecard is installed in the platform and its linecard
identification number is 1, the four ports provided by the linecard will be assigned line
numbers 5–8. Keep this line number assignment scheme in mind when connecting each
D/41ESC linecard to the telephone system.
To cable Dialogic D/41ESC linecards to the telephone system:
1. Install the linecords from the telephone system to the connectors on the D/41ESC
(refer to the linecard diagram in Figure 4 for channel assignments).
If the linecords from the telephone
system (switch) end with…
Then…
RJ-11 plugs Plug RJ-11 linecords into the RJ-11 connectors
on the linecard.
RJ-14 plugs Plug RJ-14 cords to the RJ-11–to–RJ-14
converter, then plug the RJ-11 cord on the
converter to the RJ-11 connector on the
linecard.
Refer to the diagram shown in Figure 5 to
connect RJ-14 and RJ-11 cords to the RJ-11–to–
RJ-14 connector.

Dialogic SCbus Linecard Installation and Replacement
R3B ãAug 2001 Ericsson Enterprise AB 13
2. Choose one:
If the linecard(s) you cabled… Then…
Increase the number of ports in
the platform
You need to add the new linecard(s) to the
configuration of the Dialogic System Software.
Refer to the “Adding or Removing SCbus
Linecards in Dialogic System Software” section
for instructions. However, if Dialogic System
Software is not installed in the platform, refer to
the “Installing Dialogic System Software”
section for instructions first.
You will need to install a new feature key
diskette to enable the additional ports.
Are of the same type(s) and
configured for the same linecard
identification number(s) as the
one(s) removed
You have finished the linecard installation.
Because you are using the same linecard(s) in
the same position(s), you do not need to modify
the Dialogic System Software.
Are of different type(s) or
configured for different linecard
identification number(s) than the
one(s) removed
You need to add the card in Dialogic System
Software. Refer to the “Adding or Removing
SCbus Linecards in Dialogic System Software”
section for details.
Figure 4. Dialogic D/41ESC linecard port assignments
Port 1
Port 2
Port 3
Port 4

Dialogic SCbus Linecard Installation and Replacement
R3B ãAug 2001 Ericsson Enterprise AB
14
Connecting RJ-11–to–RJ-14 Converters
We ship each Dialogic D/41ESC linecard sold in North America with two RJ-11–to–
RJ-14 converters, shown in Figure 5. These converters allow you to connect the single-
channel RJ-11 connectors at the back of the D/41ESC to a two-channel RJ-14 cord.
Figure 5. RJ-11–to–RJ-14 converter
RJ-14 connecto
r
RJ-14 linecord
RJ-11 linecord

Dialogic SCbus Linecard Installation and Replacement
R3B ãAug 2001 Ericsson Enterprise AB 15
Cabling Dialogic D/160SC-LS Linecards to the
Telephone System
After the Dialogic D/160SC-LS linecards have been installed into the platform and have
been connected to the SCbus cable, they need to be cabled to the telephone system.
OneBox assigns line numbers in ascending order based on the linecard identification
number. For example, if a D/160SC-LS linecard is installed in the platform and its
linecard identification number is 0, the 16 ports provided by the linecard will be assigned
line numbers 1–16. If another D/160SC-LS linecard is installed in the platform and its
linecard identification number is 1, the 16 ports provided by the linecard will be assigned
line numbers 17–32. Keep this line number assignment scheme in mind when connecting
each D/160SC-LS linecard to the telephone system.
To cable Dialogic D/160SC-LS linecards to the telephone system:
1. Connect the D/160 adapter cable to the linecard and tighten the screws.
The D/160 adapter cable, also known as a SA/240 or Amphenol cable, has a female
DB-37 connector and a female RJ-21 (Amphenol) connector. The pinouts for each of
these connectors is shown in Figure 6.
2. Choose one:
If linecords from the telephone
system end with…
Then…
RJ-14 plugs Continue to step 3.
RJ-21 (Amphenol) plugs Plug the RJ-21 plug to the RJ-21 connector on the
D/160 adapter cable, then skip to step 5.
3. Connect the D/160 adapter cable to a male RJ-21–to–RJ-14 converter (also known as
a harmonica), shown in Figure 7.
4. Plug the RJ-14 linecords to the RJ-21–to–RJ-14 converter.
Figure 7 displays the channel assignments of the RJ-21–to–RJ-14 converter. It also
shows a block diagram of the connection between the D/160SC-LS and the telephone
system.

Dialogic SCbus Linecard Installation and Replacement
R3B ãAug 2001 Ericsson Enterprise AB
16
5. Choose one:
If the linecard(s) you installed… Then…
Increase the number of ports in
the platform
You need to add the new linecard(s) to the
configuration of the Dialogic System Software.
Refer to “Adding or Removing SCbus Linecards in
the Dialogic System Software” for instructions.
However, if the Dialogic System Software has not
been installed on the OneBox platform, refer to the
“Removing Dialogic System Software” section for
instructions.
You will need to install a new feature key diskette
to enable the additional ports.
Are of the same type(s) and
configured for the same linecard
identification number(s) as the
one(s) removed
You have finished the linecard installation.
Because you are using the same linecard(s) in the
same position(s), you do not need to modify the
Dialogic System Software.
Are of different type(s) or
configured for different linecard
identification number(s) than the
one(s) removed
You need to rerun Board Configuration. Refer to
“Adding or Removing SCbus Linecards in Dialogic
System Software” for details.
Figure 6. D/160 adapter cable pinouts
DB-37
female
connecto
r
Tip1
Tip 2
Tip 3
Tip 4
Tip 5
Tip 6
Tip 7
Tip 8
Tip 9
Tip 10
Tip 11
Tip 12
Tip 13
Tip 14
Tip 15
Tip 16
Unused
Ring 1
Ring 2
1
2
3
4
5
6
7
8
9
10
11
12
13
14
15
16
17
18
19
20
21
22
23
24
25
26
27
28
29
30
31
32
33
34
35
36
37
Ring 3
Ring 4
Ring 5
Ring 6
Ring 7
Ring 8
Ring 9
Ring 10
Ring 11
Ring 12
Ring 13
Ring 14
Ring 15
Ring 16
Unused
Unused
Unused
G
r
ou
n
d
1
2
3
4
5
6
7
8
9
10
11
12
13
14
15
16
17
18
19
20
21
22
23
24
25
Ring 1
Ring 2
Ring 3
Ring 4
Ring 5
Ring 6
Ring 7
Ring 8
Ring 9
Ring 10
Ring 11
Ring 12
Ring 13
Ring 14
Ring 15
Ring16
26
27
28
29
30
31
32
33
34
35
36
37
38
39
40
41
42
43
44
45
46
47
48
49
50
Tip 1
Tip 2
Tip 3
Tip 4
Tip 5
Tip 6
Tip 7
Tip 8
Tip 9
Tip 10
Tip 11
Tip 12
Tip 13
Tip 14
Tip 15
Tip 16
50-pin female
connector
compatible with
RJ-21 pinouts

Dialogic SCbus Linecard Installation and Replacement
R3B ãAug 2001 Ericsson Enterprise AB 17
Figure 7. RJ-21–to–RJ-14 converter with channel assignments
D/160 ada
p
ter cable
D/160SC-LS
linecard
DB-
3
7
co
nn
ector
RJ-21 connecto
r
RJ-14 cables from the
tele
p
hone s
y
stem
RJ-21–toRJ-14
ada
p
te
r
15 13 11 9 7 5 3 1
Channels & & & & & & & &
16 14 12 10 8 6 4 2

Dialogic SCbus Linecard Installation and Replacement
R3B ãAug 2001 Ericsson Enterprise AB
18
Removing Dialogic System Software
OneBox software version 2.01 requires Dialogic System software SR5.01. However,
before upgrading to a new version of Dialogic System Software, it is necessary to remove
older versions of the software. Use the following procedures to remove any old Dialogic
System Software.
To remove the DNA version 2 or 3.3:
1. Log on to Windows NT Server with an account that has Administrator privileges on
the platform.
2. Shut down the telephony server and related services and clear the Auto-start
check box in each (refer to the administration guide that accompanied the platform).
3. Click the red Stop button in the tool bar or click Stop Service from the Service menu.
4. From the Start menu, point to Programs, point to Dialogic System Software, and
select Uninstall.
5. At the Uninstall dialog box, click Yes.
IMPORTANT
If the uninstall program displays a warning about deleting the shared file Ctl3d32.dll, click No to
prevent its deletion.
It is safe to delete all other shared files.
6. At the second Uninstall dialog box, click OK.
7. When prompted to reboot the computer, click Yes.
8. After rebooting, right-click the My Computer icon and select Explore.
9. From the C:\Program Files directory, delete the Dialogic folder and its contents.
10. Shut down and restart the platform.

Dialogic SCbus Linecard Installation and Replacement
R3B ãAug 2001 Ericsson Enterprise AB 19
Removing the Streams Environment Protocol
If the Streams Environment protocol is present on the OneBox platform, you may choose
to remove the protocol. Leaving the protocol installed will not affect the platform.
To remove the Streams Environment protocol:
1. From the Start menu, point to Settings, and select Control Panel.
2. In Control Panel, double-click the Network icon.
3. At the Network dialog box, click the Protocols tab.
4. From the list of Network Protocols, select Streams Environment, then click
Remove.
5. After the network protocols are bound to the network interface card (LAN adapter),
restart the platform.

Dialogic SCbus Linecard Installation and Replacement
R3B ãAug 2001 Ericsson Enterprise AB
20
Installing Dialogic System Software
Once the linecards have been installed into the platform, cabled to the other SCbus cards
installed in the platform, cabled to the telephone system, and old Dialogic software
removed, the Dialogic System Software must be installed on the OneBox platform. With
the release of OneBox 2.01, OneBox supports Dialogic System Software SR5.01. Earlier
versions of OneBox may use different versions of Dialogic Software. Refer to Table 5 to
determine which version of Dialogic System software your system requires.
Table 5. OneBox and Dialogic matrix
OneBox Version Dialogic System
Software
Dialogic System Software
Location
OneBox for Windows NT 1.0
and 1.10
DNA2 On OneBox CD-ROM
OneBox 2.0 DNA 3.3 On OneBox CD-ROM
OneBox 2.01 SR5.01 On separate CD-ROM provided
with OneBox System
This manual suits for next models
1
Table of contents
Other Dialogic PCI Card manuals

Dialogic
Dialogic Brooktrout TruFax User manual

Dialogic
Dialogic D/41JCT-LS Use and care manual

Dialogic
Dialogic Brooktrout TR1034 BRI User manual

Dialogic
Dialogic D/4PCI Use and care manual

Dialogic
Dialogic DM/N Series Instructions for use

Dialogic
Dialogic Diva User manual

Dialogic
Dialogic D/41EPCI User manual

Dialogic
Dialogic Brooktrout TR1034 User manual

Dialogic
Dialogic Brooktrout TR1034 BRI User manual

Dialogic
Dialogic D/4PCI Use and care manual