manuals.online logo
Brands
  1. Home
  2. •
  3. Brands
  4. •
  5. Digisol
  6. •
  7. IP Camera
  8. •
  9. Digisol DG-SC2600 User manual

Digisol DG-SC2600 User manual

Other manuals for DG-SC2600

2

This manual suits for next models

1

Other Digisol IP Camera manuals

Digisol SKYROS SERIES User manual

Digisol

Digisol SKYROS SERIES User manual

Digisol DG?SC3800P User manual

Digisol

Digisol DG?SC3800P User manual

Digisol DG-SC2100 User manual

Digisol

Digisol DG-SC2100 User manual

Digisol DG-SC2600 User manual

Digisol

Digisol DG-SC2600 User manual

Digisol DG-SC1600W User manual

Digisol

Digisol DG-SC1600W User manual

Digisol SKYROS SERIES User manual

Digisol

Digisol SKYROS SERIES User manual

Digisol DG-SC3610W User manual

Digisol

Digisol DG-SC3610W User manual

Digisol DG-SC8860VPI User manual

Digisol

Digisol DG-SC8860VPI User manual

Digisol DG-SC2600 User manual

Digisol

Digisol DG-SC2600 User manual

Digisol DG-SC6820VPIE User manual

Digisol

Digisol DG-SC6820VPIE User manual

Digisol DG?SC3800P User manual

Digisol

Digisol DG?SC3800P User manual

Digisol DG-SC4600PI User manual

Digisol

Digisol DG-SC4600PI User manual

Digisol DG-SC5800PI User manual

Digisol

Digisol DG-SC5800PI User manual

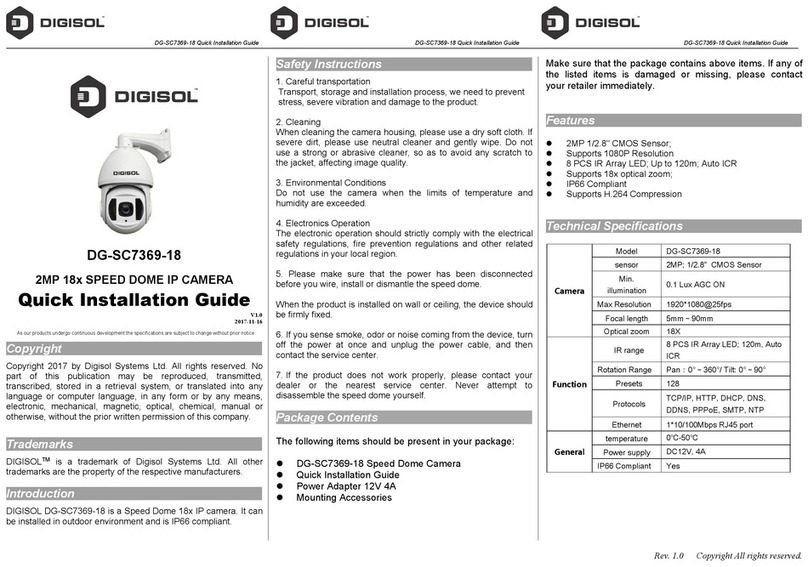
Digisol DG-SC7369-18 User manual

Digisol

Digisol DG-SC7369-18 User manual

Popular IP Camera manuals by other brands

Challenger Smart Force ASFCAM2 quick start guide

Challenger

Challenger Smart Force ASFCAM2 quick start guide

Foscam FI8903W user manual

Foscam

Foscam FI8903W user manual

BenQ DVY22 user manual

BenQ

BenQ DVY22 user manual

Avigilon H4A-BO1-IR installation guide

Avigilon

Avigilon H4A-BO1-IR installation guide

Digital Watchdog DWCA-C128-64 manual

Digital Watchdog

Digital Watchdog DWCA-C128-64 manual

Ganz ZN8 Series user manual

Ganz

Ganz ZN8 Series user manual

ShareTech AV1 user manual

ShareTech

ShareTech AV1 user manual

HOME8 V33040US quick start guide

HOME8

HOME8 V33040US quick start guide

Ezviz C6C quick start guide

Ezviz

Ezviz C6C quick start guide

Melchioni UCAM 2015 manual

Melchioni

Melchioni UCAM 2015 manual

Zxtech Tropox user manual

Zxtech

Zxtech Tropox user manual

Arecont Vision MegaBall AV3146DN-3310-D-LG installation manual

Arecont Vision

Arecont Vision MegaBall AV3146DN-3310-D-LG installation manual

Mitel 6800i Series Administrator's guide

Mitel

Mitel 6800i Series Administrator's guide

Vitek VTC-IR403-212NP quick start guide

Vitek

Vitek VTC-IR403-212NP quick start guide

THOMSON DSC - 323W user guide

THOMSON

THOMSON DSC - 323W user guide

ACTi TCM-5311 Hardware user manual

ACTi

ACTi TCM-5311 Hardware user manual

Eneo MCB-64A0003M0A Quick installation guide

Eneo

Eneo MCB-64A0003M0A Quick installation guide

deView electronics CBDNI36F instruction manual

deView electronics

deView electronics CBDNI36F instruction manual

manuals.online logo
manuals.online logoBrands
  • About & Mission
  • Contact us
  • Privacy Policy
  • Terms and Conditions

Copyright 2025 Manuals.Online. All Rights Reserved.

1
SKYROS SERIES
IP Surveillance Camera
DG-SC2600/DG-SC2600W
V1.2
2012-11-27
2
3
The following items should be present in your package
DG-SC2600/DG-SC2600W IP Surveillance Camera
One Antenna (Wireless model)
Switching Power Adapter (12 V DC, 1A)
Camera Mounting Kit
Installation Software CD(includes User Manual, QIG & Utility)
Patch Cord (1 No.)
Make sure that the package contains above items. If any of the listed
items is damaged or missing, please contact your retailer immediately.
Thank You for purchasing DIGISOL DG-SC2600/DG-SC2600W IP
Surveillance Camera. DG-SC2600/DG-SC2600W is an IP surveillance
camera with Mega pixel image sensor, H.264 compression and in-built
microphone. The Mega pixel image sensors and H.264 compression help in
streaming high quality video at low bandwidth. The easy to use utility and
features like two way audio, motion detection and event triggers to email/FTP
makes it an ideal choice for SOHO and SMB surveillance.
4
No pre-loaded software required - all you need is a browser like
Internet Explorer 6 (and above, with plugin installed).
With supplied SKYROS Manager software, you can connect up to 16
video cameras and view images captured by every camera at the
same time.
Supports 3 video resolutions: MJPEG and H.264 SXGA (1280 x
1024), VGA (640 x 480) and QVGA (320 x 240); MPEG4 XGA (1024
x 768), VGA (640 x 480) and QVGA (320 x 240).
Anti-flicker function (eliminates flash caused by fluorescent lights, 50 /
60Hz selectable).
Audio function, suitable for applications like video conference or
environment monitor.
Wired and wireless network (802.11b / 802.11g / 802.11n) supports
up to 100Mbps for wired network.
Wireless data encryption (WEP / WPA).
Supports DHCP and PPPoE protocol, you can also assign a fixed IP
address to the camera.
Supports Dynamic DNS (used to allocate the IP camera’s Internet
address, when the ISP you’re using does not assign you a fixed
Internet address).
Supports UPnP, Windows XP (and above) will discover this IP
camera in network neighbor automatically.
Send captured picture and video by Email or FTP when motion is
detected.
Configurable motion detection sensitivity (from most sensitive to least
sensitive).
Built-in clock, date and time information will be recorded with every
captured picture / video clip (also supports auto time synchronization
via network time protocol).
Upgradeable firmware.
Supports up to 16 users, and you can set different password to
different users.
Usage and event logging.
5
The following system requirements are recommended
Computer with Windows® 7, Vista or XP
PC with dual core or above; at least 2GB RAM
Internet Explorer 6.0 or above
Existing 10/100 Ethernet-based network or wireless 802.11b/g/n
network(for wireless model only)
LAN LED: Indicates LAN activity.
WLAN LED: Indicates Wireless LAN activity (Not Applicable for DG-SC2600.)
Power LED: Indicates power status.
Camera: Video camera with lens.
Focus Ring: Adjusts focus by rotating it to get a clear image.
Camera Focus Ring
LAN LED
WLAN LED
Power LED
6
Bottom view (Wired)
Bottom view (Wireless)
WPS: Click the button on IP Cam and click it on the AP you want to connect
wirelessly. (Only applicable for DG-SC2600W)
Reset to Default: Press and hold the reset button until all the LED’s on the
camera go off so as to reset the camera settings.
Power Connector: Connects to 12V DC power adapter.
Ethernet Connector: Connects to your local area network.
Audio Connector: Connects to external speaker for audio output.
Microphone: Built-in microphone for voice pick-up.
7
Top view (Wired)
Top view (Wireless)
SD Card Slot: Accepts SD / SD-HC memory card for image / video storage.
USB Port: Connects to certain wireless module.
Antenna Base: Connects to supplied antenna.
* The USB port on DG-SC2600 (Wired model) is for future application.
USB Port
SD Card
Antenna
SD Card Slot
8
Camera Installation – Hardware
Please follow the instructions mentioned below to set up your IP camera.
1. Unpack the product package and check if anything’s missing.
2. Connect the Ethernet cable to your local area network, and connect the
other end to the LAN jack of this IP camera.
NOTE: You can skip this step if you plan to use wireless LAN only.
3. Plug the power adapter to the wall socket, and connect the power
connector to the power jack located at the bottom of the IP camera.
4. For the wireless version, connect the antenna to the antenna bases, which
is located at the top of this IP camera.
5. Place the camera at a secure place, and point the camera to the place you
wish to monitor. If you wish to hang the camera on the ceiling or wall,
please use the tripod connector.
6. Launch Internet Explorer on your computer, and follow the instructions
given in the next section to set the IP camera.
9
Camera Installation – Software

Insert the set up CD into your CD ROM drive of notebook/desktop
computer.
The CD will automatically run. Click on the ‘Install Administrator Utility’.
10
Click ‘Next’ to start the installation of SKYROS CameraAdmin software.
You can change the installation folder of camera setup software here,
click ‘Browse’ to select an existing folder or you can just click ‘Next’ to
use default installation folder: