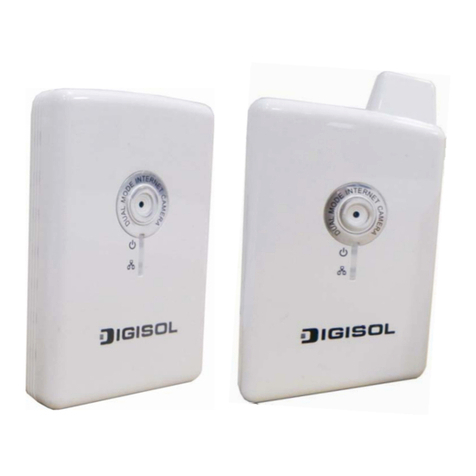
Digisol DG-SC2600 User manual

DG-SC2600 /
DG-SC2600W
IP Surveillance Camera
User Manual
V1.2
2011-07-14
As our products undergo continuous development the specifications are subject to change without prior notice.

DG-SC2600/DG-SC2600W User Manual
2
COPYRIGHT
Copyright ©2011 by this company. All rights reserved. No part of this
publication may be reproduced, transmitted, transcribed, stored in a retrieval
system, or translated into any language or computer language, in any form or
by any means, electronic, mechanical, magnetic, optical, chemical, manual or
otherwise, without the prior written permission of this company
This company makes no representations or warranties, either expressed or
implied, with respect to the contents hereof and specifically disclaims any
warranties, merchantability or fitness for any particular purpose. Any software
described in this manual is sold or licensed "as is". Should the programs
prove defective following their purchase, the buyer (and not this company, its
distributor, or its dealer) assumes the entire cost of all necessary servicing,
repair, and any incidental or consequential damages resulting from any defect
in the software. Further, this company reserves the right to revise this
publication and to make changes from time to time in the contents thereof
without obligation to notify any person of such revision or changes.
Trademarks:
DIGISOL™ is a trademark of Smartlink Network Systems Ltd. All other
trademarks are the property of the respective manufacturers.
Safety
This equipment is designed with the utmost care for the safety of those who
install and use it. However, special attention must be paid to the dangers of
electric shock and static electricity when working with electrical equipment. All
guidelines of this and of the computer manufacturer must therefore be allowed
at all times to ensure the safe use of the equipment.

DG-SC2600/DG-SC2600W User Manual
3
INDEX
1 Getting familiar with your IP Surveillance Camera ..........................................................5
1.1 Basic Introduction...............................................................................................................5
1.2 Product Features..................................................................................................................6
1.3 Preparation Before Installation ...........................................................................................7
1.4 Technical Specifications......................................................................................................7
1.5 Hardware Description .........................................................................................................8
1.6 Camera Installation...........................................................................................................13
1.7 Locate the IPAddress of this IP Camera...........................................................................14
1.8 Using Camera Admin Software to Locate Camera...........................................................18
1.9 Log Onto Web Management Interface..............................................................................24
2 Using Web Management Interface .....................................................................................27
2.1 Camera Settings................................................................................................................27
2.2. Video................................................................................................................................30
2.2.1 MJPEG.................................................................................................................31
2.2.2 MPEG4.................................................................................................................32
2.2.3 H.264....................................................................................................................33
2.2.4 OSD......................................................................................................................34
2.3 Network Settings...............................................................................................................35
2.3.1 LAN.......................................................................................................................36
2.3.2 WLAN...................................................................................................................38
2.3.3 Dynamic DNS......................................................................................................42
2.3.4 UPnP....................................................................................................................43
2.3.5 LoginFree.............................................................................................................45
2.3.6 RTSP....................................................................................................................46
2.4 Motion Detection ..............................................................................................................47
2.4.1 Motion Detection.................................................................................................48
2.4.2 Motion Region.....................................................................................................50
2.4.3 Email.....................................................................................................................52
2.4.4 FTP Configuration ..............................................................................................53
2.4.5 SD Card Configuration.......................................................................................54
2.5 System Info .......................................................................................................................55
2.5.1 Camera Information ...........................................................................................55
2.5.2 Date / Time Setting.............................................................................................56
2.5.3 Utilities..................................................................................................................58
2.5.4 Status ...................................................................................................................59
2.6 Account .............................................................................................................................60
2.7 SDHC................................................................................................................................61
2.7.1 Status ...................................................................................................................62
2.7.2 Space Alarm........................................................................................................62
2.7.3 File Management................................................................................................64
DG-SC2600/DG-SC2600W User Manual
4
3 Using SKYROS Surveillance Manager Software ............................................................65
3.1 Installing SKYROS Surveillance Manager Software .......................................................65
3.2 Using SKYROS Surveillance Manager software..............................................................69
3.3 Configuring the SKYROS Surveillance Manager software..............................................72
3.3.1 Configuring cameras..........................................................................................72
3.3.1.1 ‘Camera’tab................................................................................................73
3.3.1.2 Schedule Recording ....................................................................................75
3.3.1.3 Audio...........................................................................................................77
3.3.1.4 Motion Record ............................................................................................78
3.3.2 General Settings.................................................................................................79
3.3.2.1 ‘General’tab................................................................................................79
3.3.2.2 ‘E-Mail Setting’tab.....................................................................................81
3.3.2.3 Security .......................................................................................................83
3.3.2.4 About...........................................................................................................84
3.4 Change Display Layout.....................................................................................................85
3.5 Full-screen mode...............................................................................................................88
3.6 Scan...................................................................................................................................89
3.7 Zoom-in / Zoom-out..........................................................................................................90
3.8 PTZ ...................................................................................................................................91
3.9 Snapshot............................................................................................................................92
3.10 Recording........................................................................................................................92
3.11 Video Playback................................................................................................................93
4 Appendix ...................................................................................................................................94
4.1 Specifications....................................................................................................................94
4.2 Troubleshooting ................................................................................................................95
4.3 Obtaining a free Dyndns account......................................................................................98
4.4 IP Camera behind a router/firewall – Sample Configuration..........................................104
4.4.1 Setup Dyndns Dynamic IP address Mapping...............................................104
4.4.2 Open Ports Required by IP CAM...................................................................105
4.4.3 DMZ Settings ....................................................................................................106
4.5 Using Cellphone as Image Viewer..................................................................................107
4.5.1 iPhone................................................................................................................107
4.6 Windows Vista / Windows 7 UAC Configuration...........................................................110
Glossary .....................................................................................................................................113

DG-SC2600/DG-SC2600W User Manual
5
1 Getting familiar with your IP Surveillance Camera
1.1 Basic Introduction
This IP Surveillance camera is an ideal product for all kinds of video-surveillance
purposes, like home/office safety, kid/pet monitoring, and remote video acquisition
etc. Unlike conventional close-circuit video camera; you’re not limited to the length of
the cable. Once this IP camera is connected to Internet, you can receive video from
anywhere in the world where Internet access is available.
If installing an Ethernet cable for the surveillance camera is not feasible, we have a
wireless version of the IP surveillance Camera. This camera can connect to the
network wirelessly and communicate to the monitoring desktop/PC. The wireless
camera would require only the 12V power provided by the power adapter that comes
with the product package.
The wireless IP Surveillance Camera is highly secure unlike conventional analog
wireless camera, in which case video can be intercepted by anyone with a
compatible video receiver. The required security can be achieved by using data
encryption (WEP & WPA). All video transmitted over the air is encrypted preventing
any intelligent interception.
Setting up a secure wireless Camera is not a very complex process. The wireless IP
Camera supports WPS (Wi-Fi Protected Setup), which allows users to setup wireless
security by just pressing a button or keying in a 8-digit number.

DG-SC2600/DG-SC2600W User Manual
6
1.2 Product Features
No pre-loaded software required - all you need is a browser like
Internet Explorer 6 (and above, with plugin installed).
With supplied SKYROS Manager software, you can connect up to
16 video cameras and view images captured by every camera at
the same time.
Supports 3 video resolutions: MJPEG and H.264 SXGA (1280 x
1024), VGA (640 x 480), and QVGA (320 x 240); MPEG4 XGA
(1024 x 768), VGA (640 x 480), and QVGA (320 x 240).
Anti-flicker function (eliminates flash caused by fluorescent lights,
50 / 60Hz selectable).
Supports all major web browser, including Microsoft Internet
Explorer, Apple Safari, Google Chrome, Firefox, and Opera*.
Audio function, suitable for applications like video conference or
environment monitor.
Wired and wireless network (802.11b / 802.11g / 802.11n) supports
up to 100Mbps for wired network.
Wireless data encryption (WEP / WPA)
Supports DHCP and PPPoE protocol, you can also assign a fixed
IP address to the camera also.
Supports Dynamic DNS (used to allocate the IP camera’s Internet
address, when the ISP you’re using does not assign you with a
fixed Internet address).
Supports UPnP, Windows XP (and above) will discover this IP
camera in network neighbor automatically.
Send captured picture and video by Email or FTP when motion is
detected.
Configurable motion detection sensitivity (6 levels from most
sensitive to least sensitive).
Built-in clock, date and time information will be recorded with every
captured picture / video clip (also supports auto time
synchronization via network time protocol).
Upgradeable firmware.
Supports up to 16 users, and you can set different password to
different user.
Usage and event logging.
*Some functionality like ‘fit to window’ only works on Microsoft Internet
Explorer.

DG-SC2600/DG-SC2600W User Manual
7
1.3 Preparation Before Installation
Package Contents
IP Camera
One Antenna (Wireless model)
Power Adapter (12 V DC, 1A)
Ethernet Cable
Installation Software CD-ROM
Accessory Kit
Quick Installation Guide
System Requirements
Computer with Windows® 7, Vista or XP
PC with dual core or above; at least 2GB RAM
Internet Explorer 6.0 or above
Existing 10/100 Ethernet-based network or wireless 802.11b/g/n
network(for wireless model only)
1.4 Technical Specifications
Environment Requirements:
The whole device can survive in a wide range of operating temperature and
can work normally and stably in tough environment.
Operating temperature: 0˚C—40˚C
Relative humidity: 10%—90% (non-condensing)
Power:
12V DC, 1A power adaptor
Physical Characteristics:
Dimension (L x W x H): 115 x 80 x 46 mm (DG-SC2600)
121 x 80 x 46 mm(DG-SC2600W)
Weight: 150gms (DG-SC2600)
155gms (DG-SC2600W)

DG-SC2600/DG-SC2600W User Manual
1.5 Hardware Description
Front View
8
LAN LED
WLAN LED
Power LED
Camera
Focus Ring
LAN LED: Indicates LAN activity
WLAN LED: Indicates Wireless LAN activity (Not Applicable for DG-SC2600)
Power LED: Indicates power status
Camera: Video camera with lens
Focus Ring: Adjusts focus by rotating it to get a clear image.

DG-SC2600/DG-SC2600W User Manual
Top View – Wired Model
USB Port
SD Card Slot
Top View – Wireless Model
Antenna
SD Card Slot: Accepts SD / SD-HC memory card for image / video storage
USB Port: Connects to certain wireless module.
Antenna Base: Connects to supplied antenna
* The USB port on DG-SC2600 (Wired model) is for future application
9

DG-SC2600/DG-SC2600W User Manual
Bottom View
WPS: click the button on IP Cam and click it on the AP you want to connect
wirelessly. (Only applicable for DG-SC2600W)
Reset to Default Button: Press and hold for more than 10 seconds to reset the
camera settings to factory default value.
Power Connector: Connects to 12V DC power adapter
Ethernet Connector: Connect to your local area network
Audio Connector: Connects to external speaker for audio output
Microphone: Built-in microphone for voice pick-up
10

DG-SC2600/DG-SC2600W User Manual
Back View
Tripod Connector: Connects to any standard tripod / camera wall holder.
MAC Address Label: Shows the MAC address of this IP camera. Useful when
you can’t locate the camera on the network.
11

DG-SC2600/DG-SC2600W User Manual
12
LED Indicators descriptions
LED Name Status Description
Off Camera is not powered (camera off)Power On Camera is correctly powered (camera on)
Off LAN port not in use
On LAN port in use
LAN
Flash Transferring data via LAN port
Off Wireless LAN not in use
On Wireless LAN in use
Flash at low
speed Waiting for WPS connection from AP and
flash speed is once a second.
WLAN
Flash Transferring data via wireless LAN

DG-SC2600/DG-SC2600W User Manual
13
1.6 Camera Installation
Please follow the instructions mentioned below to set up your IP camera.
1. Unpack the product package and check if anything’s missing.
2. Connect the Ethernet cable to your local area network, and connect the
other end to the LAN jack of this IP camera.
NOTE:You can skip this step if you plan to use wireless LAN only.
3. Plug the power adapter to the wall socket, and connect the power
connector to the power jack located at the bottom of the IP camera.
4. For the wireless version, connect the antenna to the antenna bases, which
is located at the top of this IP camera.
5. Place the camera at a secure place, and point the camera to the place you
wish to monitor. If you wish to hang the camera on the ceiling or wall,
please use the tripod connector.
6. Launch Internet Explorer on your computer, and follow the instructions
given in the next section to set the IP camera.

DG-SC2600/DG-SC2600W User Manual
1.7 Locate the IP Address of this IP Camera
Default IP address of this IP camera is 192.168.2.3. If you wish to assign
another IP address to this IP camera, you have to log onto the web
configuration interface of the camera first.
If the left three fields of the IP address of your computer is not 192.168.2,
you’ll have to change the IP address of your computer first:
1. Click ‘Start’ -> ‘Control Panel’
14

DG-SC2600/DG-SC2600W User Manual
2. Double-click ‘Network Connections’ icon.
3. Right-click ‘Local Area Connection’, and click ‘Properties’.
15

DG-SC2600/DG-SC2600W User Manual
4. Select ‘Internet Protocol (TCP/IP)’, then click ‘Properties’.
16

DG-SC2600/DG-SC2600W User Manual
5. In ‘IP address’ field, please fill in any IP address that begins with
‘192.168.2’, and ends with a value greater than 2 and less than 254 (You
can use the example in the picture ‘192.168.2.239’). In Subnet mask field,
please fill ‘255.255.255.0’. Please keep all other fields empty, and click
‘OK’.
If you changed the IP address of this IP camera and you forgot it, there’re 2
methods to recover it:
a. Press and hold the ‘Reset’ button located at the bottom of this IP
camera, to clear all settings of the IP camera and reset the IP address
back to 192.168.2.3. You’ll lose all settings in the IP camera.
b. Ask the network administrator to check the DHCP release table, if the
camera was set to obtain the IP address by DHCP, a new record will
be added to the DHCP release table on the DHCP server. (when the
IP camera is connected to the local area network)
17

DG-SC2600/DG-SC2600W User Manual
1.8 Using Camera Admin Software to Locate Camera
If you can’t connect to the camera by the instructions given in last chapter,
you can use camera admin software to search the camera which is connected
to your local area network. The admin software is also capable to locate
multiple cameras on your local area network.
Please insert the Installation Software CD-ROM supplied in the product
package, and the CD will automatically run. Click on the ‘Install Administrator
Utility’
18

DG-SC2600/DG-SC2600W User Manual
Then follow the below mentioned instructions to install and use camera admin
software:
1. Click ‘Next’ to start the installation of SKYROS Camera Admin software:
2. You can change the installation folder of camera setup software here, click
‘Browse’ to select an existing folder or you can just click ‘Next’ to use
default installation folder:
19

DG-SC2600/DG-SC2600W User Manual
3. If you wish to create desktop icon and / or quick launch icon for camera
admin software, please check corresponding box, and click ‘Next’ to
continue.
4. You’ll see a brief of all options you selected, click ‘Install’ to install camera
admin software now or click ‘back’ to go back to previous steps to change
settings.
20
Other manuals for DG-SC2600
2
This manual suits for next models
1
Table of contents
Other Digisol IP Camera manuals

Digisol
Digisol DG-SC1600W User manual

Digisol
Digisol DG-SC2600 User manual

Digisol
Digisol SKYROS SERIES User manual

Digisol
Digisol DG-SC2600 User manual

Digisol
Digisol DG-SC8860VPI User manual

Digisol
Digisol DG-SC5800PI User manual

Digisol
Digisol DG-SC4600PI User manual

Digisol
Digisol SKYROS SERIES User manual

Digisol
Digisol DG-SC2100 User manual

Digisol
Digisol DG-SC3610W User manual