manuals.online logo
Brands
  1. Home
  2. •
  3. Brands
  4. •
  5. Digitrax
  6. •
  7. Media Converter
  8. •
  9. Digitrax DN163I0 User manual

Digitrax DN163I0 User manual

DN163I0
Fits InterMountain N-Scale SD40T
Tunnel Motor Locos
F
Fe
ea
at
tu
ur
re
es
s:
:
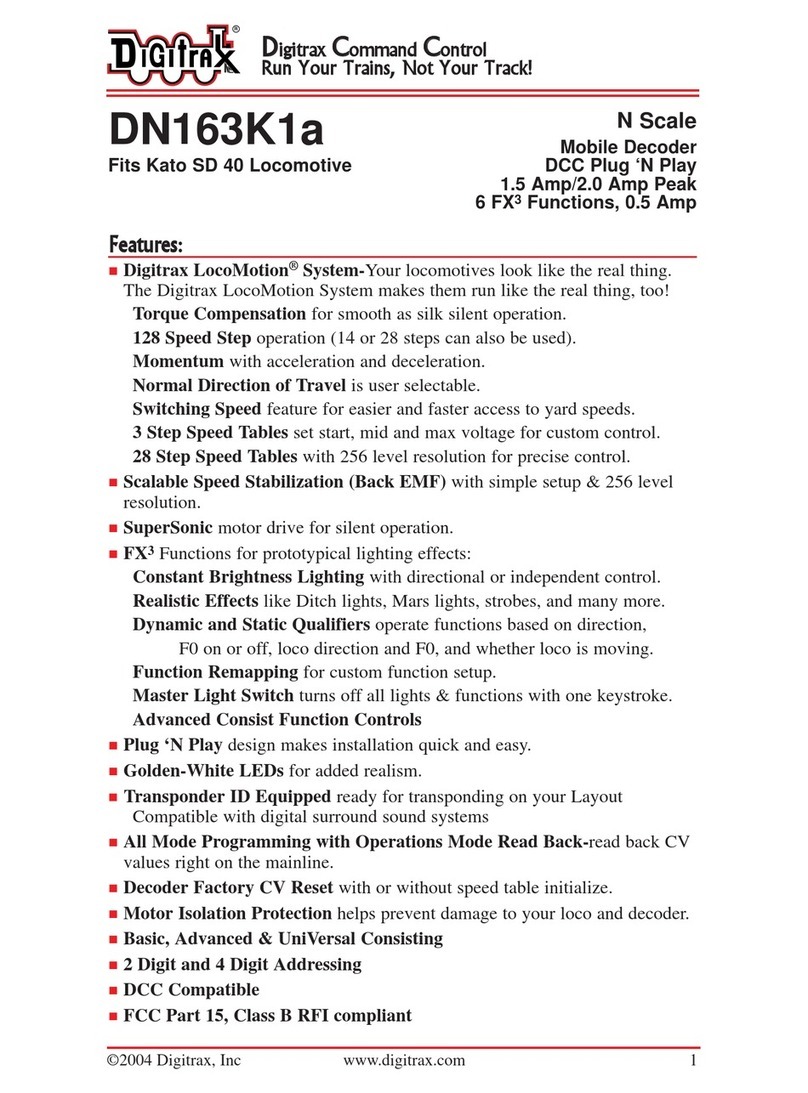
nDigitrax LocoMotion®System-Your locomotives look like the real thing.
The Digitrax LocoMotion System makes them run like the real thing, too!
Torque Compensation for smooth as silk silent operation.
128 Speed Step operation (14 or 28 steps can also be used).
Momentum with acceleration and deceleration.
Normal Direction of Travel is user selectable.
Switching Speed feature for easier and faster access to yard speeds.
3 Step Speed Tables set start, mid and max voltage for custom control.
28 Step Speed Tables with 256 level resolution for precise control.
nScalable Speed Stabilization (Back EMF) with simple setup & 256 level
resolution.
nSuperSonic motor drive for silent operation.
nFX3Functions for prototypical lighting effects:
Constant Brightness Lighting with directional or independent control.
Realistic Effects like Ditch lights, Mars lights, strobes, and many more.
Dynamic and Static Qualifiers operate functions based on direction,
F0 on or off, loco direction and F0, and whether loco is moving.
Function Remapping of 14 functions for custom function setup.
Master Light Switch turns off all lights & functions with one keystroke.
Advanced Consist Function Controls
nPlug ‘N Play design makes installation quick and easy.
nGolden-White LEDs for added realism.
nTransponder equipped ready for transponding on your layout.
nAll Mode Programming with Operations Mode Read Back-read back CV
values right on the mainline.
nDecoder Factory CV Reset with or without speed table initialize.
nMotor Isolation Protection prevents damage to your loco and decoder.
nBasic, Advanced & UniVersal Consisting
n2 Digit and 4 Digit Addressing
nDCC Compatible
nFCC Part 15, Class B RFI compliant
©2009 Digitrax, Inc www.digitrax.com 1
D
Di
ig
gi
it
tr
ra
ax
xC
Co
om
mm
ma
an
nd
dC
Co
on
nt
tr
ro
ol
l
R
Ru
un
nY
Yo
ou
ur
rT
Tr
ra
ai
in
ns
s,
,N
No
ot
tY
Yo
ou
ur
rT
Tr
ra
ac
ck
k!
!
N Scale
Mobile Decoder
DCC Plug ‘N Play
1.5 Amp/2.0 Amp Peak
6 FX3Functions, 0.5 Amp
©2009 Digitrax, Inc www.digitrax.com 2
P
Pa
ar
rt
ts
sL
Li
is
st
t
1 DN163I0 Decoder 1 Instruction sheet
I
In
ns
st
ta
al
ll
la
at
ti
io
on
nI
In
nf
fo
or
rm
ma
at
ti
io
on
n
See the Digitrax Decoder Manual for complete decoder test procedures, instal-
lation instructions, programming and technical information. Digitrax manuals
and instructions are updated periodically. Please visit www.digitrax.com for the
latest versions, technical updates and additional locomotive-specific installation
instructions.
I
In
ns
st
ta
al
ll
la
at
ti
io
on
nI
In
ns
st
tr
ru
uc
ct
ti
io
on
ns
s-
-I
In
nt
te
er
rM
Mo
ou
un
nt
ta
ai
in
nS
SD
D4
40
0T
TL
Lo
oc
co
om
mo
ot
ti
iv
ve
e
1. Carefully remove the
locomotive’s shell from
the frame. Notice the
orientation of the light
board inside so that you
can install the decoder
in the same orientation.
2. Carefully remove the
plastic light shroud at
the front of the loco and
loosen the frame screws
enough to allow the
removal of the light
board. Lift the board out
of the frame.
3. Apply the Kapton insu-
lating tape on the front
of frame to completely
cover the flat area above
the frame screw. Install
the decoder, square
CPU on the bottom,
between the frame
halves. The narrow part
of the decoder fits
between the frame with
the frame clips holding
it at the corners of the
decoder cutout. The
brass motor contacts
should contact the pads
on the bottom of the
decoder. The motor
contacts can also be
D
Di
ig
gi
it
tr
ra
ax
xC
Co
om
mm
ma
an
nd
dC
Co
on
nt
tr
ro
ol
l
R
Ru
un
nY
Yo
ou
ur
rT
Tr
ra
ai
in
ns
s,
,N
No
ot
tY
Yo
ou
ur
rT
Tr
ra
ac
ck
k!
!
Figure 1: Remove loco shell
Figure 2: Loosen frame screws and
remove light board
replace light shrouds
frame screws
apply insulating
tape here
apply Kapton
insulating tape
here
frame clips
Motor
contacts
Light
shroud
Light
shroud
Factory Light board
Figure 3:
Place decoder in frame.
©2009 Digitrax, Inc www.digitrax.com 3
inserted through the slots of the motor tabs. Squeeze the frame halves
together to hold the decoder in place.
4. Tighten the frame screws. Replace the trucks if they have fallen out during
the installation of the decoder. Place the locomotive on the track, select
address 03 on your throttle and apply power. If the motor does not respond
but you can control the lights, check the installation for motor short circuits.
5. Replace the locomotive shell. Digitrax decoders are set up with configura-
tion variable (CV) default values so you can run your locomotive right
away using address 03. See the Digitrax Decoder Manual for complete
instructions on setting up the CVs for customizing your locomotive’s per-
formance characteristics.
Note: Motor contacts may optionally be bent to engage provided slots on
the decoders (See figure 6) Be sure to check clearance to frame after instal-
lation.
Installation Notes:
1. Do not exceed the decoder’s 500mA total function output rating.
2. To use a function output with an inductive (coil) type load, see the Digitrax
Decoder Manual for more information to avoid damage to the decoder.
3. See the Digitrax Decoder Manual for full details of wiring 12-16V lamps,
1.5V lamps, and LEDs. Lamps that draw more than 80 mA when running
require a 22 ohm 1/4 watt resistor in series with the directional light func-
tion lead to protect the decoder.
C
Cu
us
st
to
om
mi
iz
zi
in
ng
gY
Yo
ou
ur
rD
De
ec
co
od
de
er
r
Your Digitrax decoder is ready to run and will operate using address 03 with no
additional programming. For a more prototypical railroading experience, your
decoder can be customized for your specific locomotive by programming some
of the Configuration Variables, or CVs, available. See the Digitrax Decoder
Manual or the Digitrax web site for more information.
C
Ch
ha
an
ng
gi
in
ng
gt
th
he
eD
De
ec
co
od
de
er
rA
Ad
dd
dr
re
es
ss
s
The first CV most people change is the decoder address so that the loco can be
independently controlled with it’s own unique address. All Digitrax decoders
are shipped with CV01 (AD2), the two digit address, set to 03. See your Starter
Set Manual for complete programming instructions. Following is a brief
description of how to change the decoder address with a DT series throttles.
1. Place the loco on the programming track. Go into Program Mode on your
system. On DT400 press PROG. On DT300, DT100 & DT200 press
RUN/STOP & FN/F0.
2. Choose AD2 for 2 digit addressing or AD4 for 4 digit addressing (DT300 &
DT400). (Ad for DT100 & DT200, see set manual for 4 digit instructions).
2
24
44
43
3T
Tr
ra
an
ns
sm
mi
it
tt
te
er
rR
Rd
dT
T8
85
50
0-
-8
87
72
2-
-9
98
89
90
0
P
Pa
an
na
am
ma
aC
Ci
it
ty
y,
,F
FL
LU
US
SA
A3
32
24
40
04
4F
F8
85
50
0-
-8
87
72
2-
-9
95
55
57
7
w
ww
ww
w.
.d
di
ig
gi
it
tr
ra
ax
x.
.c
co
om
mE
Es
sa
al
le
es
s@
@d
di
ig
gi
it
tr
ra
ax
x.
.c
co
om
m
©2009 Digitrax, Inc www.digitrax.com 4
3. Choose the address you want to set up for the decoder.
4. Complete address programming. On DT400 press ENTER. On DT300,
DT100 & DT200 press SEL.
Note: CV29 must also be programmed to enable 4 digit addressing, this is
done automatically by the DT300 & DT400 but not on earlier throttles.
D
Di
ig
gi
it
tr
ra
ax
xL
Lo
oc
co
oM
Mo
ot
ti
io
on
n
®
S
Sy
ys
st
te
em
m
Your locomotives look like the real thing, now you can make them run like the
real thing, too. Digitrax decoders incorporate torque compensation for smooth
as silk operation. You can also program CVs that control momentum, 3 step
and 128 step speed tables, switching speed, normal direction of travel,
scaleable speed stabilization and more to take full advantage of the Digitrax
LocoMotion System.
M
Mo
om
me
en
nt
tu
um
m-
-C
CV
V0
03
3&
&C
CV
V0
04
4
Acceleration is controlled by CV03 and deceleration by CV04. Both come
from the factory set to 000/x00. A range of 000/x00/ to 031/x1F is available for
both accel and decel. We recommend that you try CV03:003/x03 and
CV04:000/x00 as a starting point for experimenting with momentum.
S
Sp
pe
ee
ed
dT
Ta
ab
bl
le
es
s-
-H
Ho
ow
wt
th
he
eL
Lo
oc
co
oR
Re
es
sp
po
on
nd
ds
st
to
ot
th
he
eT
Th
hr
ro
ot
tt
tl
le
e
With Digitrax LocoMotion, there are two types of speed tables: 3 Step Tables
and High Resolution 28 Step Tables. Please see your Decoder Manual for a dis-
cussion of the 28 Step Tables. The 3 Step Tables are set up by programming 3
CVs: Start Voltage (CV02), Mid point Voltage (CV06) and Max Voltage
(CV05). These values are set at 000/x00 at the factory. All have a range of val-
ues from 000/x00 to 255/xFF. We recommend the following CV values as a
starting point for experimenting with speed tables.
D
Di
ig
gi
it
tr
ra
ax
xC
Co
om
mm
ma
an
nd
dC
Co
on
nt
tr
ro
ol
l
R
Ru
un
nY
Yo
ou
ur
rT
Tr
ra
ai
in
ns
s,
,N
No
ot
tY
Yo
ou
ur
rT
Tr
ra
ac
ck
k!
!
Loco Type V Start V Mid V Max
CV02 CV06 CV05
Switcher
Concentrated low speed. Limited top 002/x02 038/x26 064/x50
speed
Road Switcher
Prototypical top speed w/evenly 002/x02 048/x30 098/x62
distributed curve from 0 to top speed
Mainline Loco
Quick increase to cruising speed then 002/x02 128/x80 154/x9A
levels off to prototypical top speed.
©2009 Digitrax, Inc www.digitrax.com 5
O
Ot
th
he
er
rL
Lo
oc
co
oM
Mo
ot
ti
io
on
n
®
F
Fe
ea
at
tu
ur
re
es
s:
:S
Sw
wi
it
tc
ch
hi
in
ng
gS
Sp
pe
ee
ed
d,
,N
No
or
rm
ma
al
lD
Di
ir
re
ec
ct
ti
io
on
no
of
f
T
Tr
ra
av
ve
el
l&
&S
Sc
ca
al
le
ea
ab
bl
le
eS
Sp
pe
ee
ed
dS
St
ta
ab
bi
il
li
iz
za
at
ti
io
on
n(
(B
Ba
ac
ck
kE
EM
MF
F)
)F
Fe
ea
at
tu
ur
re
es
s
Switching speed is controlled by CV54. The factory setting is 000/x00 for
OFF. To turn on the switching speed feature, program CV54 to a value of
001/x01. When this feature is on, use F6 to activate and deactivate switching
speed. When switching speed is ON and F6 is ON, the switching speed feature
is on. With the feature on the throttle’s target speed is effectively reduced by
about 50% and the effects of accel and decel programmed into the decoder are
reduced by 1/4. This is useful for yard switching operations.
Normal Direction of Travel is controlled by CV29. See your decoder manual
for additional information on the settings for CV29.
Scaleable Speed Stabilization (Back EMF) intensity, or droop, is controlled
by CV57. The factory setting for this feature is 006/x06 which is suitable for
most locos. You can adjust this value in the range of 000/x00 for OFF to
015/x0F for the maximum effect. Consult your Digitrax Decoder Manual for
info about CVs 55 & 56 and their effects on scaleable speed stabilization.
S
Su
up
pe
er
rS
So
on
ni
ic
cS
Si
il
le
en
nt
tO
Op
pe
er
ra
at
ti
io
on
na
an
nd
dT
To
or
rq
qu
ue
eC
Co
om
mp
pe
en
ns
sa
at
ti
io
on
n
The factory settings in the decoder provide silent, smooth operation of your
locomotive under most conditions. For more information about these settings,
please see the Digitrax Decoder Manual or our web site.
2
24
44
43
3T
Tr
ra
an
ns
sm
mi
it
tt
te
er
rR
Rd
dT
T8
85
50
0-
-8
87
72
2-
-9
98
89
90
0
P
Pa
an
na
am
ma
aC
Ci
it
ty
y,
,F
FL
LU
US
SA
A3
32
24
40
04
4F
F8
85
50
0-
-8
87
72
2-
-9
95
55
57
7
w
ww
ww
w.
.d
di
ig
gi
it
tr
ra
ax
x.
.c
co
om
mE
Es
sa
al
le
es
s@
@d
di
ig
gi
it
tr
ra
ax
x.
.c
co
om
m
©2009 Digitrax, Inc www.digitrax.com 6
F
Fu
un
nc
ct
ti
io
on
nO
Ou
ut
tp
pu
ut
ts
so
on
nt
th
he
eD
DN
N1
16
63
3I
I0
0
The DN163I0 is set up at the factory to control six functions. The unit is
prewired with two golden-white LEDs set up for directional lighting as
F0F/F0F+ for the front light and F0R/F0R+ for the rear light. Functions F1
(Green), F2 (Violet), F3 (Brown) and F4 (White/Yellow) can be used by solder-
ing a wire from the pad for the function you wish to use to the lamp (or other
function) you wish to control. The wire colors indicated are the standard color
code used in the industry (you can use any color you like). These colors are
important if you plan to use function remapping.
CAUTION: When adding function wires, be very careful that the wires you add
do not come into contact with any other pads or components on the board
where they might create a short circuit.
All six function outputs can be easily set up with Digitrax FX3lighting effects
or as standard on/off functions with the following operational qualifiers:
1. Forward or Reverse direction of travel, or
2. Whether F0 is on or off, or
3. Both direction of travel and whether F0 is on or off, or
4. Whether the locomotive is stopped or moving.
F
Fu
un
nc
ct
ti
io
on
nR
Re
em
ma
ap
pp
pi
in
ng
g
Function remapping allows you to program the function outputs of your
decoder to be controlled by selected function keys on your throttle. Please
consult the Digitrax Decoder Manual or website for information on function
remapping.
D
Di
ig
gi
it
tr
ra
ax
xC
Co
om
mm
ma
an
nd
dC
Co
on
nt
tr
ro
ol
l
R
Ru
un
nY
Yo
ou
ur
rT
Tr
ra
ai
in
ns
s,
,N
No
ot
tY
Yo
ou
ur
rT
Tr
ra
ac
ck
k!
!
Figure 6: Function Outputs on Your DN163I0 (Top View)
Function 3
(Brown)
Function 4
(White/Yellow)
Function 1
(Green)
Function 2
(Violet)
+Common
Note If you are using this manual as a reference for your existing or
older DN163I0 and this diagram’s pinouts do not match your device,
please go to the Digitrax website (digitrax.com) and use the ‘Version 1’
manual for the DN163I0 that is archived there.
Motor Contact
Slots
LED Leads
Leading to
Front Light
©2009 Digitrax, Inc www.digitrax.com 7
D
Di
ig
gi
it
tr
ra
ax
xT
Tr
ra
an
ns
sp
po
on
nd
di
in
ng
gC
CV
V6
61
1
Digitrax Transponding is controlled by CV61. The default value is 000/x00
for OFF. To turn on transponding, program CV61 to a value of 002/x02. This
allows you to use Digitrax transponding to keep track of your rolling stock.
D
De
ec
co
od
de
er
rR
Re
es
se
et
tC
CV
V0
08
8
Decoder reset lets you reset all CV values to the factory default settings. To
reset all CV values, program CV08 to a value of 008/x08. You also have the
option of resetting all values except the 28 speed step tables. To do this, pro-
gram CV08 to a value of 009/x09.
W
Wa
ar
rr
ra
an
nt
ty
y&
&R
Re
ep
pa
ai
ir
r
All warranties on Digitrax products are limited to refund of purchase price,
repair or replacement at Digitrax’s sole discretion. Except as expressly stated in
the full warranty statement, there are no warranties, express or implied, includ-
ing but not limited to any warranties of merchantability or fitness for a particu-
lar purpose. For complete warranty details see www.digitrax.com.
Damaged decoders should be returned directly to Digitrax for repair.
Digitrax, Inc. is not responsible for unintentional
errors or omissions in this document.
Caution: To prevent damage to your decoder and locomotive, track
voltage used during operation must not exceed the operating parame-
ters of the locomotive and its lighting system in which the decoder is
installed (typically this is 12V DC). For most N scale layouts, Digitrax
recommends using 14 volts DCC or less for operation to avoid damage
to the locomotive shell, lamps and decoder.
2
24
44
43
3T
Tr
ra
an
ns
sm
mi
it
tt
te
er
rR
Rd
dT
T8
85
50
0-
-8
87
72
2-
-9
98
89
90
0
P
Pa
an
na
am
ma
aC
Ci
it
ty
y,
,F
FL
LU
US
SA
A3
32
24
40
04
4F
F8
85
50
0-
-8
87
72
2-
-9
95
55
57
7
w
ww
ww
w.
.d
di
ig
gi
it
tr
ra
ax
x.
.c
co
om
mE
Es
sa
al
le
es
s@
@d
di
ig
gi
it
tr
ra
ax
x.
.c
co
om
m
Made in U.S.A.
307-3008-0000 1K/2/09
Digitrax, Inc
2443 Transmitter Road
PANAMA CITY, FL 32404
[email protected]
(850) 872 9890
(850) 872 9557
DN163I0
Plug and Play Decoder for InterMountain N-Scale
SD40T Tunnel Motor Locomotives

This manual suits for next models

1

Other Digitrax Media Converter manuals

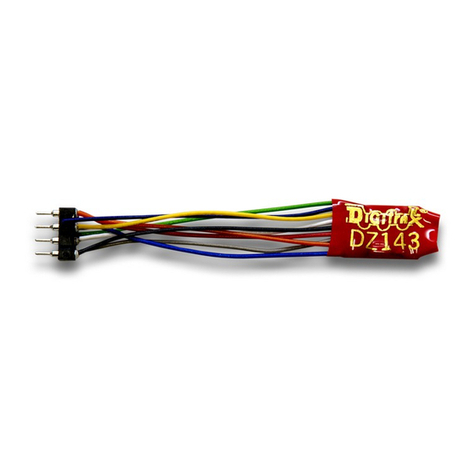
Digitrax DZ143 User manual

Digitrax

Digitrax DZ143 User manual

Digitrax DH166P User manual

Digitrax

Digitrax DH166P User manual

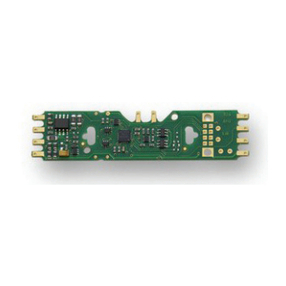
Digitrax DN163I1B User manual

Digitrax

Digitrax DN163I1B User manual

Digitrax DN163A2 User manual

Digitrax

Digitrax DN163A2 User manual

Digitrax DH165K1A User manual

Digitrax

Digitrax DH165K1A User manual

Digitrax SoundFX SDN144A1 User manual

Digitrax

Digitrax SoundFX SDN144A1 User manual

Digitrax SDN144K1E User manual

Digitrax

Digitrax SDN144K1E User manual

Digitrax SoundFX SFX004 User manual

Digitrax

Digitrax SoundFX SFX004 User manual

Digitrax DN163A3 User manual

Digitrax

Digitrax DN163A3 User manual

Digitrax DS64 User manual

Digitrax

Digitrax DS64 User manual

Digitrax SoundFX SFX064D User manual

Digitrax

Digitrax SoundFX SFX064D User manual

Digitrax DZ126Z1 User manual

Digitrax

Digitrax DZ126Z1 User manual

Digitrax DH163A0 User manual

Digitrax

Digitrax DH163A0 User manual

Digitrax DN163A1 User manual

Digitrax

Digitrax DN163A1 User manual

Digitrax DH123PS User manual

Digitrax

Digitrax DH123PS User manual

Digitrax DN163K1a User manual

Digitrax

Digitrax DN163K1a User manual

Digitrax SDH104K1A User manual

Digitrax

Digitrax SDH104K1A User manual

Digitrax DH166MT User manual

Digitrax

Digitrax DH166MT User manual

Digitrax DN166I1A User manual

Digitrax

Digitrax DN166I1A User manual

Digitrax DZ123M0 User manual

Digitrax

Digitrax DZ123M0 User manual

Digitrax SoundFX SDXN146K2 User manual

Digitrax

Digitrax SoundFX SDXN146K2 User manual

Digitrax SoundFX SDXN146K1E User manual

Digitrax

Digitrax SoundFX SDXN146K1E User manual

Digitrax DH163IP User manual

Digitrax

Digitrax DH163IP User manual

Digitrax 3 Series User manual

Digitrax

Digitrax 3 Series User manual

Popular Media Converter manuals by other brands

TRENDnet TFC-110MSTE user guide

TRENDnet

TRENDnet TFC-110MSTE user guide

ClimaxDigital EzCAP series manual

ClimaxDigital

ClimaxDigital EzCAP series manual

Pepperl+Fuchs K23-SSI/Rx/IU-C manual

Pepperl+Fuchs

Pepperl+Fuchs K23-SSI/Rx/IU-C manual

SMC Networks GLSC quick start guide

SMC Networks

SMC Networks GLSC quick start guide

Belle BGF 24 Operator's manual

Belle

Belle BGF 24 Operator's manual

Fujitsu Airstage UTY-VTGX installation manual

Fujitsu

Fujitsu Airstage UTY-VTGX installation manual

Endress+Hauser Tankvision NXA20 manual

Endress+Hauser

Endress+Hauser Tankvision NXA20 manual

Schnick-Schnack-Systems DPB Pixel-Router Pro user guide

Schnick-Schnack-Systems

Schnick-Schnack-Systems DPB Pixel-Router Pro user guide

Lenz Digital plus LE1035A Information

Lenz

Lenz Digital plus LE1035A Information

Moxa Technologies TCF-142-S-ST-RM Quick installation guide

Moxa Technologies

Moxa Technologies TCF-142-S-ST-RM Quick installation guide

Digikeijs DK50018 instruction manual

Digikeijs

Digikeijs DK50018 instruction manual

UTEPO MC2-FS user manual

UTEPO

UTEPO MC2-FS user manual

Blankom IRD-6100 user manual
Blankom

Blankom IRD-6100 user manual

CTS CVT-3002-PLUS SERIES user manual

CTS

CTS CVT-3002-PLUS SERIES user manual

roco 10885 manual

roco

roco 10885 manual

ADF Web HD67C58-B2 user manual

ADF Web

ADF Web HD67C58-B2 user manual

Optocore X6R operating manual

Optocore

Optocore X6R operating manual

SIIG CE-H23L11-S1 quick start guide

SIIG

SIIG CE-H23L11-S1 quick start guide

manuals.online logo
manuals.online logoBrands
  • About & Mission
  • Contact us
  • Privacy Policy
  • Terms and Conditions

Copyright 2025 Manuals.Online. All Rights Reserved.