manuals.online logo
Brands
  1. Home
  2. •
  3. Brands
  4. •
  5. Dimplex
  6. •
  7. Indoor Fireplace
  8. •
  9. Dimplex 314CHE User manual

Dimplex 314CHE User manual

Installation and Operating Instructions
08/16889/0 Issue 7
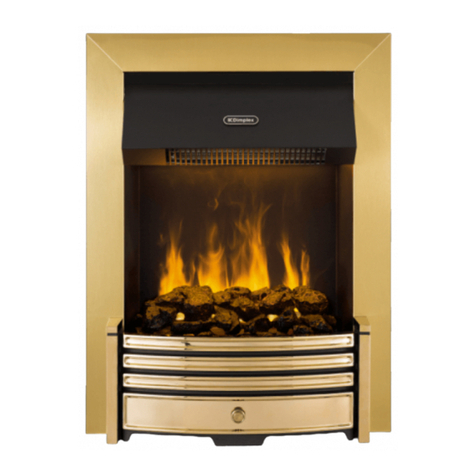
Dimplex Optima Fuel Effect Fire
Model: 314CHE
Important Safety Advice
When using electrical appliances, basic
precautions should always be followed to
reduce the risk of re, electrical shock, and
injury to persons, including the following:
If the appliance is damaged, check with the
supplier before installation and operation.
Do not use outdoors.
Donotuseintheimmediatesurroundingsof
a bath, shower or swimming pool.
Do not locate the heater immediately below
a xed socket outlet or connection box.
The guard on this appliance conforms to
the requirements of BS 1945 (1971) and
satises the heating appliances (reguards)
regulations 1973. The guard is to prevent
the risk of re or injury from burns, and no
part of it should be permanently removed.
This appliance is not intended for use by
childrenorotherpersons without assistance
or supervision if their physical, sensory or
mentalcapabilitiesprevent them fromusing
it safely.
In the event of a fault unplug the heater.
Unplug the heater when not required for
long periods.
Keep the supply cord away from the front
of the heater.
Do not use this heater in series with a
thermal control, a program controller, a
timer or any other device that switches on
the heat automatically, since a re risk exists
when the heater is accidentally covered or
displaced.
Ensure that furniture, curtains or other
combustible material are positioned no
closer than 1 metre from the heater.
Although this heater complies with safety
standards, we do not recommend its use on
deeppilecarpetsoronlonghairtypeofrugs.
Theappliancemustbepositionedsothatthe
plug is accessible.
Fig. 1
WARNING : THESE INSTRUCTIONS SHOULD BE READ CAREFULLY AND RETAINED FOR FUTURE REFERENCE
Ifthesupplycord isdamageditmustbereplaced
by the manufacturer or service agent or a
similarly qualied person in order to avoid a
hazard.
This appliance can be used by children
aged from 8 years and above and persons
with reduced physical, sensory or mental
capabilities or lack of experience and
knowledge if they have been given
supervision or instruction concerning use of
the appliance in a safe way and understand
the hazards involved. Children shall not
play with the appliance. Cleaning and user
maintenance shall not be made by Children
without supervision.
Children of less than 3 years should be
kept away unless continuously supervised.
Children aged from 3 years and less than 8
years shall only switch on/off the appliance
provided that it has been placed or installed
in its intended normal operating position
and they have been given supervision or
instruction concerning use of the appliance
in a safe way and understanding the hazards
involved. Children aged from 3 years and
less than 8 years shall not plug in, regulate
and clean the appliance or perform user
maintenance.
Warning: In order to avoid overheating,
do not cover the appliance. Do not place
material or garments on the appliance,
or obstruct the air circulation around
the appliance, for instance by curtains or
furniture, as this could cause overheating and
a re risk.
CAUTION - Some parts of this product can
become very hot and cause burns. Particular
attention has to be given where children and
vulnerable people are present.
Electronic Economiser Temperature Control
This sensitive output control 3 will switch the radiant heater
elements ON and OFF to accurately maintain the level of
comfort that you have selected. Select low or high heat -
then turn the control dail to 7, when the room reaches a
comfortable level of warmth, turn the dial down until the
electronic controlled elements turn off. The control dial
should be left at this setting, the electronic control will the
switch the element ON and OFF as needed to maintain your
chosen level.
Maintenance
WARNING : ALWAYS DISCONNECT FROM THE POWER
SUPPLY BEFORE ATTEMPTING ANY MAINTENANCE.
Removing the guard
Unscrew the 2 screws at each end of the guard, then withdraw
the lower edge of the guard rst. - see Fig. 3
Replace the guard in reverse order.
Removing the elements
Theelement holders arespringloaded. Toremove an element,
griponeend using a soft cloth to protect the surface, then push
carefully but rmly to one side until the other end disengages
from its socket. Withdraw the element carefully - see Fig. 4.
Ret in reverse order.
Cleaning the reector
The reector may be more easily cleaned if the elements are
rst removed (see previous). Wipe the reector with a warm
soapy cloth, then buff with a soft dry cloth.
DO NOT use abrasive cleaning powders or metal polish.
Fig. 4
Introduction
Unpack the heater carefully and retain all packaging for
future use.Always ensure that the heater is stood on a rm,
level base near to, but not directly beneath, a suitable mains
supply socket.
This fuel effect heater is to be a wall mounted product, either
at raised or oor level.
Electrical connection
WARNING – THIS APPLIANCE MUST BE EARTHED
This heater must be used on an AC ~ supply only and the
voltage marked on the heater must correspond to the supply
voltage.
Before switching on, please read the safety warnings and
operating instructions.
Inthe event ofreplacing the fuseinthe plugsupplied,a 13 amp
fuse approved by ASTAto BS1362 must be used.
Using the heater
Before switching on remove the fuel effect (two screws - see
Fig. 3) and check that the lamp and icker rotor are positioned
correctly.
The icker rotor should sit horizontal on its pin and spin freely
without fouling its mounting brackets. If necessary, adjust the
bracket by bending slightly.
Ret the fuel effect by inserting the front edge rst, then secure
with the screws. Ensure that all packing items are removed
(read any warning labels carefully) and that the radiant
elements and fuel effect are positioned correctly, otherwise
damage may occur.
Operation
Whenyou are certain that youhavecompleted the installation,
plug in and switch on at the wall socket.
The fuel effect will light up as soon as the plug is plugged in
and the socket turned on, even if the heat selector switches
are in the OFF position.
The icker rotor will begin to rotate after a minute or so.
Thelamps will goout when thepoweris turnedoffatthesocket
or the product is unplugged.
Radiant Elements
You have a choice of low heat (two elements 1332W) or high
heat (three elements 1998W). Both settings have electronic
temperture control - see below.Aswitch is set to ON when the
red section is visible on the switch.
Low Heat Setting - see Fig. 2
Press switch 1 to ON. Two elements will glow and, when the
temperatureselected onthe electroniccontrol dial3is reached,
one of the elements will turn off, it will come back on when the
temperature falls.
High Heat Setting
Set switches 1 & 2 to ON. All three elements will glow and,
when the temperature selected on the electronic control dial 3
is reached, two of the elements will turn off, it will come back
on when the temperature falls.
The unit can be returned to Low Heat by pressing switch 2
to OFF.
Fig. 3
Fig. 2
Lamp replacement
The fuel effect is secured by 2 screws, one at each end.
Slacken these screws (do not remove them fully) until the fuel
effect is released, the lift it away.
Replace the defective lamp with a 60W B22 ‘Fireglow’ lamp.
Reassemble in reverse order, ensuring that the diffuser/top
bracket arms are positioned correctly and the icker rotors
spin freely.
Each icker rotor should sit horizontally on its pin and spin
freely without fouling its mounting bracket. If necessary adjust
the bracket by bending slightly (the plastic diffuser is exable).
Wall Mounting the Heater
Three wall xing points are provided - see below.
The Positions of the xing holes are as follows.
Note the recommended maximum height above the oor is
300mm.
The heater should be mounted at sufcient height to allow easy
cleaning of the oor covering below the heater.
Mark the positions of the two xing points on the wall. Drill and
appropriately plug the xing holes. Screw in suitable round
headed screws to a depth which allows the heater to be hung
rmly in positon.
Next remove the fuel effect as described earlier to reveal
the third xing point, hang the heater on the two xings just
installed and mark the position of the third xing. Remove the
heater and plug the third hole. Ret the heater and screw x
it in postion through the third xing.
Replace the fuel effect.
Cleaning
Before cleaning the heater, disconnect it by pulling out the
plug from the wall socket. Do not use detergents, abrasive
cleaningpowder orpolish ofany kindon thebodyof theheater.
Allow the heater to cool, then wipe with a dry cloth to remove
dust and a damp cloth (not wet) to clean off stains. Be careful
not to allow moisture into the heater.
To clean the reector, see ‘Maintenance’.
Recycling
For electrical products sold within the European
Community.At the end of the electrical products
useful life it should not be disposed of with
household waste. Please recycle where facilities
exist. Check with your Local Authority or retailer
for recycling advice in your country.
After Sales Service
Your product is guaranteed for one year from the date of
purchase.
Within this period, we undertake to repair or exchange this
product free of charge (subject to availability) provided it
has been installed and operated in accordance with these
instructions.
Yourrightsunderthisguaranteeare additionalto yourstatutory
rights, which in turn are not affected by this guarantee.
Should you require after sales information or assistance
with this product, please contact 0844 879 3588 (UK) or
01 842 4833 (R.O.I.)
Please retain your receipt as proof of purchase.
Ensure icker rotors rotate freely on
pins and that lamps are in sockets
correctly
Dimplex
Millbrook House
GrangeDrive
HedgeEnd
Southampton
Hampshire.SO30 2DF
TEL: 0844 879 3588
FAX: 0844 879 3583
WEBSITE: www.dimplex.co.uk
Republic of Ireland Tel.01 8424833
[c] GDC Group Ltd,
All rights reserved. Material contained in this publication may not be reproduced in whole or in part, without prior permission in writing of Dimplex. A division of GDC
Group Ltd,
THIS APPLIANCE HAS BEEN CAREFULLY PACKED TO REACH YOU IN PRIME CONDITION. IN THE UNLIKELY EVENT YOU HAVE
REASON TO RETURN IT PLEASE ENSURE IT IS CAREFULLY PACKED IN ITS ORIGINAL PACKAGING OTHERWISE WE CANNOT
ACCEPT LIABILITY FOR THE PRODUCT RETURNED. WE SUGGEST YOU FOLD THE CARTON FLATAND STORE IT COMPLETE
WITH PACKAGING.
THIS DOES NOTAFFECT YOUR ATATUTORY RIGHTS
The product complies with the European Safety Standards EN60335-2-30 and the European Standard Electromagnetic Compatibility (EMC) EN55014, EN60555-2 and
EN60555-3. These cover the essential requirements of EEC Directives 2006/95/EC and 2004/108/EC

Other Dimplex Indoor Fireplace manuals
Dimplex Pro Series Technical manual

Dimplex

Dimplex Pro Series Technical manual

Dimplex XHD28L User manual

Dimplex

Dimplex XHD28L User manual

Dimplex TOLUCA TLC20 Instruction Manual

Dimplex

Dimplex TOLUCA TLC20 Instruction Manual

Dimplex SP1 Wallfire User manual

Dimplex

Dimplex SP1 Wallfire User manual

Dimplex Revillusion OSB20C-AU User manual

Dimplex

Dimplex Revillusion OSB20C-AU User manual

Dimplex TFA36E User manual

Dimplex

Dimplex TFA36E User manual

Dimplex LVA191 User manual

Dimplex

Dimplex LVA191 User manual

Dimplex DNV20BR User manual

Dimplex

Dimplex DNV20BR User manual

Dimplex DF2690 User manual

Dimplex

Dimplex DF2690 User manual

Dimplex Prism BLF5051 User manual

Dimplex

Dimplex Prism BLF5051 User manual

Dimplex Opti-V PGF10 User manual

Dimplex

Dimplex Opti-V PGF10 User manual

Dimplex DFI2309 User manual

Dimplex

Dimplex DFI2309 User manual

Dimplex DF2690 User manual

Dimplex

Dimplex DF2690 User manual

Dimplex DWF-13XX User manual

Dimplex

Dimplex DWF-13XX User manual

Dimplex MULTIFIRE DF3215 User manual

Dimplex

Dimplex MULTIFIRE DF3215 User manual

Dimplex LEE 20RC User manual

Dimplex

Dimplex LEE 20RC User manual

Dimplex Revillusion SWD20-AU User manual

Dimplex

Dimplex Revillusion SWD20-AU User manual

Dimplex STRAUSS STS20 User manual

Dimplex

Dimplex STRAUSS STS20 User manual
Dimplex DWF1203B User manual

Dimplex

Dimplex DWF1203B User manual

Dimplex BF39STP/DXP User manual

Dimplex

Dimplex BF39STP/DXP User manual

Dimplex Canterbury CAB20F User manual

Dimplex

Dimplex Canterbury CAB20F User manual

Dimplex Dakota DKT20 User manual

Dimplex

Dimplex Dakota DKT20 User manual

Dimplex Cassette 500 Retail Optimyst User manual

Dimplex

Dimplex Cassette 500 Retail Optimyst User manual

Dimplex EF3003 User manual

Dimplex

Dimplex EF3003 User manual

Popular Indoor Fireplace manuals by other brands

Napoleon Altitude X Series installation manual

Napoleon

Napoleon Altitude X Series installation manual

Regency PANORAMA P33E Owners & installation manual

Regency

Regency PANORAMA P33E Owners & installation manual

Escea DS Series Indoor/outdoor installation & operating instructions

Escea

Escea DS Series Indoor/outdoor installation & operating instructions

Travis Industries 864 TRV GS Operation and maintenance manual

Travis Industries

Travis Industries 864 TRV GS Operation and maintenance manual

SimpliFire ASHLEYC23-ESP Assembly instructions

SimpliFire

SimpliFire ASHLEYC23-ESP Assembly instructions

Regency U31-NG and Installation and operating instructions

Regency

Regency U31-NG and Installation and operating instructions

ORTAL Wilderness Stand Alone 25H TS Installation and operation manual

ORTAL

ORTAL Wilderness Stand Alone 25H TS Installation and operation manual

Superior Fireplaces VRT4032ZEN Installation and operation instructions

Superior Fireplaces

Superior Fireplaces VRT4032ZEN Installation and operation instructions

Mendota FV46 Installation and operating instructions

Mendota

Mendota FV46 Installation and operating instructions

Napoleon HD35NT Installation and operating instructions

Napoleon

Napoleon HD35NT Installation and operating instructions

Superior WCT6820WS Installation and operation instructions

Superior

Superior WCT6820WS Installation and operation instructions

Town & Country Fireplaces TC42 Installation and operating instructions

Town & Country Fireplaces

Town & Country Fireplaces TC42 Installation and operating instructions

Town & Country Fireplaces TCWS38 Installation and operating instructions

Town & Country Fireplaces

Town & Country Fireplaces TCWS38 Installation and operating instructions

Mendota ML47-PF2 Installation and operation manual

Mendota

Mendota ML47-PF2 Installation and operation manual

Burley 227 operating instructions

Burley

Burley 227 operating instructions

Escea AF series Installation and service instructions

Escea

Escea AF series Installation and service instructions

Dru Metro 150 XT installation instructions

Dru

Dru Metro 150 XT installation instructions

BOND MANUFACTURING 66594 owner's manual

BOND MANUFACTURING

BOND MANUFACTURING 66594 owner's manual

manuals.online logo
manuals.online logoBrands
  • About & Mission
  • Contact us
  • Privacy Policy
  • Terms and Conditions

Copyright 2025 Manuals.Online. All Rights Reserved.