Dinstar C62U User manual
Quick Start Guide
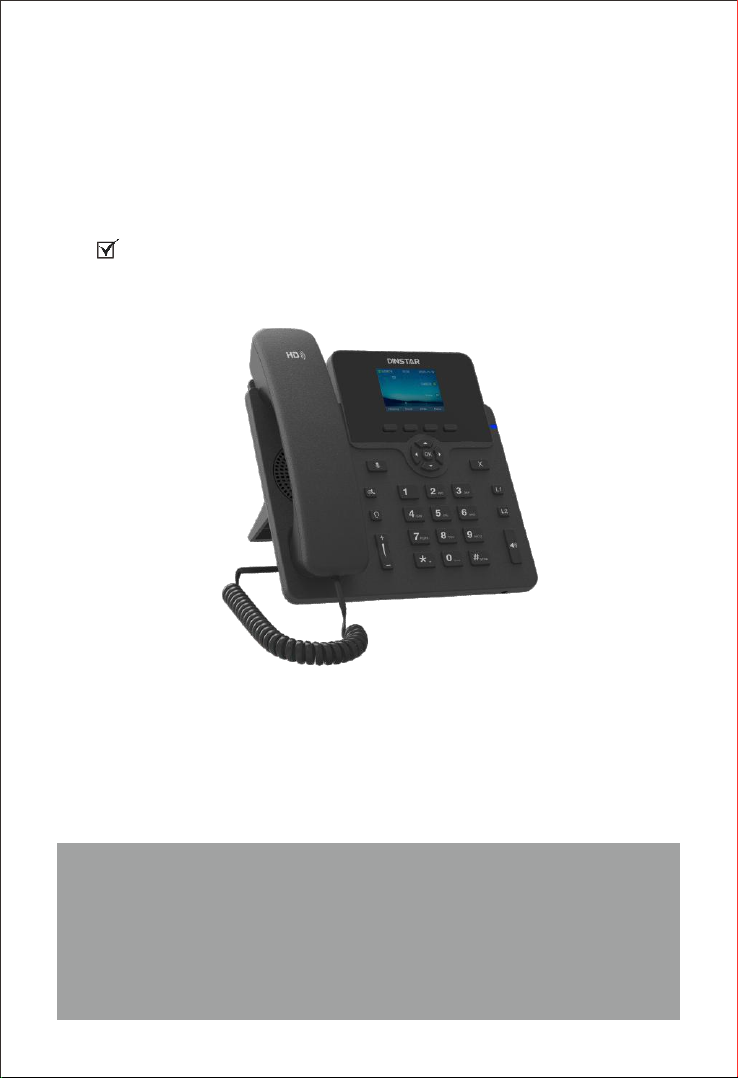
C62U/C62UP Business IP Phone
Thanks for Choosing Dinstar’s IP phone!
Please read this guide carefully before using this product. If you need any technical
support ., please contact us
Tel: +86 755 61919966
Email: support@dinstar.com
Website: www.dinstar.com

Packaging Contents
1
The following items are included in your package. If you find anything
missing, please contact our supporting and customer center.
IP Phone Handset Handset
Cord
Ethernet
Cable
Stand Power Adapter
(Optional)
The main hardware components of the C62U/C62UP IP phone are the
LCD screen and the keypad.
Hardware Component Instructions
2
C62U/C62UP IP Phone
Note: The C62UP IP phone is powered by PoE, the power adapter will not be provided.
LCD Screen
Power Indicator
Line Key 1
Speakerphone
Line Key 2
Keypad
Navigation Key
Hookswitch
Hookswitch Tab
Soft Keys
Speaker
Mute Key
Headset Key
Volume Key
Hold Key
Displays the call, default account, message, soft key, time, date and other related information.
Indicates the power connection status and other characteristic status of the telephone:
When receiving a call, the indicator light flashes quickly;
When there are missed calls or received voice messages / short messages, the indicator light
flashes slowly.
It is used to activate 2 accounts and configure various functions.
The LCD interface of the phone displays the function names corresponding to the four soft keys,
and the user can press the corresponding soft keys to complete the operation.
Pick up the handle from the handle frame, spring up the fork spring and connect the lines;
Color LCD Screen
Power Indicator
Line Keys
Soft Keys
Hookswitch
Keypad Provides input for numbers, uppercase and lowercase letters, and other special characters.
·
·
·
Put the handle back into the handle holder and disconnect.
·
·
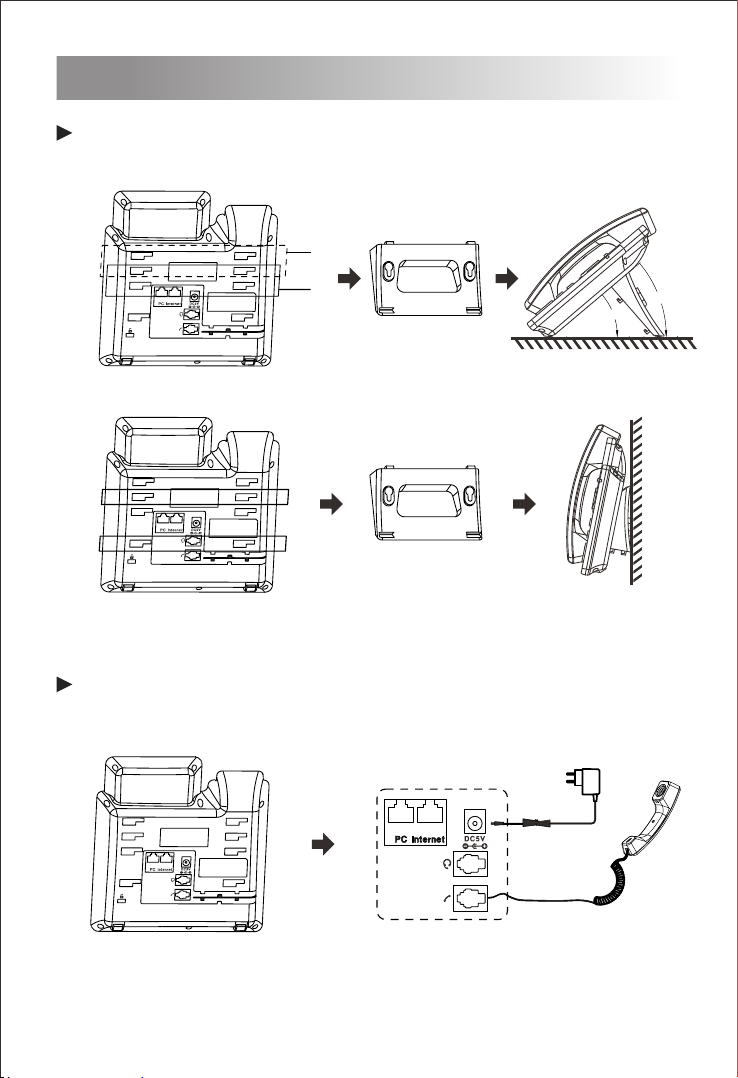
Assembling the IP Phone
3
Attach the stand to the IP Phone, as shown below:
Connect the handle, headset, PC and power supply as shown in the
figure below:
Note: PC connection and Expansion Module connection are optional.
A
B
A
B

After the IP phone is powered on and connected to network, it will start up automatically.
And then the IP phone is ready for use. You can configure the phone via the phone’s
user interface or the web user interface.
· Configure via the LCD screen on the IP Phone
· Configure via the Web GUI on your PC
The LCD screen and the keypad on the IP phone allows you to execute all call
operation tasks and basic configuration changes directly on the phone.
Startup
4
There are two ways to configure the IP Phone:
Configure the IP Phone
5
Configure via the user interface on the IP Phone
Network Setting
By default, the phone attempts to contact a DHCP server in your network to obtain its
valid network settings, e.g., IP address, subnet mask and gateway address .
Account Setting
If your phone cannot contact a DHCP server, you need to configure network settings
manually.
Select an account to configure account information. The following is the explanation
of relevant parameters:
Label: It is shown on the LCD screen to identify the account.
Active: Press or to select Enable/Disable to enable or disable the account
Display Name: It is shown as caller ID when you place a call.
Register Name: It is an authenticated ID for authentication provided by ITSP (required).
User Name: It is provided by ITSP for registration (required).
Password: It is provided by ITSP for registration (required).
SIP Server: It is provided by ITSP for registration (required).
SIP Port:It is provided by ITSP for registration (required).
Press the Menu soft key when the phone is idle, select Settings Advanced
Setting, input the default password ‘admin’, and then select Network LAN
Port
IPv4, press .
Select IPv4 Static or PPPoE. If you select IPv4 Static, you need to enter the IP
address, subnet mask and gateway address. If you select PPPoE, you need to
enter the username and password of the PPPoE account.
Press the Save soft key to accept the change. Then the network settings is
completed.
(3)
(2)
(1)
For more information about account parameters, please refer to the user manual of
the IP phone.
Press the ‘Menu’ soft key when the phone is idle, and then select Settings
Advanced Setting, input the default password ‘admin’, and then select
Account, press .
(1)
(2)
Configure via the Web interface on your PC
Basic Call Features
6
Place a call
Using the handset
(1) Pick up the handset.
(2) Enter the number and then press the Send soft key.
Using the speakerphone
(1) With the handset on-hook, press .
(2) Enter the number and then press the Send soft key.
Using the Headset
(1) With the headset connected, press to activate the headset mode.
(2) Enter the number and then press the Send soft key.
Note: During a call, you can alternate between the headset, hands-free speakerphone
and the handset mode by pressing the corresponding key or by picking up the handset.
Answer a call
Using the handset
Pick up the handset.
Using the speakerphone
(1) Press .
Using the headset
Press the key when the phone is idle to obtain the IP address of the phone.
Accessing the web interface on PC
Open a web browser on your PC, enter the IP address into the address
bar(e.g. http://192.168.11.110'), and then press Enter.
Enter the username (default: admin) and password (default: admin) in to
the login page and then click Login .
Network Setting
Click Network Basic to configure the LAN port and the PC port.
Account Setting
(1)
(2)
(3)
Click Account Basic to configure the basic information of an account. For the
explanation of the account parameters, please refer to Configure via the user
interface on the Phone.
If there is a need, click Network Advanced to configure the VLAN, VPN, SNMP,
TR069,LLDP, local RTP, QoS and 802.1x.
If there is a need, click Account to configure the codec, DTMF, call-related
information and etc. for the account.
(1) Press .
Note: You can reject an incoming call by pressing the Reject soft key.
Terminate a call
Using the handset
Hand up the handset or press the End soft key .
Using the speakerphone
Press or the End soft key.
Using the Headset
Press the End soft key.
Call Mute and Un-mute
Press to mute the microphone during a call.
Press again to un-mute the call.
Call Hold and Resume
Place a call on hold
If there is only one call on hold, press or the Resume soft key .
To resume a call
If there is more than one call on hold, press or to select the desired call, and
then press or the Resume soft key .
Press or the Hold soft key during an active call.
Call Transfer
(1) Press the Trans soft key during an active call. The call is placed on hold.
(2) Enter the number you want to transfer to.
(3) Press .
Call Forward
(2) Select the desired forward type:
Always Forward: Incoming calls are forwarded unconditionally.
Busy Forward: Incoming calls are forwarded when the phone is busy.
No Answer Forward: Incoming calls are forwarded if not answered after a period
of time.
(4) Press the Save soft key to accept the change.
Redial
Press the History soft key,then press or to select the desired entry, and
then press the Send soft key.
Enter the number you want the call to be forwarded to. For No Answer
Forward, set a value in the Timeout field for determining the duration of the
ringing time before the call is forwarded.
(1) Press to enter the interface for configuring call forwarding, or press the Menu
soft key when the phone is idle and then select Features Call Forward.
(3)

(1) Press the Menu soft key when the phone is idle, select Settings Advanced
Setting,input the default password 'admin', and then select Account.
DND
To enable DND:
Press the DND soft key when the phone is idle, or press the Menu soft key and then
select Features DND to enable DND and complete relevant configurations.
Hotline
To configure a hotline number:
(2) Press the Switch soft key to select Enable for the Hotline Active field, and then
enter the desired hotline number in the Hotline Number field.
(3) Enter the hotline delay time in the Timeout field. The valid values range from 0 to
5 and default value is 4.
(4) Press the Save soft key to accept the change.
Pick up the handset or press , and the call to the preset hotline will be dialed out
automatically.
To use the hotline:
Speed Dial
To configure a speed dial key:
Press the speed dial key to dial out the preset number.
To use the speed dial key:
(1) Press the Menu soft key when the phone is idle, and then select Features
Programmable Keys Line Keys.
(2) Select the desired line key, and then press the Enter soft key.
(3) Press the Switch soft key to select Speed Dial from the Type field, and then
enter the number for speed dial in the Value field.
(4) Press the Save soft key to accept the change.
Call Conference
(1) Press or the New soft key to make a new call to a third party during an active
call.
(2) Press again or the Conf soft key to start a three-way conference after the
third party has answered the call.
(3) Press the the Conf soft key, enter the number, then press the Send soft key to call
the fourth party.
(4) Press or the Conf soft key to start a four-way conference after the fourth
party has answered the call.
(5) Repeat step 3 to step 4 once to start the five-way conference.
(6) When the call conference ends, press the End soft key to disconnect all parties.
Voice Message
(1) Press or the last line key on the right of the phone interface, and then
press the Conn soft key.
(2) Follow the voice prompts to listen to your voice message.
Message waiting indicator(MWI) on the idle LCD screen indicates one or more voice
messages are waiting at the message center. The power indicator slowly flashes red.
To listen to voice message:

Customize the IP Phone
7
(1) Press the History soft key when the phone is idle, press or to scroll
through the call list.
(2) Select an entry from the list, and you can do the following:
Press the Dial soft key to place a call to this entry;
Press the Delete soft key to delete the entry from the list.
If you press the Option soft key, you can also do the following:
Select Detail to view detailed information about the entry;
Select Add to Contacts to add the entry to the local phonebook;
Select Add to Blacklist to add the entry to the blacklist;
Select Delete All to delete all entries from the history call list.
Call History
Ring Tones
(1) Press the Menu soft key when the phone is idle, and then select Settings Basic
Setting Ring Tones.
(2) Press or to select the desired ring tone, and then press the Save
soft key.
.
Volume Adjustment
Press during a call to adjust receiver volume of the handset/speakphone/headset,
Press the same key when the phone is idle or ringing to adjust the ring volume.
You can also press the Menu soft key and select Settings Basic Setting Volume
Setting to adjust the talk volume, tone volume, ring volume, Mic (handset/headset/
handfree) volume as well as key volume.
(1) Press or the Book soft key when the phone is idle, and then select Local
Phonebook All Contacts.
To add a contact to the local phonebook:
Phonebook
(2) Press the Add soft key to add a contact to the phonebook.
(3) Enter the contact’s information in corresponding fields and press the Save soft key.
(1) Press or the Book soft key when the phone is idle, and then select Local
Phonebook All Contacts.
To delete a contact:
(3) Press the OK soft key when the LCD screen displays ‘Delete selected item?’.
(2) Press or to select the desired contact, press the Option soft key and
then select Delete from the prompt list.
This manual suits for next models
1
Table of contents
Other Dinstar IP Phone manuals


